AWS Database Blog

Migrate Oracle reference partitioned tables to Amazon RDS or Aurora PostgreSQL with AWS DMS

Database migrations from Oracle to PostgreSQL are becoming increasingly common as organizations seek to optimize database costs while leveraging the benefits of open-source database solutions. However, these migrations present specific challenges, particularly when dealing with an Oracle-specific feature such as reference partitioning, which doesn’t have a direct equivalent in PostgreSQL.

In this post, we show you how to migrate Oracle reference-partitioned tables to Amazon Relational Database Service (Amazon RDS) for PostgreSQL or Amazon Aurora PostgreSQL-Compatible Edition using AWS Database Migration Service (AWS DMS).

Understanding Oracle reference partitioning

Oracle reference partitioning, introduced in Oracle 11g, allows a child table to inherit the partitioning scheme from its parent table through a referential integrity constraint. This feature ensures that child records are stored physically in the same partition as their corresponding parent records, significantly improving query performance of partition-level joins on these tables. Let’s consider the following reference partition example in Oracle, where a sales tracking system has sales records linked to multiple line items:

  • A SALES table partitioned by sale_date (monthly)
  • An ITEMS table reference-partitioned based on its foreign key relationship to SALES

This reference partitioning design ensures that when sales and the items in those sales are accessed together, the database performs optimized partition-level joins, reducing I/O and improving query performance.

Challenges when replicating reference-partitioned data

When migrating reference-partitioned data to PostgreSQL, you will face the following challenges:

  • Feature absence – PostgreSQL doesn’t offer native reference partitioning. Although PostgreSQL supports table partitioning, it doesn’t automatically align child records with their parent partitions.
  • Partition key requirements – In PostgreSQL, each partitioned table must be partitioned based on columns in that table. You can’t directly partition a child table based on a parent table’s column.
  • Data replication – Oracle’s reference partitioning allows child tables to inherit partitioning schemes from their parents. Though AWS DMS migrates the child table data to PostgreSQL, it replicates it without the partition key data, making standard migration approaches ineffective without special handling.

Solution overview

We demonstrate an approach for migrating Oracle reference-partitioned tables to PostgreSQL. This solution relies on a PostgreSQL BEFORE INSERT trigger that does the following:

  • Fetches the partition key from the parent table
  • Inserts the record in the child table with the partition key

The trigger ensures that any records inserted in the child table during the migration are stored in the same partition as their corresponding parent, mimicking Oracle’s reference partitioning behavior. Without this trigger, data replication for the child table will fail because of missing partition key information that’s needed for PostgreSQL’s partitioning scheme.

It’s important to note that this trigger-based solution may introduce performance overhead, especially for high-volume transactional workloads. At scale, the trigger can potentially become a performance bottleneck due to the additional database operations required for each insert. Before implementing this solution in a production environment, thoroughly test its performance impact and consider alternative approaches for very large or high-throughput systems.

Prerequisites

You must meet the following prerequisites before proceeding to implement this post’s solution:

Create reference-partitioned tables in Oracle database

This post uses an Amazon RDS for Oracle database and creates two sample tables called SALES and ITEMS. In the sample data model, the SALES table is partitioned by sale_date, and the ITEMS table is a reference-partitioned table based on its foreign key relationship with SALES. When a row is inserted into the SALES table, it goes to a specific partition based on its sale_date value. Any corresponding ITEMS rows are automatically placed in the matching partition, maintaining data locality for JOIN operations.

Complete the following steps to create the source tables:

  1. Create the SALES table, partitioned by sale_date:
    -- Create the SALES parent table partitioned by sale_date
    CREATE TABLE sales (
        sale_id NUMBER PRIMARY KEY,
        customer_id NUMBER,
        sale_date DATE NOT NULL,
        total_amount NUMBER(10,2),
        payment_method VARCHAR2(50)
    )
    PARTITION BY RANGE (sale_date) (
        PARTITION p_2024_09 VALUES LESS THAN (TO_DATE('2024-10-01', 'YYYY-MM-DD')),
        PARTITION p_2024_10 VALUES LESS THAN (TO_DATE('2024-11-01', 'YYYY-MM-DD')),
        PARTITION p_2024_11 VALUES LESS THAN (TO_DATE('2024-12-01', 'YYYY-MM-DD')),
        PARTITION p_2024_12 VALUES LESS THAN (TO_DATE('2025-01-01', 'YYYY-MM-DD')),
        PARTITION p_2025_01 VALUES LESS THAN (TO_DATE('2025-02-01', 'YYYY-MM-DD')),
        PARTITION p_2025_02 VALUES LESS THAN (TO_DATE('2025-03-01', 'YYYY-MM-DD')),
        PARTITION p_2025_03 VALUES LESS THAN (TO_DATE('2025-04-01', 'YYYY-MM-DD')),
        PARTITION p_2025_04 VALUES LESS THAN (TO_DATE('2025-05-01', 'YYYY-MM-DD')),
        PARTITION p_2025_05 VALUES LESS THAN (TO_DATE('2025-06-01', 'YYYY-MM-DD')),
        PARTITION p_2025_06 VALUES LESS THAN (TO_DATE('2025-07-01', 'YYYY-MM-DD')),
        PARTITION p_2025_07 VALUES LESS THAN (TO_DATE('2025-08-01', 'YYYY-MM-DD')),
        PARTITION p_2025_08 VALUES LESS THAN (TO_DATE('2025-09-01', 'YYYY-MM-DD')),
        PARTITION p_2025_09 VALUES LESS THAN (TO_DATE('2025-10-01', 'YYYY-MM-DD'))
    );
  2. Create the ITEMS table with reference partitioning based on the SALES table:
    CREATE TABLE items (
        item_id NUMBER PRIMARY KEY,
        sale_id NUMBER NOT NULL,
        product_id NUMBER,
        quantity NUMBER,
        price NUMBER(10,2),
        CONSTRAINT fk_sale FOREIGN KEY (sale_id) REFERENCES sales(sale_id)
    )
    PARTITION BY REFERENCE (fk_sale);
  3. Use the following procedure to insert sample data:
    -- First, create a sequence for sale_id
    CREATE SEQUENCE sale_seq START WITH 1 INCREMENT BY 1;
    -- Create a sequence for item_id
    CREATE SEQUENCE item_seq START WITH 1 INCREMENT BY 1;
    
    DECLARE
        v_sale_id NUMBER;
        v_customer_id NUMBER;
        v_sale_date DATE;
        v_total_amount NUMBER(10,2);
        v_payment_methods VARCHAR2(50);
        v_products_per_sale NUMBER;
        v_product_id NUMBER;
        v_quantity NUMBER;
        v_price NUMBER(10,2);
        
        -- Array of payment methods
        TYPE payment_array IS TABLE OF VARCHAR2(50);
        payment_methods payment_array := payment_array('Credit Card', 'Cash', 'Debit Card', 'PayPal', 'Apple Pay');
        
    BEGIN
        -- Generate approximately 100,000 sales (this will result in roughly 500,000 items)
        FOR i IN 1..100000 LOOP
            -- Generate sale record
            v_sale_id := sale_seq.NEXTVAL;
            v_customer_id := TRUNC(DBMS_RANDOM.VALUE(1, 10001)); -- 10,000 customers
            v_sale_date := TO_DATE('2024-09-01', 'YYYY-MM-DD') + 
                           TRUNC(DBMS_RANDOM.VALUE(0, 395)); -- Random date between Sep 2024 and Sep 2025
            v_payment_methods := payment_methods(TRUNC(DBMS_RANDOM.VALUE(1, 6)));
            
            -- Random number of products per sale (3-8 items)
            v_products_per_sale := TRUNC(DBMS_RANDOM.VALUE(3, 9));
            
            -- Initialize total amount
            v_total_amount := 0;
            
            -- Insert into SALES table
            INSERT INTO sales (
                sale_id,
                customer_id,
                sale_date,
                total_amount,
                payment_method
            ) VALUES (
                v_sale_id,
                v_customer_id,
                v_sale_date,
                0, -- Will update this after calculating items
                v_payment_methods
            );
            
            -- Generate items for this sale
            FOR j IN 1..v_products_per_sale LOOP
                v_product_id := TRUNC(DBMS_RANDOM.VALUE(1, 1001)); -- 1000 different products
                v_quantity := TRUNC(DBMS_RANDOM.VALUE(1, 6)); -- 1-5 quantities
                v_price := ROUND(DBMS_RANDOM.VALUE(10, 1000), 2); -- Price between 10 and 1000
                
                -- Insert into ITEMS table
                INSERT INTO items (
                    item_id,
                    sale_id,
                    product_id,
                    quantity,
                    price
                ) VALUES (
                    item_seq.NEXTVAL,
                    v_sale_id,
                    v_product_id,
                    v_quantity,
                    v_price
                );
                
                -- Add to total amount
                v_total_amount := v_total_amount + (v_quantity * v_price);
            END LOOP;
            
            -- Update the total amount in SALES table
            UPDATE sales 
            SET total_amount = v_total_amount 
            WHERE sale_id = v_sale_id;
            
            -- Commit every 1000 sales to avoid redo log issues
            IF MOD(i, 1000) = 0 THEN
                COMMIT;
            END IF;
        END LOOP;
        
        COMMIT;
    END;
    /
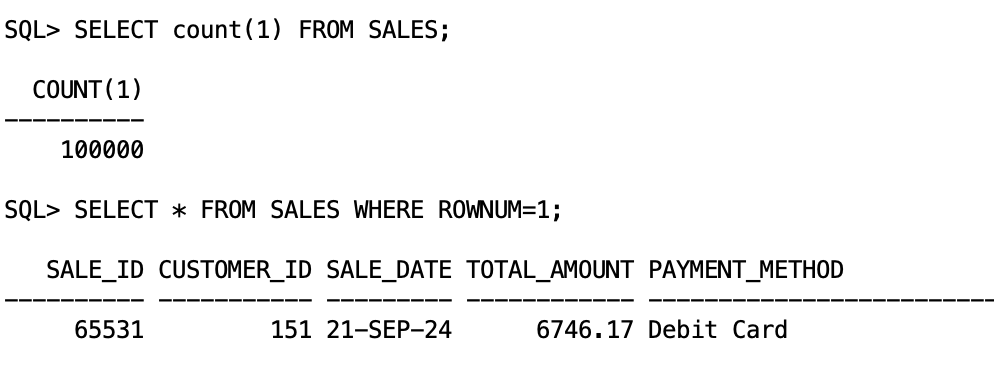
  4. Verify the data has been inserted:
    SELECT count(1) FROM SALES;
    SELECT * FROM SALES WHERE ROWNUM=1;

    SQL queries showing row counts and sample data from SALES table

    SELECT count(1) FROM ITEMS;
    SELECT * FROM ITEMS WHERE ROWNUM=1;

    SQL queries showing row counts and sample data from ITEMS table

Create target tables in the PostgreSQL database

Now that we have created our source tables in Oracle, we need to create corresponding target tables in PostgreSQL that will store our migrated data.

  1. Create a sales table partitioned by sale_date:
    -- Create parent table with monthly partitioning
    CREATE TABLE sales (
        sale_id INTEGER,
        customer_id INTEGER,
        sale_date DATE NOT NULL,
        total_amount NUMERIC(10,2),
        payment_method VARCHAR(50),
        primary key (sale_id, sale_date)
    ) PARTITION BY RANGE (sale_date);
    
    -- Create partitions for the sales table
    CREATE TABLE sales_2024_09 PARTITION OF sales 
      FOR VALUES FROM ('2024-09-01') TO ('2024-10-01');
    CREATE TABLE sales_2024_10 PARTITION OF sales 
      FOR VALUES FROM ('2024-10-01') TO ('2024-11-01');
    CREATE TABLE sales_2024_11 PARTITION OF sales 
      FOR VALUES FROM ('2024-11-01') TO ('2024-12-01');
    CREATE TABLE sales_2024_12 PARTITION OF sales 
      FOR VALUES FROM ('2024-12-01') TO ('2025-01-01');
    CREATE TABLE sales_2025_01 PARTITION OF sales 
      FOR VALUES FROM ('2025-01-01') TO ('2025-02-01');
    CREATE TABLE sales_2025_02 PARTITION OF sales 
      FOR VALUES FROM ('2025-02-01') TO ('2025-03-01');
    CREATE TABLE sales_2025_03 PARTITION OF sales 
      FOR VALUES FROM ('2025-03-01') TO ('2025-04-01');
    CREATE TABLE sales_2025_04 PARTITION OF sales 
      FOR VALUES FROM ('2025-04-01') TO ('2025-05-01');
    CREATE TABLE sales_2025_05 PARTITION OF sales 
      FOR VALUES FROM ('2025-05-01') TO ('2025-06-01');
    CREATE TABLE sales_2025_06 PARTITION OF sales 
      FOR VALUES FROM ('2025-06-01') TO ('2025-07-01');
    CREATE TABLE sales_2025_07 PARTITION OF sales 
      FOR VALUES FROM ('2025-07-01') TO ('2025-08-01');
    CREATE TABLE sales_2025_08 PARTITION OF sales 
      FOR VALUES FROM ('2025-08-01') TO ('2025-09-01');
    CREATE TABLE sales_2025_09 PARTITION OF sales 
      FOR VALUES FROM ('2025-09-01') TO ('2025-10-01');
    
    -- Create default partition for sales table for any values outside the defined ranges
    CREATE TABLE sales_default PARTITION OF sales DEFAULT;
  2. Create an ITEMS table partitioned by sale_date:
    -- Create child table with same partitioning scheme
    CREATE TABLE items (
        sale_date DATE not null,
        item_id INTEGER,
        sale_id INTEGER NOT NULL,
        product_id INTEGER,
        quantity INTEGER,
        price NUMERIC(10,2),
        primary key (item_id, sale_date),
        FOREIGN KEY (sale_id,sale_date) REFERENCES sales(sale_id, sale_date)
    ) PARTITION BY RANGE (sale_date);
    
    -- Create corresponding partitions for items
    CREATE TABLE items_2024_09 PARTITION OF items 
      FOR VALUES FROM ('2024-09-01') TO ('2024-10-01');
    CREATE TABLE items_2024_10 PARTITION OF items 
      FOR VALUES FROM ('2024-10-01') TO ('2024-11-01');
    CREATE TABLE items_2024_11 PARTITION OF items 
      FOR VALUES FROM ('2024-11-01') TO ('2024-12-01');
    CREATE TABLE items_2024_12 PARTITION OF items 
      FOR VALUES FROM ('2024-12-01') TO ('2025-01-01');
    CREATE TABLE items_2025_01 PARTITION OF items 
      FOR VALUES FROM ('2025-01-01') TO ('2025-02-01');
    CREATE TABLE items_2025_02 PARTITION OF items 
      FOR VALUES FROM ('2025-02-01') TO ('2025-03-01');
    CREATE TABLE items_2025_03 PARTITION OF items 
      FOR VALUES FROM ('2025-03-01') TO ('2025-04-01');
    CREATE TABLE items_2025_04 PARTITION OF items 
      FOR VALUES FROM ('2025-04-01') TO ('2025-05-01');
    CREATE TABLE items_2025_05 PARTITION OF items 
      FOR VALUES FROM ('2025-05-01') TO ('2025-06-01');
    CREATE TABLE items_2025_06 PARTITION OF items 
      FOR VALUES FROM ('2025-06-01') TO ('2025-07-01');
    CREATE TABLE items_2025_07 PARTITION OF items 
      FOR VALUES FROM ('2025-07-01') TO ('2025-08-01');
    CREATE TABLE items_2025_08 PARTITION OF items 
      FOR VALUES FROM ('2025-08-01') TO ('2025-09-01');
    CREATE TABLE items_2025_09 PARTITION OF items 
      FOR VALUES FROM ('2025-09-01') TO ('2025-10-01');
    
    -- Create default partition for items table for any values outside the defined ranges
    CREATE TABLE items_default PARTITION OF items DEFAULT;
  3. Next, we create the BEFORE INSERT trigger that maintains the relationship between sales and items data in PostgreSQL. This trigger serves as a replacement for Oracle’s reference partitioning:
    -- Step 1: Create a function that will be called by the trigger
    CREATE OR REPLACE FUNCTION set_item_date_from_sale()
    RETURNS TRIGGER 
    LANGUAGE plpgsql 
    AS $$
    DECLARE
        sale_date_value DATE;
    BEGIN
        -- Fetch the sale_date based on the sale_id
        SELECT sale_date INTO sale_date_value
        FROM sales
        WHERE sale_id = NEW.sale_id;
        
        -- If sale found, set the item_date to match the sale_date
        IF FOUND THEN
            insert into ITEMS values (sale_date_value, new.item_id, new.sale_id, new.product_id, new.quantity, new.price);
        ELSE
            RAISE EXCEPTION 'No sale found with ID %', NEW.sale_id;
        END IF;
        
        RETURN NULL;
    END;
    $$ 
    
    -- Step 2: Create a trigger that runs before insert
    CREATE or replace TRIGGER before_item_insert
    BEFORE INSERT ON items
    FOR EACH row
    WHEN (pg_trigger_depth() = 0)
    EXECUTE FUNCTION set_item_date_from_sale()

Configure AWS DMS

Now that you have created your source tables in Oracle database and your target tables in PostgreSQL database, you are ready to migrate your data with the help of AWS DMS. This section of the post walks you through the steps to migrate your data.

Create AWS DMS endpoints for the source and target database. AWS DMS endpoints provide the connection, data store type, and location information about your data store.

For instructions to create your Oracle source endpoint, refer to Using an Oracle database as a source for AWS DMS.

Enable supplemental logging for primary key columns on the Amazon RDS for Oracle source database:

begin
    rdsadmin.rdsadmin_util.alter_supplemental_logging(
        p_action => 'ADD',
        p_type   => 'PRIMARY KEY');
end;
/

Alternatively, you can add AddSupplementalLogging=true in the source endpoint setting to allow AWS DMS to set up table-level supplemental logging for the Oracle database, if you have not explicitly added supplemental logging.

Create the AWS DMS tasks

Use the following steps to create the AWS DMS task:

  1. Open the AWS DMS console
  2. In the navigation pane on the left, under Migrate or Replicate click on Tasks
  3. Click create task
  4. For Task identifier, enter an identifiable name
  5. For Source database endpoint, select the Oracle endpoint you created.
  6. For Target database endpoint, select the Aurora PostgreSQL endpoint you created.
  7. Select Task Mode as Provisioned
  8. For Replication instance, choose the replication instance you created.
  9. For Migration type, select Migrate.
  10. For Target table preparation mode, choose Do nothing (because you’ve already created your tables).
  11. Enable Amazon CloudWatch Logs under the task settings so you can debug issues.
  12. Under Advanced task settings, set Maximum number of tables to load in parallel to 1. This ensure sequential loading of the tables, which is critical because the SALES table must be loaded before the ITEMS table for the trigger to work properly.
  13. Under Table mappings, for Editing mode, select JSON editor.
    The following JSON shows an example of the table mapping rules for the AWS DMS task. Replace the schema name (“BLOGTEST”) with the name under which you created the table.

    The load-order setting controls the table migration sequence; tables and views with higher values are loaded first. SALES is set to “load-order: 2” and ITEMS is set to “load-order: 1”, ensuring SALES table is loaded first.

    {
        "rules": [
            {
                "rule-type": "transformation",
                "rule-id": "441247639",
                "rule-name": "441247639",
                "rule-target": "column",
                "object-locator": {
                    "schema-name": "BLOGTEST",
                    "table-name": "%",
                    "column-name": "%"
                },
                "rule-action": "convert-lowercase",
                "value": null,
                "old-value": null
            },
            {
                "rule-type": "transformation",
                "rule-id": "441229737",
                "rule-name": "441229737",
                "rule-target": "table",
                "object-locator": {
                    "schema-name": "BLOGTEST",
                    "table-name": "%"
                },
                "rule-action": "convert-lowercase",
                "value": null,
                "old-value": null
            },
            {
                "rule-type": "transformation",
                "rule-id": "441209756",
                "rule-name": "441209756",
                "rule-target": "schema",
                "object-locator": {
                    "schema-name": "BLOGTEST"
                },
                "rule-action": "rename",
                "value": "public",
                "old-value": null
            },
            {
                "rule-type": "selection",
                "rule-id": "441168658",
                "rule-name": "441168658",
                "object-locator": {
                    "schema-name": "BLOGTEST",
                    "table-name": "ITEMS"
                },
                "rule-action": "include",
                "load-order": "1"
            },
            {
                "rule-type": "selection",
                "rule-id": "441168659",
                "rule-name": "441168659",
                "object-locator": {
                    "schema-name": "BLOGTEST",
                    "table-name": "SALES"
                },
                "rule-action": "include",
                "load-order": "2"
            }
        ]
    }
  14. Uncheck the Premigration assessment checkbox. Though this feature is typically recommended, you disable it as part of this blog post’s solution to simplify the setup process and avoid additional configuration requirements.
  15. Leave everything else as default and choose Create task to start the task.

Data validation

To verify that your data has been successfully migrated without errors, follow these steps:

  1. Verify that AWS DMS has replicated the data without any errors or failures.
    AWS DMS table statistics interface showing completed migrations for BLOGTEST ITEMS and SALES tables with detailed performance metrics and data validation options
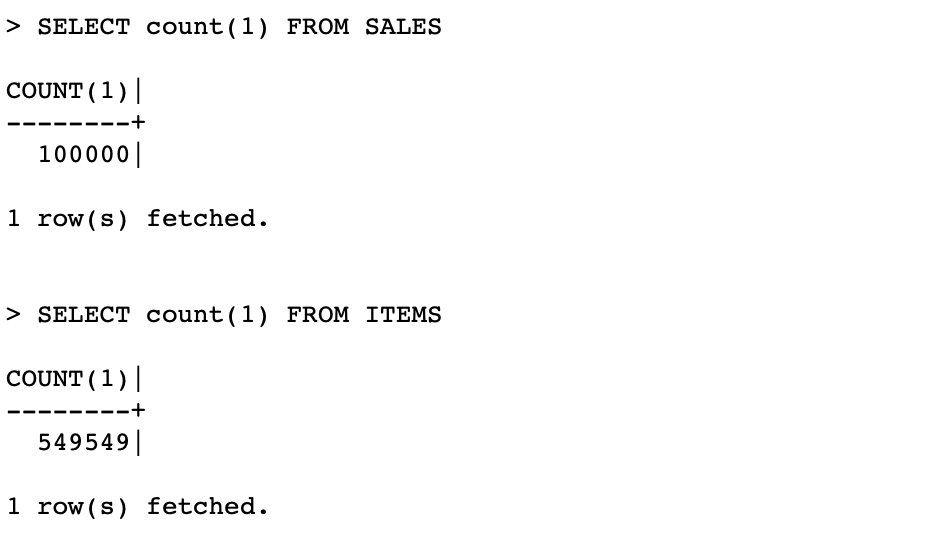
  2. Execute following queries on target databases to verify data was loaded:
    SELECT count(1) FROM SALES
    SELECT count(1) FROM ITEMS;

    SQL query results showing row counts for SALES (100000) and ITEMS (549549) tables

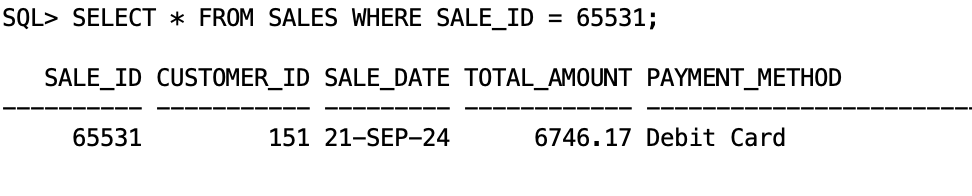
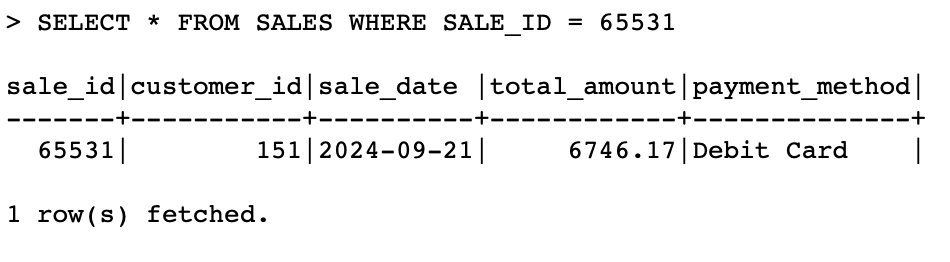
  3. Compare a sample record between source and target databases:
    SELECT * FROM SALES WHERE SALE_ID = 65531;
    Source database:

    Source database SELECT query output displaying SALE_ID 65531 with transaction details

    Target database:

    Target database SELECT query output displaying SALE_ID 65531 with transaction details

Clean up

To avoid unnecessary charges, clean up the resources that you built as part of this architecture that you are no longer using:

  1. Delete the Aurora PostgreSQL cluster.
  2. Delete the RDS for Oracle database instance.
  3. Delete the AWS DMS replication instance along with source and target endpoints and tasks.
  4. If you’ve conducted this test on your existing database and plan to keep it operational, make sure to explicitly drop the test tables from both the source and target databases after you’ve completed this experiment.

Conclusion

Migrating Oracle reference-partitioned tables to PostgreSQL presents unique challenges because of the fundamental difference in how these databases implement partitioning. In this post, we presented a solution that bridges the migration gap between Oracle’s reference partitioning and PostgreSQL’s declarative partitioning by:

  • Creating an equivalent partitioning scheme in PostgreSQL.
  • Using a trigger mechanism to maintain data colocation.

This approach helps to ensure that your migrated data maintains the same performance benefits of partitioning while smoothly transitioning from Oracle to PostgreSQL by using AWS DMS.

For more information on AWS DMS and its capabilities, refer to AWS DMS documentation. If you have any questions or suggestions about these migration techniques, leave your feedback in the comments.


About the authors

Ahmed Virani

Ahmed Virani

Ahmed is a Specialist Solutions Architect at AWS, dedicated to enabling Public Sector customers to achieve successful cloud transformation. He specializes in designing and implementing efficient, cloud-native database solutions and complex database migration strategies. Leveraging deep expertise in AWS RDS and AWS Database Migration Service (DMS), he guides customers from complex on-premises environments to resilient, scalable, and high-performance database architectures on the AWS Cloud.

Vanshika Nigam

Vanshika Nigam

Vanshika is a Database Migration Solutions Architect with the Database Migration Accelerator (DMA) team at AWS. As an Amazon DMA Advisor, she helps customers accelerate their journey from on-premises and commercial databases to AWS Cloud database solutions. With over 7 years of experience in Amazon RDS and AWS DMS, she specializes in designing and implementing efficient database migration strategies.

Alex Anto

Alex Anto

Alex serves as a Senior Data Migration Specialist Solutions Architect on the AWS Database Migration Service (DMS) team, partnering with enterprise customers to execute complex database migrations from on-premises to AWS Cloud solutions. With deep expertise in AWS DMS, he supports migrations across all source and target database combinations that the service enables. Beyond customer engagements, Alex contributes to improving AWS data migration products and has successfully guided hundreds of customers through their cloud transformation journeys.