AWS DevOps & Developer Productivity Blog
Using Single Sign On (SSO) to manage project teams for Amazon CodeCatalyst
Amazon CodeCatalyst is a modern software development service that empowers teams to deliver software on AWS easily and quickly. Amazon CodeCatalyst provides one place where you can plan, code, and build, test, and deploy your container applications with continuous integration/continuous delivery (CI/CD) tools.
CodeCatalyst recently announced the teams feature, which simplifies management of space and project access. Enterprises can now use this feature to organize CodeCatalyst space members into teams using single sign-on (SSO) with IAM Identity Center. You can also assign SSO groups to a team, to centralize your CodeCatalyst user management.
CodeCatalyst space admins can create teams made up any members of the space and assign them to unique roles per project, such as read-only or contributor.
Introduction:
In this post, we will demonstrate how enterprises can enable access to CodeCatalyst with their workforce identities configured in AWS IAM Identity Center, and also easily manage which team members have access to CodeCatalyst spaces and projects. With AWS IAM Identity Center, you can connect a self-managed directory in Active Directory (AD) or a directory in AWS Managed Microsoft AD by using AWS Directory Service. You can also connect other external identity providers (IdPs) like Okta or OneLogin to authenticate identities from the IdPs through the Security Assertion Markup Language (SAML) 2.0 standard. This enables your users to sign in to the AWS access portal with their corporate credentials.
Pre-requisites:
To get started with CodeCatalyst, you need the following prerequisites. Please review them and ensure you have completed all steps before proceeding:
1. Set up an CodeCatalyst space. To join a space, you will need to either:
- Create an Amazon CodeCatalyst space that supports identity federation. If you are creating the space, you will need to specify an AWS account ID for billing and provisioning of resources. If you have not created an AWS account, follow the AWS documentation to create one

Figure 1: CodeCatalyst Space Settings
- Use an IAM Identity Center instance that is part of your AWS Organization or AWS account to associate with CodeCatalyst space.
- Accept an invitation to sign in with SSO to an existing space.
2. Create an AWS Identity and Access Management (IAM) role. Amazon CodeCatalyst will need an IAM role to have permissions to deploy the infrastructure to your AWS account. Follow the documentation for steps how to create an IAM role via the Amazon CodeCatalyst console.
3. Once the above steps are completed, you can go ahead and create projects in the space using the available blueprints or custom blueprints.
Walkthrough:
The emphasis of this post, will be on how to manage IAM identity center (SSO) groups with CodeCatalyst teams. At the end of the post, our workflow will look like the one below:
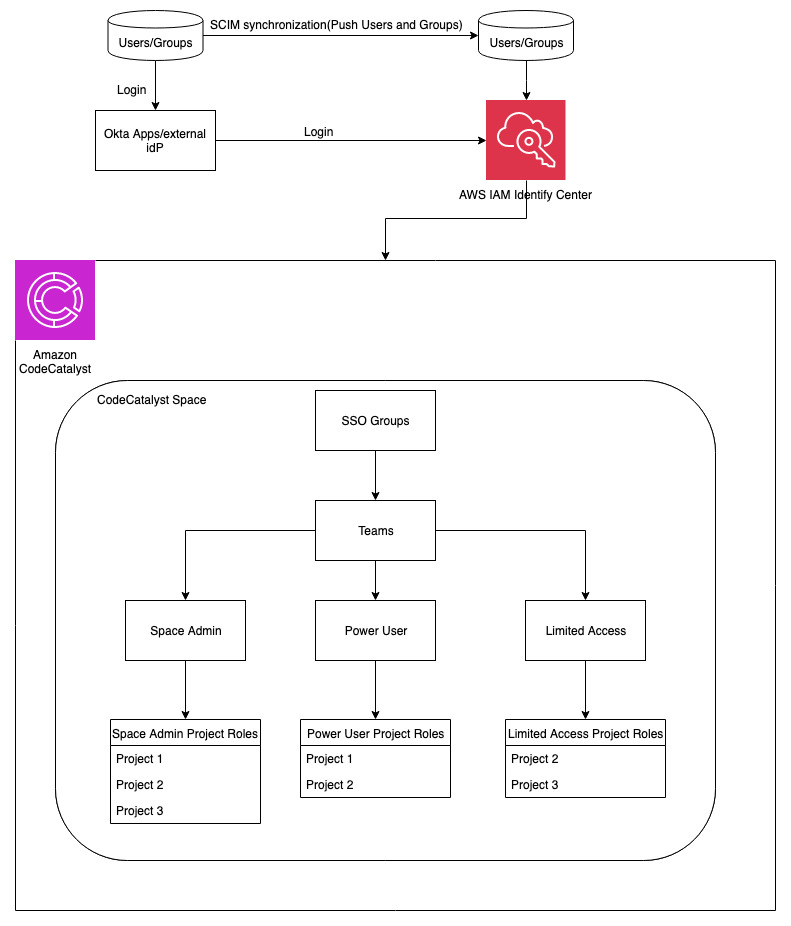
Figure 2: Architectural Diagram
For the purpose of this walkthrough, I have used an external identity provider Okta to federate with AWS IAM Identity Center to manage access to CodeCatalyst.
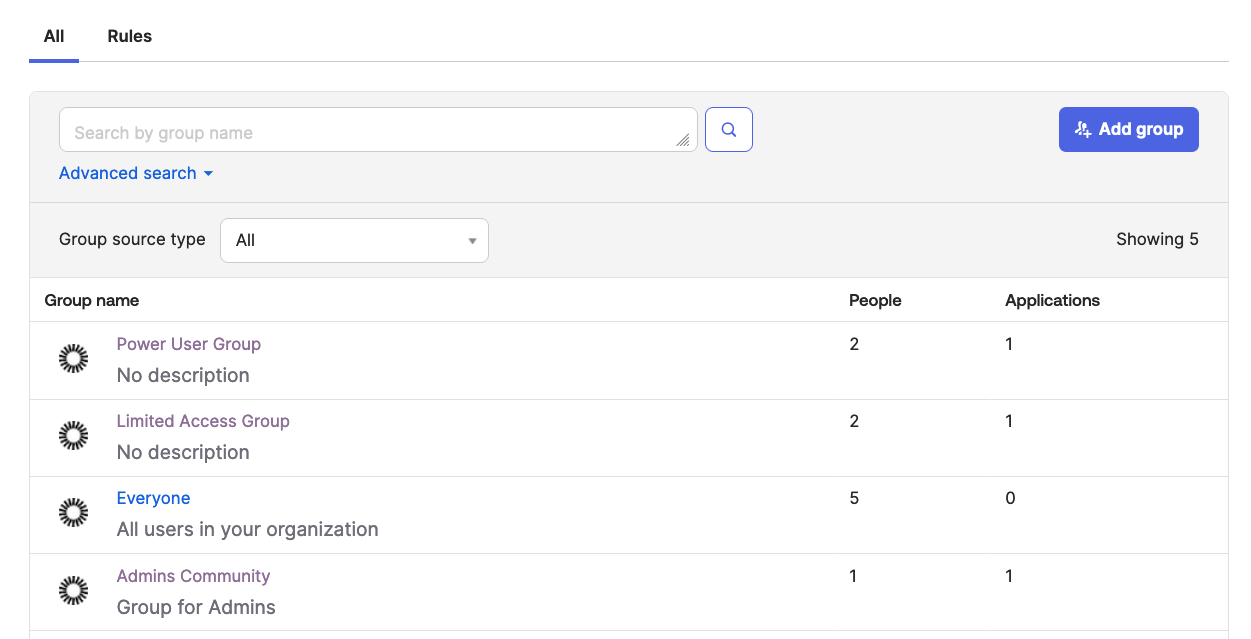
Figure 3: Okta Groups from Admin Console
You can also see the same Groups are synced with the IAM Identity Center instance from the figure below. Please note Groups and member management must be done only via external identity providers.
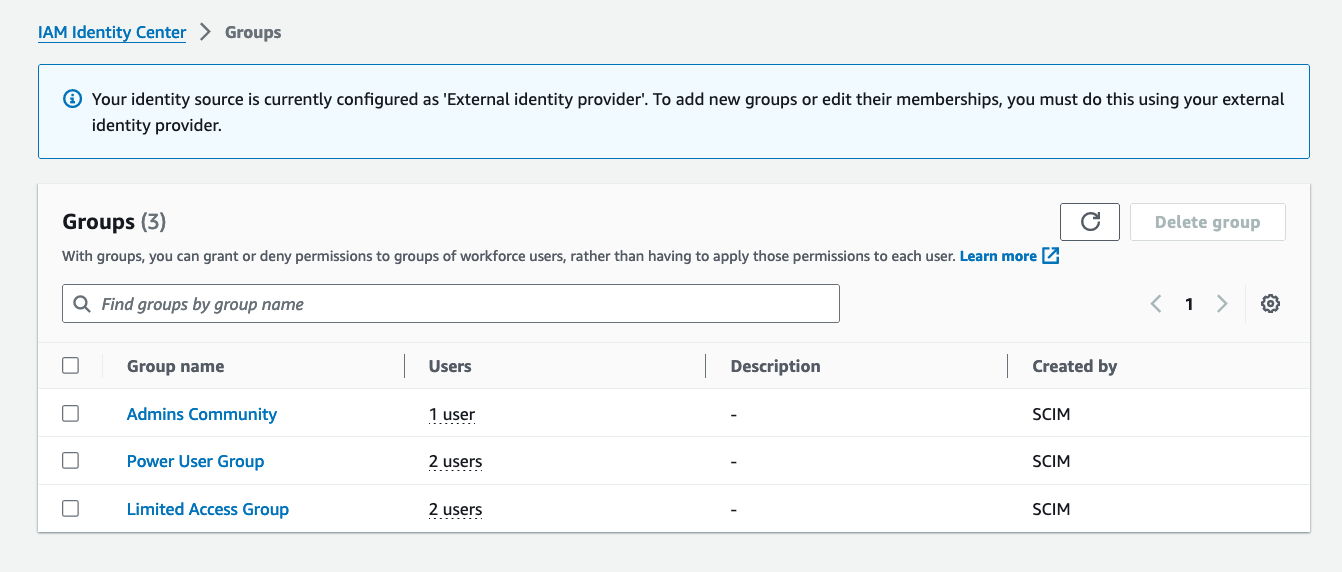
Figure 4: IAM Identity Center Groups created via SCIM synch
Now, if you go to your Okta apps and click on ‘AWS IAM Identity Center’, the AWS account ID and CodeCatalyst space that you created as part of prerequisites should be automatically configured for you via single sign-on. Developers and Administrators of the space can easily login using this integration.
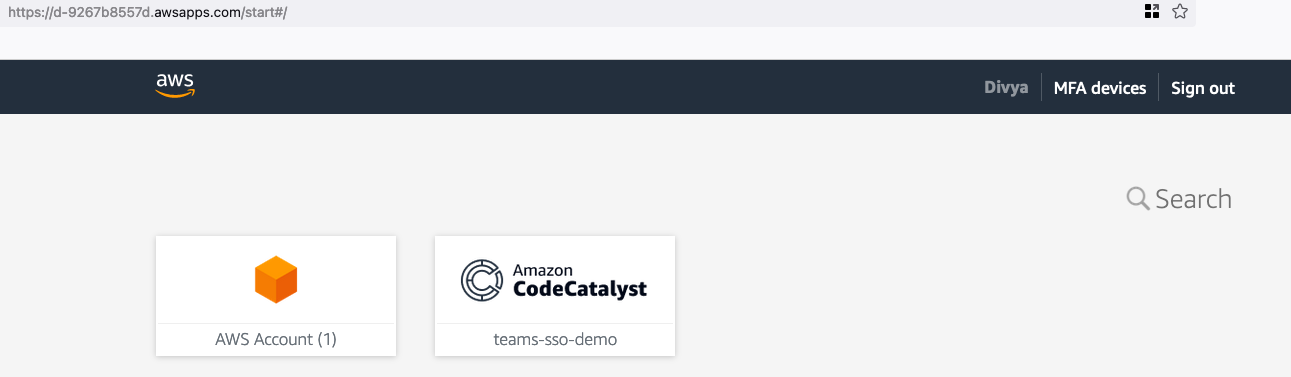
Figure 5: CodeCatalyst Space via SSO
Once you are in the CodeCatalyst space, you can organize CodeCatalyst space members into teams, and configure the default roles for them. You can choose one of the three roles from the list of space roles available in CodeCatalyst that you want to assign to the team. The role will be inherited by all members of the team:
- Space administrator – The Space administrator role is the most powerful role in Amazon CodeCatalyst. Only assign the Space administrator role to users who need to administer every aspect of a space, because this role has all permissions in CodeCatalyst. For details, see Space administrator role.
- Power user – The Power user role is the second-most powerful role in Amazon CodeCatalyst spaces, but it has no access to projects in a space. It is designed for users who need to be able to create projects in a space and help manage the users and resources for the space. For details, see Power user role.
- Limited access – It is the role automatically assigned to users when they accept an invitation to a project in a space. It provides the limited permissions they need to work within the space that contains that project. For details, see Limited access role.
Since you have the space integrated with SSO groups set up in IAM Identity Center, you can use that option to create teams and manage members using SSO groups.
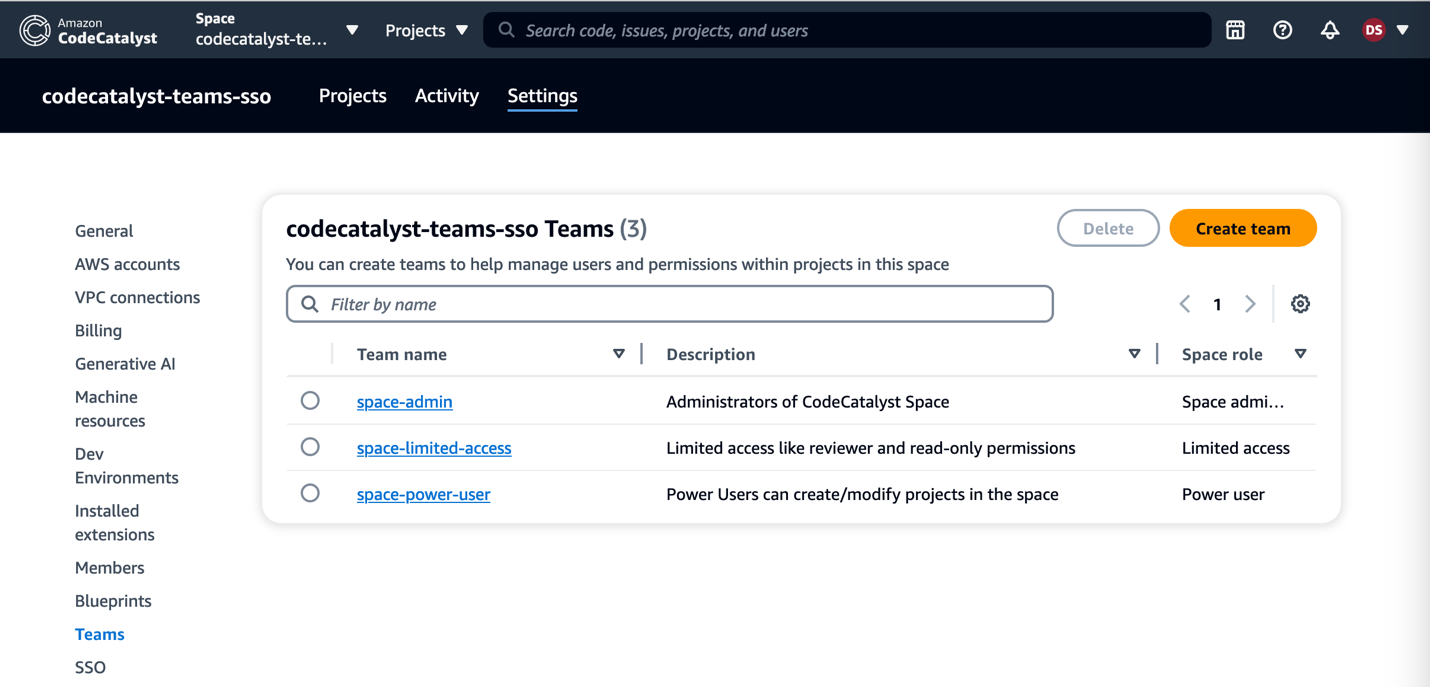
Figure 6: Managing Teams in CodeCatalyst Space
In this example here, if I go into the ‘space-admin’ team, I can view the SSO group associated with it through IAM Identity Center.
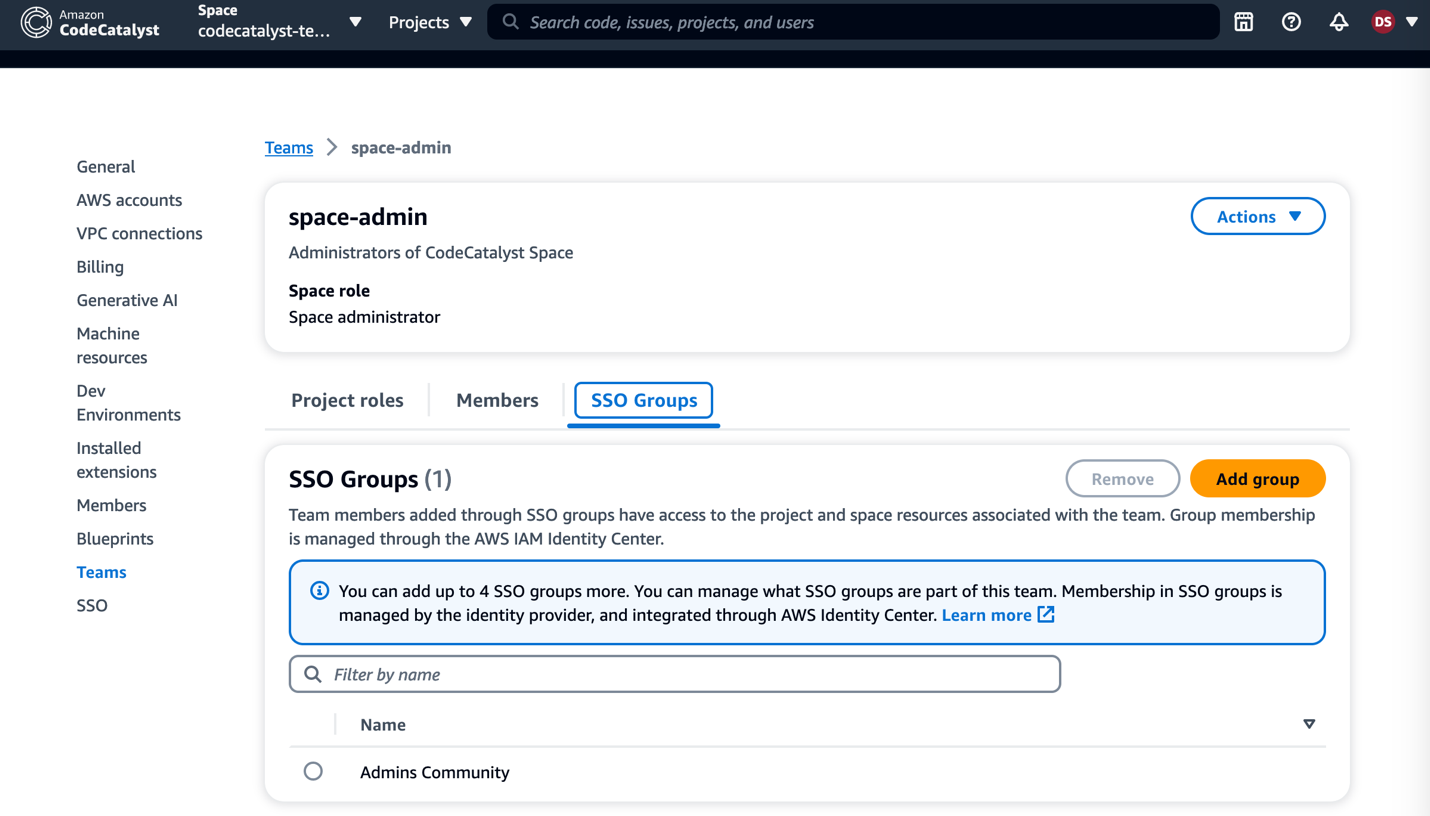
Figure 7: SSO Group association with Teams
You can now use these teams from the CodeCatalyst space to help manage users and permissions for the projects in that space. There are four project roles available in CodeCatalyst:
- Project administrator — The Project administrator role is the most powerful role in an Amazon CodeCatalyst project. Only assign this role to users who need to administer every aspect of a project, including editing project settings, managing project permissions, and deleting projects. For details, see Project administrator role.
- Contributor — The Contributor role is intended for the majority of members in an Amazon CodeCatalyst project. Assign this role to users who need to be able to work with code, workflows, issues, and actions in a project. For details, see Contributor role.
- Reviewer — The Reviewer role is intended for users who need to be able to interact with resources in a project, such as pull requests and issues, but not create and merge code, create workflows, or start or stop workflow runs in an Amazon CodeCatalyst project. For details, see Reviewer role.
- Read only — The Read only role is intended for users who need to view the resources and status of resources but not interact with them or contribute directly to the project. Users with this role cannot create resources in CodeCatalyst, but they can view them and copy them, such as cloning repositories and downloading attachments to issues to a local computer. For details, see Read only role.
For the purpose of this demonstration, I have created projects from the default blueprints (I chose the modern three-tier web application blueprint) and assigned Teams to it with specific roles. You can also create a project using a default blueprint in CodeCatalyst space if you don’t already have an existing project.

Figure 8: Teams in Project Settings
You can also view the roles assigned to each of the teams in the CodeCatalyst Space settings.
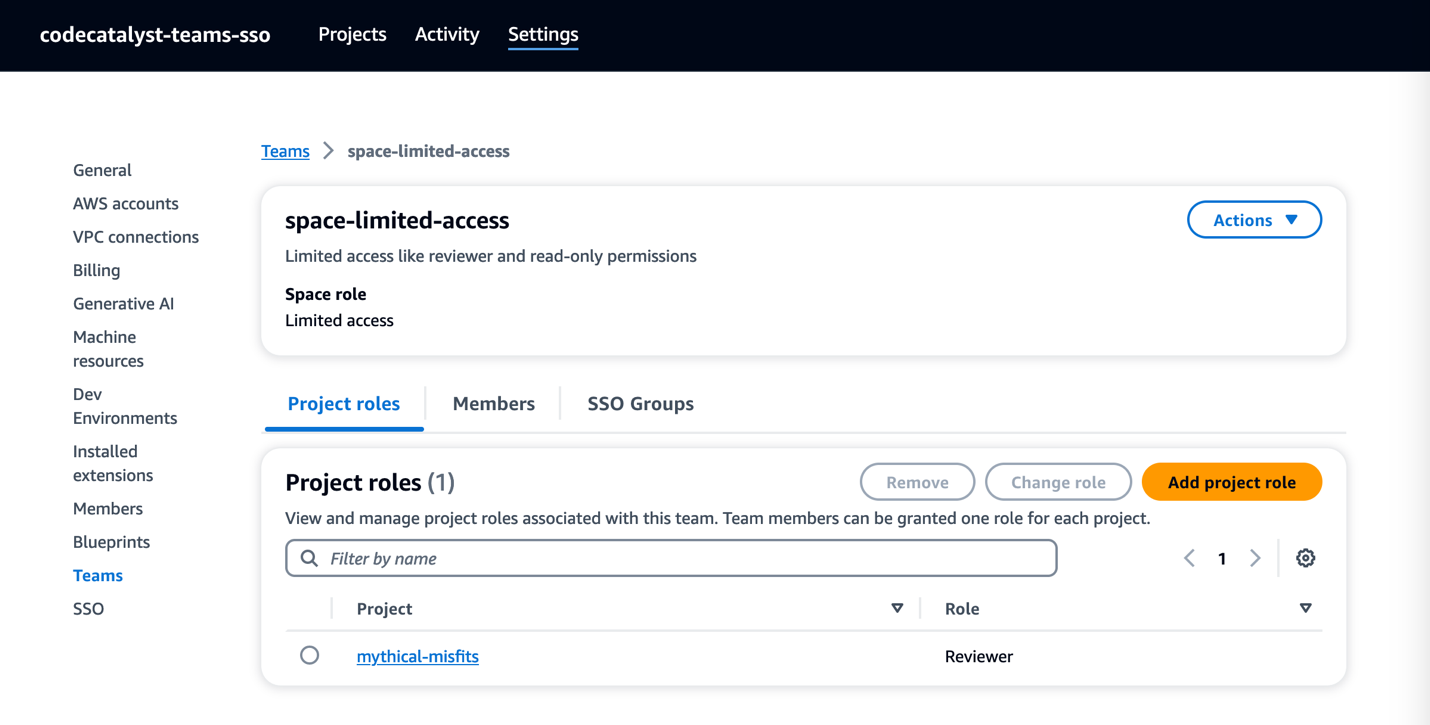
Figure 9: Project roles in Space settings
Clean up your Environment:
If you have been following along with this workflow, you should delete the resources you deployed so you do not continue to incur charges. First, delete the two stacks that CDK deployed using the AWS CloudFormation console in the AWS account you associated when you launched the blueprint. If you had launched the Modern three-tier web application just like I did, these stacks will have names like mysfitsXXXXXWebStack and mysfitsXXXXXAppStack. Second, delete the project from CodeCatalyst by navigating to Project settings and choosing Delete project.
Conclusion:
In this post, you learned how to add Teams to a CodeCatalyst space and projects using SSO Groups. I used Okta for my external identity provider to connect with IAM Identity Center, but you can use your Organizations idP or any other IDP that supports SAML. You also learned how easy it is to maintain SSO group members in the CodeCatalyst space by assigning the necessary roles and restricting access when not necessary.