AWS for Industries
Integrate OHIF viewer with AWS HealthImaging and OpenID Connect authentication
AWS HealthImaging now supports OpenID Connect authentication, making it quicker to integrate with medical imaging applications. While AWS HealthImaging has traditionally used AWS Signature Version 4 (SigV4) for authentication, many medical imaging applications are designed to work with standard web authentication protocols, such as OpenID Connect. By adding OpenID Connect support alongside SigV4, AWS HealthImaging becomes more accessible to open-source medical imaging applications without requiring custom authentication code.
Streamlined authentication for medical imaging applications
Many popular open-source medical imaging viewers, like the Open Health Imaging Foundation (OHIF) Viewer, are designed to work with standard web authentication methods such as OpenID Connect. These methods provide direct user authentication and authorization.
Previously, integrating these viewers with AWS HealthImaging involved a multi-step process:
- Authenticate users through a separate system
- Use AWS Security Token Service (AWS STS) to obtain temporary AWS credentials
- Sign requests to AWS HealthImaging using AWS Signature Version 4 (SigV4)
Now, AWS HealthImaging accepts standard OpenID Connect tokens, streamlining this process. This new capability provides organizations with a way to:
- Streamline architecture: Eliminate intermediate steps to obtain Amazon Web Services (AWS) credentials
- No code modifications required: Integrate existing OpenID Connect-enabled applications without custom authentication code
- Faster deployment: Leverage existing identity providers such as Okta, Azure AD, or AWS Cognito
- Enhanced interoperability: Connect with DICOM-compliant systems using consistent authentication methods
Demonstrating seamless integration: OHIF viewer with AWS HealthImaging
The OHIF Viewer is a widely adopted, open-source platform for medical image visualization. Let’s explore how to integrate it with AWS HealthImaging using OpenID Connect authentication. The integration leverages the built-in OpenID Connect support of the OHIF Viewer, requiring only configuration changes rather than code modifications. This approach maintains the integrity of the OHIF Viewer codebase, while enabling secure, standards-based authentication with AWS HealthImaging.
What we will build
By following this guide, you’ll deploy:
- AWS HealthImaging datastore enabled with AWS Lambda Authorizer validating OpenID Connect tokens for HealthImaging access
- OHIF Viewer running on AWS CloudFront, configured for OpenID Connect authentication
- Amazon Cognito providing OpenID Connect identity services
Architecture overview
Our solution consists of several key components working together to provide secure, standards-based authentication:
- Component breakdown:
- Web browser: Users access the OHIF medical imaging viewer through their web browser.
- Amazon Simple Storage Service (Amazon S3): Stores the OHIF static content (HTML, JavaScript, CSS files).
- Amazon CloudFront: Serves the OHIF Viewer as a static website hosted on Amazon S3.
- Amazon Cognito User Pool: Serves as our OpenID Connect identity provider, managing user authentication and issuing access tokens.
- AWS Lambda: Authorizer function that validates OpenID Connect tokens for every DICOMWeb request.
- AWS HealthImaging: Stores and serves DICOM data through standards-compliant DICOMWeb APIs.
- Authentication flow:
- User access: Users navigate to the OHIF Viewer hosted on CloudFront, which serves static content from Amazon S3.
- Authentication: Users are redirected to Cognito for authentication and receive OpenID Connect access tokens.
- DICOMWeb request: The OHIF Viewer makes DICOMWeb API requests to AWS HealthImaging, including the OpenID Connect access token in the authorization header.
- Token validation: AWS HealthImaging forwards the authorization header to the Lambda authorizer function for validation.
- Public key retrieval: The Lambda function validates the token validity for each identity provider verification method.
- Authorization response: After successful token verification, the Lambda function returns an AWS Identity and Access Management (IAM) role Amazon Resource Name (ARN) that HealthImaging assumes to serve the users requests.
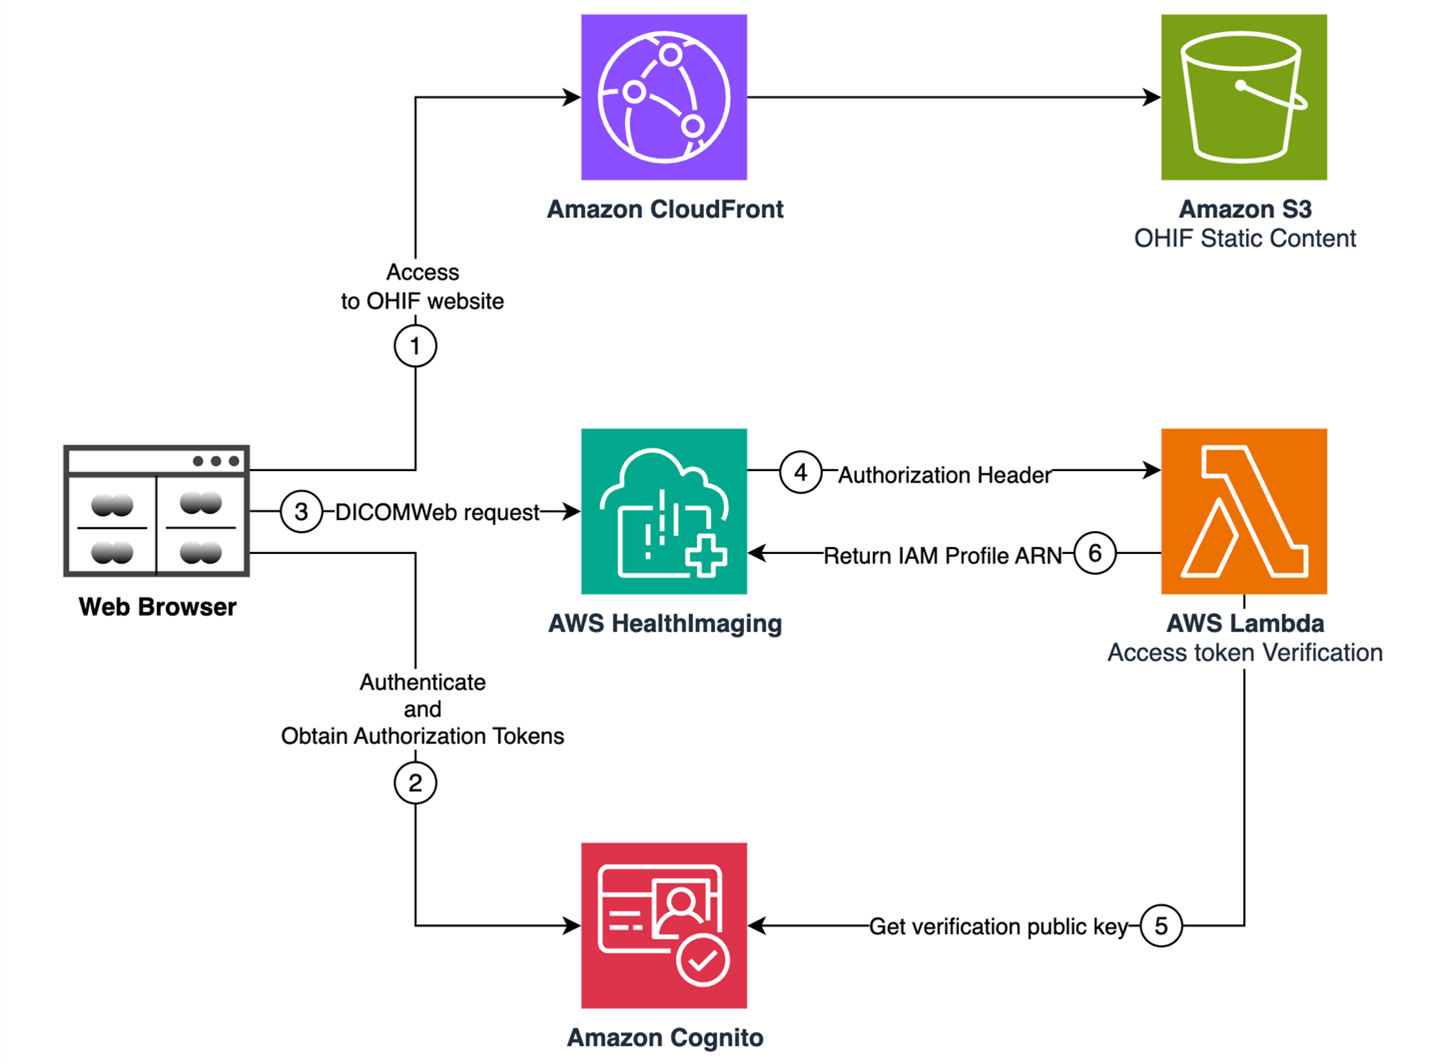 Figure 1 – Hight level solution design
Implementation steps
Setting up this solution involves multiple AWS services and configuration steps. To streamline its deployment, we’ve created an automated CDK solution in the AWS HealthImaging Samples repository that deploys the complete stack with a few commands. Let’s walk through the key implementation steps and essential configurations:
- Create a Lambda authorizer function
- Create an AWS HealthImaging datastore with OpenID Connect support
- Set up the web infrastructure
- Configure Cognito authentication
- Configure and deploy the OHIF Viewer
- Import test data
- Verify our deployment
1. Create a Lambda authorizer function
Create a Lambda function to validate OpenID Connect access tokens for DICOMWeb API requests. AWS HealthImaging invokes this function for each request to determine authorization. The function must perform these operations:
- Extract the access token from the event payload passed by HealthImaging to the Lambda function.
- Validate the access token using your identity provider’s verification method.
- Evaluate the token claims and select an IAM role ARN to return.
- Return an authorization response that specifies whether the token is valid and the ARN of the IAM role HealthImaging should assume to process the DICOMWeb request.
Resource policy
Since HealthImaging invokes this function within your AWS account, you must configure a resource-based policy. Read Set up an AWS Lambda authorizer for OIDC authentication for the required event structure, response format, and security policies.
Best practices for token verification
Token verification is more complex than it may initially appear. We strongly recommend consulting your identity provider’s documentation for recommended verification logic and libraries. For example, Amazon Cognito recommends using the aws-jwt-verify Node.js library to verify access tokens issued by Cognito.
2. Create an AWS HealthImaging datastore with OpenID Connect support
To enable OpenID Connect authentication, associate the datastore with your Lambda authorizer by specifying the function’s ARN during creation. Use the following AWS Command Line Interface (AWS CLI) command:
aws medical-imaging create-datastore \
--datastore-name YourDatastoreName \
--lambda-authorizer-arn YourAuthorizerFunctionArn
3. Set up the web infrastructure
Create an S3 bucket and CloudFront distribution to host the OHIF Viewer. The S3 bucket stores static application files, while CloudFront distributes the content globally with low latency over HTTPS. This architecture pattern for web applications provides scalability and performance without managing web servers.
Security
While the CloudFront distribution is publicly accessible this poses no security risk because it only serves the static OHIF Viewer web application. No patient data is stored or transmitted through this channel. All medical imaging data is retrieved directly between the OHIF Viewer client in the user’s browser and AWS HealthImaging APIs, secured by OpenID Connect authentication and HTTPS. The separation of static content delivery from data access confirms robust security.
4. Configure Cognito authentication
Set up an Amazon Cognito User Pool and application client to serve as your OpenID Connect identity provider. When creating the user pool’s application client configuration, you’ll need to configure several OAuth 2.0 settings that enable OHIF Viewer to authenticate users properly.
Application client settings:
- Allowed Callback URLs: https://[YourCloudfrontDistributionURL]/callback
- Allowed sign-out URLs URL: https://[YourCloudfrontDistributionURL]/logout
- OAuth 2.0 Grant Types: Authorization code grant
- OAuth 2.0 Scopes:
- openid: Required for OpenID Connect authentication
- profile: Provides access to user profile information
- email: Allows access to user’s email address
These settings establish the trust relationship between Cognito and your OHIF Viewer, enabling secure user authentication. Make sure to use your CloudFront distribution domain in the callback and logout URLs, because this is where your OHIF Viewer will be hosted. This is needed for Cognito to know where to redirect the browser to after successful authentication.
5. Configure and deploy the OHIF Viewer
The OHIF Viewer needs to be downloaded, configured, and built before its deployment. Here are the key steps:
- Clone the OHIF/Viewers repository.
- Update the OHIF Viewer configuration in the default.js. The example configuration shows the required settings for AWS HealthImaging DICOMWeb and Cognito endpoints integration. Use this as a reference to craft your own configuration file rather than copying it directly. Your implementation may require different OHIF Viewer settings, for enabling other extensions.
Required parameter replacements:
[region]: Your AWS Region (such as, us-east-1)
[datastore_id]: The ID of your AWS HealthImaging datastore obtained during its creation
[user_pool_id]: Your Cognito User Pool ID (such as, us-east-1_abcd1234)
[app_client_id]: Your Cognito Application Client ID
The example configuration for reference only:
Increased scalability
Due to the robust scalability of the AWS HealthImaging DICOMWeb API, you can significantly increase the maxNumRequests.interaction parameter in the OHIF Viewer configuration. This allows for a higher number of concurrent frame downloads, potentially improving the viewer’s performance and responsiveness without overwhelming the backend infrastructure. The exact value can be tuned based on your specific use case and network conditions.
- Refer to the OHIF Viewer Build for Production to install the dependencies and compile the web application. This will create a production-ready build in the platform/app/dist directory.
- Copy the content of the platform/app/dist directory to the root S3 bucket previously created to store the OHIF Viewer static content.
6. Import test data
To verify that your deployment is working correctly, import sample DICOM files into your newly created HealthImaging datastore. AWS HealthImaging supports two import methods:
- Import DICOM data from Amazon S3
- Send DICOM data through the DICOMWeb STOW API
Refer to the AWS HealthImaging Starting an import job documentation for instructions on importing DICOM data into your OpenID Connect-enabled datastore.
7. Verify our deployment
Access the OHIF Viewer through your CloudFront distribution URL. The OHIF Viewer automatically redirects to Cognito for authentication.
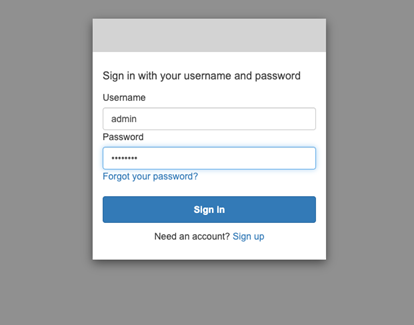
Figure 2 – Cognito authentication web page
After successful login, you’re returned to the OHIF Viewer, which immediately queries your AWS HealthImaging datastore using the DICOMWeb SearchStudies API. Your imported studies appear in the interface. Examining the network request in your browser’s developer tools confirms the authorization header contains the OpenID Connect access token from Cognito.

Figure 3 – OHIF Viewer Search Series request containing an authorization Bearer token
Conclusion and next steps
AWS HealthImaging OpenID Connect authentication support addresses a longstanding integration challenge. It eliminates a critical barrier between cloud healthcare services and standards-compliant DICOM viewers. By accepting industry-standard JSON web tokens alongside SigV4, organizations can now leverage existing identity providers and OAuth 2.0 flows without building custom authentication layers.
As demonstrated through the OHIF Viewer integration, this delivers measurable benefits: a streamlined architecture, reduced development overhead, and faster deployment. The reference architecture presented—combining AWS HealthImaging with AWS Lambda authorizers, Amazon Cognito, and OHIF Viewer—provides a production-ready implementation requiring only configuration changes, rather than custom code modifications.
Contact an AWS Representative to find out how we can help accelerate your business.