AWS Cloud Operations Blog
Using AWS CloudTrail to propagate tags across related AWS resources – Part 1
AWS allows customers to assign metadata to their AWS resources in the form of tags. Each tag consists of a customer-defined key and an optional value. Tags can make it easier to manage, search for, and filter resources by purpose, owner, environment, or other criteria. AWS tags can be used for many purposes like organizing your AWS resources or for your cost and usage report, automation, IT service management, access control, and security risk management.
Many customers require some or all AWS resources created by an AWS service to add a tag for consistency. This can be a default tag or custom tag for example ‘deployment ID’. For example, you might need to propagate custom tags from an Amazon Aurora Serverless to the VPC endpoints and network interfaces it creates or, when you create an Amazon SageMaker Studio Control Panel, to the Amazon EFS volume and security group it creates.
You can use AWS Tag Editor and AWS Resource Groups to find and add tags after the resources are created. Another option is to automatically propagate tags when the AWS resources are created. In this blog post, we share an example of how you can propagate custom tags automatically to the resources when you create Aurora serverless. In the next post, we will share another example of how you can re-use the same mechanism to automatically propagate custom tags when you create Sagemaker Studio Control Panel. You can use the same mechanism for other use-cases (for example, to propagate tags upon resource modification or after restoring an AWS resource from a backup).
Overview of solution
AWS CloudTrail helps you enable governance, compliance, and operational and risk auditing of your AWS account. Every action by an AWS service is an API call that is recorded in CloudTrail as an event. In the solution we describe in this post, we create a rule in Amazon EventBridge that triggers an AWS Lambda function. The AWS Lambda function gets a list of tags from the primary resource that we’re launching and applies tags to resources that are associated with it.

Figure 1: Services used in the solution
Solution steps:
- Find the AWS resources created by an AWS service that you need to tag.
- Create a rule in EventBridge that is triggered by an API call recorded in CloudTrail.
- Trigger a Lambda function to get the primary resource and tag, find associated resources, and apply the tag.
Solution walkthrough
We’ll share two examples of how you can tag AWS resources that are created by AWS services in your account.
Prerequisites
To complete the steps in this walkthrough, you need the following:
- An AWS account.
- Basic understanding of Python using Boto3 APIs and AWS CLI
Solution to automatically propagate tags when you create Amazon Aurora Serverless configuration
Complete these steps or use the CloudFormation template to tag VPC endpoints and network interfaces.
- Sign in to the AWS Cloud9 console.
- In Configure settings, create an environment with the default settings shown here:

Figure 2: Create a Cloud9 environment
- Run the following commands in your AWS Cloud9 environment to download the DNS resolver module in the target directory.
- Create a Python file named
lambda_function.pyin this directory and paste the following code:
- Zip these files and lambda_function.py in a single ZIP file.
- Push the file to your S3 bucket.
- Go the IAM console, choose Policies, and then choose Create Policy.
- Choose the JSON tab and paste the following to grant permissions to create tags for resources in an Aurora Serverless configuration.

Figure 3: JSON
- Choose Next: Tags and then choose Next: Review.
- On the Review policy page, enter
auroraTaggingPolicyfor the policy name and then choose Create policy. - To create a role for the Lambda function, in the left navigation pane, choose Roles and then choose Create role.
- On Create role, under Choose a use case, choose Lambda, and then choose Next: Permissions.
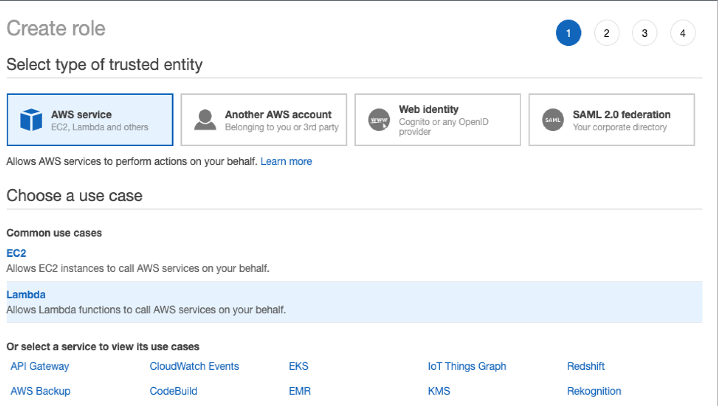
Figure 4: Choose a use case
- Search for the policy you just created, choose Next: Tags, and then choose Next: Review.
- For the put role name, enter
auroraTagPropagatorRole. - Go to the AWS Lambda console and create a function with the following details:
- Function name:
propagateAuroraTags - Runtime: Python 3.8
- Function name:
- For permissions, choose Use an existing role, and then choose auroraTagPropagatorRole from the dropdown.
- Choose Upload from and then upload the ZIP file.
- Since DNS update takes longer than the default lambda timeout of 30 seconds, we will update the timeout period to 1 min 30 seconds. To update the timeout, choose the Configuration tab, under General configuration, update the timeout period to 1 min 30 sec, as shown here:

Figure 5: General configuration
- Go to the Amazon EventBridge console, choose Events, choose Rules, and then choose Create rule.
- For the rule name, enter
propgateAuroraTagsRule. - In Define pattern, choose Event pattern. For Event matching pattern, choose Pre-defined pattern by service. For Service provider, choose AWS. For Service name, choose Relational Database Service (RDS). For Event type, choose AWS API Call via CloudTrail. Choose Specific operation(s) and then enter
CreateDBCluster.
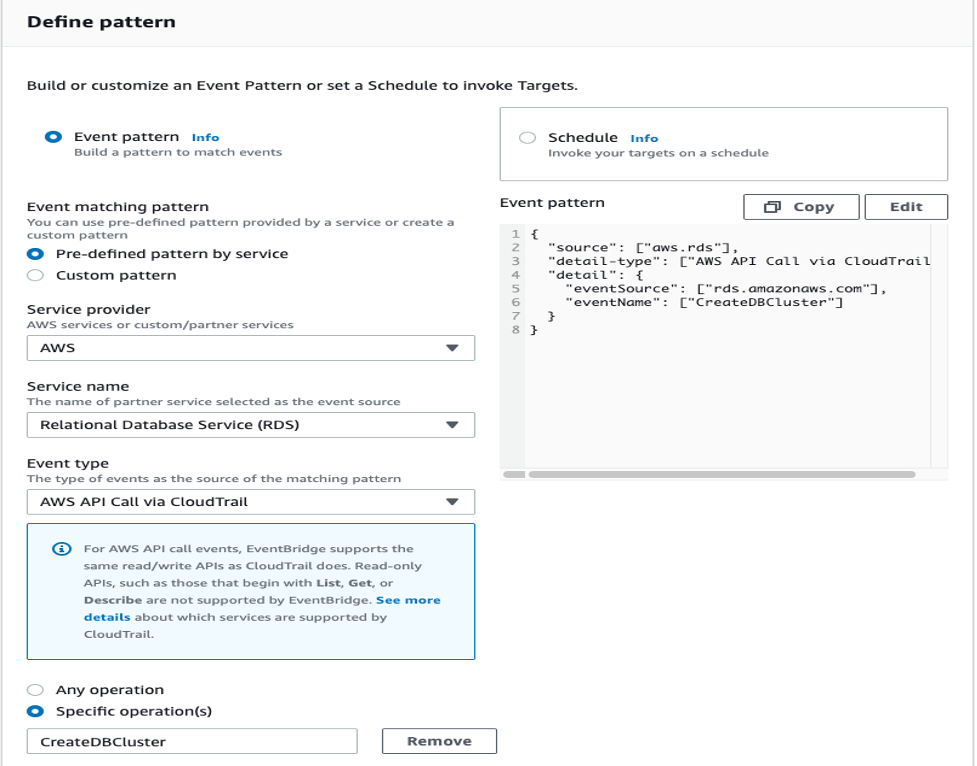
Figure 6: Define pattern
- On Select targets, under Target, choose Lambda function. Under Function, choose propagateAuroraTags from the dropdown, and then choose Create.
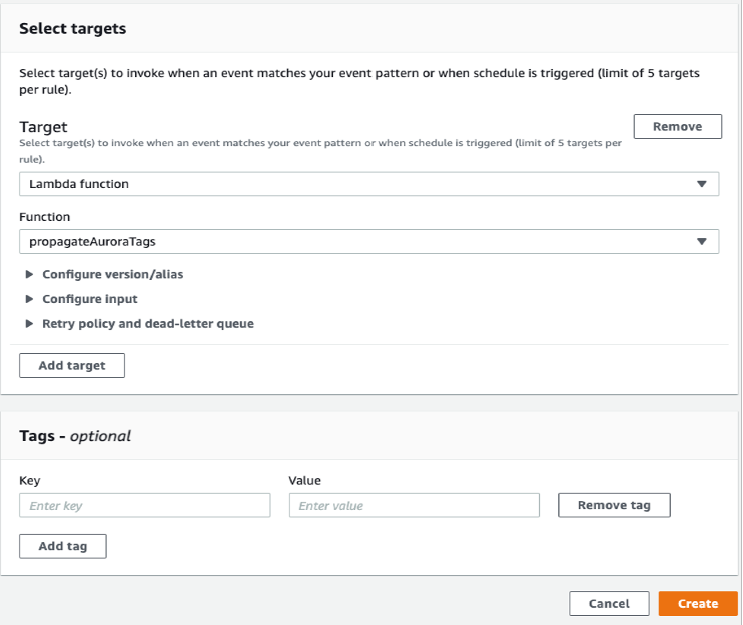
Figure 7: Select targets
You can verify the tags are attached to the VPC endpoint and network interfaces. The next time an Aurora Serverless configuration is created, custom tags will be applied automatically to the VPC endpoint and network interfaces.
Cleaning up
If you created the environment using CloudFormation template, here are the instructions to delete the CloudFormation stack.
Conclusion
In this post, we showed how you can create an automation to propagate tags whenever a resource is created. You can extend this logic to any of your use-case that requires you to tag all the subsequent resources when a new AWS service is created.