AWS Storage Blog
Deploying Amazon FSx for Windows File Server into a shared VPC
As enterprises continue to move more of their application footprint to the cloud, they quickly realize that they need a solution for their file data. While many modern applications are built to interact with API driven storage services, like object stores, NoSQL, or graph databases (among others), there are still a large number of workloads that are dependent on file services. These applications are often architected against a set of principles that require strict availability characteristics from file storage solutions.
For previously stated reasons, many of our customers are turning to Amazon FSx for Windows File Server (Amazon FSx) for an easy way to provide applications with resilient, scalable, and durable Windows file storage accessible by the industry-standard SMB protocol. Recently, Amazon FSx announced support for shared Virtual Private Cloud (VPC) environments, enabling customers to deploy file systems directly into subnets shared within their local accounts. Adopting this type of pattern provides application developers with enhanced speed while maintaining security, through the separation of duties. Application developers can focus on building while a separate team ensures that the underlying network topology meets all of their organization’s security standards and best practices. I explain these benefits in greater detail further below.
In this blog post, I cover the deployment of Amazon FSx in shared VPC environments. But first, let’s spend a minute talking about why some of our customers have decided to adopt shared VPCs.
Why are customers using shared VPCs?
Many AWS customers are using multiple accounts as a way to provide workload isolation. There are numerous strategies customers may employ to map workloads to accounts, from provisioning one account per application to grouping applications by architecture pattern or classification. Managing these accounts at scale often involves using AWS Organizations. Organizations integrates with AWS Resource Access Manager (AWS RAM), allowing customers to share numerous services (like VPC subnets) to other AWS accounts and control that sharing from a single location.
Some customers would like to go beyond providing account-based workload isolation, and are looking to centralize networking responsibilities by delegating the definition of network topologies to a separate team. They view the separation of duties surrounding networking and application infrastructure as another way of enforcing least privilege. For some of these customers, shared VPCs may be an attractive option. Shared VPCs give customers the ability to extend a VPC beyond its traditional account boundaries by providing a mechanism to share VPC subnets with other accounts. An AWS account can provision a set of subnets from within a local VPC and then share these subnets with a second account. That second account, referred to as the VPC sharing participant, can then provision AWS resources into the VPC. The VPC owner maintains control of the network topology while the VPC participant owns any resources they provision within that shared network.
Shared VPCs and file services
So what do customers do when SMB-based Windows applications and workloads require Windows file services? As I mentioned above, recently Amazon FSx has announced support for deploying into shared VPCs. In this blog post, I cover its deployment into one of these environments.
This environment consists of the following accounts, grouped into a single AWS Organization.
- The Organizations master account, which enables sharing among the multiple organization accounts.
- A shared identity account, which hosts the Microsoft Active Directory environment.
- A network services account, which hosts the shared VPC.
- A VPC participant account, which consumes the shared subnets and be used to deploy an Amazon FSx for Windows File Server file system.
The architecture defined is reflected in the following diagram:

In this blog post, I walk you through the following steps:
- Configuring the required AWS Organizations dependencies
- Creating the Amazon FSx VPC subnets and sharing them out
- Sharing the AWS managed Microsoft Active Directory environment with your application account
- Provisioning Amazon FSx for Windows File Server in the shared subnets
Note: Amazon FSx provides customers with a great deal of flexibility around how Windows file services can be provisioned and consumed. While this blog focuses on deploying into a shared VPC subnet, customers could alternatively decide to deploy Amazon FSx into non-shared subnets. Shared subnets could then be provisioned and used by remote accounts to deploy resources that mount those file shares.
Enabling Resource Access Manager within AWS Organizations
AWS Organizations must be configured to allow other organization accounts to use AWS RAM to share resources. This authorization is done within the Organizations master account. Verify that AWS RAM is enabled within your Organization’s master account.

Next, within the Organizations master account, you must verify that Enable sharing within your AWS Organization is selected. If not, check this option and select save.

Both of these options are required to allow you to share subnet resources between accounts that make up your Organization. Once this has been completed, you should now be able to create subnets and share these via AWS RAM.
Build shared VPC environment
From the network services account, build a single VPC with two subnets across two Availability Zones for resiliency. These subnets are shared with the application account to be used by your FSx for Windows File Server deployment.

Once the VPC and subnets have been created, you can create your resource share. Within AWS RAM, create a new resource share of type subnet. Select the two subnets that will be used by your Amazon FSx deployment, and add the account ID of the application account as the associated principal. When the resource share is created, this shares your two subnets with the application account and displays the following under shared resources:
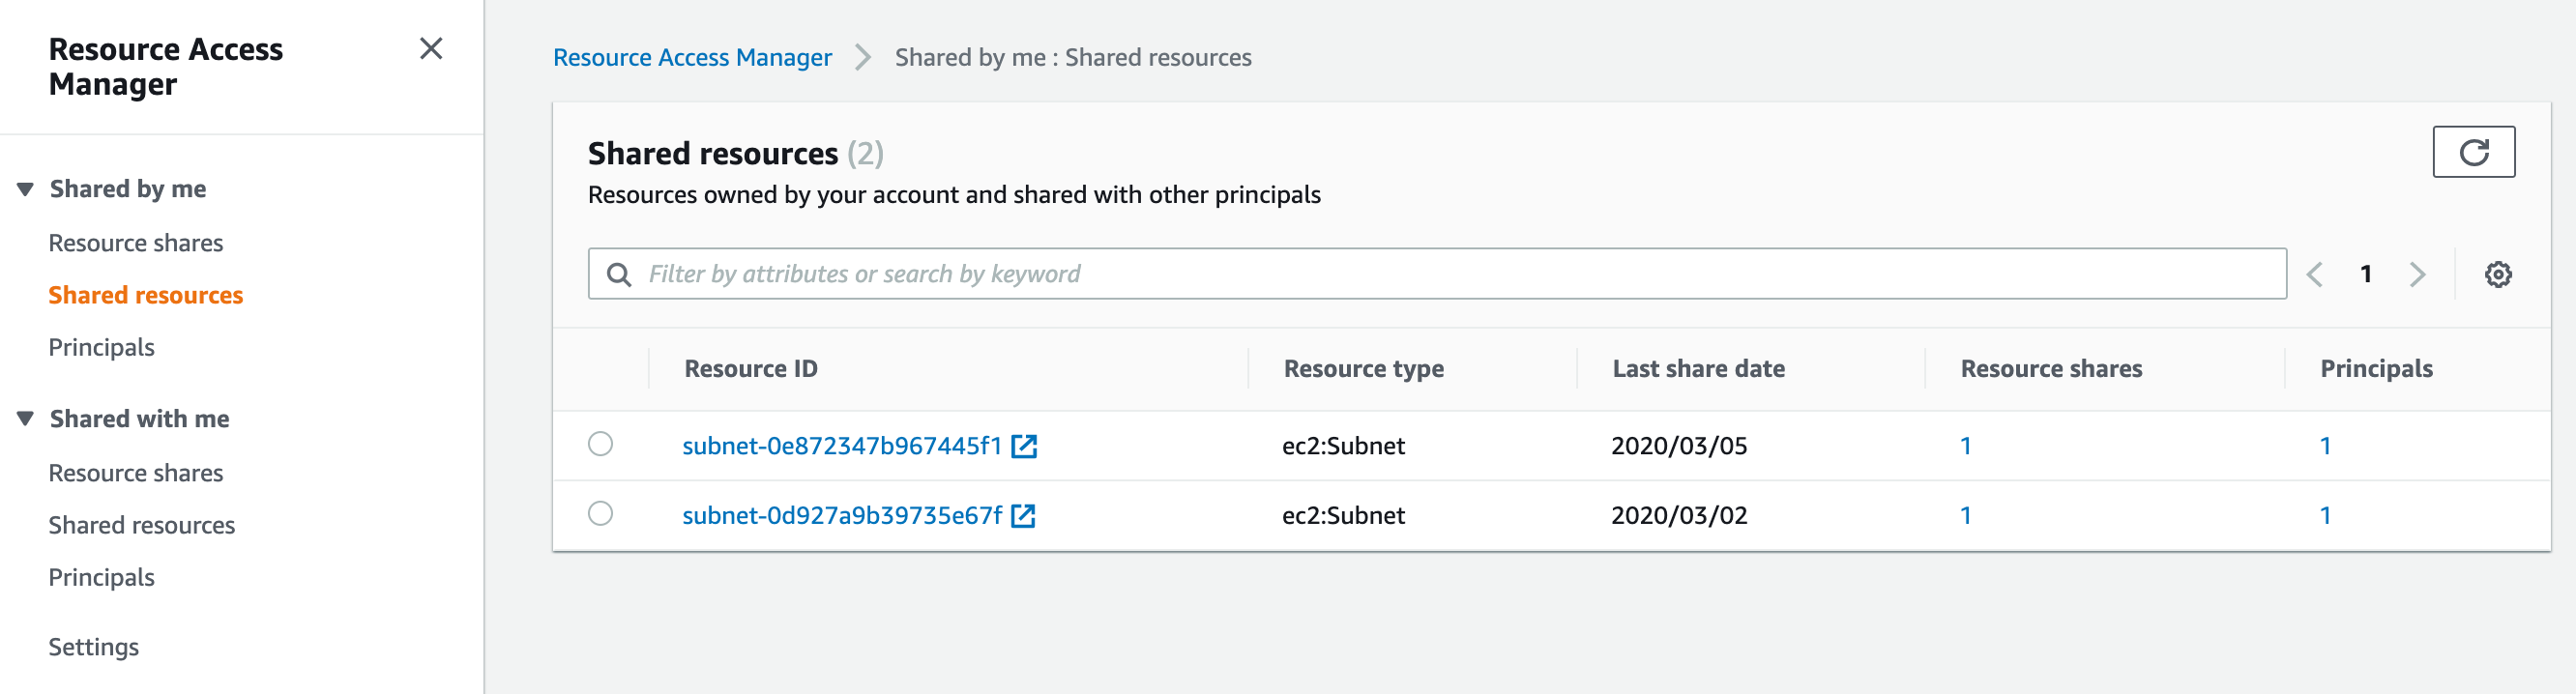
Resource shares require a confirmation from recipient, so accept the share from the “Shared with me” section of AWS RAM within the application.
You now have an operational shared VPC environment! Before you begin deploying your FSx for Windows File Server resources, however, you must configure and share your Microsoft Active Directory environment.
Sharing the Microsoft Active Directory environment
I’m going to skip ahead a bit since the AWS managed Microsoft Active Directory environment has already been deployed into a shared identity account. AWS Managed Microsoft AD gives users the ability to share Active Directory environments with other AWS accounts. This means you can deploy your AD environment in a centralized account while still providing your resources stationed in remote accounts with the required access. Among these resources are Windows-based EC2 instances or Amazon FSx file shares. Deploying your identity services into a separate account enables you to enforce account level isolation between identity services and those provided elsewhere. In this blog we’ve centralized identity management into a shared identity account but it’s worth noting that Amazon FSx also integrates directly with on-premises, and self-managed Active Directory environments.
Before you’re able to share your directory, however, you must first ensure that there is network connectivity between the VPC hosting directory services and the VPC consuming them. In this environment, that’s the identity VPC and the network services VPC. Refer to this documentation for more information on these requirements.
I’ve gone ahead and configured a peering relationship between these VPCs, so the next step is to share the directory with the application account. While I chose to peer the two VPCs, the requirement is network connectivity, so any network path would suffice (this includes AWS Transit Gateway). Also, since I’m deploying Amazon FSx into the VPC participant account, any resources deployed into the shared subnet can leverage the network services VPC peering connection, providing the subnets have the appropriate routes in place.
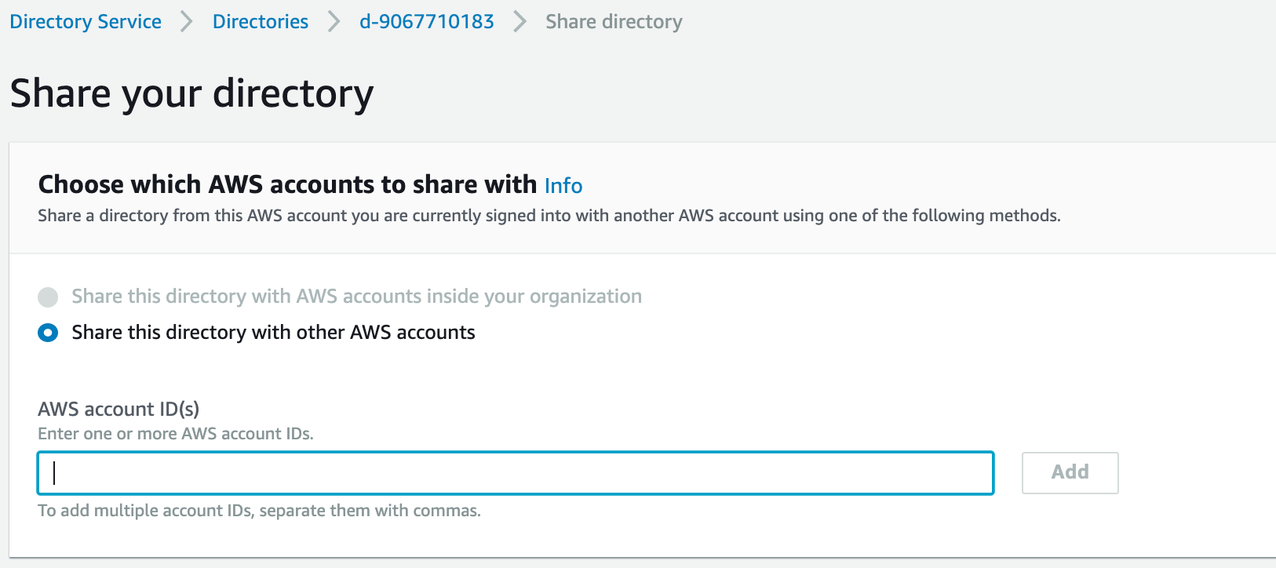
From the Directories menu link of the Directory Service page, select the Directory ID and choose Actions→Share directory from the top menu. Since the network service account is not the Organizations master account, the “Share this directory with AWS accounts inside your organization” is grayed out. Share the directory directly with the application account, by specifying the account ID and selecting Share.
Within target account, the Active Directory environment should now be visible from the Directory Service screen, under “Directories shared with me.” With this step complete, you are now ready to deploy your FSx for Windows File Server in your shared VPC environment.
Deploying FSx for Windows File Server in the shared subnets
The final steps happen within your application account.
Before beginning your deployment, you must first create a Security Group for your infrastructure. This security group is created within your application account and references your shared VPC. Add the necessary inbound/outbound ports from this documentation.
With the security group created, you’re ready to begin your deployment. From the Amazon FSx service screen, perform the following:
- Select Create file system.
- Choose Amazon FSx option and select Next.
- From the Create file system screen provide the following information:
- Complete the File system details section by specifying a name, storage capacity, and throughput capacity. You keep Multi-AZ selected as you want your file system to be highly available.
- From the Network & security section, select the ID of your shared VPC and choose your two shared subnets, one for preferred and one for standby. Choose the security group created above.
- Choose the shared Microsoft Active Directory environment from the Windows authentication section.
- Keep the defaults for Encryption and the remaining sections and select Next.
- Review the options and select Create file system.
That’s it! When the file system finishes creating, select the file system name and verify the VPC subnet location information from the Network & security tab.

Cleanup
It’s time to remove the resources you’ve deployed. Focus on removing those in the Network services and Application accounts, since you leveraged a pre-existing Active Directory environment from your Shared identity account.
Perform the following steps from your Application account:
- Delete the Amazon FSx file system
- From the Amazon FSx screen, select the name of your newly created Windows file system and choose Actions, then choose Delete file system.
- Since this is a demo, you aren’t going to create a final backup. This process could take several minutes.
- Delete the security group used by your Amazon FSx file system
- Remove the shared Microsoft Active Directory
- From the Directory Service screen, under Directories shared with me, select the shared directory and choose Delete.
- From the Amazon FSx screen, select the name of your newly created Windows file system and choose Actions, then choose Delete file system.
- From the Network service account:
- Delete the shared VPC subnets
- Delete shared VPC
Summary
Within your Organization you’ve enabled resource sharing, built a VPC, shared two subnets with your application account, shared your Microsoft Active Directory environment, and finally deployed FSx for Windows File Server into the shared VPC subnets. Your application team now has the ability to provision file shares for their SMB workloads, while the network services team retains control of the underlying network topology. Why is this beneficial? Simple. This gives your application developers the ability to move fast while remaining secure. Developers no longer need to focus on the complexities of network communication or network security and can focus on building.
Let’s wrap things up with a couple final thoughts. First, application isolation through the use of multiple VPCs is becoming increasingly common. For those customers moving towards shared VPCs, creating account-scoped Amazon FSx environments by deploying into shared subnets helps customers enforce separation of duties.
And finally, Amazon FSx supports a wide variety of ways to access file shares, and I have just scratched the surface today. File shares can also be accessed across accounts, AWS Regions, from on-premises clients, as well as numerous others. Amazon FSx even supports accessing file shares through Linux or macOS. For more information on the different types of access methods, refer to this documentation.
Thanks for reading about the process of deploying FSx for Windows File Server into shared VPC environments. Please leave feedback in the comments section below if you have any additional questions.