Containers
Fast forward on your first serverless container deployment on AWS
Introduction
Modernization and container technologies are a hot topic in recent technology news, reports, and conference talks. Containers are becoming a dominant modern compute layer for on-premise, local, and hybrid workloads. This blog post introduces container concepts with easy-to-understand examples and equips the reader with a lightweight toolset to deploy your first containers on AWS.
Are you a tech beginner or work in a non-tech role? Do you ever find time to do some coding and hands-on work? Have you ever wanted to deploy a container on AWS? If you sum up with yes, yes and yes, you are in the right place. In a couple of minutes, you can deploy your first container on AWS and observe the builder experience.
Everything starts with an idea, an inspiration you want to validate. This post will assume the idea is a new web application that the world hasn’t seen before. You built the application and now need to find a new home to showcase your innovation. One great option is deploying it into a fully scalable, serverless container deployment on AWS.
Given the evolution of containers over the last years, you can find a lot of references and deep dives into container technology on our containers blog. I will add a further reading section at the end of the post where you can continue with further container reading. This post introduces only the very necessary steps and concepts to deploy and un-deploy a containerized infrastructure on AWS. Let’s get started.
Technical introduction
Let’s jump into a quick technical introduction. We have to clarify a few things upfront before we deploy your very first container on AWS.
Before we unpack the container technology, let’s have a quick look on the following table to learn about use cases where containers are of great fit.

Have a look at our Containers on AWS page for further information around containers, our services, use cases and customer stories.
This post covers your first serverless container deployment on AWS. Serverless is a way to describe the services, practices, and strategies that enable you to build more agile applications so you can innovate and respond to change faster. Here we use AWS Fargate to run serverless containers on Amazon Elastic Container Service (Amazon ECS). AWS Fargate is a service that allows you to run containers without having to manage servers or clusters. You can simply focus on your application needs, chose a suitable computing option – configuration couple of CPU and memory – and run your container. The benefits are to not think about various cluster optimizations or server management, but keep the focus on architecting and developing your applications.
Now, let’s clarify how you deploy your first serverless container on AWS? The best way to fast-track your first serverless container on AWS is AWS Copilot. AWS Copilot is a command line interface (CLI) that enables customers to quickly launch and easily manage containerized applications on AWS without thinking about the underlying infrastructure automation.
Tutorial
In the list of potential use cases, we saw that containers can be used for a variety of architectures. Here, we simulate a web application packaged into a container and deploy it on AWS.
The following diagram shows the simplified infrastructure.

Now let’s explore how we come to this architecture for the container deployment and then unpack the different components.
The only prerequisite we need is an AWS account. Inside the AWS Account we will use AWS Cloud9. It is an integrated development environment (IDE) that enables you to write, run, and debug your code with just a browser. The same can be achieved using your local machine with your preferred text editor and configured terminal. In this post, we focus on simplicity so you don’t have to install a lot of tools onto your local machine.
Follow this link to directly navigate to AWS Cloud9 in the AWS Management Console. After you sign in to the console, in the top navigation bar, choose an AWS Region in which to create the environment.

Now we need to create an environment:

After executing three steps, we are ready to work in the fresh Cloud9 instance. Simply provide a name like ‘first container on aws’ and hit “Next step”. In the second step, you can leave the settings as is and hit “Next step”. Step three summarizes your previous steps. Review and select “Create environment”.
AWS is now creating your AWS Cloud9 environment and will provide you with its web interface where you find the terminal window at the bottom.
One additional benefit of using Cloud9 is the already installed software stack including the AWS CLI and Docker:

You now need to give your created Cloud9 instance the proper permissions to deploy AWS infrastructure. Before we do that, simply run this command to install a small helper utility:
sudo yum install -y jqNow, follow this guide to create an IAM role, attach to the workspace and finally update the IAM settings for your Cloud9 workspace. The guide will also set the default AWS Region that is required for the deployment. The instance now has all required permissions. You can find links to learn more about security in the further reading section.
The only tool to install is AWS Copilot. Simply copy and paste the following command into the open terminal and Copilot CLI will be installed and ready to use.
sudo curl -Lo /usr/local/bin/copilot https://github.com/aws/copilot-cli/releases/latest/download/copilot-linux \
   && sudo chmod +x /usr/local/bin/copilot \
   && copilot --help
We now have everything in place to bring the innovation into live using a container deployment on AWS. Within the AWS Cloud9 environment we create a directory, and a project file. Here we will produce a simple HTML-file (index.html) that will show us a headline saying “My first serverless container app on AWS”. Copy and paste this command:
mkdir myApp && cd myApp && echo "<html><body><h1>My first serverless container app on AWS</h1><body></html>" > index.htmlThis minimalist example is just there to showcase our goal of the post: deploy your first container on AWS. Depending on your idea and technology, you would replace the HTML file with your source code.
We learned that we need a Dockerfile for a container-based deployment. As this Dockerfile is just a text file, we can create a very basic Dockerfile that picks up your app (index.html) and puts it into the right place inside the container image to be ready to deploy it.
printf "FROM public.ecr.aws/nginx/nginx:1.19-alpine\nCOPY index.html /usr/share/nginx/html" > DockerfileLet’s have a quick look into the Dockerfile. In the first line you need to refer to an image. We are building a web application and can use publicly available Docker images.
1: FROM public.ecr.aws/nginx/nginx:1.19-alpine
2: COPY index.html /usr/share/nginx/html
In line one, we refer to the underlying image. Here we use NGINX as the web server provided on the public Amazon ECR container registry. The part after the colon depicts the version of the image to use. As you want to bring your idea to production, you specify a version and don’t use the latest (:latest) version of the image. The second line instructs Docker to copy the index.html file into a specific folder of the image during the image build process. This folder is picked up NGINX to be served automatically when deployed.
Now it is time to deploy our very first container on AWS using one command:
copilot init --app myapp \
--name myapp-service \
--type 'Load Balanced Web Service' \
--dockerfile './Dockerfile' \
--port 80 \
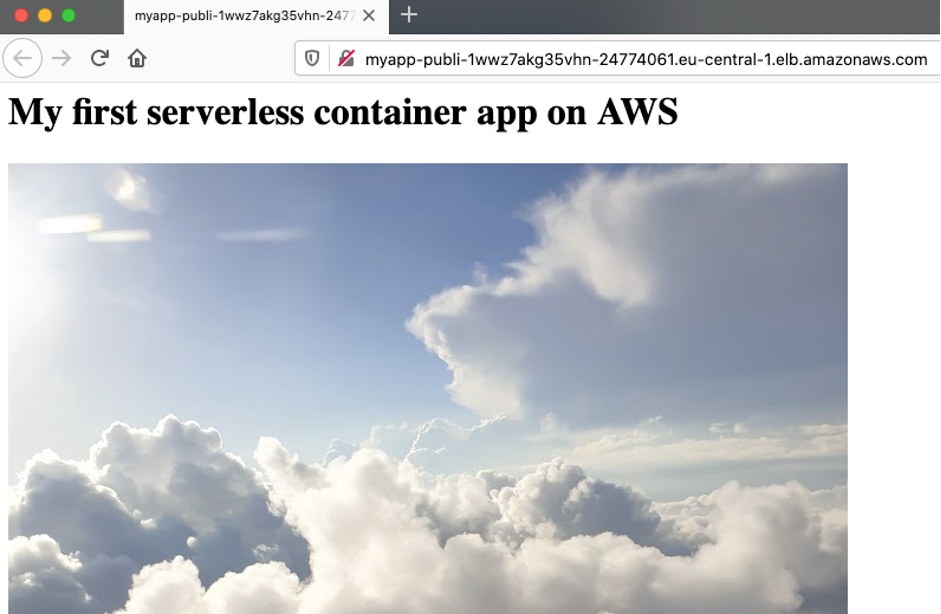
--deployCongratulations. After a few minutes you will see a similar screen indicating that you have deployed your first container application on AWS. You can head over and click on the provided URL where your app is reachable.
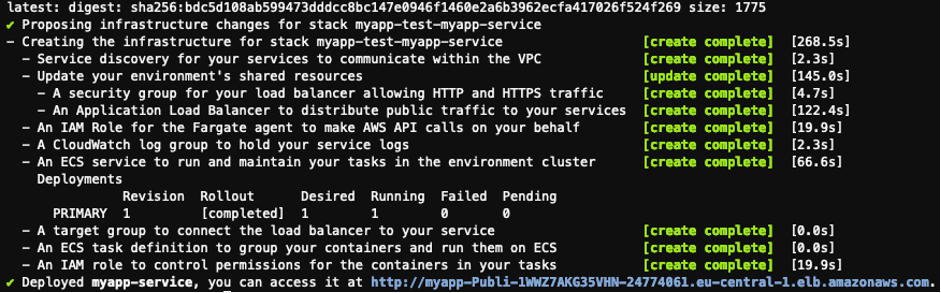
You see your greeting served from an AWS Fargate container running your web app.

Let’s inspect what we have deployed. You can visit CloudFormation in the AWS Management Console and see all created resources. Copilot divides the deployment into different stacks. This is useful if we want to adjust parts of our deployment and redeploy the changes faster.

You can select one stack and see the CloudFormation template that deployed your container or see a summary of all deployed resources.

Take some time and view the different deployed stacks and how much time you saved using Copilot CLI. We just used one command to create a fully scalable and serverless container-based deployment. Let’s see how we can make adjustments and make use of the elasticity features of cloud deployments. I’m assuming you made a couple of changes to your application and now want to deploy not only one container but two and now need to let the load balancer distribute your traffic.
Download this picture and upload it into your Cloud9 environment.

Within Cloud9, simply drag and drop the local image file and store it next to your index.html in the myapp directory.

Now double click on the index.html file and reference the uploaded file. Add:
<img src=”clouds.jpg”>The file looks similar to the screenshot:

The second step is to update our Dockerfile so that our app is aware of the new file. Open the Dockerfile and append the following line to the file:
COPY clouds.jpg /usr/share/nginx/htmlYour Dockerfile should now have three lines:
FROM public.ecr.aws/nginx/nginx:1.19-alpine
COPY index.html /usr/share/nginx/html
COPY clouds.jpg /usr/share/nginx/html
Now we have added some more content to our app, we need to adjust the number of deployed containers. To accomplish this, we need to open the Copilot directory within Cloud9 and look for the manifest.yml file. This file is essentially the Copilot engine configuration to generate CloudFormation scripts to deploy your app. Let’s change the ‘count’ from ‘1’ to ‘2’.

We are now set to build the container image with the updated code and added picture, push the locally built image to ECR, convert the changed manifest file to CloudFormation and update the deployment:
copilot deployAfter a few minutes the new deployment is live and you can refresh your browser to validate the update:
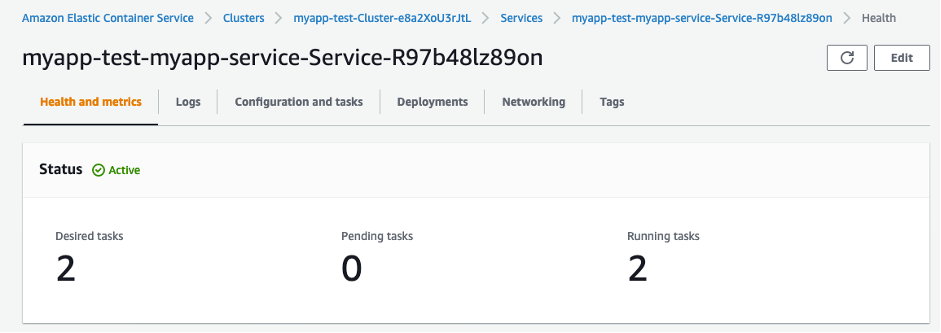
You can also head over to Amazon ECS in the AWS Management Console and see that you now have two containers deployed:
Assuming want to do some operational tasks and want to look into your logs (stored in Amazon CloudWatch), you can simply run this command:
copilot svc logsOur final architecture with two containers looks like this:

Finally, we want to clean up and delete our first deployed container on AWS:
copilot app deleteYou need to confirm with ‘Y’ to finally delete the complete application and its resources.

All container related infrastructure has been deleted. Don’t forget to also stop and delete the Cloud9 environment if you’re not using it any longer.
Further reading
Further recommended reading section to continue container journey:
- AWS Security and our Shared Responsibility Model
- Head over to our container blog to dive deep on various container services, news and use cases
- Dive deep into what is possible using AWS Copilot CLI and its concepts to build up on your gained experience
- Explore our containers @ AWS home page
- Read more about containers and images on the official Kubernetes documentation
- Best practices for writing Dockerfiles
- Choice cut blog post for you to read: Amazon ECS vs Amazon EKS: making sense of AWS container services
- Choice cut video blog with lots of great content: Containers from the Couch
- Have a look at our eksworkshop.com or ecsworkshop.com to get started with Amazon EKS and Amazon ECS.
I could go on listing resources, but the nine described above provide a great place to start.
Conclusion
In this post, you have deployed your first container on AWS. But not only this, you learned about AWS Copilot, a command line tool that helps you focus on your idea instead of developing cloud infrastructure and automation. You learned about basic container concepts and now understand the common container terminology. There is much more to explore and I hope you have experienced the builder experience and bring your idea to live on AWS. Let us know how you brought your ideas to our platform.
Continue your journey and learn more about containers on AWS with our public Amazon ECS Workshop.