Create a distribution
Deliver Content Faster with Amazon CloudFront
Introduction
Implementation
1. Prepare your content
In this step, we will upload sample static content to an Amazon S3 bucket. In later steps, we will use this bucket as a CloudFront origin. Amazon S3 is a good choice for an Amazon CloudFront origin that includes static content such as images, videos, HTML pages, .css files, and .js files. Create an HTML file.
2. Enter the Amazon S3 console
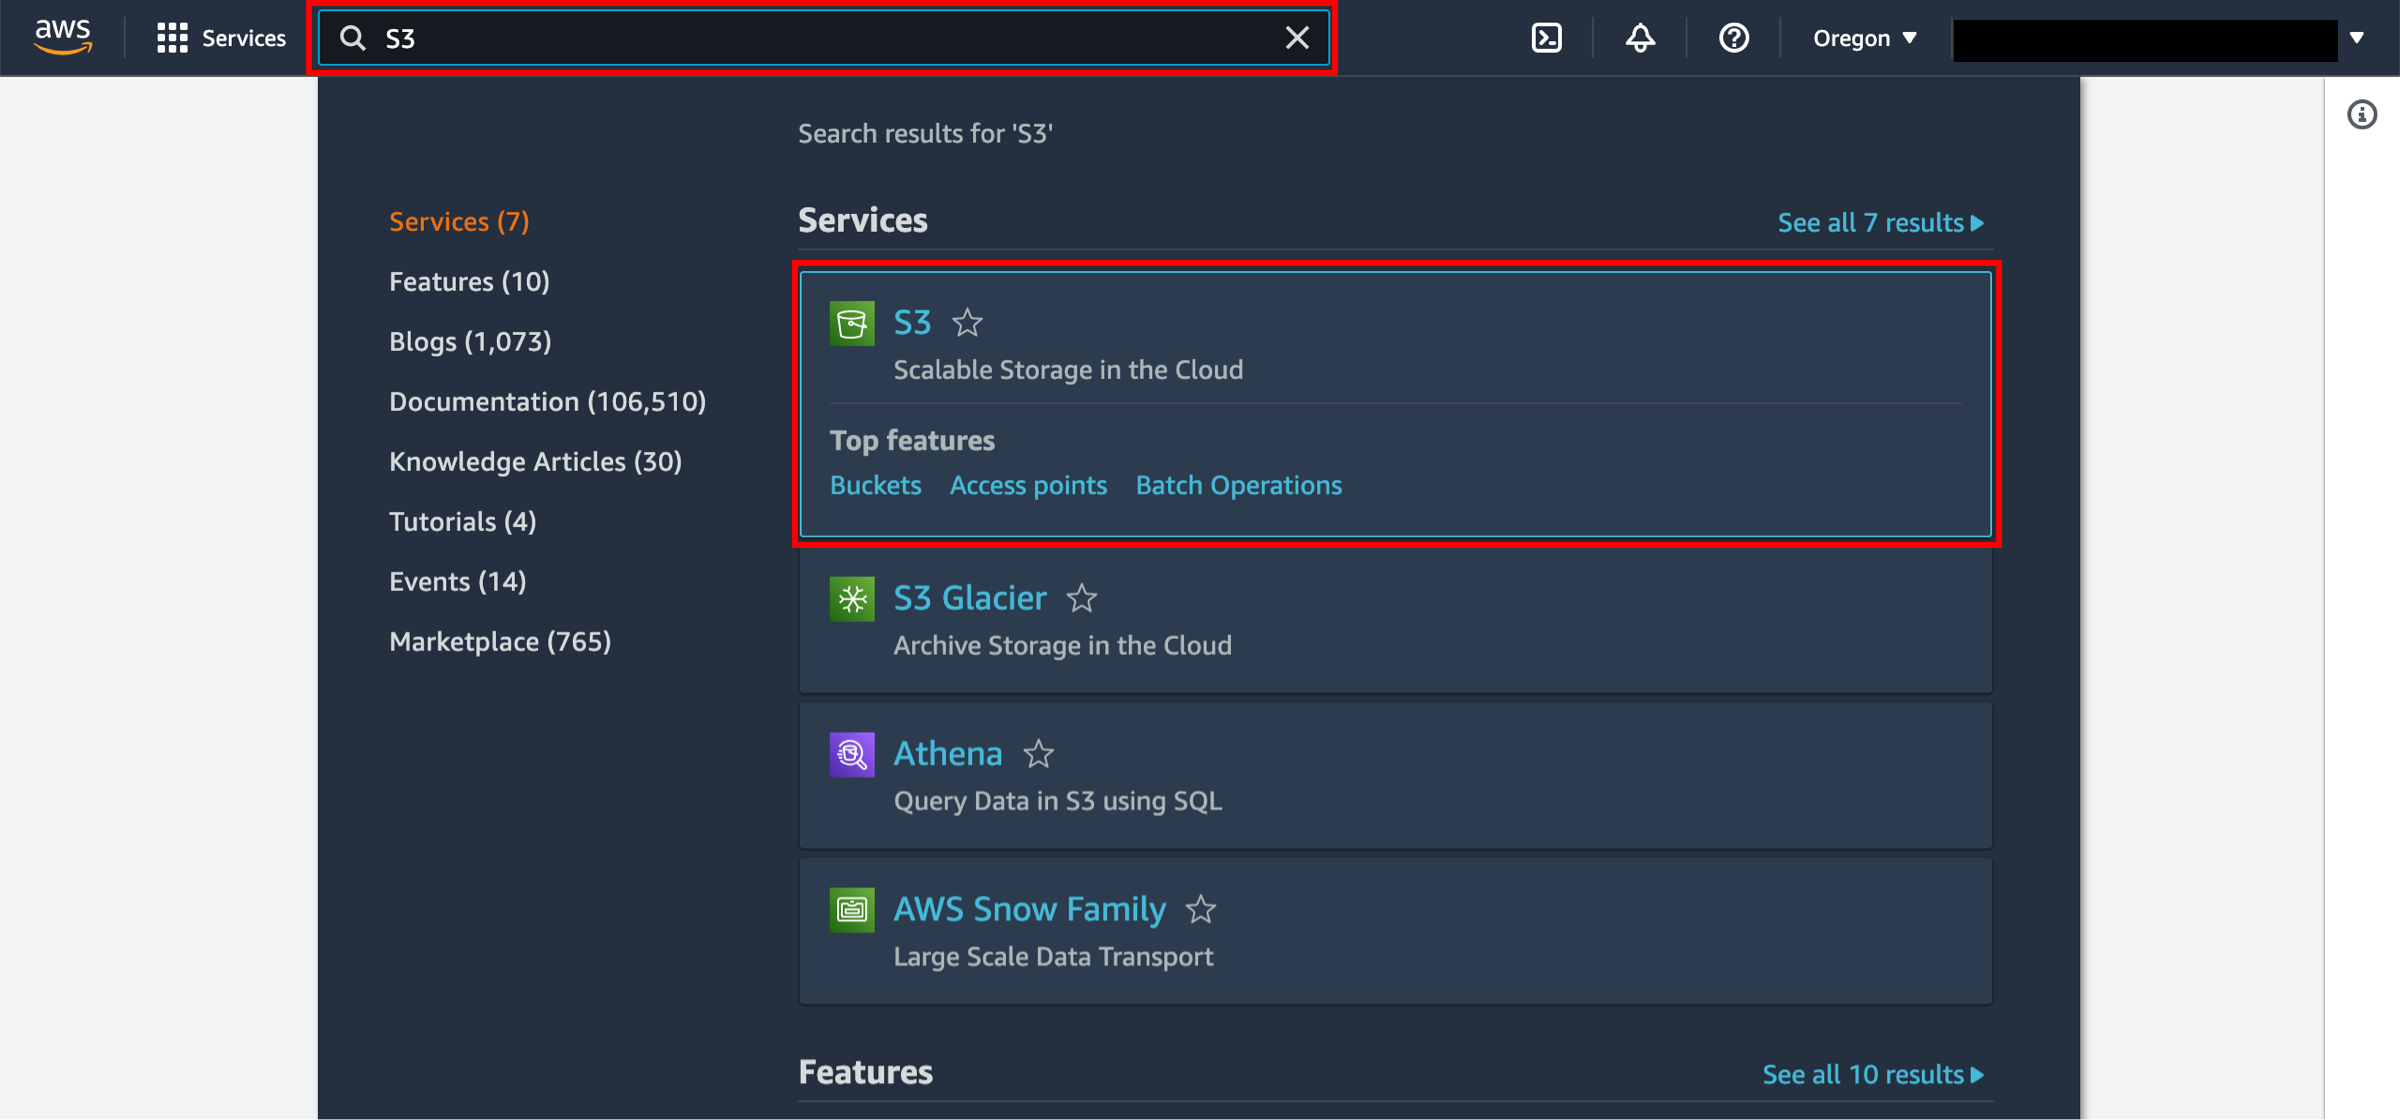
When you click here, the AWS Management Console will open in a new browser window. Type S3 in the search bar and select S3 to open the console.
3. Create S3 bucket
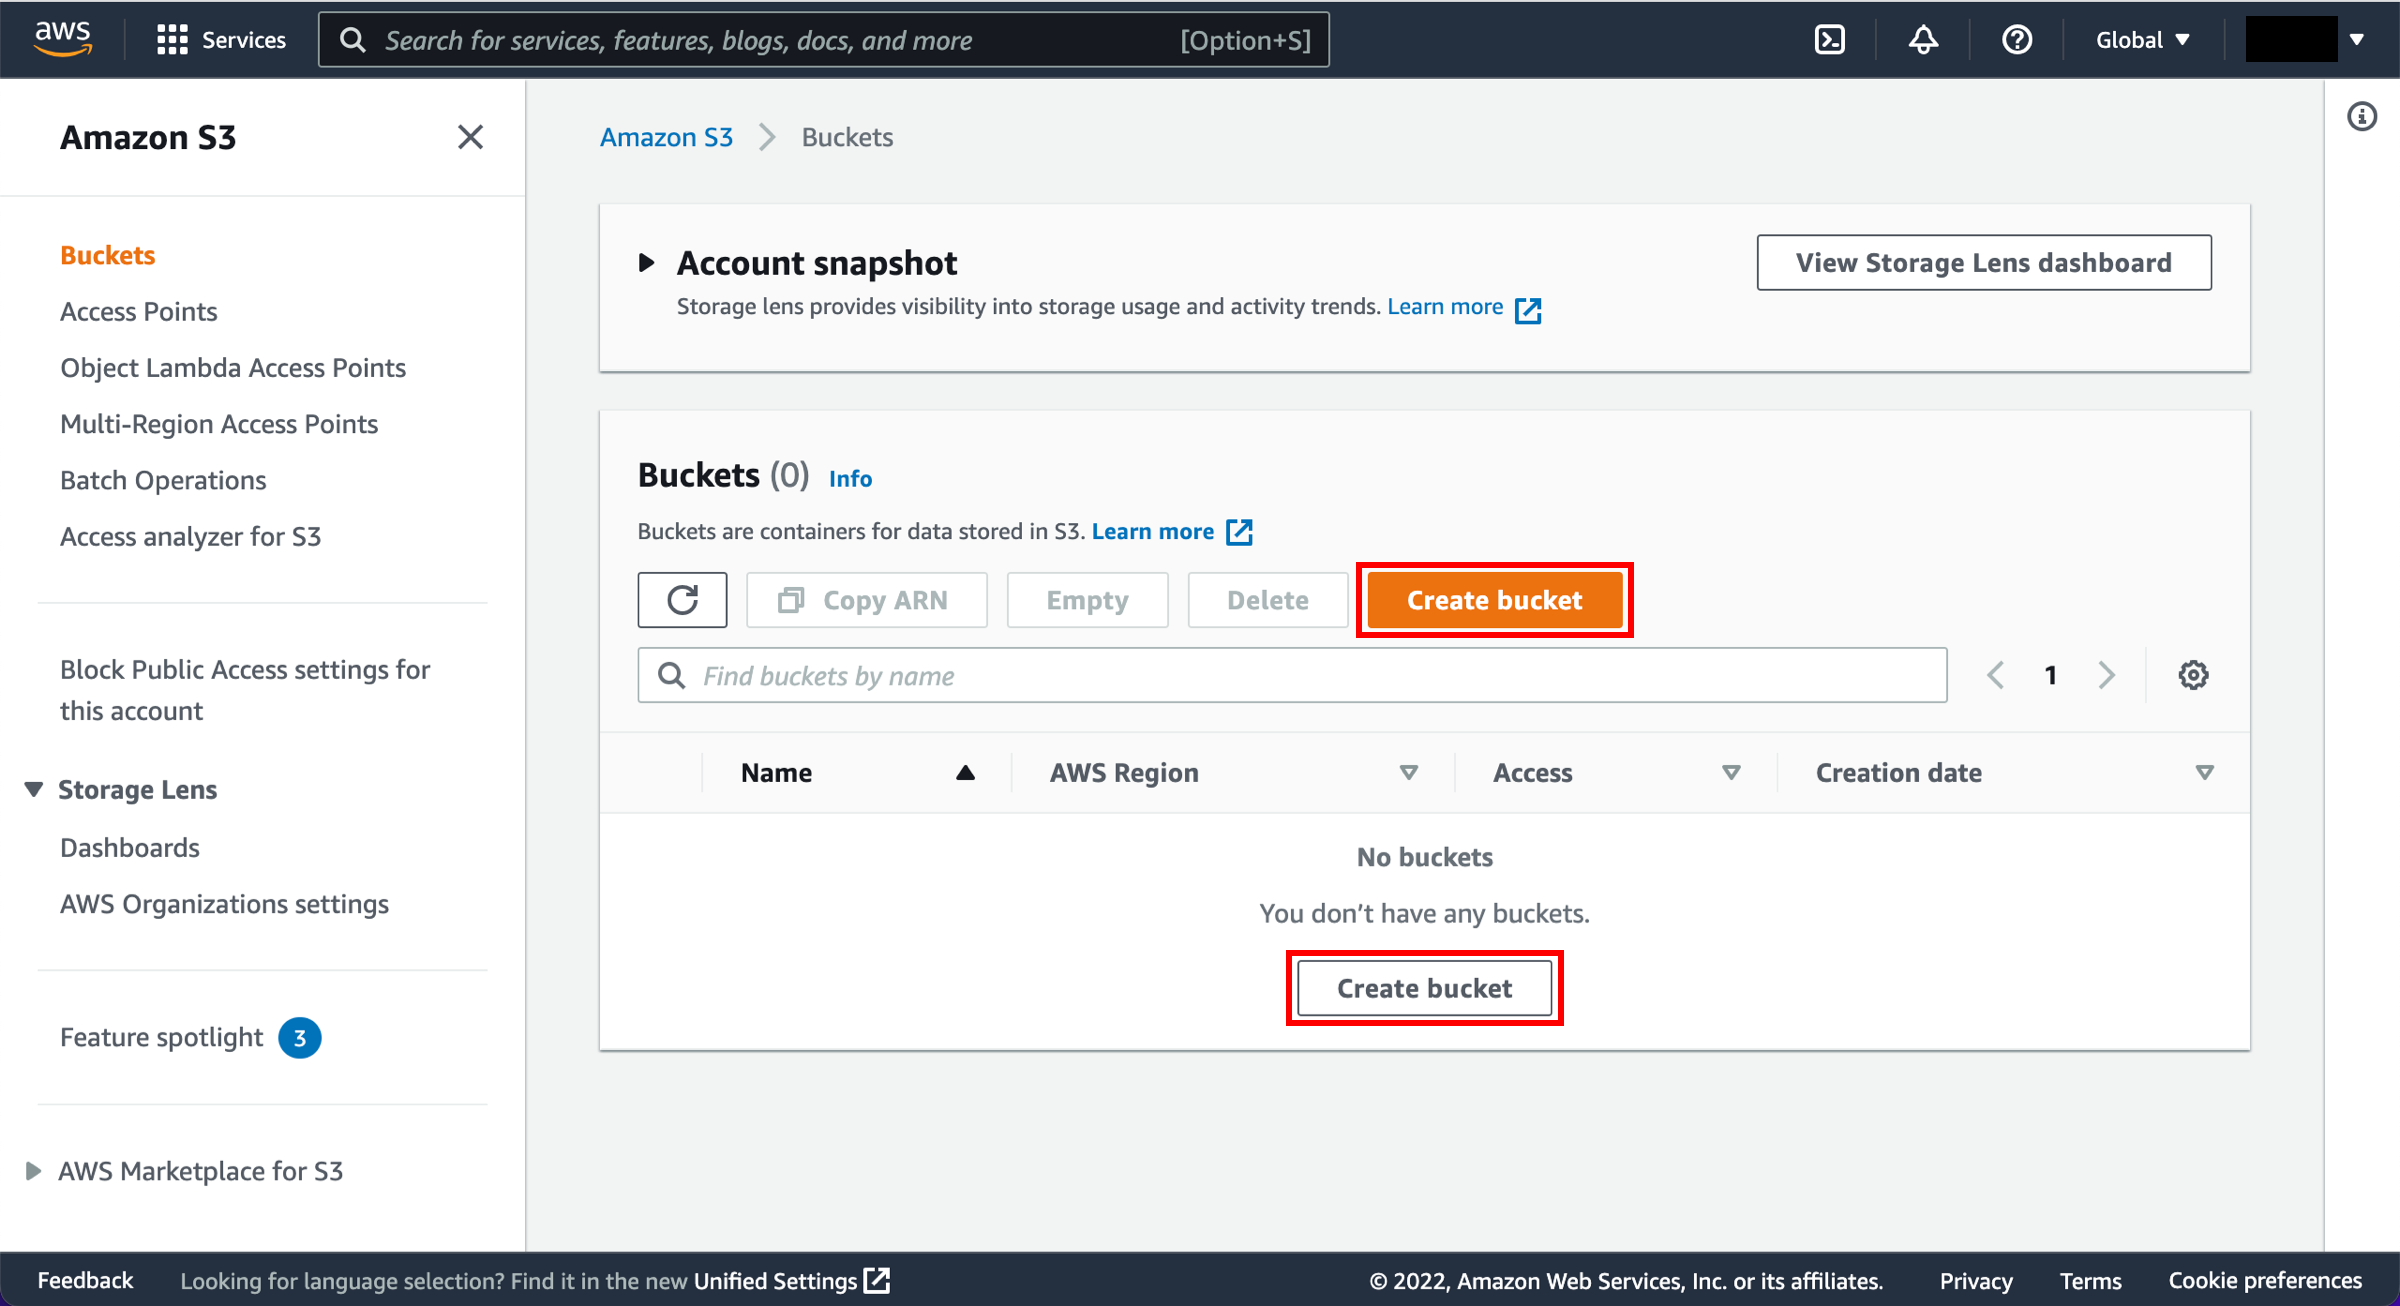
In the S3 dashboard, choose Create bucket.
If this is the first time you have created a bucket, you will see a screen that looks like the image pictured here.
If you have already created S3 buckets, your S3 dashboard will list all the buckets you have created.
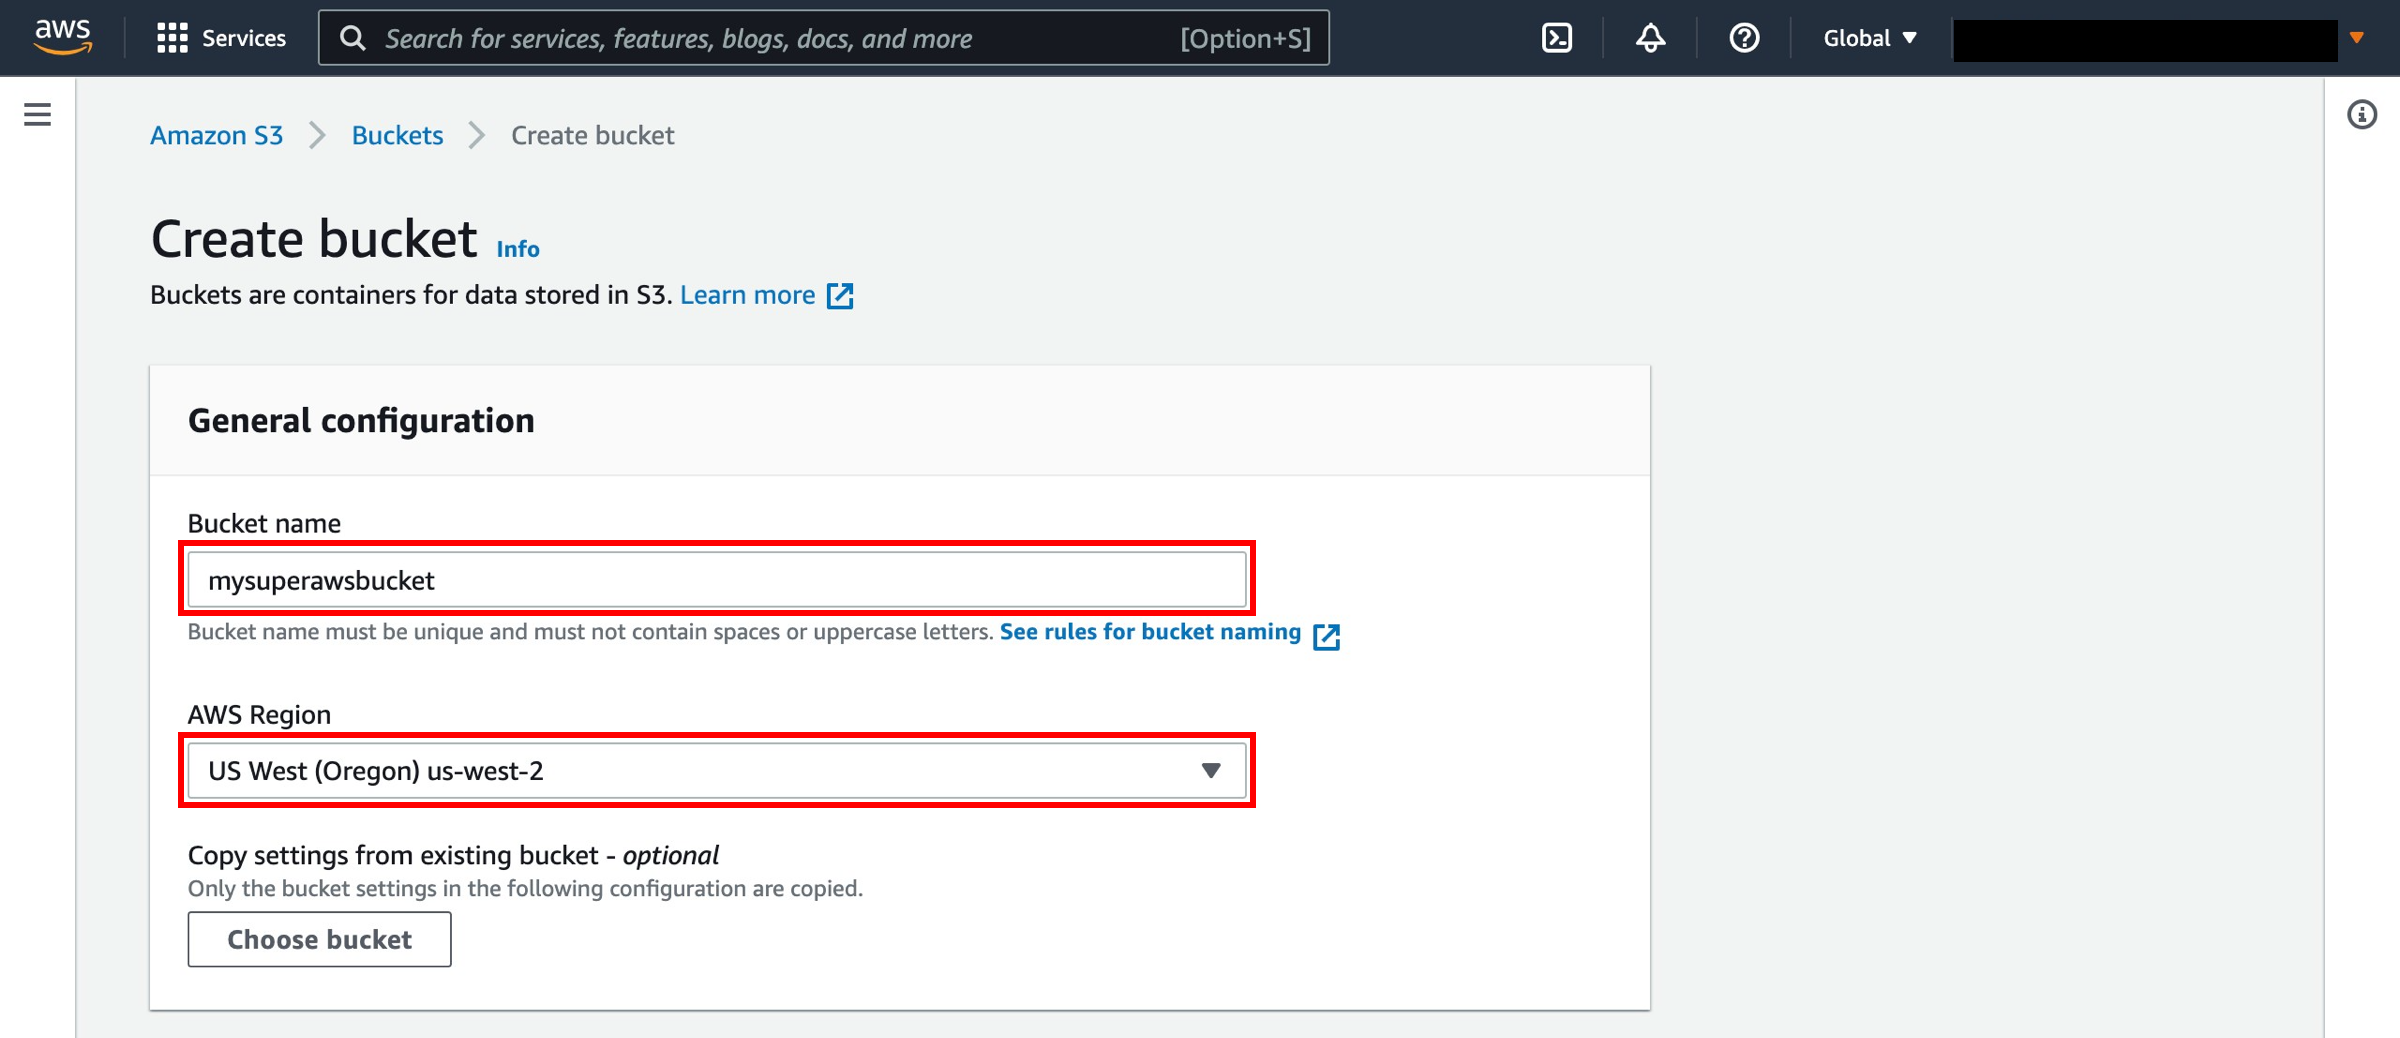
4. Enter bucket name
Enter a unique bucket name. Bucket names must be unique across all existing bucket names in Amazon S3. There are a number of other restrictions on S3 bucket names as well. Then select a Region to create your bucket in.
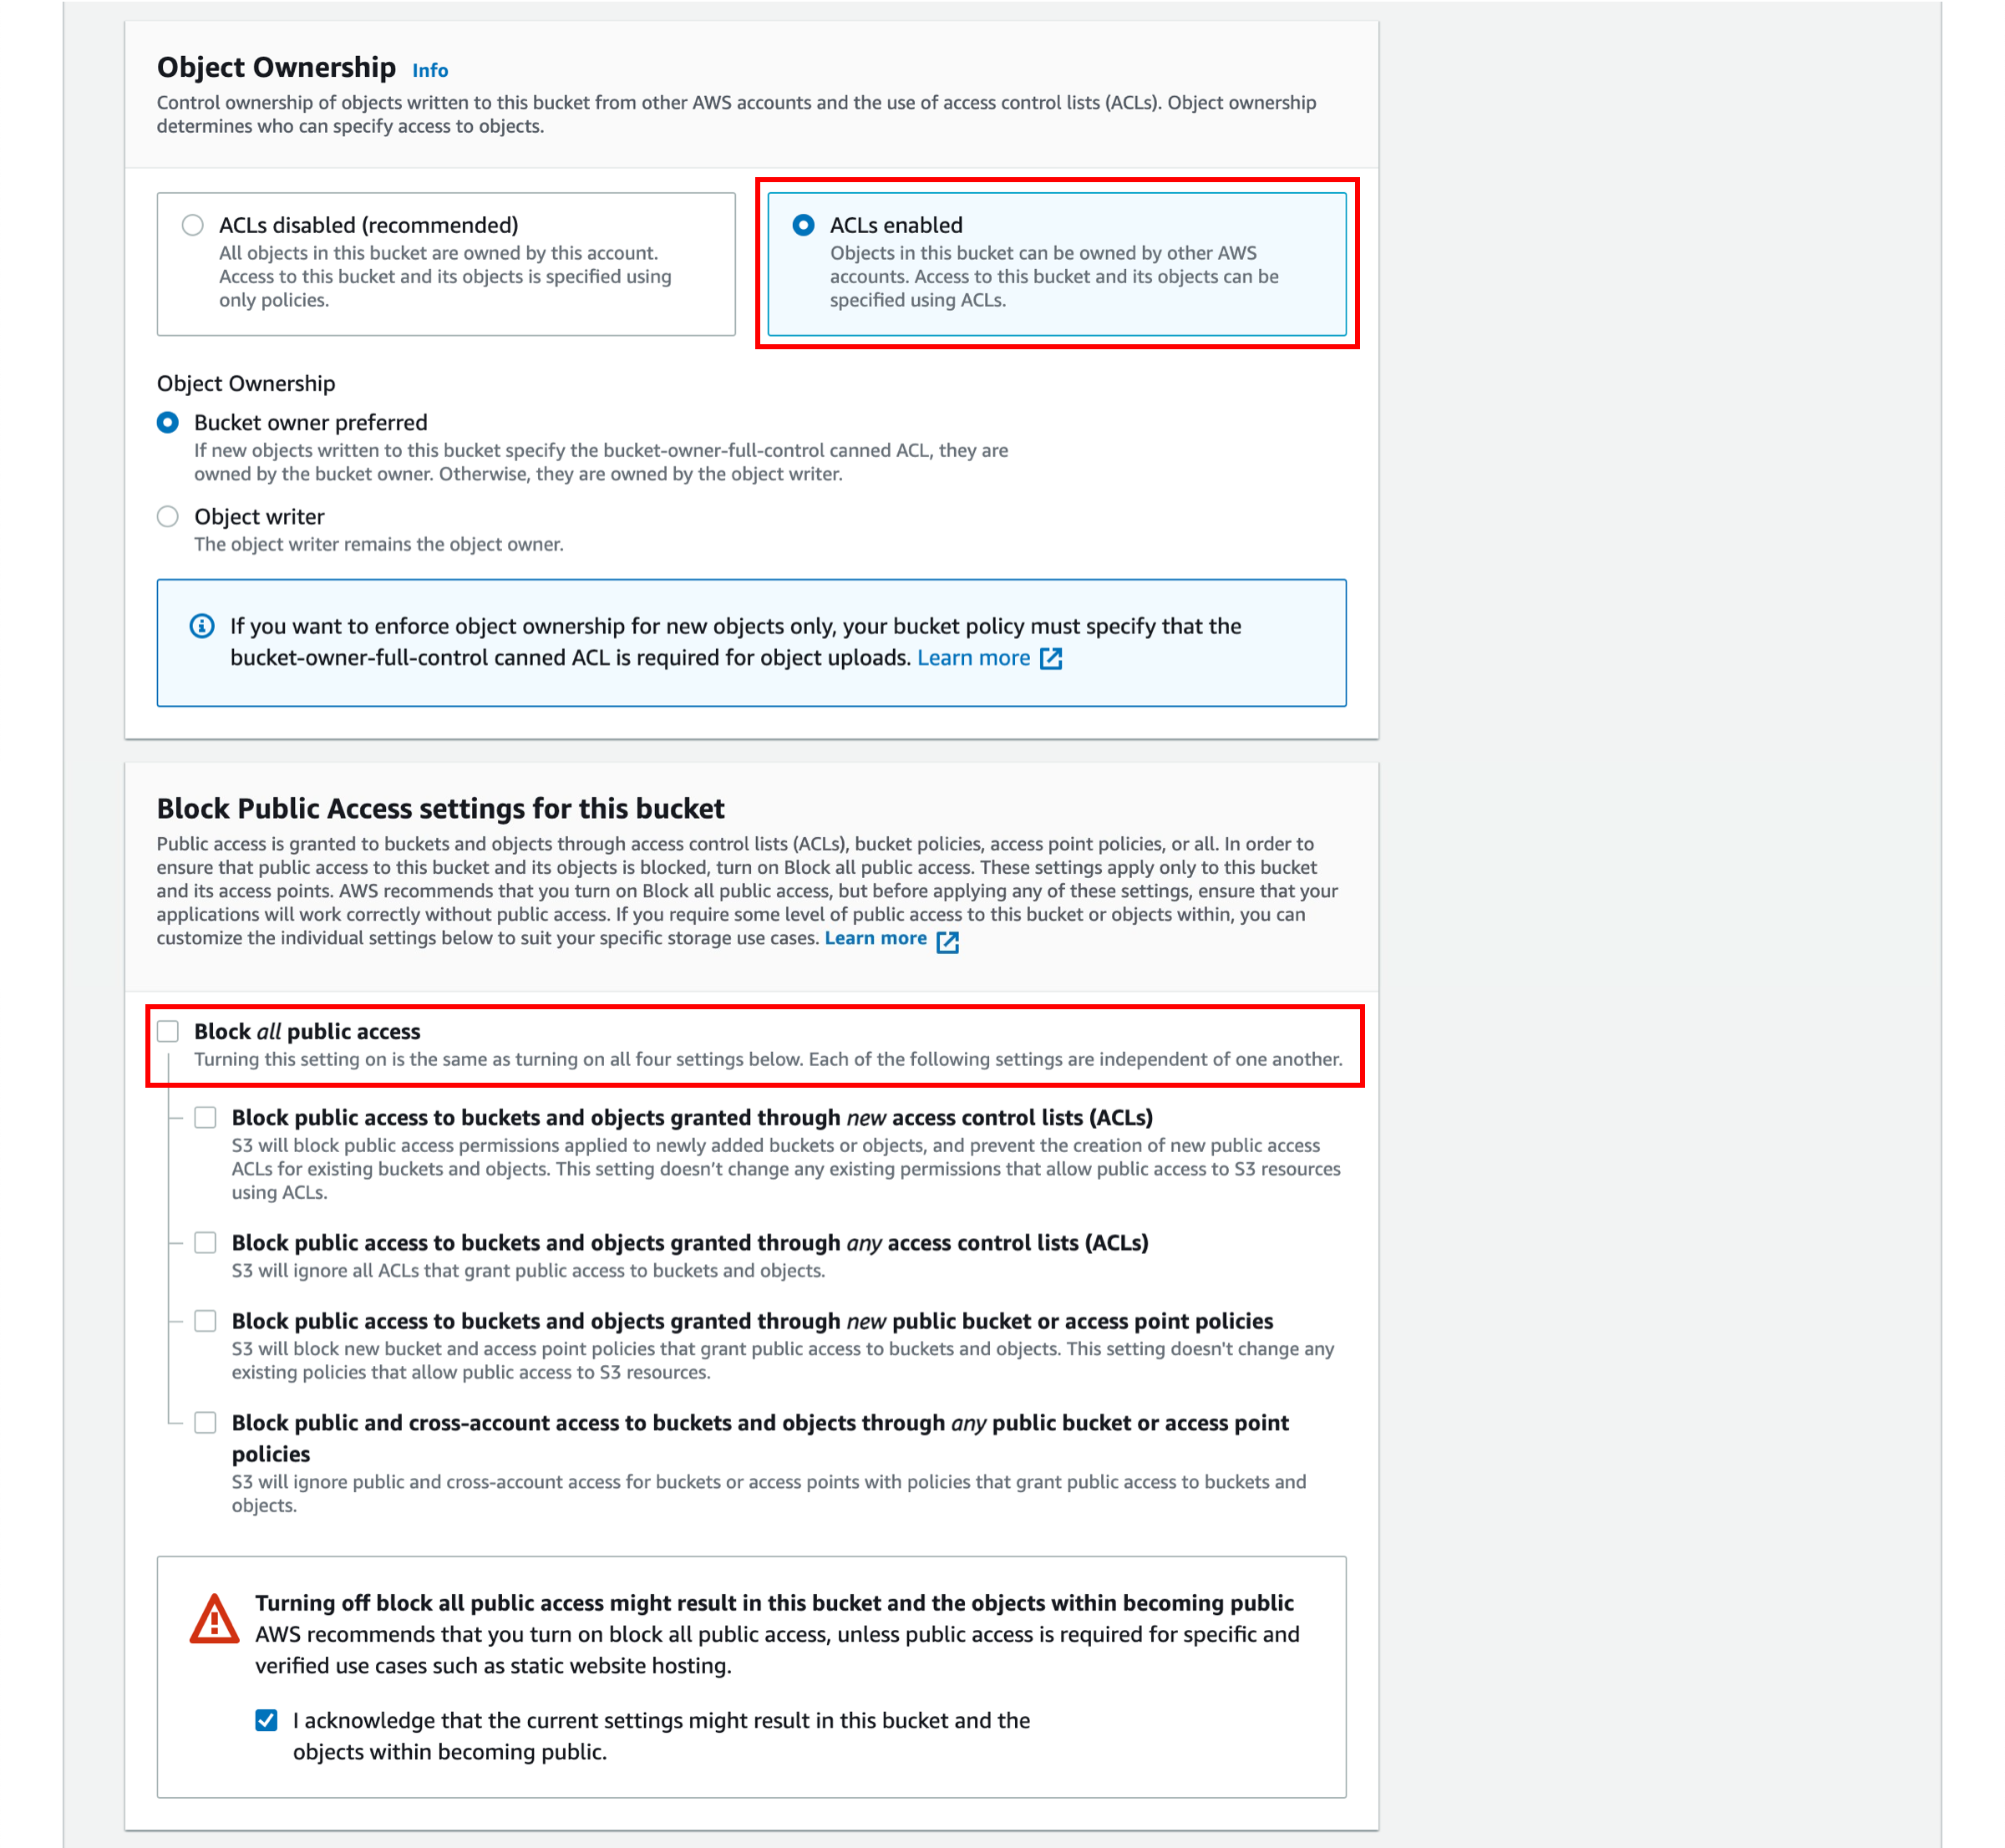
5. Set permission settings
You have the ability to set permission settings for your S3 bucket. By default, S3 objects are set to private. You will need to make your image publicly readable. Select ACLs enabled under Object Ownership, deselect “Block all public access” and select the checkbox “I acknowledge that the current settings might result in this bucket and the objects within becoming public.”
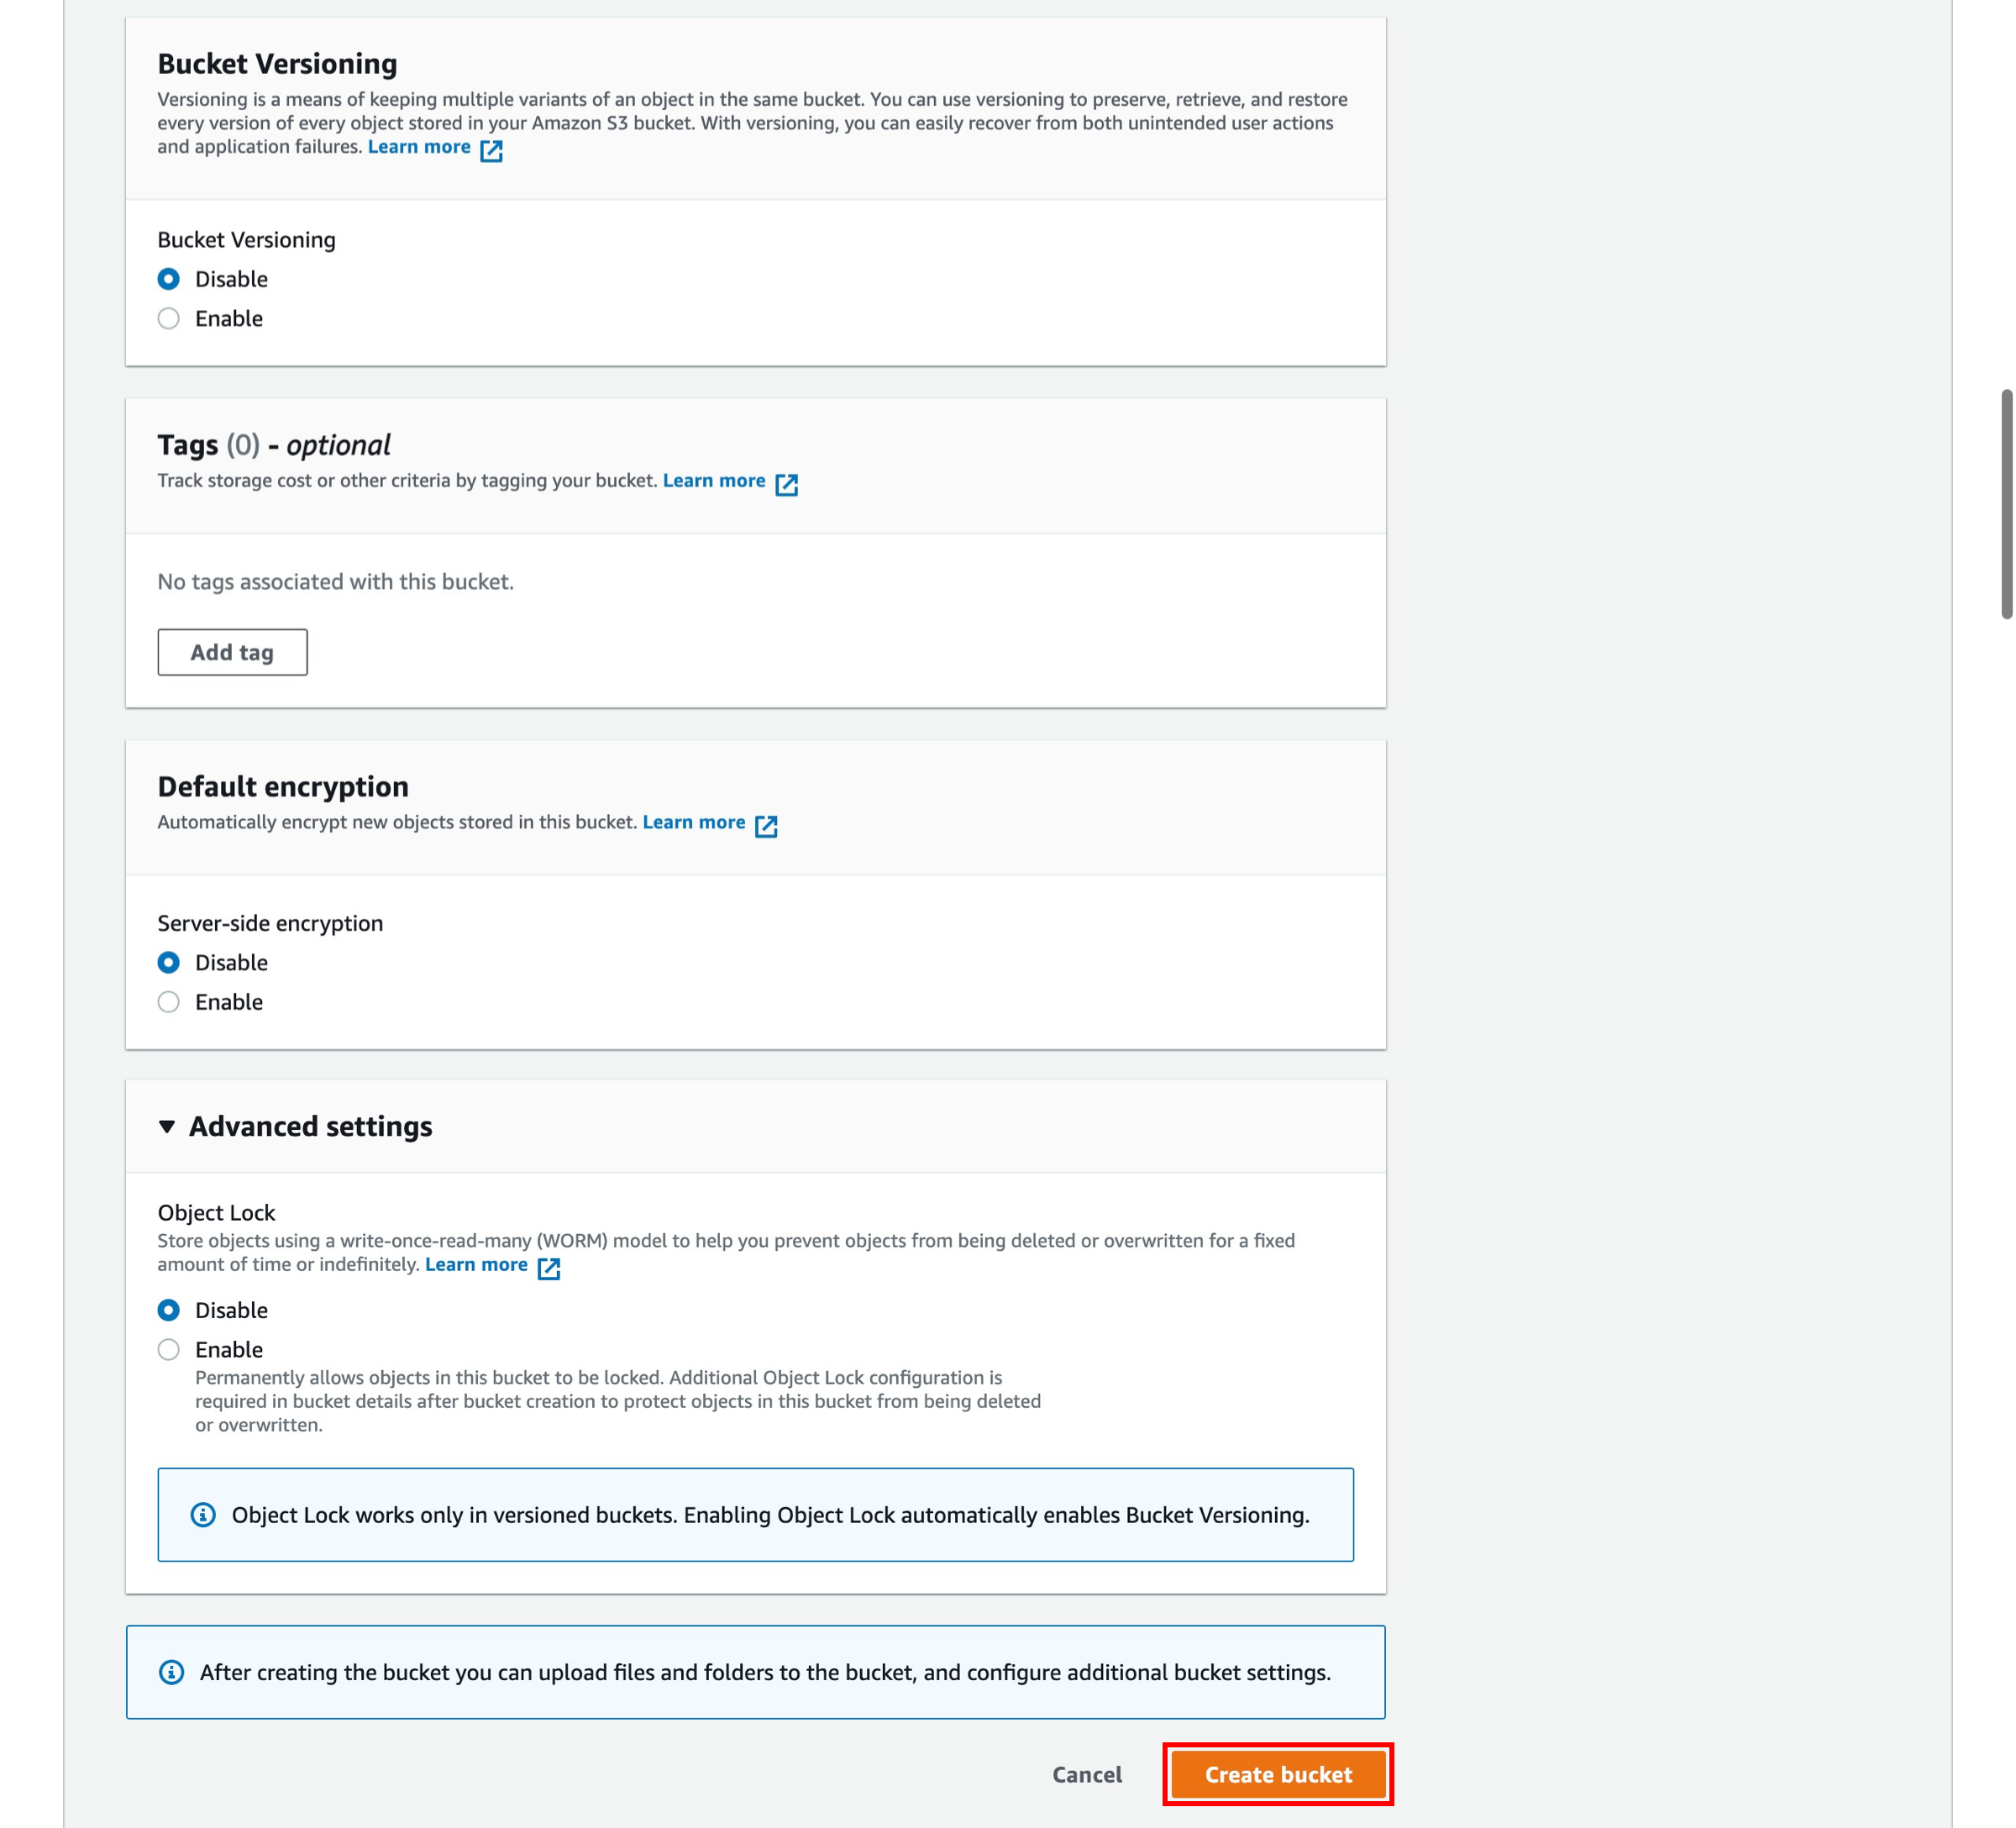
6. Create the bucket
You have many useful options for your S3 bucket including Versioning, Server Access Logging, Tags, Object-level Logging and Default Encryption. We won't enable these features for this tutorial.
Select Create bucket.
7. Navigate to the new bucket
You will see your new bucket in the S3 console. Click on your bucket’s name to navigate to the bucket. Your bucket name will not be the same as pictured in the screenshot to the right.

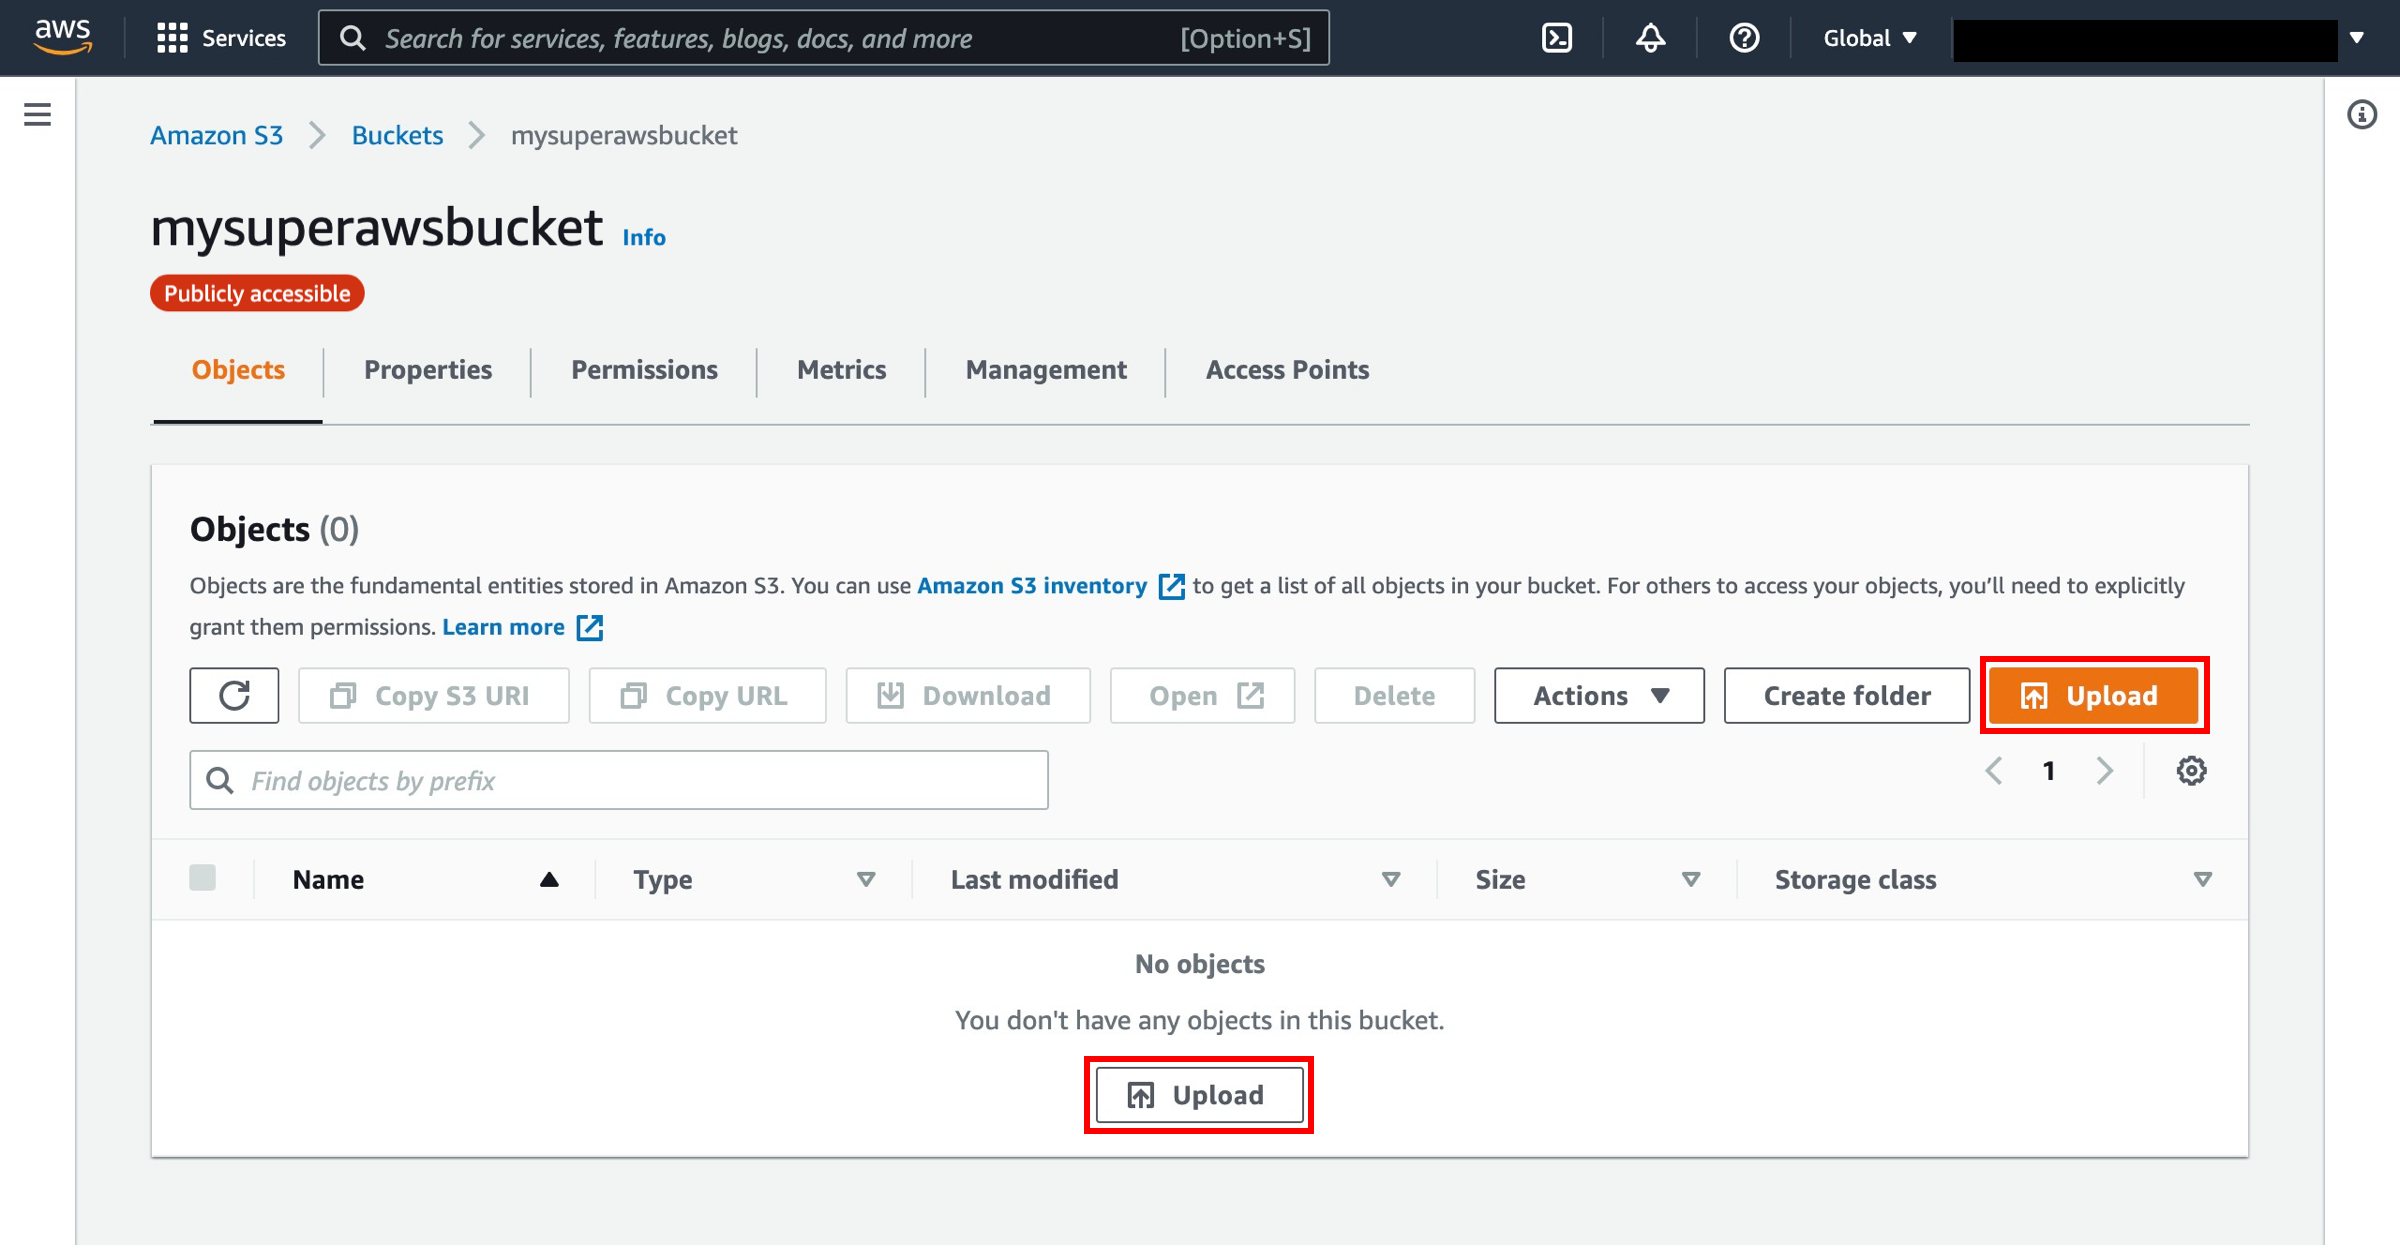
8. Select Upload
You are in your bucket’s home page.
Select Upload.
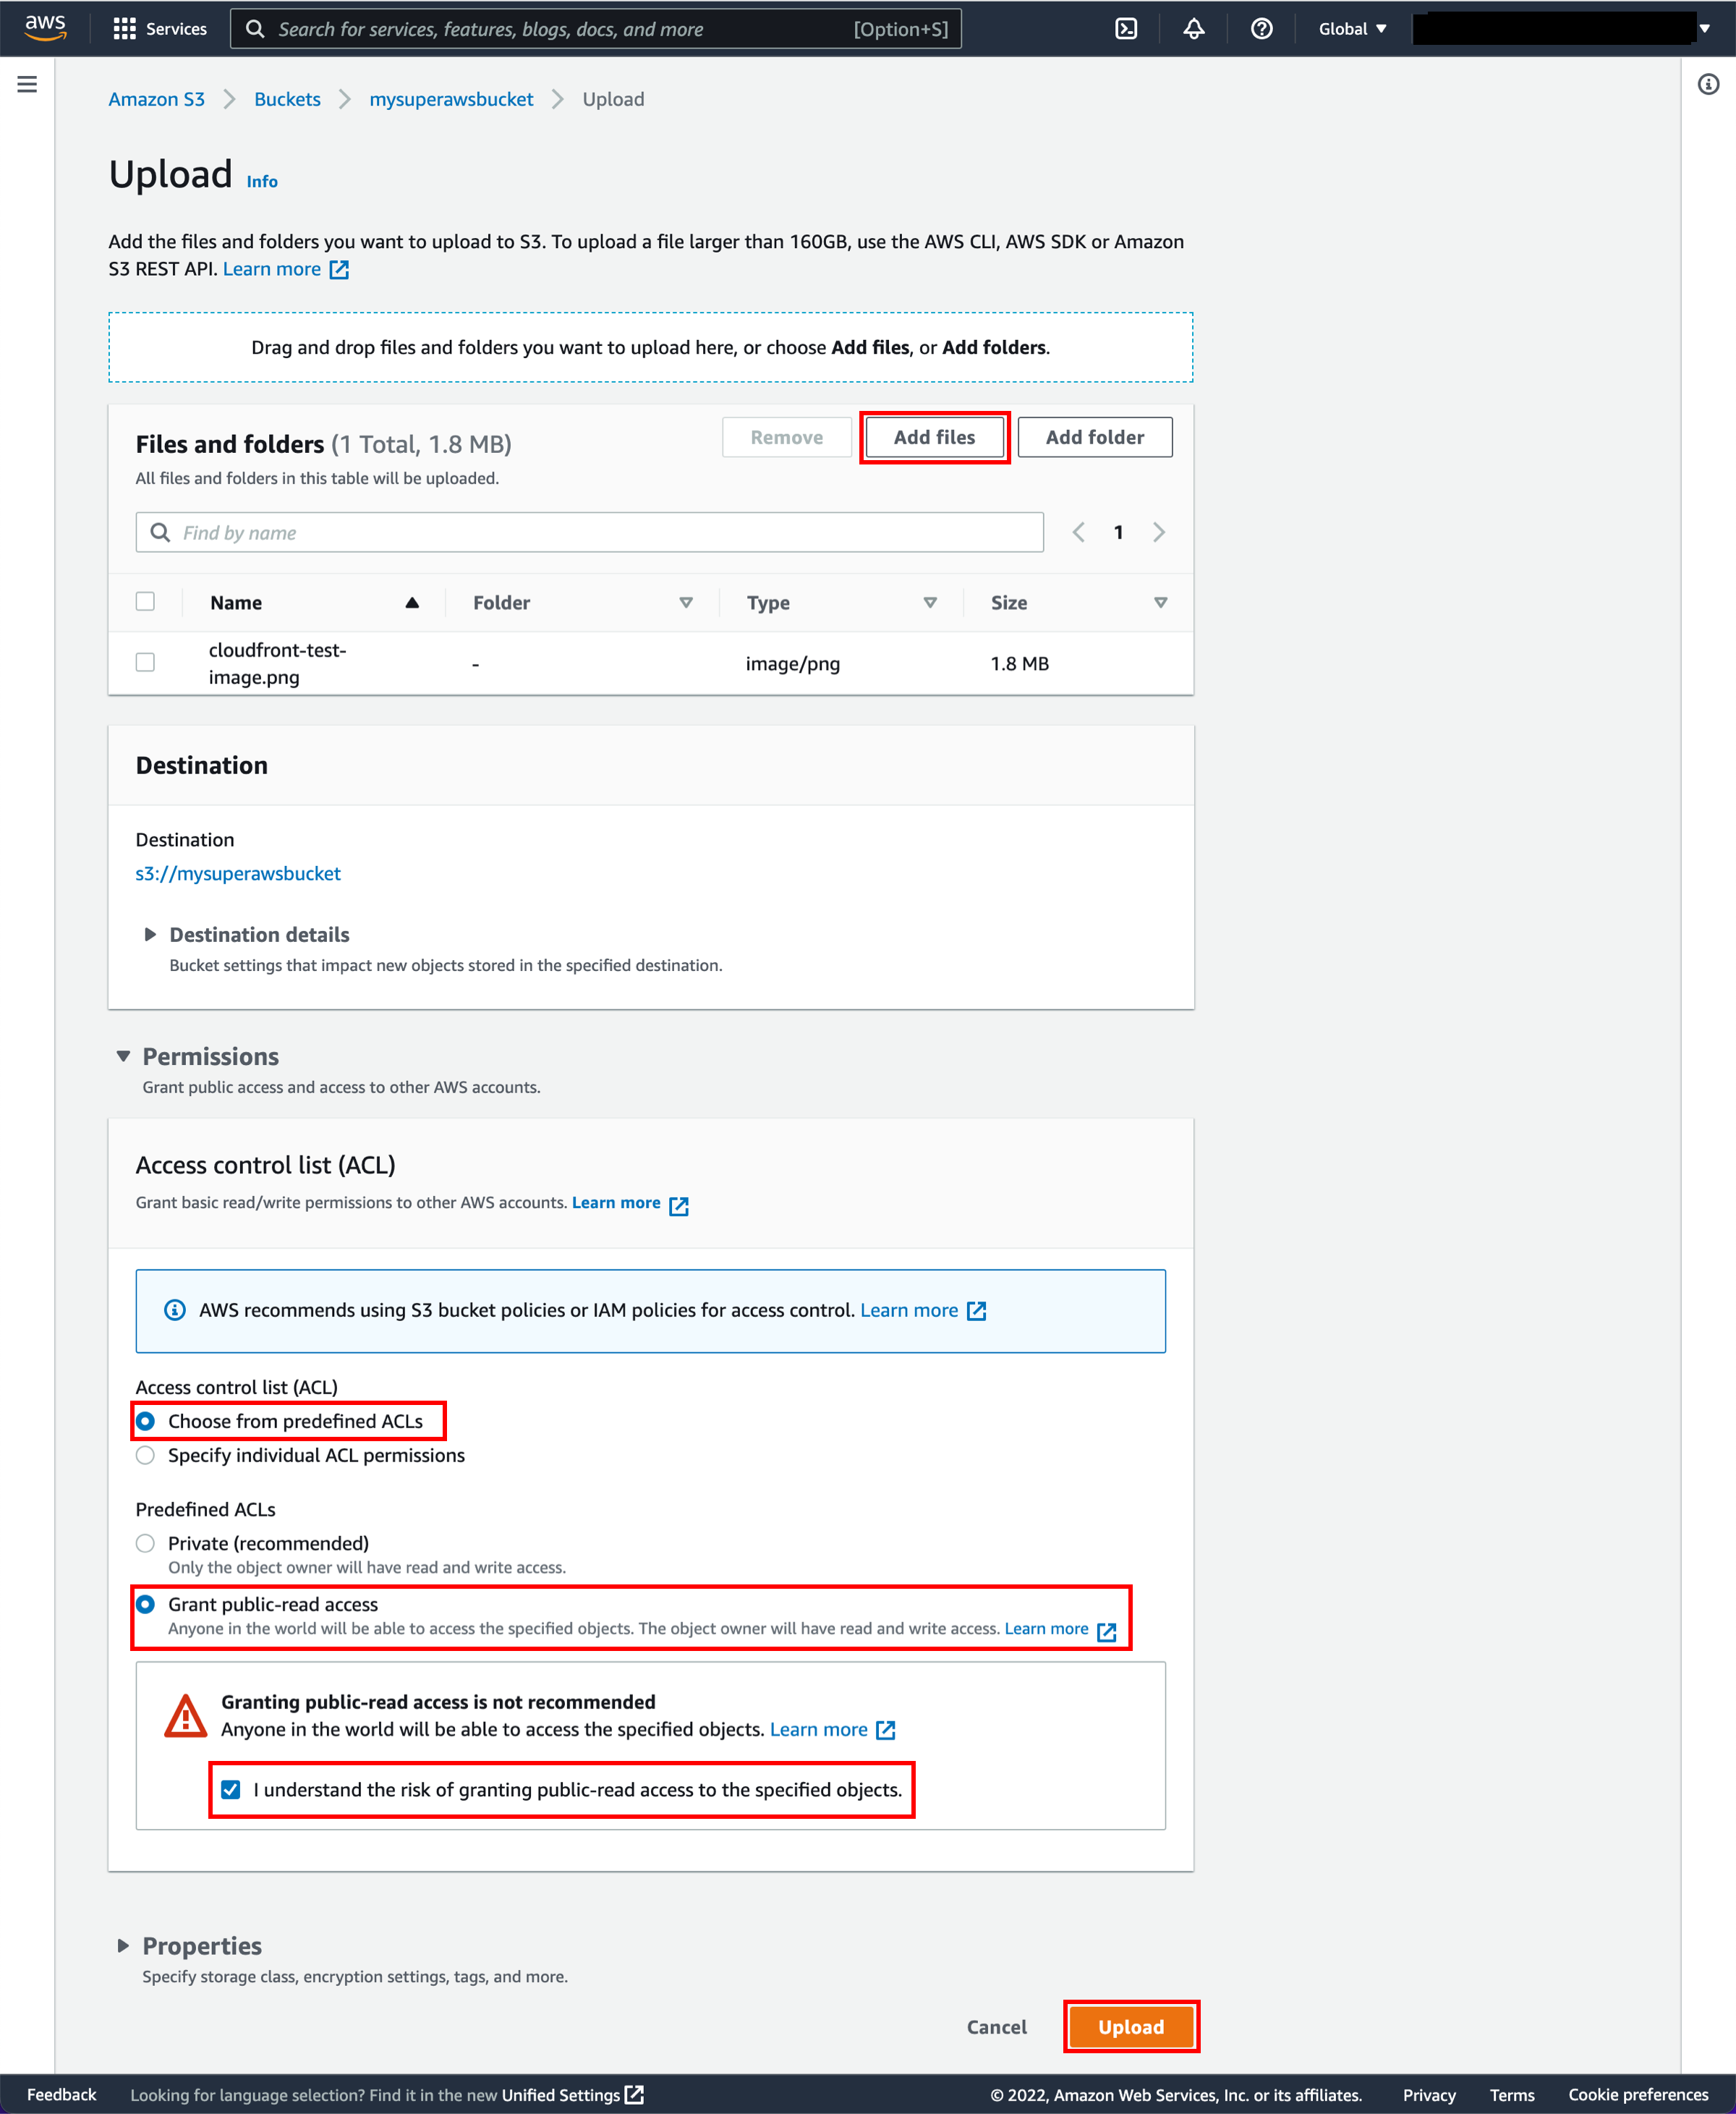
9. Upload sample content
Upload the cloudfront-test-image.png file by selecting Add files and selecting the file or dragging the cloudfront-test-image.png file to the upload box.
Open the Permissions dropdown. Select Choose from predefined ACLs and then select Grant public-read access. Select the checkbox “I understand the risk of granting public-read access to the specified objects.”
Select Upload.
Enter the CloudFront console
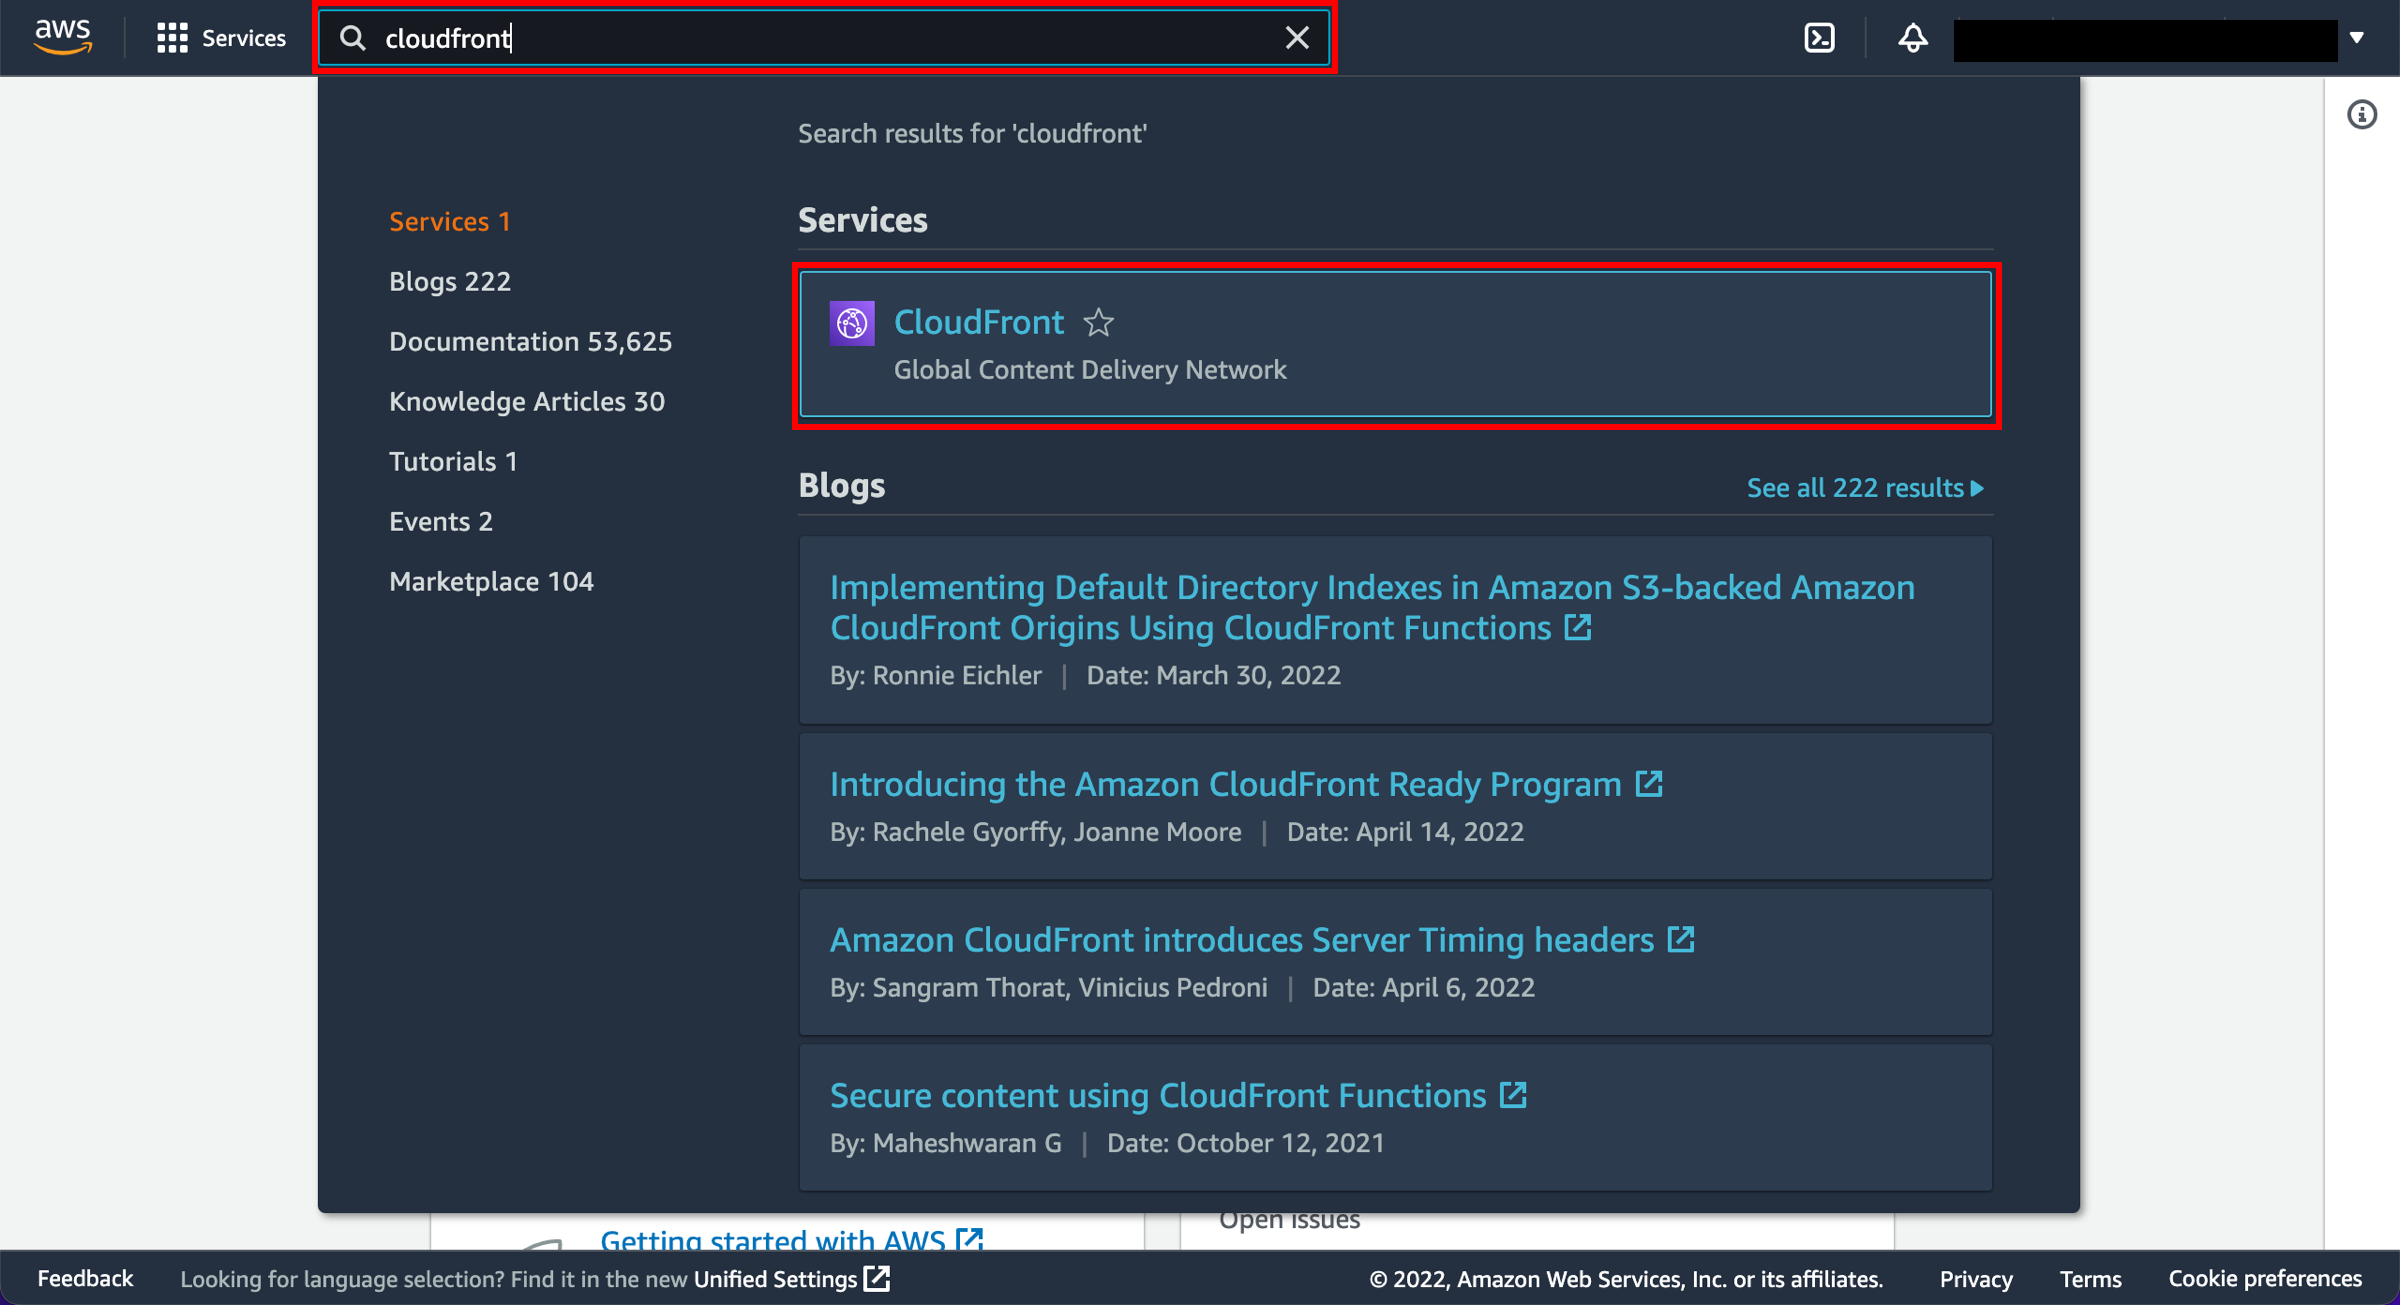
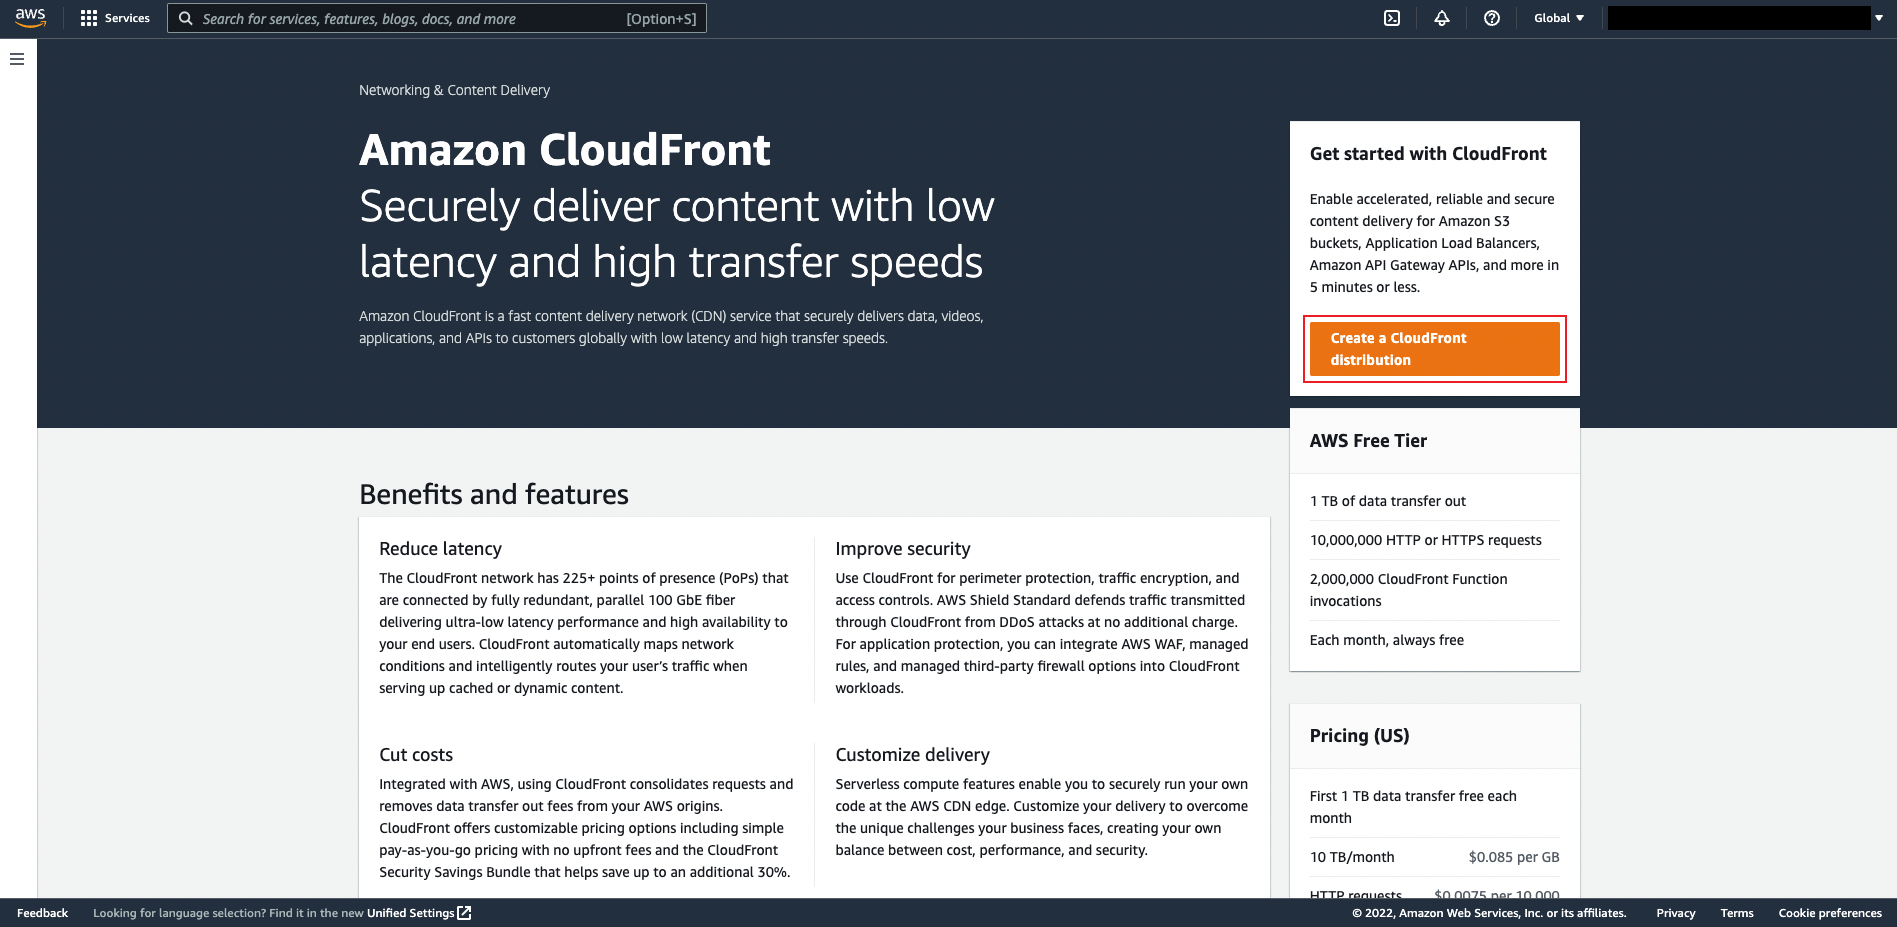
1. Open the CloudFront console
When you click here, the AWS Management Console will open in a new browser tab. Type CloudFront in the search bar and select CloudFront to open the console.
2. Create a CloudFront distribution
Select Create a CloudFront distribution.
Configure a Standard distribution
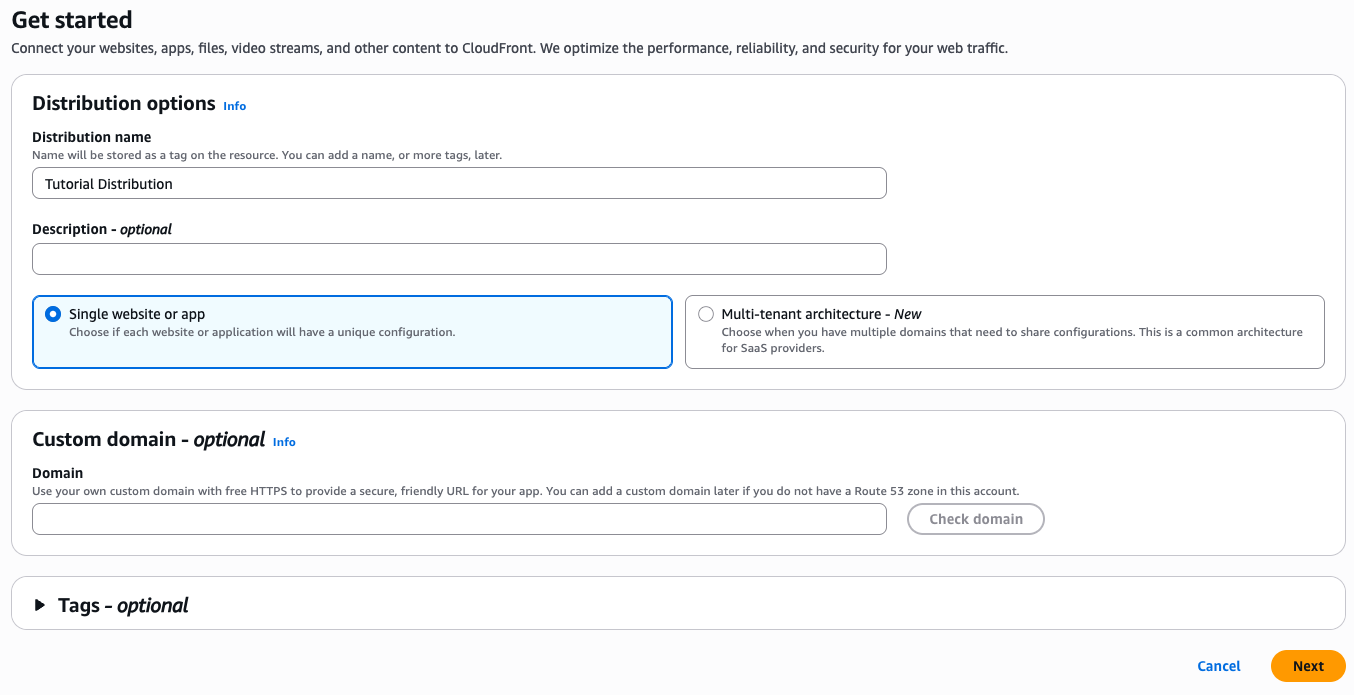
1. Get Started
Connect your websites, apps, files, video streams, and other content to CloudFront. We optimize the performance, reliability, and security for your web traffic.
Under Distribution Options, enter a Distribution name for the standard distribution and optionally provide a description.
Make sure you select Single website or app.
For the purpose of this tutorial we will skip the Custom domain and Tags setup. Leave both of these optional fields blank.
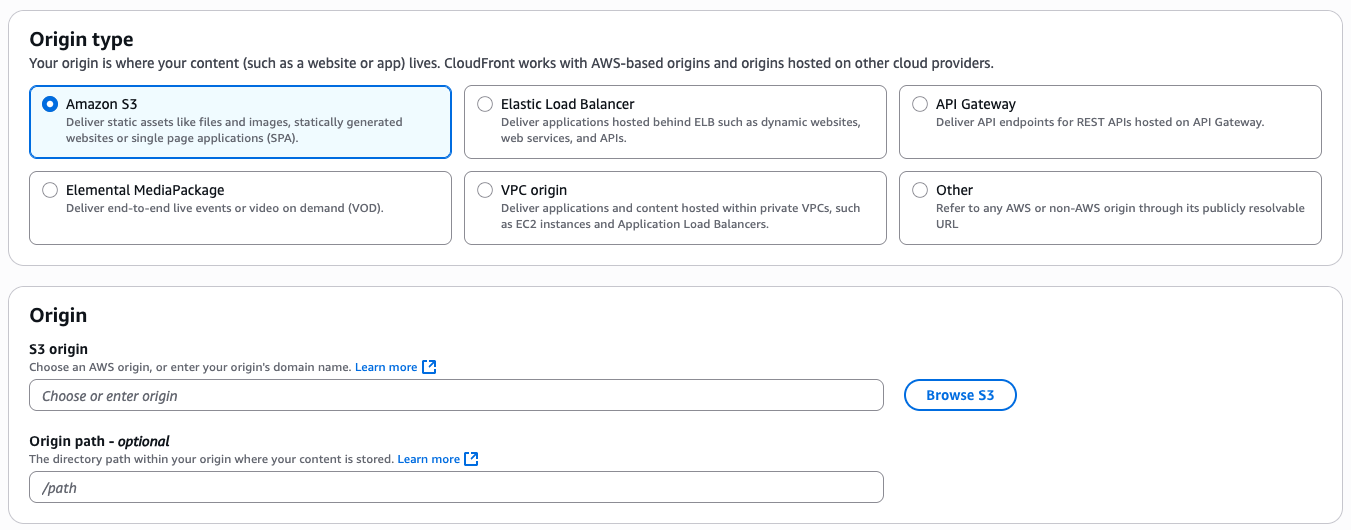
2. Specify Origin
Under Origin type, select Amazon S3 (which should be the default value). Under the Origin section, click the Browse S3 button and select the name of the S3 bucket you stored the cloudfront-test-image.png in.
You can leave the rest of the settings on this page unchanged. This will setup your distribution with the correct settings for caching content from S3 automatically.
3. Enable Security
For the purposes of this tutorial we will choose Do not enable security protections. It is highly recommended to enable security protections for non-tutorial workloads which you will keep running on CloudFront.

4. Review and Create
Create a distribution
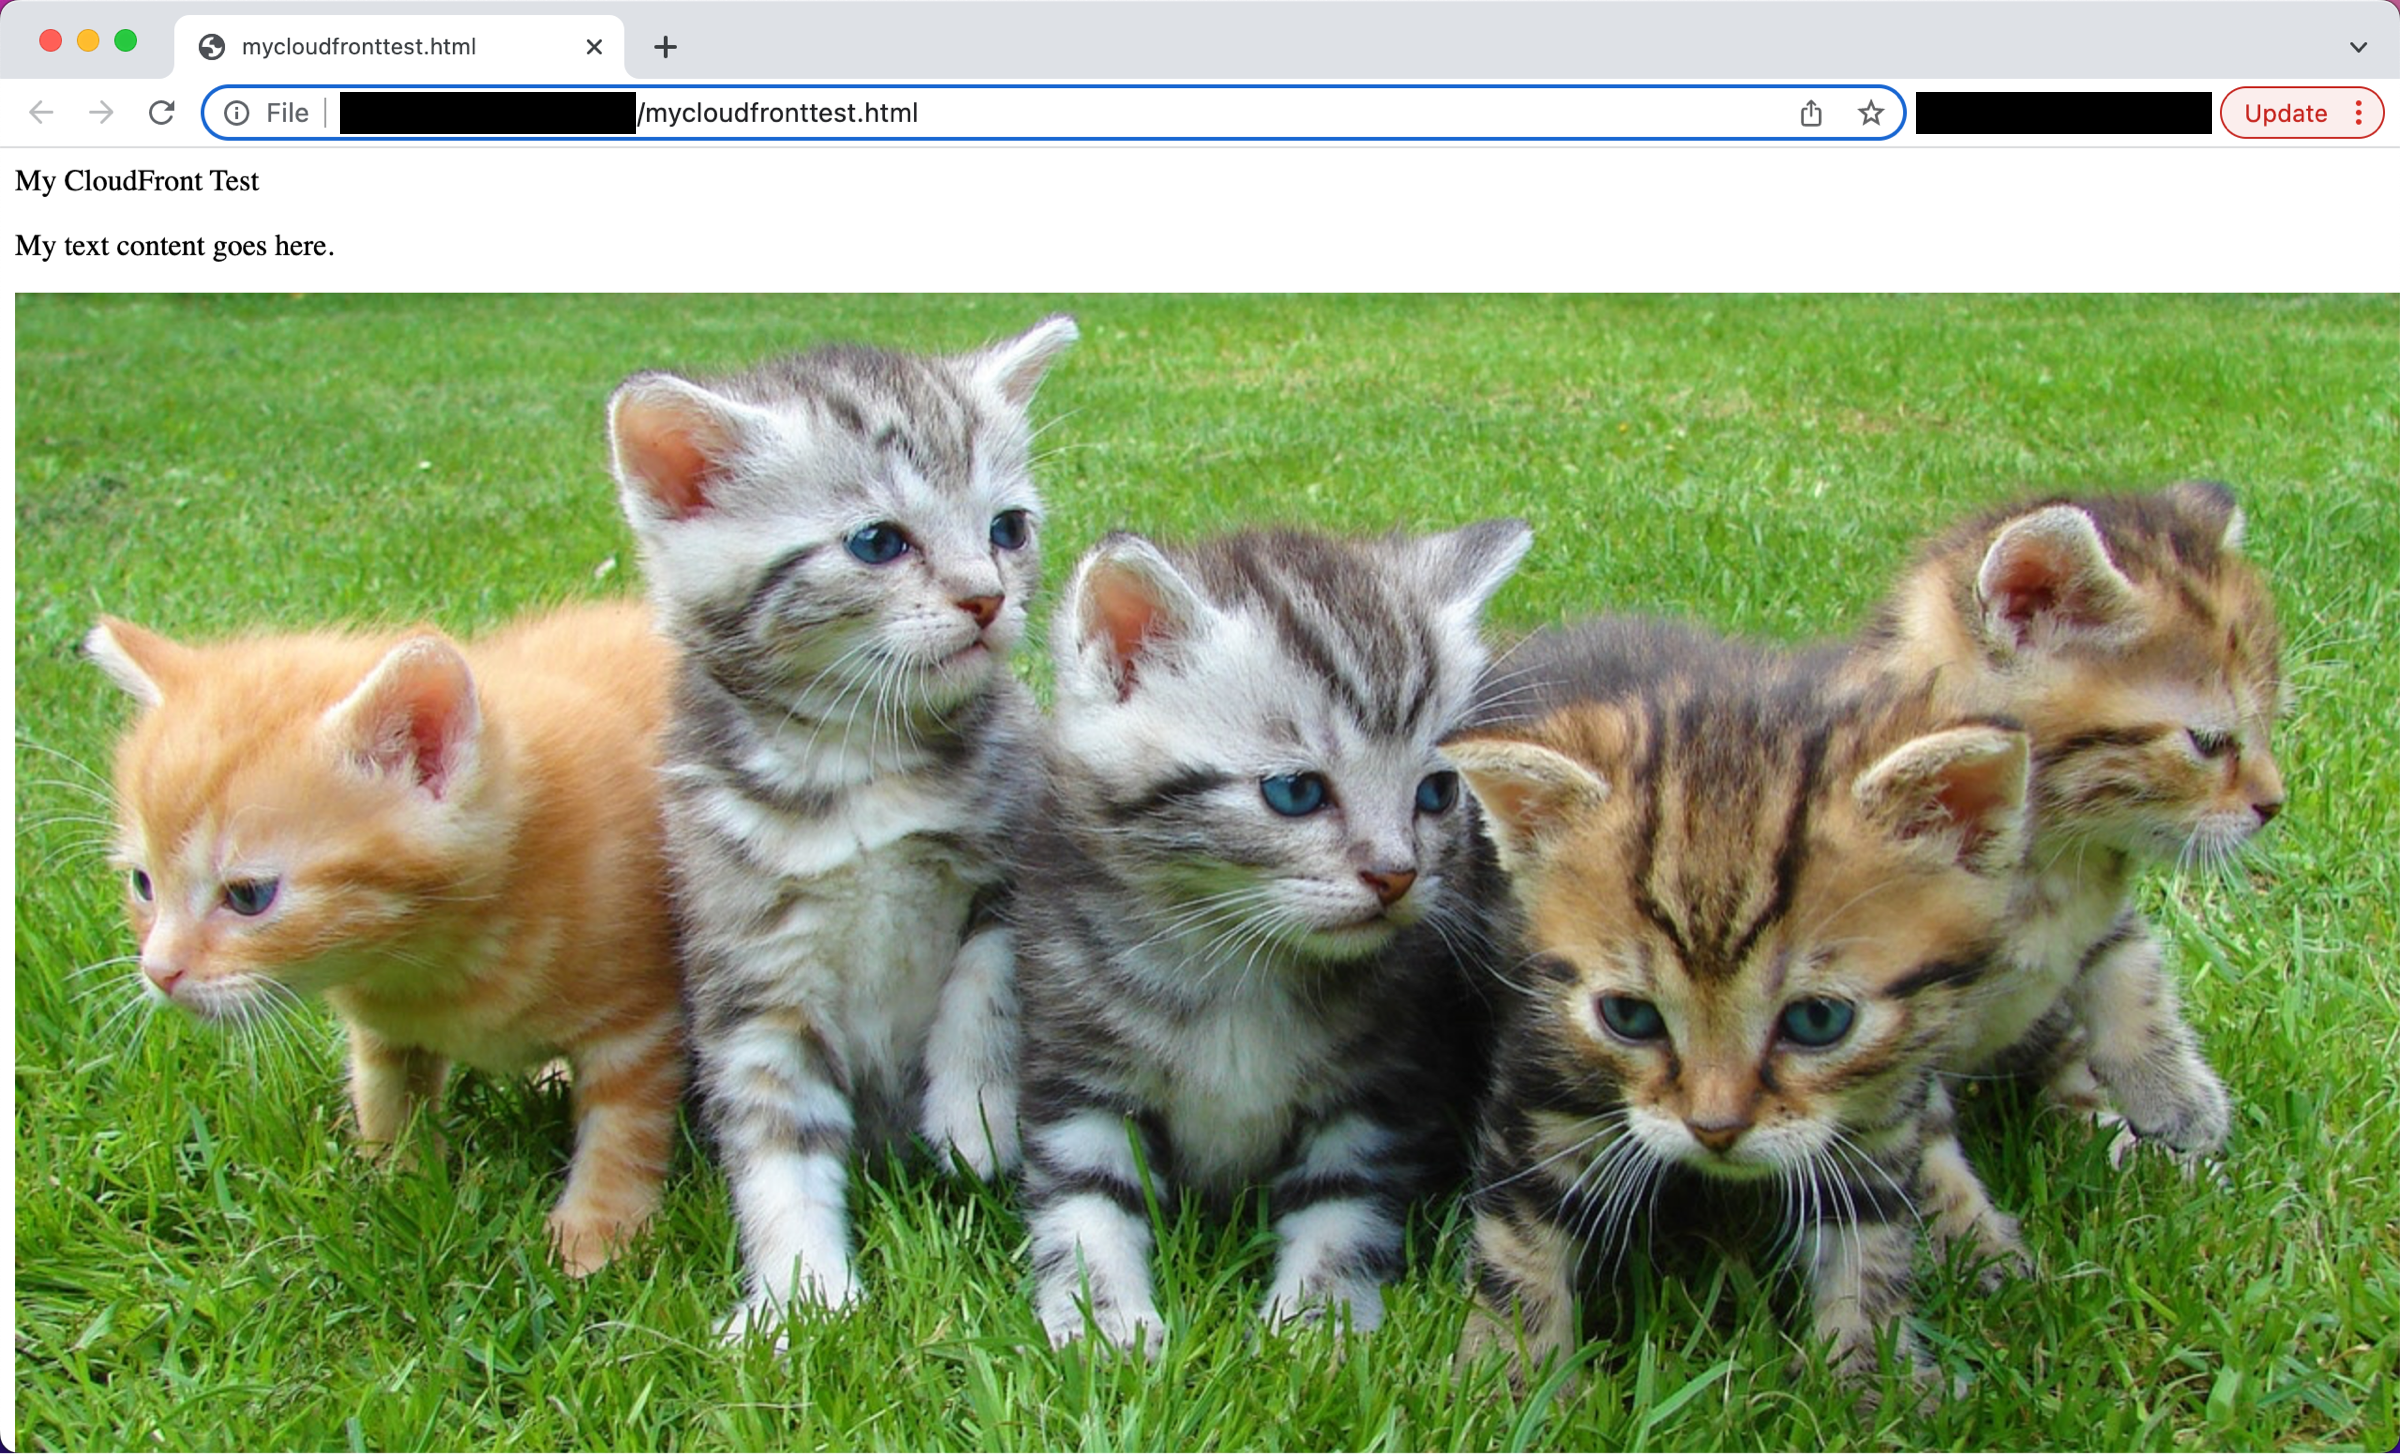
1. Create an HTML file
Open a text editor on your computer. Copy and paste the following HTML code:
<html><head>My CloudFront Test</head><body><p>My text content goes here.</p><p><img src="http://domain name/object name" alt="my test image"></body></html>Replace domain name with the domain name that CloudFront assigned to your distribution, such as d111111abcdef8.cloudfront.net.
Replace object name with the name of your image file in the Amazon S3 bucket - in our case, cloudfront-test-image.png.
Save the text in a file as mycloudfronttest.html.
Open your HTML file in a web browser to verify that the link works.
Disable and delete your distribution
1. Select the distribution to disable
Select the checkbox next to the distribution you created and choose Disable.

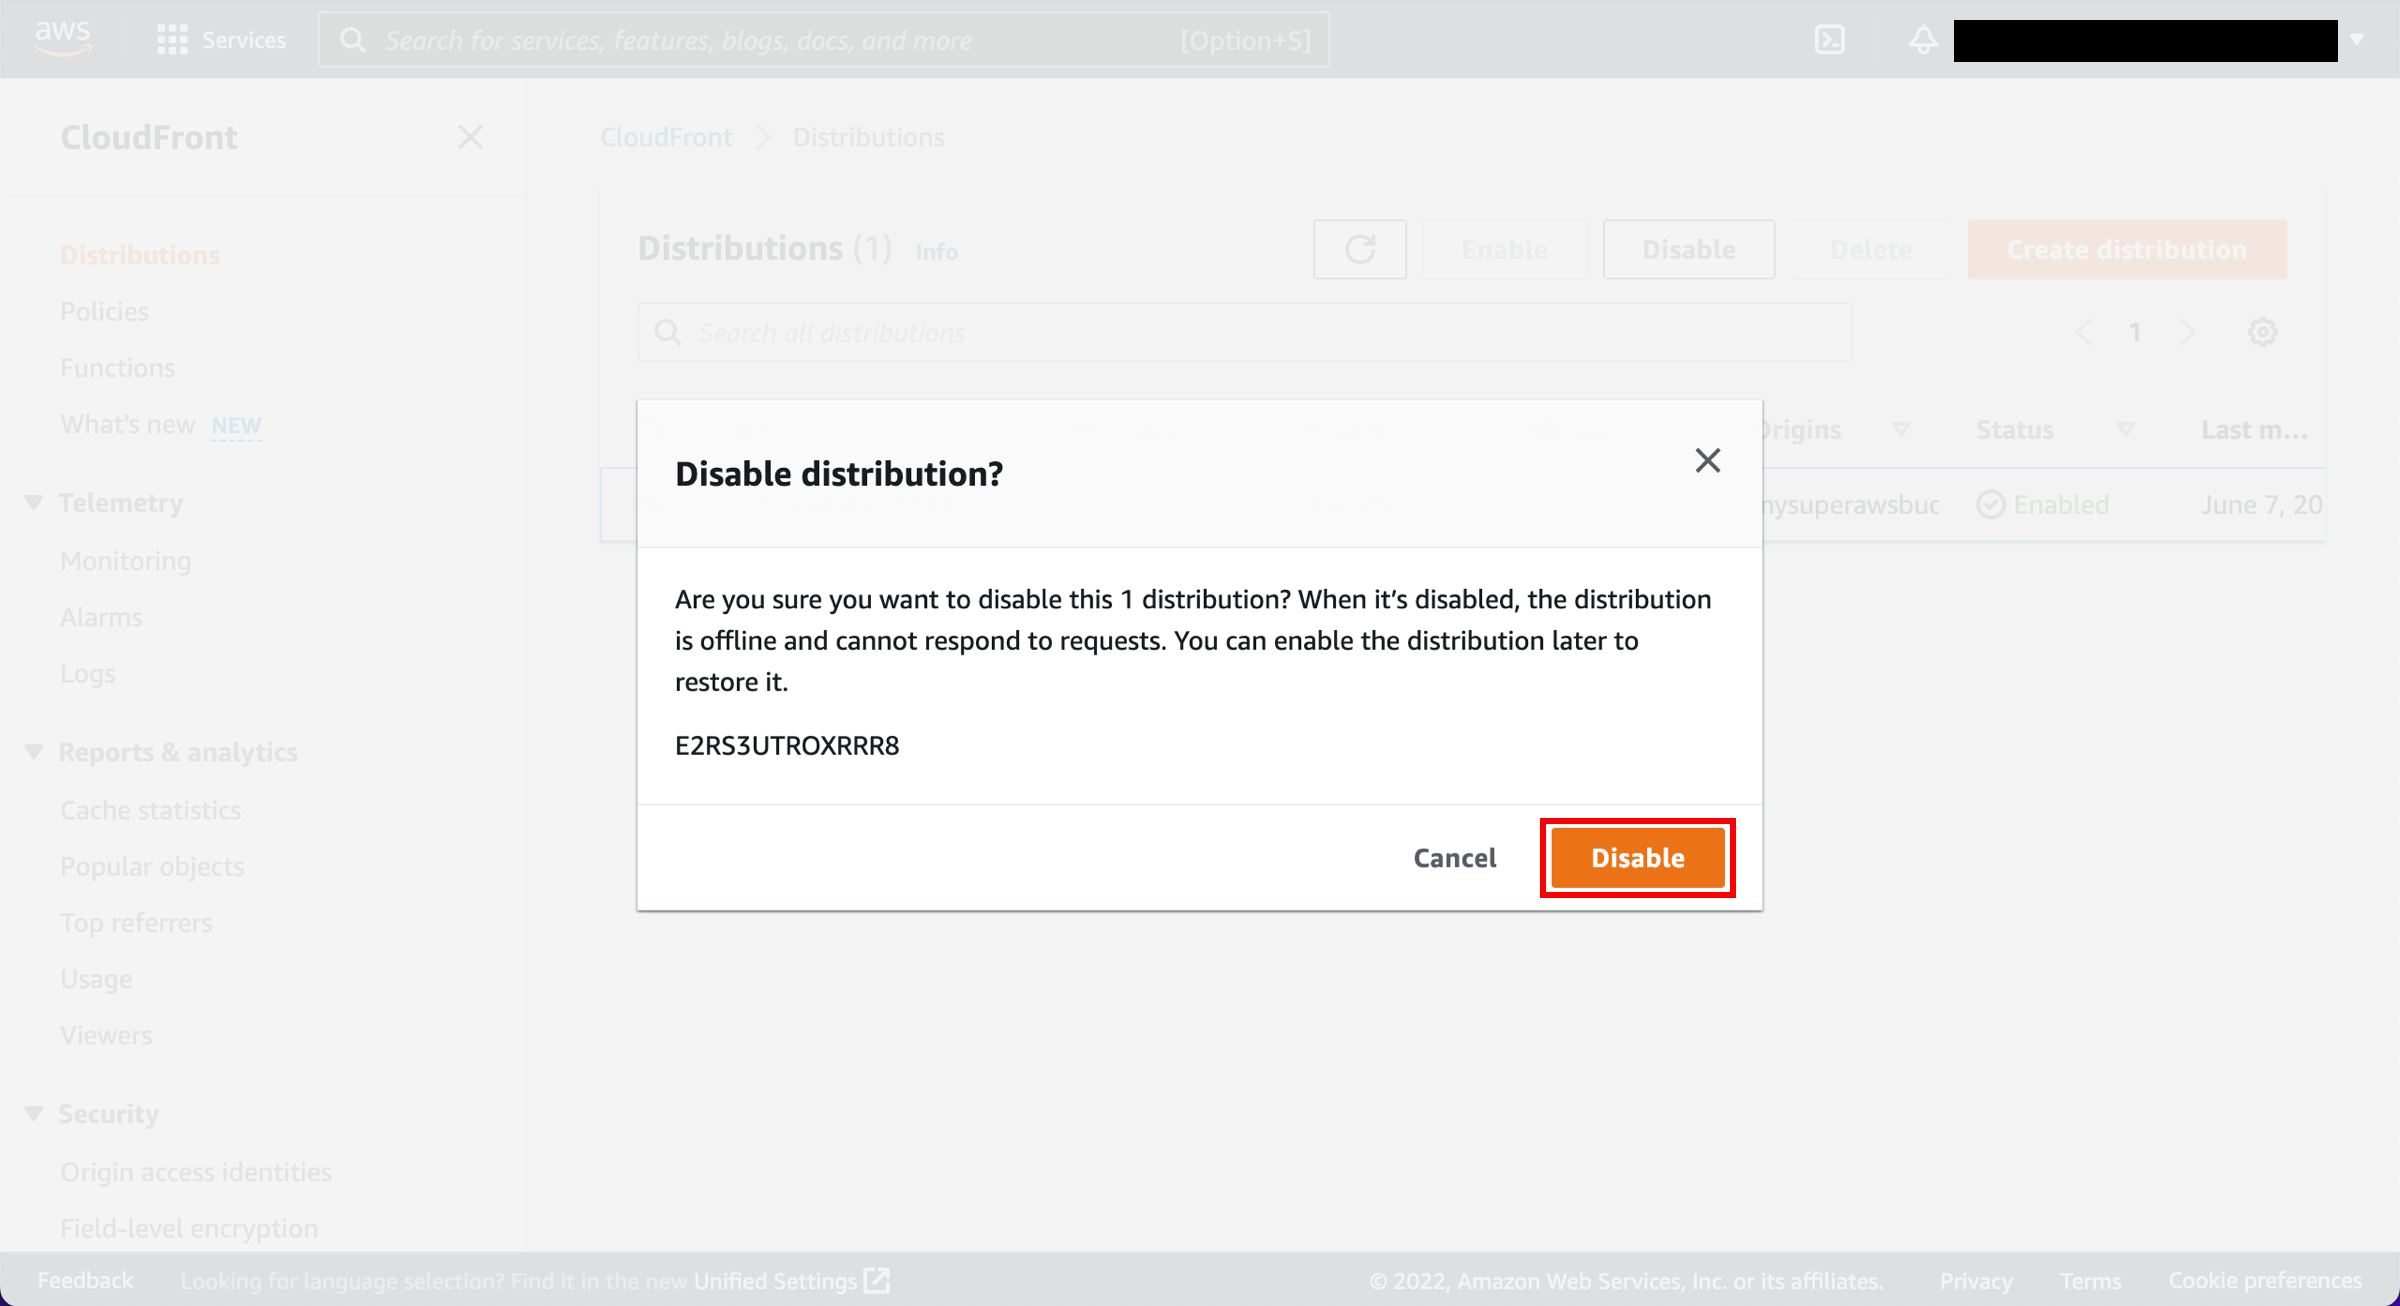
2. Confirm disabling the distribution
You will be asked to confirm. Choose Disable.
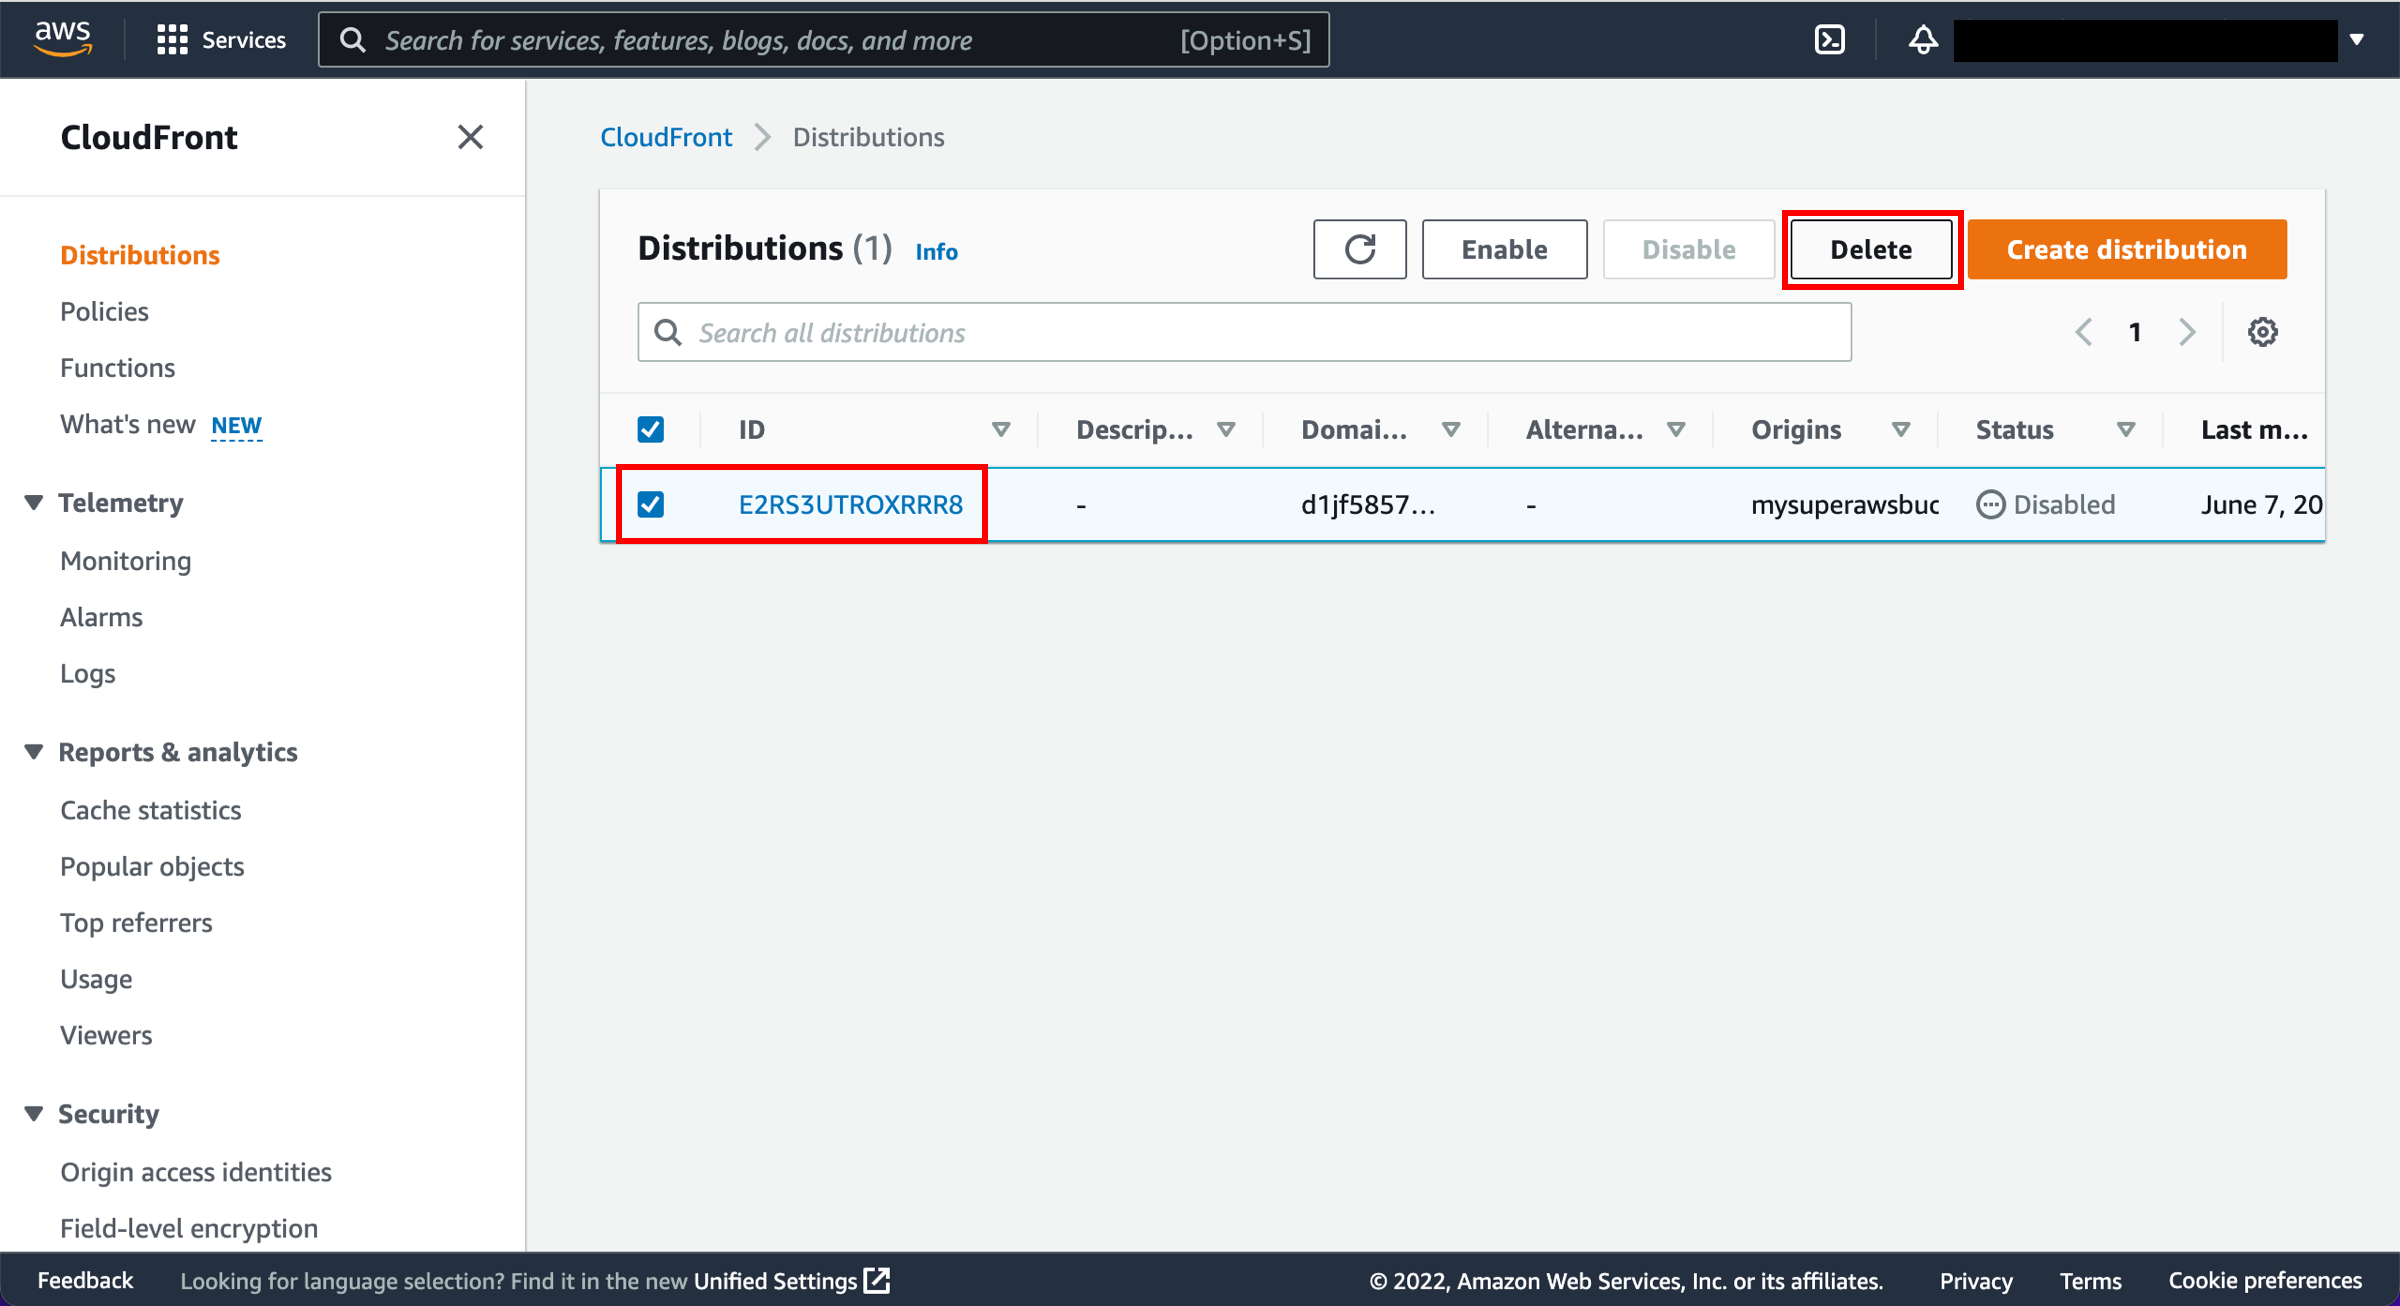
3. Select the distribution to delete
Select the checkbox next to the distribution you created and choose Delete.
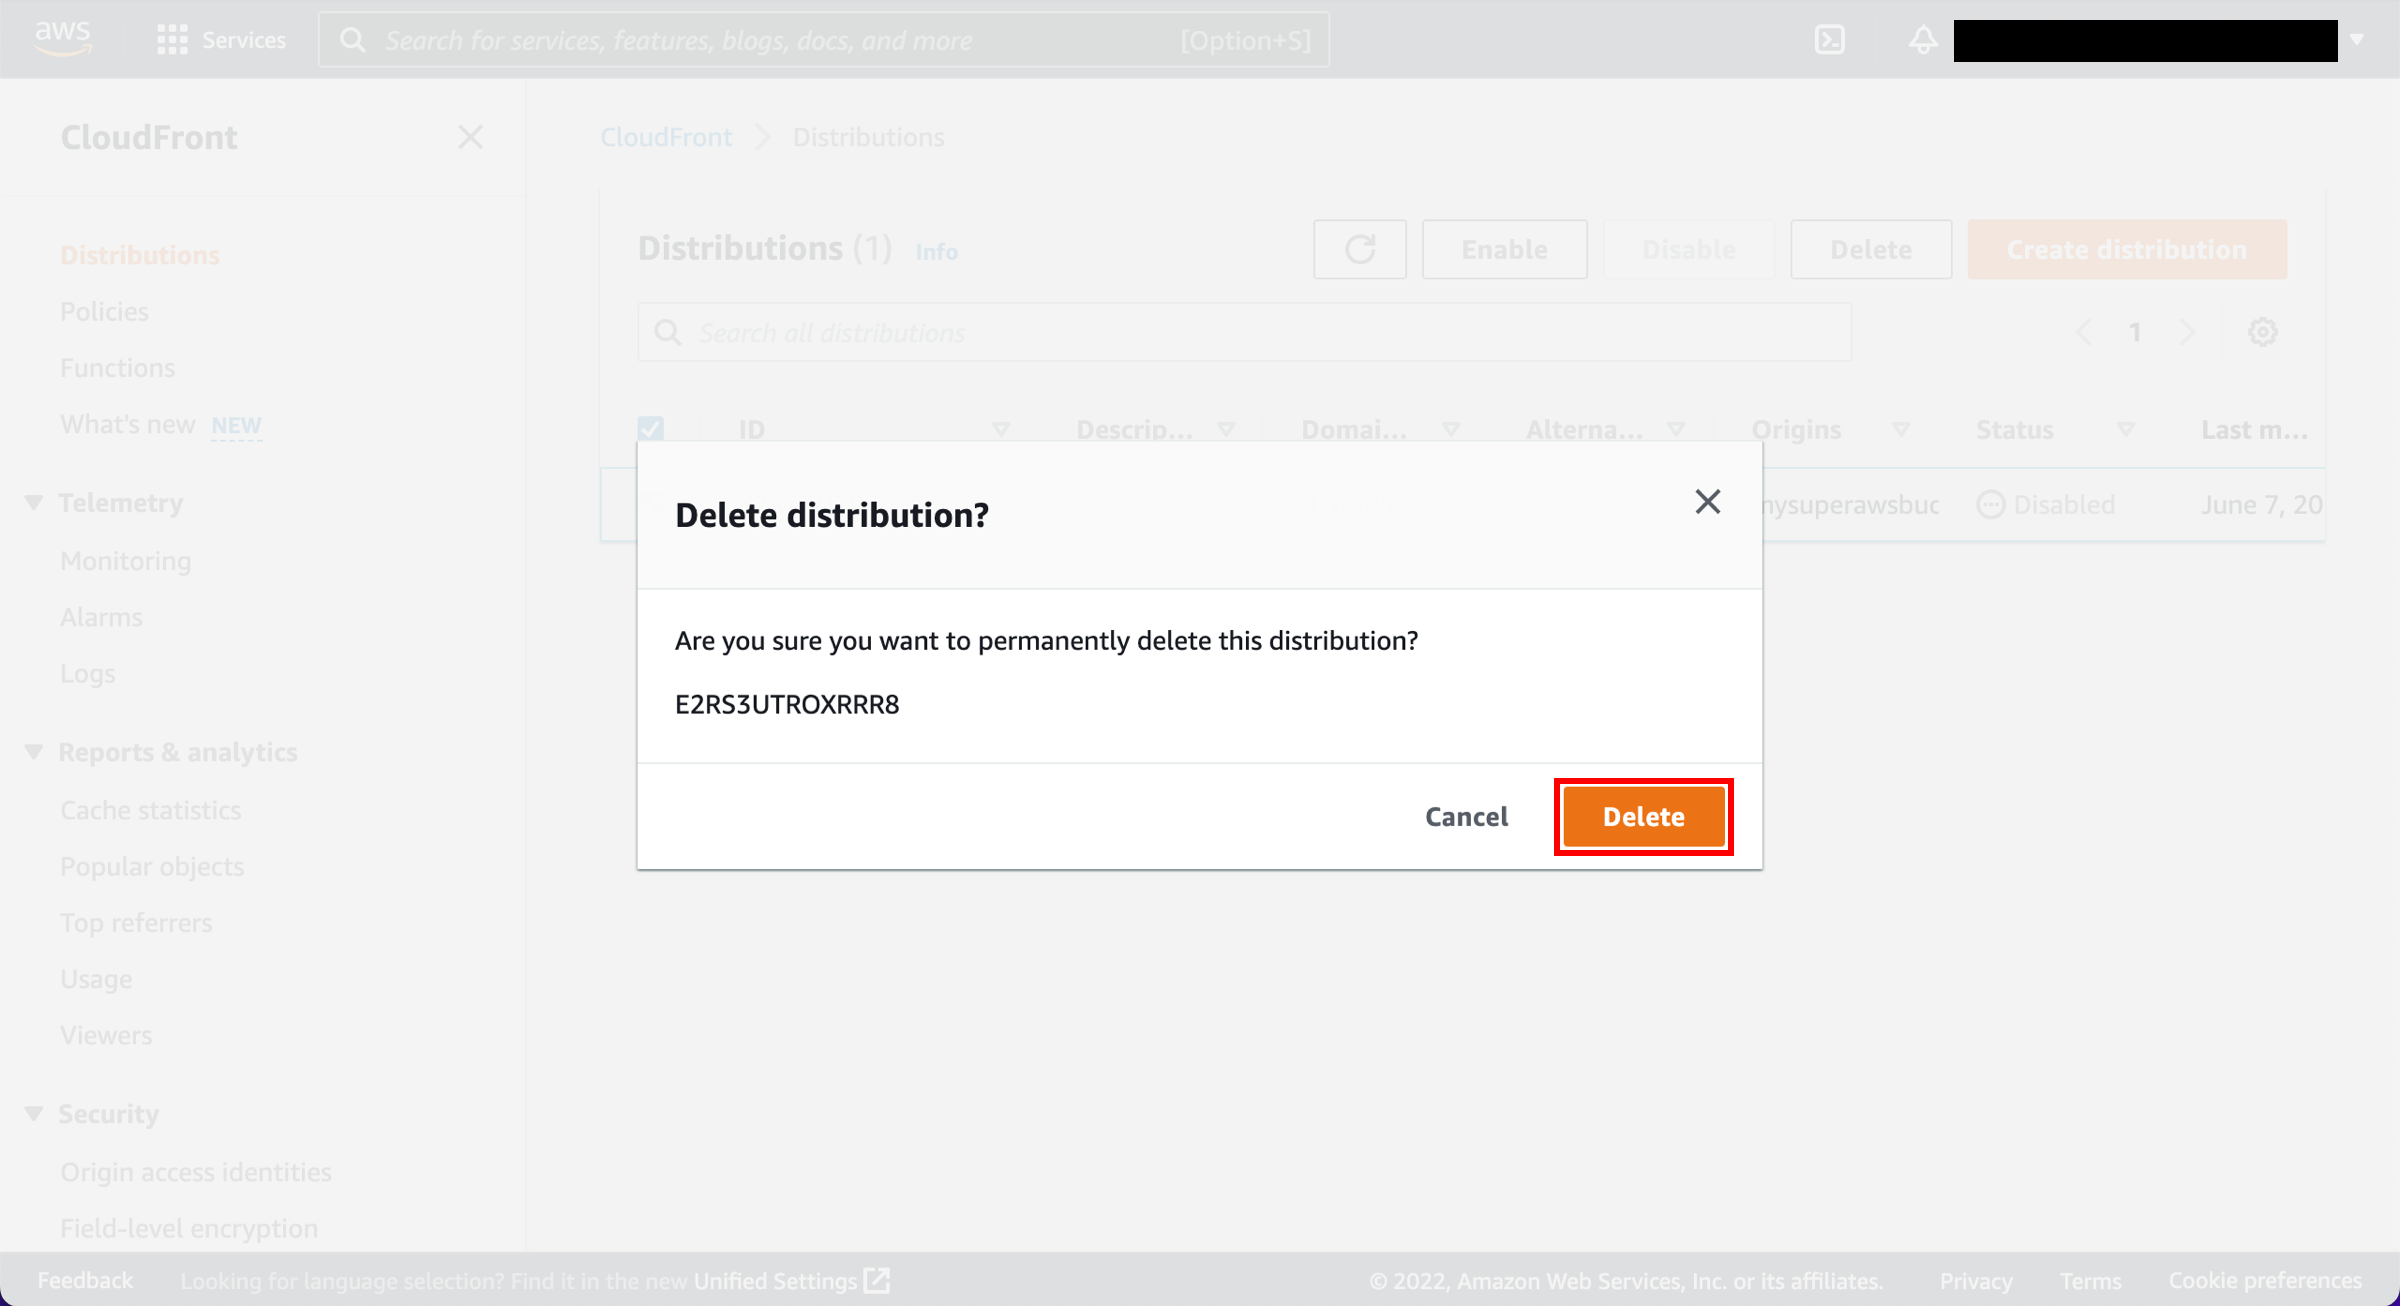
4. Confirm deleting the distribution
You will be asked to confirm. Choose Delete.
Conclusion
You created your first Amazon CloudFront web distribution and delivered a piece of static content hosted in the cloud through Amazon S3. With a few configuration changes, you can use CloudFront to deliver dynamic content, live events such as a meeting, conference, or concert, in real time over HTTP or HTTPS. Use Amazon Cloudfront to speed delivery of your entire website or application, including dynamic, static, streaming, and interactive content.
Did you find what you were looking for today?
Let us know so we can improve the quality of the content on our pages