AWS News Blog
Amazon Connect – Customer Contact Center in the Cloud

|
Customer service is essential to the success of any business. In order to provide voice-based customer service at scale, many organizations operate call centers. At the low end, call centers simply route incoming calls to any available agent. More sophisticated systems support more sophisticated routing and interaction, including the ability to create customized call trees and other Integrated Voice Response (IVR) systems. Traditionally, IVR systems have been difficult to install and expensive to license, with capacity-based pricing the norm.

Welcome to Amazon Connect
Today I would like to introduce you to Amazon Connect. Building on the same technology used by many of our own customer service teams, Connect lets you set up a cloud-based contact center in minutes. You create your contact center, design your contact flows (similar to IVRs), and on-board your agents using a modern interface that is entirely web-based.
Instead of requiring help from IT teams and specialized consultants, Connect is simple enough to be configured and run directly by business decision makers. There’s no hardware to deploy and no per-agent licenses. Instead, you pay based on the number of customer-minutes and the amount of phone time that you consume. This scalable, pay-as-you-go model means that you can use Amazon Connect in situations where your call volume is unpredictable, spiky, or both.
 Connect works with many different AWS services including:
Amazon S3 – Connect uses S3 to provide unlimited, encrypted storage of calls (audio) and reports.
AWS Lambda – This give you the ability to run code in serverless fashion as part of a customer contact. The code can pull data from your CRM or your database and use the data to provide a personalized customer experience.
Amazon Lex – Customers can build natural language contact flows using Amazon Lex to get the same automatic speech recognition (ASR) technology and natural language understanding (NLU) that powers Amazon Alexa. This lets callers simply say what they want instead of having to listen to long lists of menu options and guess which one is most closely related to what they want to do. This feature of Amazon Connect is being released in preview form, and you can request access to the preview if you are interested.
AWS Directory Service – Connect can reference an existing Active Directory or it can create a new one. The directory is used to store user (administrator, manager, or agent) identities and permissions.
Amazon Kinesis – Connect can stream contact trace records (CTRs) to Amazon Kinesis. From there they can be pushed to Amazon S3 or Amazon Redshift and analyzed using Amazon QuickSight or other business analytics tools.
Amazon CloudWatch – Connect publishes real-time operational metrics to CloudWatch. These metrics will tell you how many calls are arriving per second, how many are being held in queues, and so forth. You can use these metrics to observe the performance of your contact center and to make sure that you have the right number of agents on hand.
Amazon Connect Benefits & Features
Let’s take a look at the major benefits and features of Connect.
Cloud-Powered – Connect is an integral part of AWS, and is designed to be robust, scalable, and highly available. Each contact center instance runs in multiple AWS Availability Zones.
Simple – As I already noted, Connect was designed to be set up and run by business decision makers. The graphical console makes the setup process (including the design of graphical call flows) easy and efficient.
Flexible – The Contact Flow Editor (CFE) that powers Connect includes blocks for interaction, integration, control flow, branching, and more. Call flows can include a mixture of prerecorded audio prompts, generated audio, Lex-powered interaction, integration with existing systems and databases, conversations with agents, call transfers, and more.
Economical – Connect‘s pay-as-you-go model keeps operating costs in line with actual usage. On the agent side, Connect includes a softphone that supports high quality audio.
Amazon Connect Tour
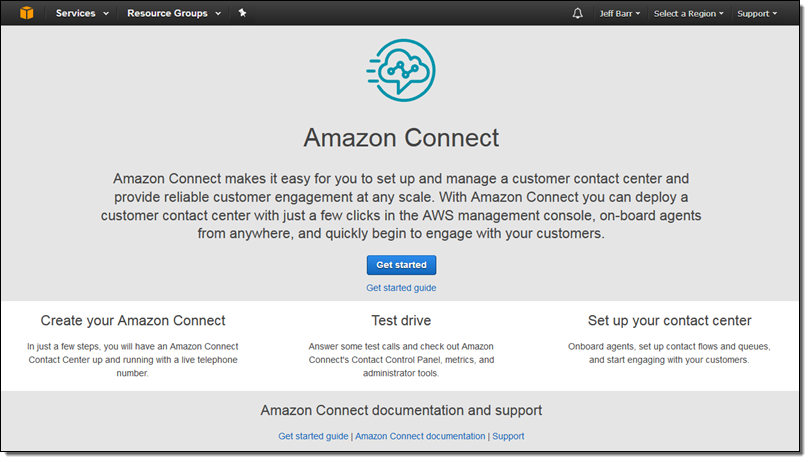
Let’s set up a customer contact center, starting at the Connect console. I click on Get started:
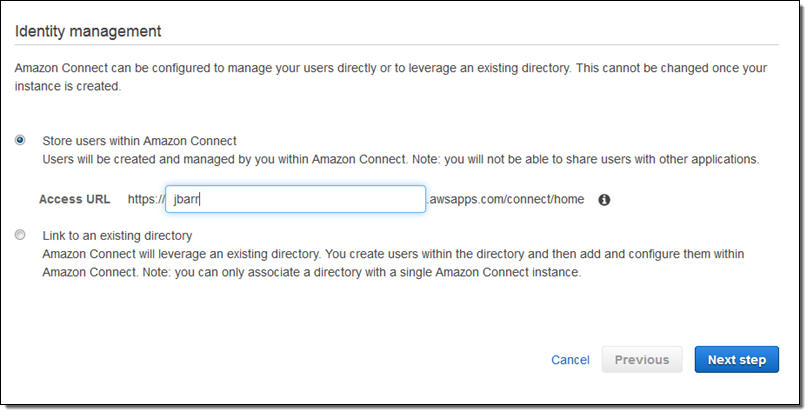
I can choose to use an existing directory or I can create a new one, which I’ll do. I’ll set up the URL for my contact center to proceed. This URL will allow my contact center’s users to sign in:
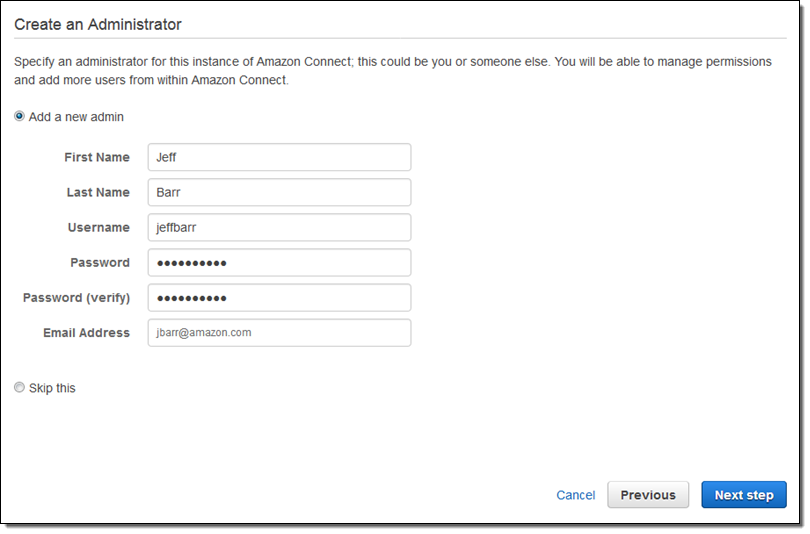
Next, I set myself up as the administrator:
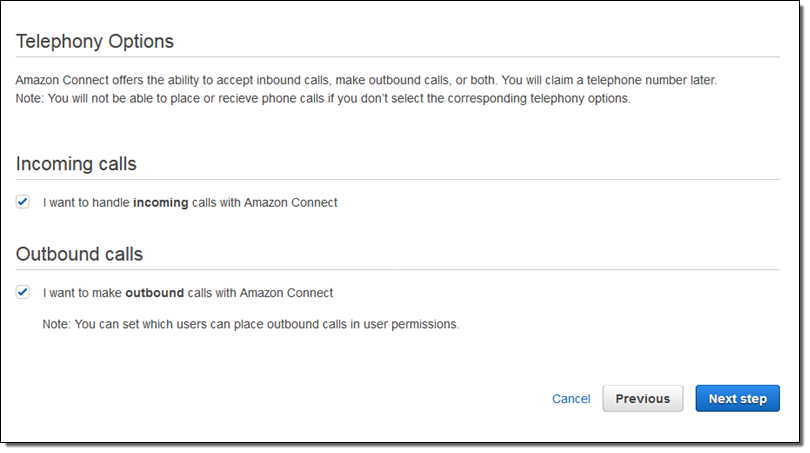
My contact center can accept incoming calls, make outgoing calls, or both. Outgoing calls can be made as part of a contact flow or by an agent. I simply specify what I need (I’ll choose my direct dial and/or toll-free numbers later):
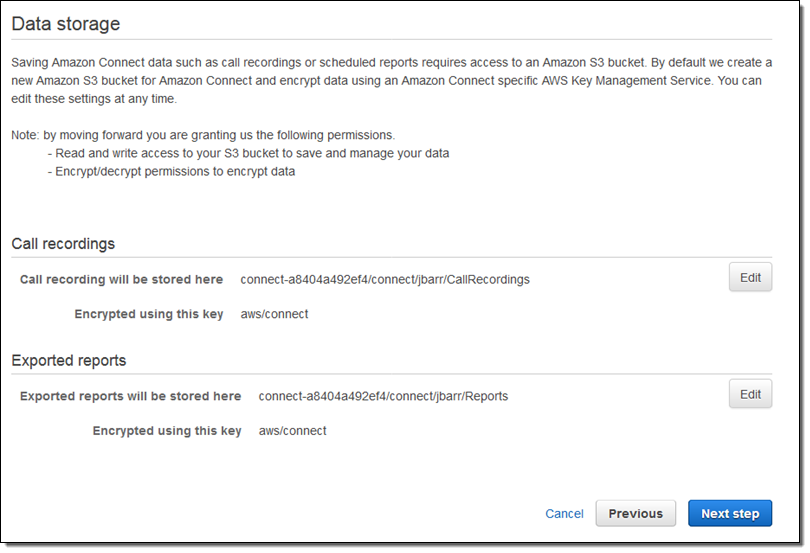
Next, I specify the S3 locations (buckets and prefixes) for call recording and reports. I can use separate buckets and prefixes for each, along with distinct AWS Key Management Service (AWS KMS) encryption keys:
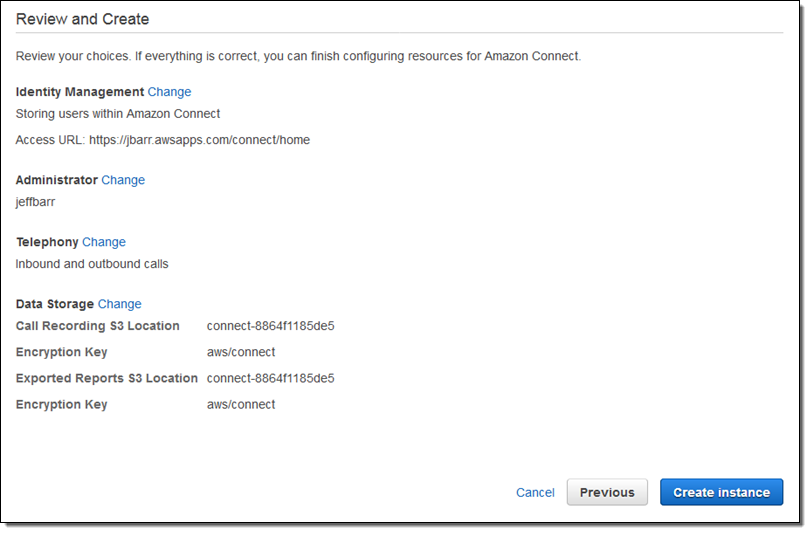
Then I confirm my choices and click on Create instance:
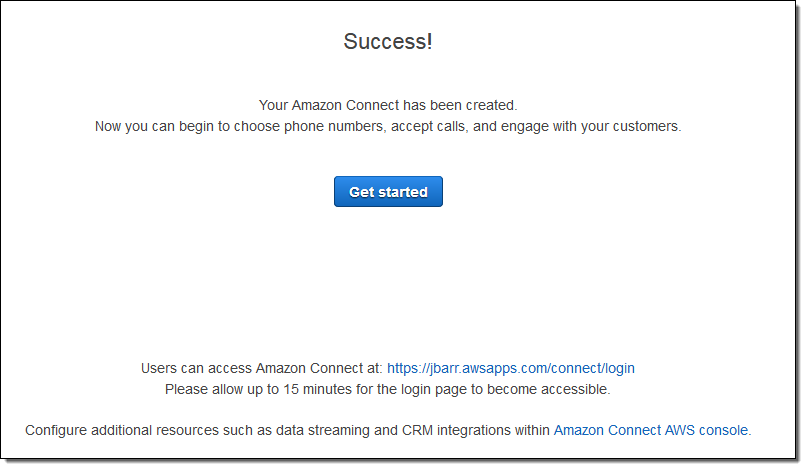
A few seconds later my Connect instance is ready to go, and I can click on Get started:
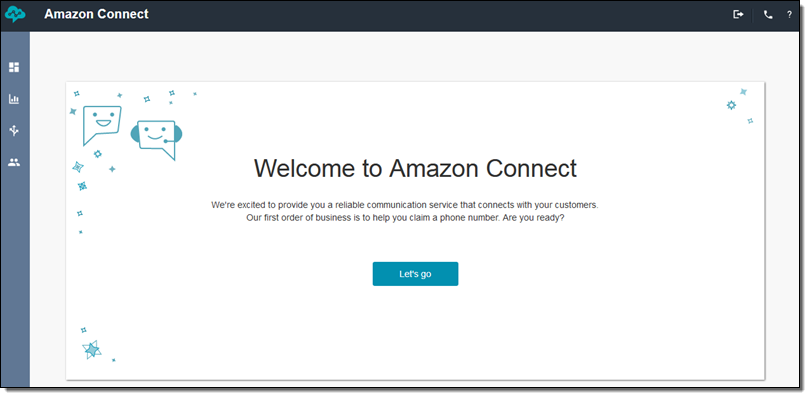
Connect logs me in using the administrator credentials that I entered earlier, and then I click on Let’s go to proceed:
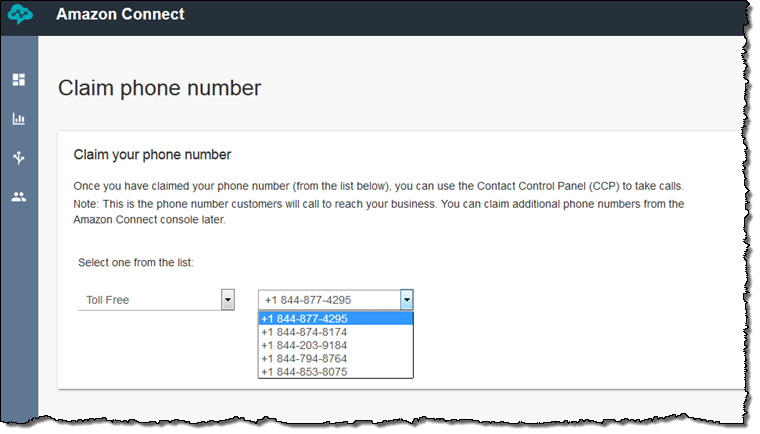
Now I can get set up to accept my first call, by choosing a toll free or direct dial phone number:
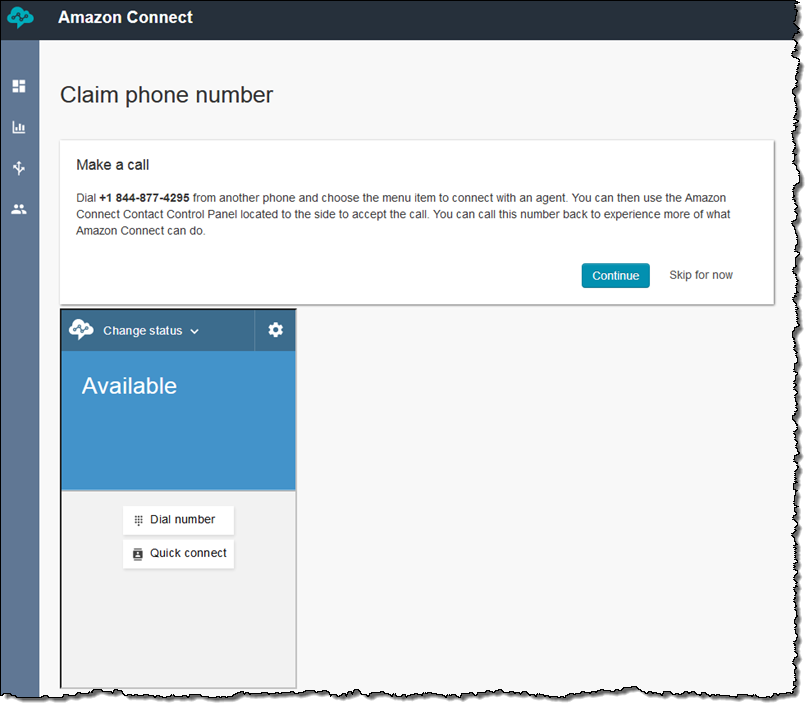
I am ready to accept my first call:
I call the number on my cell and walk through the options. I press “1” to speak to an agent, and the softphone offers to let me (playing the role of the agent) take the call: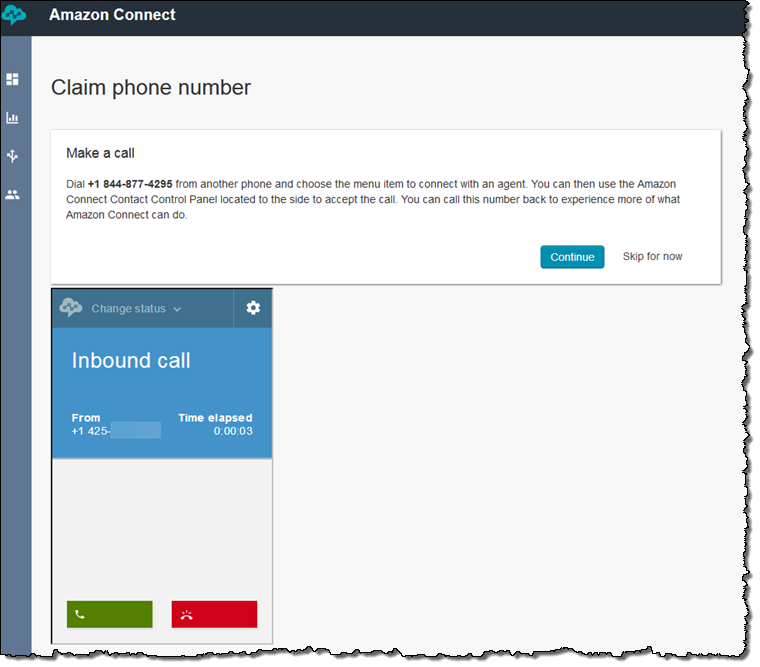
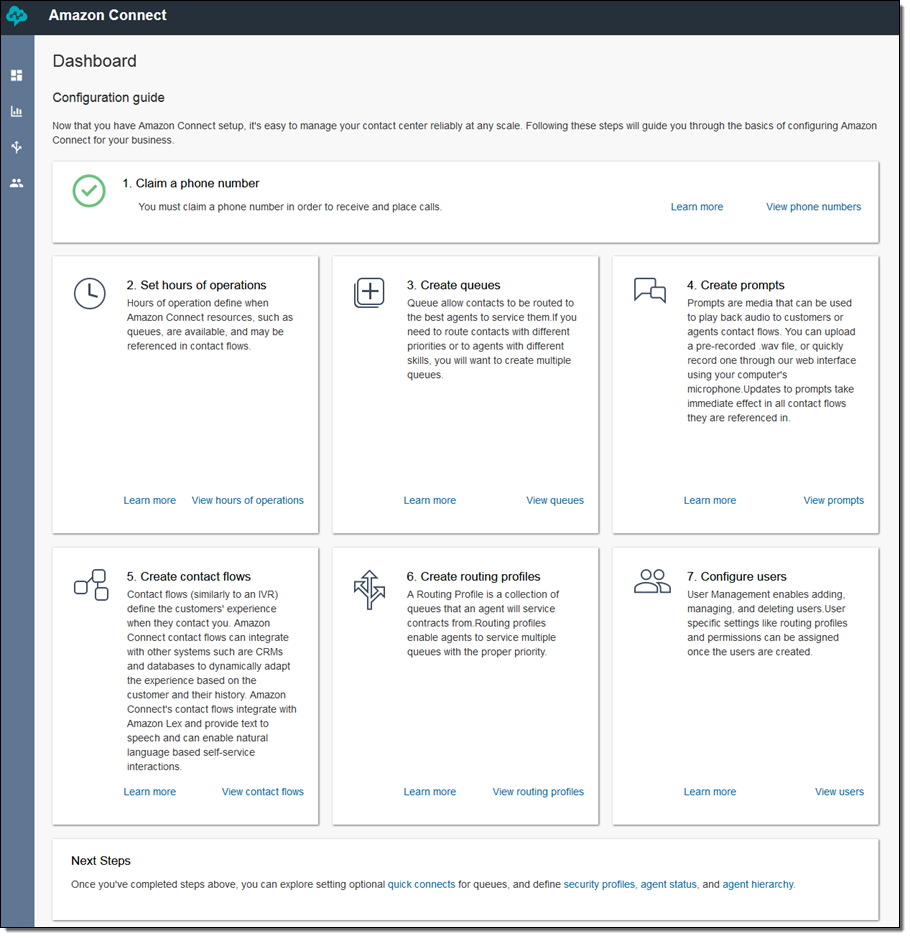
Now that the Connect is set up and accepting calls, I can explore the Dashboard and configure my contact center:
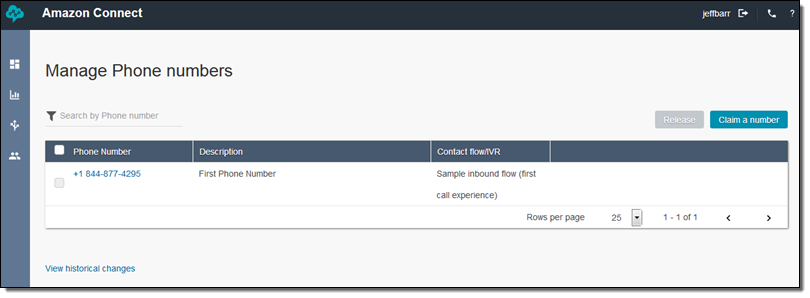
I can see the phone numbers that are associated with the call center:
And I can claim additional numbers (up to 10 direct inward dialing and 10 toll free), choosing from numbers in a wide list of countries:
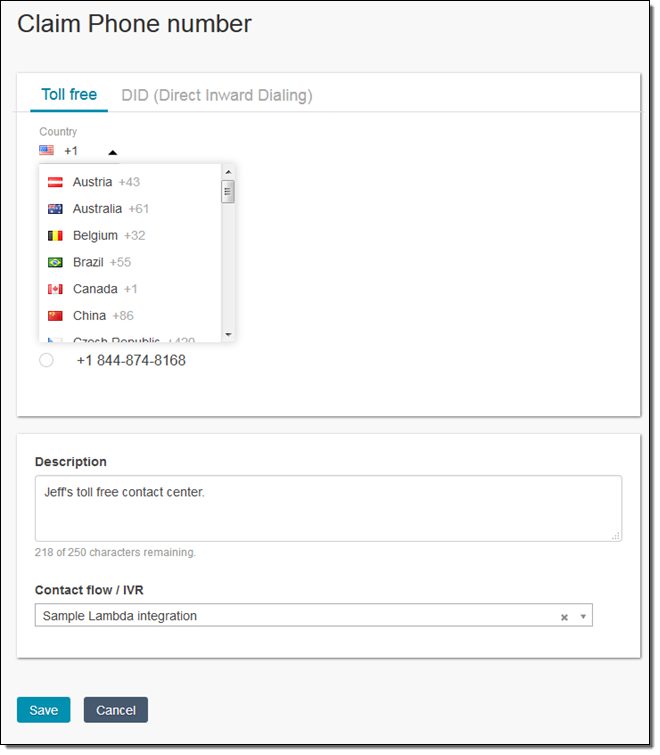
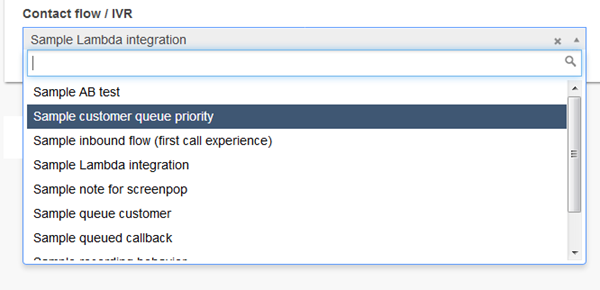
At the bottom of the screen I can choose the contact flow that is activated when the number is called:
 Returning to the dashboard, the next step is to set the hours of operation. I can see the list of existing hours of operation, and I can create a new one:
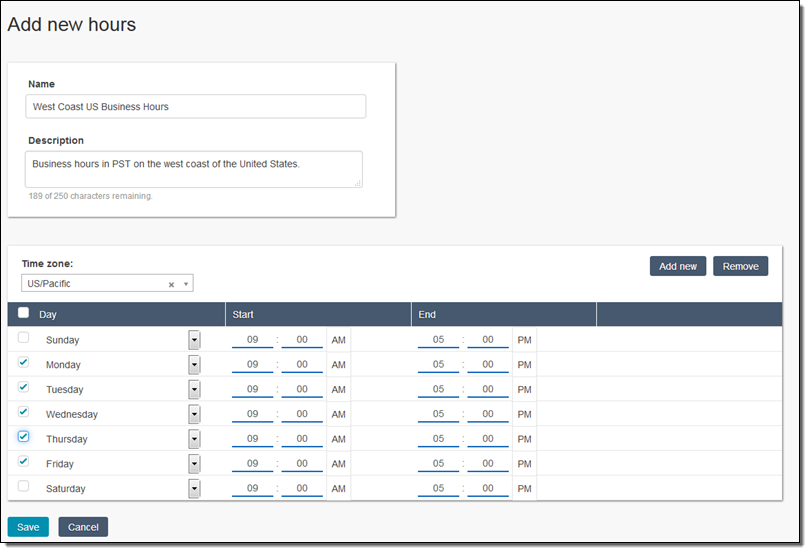
I can have multiple hours of operation, each of which can be attached to a queue or referenced from a contact flow.
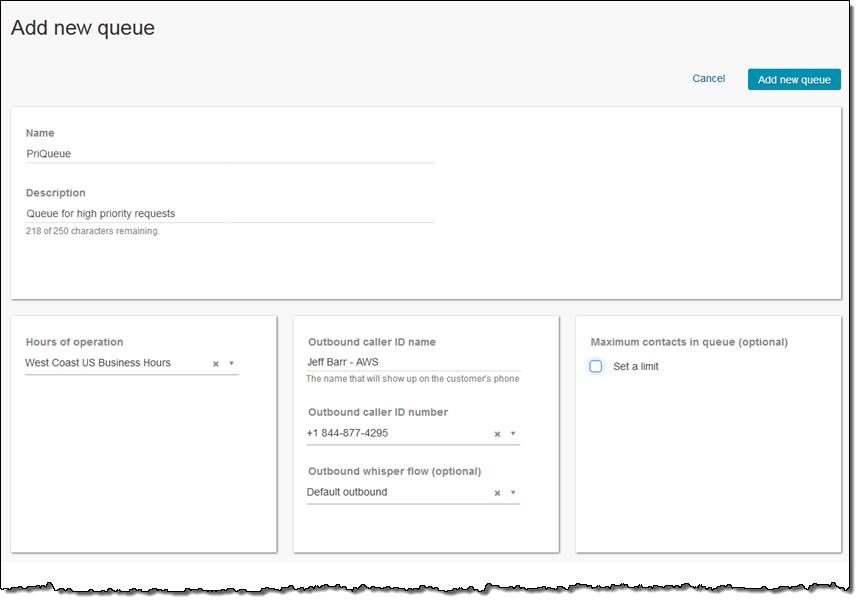
Now I can create queues to model the routing of contacts (incoming calls) to agents. Queues can represent priorities (different levels of regular and premium support), or agents with different business or language skills.
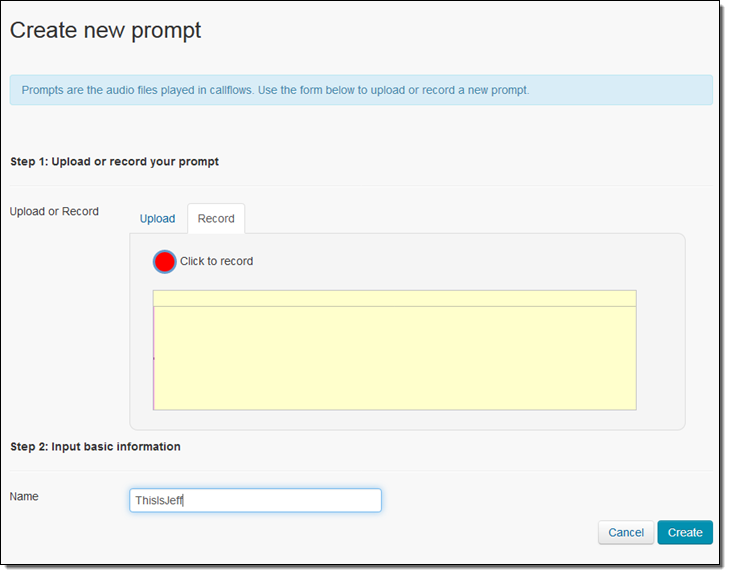
I also have the ability to create prompts. These are audio snippets that can be referenced from a contact flow. I can upload an existing WAV file or I can record one from within the browser:
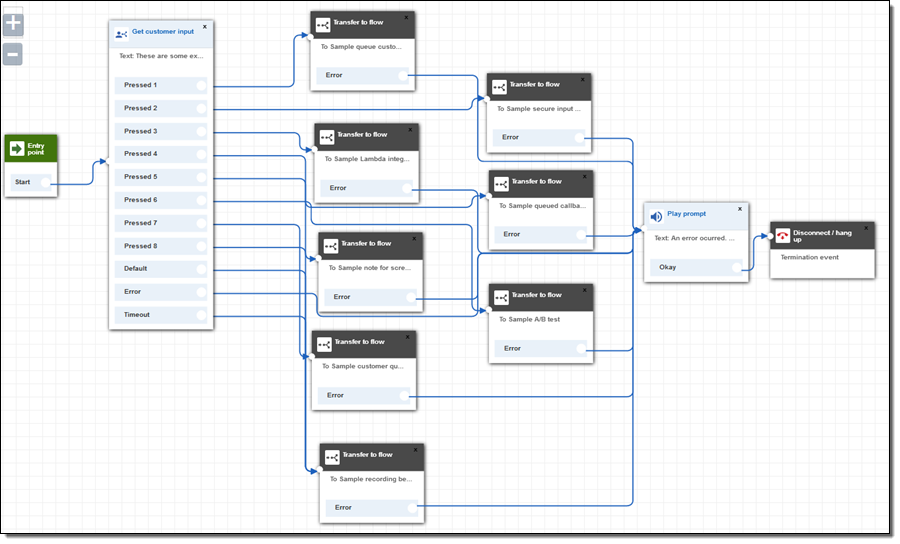
Next, I can create a new contact flow or edit an existing one. A contact flow defines the customer experience after they make contact. Here is the sample flow that is set up by default:
I can find the desired block in the menu, drag it on to the canvas, and connect it in to the flow:
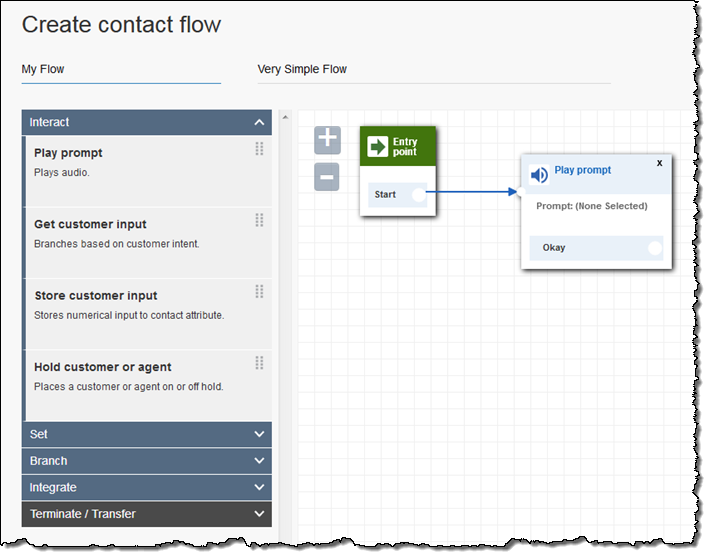
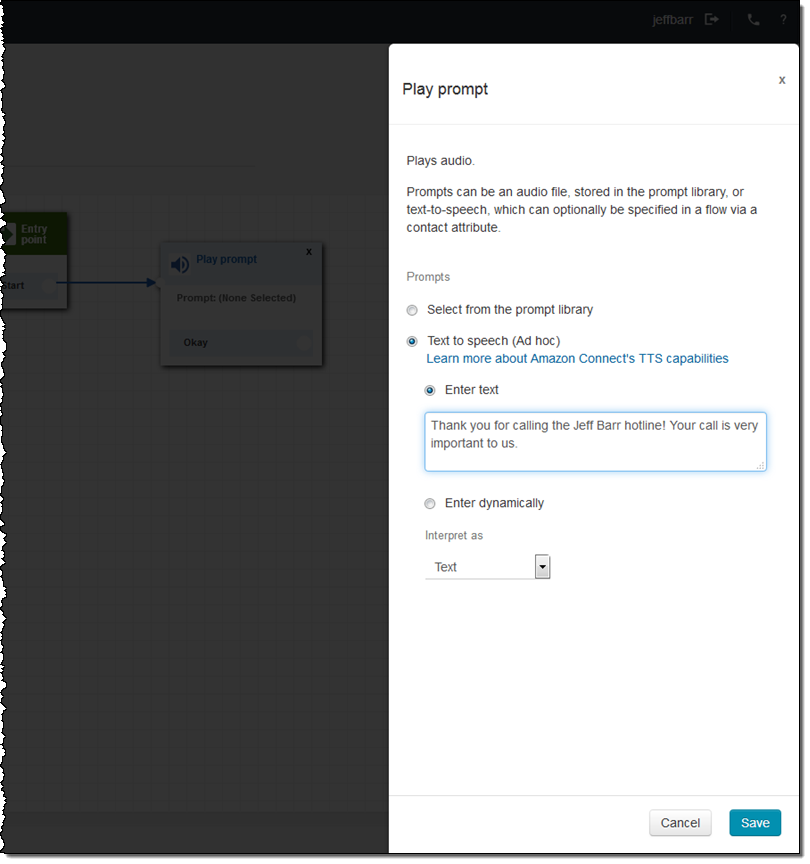
Then I click on the header of the block to set it up. I can use a prompt, or I can choose between static or dynamic text to speech (dynamic speech would reference a value attached to the call flow, perhaps resulting from a database lookup):
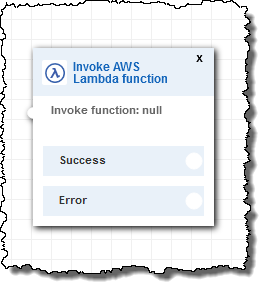
One of the most powerful and general blocks allows me to call a Lambda function during the contact flow. The function can pull data from a database, connect to a CRM, or implement any desired type of business logic. The function is provided with key-value pairs as input, and returns the same as output. The returned values are associated with the execution of the flow.
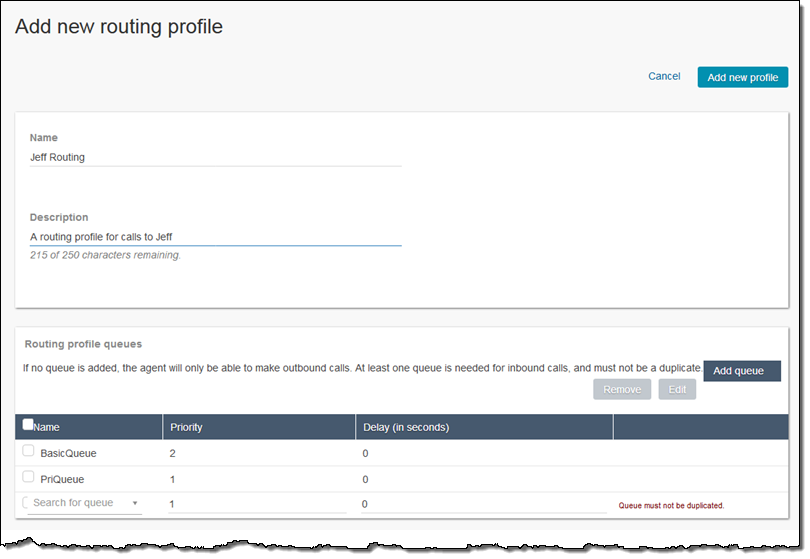
The next step is to create a routing profile, consisting of one or more queues, with associated priorities. The priorities allow agents to service multiple queues in the proper order (lower numbers are higher priority); you can combine priorities and delays to set up routing rules that are in accord with the needs of your users and your contact center:
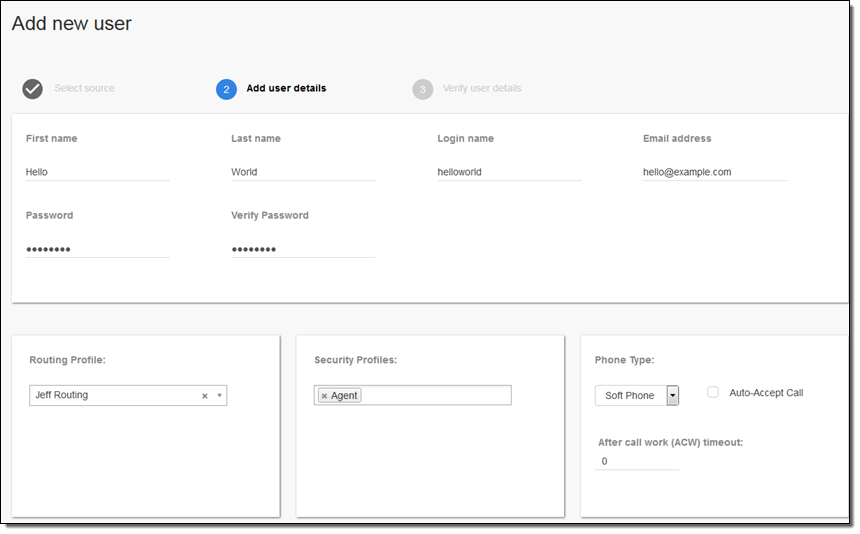
The final step is to add and empower the users (administrators, managers, agents, and so forth). This can be done on a user-by-user basis or by importing a CSV file that contains definitions for multiple users. Here’s how I add a user named Hello World:
I can also create a hierarchy of agents (great for regional and/or divisional reporting).
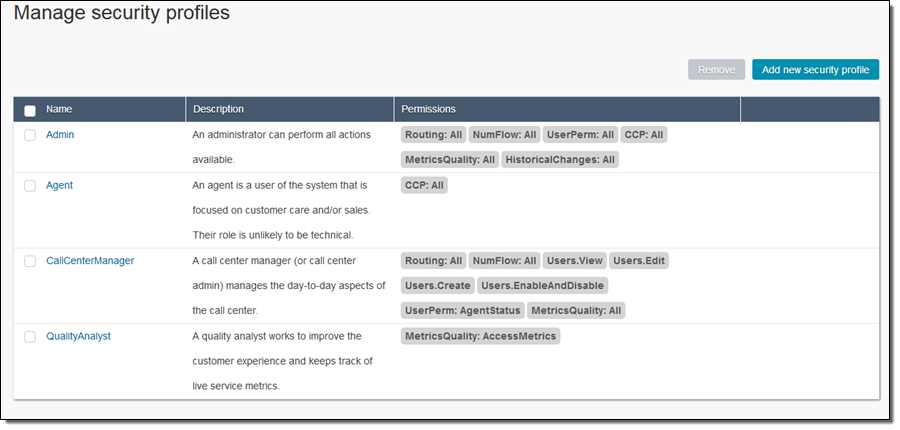
Connect lets me use security profiles to control the permissions assigned to each type of user:
I also have access to operational metrics, both real-time and historical. Here are some of the real-time metrics (the time frame and displayed fields can be customized as needed):
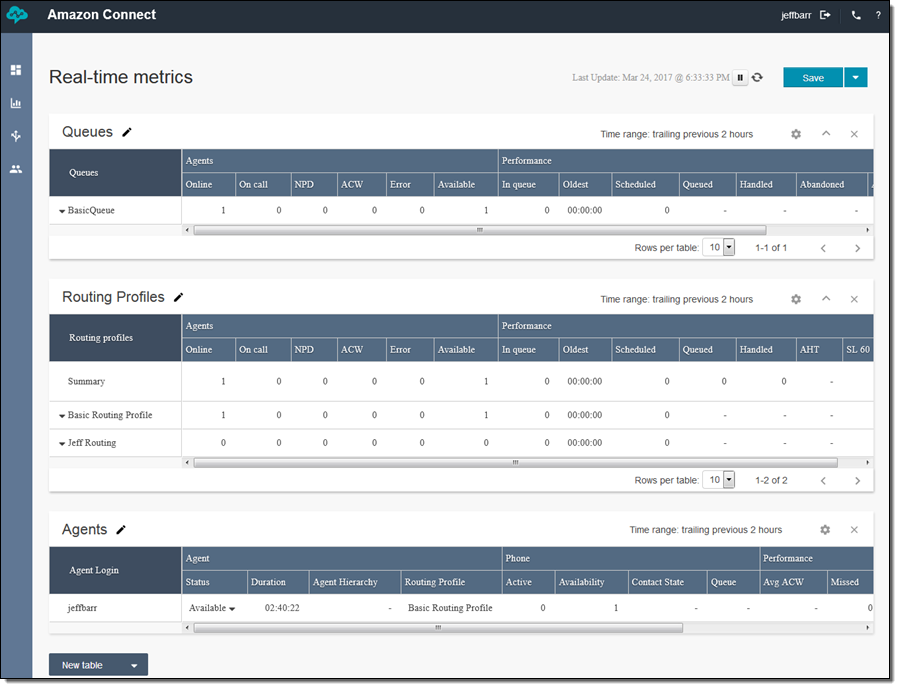
The metrics are published to CloudWatch, where they can be used to drive alarms.
I hope that this brief tour has given you a reasonably thorough introduction to Amazon Connect, and would love to hear how you have used it to modernize your contact center and to improve the level of service that you can provide to your customers:

As you can see, it is a rich and powerful service, with plenty of room for customization and extension. There are plenty of advanced features and configuration options that you can explore on your own.
Available Now
Amazon Connect is available now in the US East (N. Virginia) Region and you can create a contact center today!
Pricing, as I noted, is on a pay-as-you-go basis. You pay for each contact center and each active phone call (inbound or outbound) on a per-minute basis. As part of the AWS Free Tier, you get 90 minutes of contact center usage, two phone numbers (DID and toll-free), 30 minutes of inbound DID calls, 30 minutes of inbound toll-free calls, and 30 minutes of outbound calls, all per month, for an entire year.
— Jeff;
PS – Visit the Amazon Connect Images album to see my entire LEGO build!