AWS Big Data Blog
Tailor Amazon SageMaker Unified Studio project environments to your needs using custom blueprints
Amazon SageMaker Unified Studio is a single data and AI development environment that brings together data preparation, analytics, machine learning (ML), and generative AI development in one place. By unifying these workflows, it saves teams from managing multiple tools and makes it straightforward for data scientists, analysts, and developers to build, train, and deploy ML models and AI applications while collaborating seamlessly.
In SageMaker Unified Studio, a project is a boundary where you can collaborate with other users to work on a business use case. A blueprint defines what AWS tools and services members of a project can use as they work with their data. Blueprints are defined by an administrator and are powered by AWS CloudFormation. Instead of manually piecing together project structures or workflow configurations, teams can rapidly spin up secure, compliant, and consistent analytics and AI environments. This streamlined approach significantly reduces setup time and provides standardized workspaces across the organization. Out of the box, SageMaker Unified Studio comes with several default blueprints.
We recently launched the custom blueprints feature in SageMaker Unified Studio. Organizations can now incorporate their specific dependencies, security controls using their own managed AWS Identity and Access Management (IAM) policies, and best practices, making it straightforward for them to align with internal standards. Because they’re defined through infrastructure as code (IaC), blueprints are straightforward to version control, share across teams, and evolve over time. This speeds up onboarding and keeps projects consistent and governed, no matter how big or distributed your data organization becomes.
For enterprises, this means more time focusing on insights, models, and innovation. The custom blueprints feature is designed to help teams move faster and stay consistent while maintaining their organization’s security controls and best practices. In this post, we show how to get started with custom blueprints in SageMaker Unified Studio.
Solution overview
We provide a CloudFormation template to implement a custom blueprint in SageMaker Unified Studio. The template deploys the following resources in the project environment:
- AWS Glue database
- Amazon Redshift Serverless namespace and workgroup
- AWS Lake Formation permissions for the newly created project to access the AWS Glue database
- Custom managed policies for AWS Glue and Amazon Redshift
Prerequisites
The post assumes you have a preexisting SageMaker Unified Studio domain. If you don’t have one, refer to Create a Amazon SageMaker Unified Studio domain – quick setup for instructions to create one.
Define reserved environment parameters
The CloudFormation template uses parameters that are reserved to your SageMaker environment, such as datazoneEnvironmentEnvironmentId, datazoneEnvironmentProjectId, s3BucketArn, and privateSubnets. These parameters are automatically populated by SageMaker when creating the project. The parameters also help in retrieving other environment variables, such as SecurityGroupIds, as shown in the following snippets.
The following code illustrates defining reserved environment parameters:
The following code illustrates using reserved environment parameters to import other necessary values:
Attach custom IAM policies to project role
By default, SageMaker Unified Studio creates a project role and attaches several managed policies to the role. These managed policies are defined in the tooling blueprint. With custom blueprints, you can configure and attach your own IAM policies, in addition to the default policies, to the project role. To do this, include the IAM policies in your CloudFormation template and use the Export feature in the Outputs section, as shown in the following code. SageMaker Unified Studio gathers the policy information and adds it to the project role.
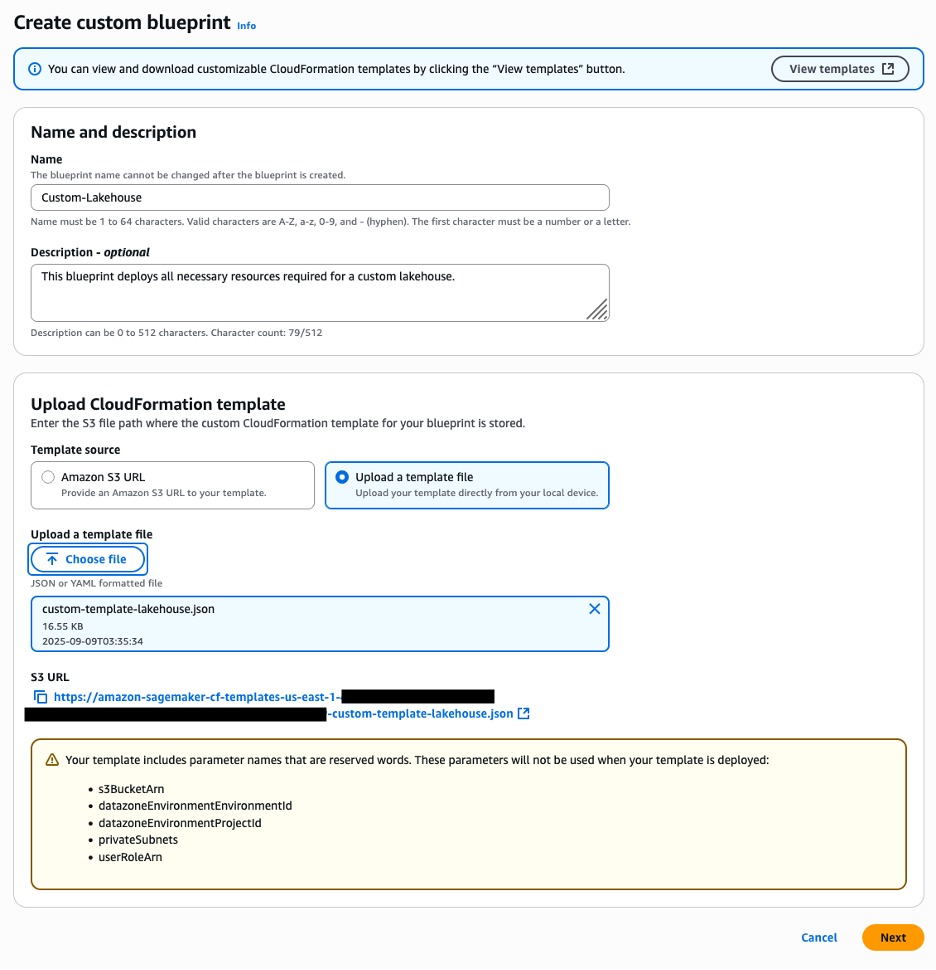
Create custom blueprint
Complete the following steps to create a custom blueprint using the CloudFormation template:
- On the Amazon SageMaker console, open the domain where you want to create a custom blueprint.
- On the Blueprints tab, choose Create.
- Under Name and description, enter a name and optional description.
- Under Upload CloudFormation template, select Upload a template file and upload the provided template.
- Choose Next.
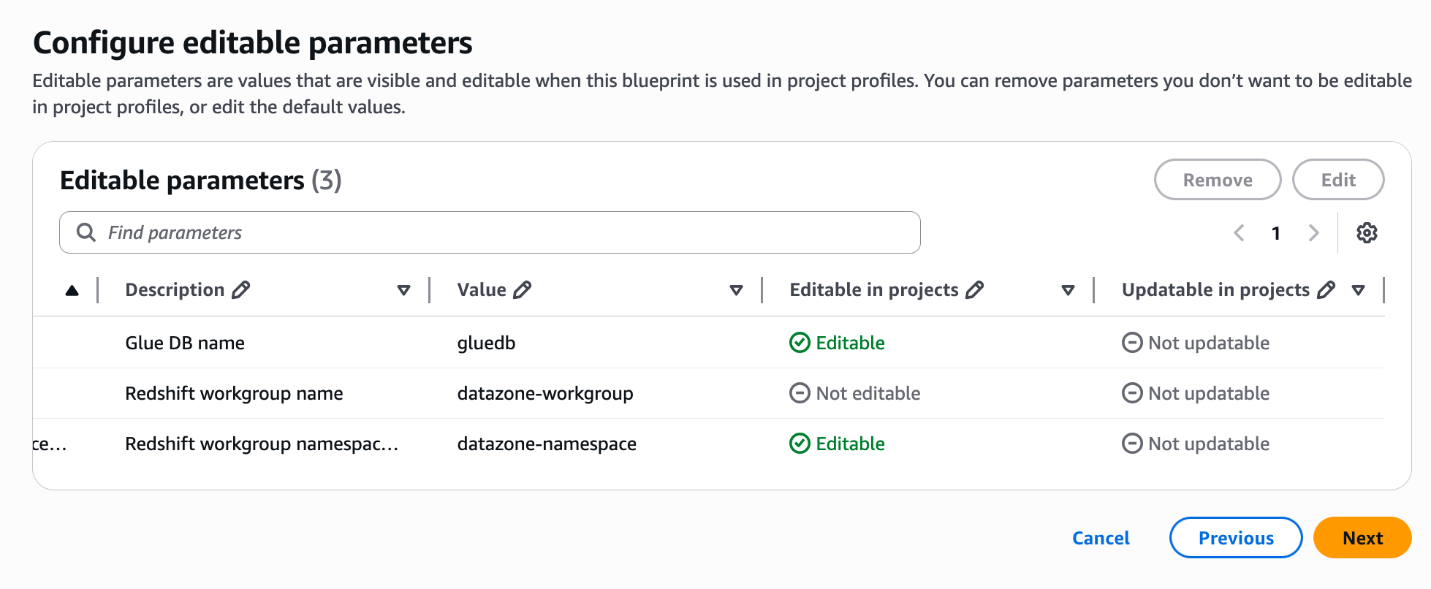
SageMaker will automatically detect the reserved parameters defined in the template, as shown in the following screenshot.
- For Editable parameters, edit the Value column if necessary, and specify whether the values can be editable at the time of project creation.
- Choose Next.
As shown in the following screenshot, the reserved parameters described earlier are not shown on this page.
- Select Enable blueprint.
- Choose the provisioning role to be used by SageMaker to provision the environment resources.
- Choose the domain units authorized to use the blueprint.
- Choose Next.
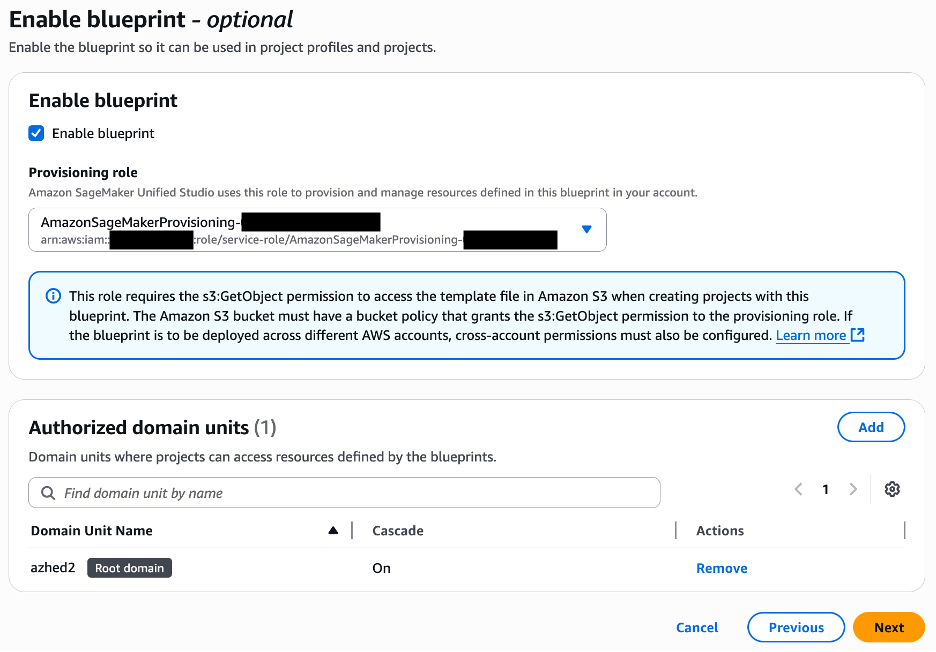
- Review the blueprint information and choose Create blueprint.
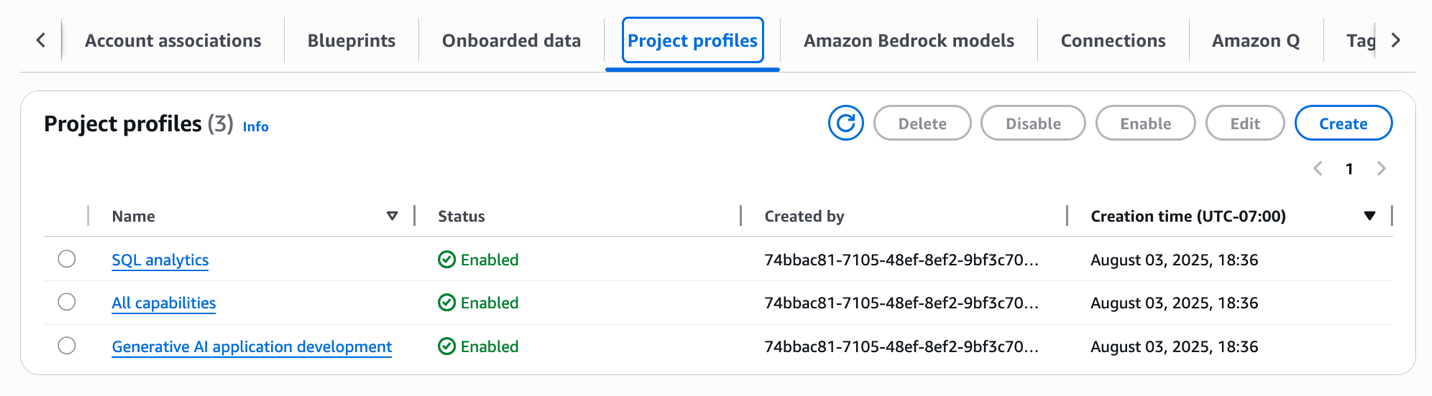
Create project profile
Complete the following steps to create a custom project profile that includes the custom blueprint created in the previous section:
- On the SageMaker console, open your domain.
- On the Project profiles tab, choose Create.
- Enter the project profile name and optional description.
- Select Custom create.
- Choose the blueprints to be included in the project profile, including the custom blueprint you created in the previous section.
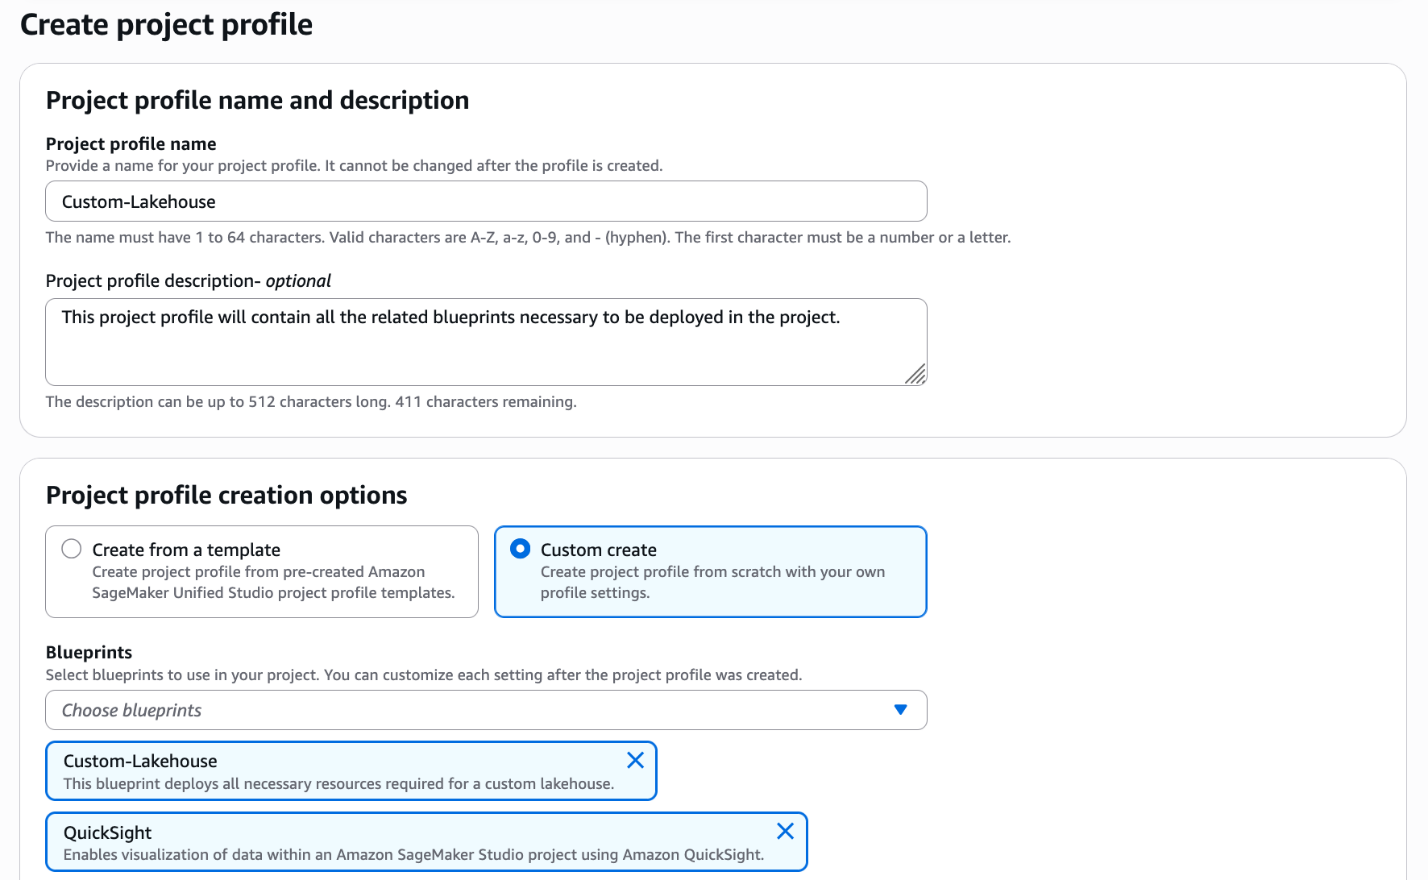
- Choose the account and AWS Region to be used.
- Choose the authorized users.
- Select Enable project profile on creation.
- Choose Create project profile.
Create project
Complete the following steps to create a new project that is based on the custom project profile and custom blueprint created in the previous sections:
- In the SageMaker Unified Studio environment, choose Create project.
- Enter a project name and optional description.
- For Project profile, choose the profile created in the previous section.
- Choose Continue.
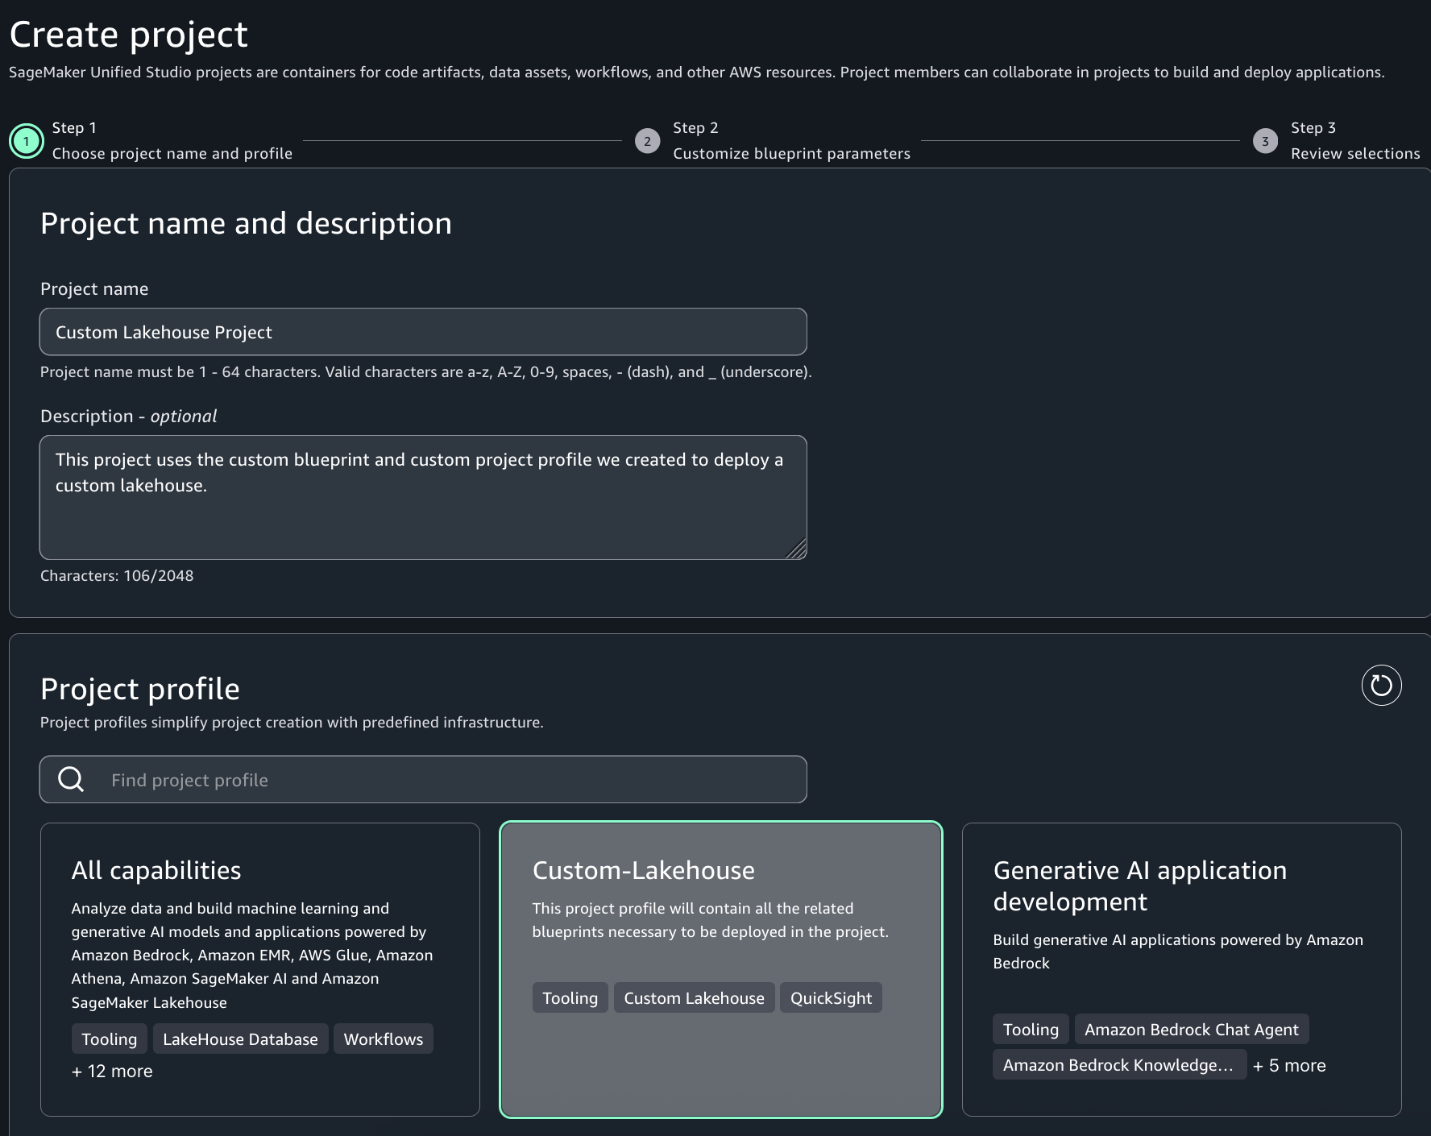
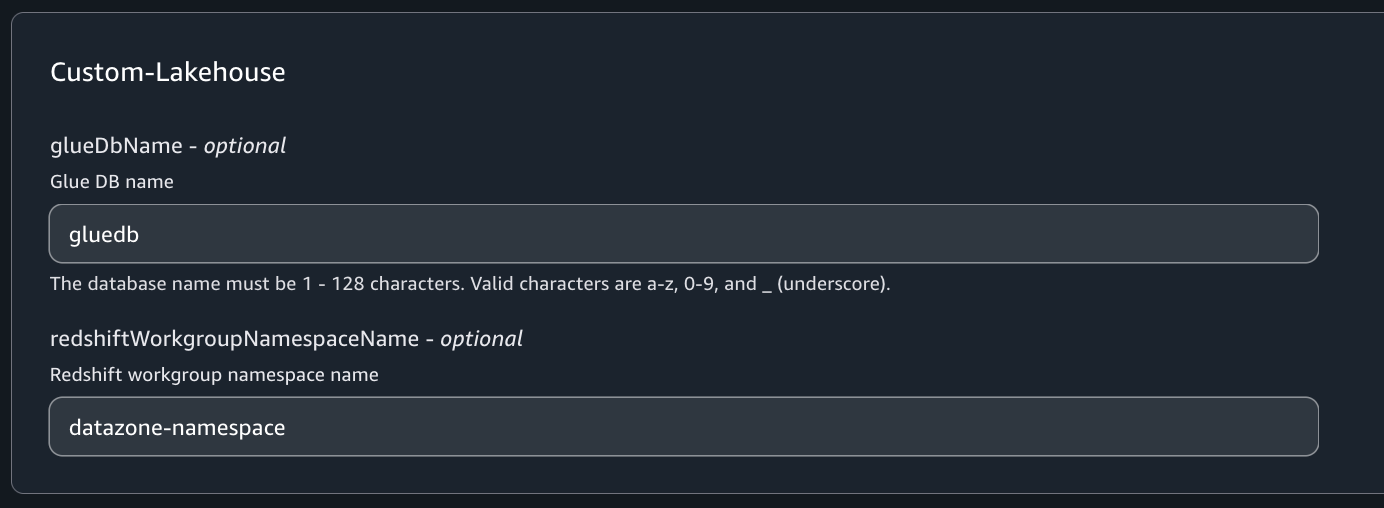
- On the Customize blueprint parameters page, review the parameters, modify as necessary, and choose Continue.
- Review your selections and choose Create project.
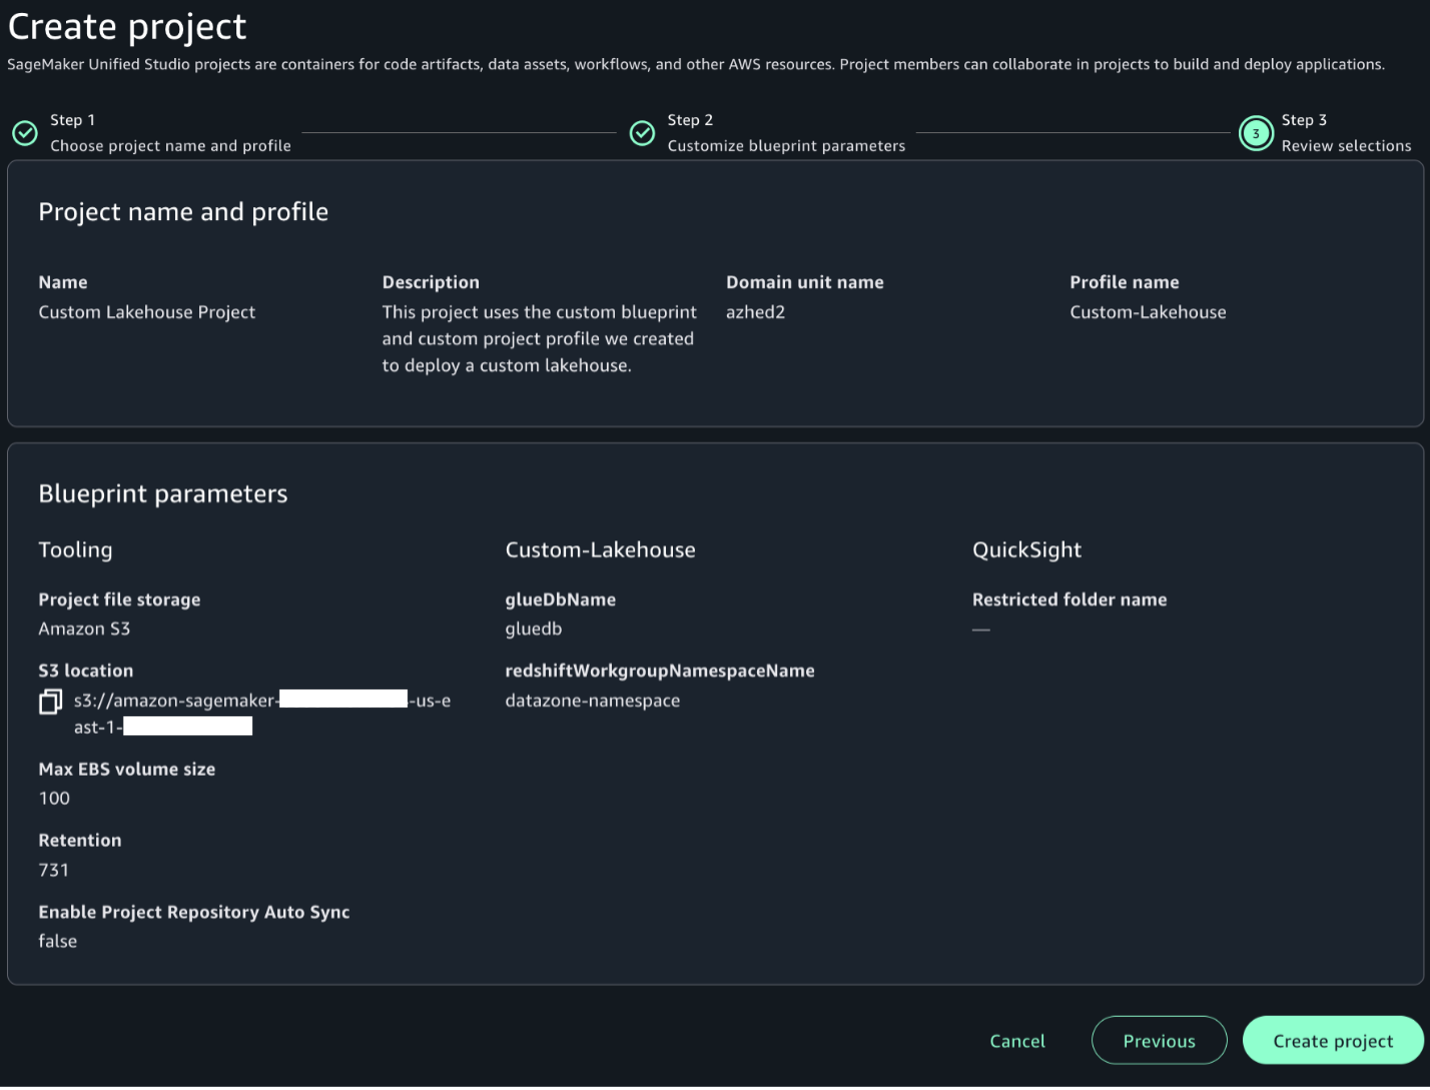
SageMaker Unified Studio will create the project environments with the resources defined in your custom blueprint.

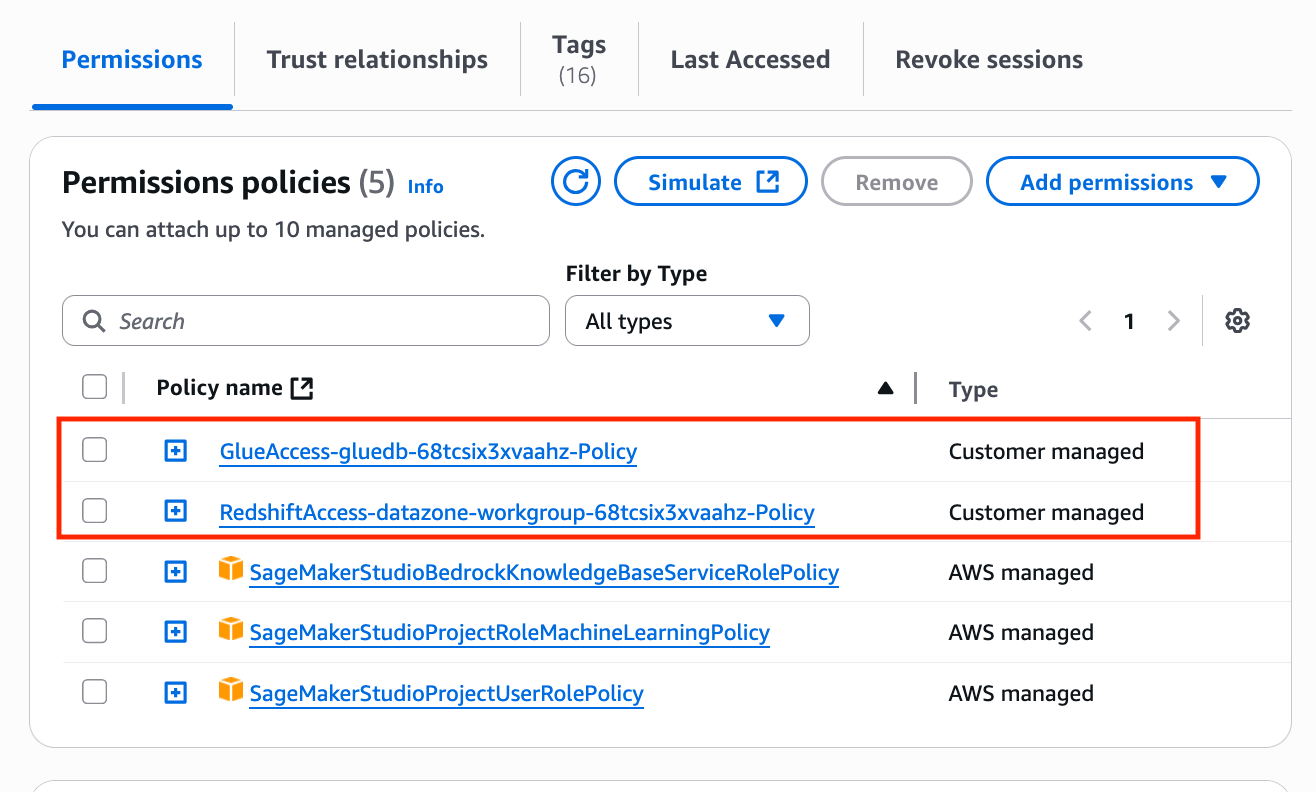
It will also attach the custom IAM policies defined and add them to the project role, as shown in the following screenshot.
Clean up
To avoid incurring additional costs, complete the following steps:
- Delete the project you created in SageMaker Unified Studio.
- Delete the custom project profile and custom blueprint you created.
- Delete the CloudFormation template.
Conclusion
In this post, we discussed custom blueprints, a new option during administrator setup in SageMaker Unified Studio. We showed how to create new custom blueprints and create custom project profiles that include the newly created custom blueprints. We also demonstrated how to create projects that implement custom blueprints.
Custom blueprints in SageMaker Unified Studio are intended to streamline and standardize data, analytics and AI workflows. By helping organizations create templated environments with preconfigured resources, security controls, and best practices, custom blueprints can reduce setup time while providing consistency and compliance across projects.
Organizations can now enforce their specific security standards and access controls at the project level using the ability to incorporate custom IAM policies directly into these blueprints. This granular control over permissions helps organizations create projects that adhere to corporate security policies right from inception. Custom blueprints can help you scale analytics and AI/ML operations securely, by including tooling designed to version control these templates, share them across teams, and automatically apply custom IAM policies.
To learn more about custom blueprints in SageMaker Unified Studio, refer to Custom blueprints.