AWS Compute Blog
Building a Photo Diary on Amazon Lightsail with Ghost
This post was written by Robert Zhu, Principal Developer Advocate at AWS.
Ghost is a simple and flexible alternative to WordPress. With Ghost, you can build a beautiful company website, personal portfolio, photo diary, or anything in between.
In this post, I show you how to start a photo diary using Ghost on Amazon Lightsail, AWS’ easiest solution for hosting virtual private servers. Compared to Amazon EC2, Amazon Lightsail takes care of advanced concepts like VPCs, Security Groups, and IAM policies for you until you want to re-engage those services. Amazon Lightsail also bundles monthly network transfer with the instance, whereas Amazon EC2 charges separately for network transfer.
There are two easy ways to get up and running with Ghost on Lightsail:
1. Using the Ghost Blueprint
Lightsail includes a number of common instance images known as “Blueprints.” When you launch a Blueprint, the selected software is installed and preconfigured, along with any dependencies. This is especially handy for Ghost because it saves you from having to install and configure MySQL. You can find our click-to-launch stacks in the Amazon Lightsail console, as shown in the following image.
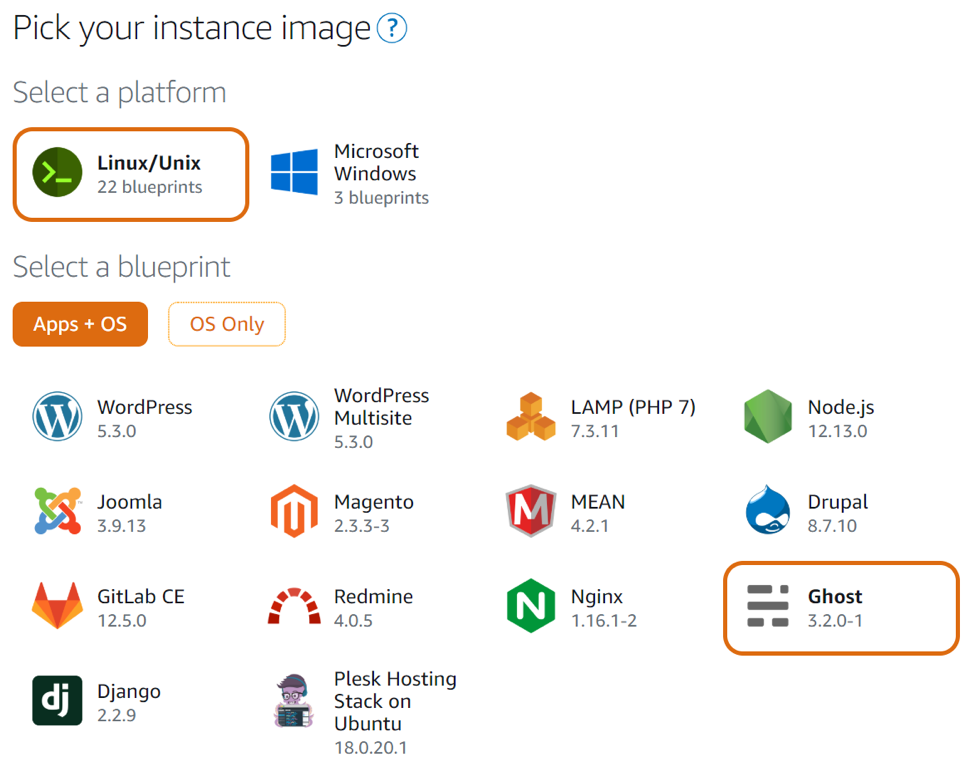
To launch a Blueprint instance, navigate to the Lightsail console. Then, select “Apps + OS” on the “Create Instance” page, and choose “Ghost.” Select the $5/month instance (this is the cheapest instance that meets the minimum requirements for running Ghost and its database on a single box).
Once the instance is up and running, find its IP address and open it in your browser. It may take a few minutes for Ghost to start running, during which you may see an error in the browser. As you can see, it is easy to start running Ghost on Amazon Lightsail with the Blueprint.
2. Running Ghost in a Container
As an alternative to launching a Ghost Blueprint, you can also run Ghost within a Docker container. In order to run Ghost within a container, you must install Docker on the Lightsail instance. Compared to the Blueprint approach, there are two advantages:
- Ability to run other applications on your Lightsail instance, such as forums, static websites, APIs, etc.
- Painless upgrades to new Ghost versions. When a new version of Ghost is released, you can upgrade with just a single command.
To run Ghost in a container complete the following steps.
- Create a Lightsail Instance (select Ubuntu 18.04).
- Connect to it using Lightsail’s browser-based SSH client. Once the instance is up and running, run the following commands to install Docker on your Lightsail instance after connecting:
sudo apt-get update && sudo apt-get install docker.io -y
sudo systemctl start docker
sudo systemctl enable docker
3. To make sure Docker is installed and running, run:
sudo docker run hello-world
You should see:

4. Start the ghost container by running:
sudo mkdir /var/lib/ghost
sudo mkdir /var/lib/ghost/content
sudo docker run -d --name blog -p 80:2368 -v /var/lib/ghost/content:/var/lib/ghost/content ghost
The last command runs the “ghost” container from the public Docker registry. It also maps port 80 (HTTP) on the host to port 2368 inside the container where Ghost is listening for HTTP requests. The -v argument maps a path on the host to a path inside the container. This way, any blog content is persisted into /var/lib/ghost/content and doesn’t disappear when you stop/delete/upgrade the container. The -d argument tells Docker to run the container in detached mode.
Now you can test your new blog.
- Find the public IP address of your Lightsail instance by selecting Manage from the Instance menu:

- Paste the IP address into a browser, and you should see your brand new Ghost blog:

Installing a Custom Theme
You can customize the look and feel of your Ghost blog by installing a custom theme. There are plenty of free and paid themes online. If you’re a designer, you can even build your own theme from scratch.
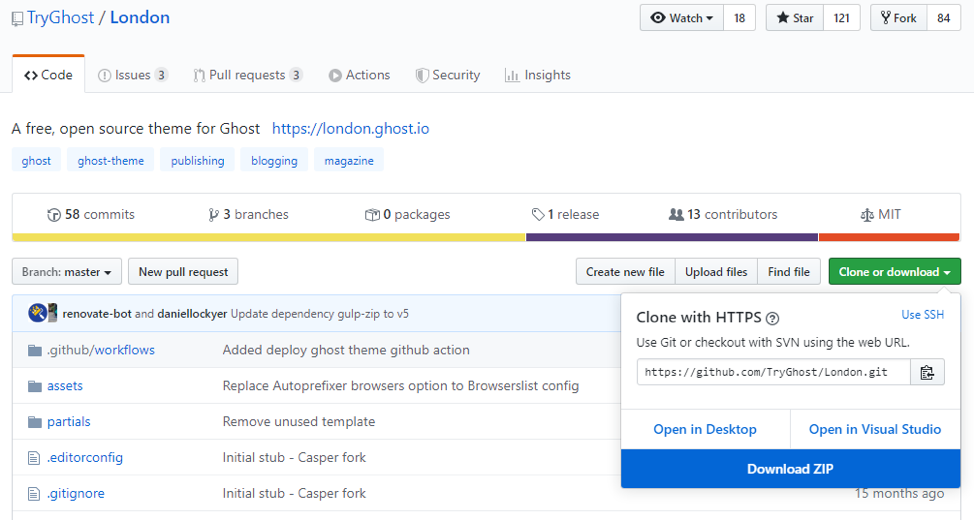
For my photo diary, I use the London theme. Download the theme by clicking “Clone or download” > “Download ZIP.”
Next, we need to log into the Ghost admin console. If you launched your Ghost instance using the Lightsail blueprint, follow these steps:
- SSH into your Ghost instance
- You should see the Bitnami welcome message and a bitnami_credentails file under your home directory.

- Display the default admin user name and password by typing
cat bitnami_credentials. - Use your credentials to administer your ghost instance at http://INSTANCEIPADDRESS/ghost.
If you launched Ghost within a Docker container, then you can administer Ghost by going to http://INSTANCEIPADDRESS/admin.
Once you are logged into the Ghost admin console, click on Settings > Design > Upload a theme.

You then see a pop-up prompt to upload the theme file. Drag and drop the theme file you downloaded above. Once the upload is complete, click “activate.”

Refresh your ghost blog IP address in another tab, and you should see a bold, new look and feel.
The Ghost admin console is also used for managing content, plugins, users, and more. For example, you can use header and footer scripts to inject code to add features like analytics and comments. By combining these features, you can make your Ghost blog stand out and fit your workflow.
Managing DNS with Lightsail
If you want to add a custom domain for your blog, you can manage that domain within Lightsail. By managing all your DNS records in one place, you can simplify your workflows.
For example, Lightsail offers the ability to assign Static IP addresses to instances, and then automatically associate an A record to a static IP address. This is a quality-of-life improvement that helps you avoid typing the wrong IP address.
Here are the steps to manage your domain with Lightsail:
- Register your domain with a domain registrar, such as Route 53 or GoDaddy.
- Once registered, create a DNS Zone within Lightsail and note the nam eservers.
- In your domain registrar, replace the domain name servers with your Lightsail DNS Zone name servers. If you’re using Route 53, do not replace the name servers in the default hosted zone. Here’s a video that makes everything clear.
- After creating your DNS Zone in Lightsail, you can now associate A (address) records with your Lightsail instances.
Once you have a custom domain, you’ll want to consider adding SSL. Here are step-by-step instructions for issuing an SSL certificate using Let’s Encrypt and terminating SSL using NGNIX.
Conclusion
While Ghost is already a very flexible platform, the Ghost community constantly adds new plugins, themes, extensions, and features. Hosting Ghost yourself is a great way to learn some basic server workflows and get the most out of your Ghost blog. And with Lightsail, it’s simple and cheap! Please feel free to contact me with comments and questions. Go ahead and start running Ghost on Amazon Lightsail.
About the Author:
Robert Zhu is a Principal Developer Evangelist at Amazon Web Services. He focuses on APIs, Web, Mobile, and Gaming. Prior to joining AWS, he worked on GraphQL at Facebook. While at Microsoft, he worked on the .net Framework, Windows Server, and Microsoft Game Studios. In his spare time, he loves learning about history, economics, and psychology. You can reach him @rbzhu on twitter or directly via telepathy.