AWS Contact Center
Automate agent onboarding with Amazon Connect using PingOne
The speed and accuracy of agent onboarding are critical to operational performance in modern contact centers. Given the ongoing workforce shifts driven by business demands, seasonality, and niche expertise, it’s imperative that organizations optimize these onboarding workflows. By automating processes such as provisioning and deprovisioning, businesses reduce operational errors, enhance data security, and significantly accelerate deployment times. Automation enforces consistent, role-based access controls, instantly removes credentials for exiting personnel, and reduces the risks tied to manual administration. Furthermore, integrated audit trails and real-time access monitoring offer transparency, ensuring regulatory compliance and swift response to emerging security threats.
In our previous posts, we demonstrate how to automate agent onboarding using user provisioning API operations within Amazon Connect and Okta. In this post, we’ll explore how to enhance contact center operational efficiency in agent onboarding by integrating PingOne Event Hooks with Amazon Connect. Once configured, the integration allows for the automatic provisioning of new agents in Amazon Connect the moment they are created in PingOne. This automation reduces manual errors, supports regulatory compliance, and accelerates the onboarding workflow.
Overview of the solution
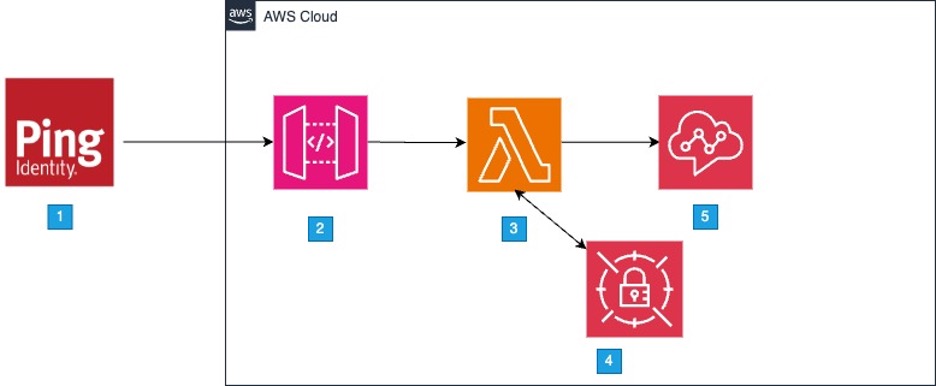
The architecture (Figure 1) of the solution is shown above.
- An agent is added to the Amazon Connect group in PingOne.
- Adding the agent to the Amazon Connect Agents group triggers an Event Hook in PingOne, sending the agent User ID and Environment ID to the Amazon API Gateway.
- Amazon API Gateway calls the AWS Lambda function to process the request.
- AWS Secrets Manager is used to store API credentials.
- The AWS Lambda function uses the Environment ID and User ID to call PingOne Users API to retrieve additional user information, such as user first name, last name, and login ID.
- The Lambda function uses the agent details to create the agent in Amazon Connect using CreateUser API.
Prerequisites
For this walkthrough, you should have the following prerequisites:
- An AWS account
- A PingOne account
- An Amazon Connect instance
- Configured single sign-on (SSO) integration between Amazon Connect and PingOne
In addition, you should have knowledge and understanding of the following services and features:
- AWS Lambda
- Amazon API Gateway
- Basic understanding of Amazon Connect public APIs
- Basic knowledge of Amazon Connect
- Basic knowledge of PingOne
- Basic knowledge of AWS CloudFormation
Deployment steps
- Install Git
- Using Git, clone the repository from GitHub
git clone https://github.com/aws-samples/sample-automate-agent-onboarding-with-amazon-connect-using-pingone.git- In your terminal, move into the root directory
cd sample-automate-agent-onboarding-with-amazon-connect-using-pingonePingOne Configuration Steps
Configure User Group and Application Assignment in PingOne
- Log in to the PingOne Admin Console – Access your PingOne Admin Console dashboard using your admin credentials.
- Navigate to the Amazon Connect environment
- Navigate to the Groups Menu – Go to the Directory section and click on the Groups menu.
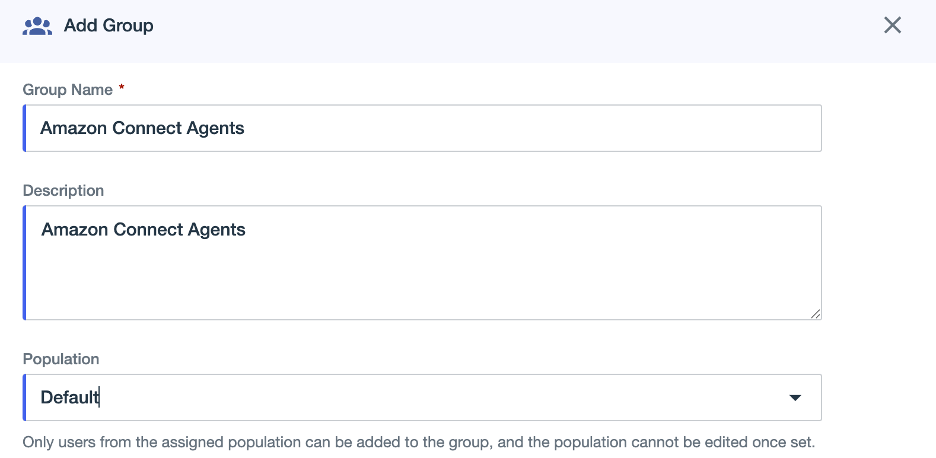
- Create a New Group – Click the Add Group button. In the form that appears:
- Enter a Name: Amazon Connect
- Optionally, add a Description: This group contains Amazon Connect agents. (Figure 2)
You can also extend this solution to configure multiple groups tailored to your business needs. These groups could represent job roles (such as agents, supervisors, and admins) or different lines of business.
- Navigate to Applications
- Create a new application with Worker application type and save the configuration.
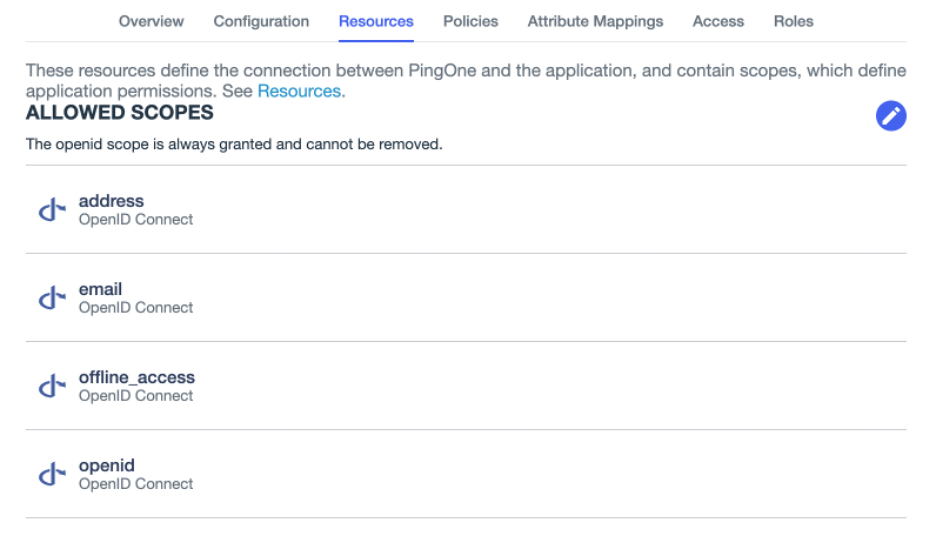
- Navigate to Resources tab and associate openid, p1:read:user or p1:read:users scope to the application. (Figure 3)
- Navigate to Access tab and associate the Amazon Connect Agents group created in the previous step.
Configure PingOne Webhook
- Navigate to Integrations menu – Go to the Webhooks section.
- Select Add Webhook button in the page.
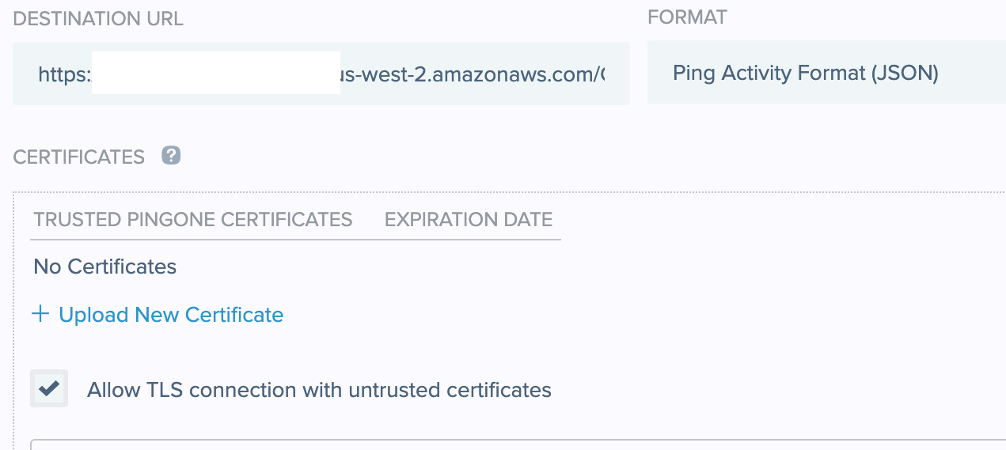
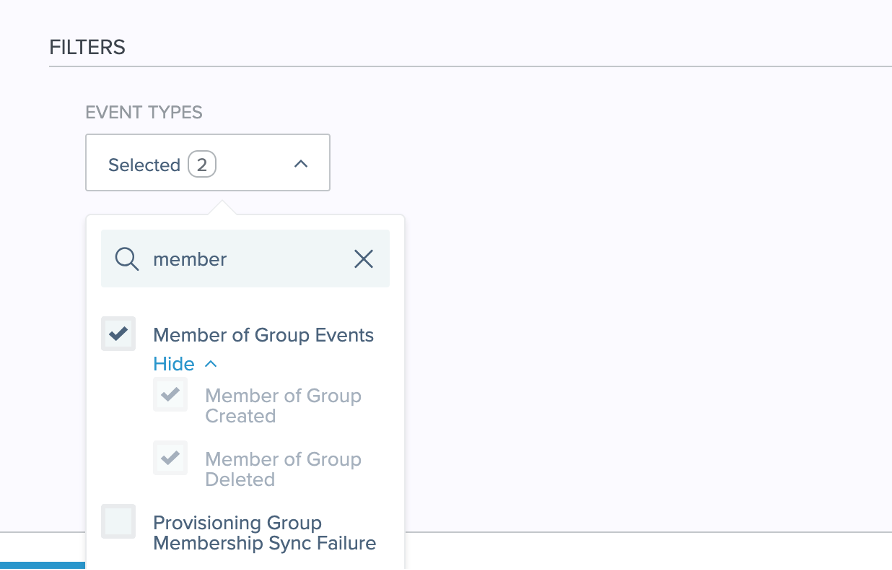
- Complete these fields: (Figure 4)
- Name: Provide a name for your Webhook connection
- Destination URL: Enter the Destination URL. For now, you can leave this field blank or use a placeholder URL. After you deploy the CloudFormation stack, the correct API Gateway URL will be provided in the Outputs section.
- Format: Choose Ping Activity Format (JSON)
- Allow TLS connection with untrusted certificates: Select the checkbox
- Under Event Types, select Member of Groups Event: Member of Group Created and Member of Group Deleted. (Figure 5)
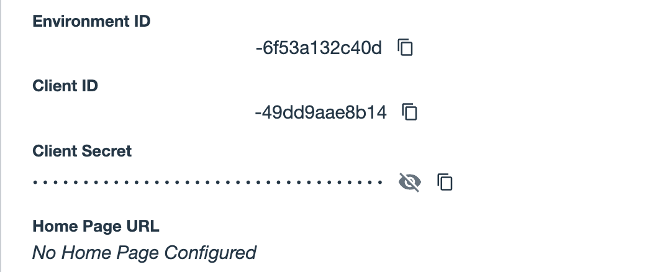
- Obtain client ID, client secret, and environment ID from your PingOne environment. (Figure 6)
AWS CloudFormation deployment
- Navigate to CloudFormation service page in your AWS Console.
- Select Create stack with new resources
- Choose Upload a template file and upload the cft.yaml file obtained from code sample and choose Next.
- Enter CloudFormation parameters for the template and choose Next. (Figure 7)
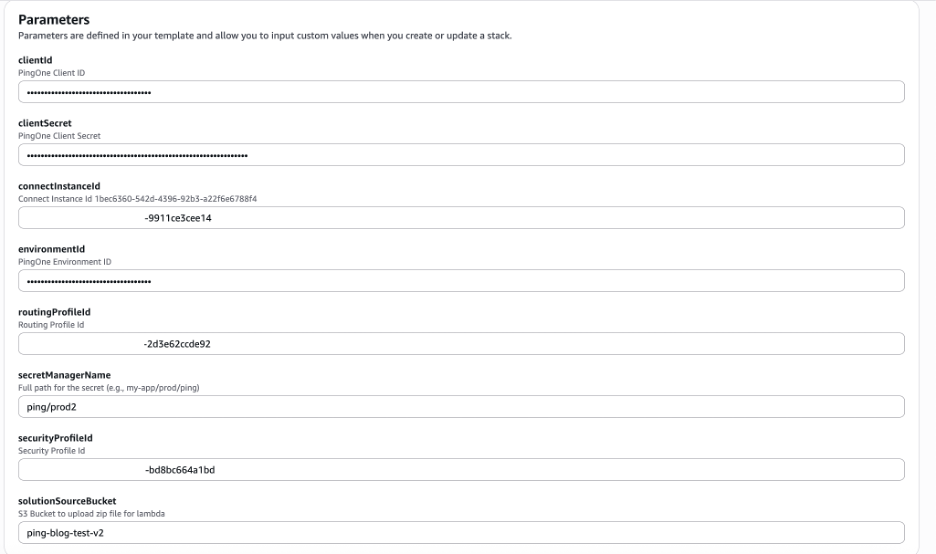
- Stack name: Provide a name for your CloudFormation stack.
- Client ID: Enter the Client ID obtained from PingOne
- Client Secret: Enter the Client Secret obtained from PingOne
- Connect Instance ID: Find your Amazon Connect instance ID or ARN
- Environment ID: Enter the Environment ID obtained from PingOne
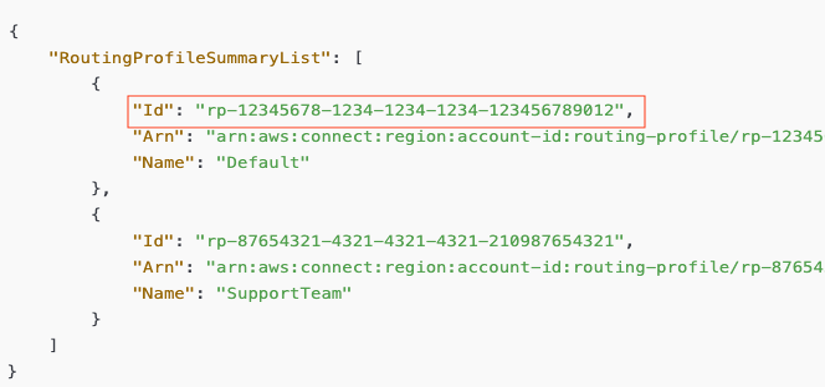
- Routing Profile ID: You can retrieve the Routing Profile ID using the CLI by running:
aws connect list-routing-profiles --instance-id Instance-IDReplace Instance-ID with your Amazon Connect Instance ID. The output will include Routing Profile ID and Name of each profile. Select the Routing Profile ID you would like to auto-assign to your agents. (Figure 8)
- Secret Manager Name: Provide a name for your Secrets Manager store where the PingOne credentials are stored and retrieved securely.
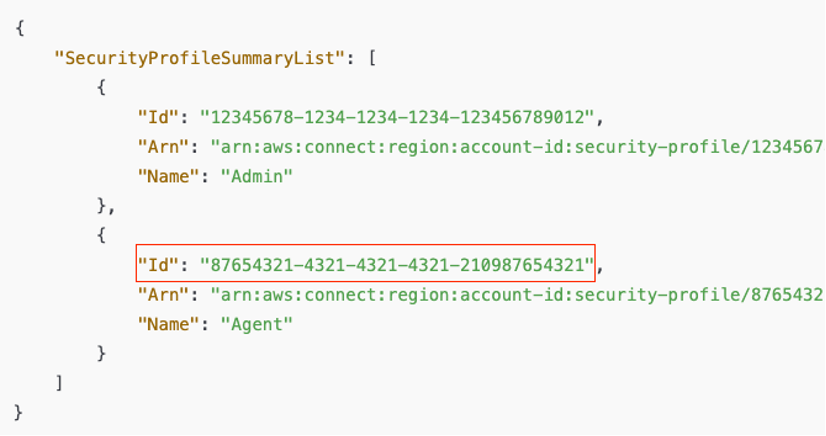
- Security Profile ID: You can retrieve the Security Profile ID using the following CLI command:
aws connect list-security-profiles --instance-id Instance-IDReplace Instance-ID with your Amazon Connect Instance ID. The output will include Security Profile ID and Name of each profile. Select the Security Profile ID you would like to auto-assign to your agents. (Figure 9)
- Acknowledge the necessary access capabilities for CloudFormation template and complete the deployment.
Test the solution
- Log in to the PingOne Admin Console – Access your PingOne Admin Console using your admin credentials.
- Navigate to Amazon Connect environment
- Navigate to Directory section and click on Users menu.
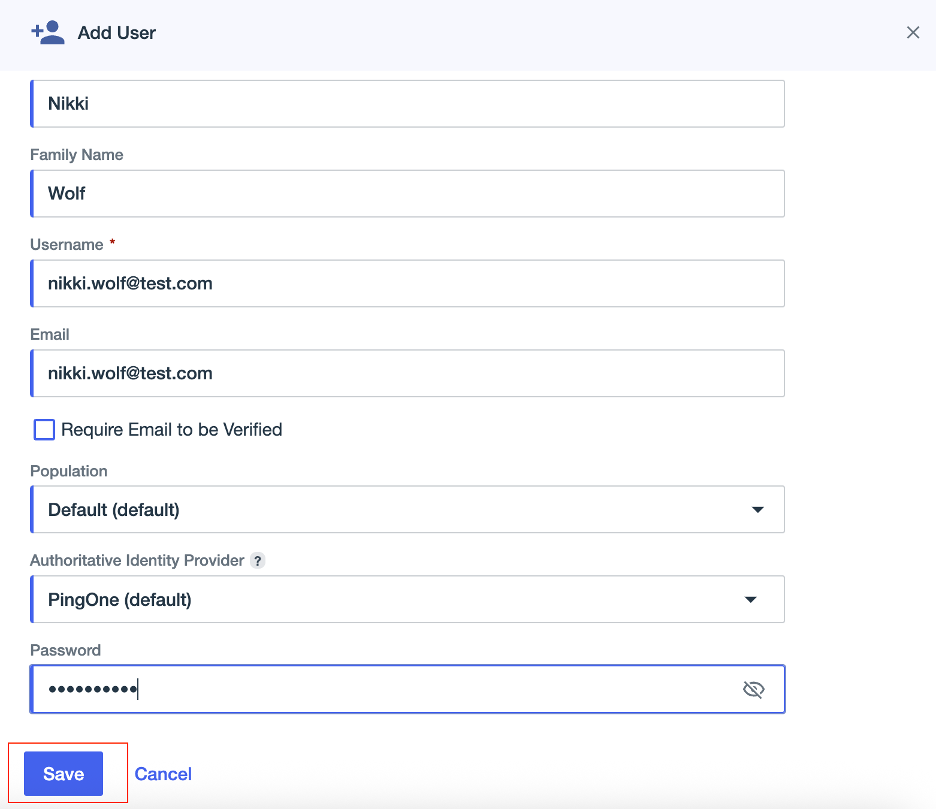
- Click the Add User button, complete the Add User form, and then click Save. (Figure 10)
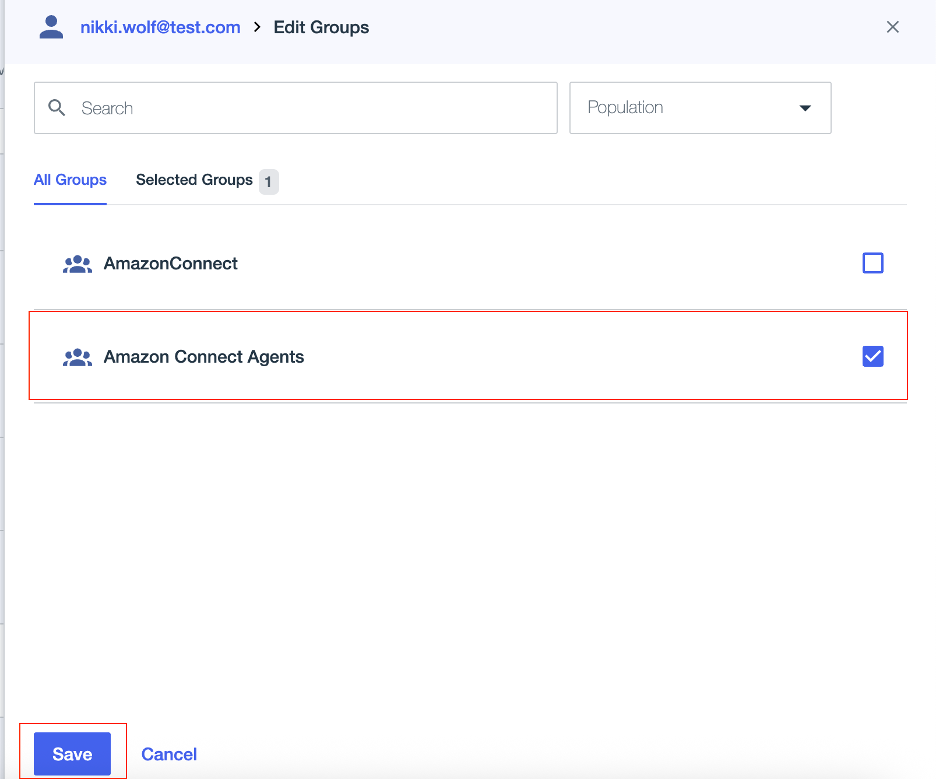
- Navigate to the Groups Tab. Select Manage Groups.
- Select Amazon Connect Agents group and click Save button. (Figure 11)
- Login to your Amazon Connect instance.
- In the left-hand navigation pane, go to Users and select User Management. You should now see that the agent created in PingOne has been automatically provisioned in Amazon Connect. (Figure 12)

Important architectural consideration for production workload
Amazon Connect imposes Transactions Per Second (TPS) limits on APIs to ensure reliability and fair usage across customers. When applications exceed these limits, they can experience throttling, resulting in failed API calls. To handle high TPS gracefully, we recommend using decoupled, asynchronous architectures with services like Amazon SQS (Simple Queue Service). For example, incoming requests can be pushed to an SQS queue, where they are processed at a controlled rate by backend workers, preventing TPS spikes.
Conclusion
This post illustrates how integrating PingOne with Amazon Connect automates user provisioning for contact center agents, boosting operational efficiency. By streamlining agent onboarding, organizations can achieve up to 95% time savings, reducing administrative burdens and costs. Adding new agents to a PingOne group automatically grants them appropriate Amazon Connect permissions, eliminating manual tasks and minimizing errors. Pairing PingOne with Amazon Connect further enhances efficiency, strengthens compliance, and improves productivity. This allows IT teams to prioritize strategic goals while ensuring agents experience a smooth, secure onboarding process.
About the authors

Michael Goligorsky
Mike Goligorsky is a Senior Solutions Architect at Amazon Web Services, bringing over 25 years of enterprise IT experience in Fortune 100 companies. He thrives on collaborating with customers to design innovative, scalable, and efficient cloud solutions for their most complex challenges. When he’s not architecting in the cloud, he’s exploring new destinations around the globe with his family.

Manoj Srinivas
Manoj Srinivas is a Senior Product Manager at AWS, based in Dallas, Texas. He specializes in helping businesses modernize their customer experience through Amazon Connect. He is passionate about Identity Management, Security, and Unified Communications, focusing on accelerating cloud adoption for organizations.

Ritesh Choudhary
Ritesh Choudhary is a Specialist Solutions Architect at AWS. Ritesh works with our customers to deliver exceptional customer service to their clients using Amazon Connect.