AWS HPC Blog
A VDI solution with EnginFrame and NICE DCV Session Manager built with AWS CDK
This post was written by Dario La Porta, AWS Professional Services Senior Consultant for HPC.
Customers across a wide range of industries such as energy, life sciences, and design and engineering are facing challenges in managing and analyzing their data. Not only is the amount and velocity of data increasing, but so is the complexity and diversity of the data sources.
Organizations that face these types of challenges seek to provide powerful, easy-to-use, and cost-effective solutions to their research staff. This allows them to spend their time solving business-critical problems, not managing infrastructure. Templates for deploying high performance computing (HPC) environments on AWS that include compute, storage, and industry-specific applications provide a great baseline for AWS customers to build on top of.
In this blog post, we will cover how to set up a fully functional Linux and Windows virtual desktop infrastructure (VDI) that is accessible through a simple web-based user interface. The VDI solution solves for the problem of providing R&D users with an easily accessible and performant user interface to submit graphics-intensive analysis requests, and review results remotely. This eliminates the need for expensive dedicated workstations, or transferring large amounts of data from the cloud to client machines. We will cover other parts of a templated HPC environment in future blog posts.
The solution uses three main components:
- NICE EnginFrameis an advanced web front end interface for accessing technical and scientific applications in the Cloud. This enables HPC users to get the job done faster, without facing the complexity of the underlying computing infrastructure.
- NICE DCVis a high-performance remote display protocol that eliminates the need to ship output files to client devices, and provides a smooth and bandwidth-efficient experience to stream HPC 3D graphics remotely.
- NICE DCV Session Managercreates and manages the lifecycle of NICE DCV sessions across a fleet of NICE DCV servers.
The solution is deployed using the AWS Cloud Developer Kit (AWS CDK), a software development framework for defining cloud infrastructure in code and provisioning it through AWS CloudFormation.
Figure 1 shows the different components of the VDI solution. The architecture shows how a user interacts with EnginFrame to launch instances across two Availability Zones according to the Auto Scaling groups for Windows and Linux NICE DCV instances.
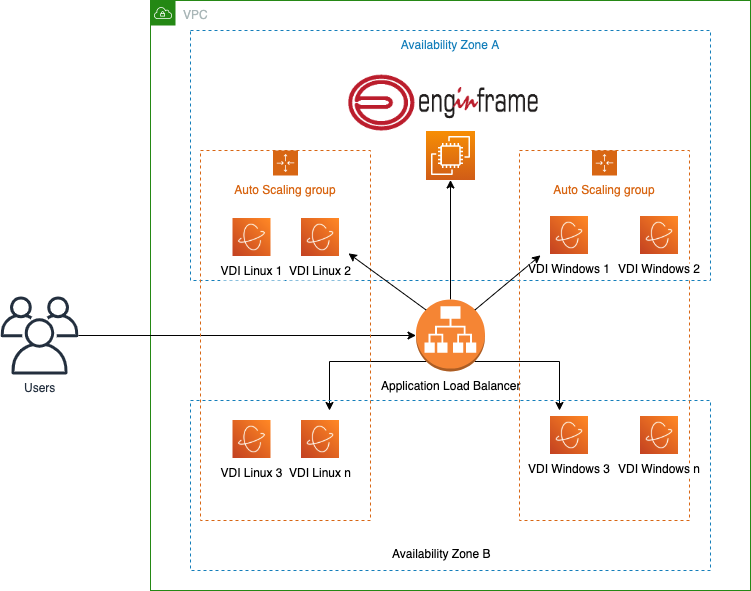
Figure 1. A high-level architecture of the VDI solution showing deployment of resources across Availability Zones in a Region.
We will now walk-through setting up the VDI solution in your own AWS account.
Creation of the default account password
The EnginFrame default administrator account, named efadmin, requires a password. To improve the security of the solution, the password must be created by the user and saved in AWS Secrets Manager. The AWS Secrets Manager tutorial explains how to create your secret. The password must have letters, numbers, and one special character. The ARN of the created secret will be required in the next section.
Deploy the solution with AWS CDK
The code used for this solution can be downloaded from this git repository. Once you download or clone the repository to your local development machine, navigate to the root repository directory. There you will find the following:
- app.py contains the configuration variables used to deploy the environment. Before the deployment, you must customize it with the required configurations. Be sure to modify
<region>and<account>to match the values for your account.<key_name>is your Amazon EC2 key pair.<arn_secret>is the ARN of the secret created in the previous step. - The following additional parameters can also be configured accordingly to your requirements:
ec2_type_enginframe: The EnginFrame instance typeec2_type_dcv_linux: The NICE DCV Linux instance typeec2_type_dcv_windows: The NICE DCV Windows instance typelinux_dcv_number: The number of NICE DCV Linux nodeswindows_dcv_number: The number of NICE DCV Windows nodesebs_engingframe_size: The Amazon Elastic Block Store (EBS) size for the EnginFrame instanceebs_dcv_linux_size: The Amazon EBS size for the NICE DCV Linux instanceebs_dcv_windows_size: The Amazon EBS size for the NICE DCV Windows instance
- dcv_session_manager_infrastructure/dcv_session_manager_infrastructure_stack.py contains the main functions to deploy all the required resources.
- lambda/cert.py is the Lambda function used to create the Application Load Balancer
- The user data directory contains the scripts used to configure the EnginFrame and NICE DCV nodes.
The following commands can be used for the deployment:
python3 -m venv .env
source .env/bin/activate
python3 -m pip install -r requirements.txt
cdk bootstrap aws://<account>/<region>
cdk deploy
The deployment creates, using the default configuration, one EnginFrame instance, one NICE DCV Linux instance, and one NICE DCV Windows instance across two Availability Zones.
After the deployment, note the Application Load Balancer URL address:
Outputs:
dcv-session-manager-infrastructure4.EnginFramePortalURL = https://dcv-s-EFLB1-1A2BCDEF3GHIJK-1234567890.eu-west-1.elb.amazonaws.com
This address will be used to access the NICE EnginFrame portal.
Accessing the EnginFrame portal
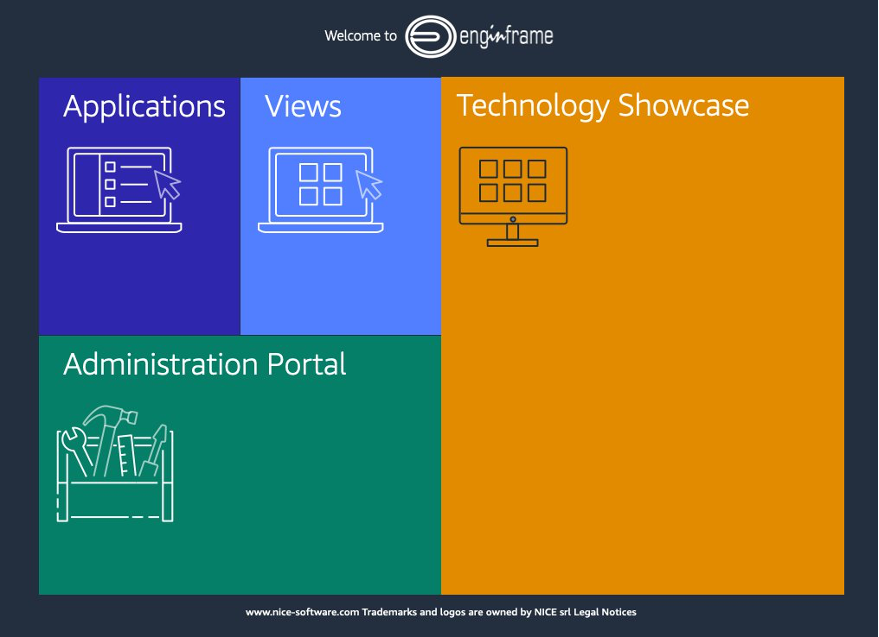
Figure 2. The EnginFrame web portal.
When you access to the URL provided at the end of the previous step, the webpage in Figure 2 is displayed.
The Views section is used to start the interactive sessions. The User, required for the access, is named efadmin. The Password of this user is the one saved in Secret Manager.
Start the interactive sessions
The services on the left side menu of the portal, and in the Services section, the Linux Desktop, and Windows Desktop menu items can start the interactive sessions. First select the Windows Desktop to start a new NICE DCV session hosted on a Windows instance. The password required to access to the Administrator Windows account is the same used to log into the EnginFrame portal.
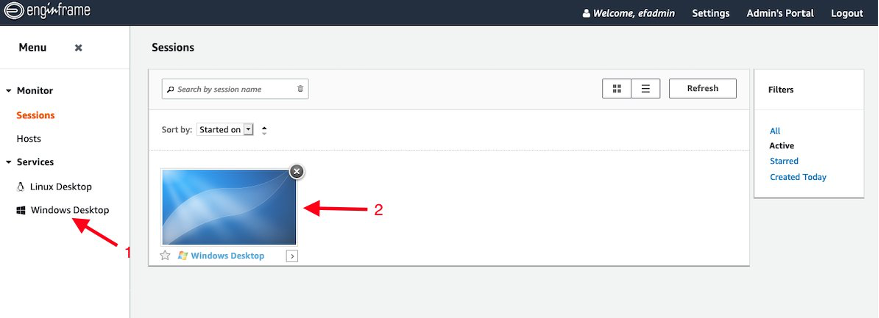
Figure 3. Starting a Windows VDI session
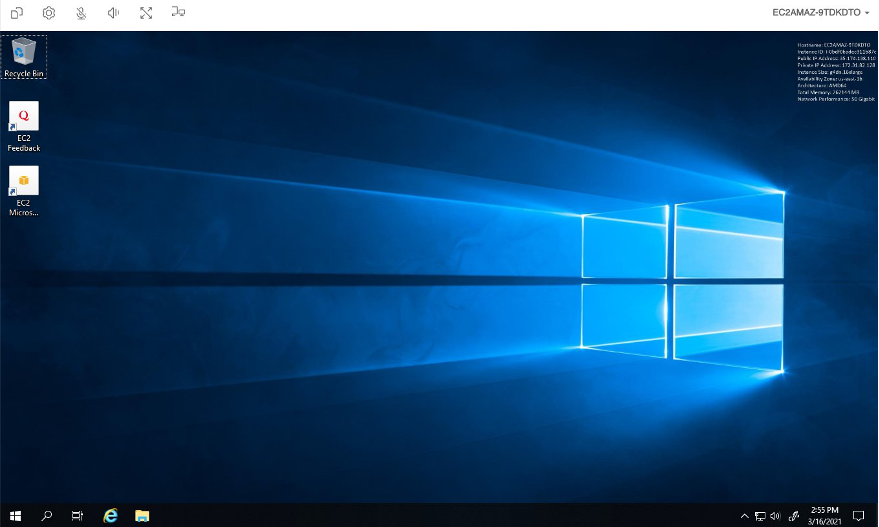
Figure 4. The Windows session desktop.
Next we will check the Linux session functionality. Return to the EnginFrame portal, and in the Services section of the left-hand menu, choose Linux Desktop. This will start a Linux NICE DCV session. The Linux efadmin password is the same as mentioned above for the Windows session.
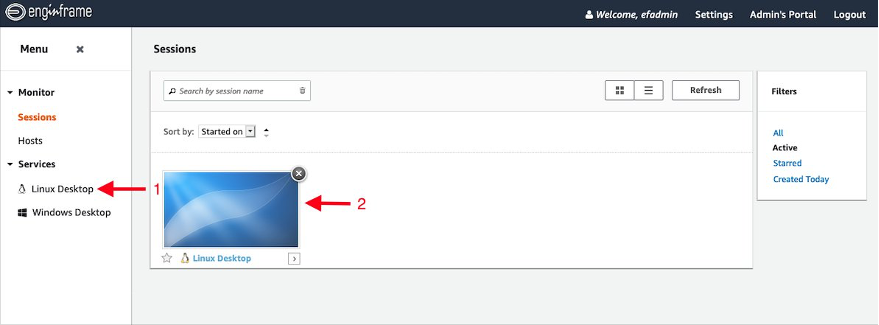
Figure 5. Starting the Linux VDI session.
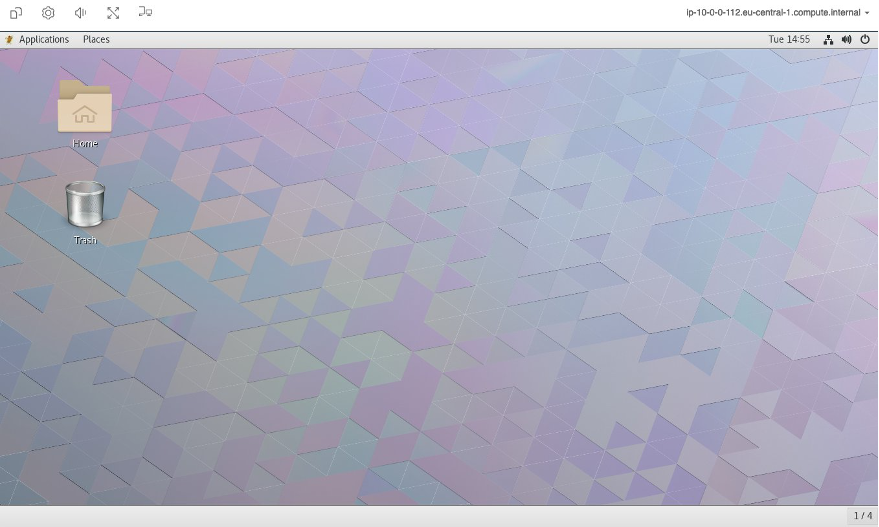
Figure 6. The Linux VDI session desktop.
The default configuration for the NICE DCV nodes uses the g4dn.xlarge instance type. This instance is the most cost-effective and versatile GPU instance for deploying graphics-intensive applications. You can modify the used instance type and the number of deployed instances by editing the app.py script. To apply the configuration change to a running environment, you can run the cdk deploy command from the dcv-session-manager-infrastructure repository’s root directory.
Clean up and teardown
In order to avoid additional charges, you can destroy the created resources by running the cdk destroy command from the dcv-session-manager-infrastructure repository’s root directory.
Conclusion
In this post, I show how to deploy a complete Windows and Linux VDI infrastructure using AWS CDK. The solution uses EnginFrame as central point of access to the VDI solution, and NICE DCV as remote display protocol that provides a secure way to deliver remote desktops and application streaming. It also uses NICE DCV Session Manager to create and manage the lifecycle of NICE DCV sessions across a fleet of NICE DCV servers.
Energy, life sciences, and computer-aided design and engineering workloads can benefit from this solution to run graphics-intensive applications remotely without the need for expensive dedicated workstations, or transferring large amounts of data from the cloud to client machines. Users can interact with a secure, intuitive, service-oriented interface to their interactive applications through a standard web browser. It also provides users the flexibility to access from any type of device, including mobile devices.
To learn more, read about how to use EnginFrame, NICE DCV, and NICE DCV Session Manager.