AWS Cloud Operations Blog
Using environment variables with Amazon CloudWatch Synthetics
With the increase in online traffic, organizations have prioritized the continuous monitoring of their applications so that they can detect issues before they cause widespread problems. Canaries emulate a user flow, making it possible for organizations to proactively catch errors thereby ensuring a good customer experience. Amazon CloudWatch Synthetics allows you to create canaries to monitor environments like websites, API endpoints, web workflows, single webpages, multipage web workflows such as wizards and checkouts, and more. Each canary run is implemented using an AWS Lambda function. CloudWatch Synthetics now supports the configuration of environment variables that can be accessed during the canary’s execution. Therefore, it’s now easier to write and design multiple canaries without having to modify the canary code.
Overview
You can use environment variables to adjust your canary’s behavior without updating code. An environment variable is a pair of strings that are stored as part of the canary’s configuration. The canary runtime makes environment variables available to your code.
You might want to use environment variables to:
- Configure one script for multiple endpoints
- Store database connection details
- Configure secrets using AWS Secrets Manager
- Set logging levels
- Set cookies for a front-end application
Configure one script for multiple endpoints
Consider the example of an organization that has three endpoints for different stages of software development: production, development, and pre-production. If a user wants to run a single script against all three endpoints, the user can create a single script and configure endPoint as an environment variable. The user then uploads this script to an Amazon Simple Storage Service (Amazon S3) bucket. The user can now create three canaries (for example, production, development, and pre-production). That single script stored in the S3 bucket can now be used for three endpoints just by modifying the endPoint environment variable.
Store database connection details
Consider the example of a user who is currently testing an API that takes in a database connection detail to select data from, analyze, and output it in the response. In the testing phase, it requires connection to a development database. However, once the code is released, the database connection details must be updated to point to the production database. The user can create a script to call the API and set database connection parameters as environment variables. Later, to switch the script to the production database, the user can modify the value of the environment variable.
Configure Secrets using AWS Secrets Manager
Consider the example of a script that emulates signing in to a website. The requirement is to emulate multiple flows, with each flow using a set of credentials stored in AWS Secrets Manager. You can write a single script where the secret name is configured as an environment variable.
Set logging levels
Consider the example of a user who creates a canary and uses logging level as a parameter to be entered in environment variables. The user has multiple canaries running, but for unknown reasons, one of the canaries keeps failing. To debug, the user must view the debug logs. Instead of writing a new script, this can be achieved by modifying the environment variable set for logging level.
Set cookies for a front-end application
Consider the example of a user who wants to test a front-end application with different cookie values. Using environment variables, the user can create a script with parameterized cookie names that allows switching between cookies without modifying the script.
Approach
Using one script to create three canaries
Here we show how you can create three canaries using a single script written in Node.js to monitor the development, pre-production, and production stages by modifying the environment variable values. The canaries are used to monitor their respective endpoints by emulating a login made with credentials stored in AWS Secrets Manager.
The following parts of the script must be configurable for the three stages:
1) Endpoint URL
2) Logging level
3) Credentials to be used for each stage
Because the stages use the same script, you can store it on your local machine or in a ZIP file in an Amazon S3 bucket. In the example we use here, we store the script in Amazon S3.
Here is the script in Node.js:
var synthetics = require('Synthetics');
const log = require('SyntheticsLogger');

const AWS = require('aws-sdk');
const secretsManager = new AWS.SecretsManager();

const getSecrets = async (secretName) => {
    var params = {
        SecretId: secretName
    };
    return await secretsManager.getSecretValue(params).promise();
}

const loginTest = async function () {

    // Setting the log level (0-3)
    synthetics.setLogLevel(process.env.LOG_LEVEL);

    // This is where we initialize the endpoint url
    const URL = process.env.URL;

    let page = await synthetics.getPage();


    const response = await page.goto(URL, {waitUntil: 'domcontentloaded', timeout: 30000});
    if (!response) {
        throw "Failed to load page!";
    }
    //Wait for page to render.
    await page.waitFor(15000);
    await synthetics.takeScreenshot('loaded', 'loaded');
    let pageTitle = await page.title();
    log.info('Page title: ' + pageTitle);
    log.info('Environment variable: ' + process.env.URL);

    // These lines will only be logged in case if the log level is set to 0(debug)
    log.debug('Request: ' + URL);

    //If the response status code is not a 2xx success code
    if (response.status() < 200 || response.status() > 302) {
        throw "Failed to load page!";
    }

    // Let’s test the login
    let secrets = await getSecrets("secretname");
    let secretsObj = JSON.parse(secrets.SecretString);
    await synthetics.executeStep('login', async function () {
        await page.type("#username", secretsObj.username);
        await page.type("#password", secretsObj.password);

        await Promise.all([
          page.waitForNavigation({ timeout: 30000 }),
          await page.click("#submit")
        ]);
    });

    // Verify login was successful
    await synthetics.executeStep('verify', async function () {
        await page.waitForXPath("#loginSuccess", { timeout: 30000 });
    });


};

exports.handler = async () => {
    return await loginTest();

        }
The script starts by setting the log level, using a function provided by CloudWatch Synthetics. For the development endpoint, you must log errors and some debugging information. For the production endpoint, you must log errors only.
The environment variables in the script follow this pattern:
process.env.<<name of your variable>>
We have configured the environment variables as follows:
a) Log level: LOG_LEVEL
b) Endpoint: URL
c) AWS Secrets Manager secret name: SECRET_NAME
Production canary
- Open the Amazon CloudWatch console and set your AWS Region.
- In the left navigation pane, under Synthetics, choose Canaries.
- Choose Create canary.
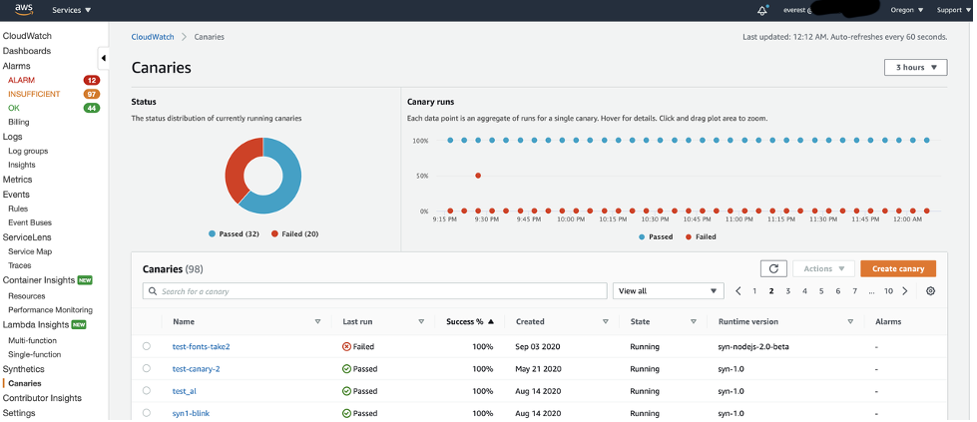
Canaries page in the CloudWatch console
- On the Create canary page, choose Import from S3.
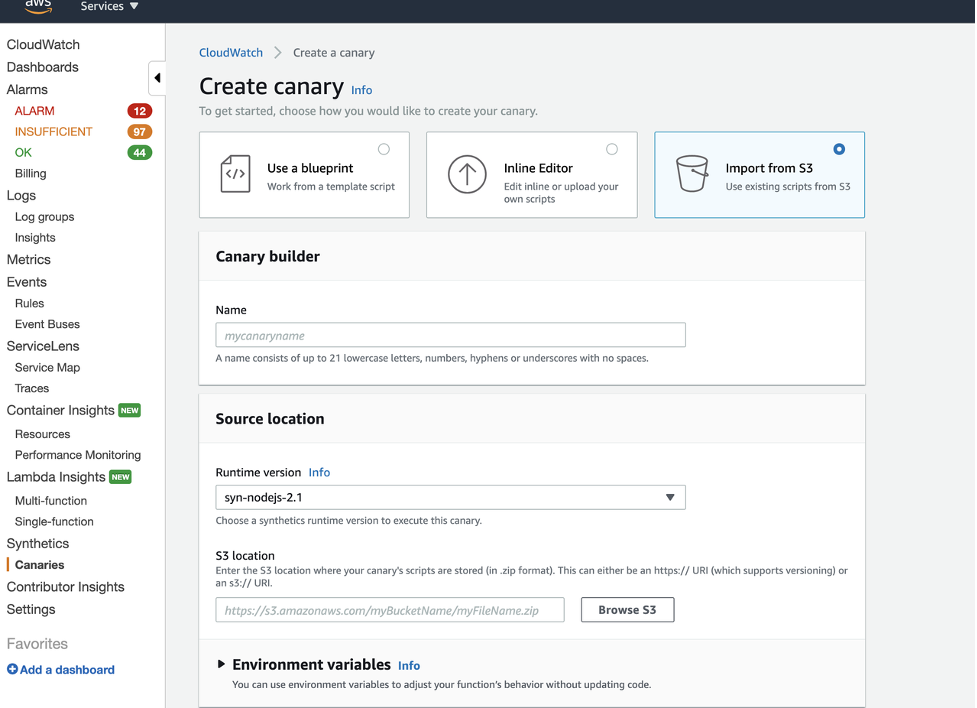
Create canary page
- In Name, enter my_app_prod.
- Upload the code to an S3 bucket as a zip. Depending on the complexity of the code, it can also be directly copied into the Synthetics UI script editor.

Upload page for Amazon S3
- Enter the URL for the ZIP folder stored in the S3 bucket.
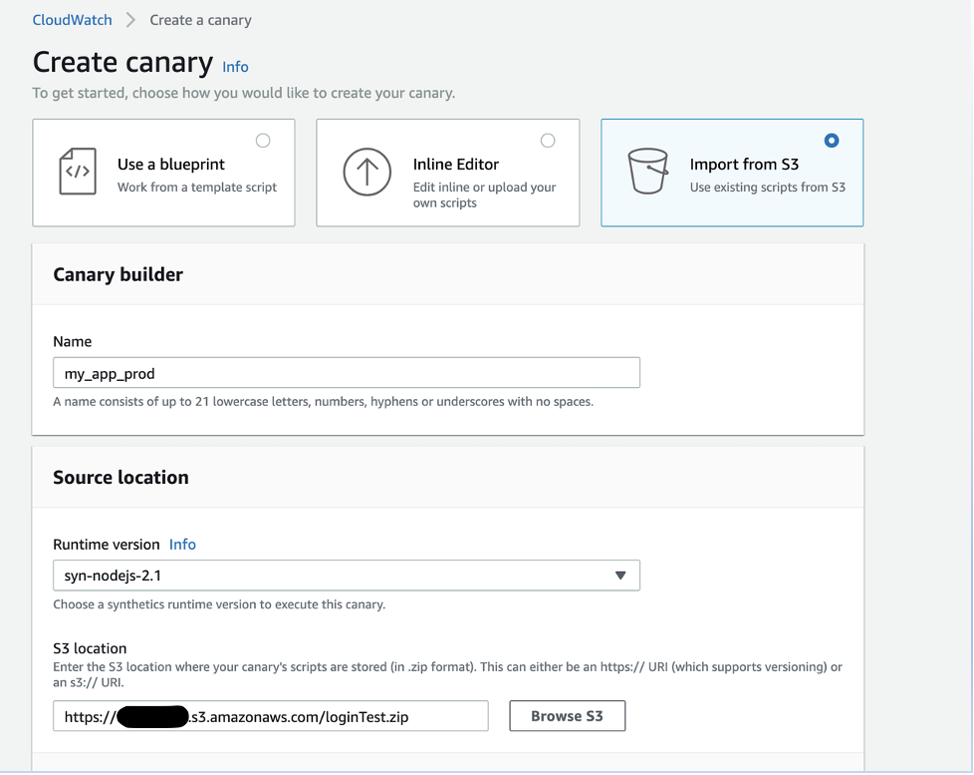
Source Code Location
- On the Create canary page, expand Environment variables, and add the following environment variables that will be used in the script as key-value pairs.
a) Endpoint: URL
b) Logging level: LOG_LEVEL
c) Name of the secret: SECRET_NAME
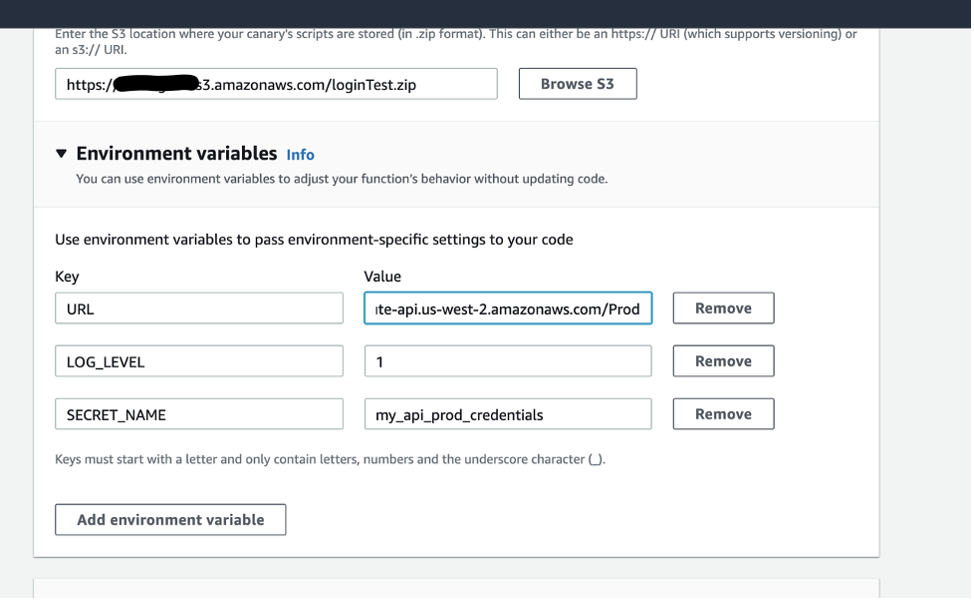
Adding environment variables
- Under Lambda handler, for Script entry point, enter handler. Set the Schedule and Data retention fields, and then choose Create canary.
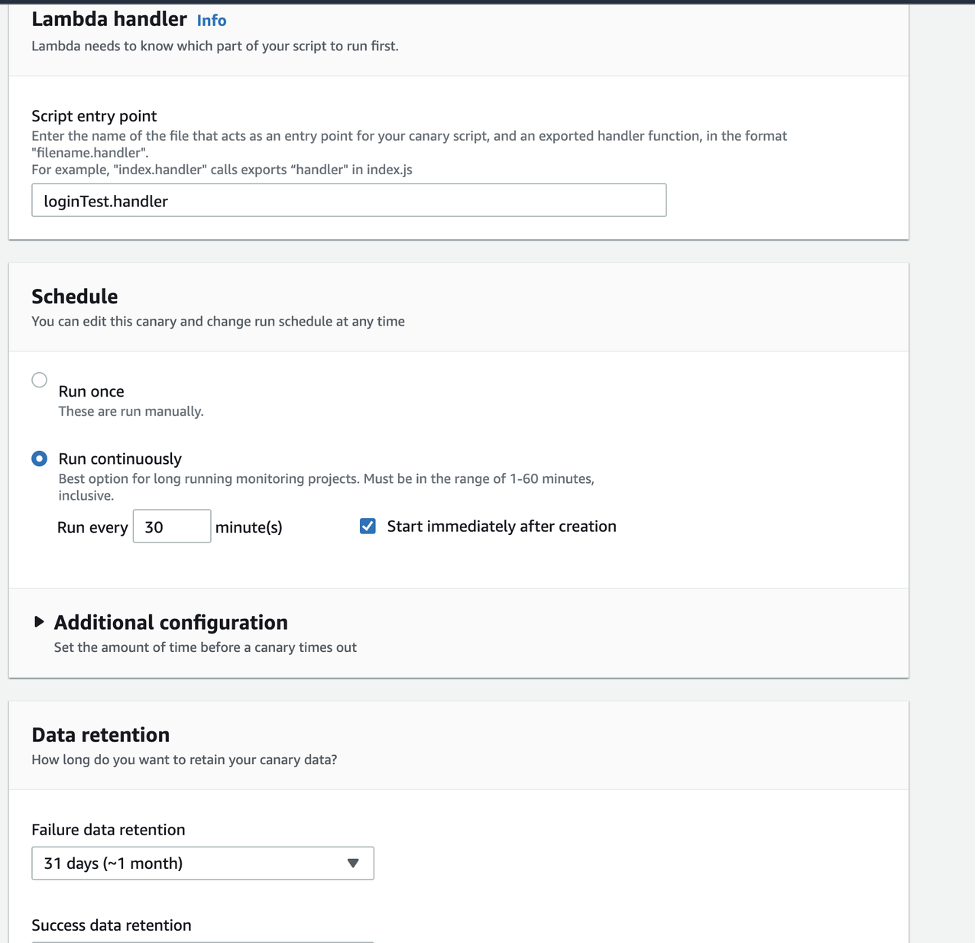
Lambda handler, Schedule, and Data retention sections
After you create the canary, you will be redirected to a list of canaries.
Pre-production canary
Now that you have created your production canary, follow these three steps to create one for the pre-production environment.
1. In Canaries, choose the production canary (my_app_prod), and from Actions, choose Clone.

Cloning a canary
- In Name, enter the name of your pre-production canary (my_app_pre_prod).
- Keep the script as is, but change the environment variable values to the pre-production values.

Clone canary page

Environment variables for the cloned canary
Development canary
Just as you did for the pre-production canary, you can clone one of the two canaries to create a development canary and then modify the values for the environment variables.
Conclusion
You now know how to use environment variables to simplify the process of configuring a canary to run in different environments. Environment variables make it possible for you to use a single script for different environments.
Cleanup
Canaries are charged per run. You can now delete the canaries we created so that you do not incur additional costs.
References
For more information, check writing a canary script in the Amazon CloudWatch User Guide.
To view Amazon CloudWatch Synthetics in action, watch the demo video.
About the Author

Sid is a Solutions Architect with Amazon Web Services. He works with AWS customers to provide guidance on cloud adoption, migration and strategy. He is passionate about technology and enjoys building and experimenting in the Networking and Observability space.

Rashmi Shukla is a software engineer on the CloudWatch Synthetics team. She works on developing sustainable software solutions and enjoys learning new technologies. Additionally, her passions include dance and books.