AWS Open Source Blog
Jupyter Deploy: Create a JupyterLab application with real-time collaboration in the cloud in minutes
Jupyter notebooks have become a popular tool for data scientists, researchers, educators and analysts who need to experiment with code, visualize data, and document their findings. Many users run Jupyter on their laptops. This creates limitations to collaborate with a distributed team because users cannot securely provide direct access to their local JupyterLab application over the internet. Similarly, users are limited by the compute power of their own device. If their workload requires more compute, for example GPU accelerators to fine-tune deep learning models, it requires a different setup.
Large enterprises can afford teams of engineers to set up and maintain deployment frameworks or managed services that support distributed compute with secure and fast remote connections, but that is beyond the resources of small organizations such as startups or research teams.
Introducing Jupyter Deploy
Today, the AI/ML Open Source team at AWS is excited to share the availability of Jupyter Deploy: a new open source command line interface (CLI) to deploy Jupyter to the cloud in a few minutes. Jupyter Deploy gives you a dedicated and sharable application running on your own domain with encrypted HTTP (TLS), GitHub OAuth integration, real-time-collaboration, and high performance UV-based development environment for applying updates and further configure your application. The CLI leverages Infrastructure-as-code (IaC) to let you define and manage resources using configuration files instead of manual setup through web consoles. Like the rest of Jupyter, the Jupyter Deploy CLI is vendor neutral, although this blog will focus on deploying to AWS. GitHub OAuth enables your collaborators to log in with their existing GitHub accounts instead of creating and managing new credentials.
With a few commands from the Jupyter Deploy CLI, you can set up an infrastructure-as-code project, configure it, and use it to create and manage the cloud resources. The first step consists of selecting a Jupyter Deploy template. Templates are pre-built infrastructure-as-code projects that handle the technical set up for you. Think of them as recipes that tell the system exactly what cloud resources to create and how to configure them. These templates are available as Python libraries and are automatically discovered by the Jupyter Deploy CLI after you install them in your Python environment.
The Jupyter Deploy CLI ships with a base template with terraform infrastructure-as-code engine, AWS cloud provider, Amazon Elastic Compute Cloud (Amazon EC2) instance, and GitHub authentication.
How Jupyter Deploy simplifies collaboration
Once you have deployed your JupyterLab application to your new Amazon EC2 instance, you can access it from your web browser as you would if Jupyter was running locally on your laptop. But unlike a locally-run JupyterLab, you can also share its URL with others. When your collaborators paste the URL in their own web browser, they will be prompted to authenticate via GitHub. If their identity matches your allowlist, they will get access to your JupyterLab application, and you can work simultaneously thanks to the real-time-collaboration feature of Jupyter with the latest improvements provided by jupyter-server-documents.
Need more compute? Run a couple commands from the directory of your Jupyter Deploy project to swap out your instance. Amazon EC2 offers a broad range of instance types: you can use compute optimized instances for CPU-intensive data science projects or GPU instances for deep-learning, for example.
Another collaborator needs access your application? Another simple command takes care of it! Same goes for adding more storage; you can mount new Amazon Elastic Block Stores (Amazon EBS), scale the existing ones, or mount a new or existing Amazon Elastic File System (Amazon EFS) with a couple jupyter-deploy commands.
How to use Jupyter Deploy
The first-time set up process involves five main steps: configuring AWS, getting a domain, setting up GitHub authentication, installing the tool, and deploying your environment. You can reuse your domain, AWS account, GitHub apps for future deployments.
Set up an AWS account and AWS credentials locally
If you do not have an AWS account, you can take advantage of the AWS Free Tier program to set up your Jupyter Deploy project. Next, install the AWS Command Line Interface (AWS CLI) in your environment and configure the AWS CLI to access your own AWS account.
Confirm your setup by running the following command that verifies that your AWS credentials are working correctly:
aws sts get-caller-identity
# you should see a response referencing your AWS account.
Buy a domain on Amazon Route 53
Next, open the AWS console, log in with your email and password, and navigate to Amazon Route 53. Amazon Route 53 is the AWS service that manages Domain Name System (DNS) operations. Amazon Route 53 will allow you to associate DNS records – a global address such as amazon.com – to the IP address of the Amazon EC2 instance the base template will set up for you.
To follow the steps in this post, you need to own a domain and have the ability to create DNS records with Amazon Route 53. If you do not own a domain, you can buy one from Amazon Route 53 console for less than $20 per year. Navigate to Amazon Route53 console. In the navigation pane, choose Domains, then Registered domains and choose Register domains.
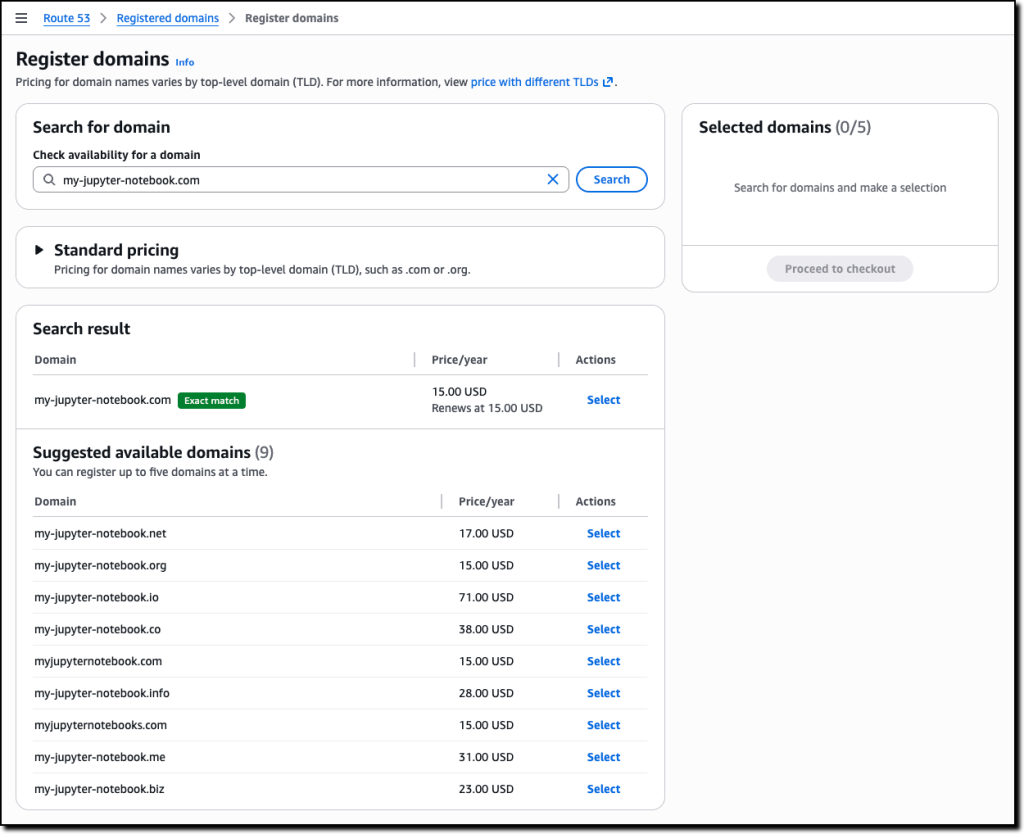
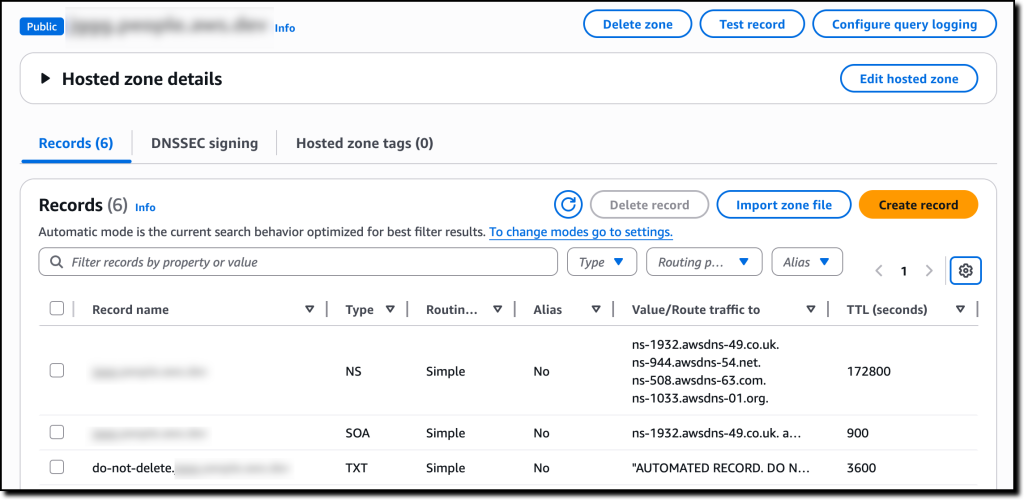
We went ahead and purchased the domain. It automatically creates a Route 53 hosted zone in your AWS account. Per Amazon Route 53 documentation, a hosted zone is a container for records, which includes information about how you want to route traffic for a domain (such as example.com) and all of its subdomains (such as www.example.com, retail.example.com, and seattle.accounting.example.com). A hosted zone has the same name as the corresponding domain.
Set up your GitHub OAuth app
The next step is to set up a GitHub OAuth app. Jupyter Deploy will configure your Amazon EC2 instance to redirect users to GitHub to authenticate by referencing this GitHub app in your GitHub account. If you do not have a GitHub OAuth app yet, follow this link to create one in your GitHub account.
For more details, refer to the GitHub documentation.
· Application name: type JupyterLab application (or any name)
· Homepage URL: type your https://jupyter.{your-domain}, in our case example.com
· Application description: type jupyter.{your-domain} or leave empty (useful to remember the domain that this OAuth app refers to.
· Authorization callback URL: type https://jupyter.{your-domain}/oauth2/callback, in our case https://jupyter.example.com/oauth2/callback. GitHub will use this callback URL to communicate the result of the authentication to your application. This URL MUST match exactly your domain or the authentication flow will fail.
· Enable Device Flow: leave unset.
Now that your GitHub OAuth app is configured, you should be able to see it on the developer settings page.
When you open it, you’ll see it has a Client ID and a Client Secret. Write down the Client ID, then generate the secret and save its value, we’ll need both of them later.
Create your Python environment and install Jupyter Deploy
Next, let’s start the jupyter-deploy project. We will create a Python virtual environment to separate the dependencies of your jupyter-deploy project from the rest of your system. We will use UV to do so.
· Open a terminal, and navigate to your home directory cd ~
· Create a UV project: uv init jupyter-deploy-projects --bare
· Install the Jupyter Deploy CLI: uv add jupyter-deploy . This command creates a virtual environment in your current directory, then downloads and install the CLI, the base template, and its dependencies.
· Now activate this environment: source .venv/bin/activate
· Then run jupyter-deploy --help
You’re all set! Time to create our first Jupyter Deploy project.
Initialize your project
Similarly to uv, the Jupyter Deploy CLI sets up a project for you:
· In your terminal, create a new directory for your project: mkdir jupyterlab-on-ec2
· Change directory: cd jupyterlab-on-ec2
· Then run jupyter-deploy init .
This generates the following project scaffolding:
~/jupyter-deploy-projects/jupyterlab-on-ec2
|_ engine
|_ manifest.yaml
|_ services
|_ variables.yaml
Configure your project with the interactive experience of Jupyter Deploy
It’s now time to configure your project. You’ll need at hand:
· your domain
· your GitHub OAuth app Client ID
· your GitHub OAuth app Client secret
· your GitHub username
Run jupyter-deploy config -s to verify your installation and prompt you to install required tools such as terraform, AWS CLI, jq and possibly other tools your specific template needs. Follow these instructions to install the dependencies, then run the command again: jupyter-deploy config -s
The template uses Lets Encrypt to generate the TLS certificates so that the traffic to your JupyterLab application is encrypted end-to-end.
You will now enter the interactive experience. The CLI will prompt you to select values for each of the required variables for this template.
· var.domain, type your domain (just the domain, without https://), in our case example.com
· var.letsencrypt email, type your email. Letsencrypt uses it to communicate with your upcoming TLS certificates expiry. You do not have to confirm this email, in which case you will not receive any communication from letsencrypt but your JupyterLab application will work fine.
· var.oauth_allowed_org leave blank
· var.oauth_allowed_teams type: []
· var.oauth_allowed_usernames type ["your-user-name"]
· var.oauth_app_client_id type the Client ID
· var.oauth_app_client_secret type the Client secret
· var.subdomains type jupyter
If you made a mistake, run jupyter-deploy config --<variable-name> VAR_VALUE
For example jupyter-deploy config --domain example.com will change the domain variable while keeping the rest of your configuration in place.
Create the cloud resources
Now it’s time to actually create your cloud resources. Run the following command jupyter-deploy up
Here terraform takes over, and prepares the deployment for you. Infrastructure-as-code is a technology that enables you to create and manage multiple inter-dependent cloud resources based on declarative files. Terraform is a popular software tool for infrastructure as code. It is not affiliated with AWS, and can be used to deploy other cloud provider resources.
Terraform prepares the plan, and displays the resources it will create in your AWS account using your AWS credentials. Type yes when prompted.
Open your application
Now, your infrastructure is ready, and is serving your application at the sub-domain.domain that we specified.
Access it with jupyter-deploy open
Your terminal might display a pop up asking you to confirm whether you trust this domain. Since you own it, you can trust it so answer yes.
Now you will be redirected to the authentication page
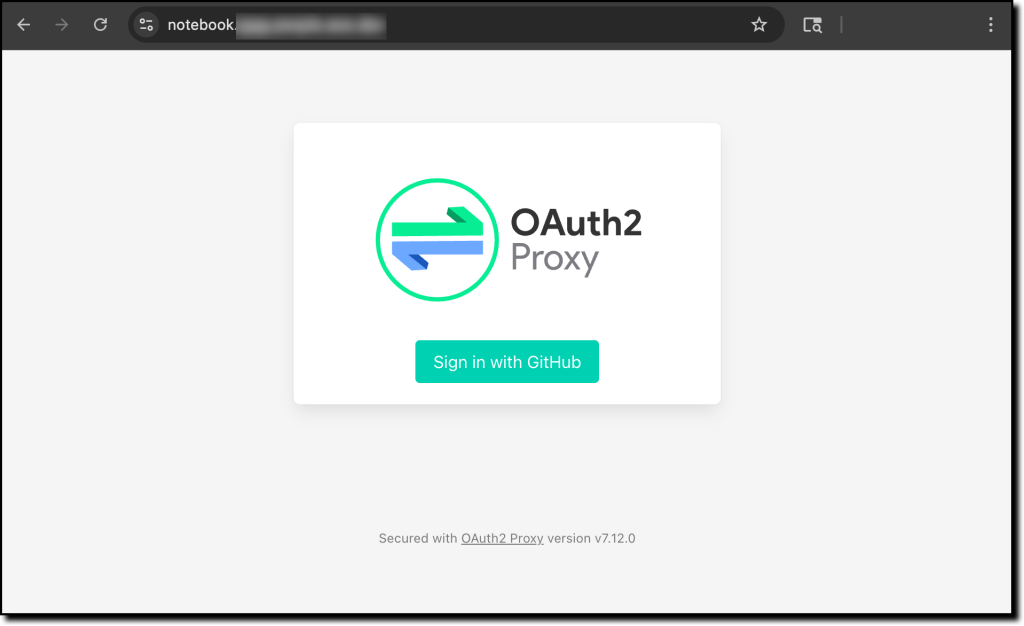
Follow the GitHub OAuth flow to authenticate.
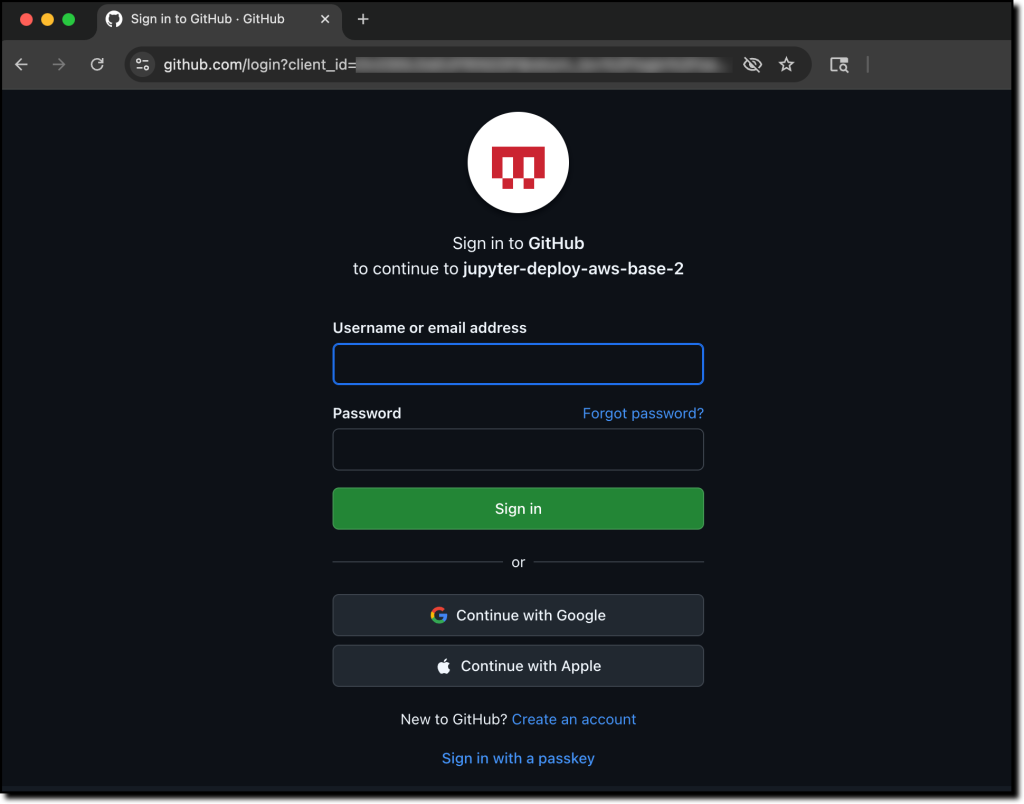
You will then be redirected to the familiar JupyterLab launcher page.
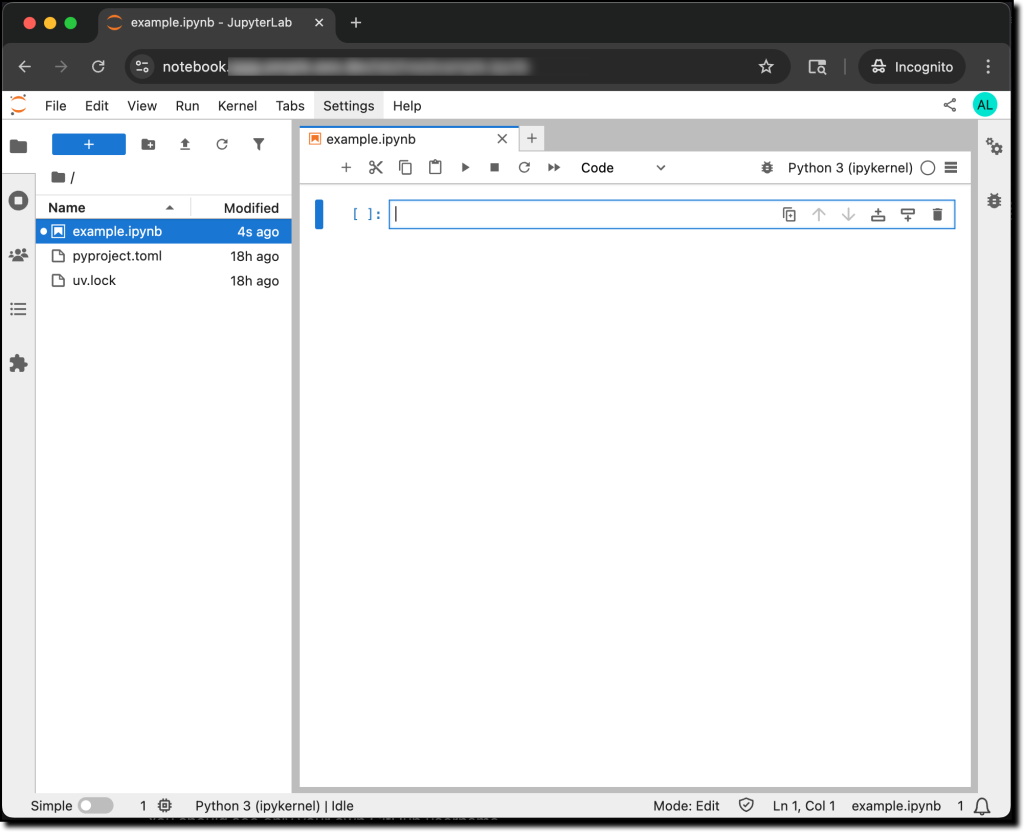
From here, you can open and run notebooks, install new packages, or interact with the terminal.
Add a collaborator and share your notebook URL
Next, let’s start collaborating on this application. Ask the person you want to collaborate with for their GitHub username. Then run the following command from your jupyter-deploy project directory:
jupyter-deploy users list
You should see only your own GitHub username.
Now add your collaborator’s username with:
jupyter-deploy users add <GITHUB-USERNAME>
Verify the application was updated by running again jupyter-deploy users list
Then provide your application URL to your collaborator (by email, text message, whichever way your prefer). Only your collaborator can access your application so you do not need to take steps to secure this URL. If you do not remember the URL, run jupyter-deploy open again.
Now you can both access the JupyterLab application from your respective web browser, and you will see each other’s changes in real time.
Stop your instance to save on Cloud bill
At the end of your workday, you may want to turn off your Amazon EC2 instance and save on your AWS bill or free-tier allowance. You can do so with a simple jupyter-deploy command for your jupyter-deploy project.
jupyter-deploy host stop
That’s it, your Amazon EC2 instance state and file system will be preserved and you can resume your work where you left it when you reconnect.
Things to know
Upgrade your instance
The base template uses t3.medium as the default Amazon EC2 instance type. That is the recommended instance for a simple workload, however you may run into capacity limits if your workload needs more CPU or more memory.
This is where infrastructure-as-code really helps; by updating one string in the declaration files, we can re-apply the project and mutate the existing infrastructure. jupyter-deploy makes this even easier, you can just run:
jupyter-deploy config --instance-type t3.2xlarge
then:
jupyter-deploy up
Share access to your JupyterLab application with a GitHub organization and GitHub teams
If you have a small team, you can also manage access to your JupyterLab application at the GitHub organization and GitHub team levels. The jupyter-deploy CLI makes this easy by providing jupyter-deploy teams and jupyter-deploy organization commands.
The base template only supports GitHub, but there are many other identity providers that support the OAuth2 protocol. Future work includes extending support to other such identities in the Amazon EC2 base template, or with new templates.
Mount additional Amazon EBS volumes or Amazon EFS file systems
You can easily create or associate existing storage volumes or file systems to the Amazon EC2 instance serving your JupyterLab application. Use the —additional-ebs-mounts of the config command to create or reuse Amazon EBS volume, and mount them under the home directory of your JupyterLab application. You can find additional configuration options by running jupyter-deploy config --help.
Call to collaborate and contribute
This blog walked you through an end-to-end deployment of a JupyterLab application to Amazon EC2, using GitHub as OAuth provider. There are many other ways to deploy Jupyter, and the jupyter-deploy CLI provides an extensible framework to do so. Our team will be working on adding another template targeting Kubernetes on Amazon Elastic Kubernetes Service (Amazon EKS). It will support running multiple applications on the cluster, and allow users to dynamically create, share and delete their own applications.
Running an application on remote compute, including on Kubernetes, is not limited to AWS. The project welcomes contributions that add new functionalities such as other OAuth providers, other TLS certificate providers, and other Cloud providers. Users would install the templates from pypi , GitHub or local using the package manager of their choice (pip, or uv as in this blog), then use the options of the init command to select it.
We encourage open source contributions to update the AWS EC2 base template, or to improve the CLI itself. Right now, the CLI and the base template are source-controlled from the same GitHub repository.
To learn more and get involved, here you can find:
· Project repository: https://github.com/jupyter-infra/jupyter-deploy
· PyPI page of the CLI: https://pypi.org/project/jupyter-deploy/
· PyPI page of the base template: https://pypi.org/project/jupyter-deploy-tf-aws-ec2-base/