Getting started using the Amazon S3 Glacier storage classes
Introduction
Implementation
1. Sign into the Amazon S3 console
If you have not already done so, create an AWS account. Access this support page for more information on how to create and activate a new AWS account.
Log into the AWS Management Console using your account information.
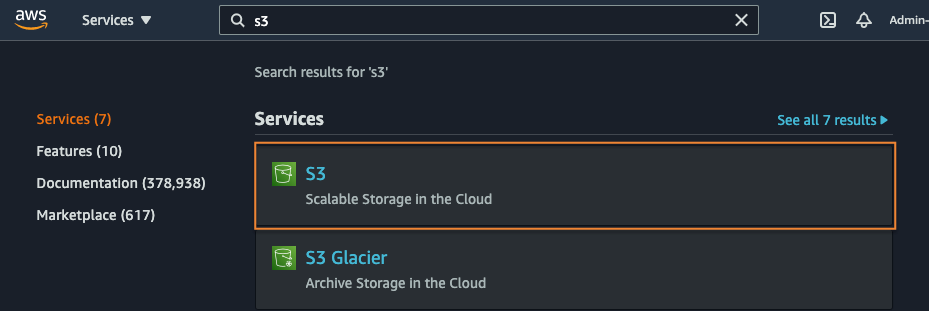
From the AWS console services search bar, enter ‘S3’. Under the services search results section, select S3. You may notice an option for S3 Glacier. This option is for the Glacier service prior to integration with Amazon S3. We recommend all new S3 Glacier users use the S3 console.
2. Create an S3 bucket
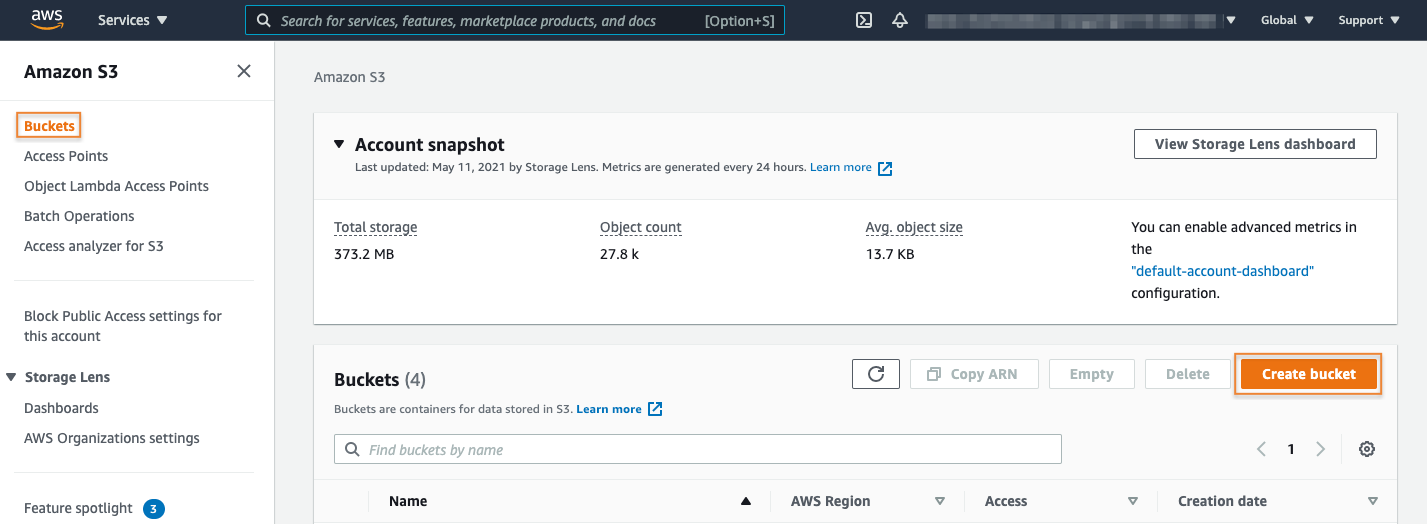
Choose Buckets from the S3 menu on the left rail and then select the Create bucket button.
3. Configure the bucket
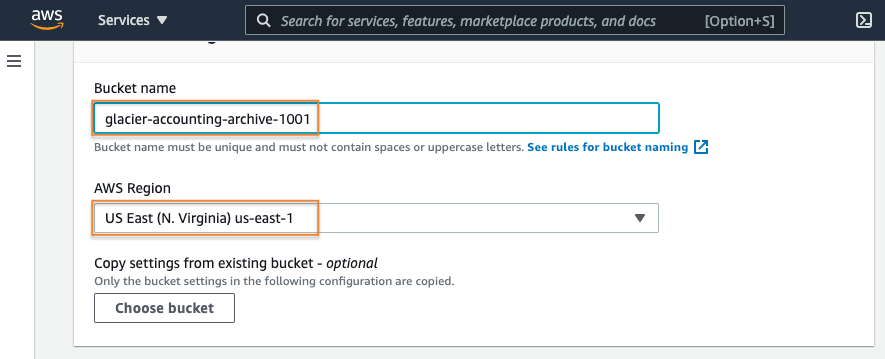
Enter a descriptive globally unique name for your bucket.
Select which AWS Region you would like your bucket created in.
The default Block Public Access setting is appropriate for this workload, so leave this section as is.
4. Enable versioning
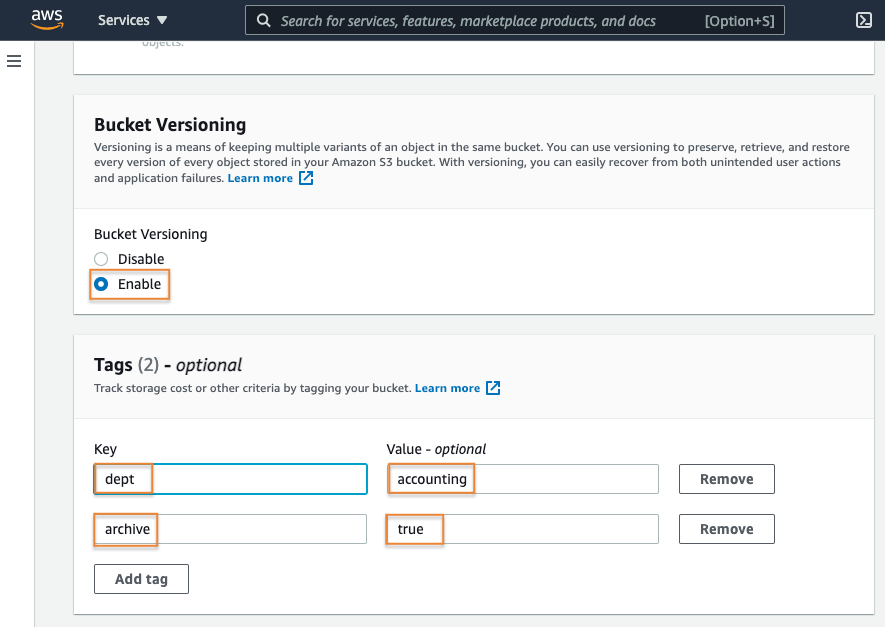
Next, enable bucket versioning to protect your data from accidental or malicious user deletes or overwrites.
Read more about bucket versioning here. Then, add some tags to help track costs associated with our archive data over time.
You can find more information about S3 bucket cost allocation tagging here.
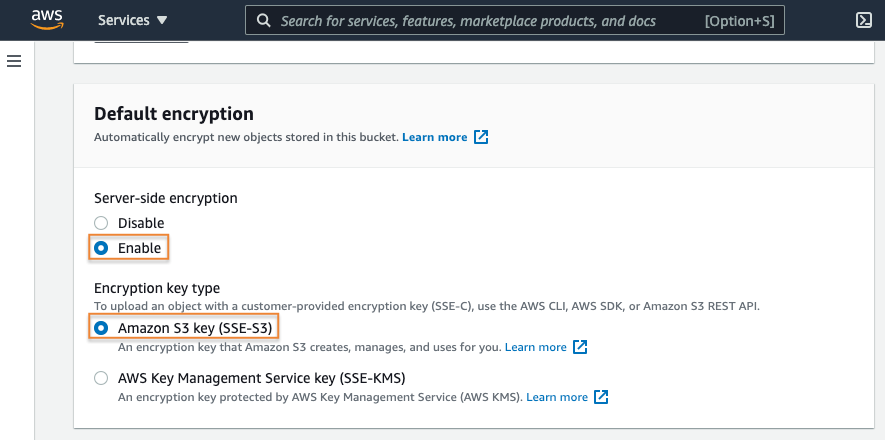
5. Enable default encryption
Next, you have the option of enabling default ‘at-rest’ encryption for the bucket. The settings here will apply to any objects uploaded to the bucket where you have not defined at-rest encryption details during the upload process.
For this example, enable server-side encryption leveraging S3 service managed keys (SSE-S3). If your workload requirements are not satisfied by SSE-S3, you can also leverage AWS Key Management Service (KMS). More information about Amazon S3 and AWS KMS can be found here.
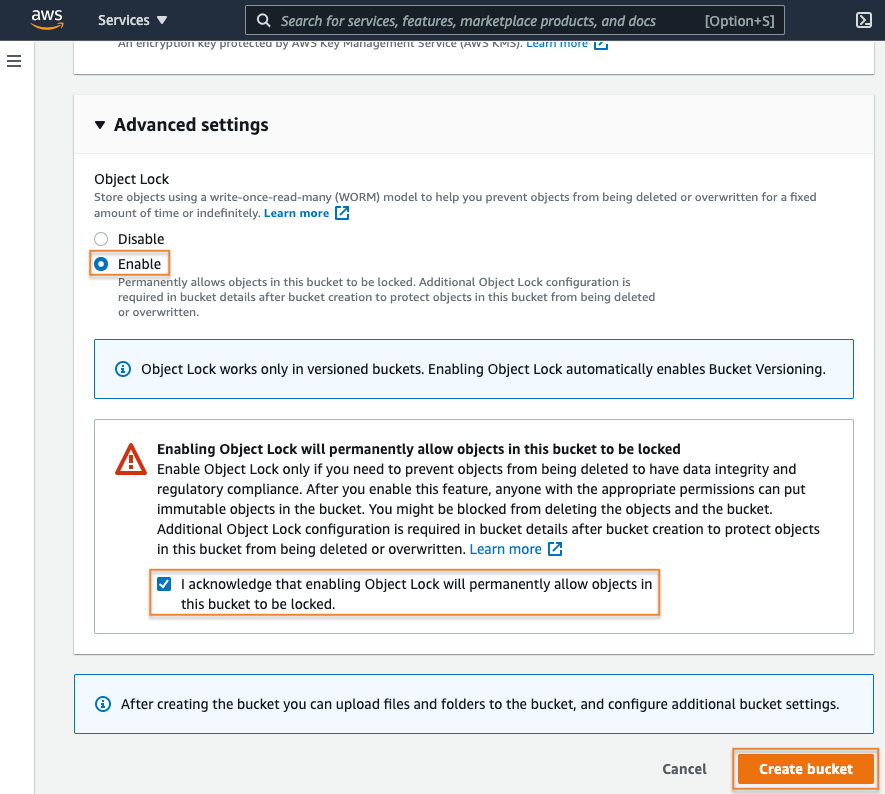
6. Enable S3 Object Lock
Now you have the option to enable S3 Object Lock in the Advanced settings section. With S3 Object Lock, you can store objects using a write-once-read-many (WORM) model. S3 Object Lock can help prevent objects from being deleted or overwritten for a fixed amount of time, or indefinitely.
S3 Object Lock can be used to help meet regulatory requirements that require WORM storage, or to simply add another layer of protection against object changes and deletion.
For this workload, it is appropriate to enable S3 Object Lock to ensure important archived data is not deleted prematurely by unauthorized users.
Choose Enable.
Select the check box to acknowledge enabling the S3 Object Lock settings
Select the Create bucket button.
7. Configure S3 Object Lock
Next, the S3 console will present a banner indicating the bucket creation was successful. The S3 console will also present a prompt informing you that additional configuration is needed to enable the S3 Object Lock feature.
Select the bucket details link presented in the prompt. Making this selection will open the Properties tab for your newly created bucket.
Note: For this exercise, use Governance mode for the S3 Object Lock configuration. This will allow you to permanently delete your test object using an admin user after this tutorial has completed.
For more information about S3 Object Lock, read the blog featuring "Protecting data with Amazon S3 Object Lock."

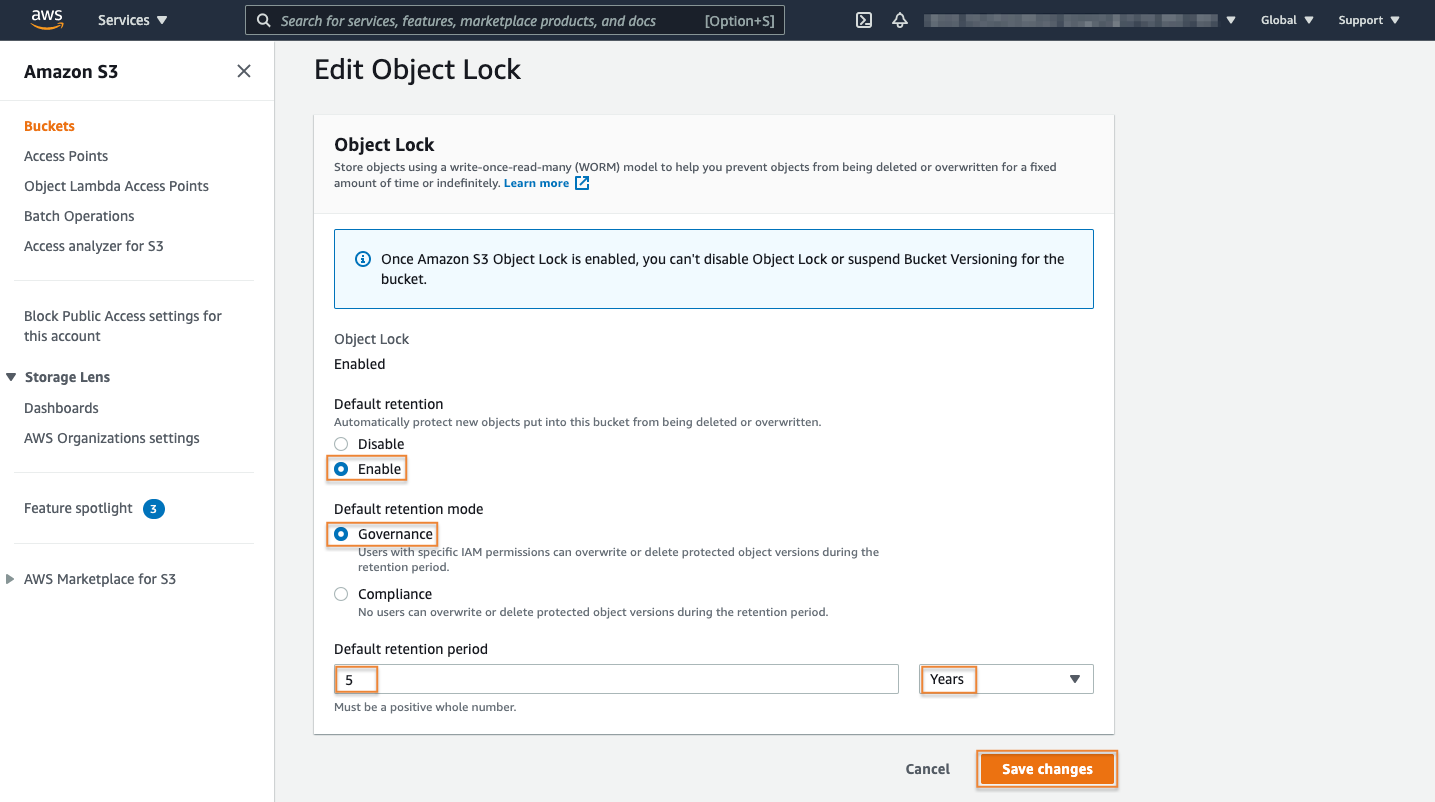
8. Edit the S3 Object Lock
On the bucket Properties tab, navigate to the Object Lock section and select the Edit button. Here you can set your default values for objects uploaded to your bucket.
For this example, you want to enable retention for all objects uploaded to this bucket for 5 years. Select Enable for the Default retention option, choose governance mode by selecting the Governance option under Default retention mode and enter 5 as the default retention period.
Lastly, select Years for the unit of measure and then select the Save changes button.
Uploading data to an Amazon S3 bucket
Now that your bucket has been created and configured, you are ready to upload archive data to the Amazon S3 Glacier storage classes.
1. Select the bucket
If you have logged out of your AWS Management Console session, log back in.
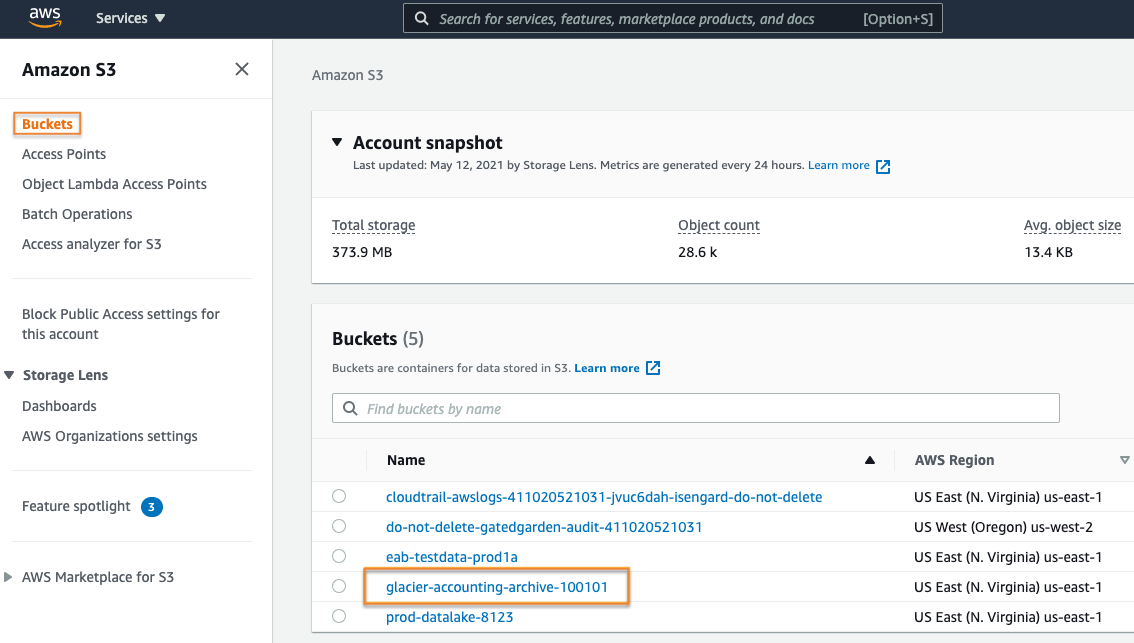
Navigate to the S3 console and select the Buckets menu option.
From the list of available buckets, select the bucket name of the bucket you just created.
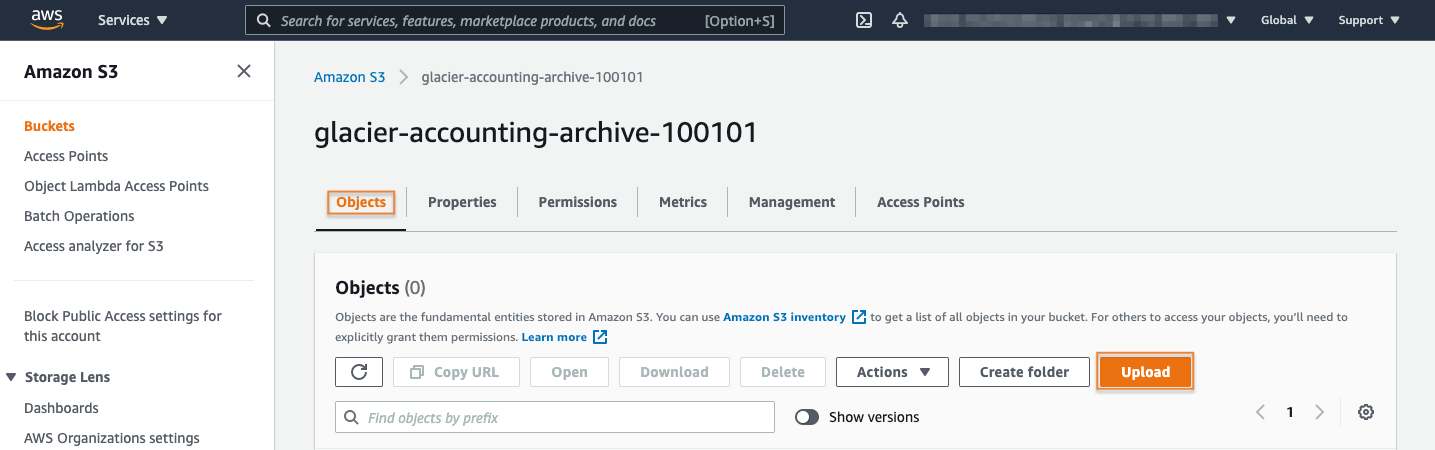
2. Start the upload
Next, choose the Objects tab. Then from within the Objects section, select the Upload button.
3. Select the file to upload
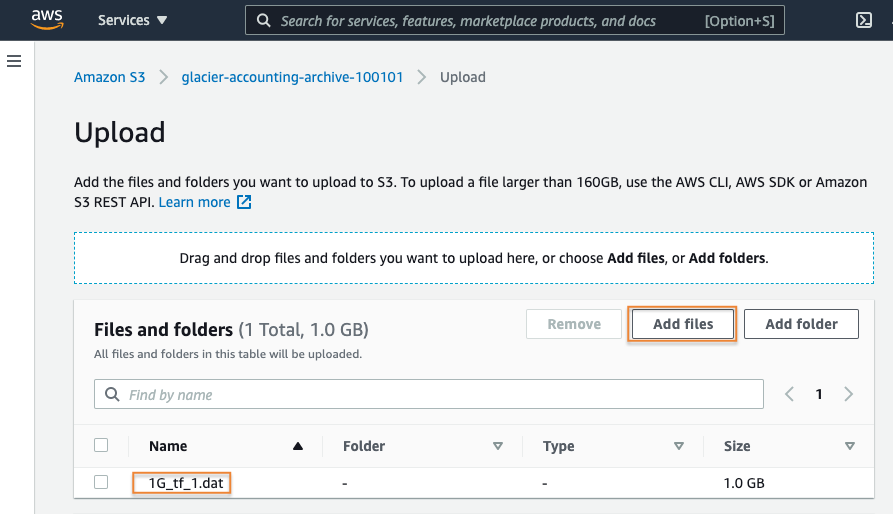
Then, select the Add files button.
Navigate your local file system to locate the archive file you would like to upload.
Select the appropriate file and then select Open.
Your file will be listed in the Files and folders section.
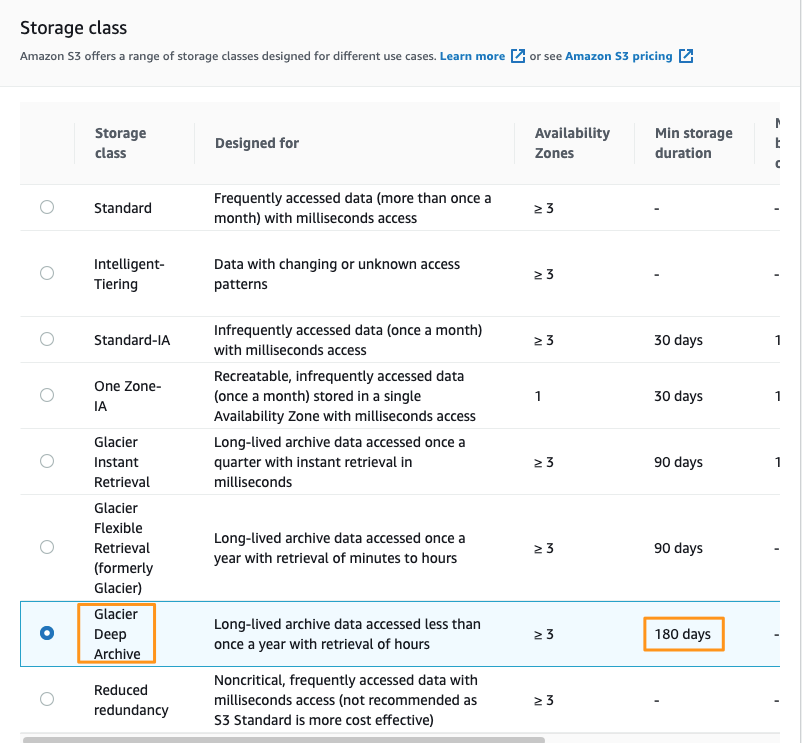
4. Select the storage class
In the Properties section, select the S3 storage class you would like to upload your archive to.
Select Glacier Deep Archive, as the example dataset needs to be retained for 5 years and there is a low probability the data will be accessed often.
Note: If your workload requires milliseconds access and single API call access to your archived data, the S3 Glacier Instant Retrieval storage class should be selected here instead. More information about the Amazon S3 Glacier storage class options can be viewed here.
Leave the rest of the options on the default settings and select the Upload button.
Note: Objects stored in many S3 storage classes have minimum object durations associated with them. In this case, uploading the test file to Glacier Deep Archive will result in 180 days of billing even if it is deleted early. Storing 1 GB in S3 Glacier Deep Archive for 180 days with the retrieval is ~$0.03. You can read more about S3 pricing here.
5. Review the status
A banner will be displayed providing you with details of the file’s upload status.

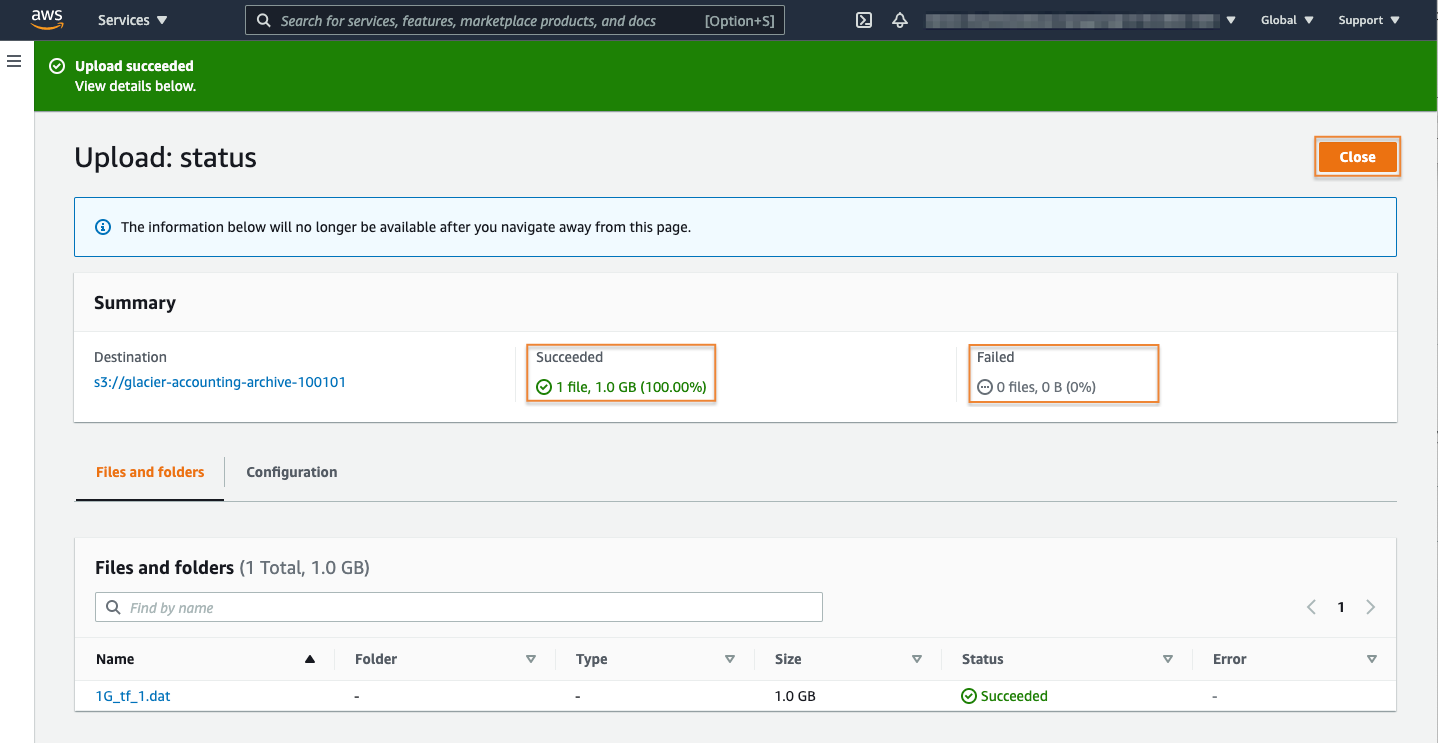
6. Confirm the upload completed
After your file upload operations have completed, you will be presented with a summary of the operations indicating if it has completed successfully or if it has failed.
In this case, the file has uploaded successfully. Select the Close button.
Restore your data
Now that you have successfully uploaded your data to S3 Glacier Deep Archive, let’s go over the process of restoring your data.
Note: the process of restoring your data before it can be accessed, is required for data that is stored in the S3 Glacier Flexible Retrieval and S3 Glacier Deep Archive storage classes. Data stored in the S3 Glacier Instant Retrieval storge class does not require this restore request prior to being accessed. You can learn more about S3 Glacier Instant Retrieval here.
1. Select the object to restore
If you have logged out of your AWS Management Console session, log back in.
Navigate to the S3 console and select the Buckets menu option.
From the list of available buckets, select the bucket name of the bucket you have created for this exercise.
From the Objects menu, select the name of the test file you just uploaded.

2. Initiate the restore
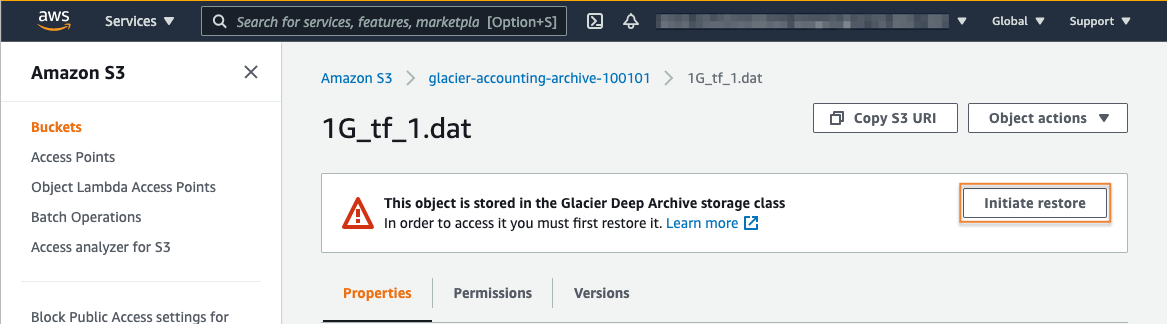
After selecting your test file’s name, you will be presented with a banner indicating that your object is stored in the S3 Glacier Deep Archive storage class and that you need to restore it if you would like to access your data.
You can initiate the restore process by simply selecting the Initiate restore button attached to the information banner, or you can choose Initiate restore from the Object actions menu.
Note: The restore process will create a copy of your archived data and will store that copy in the S3 Standard storage class. During the restore initiation process you will set the number of days that you wish to have your data available. During this time period, you will incur applicable storage charges for your data in both the archive storage class as well as in the active storage class.
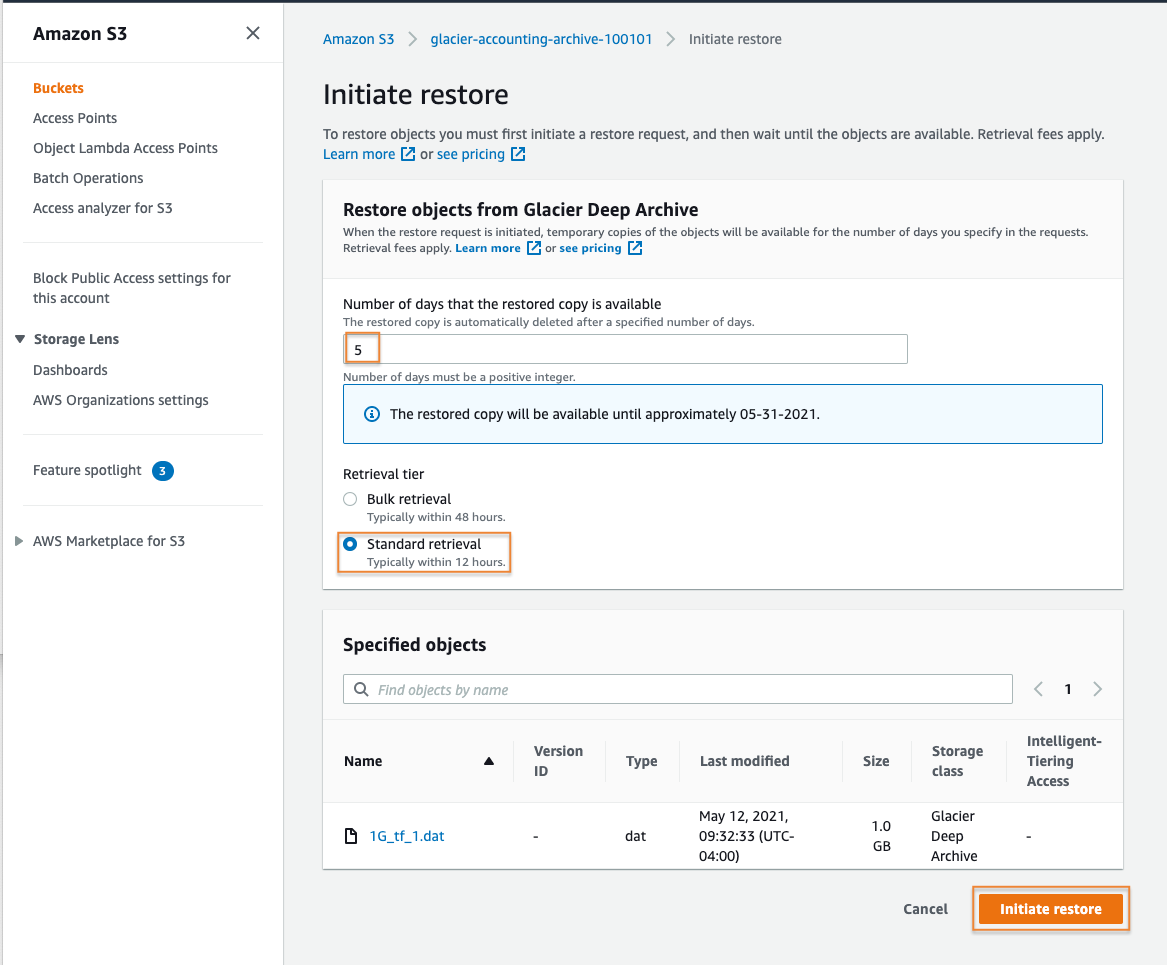
3. Configure the restore
From the Initiate restore page, you will define the number of days you desire to make your restored copy available.
Next, you will have a choice between standard or bulk retrieval. Data stored in the Amazon S3 Glacier Flexible Retrieval storage class will additionally have an option to select expedited retrieval. More information about restore options can be found here.
For this exercise, choose the Standard retrieval option. Then, select the Initiate restore button to continue.
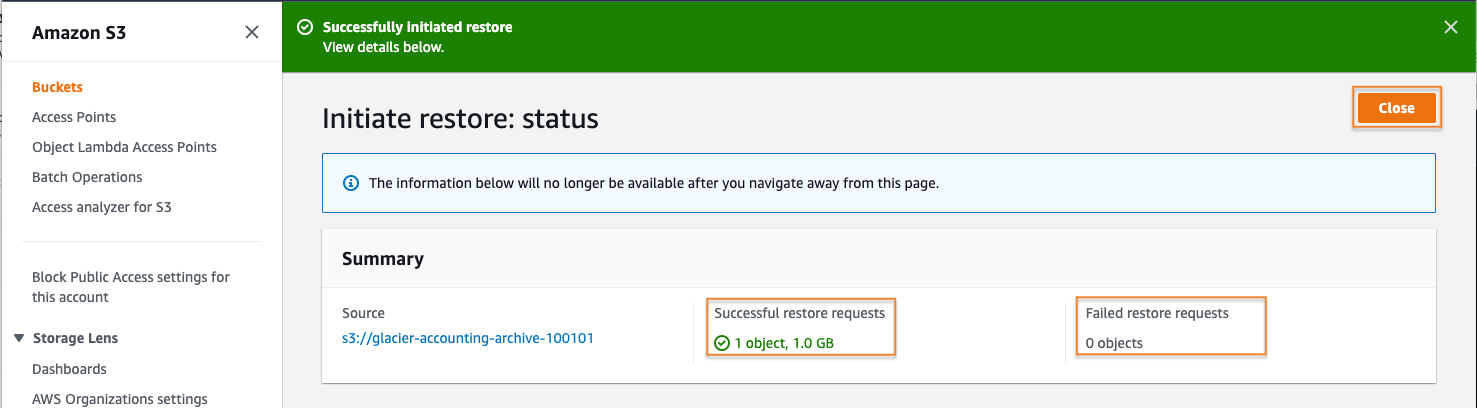
4. Wait for the restore to complete
A summary page will be displayed indicating if the restore request was successful or if any errors occurred. In this case, the restore request was successful. Select the Close button to continue.
For this standard restore from S3 Glacier Deep Archive, you will need to wait about 12 hours for the temporary object to be restored to the Amazon S3 Standard-IA storage class. S3 Event notifications support alerting when an object restore event has completed. More information about S3 Event notifications can be found in the Amazon S3 documentation here.
5. Verify restore has completed
Now you can verify that your object has been restored. After waiting about twelve hours for the restore operation to complete, log back into your S3 console.
Select Buckets from the left rail menu, and select the name of your bucket to view its contents. From the Objects section, select the file name of the object you have attempted to restore to see its current status.
Here you can see that the object’s Restore status is listed as Completed. The Restoration expiry date, which is based on the number of days we defined in the restore process, is listed as well. You have successfully restored your archived object. This object will be available until the time specified in the Restoration expiry date section.
You can now perform actions like run S3 select queries against this file, copy the object to another bucket in your account or to another account, or download the data to your local machine.

Clean up resources
In the following steps, you clean up the resources you created in this tutorial. It is a best practice to delete resources that you are no longer using so that you do not incur unintended charges.
Delete your test object
If you have logged out of your AWS Management Console session, log back in.
Navigate to the S3 console and select the Buckets menu option.
First you will need to delete the test object from your test bucket. Select the name of the bucket you have been working with for this tutorial.
Put a check mark in the checkbox to the left of your test object name, then select the Delete button.
On the Delete objects page, verify that you have selected the proper object to delete and type permanently delete into the Permanently delete objects confirmation box.
Then, select the Delete object button to continue. Next, you will be presented with a banner indicating if the deletion has been successful.
Delete your test bucket
Finally, you need to delete the test bucket you have created. Return to the list of buckets in your account.
Select the radio button to the left of the bucket you created for this tutorial, and then select the Delete button.
Review the warning message. If you desire to continue deletion of this bucket, type the bucket name into the Delete bucket confirmation box and select Delete bucket.
Congratulations!
Did you find what you were looking for today?
Let us know so we can improve the quality of the content on our pages