AWS Contact Center
How Blink by Amazon streamlined contact center reporting using AWS Glue Zero ETL
Organizations have long faced challenges in managing large contact center workforces. One key issue is maintaining data consistency between Customer Relationship Management (CRM) systems and reporting tools. Contact center supervisors face multiple pain points. These include manual data extraction, time-consuming Extract, Transform, and Load (ETL) developing and maintaining processes, and the need for frequent updates to reporting systems. These challenges are often exacerbated as CRM implementations evolve over time. For Blink by Amazon‘s 700-agent contact center, these challenges were impacting their ability to generate timely performance insights and maintain operational efficiency.
In this post, we’ll explore how Blink by Amazon streamlined their contact center operations by implementing AWS Glue Zero ETL to seamlessly integrate Salesforce CRM data with Amazon Connect. You’ll learn how this solution automates data consolidation, eliminates manual extraction processes, and provides near real-time agent performance reporting – all while maintaining data consistency as your Salesforce environment grows. Whether you’re managing a large contact center or looking to optimize your existing Salesforce and Amazon Connect integration, this solution offers a scalable approach to contact center analytics.
Overview of solution
Amazon Connect is an omnichannel, AI-powered contact center, built in the cloud from the ground-up. Using the same technology that powers Amazon.com’s customer service, it empowers businesses of all sizes to deliver exceptional customer experiences at a lower cost. Salesforce Service Cloud Voice (SCV) natively integrates Amazon Connect into Salesforce’s customer relationship management (CRM) software. This delivers a solution that brings together voice conversations, digital channels, and CRM data. Each voice interaction in SCV is captured as a Salesforce data object which makes reporting and analytics native to Salesforce.
AWS Glue offers Zero-ETL integrations. These simplify data ingestion and replication from third-party applications to AWS destinations. Salesforce is one such supported third-party application. Blink by Amazon extended the functionality for their use case to ingest and replicate Salesforce data object to Amazon Redshift cluster and built dashboard for reporting and analytics.
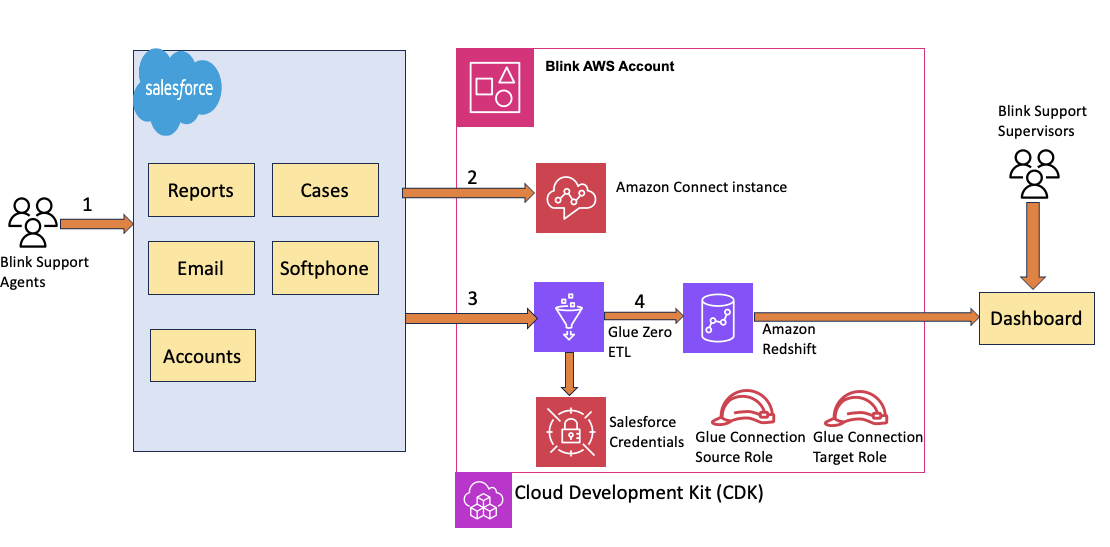
Figure 1: Architecture diagram showing the end-to-end integration between Salesforce Service Cloud Voice, AWS Glue Zero ETL, and Amazon Redshift for contact center reporting.
- Agent connects to Salesforce CRM to support customer calls.
- Amazon Connect updates the VoiceCall object on the salesforce.
- The selected VoiceCall object during the Glue ETL integration setup is synced.
- The Target Redshift is updated with the data by the ETL integration.
Prerequisites
For this walkthrough, you should have the following prerequisites:
- An AWS Identity and Management (IAM) role with the sufficient permissions to run this solution.
- Configure the AWS credentials of the Development account in the terminal. Install the AWS CDK Toolkit. If you’re unfamiliar with the steps, then review the AWS CDK workshop .
- Setup Integration between Amazon Connect and Salesforce leveraging Service cloud for Voice. Service cloud Voice workshop series walks through the steps .
Deployment Steps
You can deploy the solution using the AWS CDK or synthesizing a CDK into AWS CloudFormation templates and deploying them using AWS Management Console . The code for the solution can be found at the Git repository.
- Clone the repository and bootstrap the application in your local machine by running the following AWS Command Line Interface (AWS CLI) commands from a terminal window.
-
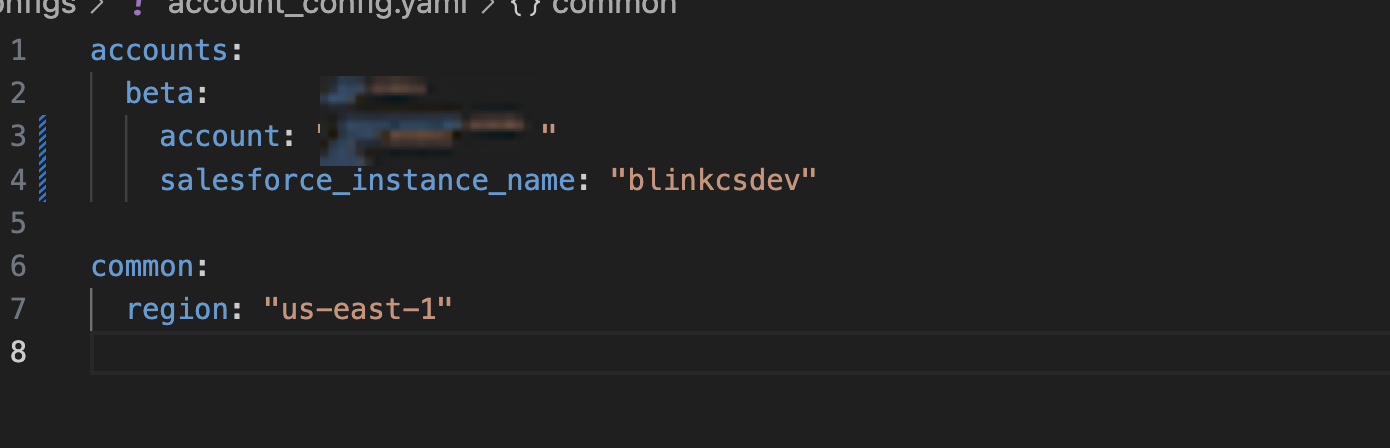
- Update the account_config.yaml file under the configs folder with the account ID and Salesforce instance name. Note: sfdc_instance_name is a parameter that is passed into the CDK stack. It’s used to dynamically generate resource names such as KMS key aliases, Secrets Manager names, and IAM role names for each Salesforce environment.

- Create an AWS Glue Connection for Salesforce . Use the Connection IAM Role ARN and the AWS Secrets Manager arn from the previous step to setup connection. During the setup you will be redirected to your salesforce instance URL to allow access the Salesforce data object which should populate the secret manager credentials. Once complete you will see the status as ready. NOTE: The connection name shouldn’t contain spaces.

Figure 4: AWS Glue console showing detailed configuration steps for creating a Salesforce source connection, including required authentication and IAM role settings
- Navigate to Zero-ETL integrations from the AWS Web Console and perform the following steps to setup source configuration:
- Configure the Source for the Glue ETL integration by selecting the Salesforce Connection and Connection IAM role from the previous step.
- Select the Salesforce object that should be replicated to AWS destination. Blink enabled Case, Contact, EmailMessage, ServicePresenceStatus, TopicAssignment, UserServicePresence, VoiceCall, Survey, SurveyInvitation, SurveyQuestion, SurveyQuestionResponse, SurveyResponse, SurveySubject, SurveyVersion fields as part of the integration NOTE: The Target IAM role is only required if you’re interested to setup AWS Glue Catalog as target integration.
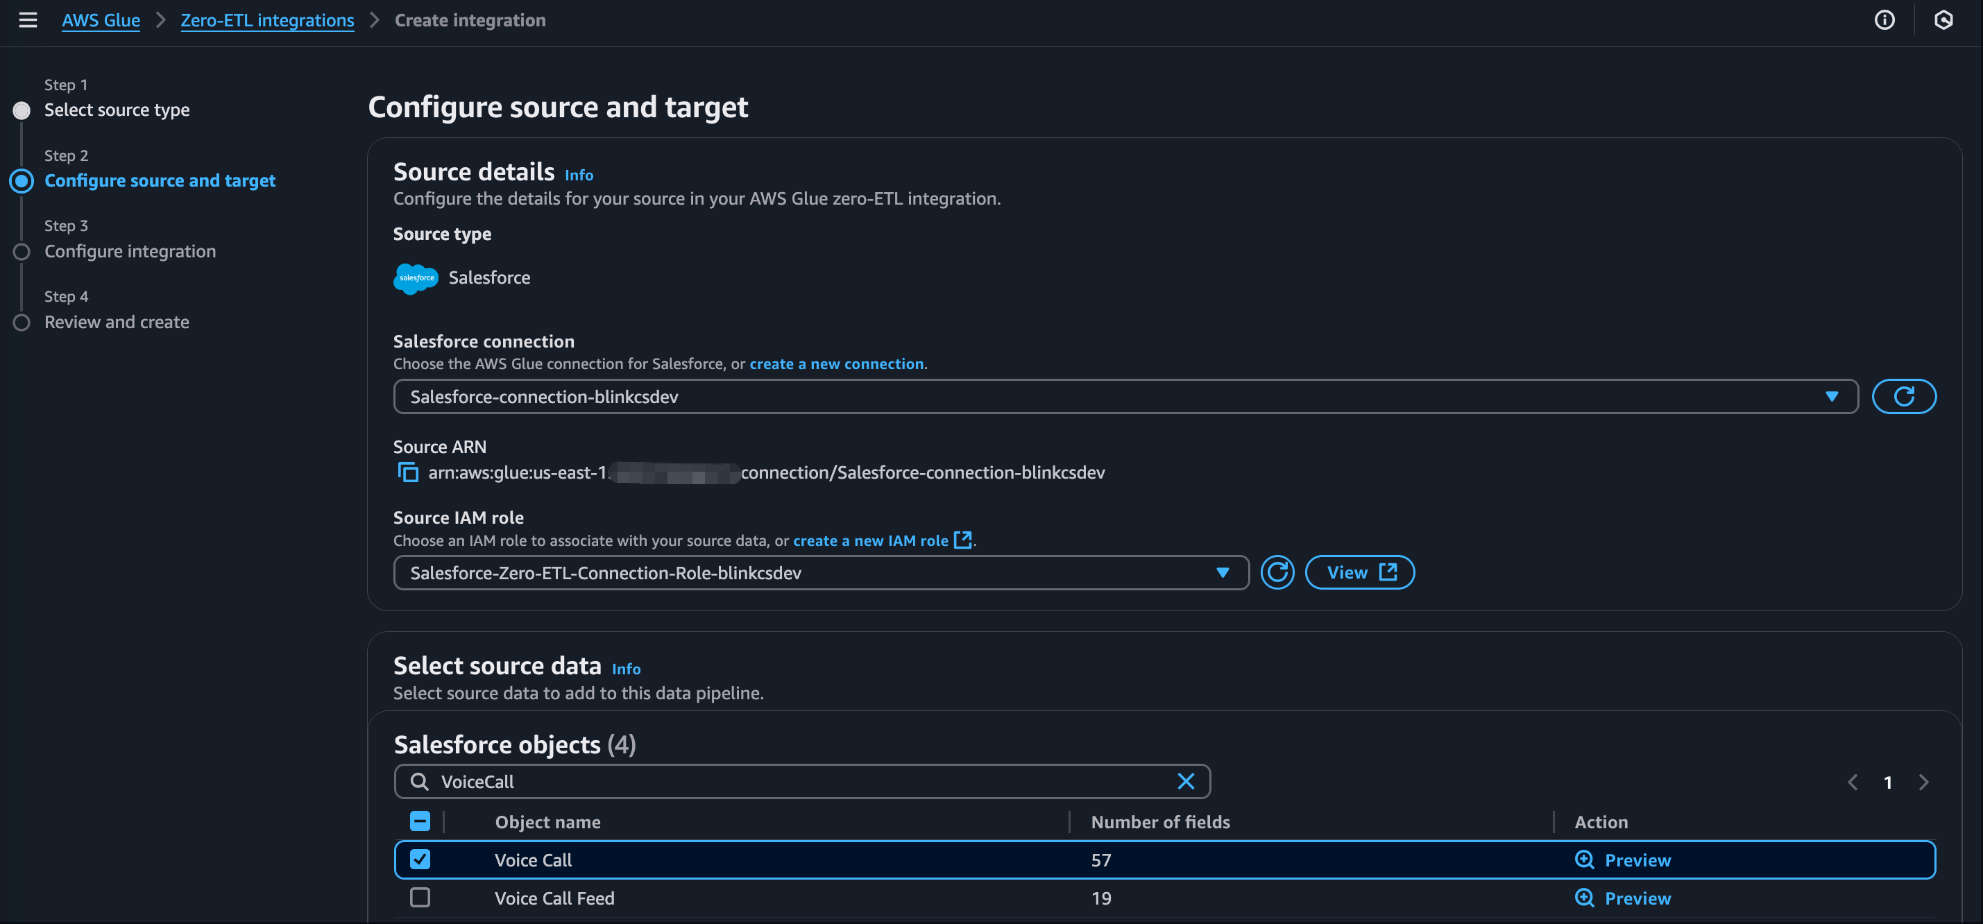
Figure 5: AWS Glue Zero ETL source configuration showing selection of Salesforce objects for replication to Amazon Redshift
- For the Target details , specify the Redshift cluster provisioned with CDK deployment and check the “Fix for me” checkbox so glue can fix the resource-based policy and associate new parameter group with enable_case_sensitive_identifier = true NOTE: If the Redshift cluster exist in a different account you should update the resource-based policy and parameter group.
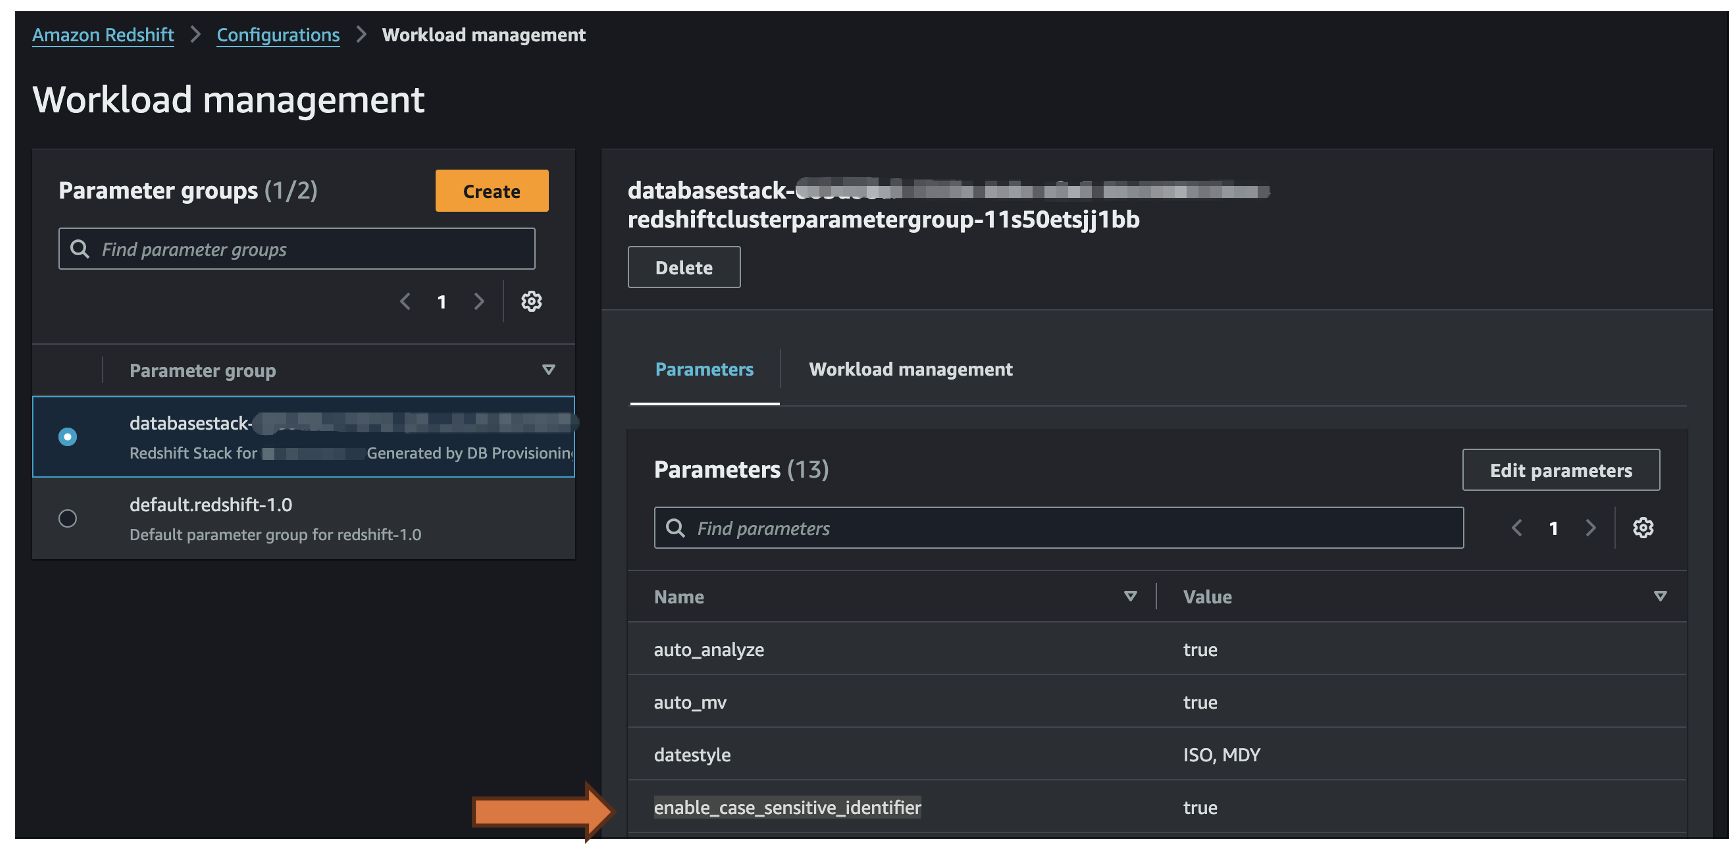
Figure 6: Amazon Redshift cluster parameter group configuration showing required case-sensitive identifier setting for proper Salesforce data mapping
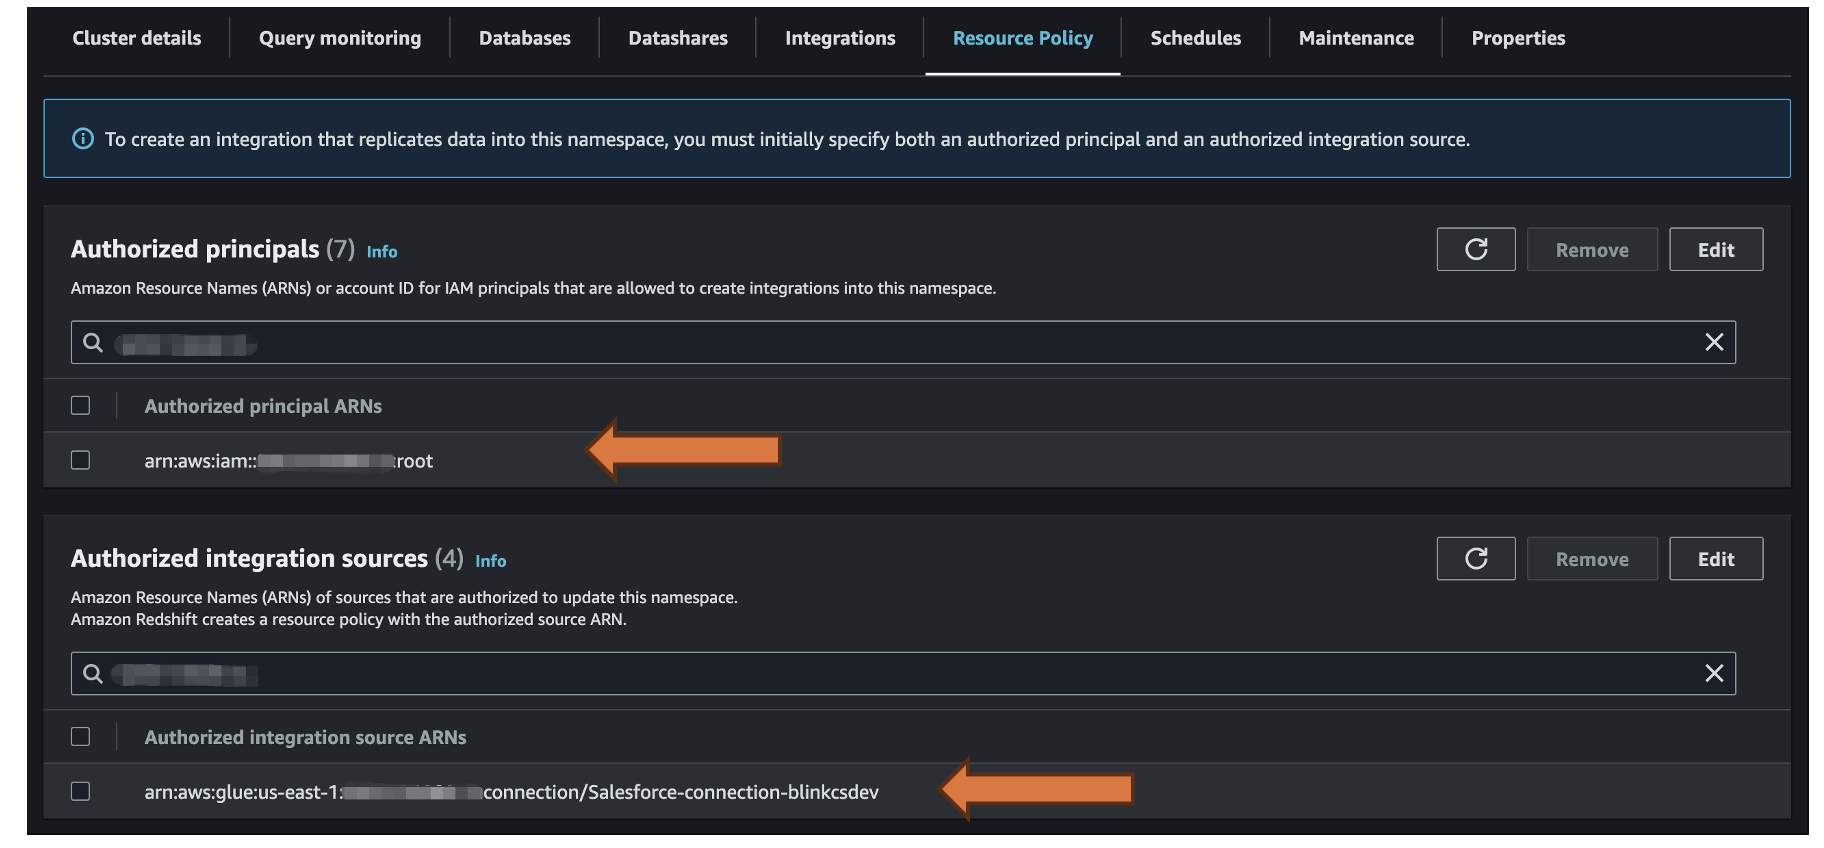
Figure 7: Resource-based policy configuration for Amazon Redshift showing required permissions for AWS Glue Zero ETL integration and data publishing.
- Give an integration name and then create the integration . Once the integration is complete you will see the status as “Active”. NOTE: The integration takes 2-4 mins to be available.
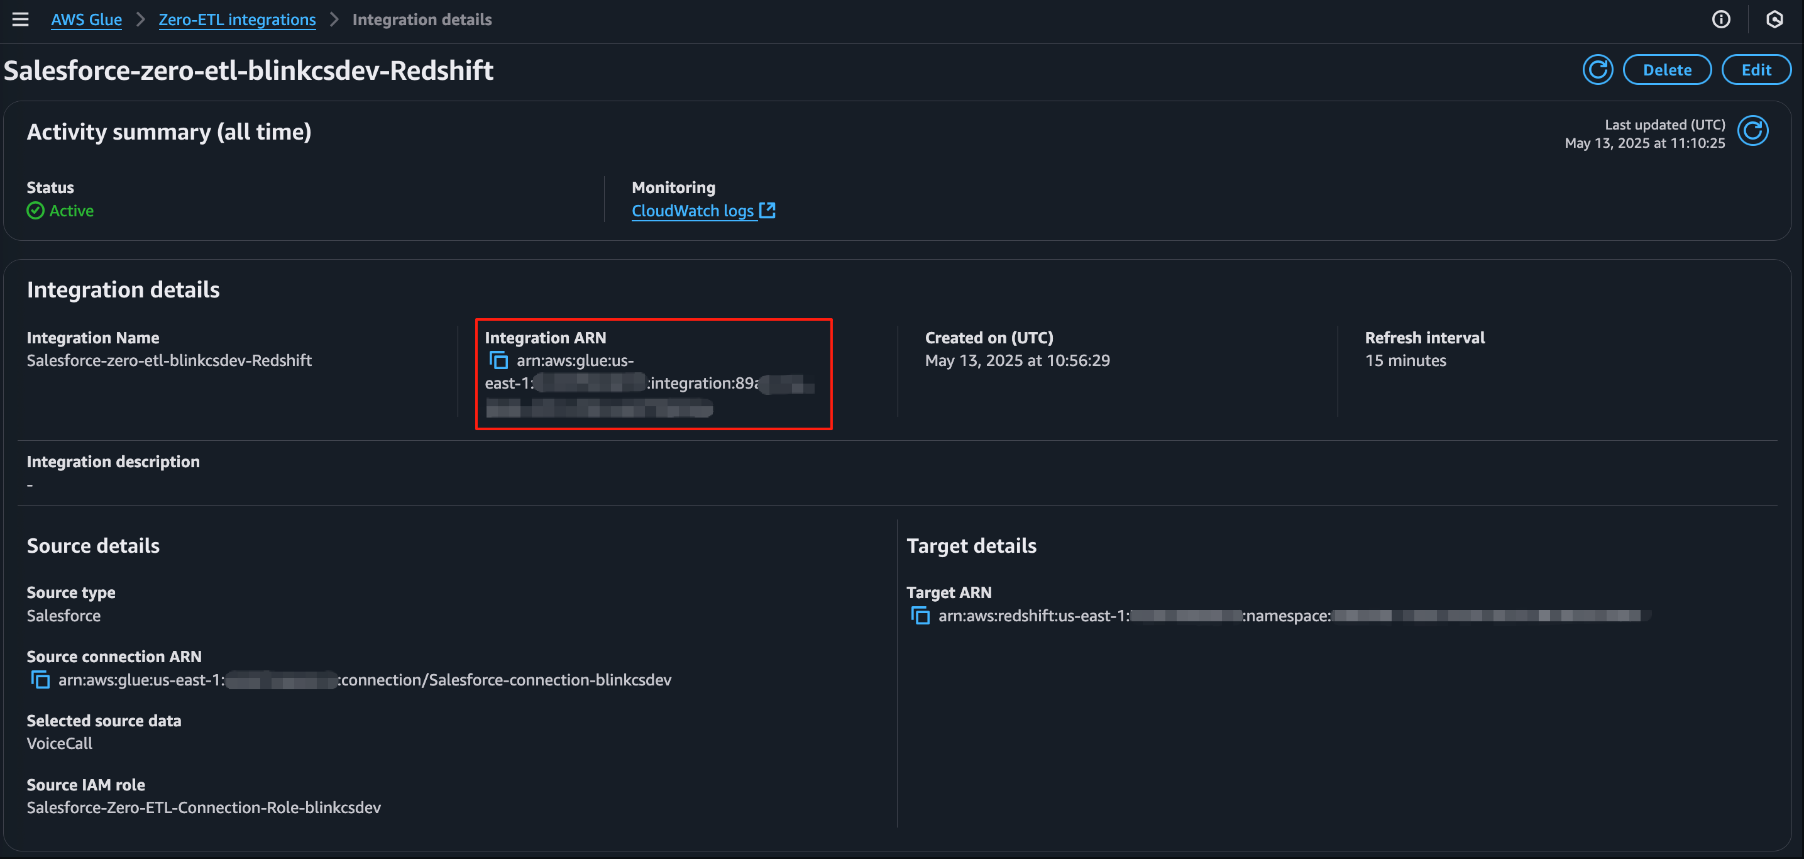
Figure 8: AWS Glue Zero ETL integration status showing successful activation of the Salesforce to Amazon Redshift data pipeline.
- After your integration is active, follow these steps:
- Navigate to the Redshift integration details page.
- Choose ‘Create a database from integration’. NOTE: It takes 2-4 mins for the database to be available
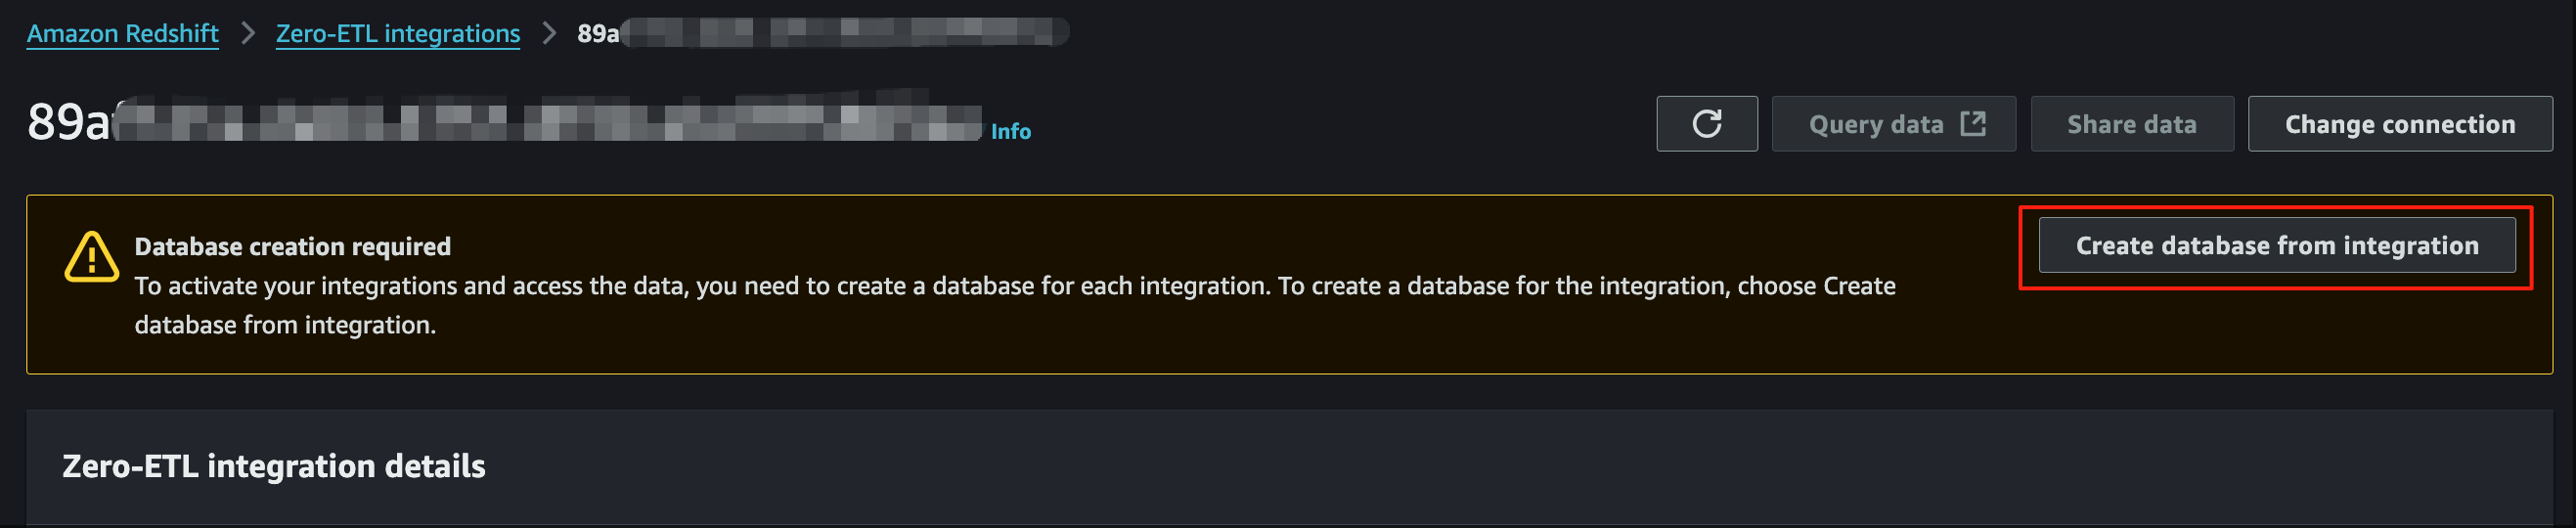
Figure 9: Database creation workflow in AWS Glue Zero ETL showing options for provisioning a new database schema for Salesforce data in Amazon Redshift.
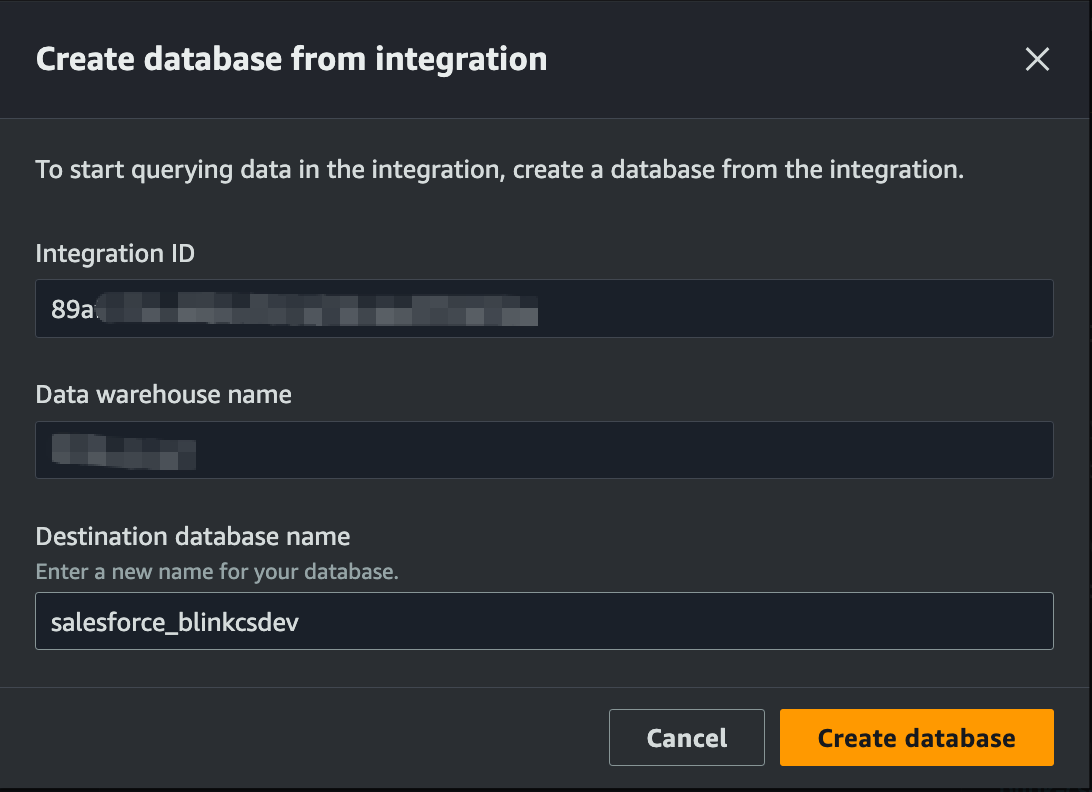
Figure 10: Redshift database details
Validating the Integration
In this step we validate the Salesforce integration on AWS Redshift :
- Open the Query editor V2 of the Redshift Cluster.
- Alter the database so that it can accept large text columns, for example EmailMessage object has text columns that can accept up to 131,072 characters long whereas Redshift only supports 65,535. NOTE: To run ALTER DATABASE admin privilege is required.
- Run the following sql query on the editor
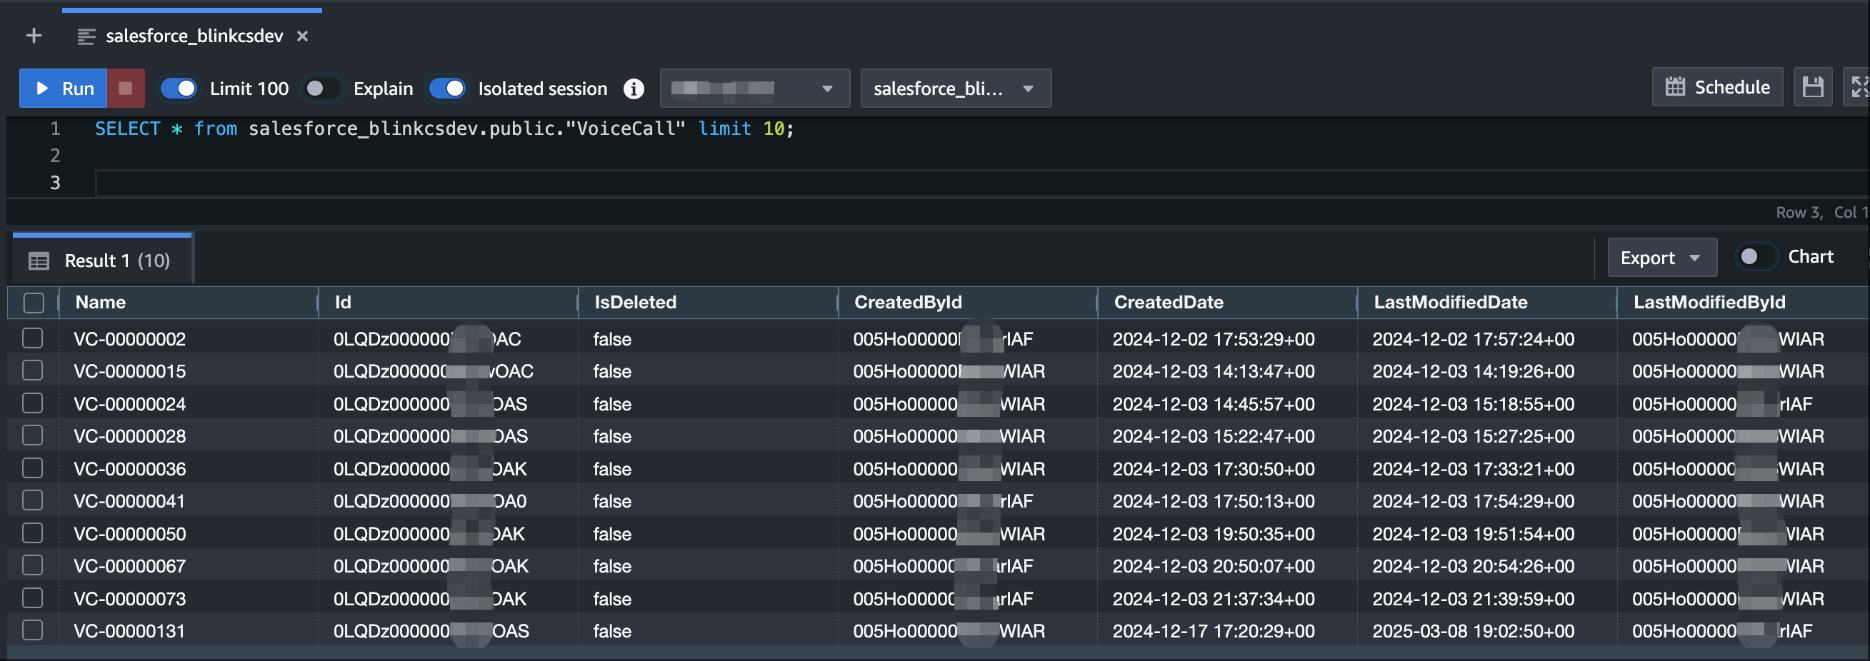
Figure 11: Amazon Redshift Query Editor V2 showing successful data replication from Salesforce VoiceCall object, demonstrating end-to-end integration validation.
Cleaning up
To avoid unnecessary charges, delete the resources created in setup of the integration and infrastructure deployment. To cleanup resources, perform the following steps in the order shown here:
- Delete the Glue ETL Integration .
- Delete the Glue Connection .
- Delete the CDK application by running the following commands: NOTE: It takes 3-5 mins for the CloudFormation stack to be deleted.
- Delete “salesforce-zero-etl-access-log-{stage}-{account}-{region}” and “salesforce-zero-etl-{stage}-{account}-{region}” s3 buckets .
Conclusion
In this post, we demonstrated how Blink by Amazon leveraged AWS Glue Zero ETL to streamline the integration between Salesforce and Amazon Connect, transforming their contact center operations. By implementing this solution, Blink achieved significant business benefits which include operational efficiency by reducing report preparation time from hours to minutes by eliminating manual data extraction, enhanced decision making by providing supervisors with immediate access to critical KPIs like call resolution times and agent availability, scalable contact center operations where they successfully scaled to support 700+ agents while maintaining data consistency and contact center supervisors can now leverage this integrated data to monitor agent performance metrics in near real-time, generate comprehensive performance reports without manual data compilation and hence make informed staffing decisions based on historical call volume patterns. We hope that you’ve found this post informative, and we look forward to hearing how you use AWS Glue Zero ETL to enhance your contact center operations.
Ready to transform your customer service experience with Amazon Connect? Contact us
About the authors
 Gopinath Jagadesan is a Senior Solution Architect at AWS, where he works with Amazon to design, build, and deploy well-architected solutions on AWS. He holds a master’s degree in Electrical and Computer Engineering from the University of Illinois at Chicago. Gopinath is passionate about generative AI and its real-world applications, helping customers harness its potential to drive innovation and efficiency. Outside of work, he enjoys playing soccer and spending time with his family and friends.
 Jiaqi Xu is a Senior Technical Architect at Blink by Amazon. He is passionate about leveraging state-of-the-art tools to simplify and automate business and data operations. Through GenAI, he is pioneering new approaches to uncover valuable insights from text data and transform them into actionable business assets.