AWS Database Blog
Configure additional storage volumes with Amazon RDS for SQL Server
Amazon Relational Database Service (Amazon RDS) for SQL Server instances traditionally use a single Amazon Elastic Block Store (Amazon EBS) volume to store database files. With the introduction of the additional storage volume feature, you can now attach up to three additional storage volumes to your Amazon RDS for SQL Server instances. By using this feature, you can distribute your data and log files across multiple volumes. This enhancement offers more granular control over storage configuration and performance optimization.
In this post, you will find different scenarios for working with the additional storage volume feature.
Solution overview
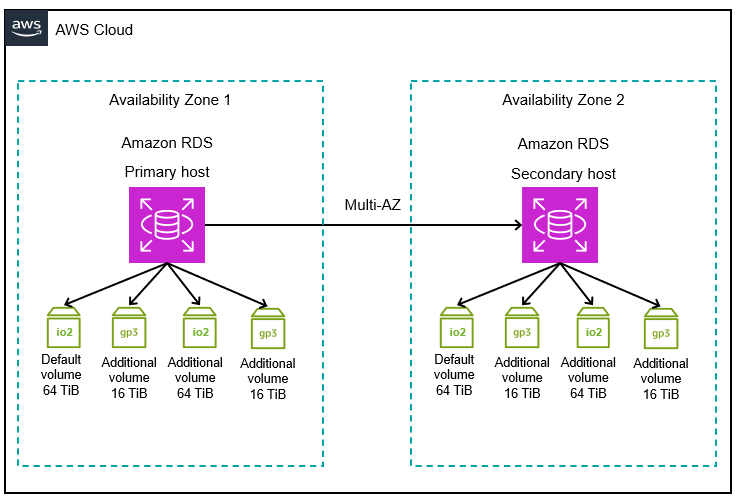
The following architecture diagram illustrates the additional storage volume configuration, showing the use of primary and secondary hosts, each with two volumes, in a multi-Availability Zone (multi-AZ) configuration.
In this post, you will learn about the following scenarios:
- Adding a new storage volume
- Scaling an existing storage volume
- Restoring a database on an additional storage volume
- Deleting a storage volume
This solution requires new AWS resources that will incur costs in your account. See AWS Pricing for more information.
Prerequisites
We assume you have familiarity with navigating the AWS Management Console. For this post, you also need the following resources and services enabled in your AWS account:
- An RDS for SQL Server instance. See Create and Connect to a Microsoft SQL Server Database with Amazon RDS for detailed instructions.
Note: For current limitations on the additional storage volume feature, see Working with SQL Server storage.
Adding a new storage volume
You can add up to three additional storage volumes either during instance creation or after an instance has been deployed. Additional storage volumes supplement the default storage volume. The default volume uses D:\ as its drive letter. Additional storage volumes support two storage types: General Purpose SSD (gp3) and Provisioned IOPS (io2), so you can choose the optimal storage performance for your database workloads. Volume names are mapped to windows disk letters as follows:
- rdsdbdata2 –
H:\drive - rdsdbdata3 –
I:\drive - rdsdbdata4 –
J:\drive
Add a storage volume when creating an instance
To add an additional storage volume during an instance creation, complete the following steps:
- See Create and Connect to a Microsoft SQL Server Database with Amazon RDS for detailed instructions to create an RDS for SQL Server instance.
- For Storage, select the appropriate storage type. This is your
D:\volume. - For Additional storage volumes – optional, Choose Add storage volume.
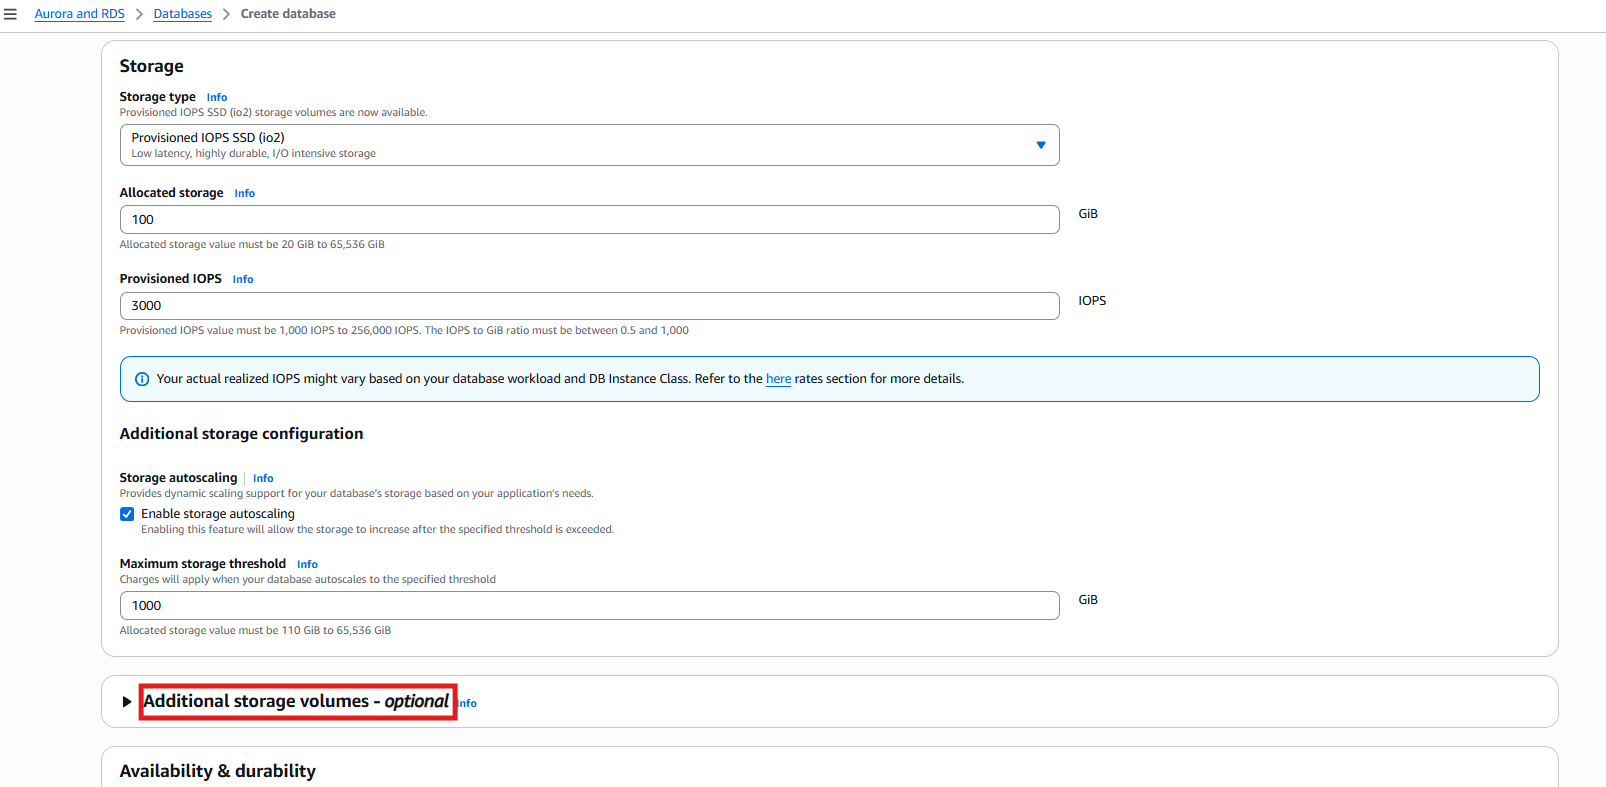
- Enter or select appropriate values for Volume name, Storage type, Allocated storage, Provisioned IOPS, and Storage throughput.

Adding a storage volume to an existing instance
Complete these steps to add storage volumes to an existing RDS for SQL Server instance:
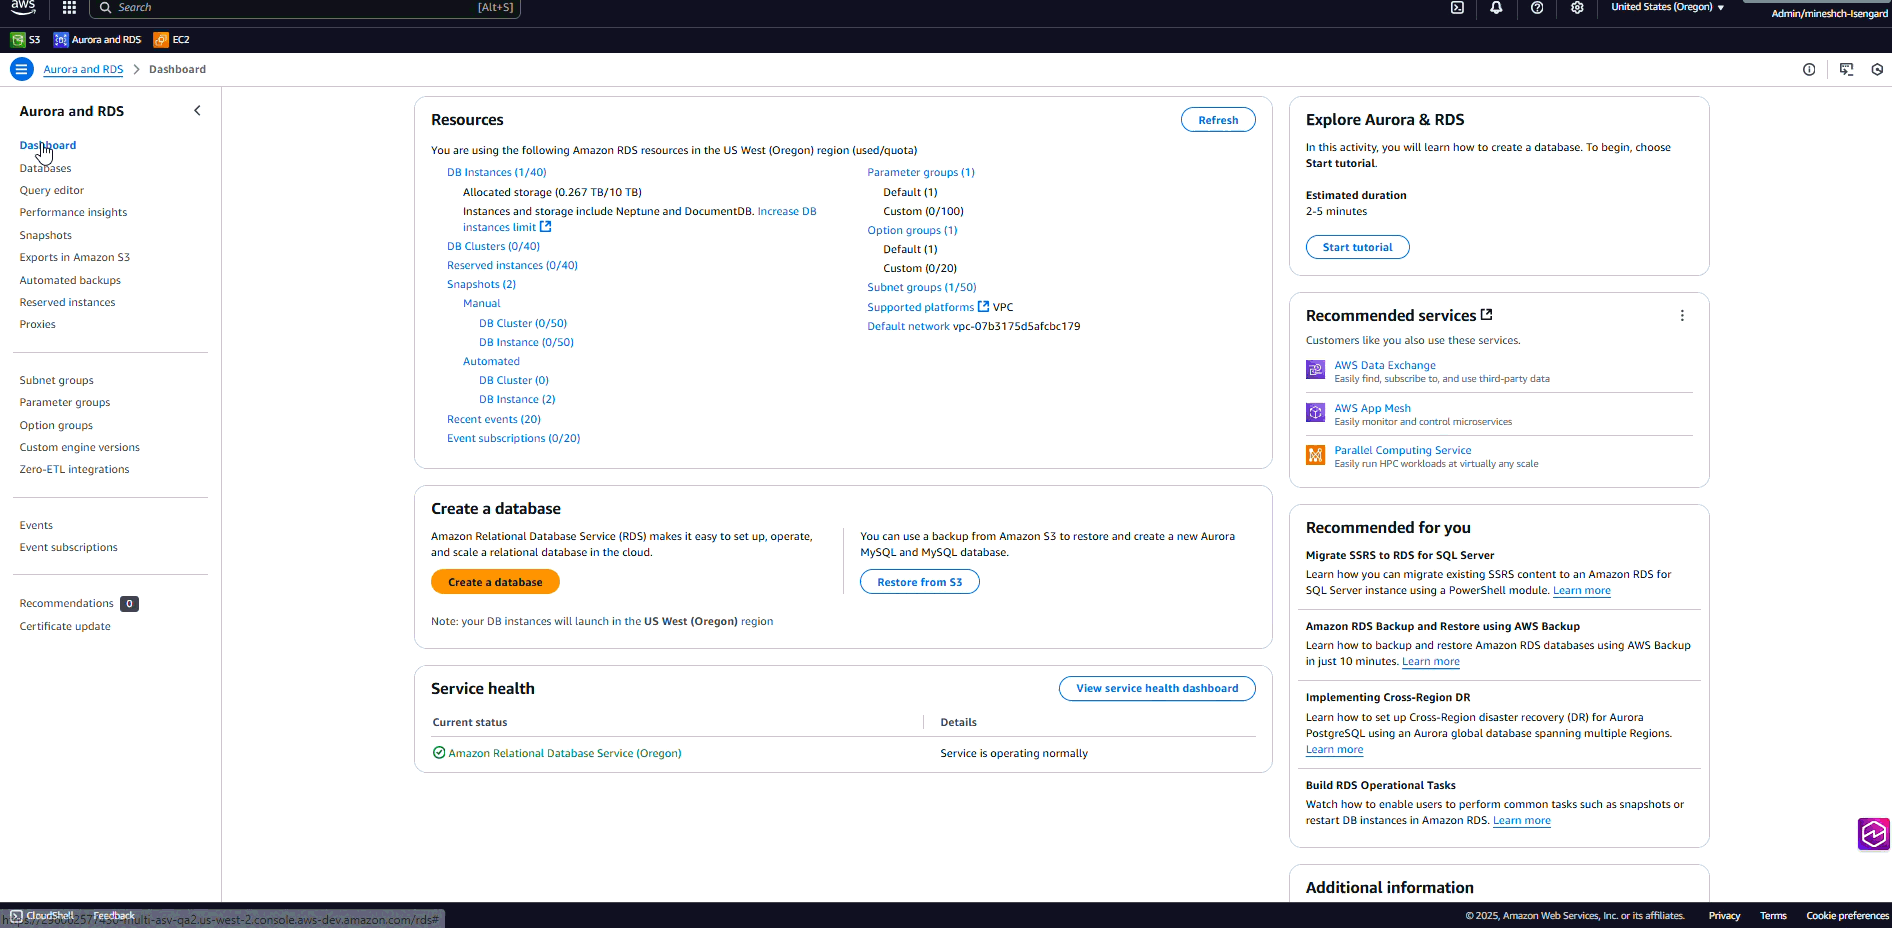
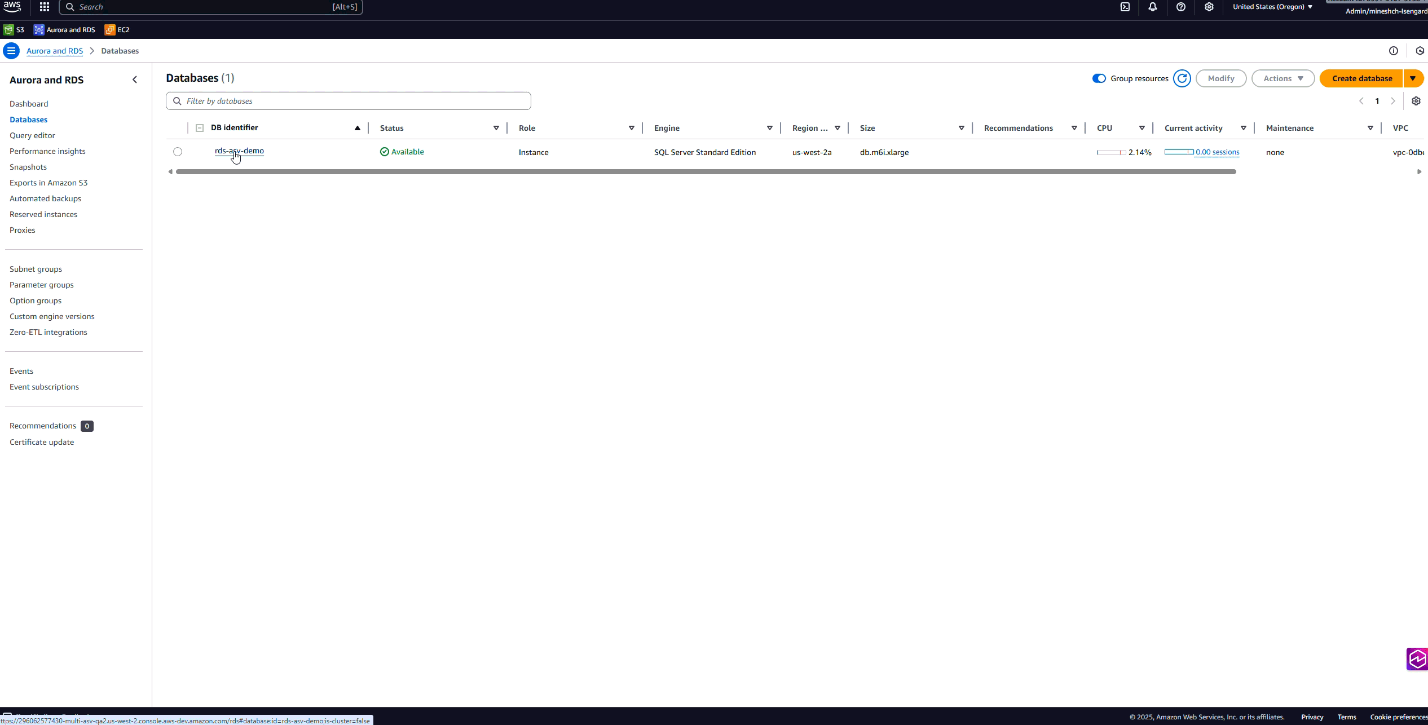
- On the Amazon RDS console, choose Databases.
- For DB identifier, select your RDS for SQL Server instance. In this example, I chose rds-asv-demo.
- Choose Configuration.
- Choose Add storage volume.
- Select appropriate values for Volume name, Storage type, Allocated storage, Provisioned IOPS, and Storage throughput.
- For Scheduling, select Apply immediately and choose Submit.
Alternatively, use the following AWS Command Line Interface (AWS CLI) to add a new storage volume to an existing Amazon RDS for SQL Server instance:
Replace <db-instance-name>, <region>, <volumename>, <storagetype>, and <value> with appropriate values.
For this example, for <volumename>, use rdsdbdata2, rdsdbdata3, or rdsdbdata4. For <storagetype> use gp3 or io2.
Scaling an additional storage volume
To scale an additional storage volume on an existing RDS for SQL Server instance, complete the following steps. While this operation typically runs without downtime, we recommend performing it during low-activity periods.
- On the Amazon RDS console, choose Databases.
- For DB identifier, select your database.
- Choose Configuration.
- Under Additional storage volumes, select the storage volume to scale and choose Modify.
- For Modify storage volume, choose appropriate values for Storage type, Allocated storage, Provisioned IOPS, and Storage throughput.
- For Scheduling, select an appropriate value and choose Submit.
To scale an existing storage volume, using the AWS CLI:.
Replace <db-instance-name>, <region> and <volumename> with appropriate values.
In the following example, we scale the IOPS of rdsdbdata2 volume to 4000.
Restoring a database on an additional storage volume
To restore a database on an additional storage volume, perform the following steps.
- Connect to your RDS for SQL Server instance in SQL Server Management Studio.
- Select New Query.
- Use the following example command to restore a database named
AdventureWorks2019on additional storage volumes. You can download a sample backup from AdventureWorks2019. Replace<bucket-name>with an appropriate value.See Importing and exporting SQL Server databases using native backup and restore for instructions to perform a database restore into an RDS for SQL Server instance. The command assumes you have configured additional storage volumes named
HandIon your RDS for SQL Server instance. - Check the status of the restore using the following command. Replace
<task_id>with appropriate values.
exec msdb.dbo.rds_task_status @task_id=<task_id>;
- Wait for the restore to complete successfully. Use the following command to check the location of the physical files.

Deleting an additional storage volume
You can only delete an additional storage volume on your instance when it’s not in use and you can’t delete the D:\ drive. To delete an additional storage volume on an existing RDS for SQL Server instance, complete the following steps:
- On the Amazon RDS console, choose Databases.
- For DB identifier, select your database.
- Choose Configuration.
- Under Additional storage volumes, select the storage volume to delete and choose Delete.
- On the Delete storage volume pop up window, enter
deleteand choose Delete.
Alternatively, use the following AWS CLI command to delete an existing storage volume on the RDS for SQL Server instance:
Replace <db-instance-name>, <region> and <volumename> with appropriate values.
Clean up
To avoid incurring unnecessary costs, remove any volumes that you’ve created but no longer need by following the instructions in the preceding section.
Conclusion
In this post, we introduced additional storage volume features for Amazon RDS for SQL Server instances and demonstrated practical implementation scenarios. We walked through the process of provisioning, deleting and managing additional storage volumes, and showed you how to restore databases to these volumes to optimize your storage architecture.Additional storage volumes provide flexibility to organize your data by workload type, improve performance through dedicated IOPS allocation, and scale your storage independently while maintaining high availability and durability.
If you have questions about implementing additional storage volumes in your environment, leave a comment.