AWS Developer Tools Blog
Run Blazor-based .NET Web applications on AWS Serverless
Blazor WebAssembly is a new client-side web development framework that lets developers to use C# to create application front end. Blazor can run client-side C# code directly in the browser, using WebAssembly. Blazor WebAssembly runs on .NET Core and it is an open source and cross-platform web framework for building single-page application using .NET and C# instead of traditional JavaScript. In this framework you implement Blazor UI components using .NET code and Razor syntax.
Web application developed using Blazor components can be hosted in two different ways. Firstly, Blazor can run directly in the client browser using WebAssembly and alternatively it can also run your client code on the server, where client event communicates to server using SignalR. In this post, you will explore the former approach. You will develop a web application interface using Blazor WebAssembly, which will run in the browser and deploy the same as static web site without any .NET server components. This blog for ASP.NET C# developers and shows steps to host a single page web application using Blazor WebAssembly to AWS, easily.
Overview of solution
In this post you will create a AWS serverless web application that will allow you to download and save any YouTube videos to your Amazon Simple Storage Service (Amazon S3) bucket. First you will set up the back end layer using Amazon API Gateway and AWS Lambda. We will use .Net Core 3.1 runtime to host AWS Lambda Code. Then you will create a web application interface, developed using Blazor WebAssembly which will be hosted as a static website with Amazon S3. This website will be accessed via Amazon CloudFront, which is a fast content delivery network (CDN) service that securely delivers static content. We will use Amazon API Gateway to post user request from the front end to the back-end layer.
Application Architecture

Prerequisites
For this walk through, you should have the following prerequisites:
- An AWS account
- As AWS Identity and Access Management (IAM) user with
AdministratorAccess. For instructions, see this deep link to create an IAM role with Administrator access. - Access to the following AWS services:
- Amazon CloudFront
- Amazon S3
- Amazon API Gateway
- Amazon Lambda
- AWS Serverless Application Model (AWS SAM)
- AWS Command Line Interface (CLI) configured with the IAM user with
AdministratorAccessaccess created above. For instructions, see this documentation. - AWS SAM CLI. For instructions, see Download SAM CLI..
- .NET Core 3.1 SDK installed. For instructions, see Download .NET Core 3.1.
- Microsoft Visual Studio 2019 16.6 or later (Visual Studio code can be an alternative)
- AWS Toolkit for Visual Studio. For instructions, see Download AWS Toolkit for Visual Studio.
This post implements the solution in Region us-east-1.
Source Code
Source code for the application back end can be downloaded from GitHub repo. Once downloaded go ahead and build the solution within Visual Studio to make sure all references are up to date.
Setting up application back end
For this walk through you will be using YDownloader project. The deployment script already has been created using AWS SAM template (template.yaml), which will help you to deploy the back end infrastructure to AWS. But to deploy this AWS CloudFormation stack first you need to create a S3 bucket. Name the bucket as code-[your-unique-bucket-name]. Please make sure that your bucket should be in the same region where you plan to deploy your back end infrastructure which is us-east-1 in this scenario.
To complete set up, use the following steps:
- Navigate to the
YDownloaderfolder and open command prompt (cmd) here. - Open swagger.yaml file and replace text
[your-aws-account-no]with your AWS account number. - Run
sam validate. Once the template been validated run below command to package the source code.sam package --template-file template.yaml --output-template-file sam.yaml --s3-bucket code-[your-unique-bucket-name] - This should create a file name
sam.yamlwhich will help us to deploy your application back end. After this run below command. This will create a CloudFormation stack name downloader and deploy AWS Lambda code to process and download your YouTube video and a AWS API Gateway endpoint with AWS Lambda integration.sam deploy --template-file sam.yaml --stack-name downloader --capabilities CAPABILITY_IAM - Once deployment has been successfully completed it should provide an API endpoint on the command console like
https://[yourapi].execute-api.[region].amazonaws.com/Prod - Make a note of the endpoint and also note the POST method endpoint will be like
https://[yourapi].execute-api.[region].amazonaws.com/Prod/downloader
Developing application front end
For this walk through you will deploy a client application ASP.NET Blazor Web Assembly in an Amazon S3 bucket. So, for that create an Amazon S3 bucket name web-[your-unique- bucket-name].
- Open Visual Studio.
- From the Get Started page, choose Create a New Project and select Blazor App.
- Provide Solution name Downloader and Project name Client and choose Create.

- At this point select Blazor WebAssembly App and select Create. This will provide you the bootstrapping code that you need to build the front end.

- Navigate to
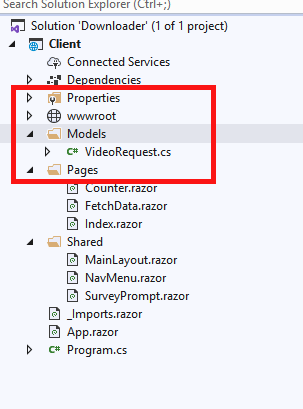
Sharedfolder and replace codes inNavMenu.razorfile with below code, this will give your web apps necessary navigation that you need<div class="top-row pl-4 navbar navbar-dark"> <a class="navbar-brand" href="">Downloader-App</a> <button class="navbar-toggler" @onclick="ToggleNavMenu"> <span class="navbar-toggler-icon"></span> </button> </div> <div class="@NavMenuCssClass" @onclick="ToggleNavMenu"> <ul class="nav flex-column"> <li class="nav-item px-3"> <NavLink class="nav-link" href="download"> <span class="oi oi-cloud-download" aria-hidden="true"></span>Download </NavLink> </li> </ul> </div> @code { private bool collapseNavMenu = true; private string NavMenuCssClass => collapseNavMenu ? "collapse" : null; private void ToggleNavMenu() { collapseNavMenu = !collapseNavMenu; } } - Create a folder name Models at the project level and create a class name
VideoRequest.csunder Models. This class will be needed to hold form data.
- Add below properties in the
VideoRequestclass.using System; using System.Collections.Generic; using System.Text; namespace Client { public class VideoRequest { public string Url { get; set; } public string BucketName { get; set; } public string VideoTitle { get; set; } } } - Under Pages create a new Razor component name
Download.razor. This will hold the view needed by the application front end.
- Add below code to render the user interface
@page "/download" @using System.Net.Http @inject HttpClient Http <table class="table"> <tr class="form-group"> <td><span class="col-form-label">Youtube URL</span></td> <td><input type="text" class="input-group" @bind="videoRequest.Url" /></td> </tr> <tr class="form-group"> <td><span class="col-form-label">Bucket Name</span></td> <td><input type="text" class="input-group" @bind="videoRequest.BucketName" /></td> </tr> <tr class="form-group"> <td><span class="col-form-label">Video Title</span></td> <td><input type="text" class="input-group" @bind="videoRequest.VideoTitle" /></td> </tr> <tr class="form-group"> <td></td> <td><button class="btn btn-primary" @onclick="DownloadVideo">Download </button></td> </tr> <tr class="form-group"> <td></td> <td><h2 class="alert-info">@uploadMsg</h2></td> </tr> </table> - Notice each
inputbeen bound to the model and it has aonclickevent to post the data to back end. - To handle the
onclickevent, ASP.NET Blazor lets you write C# code in the same file. So, append below code in theDownload.razorfile@code { private VideoRequest videoRequest = new VideoRequest(); private string uploadMsg = string.Empty; private async Task DownloadVideo() { var response = await Http.PostAsJsonAsync("https://<yourapi>.execute-api.<region>.amazonaws.com/prod/downloader", videoRequest); if (response.StatusCode == System.Net.HttpStatusCode.OK) { uploadMsg = "File Successfully uploaded."; } } }Note: Replace the Amazon API Gateway endpoint received while deploying the application back end
- Choose Build, Build Solution.
- Press CTRL + Shift + B to make sure the current solution is building correctly.
Deploying application front end
Once you build your solution all static component you need to deploy will be put together by framework under wwwroot folder located under the project directory.
- Copy
_frameworkfolder frombin,Debug,netstandard2.1,wwwrootto thewwwrootfolder
- Alternatively, you can also run
command prompt(cmd) on this folder and run following command and copy the content available underweb-publish,wwwroot.dotnet publish Client.csproj --output web-publish
- Open Window Command Prompt at this level (
Downloader,Client,wwwroot) runaws s3 sync . s3://web-[your-unique-bucket-name]command to sync content from this folder to Amazon S3 bucket you have created before as shown in the screenshot below
- Launch an AWS CloudFormation stack from this deep link with
existing_s3bucket_with_cloudfront.yamlfile available in GitHub repo to create a AWS CloudFront distribution in front of your Amazon S3 bucket. - Please select below options while launching your stack and choose Next. Please make sure Amazon S3 bucket name should be same as your front end deployment bucket which is
web-[your-unique-bucket-name]
- On this page keep everything default and choose Next again.
- Select Create Stack.
Alternatively, you can also launch the CloudFormation stack from the Command Line Interface (CLI) within the same folder where theexisting_s3bucket_with_cloudfront.yamlfile is located asaws cloudformation create-stack --stack-name pb-cloudfrontfors3 --template-body file://existing_s3bucket_with_cloudfront.yaml --parameters ParameterKey=OAIEnabled,ParameterValue=yes ParameterKey=S3BucketName,ParameterValue= web-[your-unique-bucket-name]
Launching AWS Serverless video downloader
Once the AWS CloudFormation stack shows CREATE_COMPLETE click the AWS CloudFront domain name from the Outputs window of the AWS CloudFormation console. 
Now your video downloader app using Blazor WebAssembly is ready. Type a YouTube url with an existing Amazon S3 bucket that you have access to and video title and you will have your video downloaded for you. 
Cleaning up
To avoid incurring future charges, on the AWS CloudFormation console, delete both the stacks created for this post. In order to do so
- Open the AWS CloudFormation console .
- On the Stacks page in the CloudFormation console, select the stack that you want to delete. The stack must be currently running.
- In the stack details pane, choose Delete.
- Select Delete stack when prompted.
About the Author
 |
Pratip Bagchi is a Partner Solutions Architect with Amazon Web Services.
|