AWS Cloud Operations Blog
Secure monitoring of user workflow experience using Amazon CloudWatch Synthetics and AWS Secrets Manager
Customers often need an easy way to monitor the URLs, API endpoints, and critical GUI workflows of their web applications in a secure fashion. Monitoring helps keep the service available by detecting performance bottlenecks and operational issues as soon as they arise. Customers also want to be alerted when availability and latency issues occur so that they can quickly respond and address them.
In this blog post, I explain how to create, deploy, and monitor synthetic monitoring solution using Amazon CloudWatch Synthetics. Instead of exposing the application credentials in a script, I show you how to integrate the solution with AWS Secrets Manager to manage them in a secure manner.
Overview
Amazon CloudWatch Synthetics is a fully managed synthetic monitoring service that allows developers and DevOps engineers to measure availability of their application endpoints and URLs. It uses configurable scripts called canaries that run 24×7. Canaries alert you as soon as an API, URL, or endpoint does not work as expected, as defined by the canary script. CloudWatch Synthetics canaries can be customized to check for availability, latency, transactions, broken or dead links, and step-by-step task completions. They can also check for page load errors, load latencies for UI assets, complex wizard flows, or checkout flows in your applications.
AWS Secrets Manager helps you protect secrets required to access your applications, services, and IT resources. The service enables you to easily rotate, manage, and retrieve database credentials, API keys, and other secrets throughout their lifecycle. AWS IAM users and applications retrieve secrets with a call to Secrets Manager API operations, reducing the need to hardcode sensitive information in plaintext.
Solution architecture
The solution for monitoring end-to-end customer user flows in a secure fashion requires the creation of:
- An Amazon CloudWatch Synthetics canary for a critical workflow of a sample website.
- Alarms in CloudWatch to get notifications and to integrate the canary with AWS Secrets Manager to retrieve credentials.
You can easily deploy this solution by using the AWS CloudFormation script given in the later section.
I use a pre-provisioned version of the bookstore demo application to demonstrate a GUI-based workflow using Amazon CloudWatch Synthetics. To use this application, you must first create a user name and password. These credentials are stored in Secrets Manager and are retrieved using the canary scripts.
Implementing the solution
To implement this solution, you must:
- Create an Amazon CloudWatch Synthetics canary.
- Create an AWS Secrets Manager secret.
- Attach Secrets Manager IAM policy to CloudWatch Synthetics role.
- Modify the canary script to retrieve secrets from Secrets Manager.
- Deploy the same solution using AWS CloudFormation template (Optional)
Prerequisites
- Navigate to the pre-provisioned version of the bookstore demo application.
- Click signup and create a user name and password to login into the application.
Creating a canary in Amazon CloudWatch Synthetics
To begin, create an Amazon CloudWatch Synthetics canary to monitor your website.
- Sign in to the AWS Management Console.
- In the Search box, enter
CloudWatch. - In the CloudWatch console, under Synthetics, choose Canaries.
- Choose Create canary.
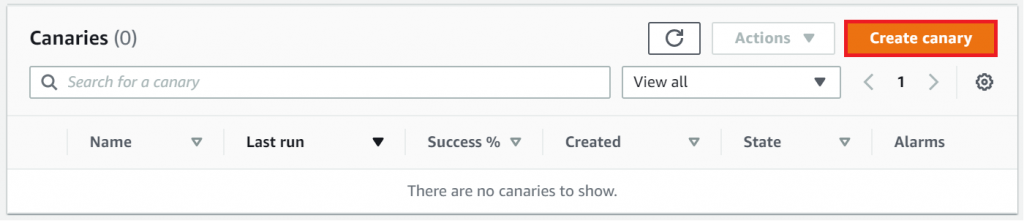
Figure 1: Create canary button
- On the Create canary page, choose Use a blueprint and GUI workflow builder.
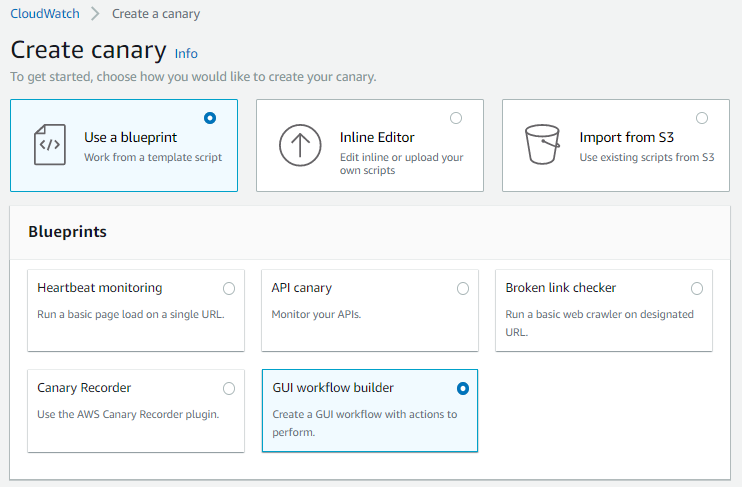
Figure 2: Use a blueprint and GUI workflow builder selected in the CloudWatch console
- In Canary builder, enter a name for the canary (
aws-book-store-demo). - Enter the application or endpoint URL for your website. For this blog post, I have given the URL of the AWS Book store demo application.

Figure 3: Canary builder section
- In the Workflow builder section, use the Action, Selector, and Text boxes to specify the actions you want the canary to take on your website. Selectors are HTML elements behind click and type actions on your website (for example,
href,id,button,div).
In the preprovisioned version of the application, here is the end-to-end workflow:
Create a user name and password, and sign in to the application. Navigate to the home page and search for a book named database. Navigate to the results page, and on the first result, choose the Add to cart button. Navigate to the checkout page and choose Log out to complete the workflow.
If you click the HTML element on the webpage, you can get the name of the selector from browser developer tools for use in the following script. You can also use CloudWatch Synthetics Recorder to generate user flow scripts for canaries.
These actions are for the flow performed on the sample application.
-
- In Action, choose Click with navigation. In Selector, enter
[href='/login']. Choose Add action. - In Action, choose Input text. In Selector, enter
[id='email']. In Text, enteremail. Choose Add action. You will replace the user name as an AWS Secrets Manager variable after the script is generated. - In Action, choose Input text. In Selector, enter
[id=password]. In Text, enterpassword. Choose Add action. You will replace the password as an AWS Secrets Manager variable after the script is generated. - In Action, choose Click with navigation. In Selector, enter
button[class='btn btn-lg btn-default btn-block']. Choose Add action. - In Action, choose Verify Selector. In Selector, enter
[id='txtSearch']. Choose Add action. - In Action, choose Input text. In Selector, enter
[id='txtSearch']. In Text, enterdatabase. Choose Add action. - In Action, choose Click with navigation. In Selector, enter
button[class='btn btn-orange no-radius']. Choose Add action. - In Action, choose Verify Selector. In Selector, enter
div[class='container-category']. Choose Add action. - In Action, choose Click with navigation. In Selector, enter
button[class='btn btn-black btn-black-center']. Choose Add action. - In Action, choose Verify Selector. In Selector, enter
div[class='media']. Choose Add action. - In Action, choose Click with navigation. In Selector, enter
[href='#'].
- In Action, choose Click with navigation. In Selector, enter
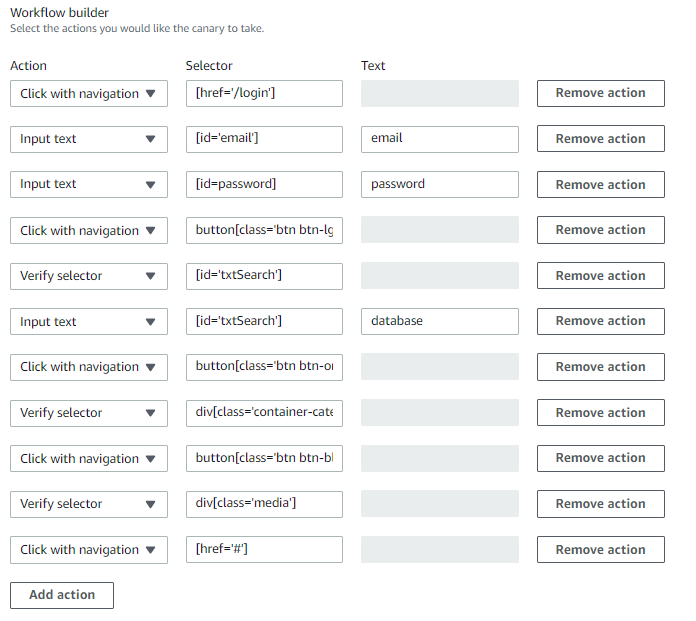
Figure 4: Workflow builder section
- In Screenshots section, select Take Screenshots
- In Script editor section, keep the Runtime version as
syn-nodejs-2.1 - In the Schedule section, choose Run continuously and keep the default frequency, in minutes, at which your canary should run. Do not select the Start immediately after creation check box.
- In the Additional configuration section, enter the default timeout value for the canary in minutes and seconds.
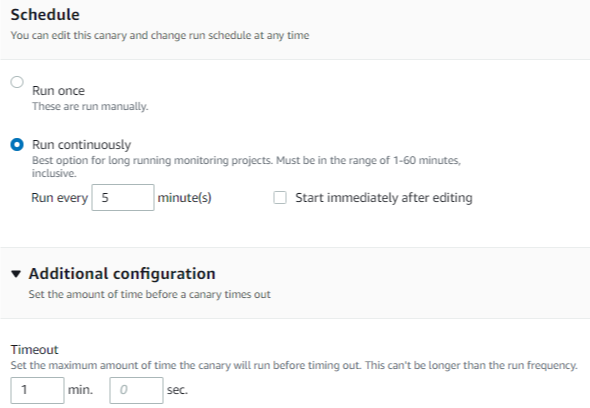
Figure 5: Schedule and Additional configuration sections
- In the Data retention section, for Failure data retention and Success data retention, keep the default periods for the canary data.
- In the Data Storage section, keep S3 location at the default. CloudWatch Synthetics creates a bucket for the data storage.
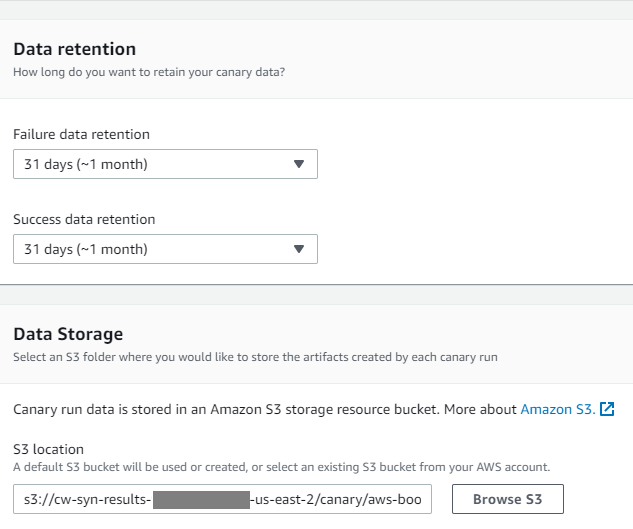
Figure 6: Data retention and Data Storage sections for the S3 bucket
- In the Access permissions section, choose Create a new role.
- In the CloudWatch alarms section, choose Add new alarm, and then select Duration and SuccessPercent as metrics.
- In the Set notifications for this canary section, choose Create a new topic, provide the topic name and Email endpoints that will receive the notification. Choose Create topic.
Note: You will receive a verification email from AWS to confirm the notification subscription. Click the link in the email to verify the subscription.
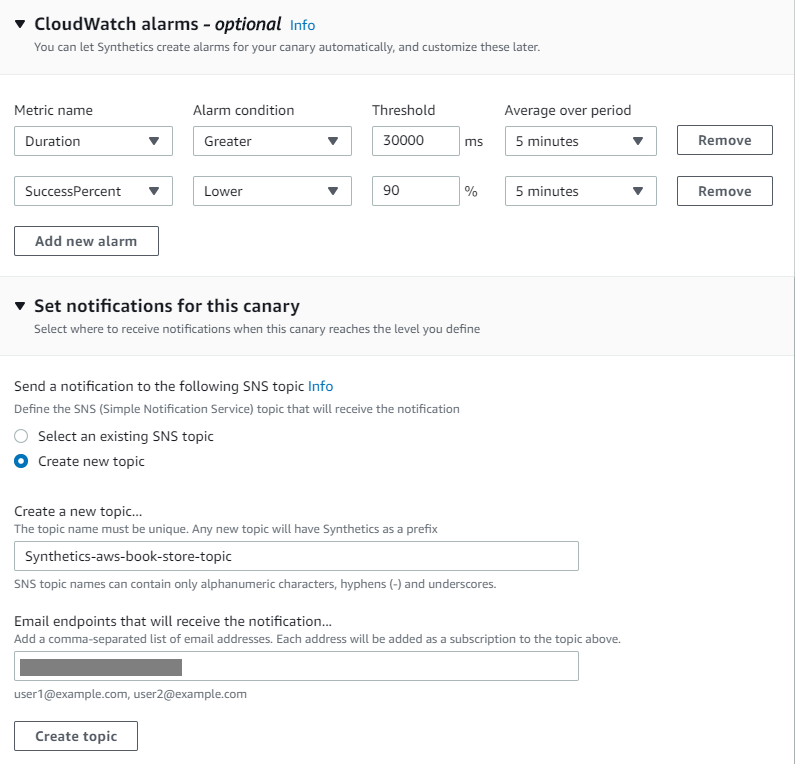
Figure 7: Create CloudWatch alarms and set notifications for the canary
- If your website, or resource is deployed in a VPC, in the VPC settings section, choose your VPC.
- In the Tags section, choose Add a new tag button to add tags to canaries to help set permissions, organize, and search for them later.
- Keep Active Tracing – Optional section as default.
- Choose Create canary.
Note: This operation might take up to a minute. After the canary is created, a success message appears.
Creating a secret in AWS Secrets Manager
We do not recommend that you store the application user name and password in clear text in the canary script. Follow these steps to store the user name and password in AWS Secrets Manager and retrieve it in the canary script to be used in the workflow action.
- Open the AWS Secrets Manager console.
- On the Store a new secret section, under Select secret type, choose Other type of secrets.
- Under Specify the key/value pairs to be stored in this secret, add rows for username and password, and then enter the application user name and password.
- In Select the encryption key, choose DefaultEncryptionKey, and then choose Next.
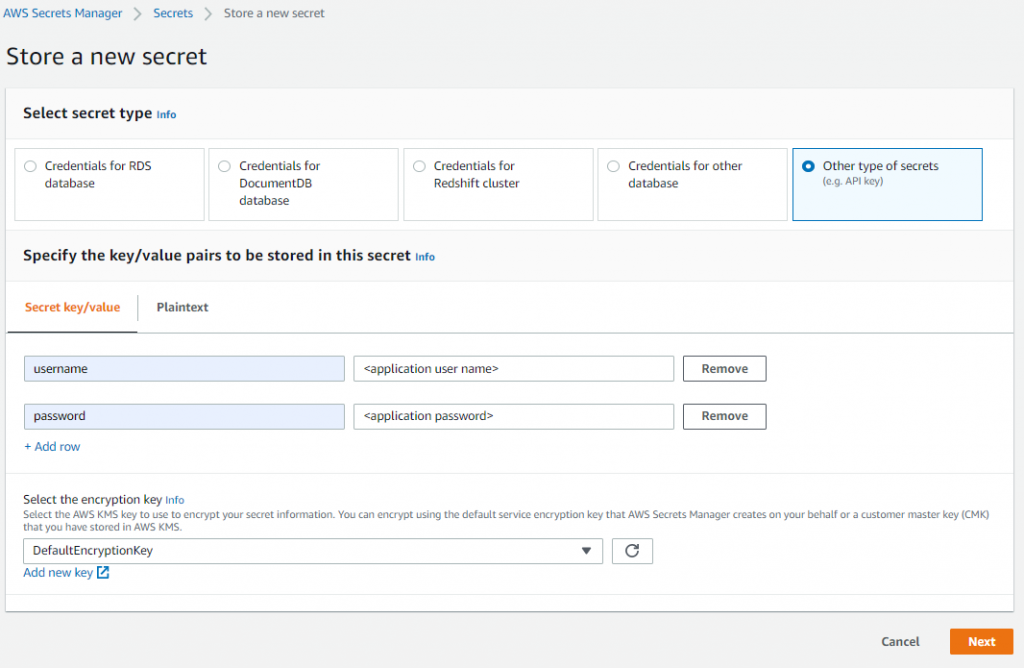
Figure 8: Create secret in the Secrets Manager console.
- For the secret name, enter
mysecret, enter an optional description, and then choose Next. - Choose Disable automatic rotation, and then choose Next.
- Choose Store.
Attaching Secrets Manager access policy to the CloudWatch Synthetics role
- Return to the Amazon CloudWatch console, and choose your canary from the list.
- On the canary details page, choose the Configuration tab.
- Under Executed with role, choose the IAM role.
- Choose Add inline policy.
- On the JSON tab, enter the following policy. Replace the AWS account ID placeholder with your account ID and Region with AWS Region where is canary is created.
{
    "Version": "2012-10-17",
    "Statement": [
        {
            "Sid": "synthetics",
            "Effect": "Allow",
            "Action": [
                "secretsmanager:GetSecretValue"
            ],
            "Resource": "arn:aws:secretsmanager:Region:Your AWS Account ID:secret:mysecret*"
        }
    ]
}
- Choose Review Policy, enter a name for the policy (
cw-synthetics-sm-policy), and then choose Create Policy.
Modifying the canary script to retrieve the secrets from AWS Secrets Manager
- To integrate with AWS Secrets Manager, add the following code to the canary script.
- On the canary details page, from Actions, choose Edit.
- Replace the script under Script editor section with the script given below and Choose Save.
var synthetics = require('Synthetics');
const log = require('SyntheticsLogger');
const AWS = require('aws-sdk');
const secretsManager = new AWS.SecretsManager();


const flowBuilderBlueprint = async function () {
    // INSERT URL here
    let url = "https://d2h3ljlsmzojxz.cloudfront.net/";

    // Get synthetics configuration
    let syntheticsConfig = synthetics.getConfiguration();

    // Set configuration values
    syntheticsConfig.setConfig({
       screenshotOnStepStart : true,
       screenshotOnStepSuccess: true,
       screenshotOnStepFailure: true
    });

    // Create a client for Secrets Manager
    const getSecrets = async (secretName) => {
    var params = {
        SecretId: secretName
    };
    return await secretsManager.getSecretValue(params).promise();
    }

    // Fetch secrets
    let secrets = await getSecrets("mysecret")
    let secretsObj = JSON.parse(secrets.SecretString);


    let page = await synthetics.getPage();

    // Navigate to the initial url
    await synthetics.executeStep('navigateToUrl', async function (timeoutInMillis = 30000) {
        await page.goto(url, {waitUntil: ['load', 'networkidle0'], timeout: timeoutInMillis});
    });

    // Execute customer steps
    await synthetics.executeStep('redirection', async function () {
        await Promise.all([
           page.waitForNavigation({ timeout: 30000 }),
           await page.click("[href='/login']")
        ]);
    });
    await synthetics.executeStep('input', async function () {
        await page.type("[id='email']", secretsObj.username);
    });
    await synthetics.executeStep('input', async function () {
        await page.type("[id=password]", secretsObj.password);
    });
    await synthetics.executeStep('redirection', async function () {
        await Promise.all([
           page.waitForNavigation({ timeout: 30000 }),
           await page.click("button[class='btn btn-lg btn-default btn-block']")
        ]);
    });
    await synthetics.executeStep('verifySelector', async function () {
        await page.waitForSelector("[id='txtSearch']", { timeout: 30000 });
    });
    await synthetics.executeStep('input', async function () {
        await page.type("[id='txtSearch']", "database");
    });
    await synthetics.executeStep('redirection', async function () {
        await Promise.all([
           page.waitForNavigation({ timeout: 30000 }),
           await page.click("button[class='btn btn-orange no-radius']")
        ]);
    });
    await synthetics.executeStep('verifySelector', async function () {
        await page.waitForSelector("div[class='container-category']", { timeout: 30000 });
    });
    await synthetics.executeStep('redirection', async function () {
        await Promise.all([
           page.waitForNavigation({ timeout: 30000 }),
           await page.click("button[class='btn btn-black btn-black-center']")
        ]);
    });
    await synthetics.executeStep('verifySelector', async function () {
        await page.waitForSelector("div[class='media']", { timeout: 30000 });
    });
    await synthetics.executeStep('redirection', async function () {
        await Promise.all([
           page.waitForNavigation({ timeout: 30000 }),
           await page.click("[href='#']")
        ]);
    });


};

exports.handler = async () => {
    return await flowBuilderBlueprint();
};
Note: This operation might take up to a minute. When it is complete, a success message appears.
- Choose the canary you updated and from Actions, choose Start. This starts the canary execution. You should see a successful execution of the script.
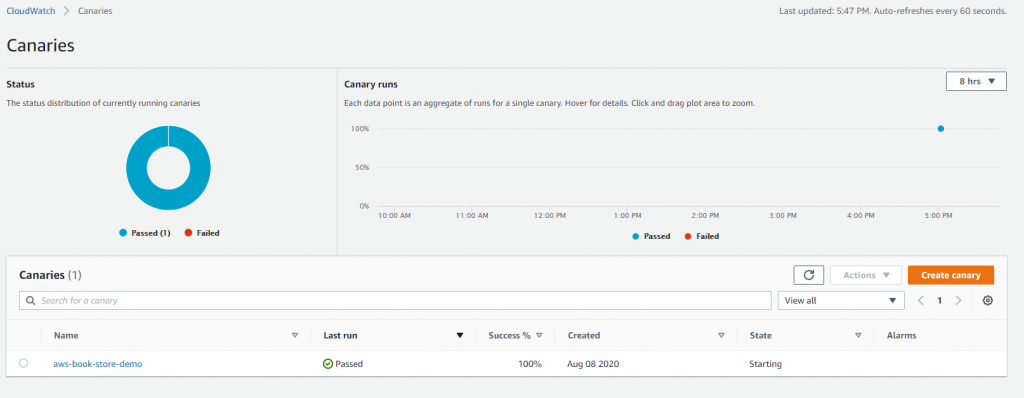
Figure 9: Canaries page
Deploying the canary using AWS CloudFormation script (Optional)
You can deploy the canary you created in the previous section using the following AWS CloudFormation script.
Description: "This template creates an Amazon Cloudwatch Synthetics Canary and required resources"
Parameters:
  UserName:
    Description: Username for your application to be stored in the Secret Manager
    Type: String
  Password:
    Description: Password for your application to be stored in the Secret Manager
    Type: String
  CanaryName:
    Type: String
    Description: Name of your Canary. A name consists of up to 21 lowercase letters, numbers, hyphens or underscores with no spaces.
  CanarySuccessLowAlarmName:
    Type: String
    Description: Name of your CW Alarm for Success Percent.
  CanaryDurationAlarmName:
    Type: String
    Description: Name of your CW Alarm for Duration.
Resources:
  SecretManagerSecret:
    Type: "AWS::SecretsManager::Secret"
    Properties:
      Description: Secret for the application
      SecretString: !Join [ "", ["{\"username\":\"",!Ref UserName,"\",\"password\":\"",!Ref Password,"\"}"] ]
      Name: myappsecret

  SyntheticsLambdaExecutionRole:
    Type: "AWS::IAM::Role"
    Properties:
      AssumeRolePolicyDocument:
        Version: "2012-10-17"
        Statement:
          - Sid: ""
            Effect: "Allow"
            Principal:
              Service: "lambda.amazonaws.com"
            Action: "sts:AssumeRole"
  SyntheticsLambdaExecutionRolePolicies:
    Type: "AWS::IAM::Policy"
    Properties:
      PolicyName: "SyntheticsLambdaExecutionRolePolicy"
      PolicyDocument:
        Version: "2012-10-17"
        Statement:
          - Action:
              - "s3:PutObject"
              - "s3:GetBucketLocation"
            Resource:
              - !Sub "arn:aws:s3:::${ArtifactS3LocationBucket}/*"
            Effect: "Allow"
          - Action:
              - "s3:ListAllMyBuckets"
              - "xray:PutTraceSegments"
            Resource: "*"
            Effect: "Allow"
          - Action:
              - "cloudwatch:PutMetricData"
            Resource: "*"
            Effect: "Allow"
          - Action:
              - "logs:*"
            Resource:
              Fn::Sub: "arn:${AWS::Partition}:logs:*:*:*"
            Effect: "Allow"
          - Action:
              - "secretsmanager:GetSecretValue"
            Resource: !Ref SecretManagerSecret
            Effect: "Allow"
      Roles:
        - !Ref "SyntheticsLambdaExecutionRole"

  ArtifactS3LocationBucket:
    Type: "AWS::S3::Bucket"
    Properties:
      BucketName: !Join [ '', ['cw-syn-results-', !Ref 'AWS::Region', '-', !Ref 'AWS::AccountId' ] ]
      BucketEncryption:
        ServerSideEncryptionConfiguration:
          - ServerSideEncryptionByDefault:
              SSEAlgorithm: AES256

  LambdaWaiter:
    Type: "AWS::Lambda::Function"
    Properties:
      Handler: "index.handler"
      Runtime: "nodejs12.x"
      Timeout: 900
      Role: !GetAtt SyntheticsLambdaExecutionRole.Arn
      Code:
        ZipFile: |
          exports.handler = function(e,r) {
            var response = require('cfn-response');
            var waitTimeSeconds = e.ResourceProperties.WaitSeconds;
            var waitTime = waitTimeSeconds * 1000;
            setTimeout(function(){
              response.send(e, r, response.SUCCESS, {}, "Waiter-" + waitTimeSeconds + "-Seconds")
            }, waitTime);
          };

  SyntheticsCanary:
    Type: AWS::Synthetics::Canary
    DependsOn:
      - SecretManagerSecret
      - SyntheticsLambdaExecutionRole
      - SyntheticsLambdaExecutionRolePolicies
    Properties:
      Name: !Ref CanaryName
      Code:
        Handler: "flowBuilderBlueprint.handler"
        Script: "var synthetics = require('Synthetics');\nconst log = require('SyntheticsLogger');\nconst AWS = require('aws-sdk');\nconst secretsManager = new AWS.SecretsManager();\n\n\nconst flowBuilderBlueprint = async function () {\n    // INSERT URL here\nlet url = \"https://d2h3ljlsmzojxz.cloudfront.net/\";\n\n    // Get synthetics configuration\n    let syntheticsConfig = synthetics.getConfiguration();\n\n    // Set configuration values\n    syntheticsConfig.setConfig({\n       screenshotOnStepStart : true,\n       screenshotOnStepSuccess: true,\n       screenshotOnStepFailure: true\n    });\n    \n    // Create a client for Secrets Manager\n    const getSecrets = async (secretName) => {\n    var params = {\n        SecretId: secretName\n    };\n    return await secretsManager.getSecretValue(params).promise();\n    }\n\n    // Fetch secrets\n    let secrets = await getSecrets(\"myappsecret\")\n    let secretsObj = JSON.parse(secrets.SecretString);\n\n\n    let page = await synthetics.getPage();\n\n    // Navigate to the initial url\n    await synthetics.executeStep('navigateToUrl', async function (timeoutInMillis = 30000) {\n        await page.goto(url, {waitUntil: ['load', 'networkidle0'], timeout: timeoutInMillis});\n    });\n\n    // Execute customer steps\n    await synthetics.executeStep('redirection', async function () {\n        await Promise.all([\n           page.waitForNavigation({ timeout: 30000 }),\n           await page.click(\"[href='/login']\")\n        ]);\n    });\n    await synthetics.executeStep('input', async function () {\n        await page.type(\"[id='email']\", secretsObj.username);\n    });\n    await synthetics.executeStep('input', async function () {\n        await page.type(\"[id=password]\", secretsObj.password);\n    });\n    await synthetics.executeStep('redirection', async function () {\n        await Promise.all([\n           page.waitForNavigation({ timeout: 30000 }),\n           await page.click(\"button[class='btn btn-lg btn-default btn-block']\")\n        ]);\n    });\n    await synthetics.executeStep('verifySelector', async function () {\n        await page.waitForSelector(\"[id='txtSearch']\", { timeout: 30000 });\n    });\n    await synthetics.executeStep('input', async function () {\n        await page.type(\"[id='txtSearch']\", \"database\");\n    });\n    await synthetics.executeStep('redirection', async function () {\n        await Promise.all([\n           page.waitForNavigation({ timeout: 30000 }),\n           await page.click(\"button[class='btn btn-orange no-radius']\")\n        ]);\n    });\n    await synthetics.executeStep('verifySelector', async function () {\n        await page.waitForSelector(\"div[class='container-category']\", { timeout: 30000 });\n    });\n    await synthetics.executeStep('redirection', async function () {\n        await Promise.all([\n           page.waitForNavigation({ timeout: 30000 }),\n           await page.click(\"button[class='btn btn-black btn-black-center']\")\n        ]);\n    });\n    await synthetics.executeStep('verifySelector', async function () {\n        await page.waitForSelector(\"div[class='media']\", { timeout: 30000 });\n    });\n    await synthetics.executeStep('redirection', async function () {\n        await Promise.all([\n           page.waitForNavigation({ timeout: 30000 }),\n           await page.click(\"[href='#']\")\n        ]);\n    });\n\n    \n};\n\nexports.handler = async () => {\n    return await flowBuilderBlueprint();\n};"
      ExecutionRoleArn:
        Fn::GetAtt: SyntheticsLambdaExecutionRole.Arn
      ArtifactS3Location: !Join [ '', ['s3://', !Ref ArtifactS3LocationBucket] ]
      RuntimeVersion: "syn-nodejs-2.1"
      Schedule: {Expression: 'rate(5 minutes)', DurationInSeconds: '3600'}
      RunConfig: {TimeoutInSeconds: 60}
      FailureRetentionPeriod: 30
      SuccessRetentionPeriod: 30
      StartCanaryAfterCreation: true

  CanarySuccessLowCWAlarm:
    Type: AWS::CloudWatch::Alarm
    Properties:
      AlarmName: !Ref CanarySuccessLowAlarmName
      AlarmDescription: The CloudWatch Synthetics Canary that monitors the Application
      Namespace: CloudWatchSynthetics
      MetricName: SuccessPercent
      Dimensions:
        - Name: CanaryName
          Value: !Ref CanaryName
      Statistic: Average
      ComparisonOperator: LessThanOrEqualToThreshold
      Threshold: 0
      Period: 300 # 5-min
      EvaluationPeriods: 2 # Alarm if the canary is not running/failing for 10 minutes
      TreatMissingData: breaching # Catch if the canary is not running

  CanaryDurationCWAlarm:
    Type: AWS::CloudWatch::Alarm
    Properties:
      AlarmName: !Ref CanaryDurationAlarmName
      AlarmDescription: The CloudWatch Synthetics Canary that monitors the Application
      Namespace: CloudWatchSynthetics
      MetricName: Duration
      Dimensions:
        - Name: CanaryName
          Value: !Ref CanaryName
      Statistic: Average
      ComparisonOperator: GreaterThanOrEqualToThreshold
      Threshold: 300000 # 5-min
      Period: 300 # 5-min
      EvaluationPeriods: 2 # Alarm if the canary is not running/failing for 10 minutes
      TreatMissingData: breaching # Catch if the canary is not running

  WaiterCustomResource:
    Type: "AWS::CloudFormation::CustomResource"
    DeletionPolicy: Retain
    UpdateReplacePolicy: Retain
    Properties:
      ServiceToken: !GetAtt LambdaWaiter.Arn
      WaitSeconds: 120

Outputs:
  CanaryName:
    Value: !Ref "SyntheticsCanary"
Follow these steps to deploy the canaries using AWS CloudFormation.
- Use the preceding code block to save a template as a local file (.yml extension) on your computer.
- Open the AWS CloudFormation console.
- In the left navigation pane, choose Stacks, and then choose Create stack.
- In Specify template, choose Upload a template file, and then choose the AWS CloudFormation template file you saved. Choose Next.
- Enter a name for your stack (for example,
aws-synthetics-stack). - In Parameters, provide the following, and then choose Next.
- CanaryDurationAlarmName: The alarm name for the Duration metric(for example,
mycanary-durationalarm). - CanaryName: The name of your canary (for example,
mycanary). - CanarySuccessLowAlarmName: The alarm name for the SuccessPercent metric. (for example,
mycanary-successlowalarm). - Password: The password for your web application.
- UserName: The user name for your web application.
- CanaryDurationAlarmName: The alarm name for the Duration metric(for example,
- Define your tags, and then choose Next. (Optional)
- On the last page, in Capabilities, be sure to select the check box, and then choose Create stack.
Cleanup
To avoid charges to your account, remove the resources you created.
- In the Amazon CloudWatch console, choose the canaries you created and from Actions, choose Stop.
- Choose the canaries again and from Actions, choose Delete.
When you delete a canary, the resources used and created by the canary are not deleted automatically. Also delete the following:
- In the Amazon CloudWatch console, delete the CloudWatch alarms created for this canary. These alarms have a name of
Synthetics-Alarm-MyCanaryName. - In the Amazon CloudWatch console, delete the CloudWatch log groups created for the canary. These logs groups have the name
aws/lambda/cwsyn-MyCanaryName. - In the AWS Lambda console, delete the Lambda function used by this canary. These have the prefix
cwsyn-MyCanaryName. - In the Amazon S3 console, delete the Amazon S3 objects and buckets created for this canary, such as the canary’s artifact location.
- In the AWS Identity and Access Management console, delete the IAM roles created for the canary. If they were created in the console, these roles have the name
role/service-role/CloudWatchSyntheticsRole-MyCanaryName. - In the AWS Secrets Manager console, delete the secrets created for the canary (for example, mysecret). Remember that AWS Secrets Manager enforces a minimum waiting period of 7 days to give you time to update your code. You will not be able to retrieve the secret if it is scheduled for deletion.
If you have created your canary using the AWS CloudFormation script, following steps can help you delete the resources:
- Navigate to Amazon S3 console, delete the Amazon S3 objects in the canary’s artifact bucket. These have a prefix
cw-syn-results. - Navigate to the AWS CloudFormation console, select the stack you created (
aws-synthetics-stack) and click Delete from the menu. - Click Delete stack from the confirmation pop-up.
Conclusion
In this post, I’ve shown how you can use Amazon CloudWatch Synthetics and AWS Secrets Manager to automatically monitor the end-to-end workflows of your web applications in a secure manner. I’ve also shown how alarms and notifications can be set to help you troubleshoot availability and latency issues in your application.
You can read more about Amazon CloudWatch Synthetics in the user guide.
About the Author
 |
Venugopalan Vasudevan is a Senior Technical Account Manager with AWS based in Denver, Colorado. Venu works with AWS customers to solve architectural, operational, and cost optimization challenges and help them build on AWS. In his spare time, he enjoys playing with his two kids. |