AWS Big Data Blog
AWS Glue Now Supports Scala Scripts
We are excited to announce AWS Glue support for running ETL (extract, transform, and load) scripts in Scala. Scala lovers can rejoice because they now have one more powerful tool in their arsenal. Scala is the native language for Apache Spark, the underlying engine that AWS Glue offers for performing data transformations.
Beyond its elegant language features, writing Scala scripts for AWS Glue has two main advantages over writing scripts in Python. First, Scala is faster for custom transformations that do a lot of heavy lifting because there is no need to shovel data between Python and Apache Spark’s Scala runtime (that is, the Java virtual machine, or JVM). You can build your own transformations or invoke functions in third-party libraries. Second, it’s simpler to call functions in external Java class libraries from Scala because Scala is designed to be Java-compatible. It compiles to the same bytecode, and its data structures don’t need to be converted.
To illustrate these benefits, we walk through an example that analyzes a recent sample of the GitHub public timeline available from the GitHub archive. This site is an archive of public requests to the GitHub service, recording more than 35 event types ranging from commits and forks to issues and comments.
This post shows how to build an example Scala script that identifies highly negative issues in the timeline. It pulls out issue events in the timeline sample, analyzes their titles using the sentiment prediction functions from the Stanford CoreNLP libraries, and surfaces the most negative issues.
Getting started
Before we start writing scripts, we use AWS Glue crawlers to get a sense of the data—its structure and characteristics. We also set up a development endpoint and attach an Apache Zeppelin notebook, so we can interactively explore the data and author the script.
Crawl the data
The dataset used in this example was downloaded from the GitHub archive website into our sample dataset bucket in Amazon S3, and copied to the following locations:
Choose the best folder by replacing <region> with the region that you’re working in, for example, us-east-1. Crawl this folder, and put the results into a database named githubarchive in the AWS Glue Data Catalog, as described in the AWS Glue Developer Guide. This folder contains 12 hours of the timeline from January 22, 2017, and is organized hierarchically (that is, partitioned) by year, month, and day.
When finished, use the AWS Glue console to navigate to the table named data in the githubarchive database. Notice that this data has eight top-level columns, which are common to each event type, and three partition columns that correspond to year, month, and day.

Choose the payload column, and you will notice that it has a complex schema—one that reflects the union of the payloads of event types that appear in the crawled data. Also note that the schema that crawlers generate is a subset of the true schema because they sample only a subset of the data.
Set up the library, development endpoint, and notebook
Next, you need to download and set up the libraries that estimate the sentiment in a snippet of text. The Stanford CoreNLP libraries contain a number of human language processing tools, including sentiment prediction.
Download the Stanford CoreNLP libraries. Unzip the .zip file, and you’ll see a directory full of jar files. For this example, the following jars are required:
- stanford-corenlp-3.8.0.jar
- stanford-corenlp-3.8.0-models.jar
- ejml-0.23.jar
Upload these files to an Amazon S3 path that is accessible to AWS Glue so that it can load these libraries when needed. For this example, they are in s3://glue-sample-other/corenlp/.
Development endpoints are static Spark-based environments that can serve as the backend for data exploration. You can attach notebooks to these endpoints to interactively send commands and explore and analyze your data. These endpoints have the same configuration as that of AWS Glue’s job execution system. So, commands and scripts that work there also work the same when registered and run as jobs in AWS Glue.
To set up an endpoint and a Zeppelin notebook to work with that endpoint, follow the instructions in the AWS Glue Developer Guide. When you are creating an endpoint, be sure to specify the locations of the previously mentioned jars in the Dependent jars path as a comma-separated list. Otherwise, the libraries will not be loaded.
After you set up the notebook server, go to the Zeppelin notebook by choosing Dev Endpoints in the left navigation pane on the AWS Glue console. Choose the endpoint that you created. Next, choose the Notebook Server URL, which takes you to the Zeppelin server. Log in using the notebook user name and password that you specified when creating the notebook. Finally, create a new note to try out this example.
Each notebook is a collection of paragraphs, and each paragraph contains a sequence of commands and the output for that command. Moreover, each notebook includes a number of interpreters. If you set up the Zeppelin server using the console, the (Python-based) pyspark and (Scala-based) spark interpreters are already connected to your new development endpoint, with pyspark as the default. Therefore, throughout this example, you need to prepend %spark at the top of your paragraphs. In this example, we omit these for brevity.
Working with the data
In this section, we use AWS Glue extensions to Spark to work with the dataset. We look at the actual schema of the data and filter out the interesting event types for our analysis.
Start with some boilerplate code to import libraries that you need:
Then, create the Spark and AWS Glue contexts needed for working with the data:
You need the transient decorator on the SparkContext when working in Zeppelin; otherwise, you will run into a serialization error when executing commands.
Dynamic frames
This section shows how to create a dynamic frame that contains the GitHub records in the table that you crawled earlier. A dynamic frame is the basic data structure in AWS Glue scripts. It is like an Apache Spark data frame, except that it is designed and optimized for data cleaning and transformation workloads. A dynamic frame is well-suited for representing semi-structured datasets like the GitHub timeline.
A dynamic frame is a collection of dynamic records. In Spark lingo, it is an RDD (resilient distributed dataset) of DynamicRecords. A dynamic record is a self-describing record. Each record encodes its columns and types, so every record can have a schema that is unique from all others in the dynamic frame. This is convenient and often more efficient for datasets like the GitHub timeline, where payloads can vary drastically from one event type to another.
The following creates a dynamic frame, github_events, from your table:
The getCatalogSource() method returns a DataSource, which represents a particular table in the Data Catalog. The getDynamicFrame() method returns a dynamic frame from the source.
Recall that the crawler created a schema from only a sample of the data. You can scan the entire dataset, count the rows, and print the complete schema as follows:
The result looks like the following:

The data has 414,826 records. As before, notice that there are eight top-level columns, and three partition columns. If you scroll down, you’ll also notice that the payload is the most complex column.
Run functions and filter records
This section describes how you can create your own functions and invoke them seamlessly to filter records. Unlike filtering with Python lambdas, Scala scripts do not need to convert records from one language representation to another, thereby reducing overhead and running much faster.
Let’s create a function that picks only the IssuesEvents from the GitHub timeline. These events are generated whenever someone posts an issue for a particular repository. Each GitHub event record has a field, “type”, that indicates the kind of event it is. The issueFilter() function returns true for records that are IssuesEvents.
Note that the getField() method returns an Option[Any] type, so you first need to check that it exists before checking the type.
You pass this function to the filter transformation, which applies the function on each record and returns a dynamic frame of those records that pass.
Now, let’s look at the size and schema of issue_events.
It’s much smaller (14,063 records), and the payload schema is less complex, reflecting only the schema for issues. Keep a few essential columns for your analysis, and drop the rest using the ApplyMapping() transform:
The ApplyMapping() transform is quite handy for renaming columns, casting types, and restructuring records. The preceding code snippet tells the transform to select the fields (or columns) that are enumerated in the left half of the tuples and map them to the fields and types in the right half.
Estimating sentiment using Stanford CoreNLP
To focus on the most pressing issues, you might want to isolate the records with the most negative sentiments. The Stanford CoreNLP libraries are Java-based and offer sentiment-prediction functions. Accessing these functions through Python is possible, but quite cumbersome. It requires creating Python surrogate classes and objects for those found on the Java side. Instead, with Scala support, you can use those classes and objects directly and invoke their methods. Let’s see how.
First, import the libraries needed for the analysis:
The Stanford CoreNLP libraries have a main driver that orchestrates all of their analysis. The driver setup is heavyweight, setting up threads and data structures that are shared across analyses. Apache Spark runs on a cluster with a main driver process and a collection of backend executor processes that do most of the heavy sifting of the data.
The Stanford CoreNLP shared objects are not serializable, so they cannot be distributed easily across a cluster. Instead, you need to initialize them once for every backend executor process that might need them. Here is how to accomplish that:
The properties tell the libraries which annotators to execute and how many words to process. The preceding code creates an object, myNLP, with a field coreNLP that is lazily evaluated. This field is initialized only when it is needed, and only once. So, when the backend executors start processing the records, each executor initializes the driver for the Stanford CoreNLP libraries only one time.
Next is a function that estimates the sentiment of a text string. It first calls Stanford CoreNLP to annotate the text. Then, it pulls out the sentences and takes the average sentiment across all the sentences. The sentiment is a double, from 0.0 as the most negative to 4.0 as the most positive.
Now, let’s estimate the sentiment of the issue titles and add that computed field as part of the records. You can accomplish this with the map() method on dynamic frames:
The map() method applies the user-provided function on every record. The function takes a DynamicRecord as an argument and returns a DynamicRecord. The code above computes the sentiment, adds it in a top-level field, sentiment, to the record, and returns the record.
Count the records with sentiment and show the schema. This takes a few minutes because Spark must initialize the library and run the sentiment analysis, which can be involved.
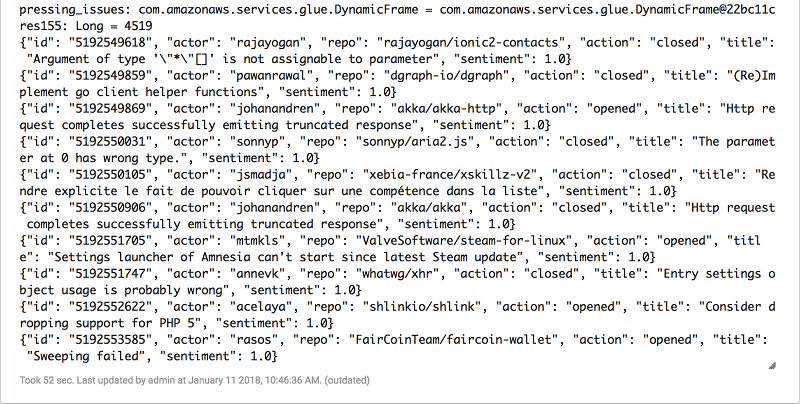
Notice that all records were processed (14,063), and the sentiment value was added to the schema.
Finally, let’s pick out the titles that have the lowest sentiment (less than 1.5). Count them and print out a sample to see what some of the titles look like.
Next, write them all to a file so that you can handle them later. (You’ll need to replace the output path with your own.)
Take a look in the output path, and you can see the output files.
Putting it all together
Now, let’s create a job from the preceding interactive session. The following script combines all the commands from earlier. It processes the GitHub archive files and writes out the highly negative issues:
Notice that the script is enclosed in a top-level object called GlueApp, which serves as the script’s entry point for the job. (You’ll need to replace the output path with your own.) Upload the script to an Amazon S3 location so that AWS Glue can load it when needed.
To create the job, open the AWS Glue console. Choose Jobs in the left navigation pane, and then choose Add job. Create a name for the job, and specify a role with permissions to access the data. Choose An existing script that you provide, and choose Scala as the language.
For the Scala class name, type GlueApp to indicate the script’s entry point. Specify the Amazon S3 location of the script.
Choose Script libraries and job parameters. In the Dependent jars path field, enter the Amazon S3 locations of the Stanford CoreNLP libraries from earlier as a comma-separated list (without spaces). Then choose Next.
No connections are needed for this job, so choose Next again. Review the job properties, and choose Finish. Finally, choose Run job to execute the job.
You can simply edit the script’s input table and output path to run this job on whatever GitHub timeline datasets that you might have.
Conclusion
In this post, we showed how to write AWS Glue ETL scripts in Scala via notebooks and how to run them as jobs. Scala has the advantage that it is the native language for the Spark runtime. With Scala, it is easier to call Scala or Java functions and third-party libraries for analyses. Moreover, data processing is faster in Scala because there’s no need to convert records from one language runtime to another.
You can find more example of Scala scripts in our GitHub examples repository: https://github.com/awslabs/aws-glue-samples. We encourage you to experiment with Scala scripts and let us know about any interesting ETL flows that you want to share.
Happy Glue-ing!
Additional Reading
If you found this post useful, be sure to check out Simplify Querying Nested JSON with the AWS Glue Relationalize Transform and Genomic Analysis with Hail on Amazon EMR and Amazon Athena.

About the Authors
 Mehul Shah is a senior software manager for AWS Glue. His passion is leveraging the cloud to build smarter, more efficient, and easier to use data systems. He has three girls, and, therefore, he has no spare time.
 Ben Sowell is a senior software development engineer at AWS Glue. He has worked for more than 5 years on ETL systems to help users unlock the potential of their data. In his free time, he enjoys reading and exploring the Bay Area.
 Vinay Vavili is a software development engineer for AWS Glue. His passion lies in taming the best of ETL for data scientists by developing transforms, data connectors and utilities by listening and understanding customer needs. During his spare time, he likes to improve his tennis skills and explore the vast and pristine national parks that the United States has to offer.