AWS Big Data Blog
Accelerate your data and AI workflows by connecting to Amazon SageMaker Unified Studio from Visual Studio Code
Developers and machine learning (ML) engineers can now connect directly to Amazon SageMaker Unified Studio from their local Visual Studio Code (VS Code) editor. With this capability, you can maintain your existing development workflows and personalized integrated development environment (IDE) configurations while accessing Amazon Web Services (AWS) analytics and artificial intelligence and machine learning (AI/ML) services in a unified data and AI development environment. This integration provides seamless access from your local development environment to scalable infrastructure for running data processing, SQL analytics, and ML workflows. By connecting your local IDE to SageMaker Unified Studio, you can optimize your data and AI development workflows without disrupting your established development practices.
In this post, we demonstrate how to connect your local VS Code to SageMaker Unified Studio so you can build complete end-to-end data and AI workflows while working in your preferred development environment.
Solution overview
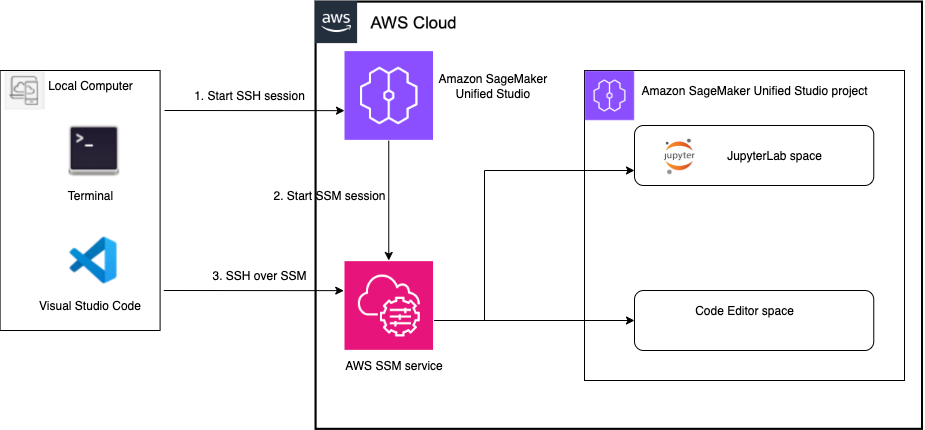
The solution architecture consists of three main components:
- Local computer – Your development machine running VS Code with AWS Toolkit for Visual Studio Code and Microsoft Remote SSH installed. You can connect through the Toolkit for Visual Studio Code extension in VS Code by browsing available SageMaker Unified Studio spaces and selecting their target environment.
- SageMaker Unified Studio – Part of the next generation of Amazon SageMaker, SageMaker Unified Studio is a single data and AI development where you can find and access your data and act on it using familiar AWS tools for SQL analytics, data processing, model development, and generative AI application development.
- AWS Systems Manager – A secure, scalable remote access and management service that enables seamless connectivity between your local VS Code and SageMaker Unified Studio spaces to streamline data and AI development workflows.
The following diagram shows the interaction between your local IDE and SageMaker Unified Studio spaces.
Prerequisites
To try the remote IDE connection, you must have the following prerequisites:
- Access to a SageMaker Unified Studio domain with connectivity to the internet. For domains set up in virtual private cloud (VPC)-only mode, your domain should have a route out to the internet through a proxy or a NAT gateway. If your domain is completely isolated from the internet, refer to the documentation for setting up the remote connection. If you don’t have a SageMaker Unified Studio domain, you can create one using the quick setup or manual setup option.
- A user with SSO credentials through IAM Identity Center is required. To configure SSO user access, review the documentation.
- Access to or can create a SageMaker Unified Studio project.
- A JupyterLab or Code Editor compute space with a minimum instance type requirement of 8 GB of memory. In this post, we use an
ml.t3.largeinstance. SageMaker Distribution image version 2.8 or later is supported. - You have the latest stable VS Code with Microsoft Remote SSH (version 0.74.0 or later), and AWS Toolkit (version 3.74.0) extension installed on your local machine.
Solution implementation
To enable remote connectivity and connect to the space from VS Code, complete the following steps. To connect to a SageMaker Unified Studio space remotely, the space must have remote access enabled.
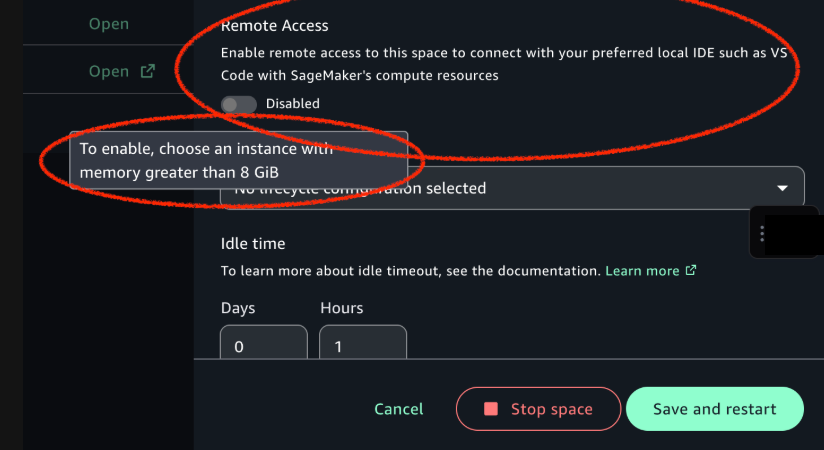
- Navigate to your JupyterLab or Code Editor space. If it’s running, stop the space and choose Configure space to enable remote access, as shown in the following screenshot.

- Turn on Remote access to enable the feature and choose Save and restart, as shown in the following screenshot.
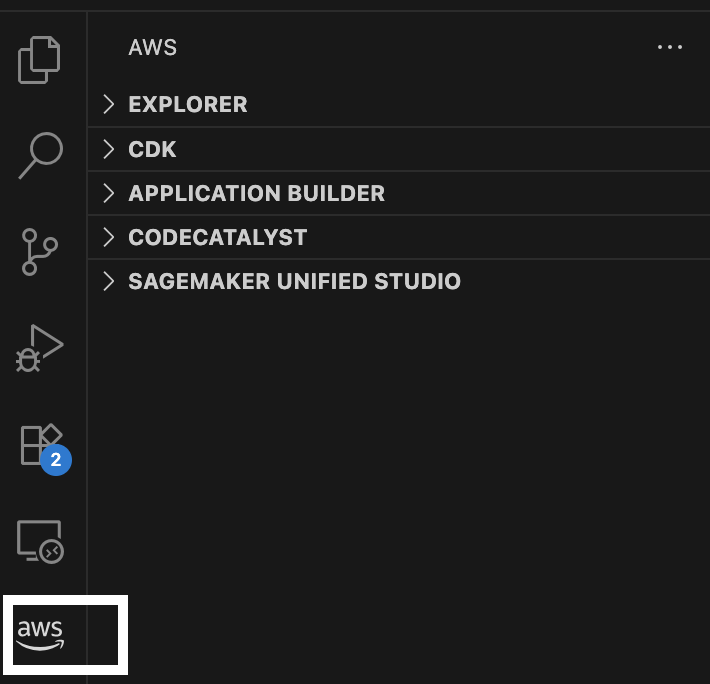
- Navigate to AWS Toolkit in your local VS Code installation.
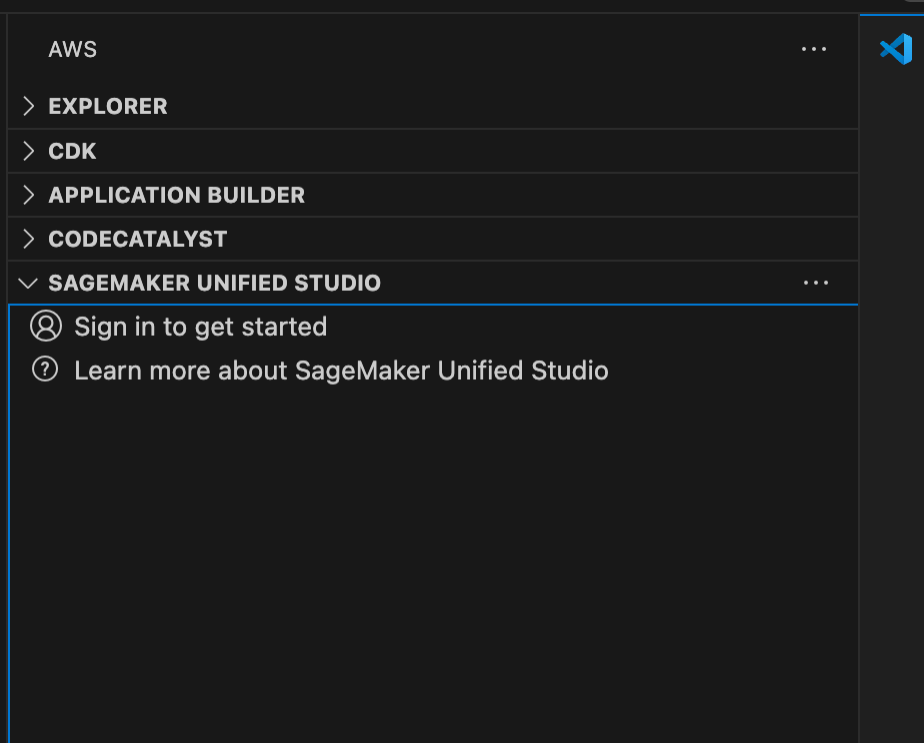
- On the SageMaker Unified Studio tab, choose Sign in to get started and provide your SageMaker Unified Studio domain URL, that is,
https://<domain-id>.sagemaker.<region>.on.aws.
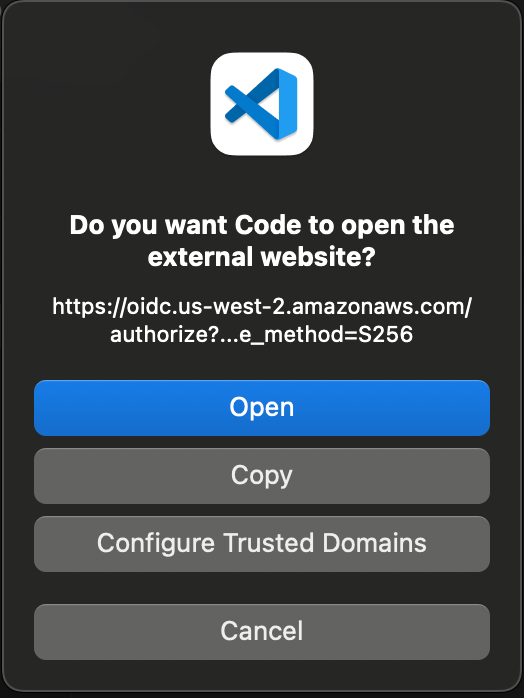
- You will be prompted to be redirected to your web browser to allow access to AWS IDE extensions. Choose Open to open a new web browser tab.
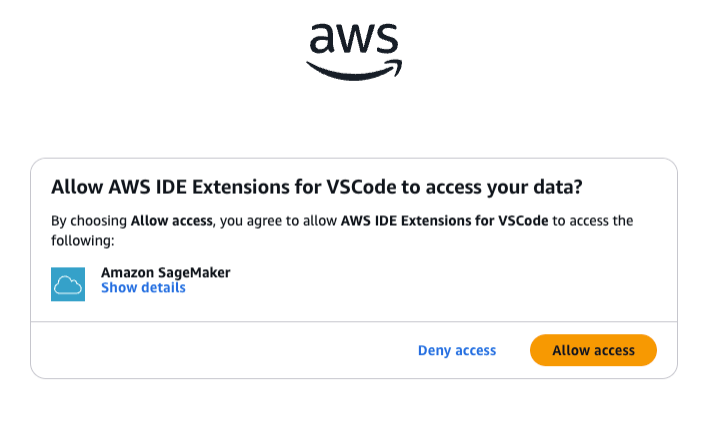
- Choose Allow access to connect to the project through VS Code.
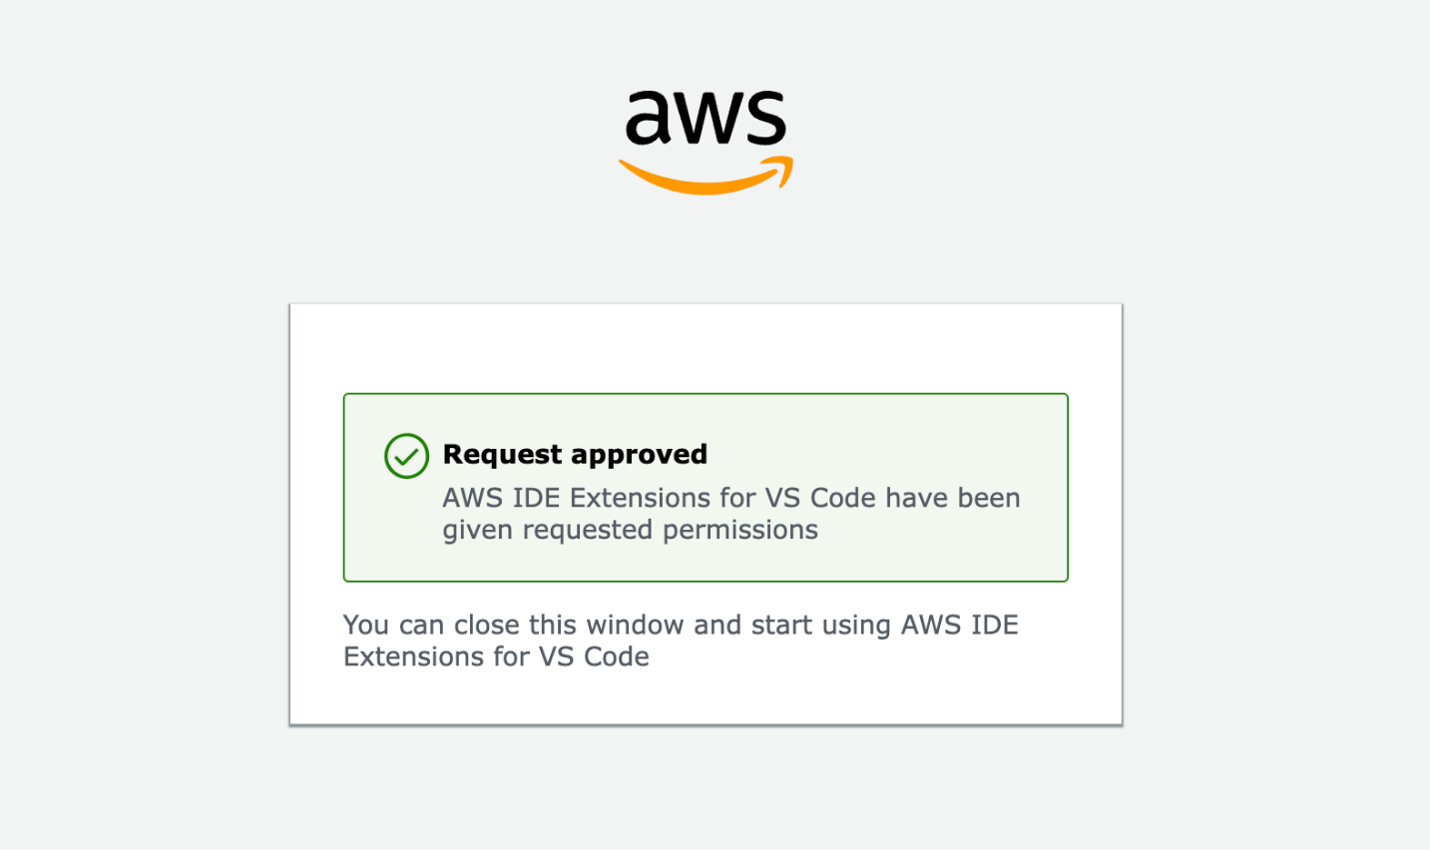
- You’ll receive a Request approved notification, indicating that you now have permissions to access the domain remotely.
You can now navigate back to your local VS Code to access your project to continue building ETL jobs and data pipelines, training and deploying ML models, or building generative AI applications. To connect to the project for data processing and ML development, follow these steps:
- Choose Select a project to view your data and compute resources. All projects in the domain are listed, but you’re only allowed access to projects where you’re a project member.
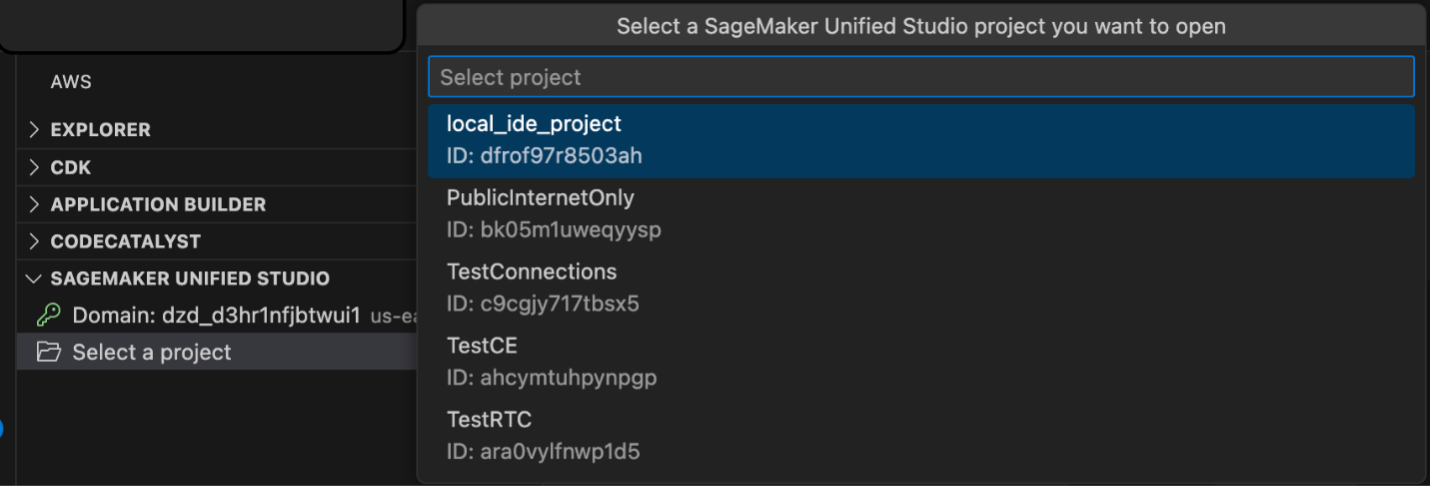
You can only view one domain and one project at a time. To switch projects or sign out of a domain, choose the ellipsis icon.
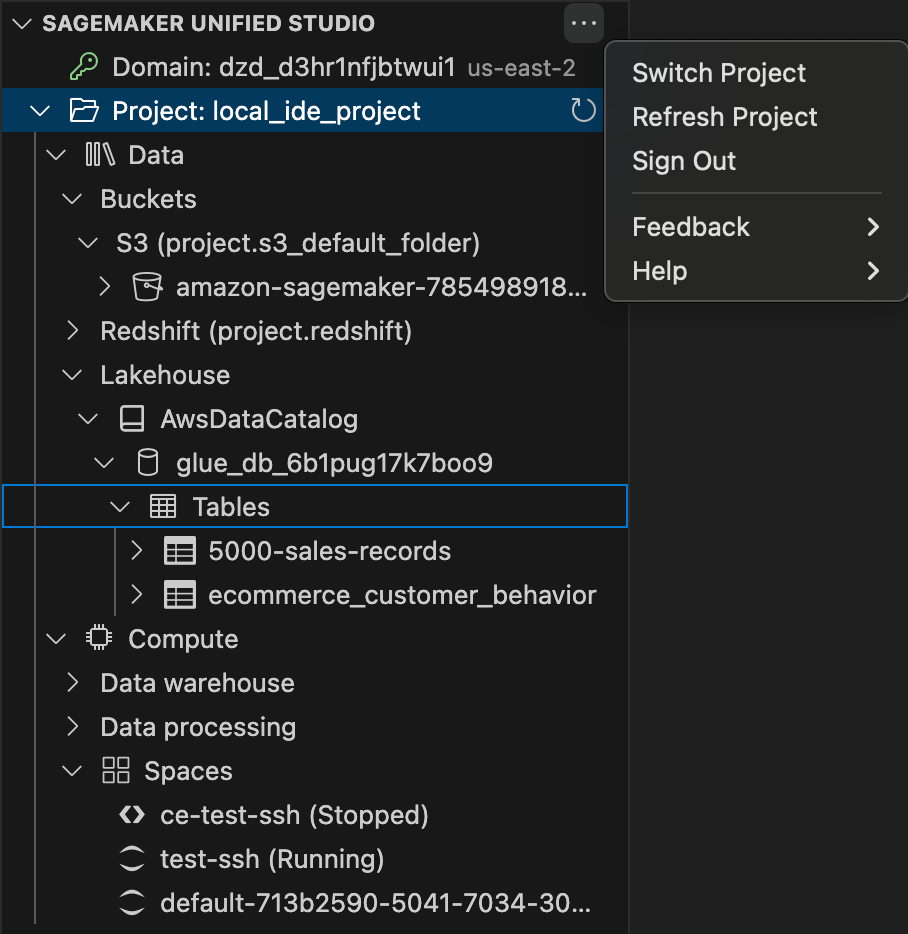
You can also view compute and data resources that you created previously.
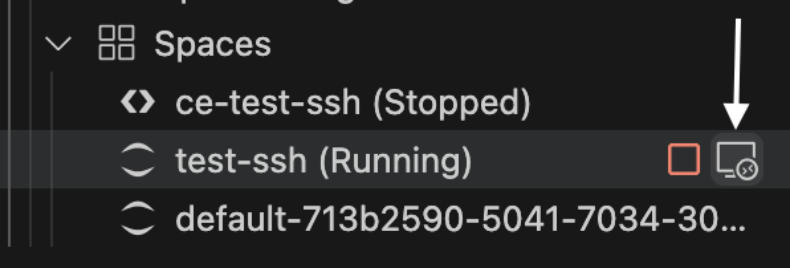
- Connect your JupyterLab or Code Editor space by selecting the connectivity icon, as shown in the following image. Note: If this option does not show as available, then you may have remote access disabled in the space. If the space is in “Stopped” state, hover over the space and choose the connect button. This should enable remote access, start the space and connect to it. If the space is in “Running” state, the space must be restarted with remote access enabled. You can do this by stopping the space and connecting to it as shown below from the toolkit.
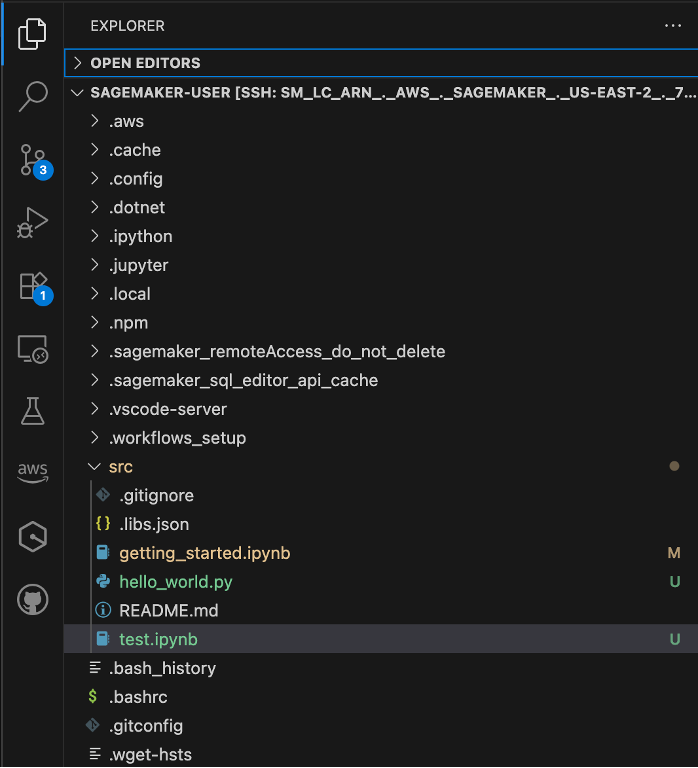
Another VS Code window will open that is connected to your SageMaker Unified Studio space using remote SSH.
- Navigate to the Explorer to view your space’s notebooks, files, and scripts. From the AWS Toolkit, you can also view your data sources.
Use your custom VS Code setup with SageMaker Unified Studio resources
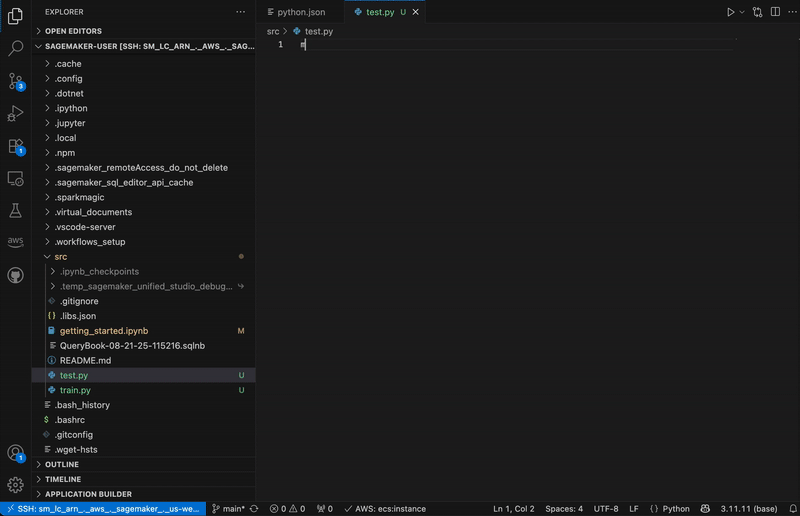
When you connect VS Code to SageMaker Unified Studio, you keep all your personal shortcuts and customizations. For example, if you use code snippets to quickly insert common analytics and ML code patterns, these continue to work with SageMaker Unified Studio managed infrastructure.
In the following graphic, we demonstrate using analytics workflow shortcuts. The “show-databases” code snippet queries Athena to show available databases, “show-glue-tables” lists tables in AWS Glue Data Catalog, and “query-ecommerce” retrieves data using Spark SQL for analysis.

You can also use shortcuts to automate building and training an ML model on SageMaker AI. In the below graphic, the code snippets show data processing, configuring, and launching a SageMaker AI training job. This approach demonstrates how data practitioners can maintain their familiar development setup while using managed data and AI resources in SageMaker Unified Studio.
Disabling remote access in SageMaker Unified Studio
As an administrator, if you want to disable this feature for your users, you can enforce it by adding the following policy to your project’s IAM role:
Clean up
SageMaker Unified Studio by default shuts down idle resources such as JupyterLab and Code Editor spaces after 1 hour. If you’ve created a SageMaker Unified Studio domain for the purposes of this post, remember to delete the domain.
Conclusion
Connecting directly to Amazon SageMaker Unified Studio from your local IDE reduces the friction of moving between local development and scalable data and AI infrastructure. By maintaining your personalized IDE configurations, this reduces the need to adapt between different development environments. Whether you’re processing large datasets, training foundation models (FMs), or building generative AI applications, you can now work from your local setup while accessing the capabilities of SageMaker Unified Studio. Get started today by connecting your local IDE to SageMaker Unified Studio to streamline your data processing workflows and accelerate your ML model development.