AWS Big Data Blog
Getting started with Apache Iceberg write support in Amazon Redshift
Many companies store structured data in warehouses for analytics while keeping diverse datasets in data lakes for flexible processing. Until now, maintaining consistency between these systems required complex ETL processes and introduced potential data synchronization challenges.
The new Amazon Redshift Apache Iceberg write support removes these complexities through direct writes to Apache Iceberg tables stored in Amazon Simple Storage Service (Amazon S3) and S3 Tables. With this native integration you can write data directly from Redshift queries to your data lake without intermediate ETL steps, facilitate data consistency with ACID-compliant transactions that help optimize query performance with flexible partitioning strategies, and use the familiar Redshift SQL interface when writing to Apache Iceberg tables. For example, you can now run a complex transformation in Redshift and write the results directly to an Apache Iceberg table that other analytics engines like Amazon EMR or Amazon Athena can immediately query. By using this approach you can query the same datasets from both Redshift and other analytics tools without copying data.
In this post, we show how you can use Amazon Redshift to write data directly to Apache Iceberg tables stored in Amazon S3 and S3 Tables for seamless integration between your data warehouse and data lake while maintaining ACID compliance.
“Verisk processes billions of catastrophe risk modeling records using Amazon Redshift and Apache Iceberg, achieving 30% faster query aggregations and significant storage cost reductions”
— Karthick Shanmugam, Associate Vice President, Verisk
Solution overview
You can now create and write directly to Apache Iceberg tables stored in Amazon S3 and S3 Tables using familiar SQL commands in Amazon Redshift. We’ll guide you through configuring permissions for S3 table buckets using AWS Lake Formation. Finally, we’ll analyze customer and order datasets across both Redshift native and Apache Iceberg data formats to derive insights. The workflow is illustrated in the following diagram:
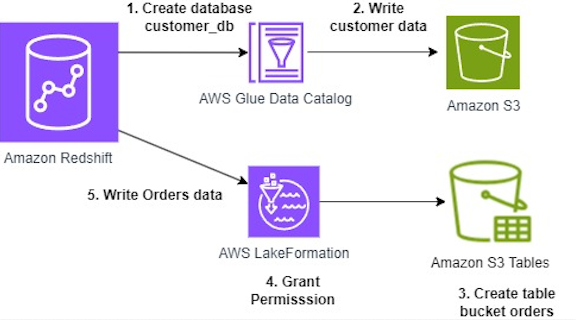
In this post we will walk you through following steps:
- Create an external database named customer_db in AWS Glue Data Catalog using Amazon Redshift SQL.
- Create an external table named customer in the Glue database and write customer data using Amazon Redshift SQL.
- Create table bucket named orders on Amazon S3 Tables to write orders data.
- Grant permissions using AWS Lake Formation to an IAM role for reading and writing to the orders table.
- Write orders data to the orders Amazon S3 table bucket.
This solution uses the following AWS services:
Prerequisites
- Create an Amazon Redshift data warehouse (provisioned or Serverless).
- Permissions to create database on AWS Glue Data Catalog from Redshift.
- Create an Amazon S3 bucket and an S3 Table bucket in the same AWS Region as your Redshift cluster.
- Have access to an IAM role that is a Lake Formation data lake administrator. For instructions, refer to Create a data lake administrator.
- Create an IAM role named
RedshifticebergRolewith the following inline and trust policies:
Inline policy:
- Associate the IAM role
RedshifticebergRolewith your Redshift cluster or Serverless namespace. - Create a new AWS Glue database named
customer_dbor use an existing database of your choice. If you use a different name, replacecustomer_dbwith your actual database name in the subsequent commands. - If your Redshift Serverless namespace has case-sensitive identifiers enabled, disable the setting before creating Iceberg tables by running the following command:
SET enable_case_sensitive_identifier TO FALSE;
To check the current case-sensitive setting, run:
SHOW enable_case_sensitive_identifier;
Setting up your environment
To set up your environment, complete the following steps.
Creating Apache Iceberg tables in Amazon S3 standard buckets
- Connect to Redshift using Query Editor V2.
- Create user for the Federated role
RedshifticebergRole. - Verify you have an Amazon Redshift External Schema configured. Run the following script on Redshift:
- Create external table customer in Apache Iceberg table format in the demo_iceberg external schema created above and then insert data. Use this two-step approach when you need control over column definitions or plan to append data.Replace your S3 bucket name in place of <<your-bucket>>.
 Figure 2: Result from demo_iceberg.customer
 - Grant access to external schema for user
IAMR:RedshifticebergRole:
Create Apache Iceberg tables in Amazon S3 Table buckets
Amazon S3 table buckets are integrated with AWS Lake Formation, which serves as the central authority for managing data access permissions. When working with Apache Iceberg tables, Lake Formation provides a unified security framework that simplifies access control across your entire data lake. This centralized approach makes sure consistent and efficient permission management, alleviating the need to handle permissions in multiple places.
To create an S3 table bucket:
- Go to Amazon S3, choose Table buckets in the left navigation pane.
- On the Table buckets page, in the Integration with AWS analytics services section, choose Enable integration.

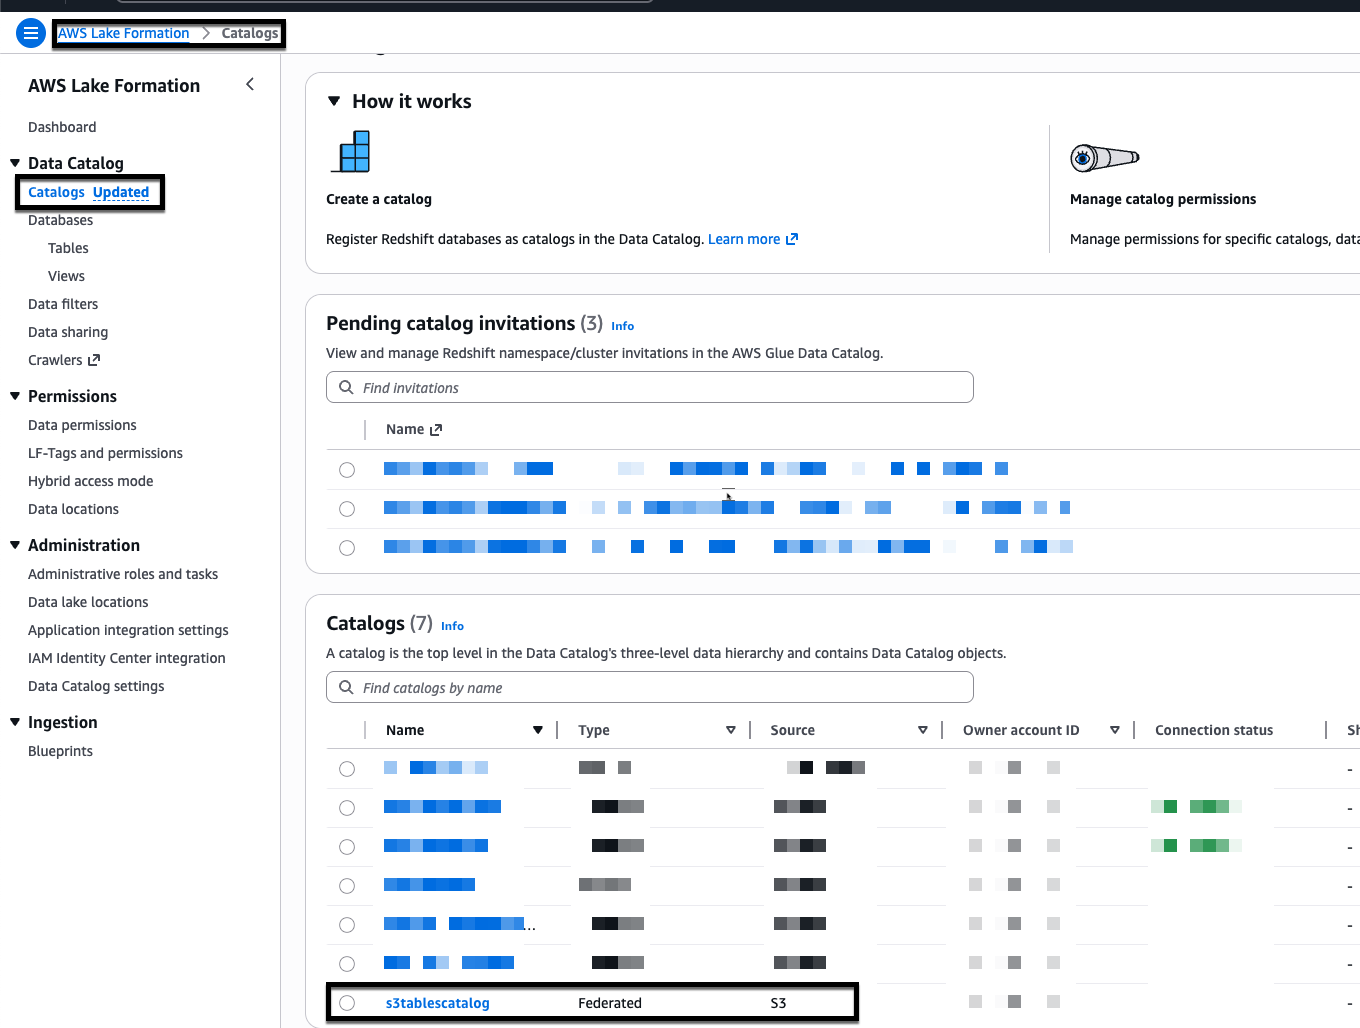
- In the Table buckets list, choose the Create table bucket button and enter a name for your table bucket, for example, iceberg-write-blog, and choose Create table bucket. After creation, the bucket will appear in the S3 tables catalog, s3tablescatalog, in the Lake Formation console.
- In the AWS Lake Formation console, choose Catalogs, in the Catalogs table select s3tablescatalog to open the detail page for that table.
- On the s3tablescatalog details page, under Catalogs, choose the table bucket iceberg-write-blog.
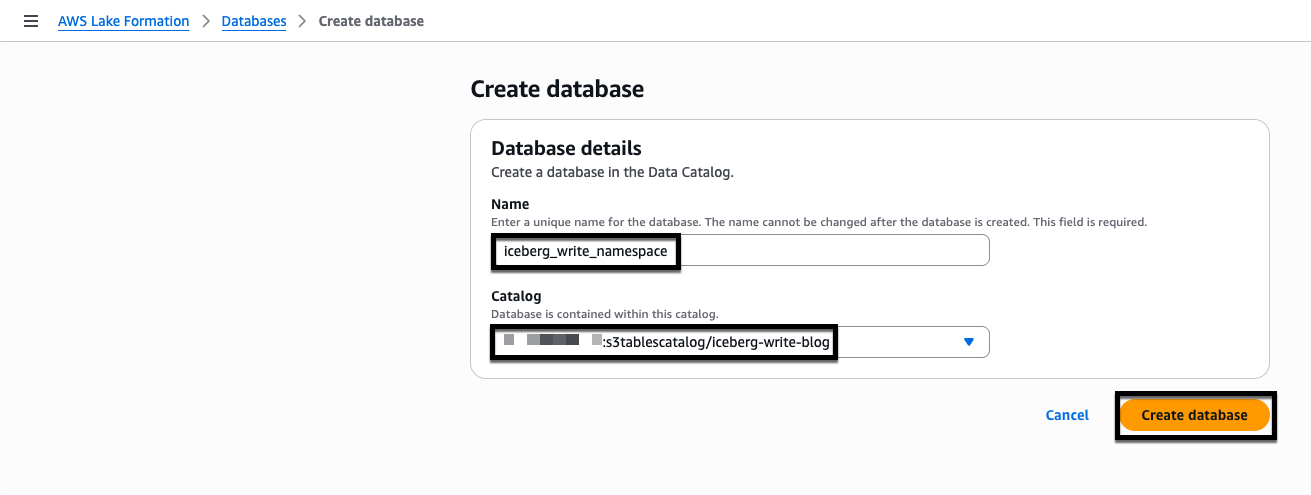
- On the iceberg-write-blog details page, under Databases, choose Create database.
- Enter the database name iceberg_write_namespace, select the Catalog from the drop down menu, and choose Create database.
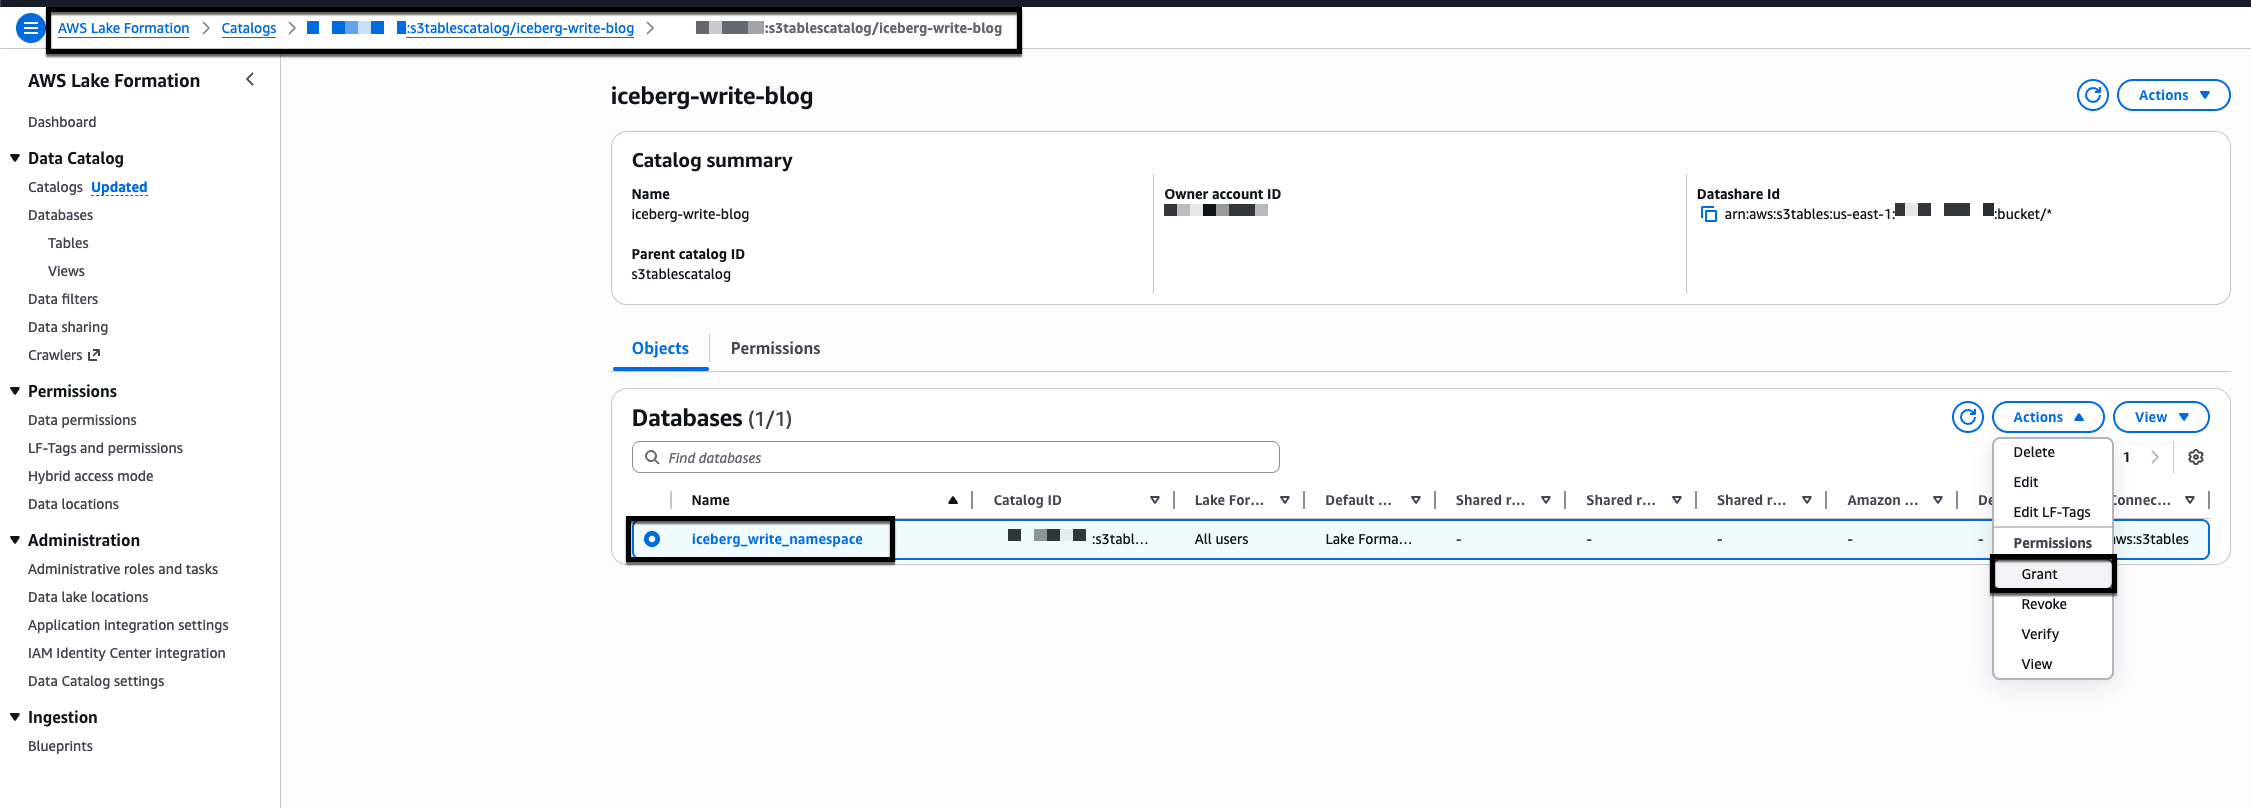
- Grant a permission to create a table in the database to the Lake Formation IAM role. On the iceberg-write-blog details page select the radio button for iceberg_write_namespace, choose Actions, Grant.
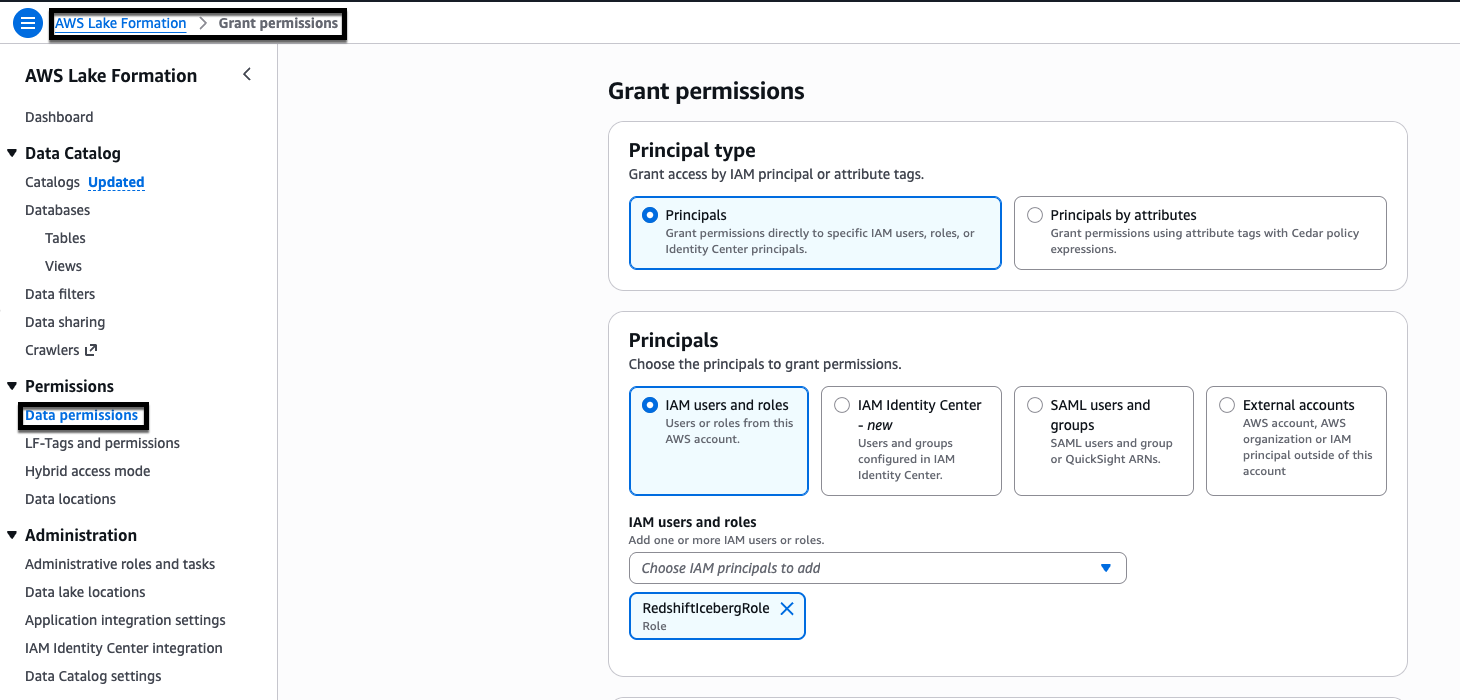
- On the Grant permissions page, under Principal type select Principals, under Principals select IAM users and roles, in the IAM users and roles drop down menu select RedshifticebergRole.
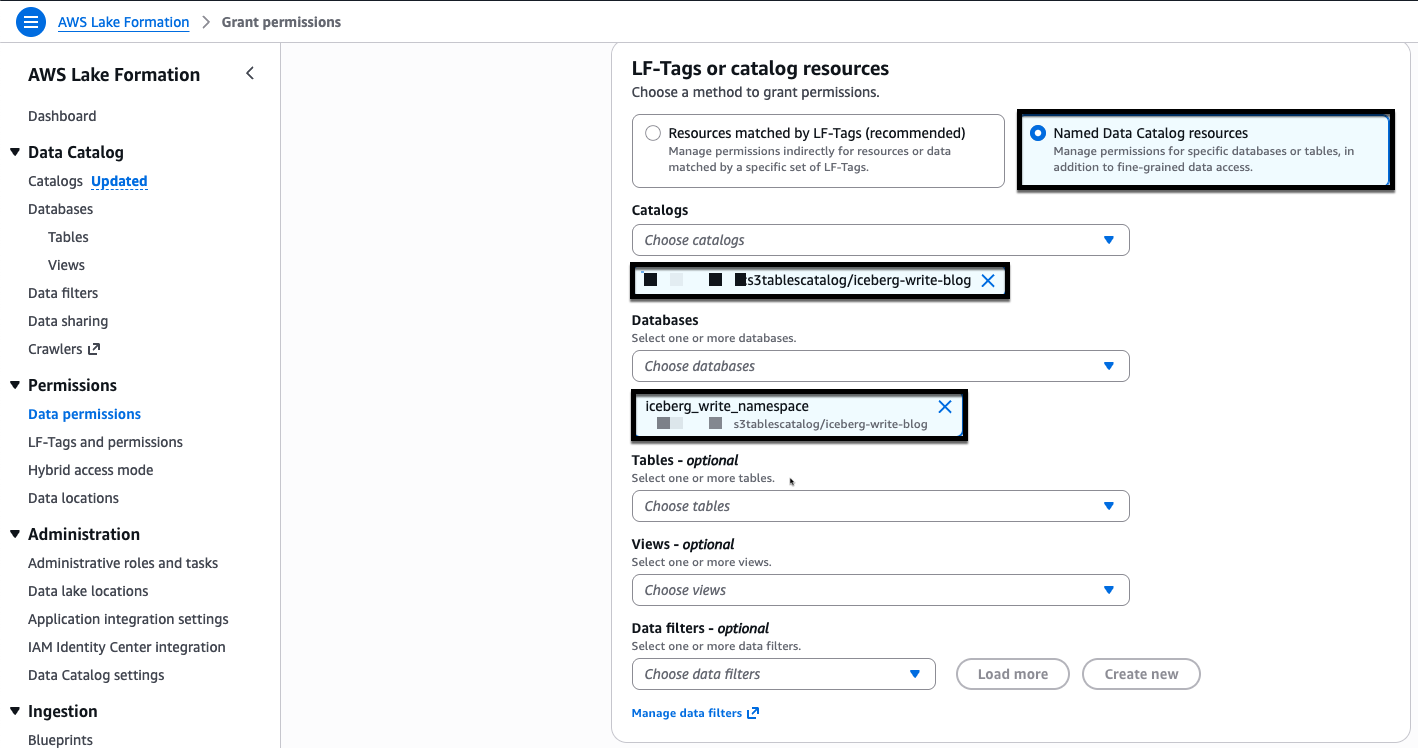
- For LF-Tags or catalog resources, choose Named Data Catalog resources, for Catalogs select iceberg-write-blog and for Databases select iceberg_write_namespace.
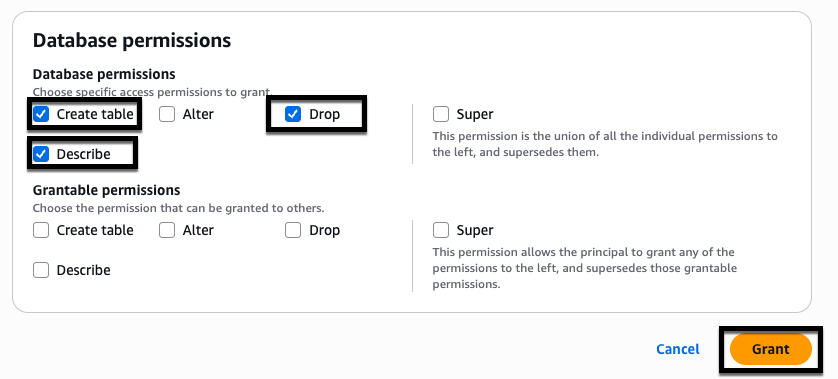
- For Database permissions select the checkbox for Create table, Drop, and Describe, then choose Grant.
Creating Apache Iceberg tables in Amazon Redshift using Amazon S3 table buckets
AWS Lake Formation catalogs are automatically mounted on Amazon Redshift data warehouses in same account. Amazon Redshift writes directly to S3 Tables using the auto mounted S3 table catalog. The SQL syntax for writing to Apache Iceberg tables stored in S3 table buckets is similar to the syntax for Apache Iceberg tables stored in S3 standard buckets. The key difference is the auto mounted S3 Table catalog, which supports three-part notation access. This feature alleviates the need to create an EXTERNAL SCHEMA when referencing data lake Apache Iceberg tables residing in S3 Table buckets.
To create the Apache Iceberg table:
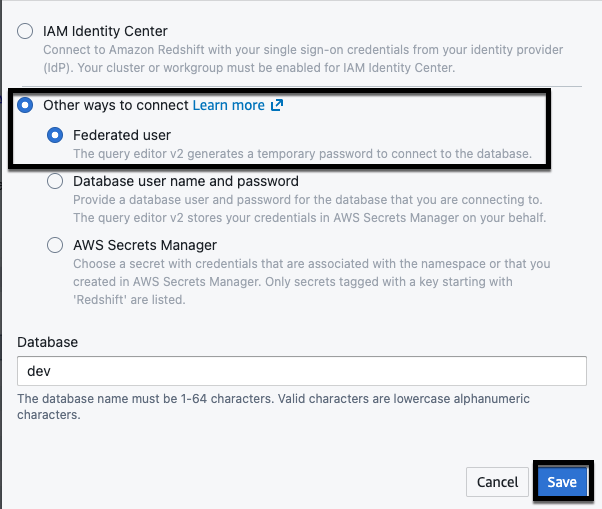
- Switch to the RedshifticebergRole. To access S3 tables through the Redshift Query Editor V2, you must use a Federated user account, the RedshifticebergRole has been granted the necessary Lake Formation permissions.
- Log in to Redshift using the Query Editor V2 Federated user option.
- In Query Editor V2, create the table named orders in Apache Iceberg table format:
- Insert data into the table using standard SQL:
- Create a Redshift local_orders table and insert sample records:
- Using the
CREATE TABLE AS (CTAS)format, create a table from the existing table with no compression: - Select data with standard SQL using the three-part notation:
You can also use the
USEclause to specify the default database (and omit the database name):The resulting table will look like the following image:
- Set a schema search path to further simplify table access by omitting the schema name from the notation:
- Show table:
Bringing it together
Let’s demonstrate how to combine data from two sources and show how they can work together in a single query.
- Customer data stored in standard S3 buckets
- Orders data stored in S3 table buckets
- Log in to Redshift using Federated user:
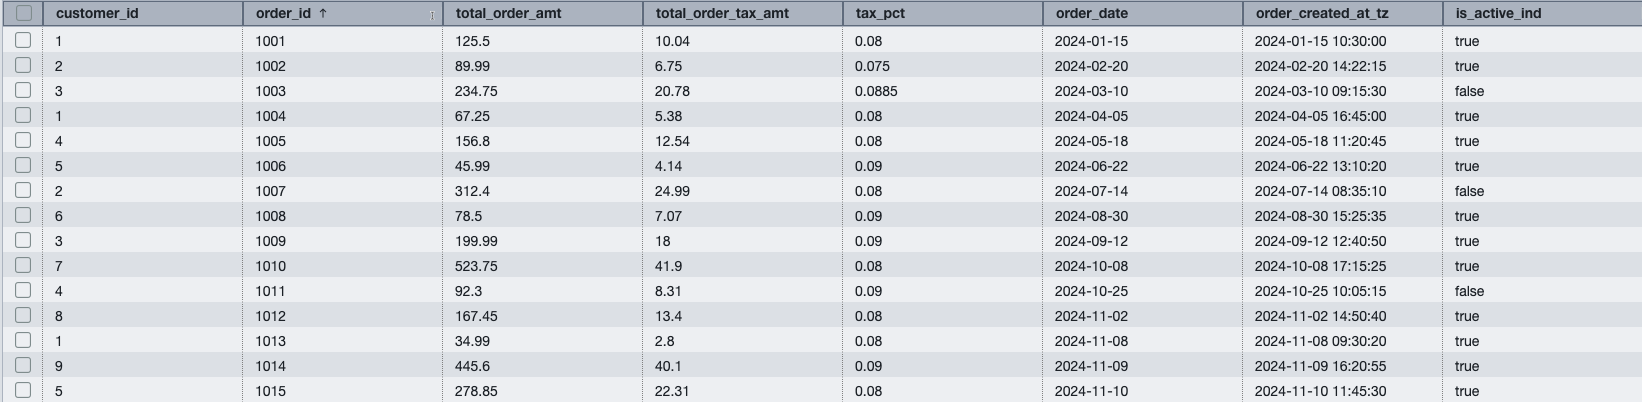
The result from the consolidated query:

- Drop table:
Clean up
To avoid ongoing charges, follow these steps in order:
- Drop Apache Iceberg tables:
- Remove S3 objects, replace your-bucket with the name of the bucket you created:
- Remove Lake Formation permissions, replace your-bucket with the name of the bucket you created:
Conclusion
With Apache Iceberg write support in Amazon Redshift you can to build flexible data architectures that combine the performance of a data warehouse with the scalability of a data lake. You can now write data directly to Apache Iceberg tables while maintaining ACID compliance and partitioning for query optimization. You can use Amazon Redshift to create Apache Iceberg tables in your data lake, making them immediately queryable through Amazon EMR or Amazon Athena.
To learn more, review the Amazon Redshift Iceberg integration and Writing to Apache Iceberg tables documentation. Visit the AWS Database Blog for latest updates.