AWS for Games Blog
Hosting your own dedicated Valheim server in the cloud
Authored by Duncan Parsons and Patrick Palmer
Hosting your own personal gaming server is increasingly common given all the benefits and flexibility it provides, however, doing so in a secure, flexible, and cost-effective manner is not simple. To achieve low cost many people host a server on their home computer, requiring them to open up their home network firewall ports in the process and exposing their computer to the wider internet and the associated security risks. Playing a game while also hosting the server for it can be a heavy task for any computer, so often players see the best performance while running a server and client on separate machines. To overcome these challenges players often look to dedicated game-server companies which provide varying degrees of control over the underlying server such as requiring fixed server sizes, giving limited access to mods, or simply charging you a flat monthly fee no matter how much you utilize the server.
In this post we will show you how to achieve both a low cost and high security solution while also providing the added benefit of flexibility to resize the server from a single core and 0.5 GiB of memory all the way to the biggest servers AWS has to offer and back down again. This allows one to scale up for a party session on the weekend and then back down again in just a few clicks. We will also show you how to easily start or stop your server so that you only pay for what you use and benefit from cloud elasticity. We use the popular game Valheim in this example, however this solution is applicable to any game and just requires some parameter changes – details on how to do this are covered later in this guide.
Solution Architecture
The solution we have designed adds a serverless control layer to the gaming server with an API to allow 3 actions:
1. Start server – this boots up the server and updates the DNS entry with the new public IP address of the server
2. Stop server – this stops the server and means you stop incurring costs for the EC2 instance. You will still incur costs for the EBS volume storage and backup storage
3. Resize server – this allows you to change the EC2 instance type so that you can only use (and therefore pay for) the instance size you need at that point in time.
All the API actions above along with the current server metadata (i.e. information about server status) are accessible through a webpage that is created and deployed for you by the CloudFormation script. Security of this webpage is controlled by Amazon Cognito with user accounts created directly in Amazon Cognito after the solution is deployed using AWS CloudFormation. We also create an optional rule to shutdown your server at a certain time every day just in case you forget to ensure you don’t pay for resources you are not using. We setup a regular backup service to take incremental backups of your server every day and to store those for 7 days just in case you want to restore your server to a previous state. You can choose the time the server will shutdown each day either when running the initial setup or afterwards via the Amazon Eventbridge service in the AWS console. Similarly, you can change the backup frequency and duration that backups are kept via the AWS Backup service in the AWS console after deploying the solution via the AWS CloudFormation script. We include some guides on how to do this later on.
You can choose to have as much or as little control over this solution as you choose. You can dig into the Lambda code (Python if you’re interested) and make it do other interesting stuff. You can add scripts to your Valheim server to further automate certain tasks like updating the server version, or you can just forget about modifying any of it and simply hit some buttons on the pre-built webpage to start/stop/resize the server and play some Valheim!
The solution in this blog post is also extensible. You can use this solution to control other game servers with some additional scripting. The solution provided here has defaults that launch a Valheim server from a BASH script and have the server firewall (EC2 Security Groups) opened on ports specific to Valheim. By supplying a different BASH script on launching this solution you can feasibly host any dedicated game server, and continue swapping out the BASH scripts like you would a game cartridge. The APIs, which are called any time you interact with the web-based application, execute actions on your EC2 instances based on EC2 Tags applied to them so you can add these Tags to additional hosts in your AWS account and control them all with a single click in the application.

Launching the solution
All the source code for this solution is located in Github here. Instructions for how to run this code are below.
Prerequisites
To utilize this solution, you will need to have an AWS Account. If you don’t already have one, go to https://aws.amazon.com and select “Create an Account”.
Before running the CloudFormation stack to create the above architecture, you will need to create a hosted zone in AWS Route 53. This will allow you to manage the DNS records for a domain you control, and point an easy to remember URL to the IP address assigned to your Valheim server. The IP address will change each time you stop and start your server, meaning if you don’t have a domain name you will simply need to update your saved server settings in your Steam client each time. While a domain isn’t required, it is recommended.
1. Register domain name: Go to https://console.aws.amazon.com/ and then either complete step 1a or 1b (Please note that without a domain name you would need to update the IP address each time you start the server and also may experience a range of error messages):
1a. Register a new domain name: You can register a domain name via Route53 or via a wide range of 3rd party services with costs starting (at the time of writing) of $5 per year for .click or .link domain names. If you use Route53 to register your domain name, a hosted zone will be setup for you automatically and you can skip step 3, if not you will need to proceed to the step 3. To register a domain name, follow the instructions here.
1b. Create hosted zone: If you already have a domain name you can use or are not using a domain name (e.g. for testing purposes) then you will still need to create a hosted zone for the CloudFormation script to run (you can delete it again afterwards). To do this, search for Route 53 in the search box and select the Route 53 option. In Route 53 select “Create a Hosted Zone”. Fill in the domain name you are using or if you are not planning on putting in a domain name, you can put in any valid domain name such as ‘mydomainname.net’. Note that if you are using your own domain name that is registered elsewhere you will need to configure that domain name to use the name servers from your newly created hosted zone – see this guide for details on how to do this (this can also be used if the domain name is registered in a different AWS account). Be sure to select ‘public hosted zone’.
2. Create EC2 key pair: The next step is to choose a region and create a key pair if you don’t already have one. Go to the AWS console and go to the EC2 service. Next select a region, go to the top right-hand corner of the page, and select the current region name (next to “Support”) and choose the region you wish to use. I suggest selecting a region close to where your users are based, e.g. eu-west-1 for users in the UK or western Europe or US-east-1 for users in the Eastern United States. Next select “Key Pairs” under “Network & Security” from the menu on the left-hand side. If you already have a key pair listed that you have access to then proceed to the next step, if not create a key pair and keep it somewhere safe. A guide for connecting to your EC2 instance can be found here: Accessing Instances including setting up a key pair.
Launching the CloudFormation solution
1. Run CloudFormation script: Now that the basic setup is done, you’re ready to run the CloudFormation script. The CloudFormation script is a piece of code we have written that will create the solution in the diagram above. Click here to view the YAML for this template. Copy the template into a text file exactly as seen, and then follow the instructions here to upload the teamplate file to CloudFormation. Please note that you will need to fill in the fields on the first page, but can leave the options on the second page as their default values. On the third page you will need to select the checkbox accepting that the stack will create IAM resources and the click “Create Stack”.
Please note that while there are no charges for using CloudFormation to run this script, you pay for AWS resources (such as Amazon EC2 instances, S3 Storage, etc.) created using AWS CloudFormation, the same as if you had created them manually. You only pay for what you use, as you use it; there are no minimum fees and no required upfront commitments.
Please note that depending on the region you launch in, you may get an error message “Your requested instance type is not supported in your requested Availability Zone” – if your chosen instance type is available in your selected region and you encounter this, just delete the stack once it has completed rollback and rerun the CloudFormation.
Note that if your stack name is too long, you may encounter an error while the CloudFormation script is running when creating the backup role – if you encounter this, just delete the failed stack and create a new one with a shorter name.
The CloudFormation template will take approximately 5 minutes to create all the resources.
2. Create website user: When first created, there will be no users in your Cognito User Pool, and therefore no-one permitted to use your web page to control your server. To add your first user, go to the AWS console and go to the Amazon Cognito service. Click on ‘Manage User Pools’ and then ‘Users and Groups’ from the menu on the left. On the ‘Users’ tab you should then be able to select ‘Create User’ – fill in a user name and your email address and then click ‘create user’. A guide on how to do this can be found here: Creating a new user using the console.
3. Get Valheim Server Password: during the install of the Valheim server software, the BASH script autogenerated a unique password and stored this in the AWS Parameter Store in your account. To get this value, login to the AWS console and go to the AWS Systems Manager Service and select the Parameter Store from the menu on the left hand side of the screen (you may need to click the 3 horizontal line menu icon to unhide the menu). You should be able to see a parameter calls mcValheimPW-[yourStackName]. Click on this and select “Show” under Value to display the password for your Valheim server.
4. Play: That’s it! You should now be able to log into your web control page. Click on the link in the ‘Outputs’ tab of your stacks CloudFormation page. After logging in, click on ‘Start’, as this will trigger the API to update your DNS entry which is not initially set as part of the CloudFormation script. You can tell if the DNS has been updated to reflect the current Public IP address as the IP box will no longer display as red. Note that when you connect to the server from the Valheim game, you can use your domain name to join the Valheim server rather than an IP address – in the “Join IP” box just enter your domain name, a colon and the port – for example you could enter “mypersonalgamingserver.link:2456” to join. This will mean you don’t need to change IP each time you stop/start your server.
How to modify and use
The common tasks of starting/stopping or resizing the server can be executed via the web-app. In order for anyone to use this they will need a Cognito account setup as above. There are some additional tasks you may want to perform so we’ve included some quick guides on how to do these below:
Update the server password (optional)
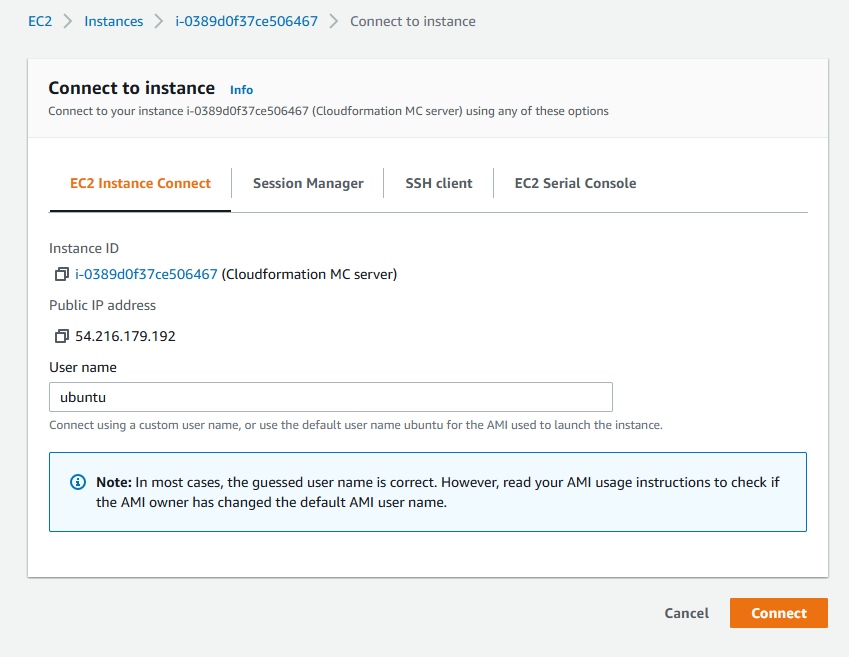
Whenever you connect to a Valheim server, you need to supply an IP address or DNS name of the server so the client can connect. If you try to connect by IP address you also need to add in the port number 2456 in a format like 192.168.0.150:2456. Once connected you then also need to supply a password to connect to the server. By default, your password is autogenerated and not easy to remember, so you may want to change this. Start by connecting to the game server via EC2 Instance Connect. Select your running instance from the EC2 Console, and click on Connect. In the next screen type in ubuntu (if not prepopulated) as the user name and click Connect.
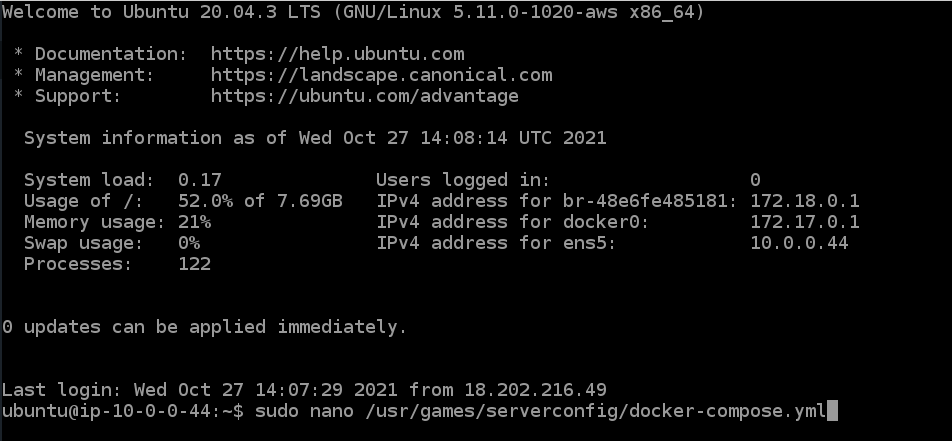
Once connected to your instance you will need to edit the docker-compose.yml file. This file contains information about the container which runs your server. Use the text editor nano to open this file for editing.
Once you have opened the file, find the line that says PASSWORD and edit its value. Below you can see the password has been updated to NewSuperSecretPassword.
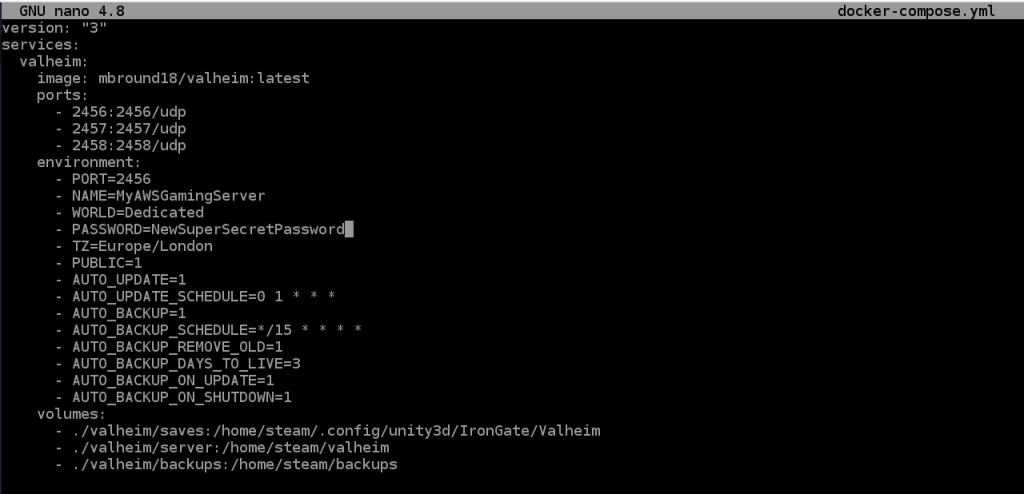
To save your edits, press Ctrl+X to exit, press Y to save the changes. Finally, the text editor will ask what file name you would like to save this as, and you should press Enter to save it to the same file name.
To make the changes affect the server, restart it by running the command sudo docker-compose up.

Update the Admin, Banned and Permitted users
While there are controls in place to ensure your server is secure from unwanted access, players who have previously played on your dedicated server may still have knowledge of your domain and thus be able to still log into your game without you wanting them to. Valheim provides controls to help with this in the form of player control files, namely; bannedlist.txt, permittedlist.txt and adminlist.txt.
You can login to your EC2 Instance and update these files to control what players you want to have on your server. As an example, you can use EC2 InstanceConnect as described in these instructions. Once logged in using EC2 Instance Connect you will see a screen in your browser similar to:

From here type cd ~/.config/unity3d/IronGate/Valheim and press enter in order to change directory to where these files are stored. Now you can type sudo nano bannedlist.txt to open the bannedlist.txt file in a simple text editor (called nano) with super user privileges. You can then move around the file using the cursor keys and add in a players’ steamID64 on each new line to ban them from accessing your server. You can then press ctrl+x to exit the text editor. If you made any changes you will be asked if you want to save the modified buffer (i.e. save your changes – just press Y and then enter) and then to confirm the filename to save, here just press enter and you’re done! Just type exit to logout and close the browser window.
Increase the EBS volume size (disk size)
On initial setup you likely left the default disk size at 8GiB, which is likely to be sufficient for most users. If, however you want to increase the size of your EBS volume, follow along with the AWS documentation here. Note that increasing this size will incur more costs to your account. Once you have expanded the EBS volume, you will also need to inform the Operating System (Ubuntu) of the newly available disk space, and instructions for doing so can be found here.
Change the auto shut down time
On initial setup you likely selected a time for the server to automatically shut down every day. You can change this to any schedule you like and vary this by day, you just need to define the schedule (CRON) expression as explained in these instructions and then update the rule in EventBridge. In order to do so, go to the AWS console and go to the EventBridge service. Select ‘Events’ and then ‘Rules’ and you should see a list of all rules in a given region on your account. Select the ‘[yourStackName-mcBedTime-[randomLetters]‘ rule and then ‘Edit’ and simply replace the CRON expression with whatever expression you want. You can also add rules to start the server or resize at whatever schedule you choose or disable the rules altogether.
Restore from backup
By default, the solution will create a restore point daily and keep these for 7 days. If for whatever reason you wish to go back to a previous version of your server, you can restore it to any of these restore points by following the instructions here.
Costs
The costs of running this solution will comprise of 2 components – recurring and one-off costs and usage costs. Recurring and one-off costs include domain name registration and Route 53 hosted zone costs which we estimate to be under $1 per month over the course of a year (using a .click or .link domain name registered via Route 53). Usage costs we estimate based on 20 hours per week of usage:
- Small server (t3a.small – 1 GiB RAM would be under $2 per month
- Medium server (t3a.medium – 4 GiB RAM under $5 per month
- Large Server (t3a.large – 8 GiB RAM under $9 per month
With this solution though you can change server size as much as you like – if you have a large event planned you can scale up to something enormous like an m5.24xlarge with 384 GiB of RAM and 25 Gbps of network throughput and then back down to a t3a.nano with 0.5GiB of RAM and up to 5 Gbps of network throughput and only pay for what you use. By resizing your server to meet your need you can reduce your usage below the numbers above by only scaling to a large or even enormous personal gaming server when you need to.