AWS Cloud Operations Blog
Bring your own CLI to Session Manager with configurable shell profiles
In keeping with the principle that identity is the new perimeter, AWS Systems Manager Session Manager provides a mechanism for authenticated and authorized AWS Identity and Access Management (IAM) principals to gain data-plane shell access to Amazon EC2 instances, without setting up a traditional SSH pathway for access. It has become an indispensable tool for many AWS customers that we work with, as part of AWS Professional Services engagements. So long as a given instance has a network path to the Session Manager APIs (via the public service endpoints, NAT, or VPC interface endpoints), and has an appropriate instance profile, encrypted shell access can be offered via IAM without needing to provision more traditional remote management requirements. This includes an EC2 key pair, a public IP address, or a bastion host. In addition: no inbound security group ingress rule is required, because Session Manager traffic originates from the instance itself, not an external client as is the case with SSH.
As the options for hybrid networking and VPC design have proliferated to address ever-more nuanced use cases, the ability to quickly spin up an EC2 instance with shell access in a particular VPC subnet is an essential diagnostic tool in your operational toolkit.
Session Manager now has even more flexibility and power via the introduction of configurable shell profiles. With this feature, you can specify a session document that defines configuration for Amazon S3 logging, Amazon CloudWatch Logs, encryption, and custom shell commands to use in a session. In this post, we focus on the custom shell commands, which enable a custom command line interface (CLI) environment within Session Manager sessions.
Run a simple command on connection
The following code is an example of a simple session document:
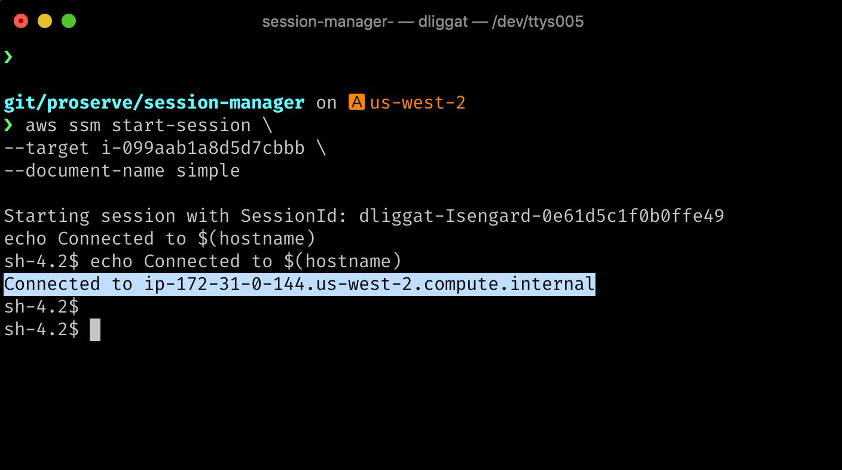
The shellProfile section specifies the command that should be run within the shell after connection, in Windows or Linux respectively. Although you don’t have to specify equivalent commands on both Linux and Windows, in this case Session Manager prints the hostname to the console upon connection.
Using the preceding document, we create the session document with the following command:
In a new session, the Linux command specified by the document runs on login. A Windows instance will run the corresponding command.
You can use aws ssm start-session and directly enter a shell on an EC2 instance; this requires both the AWS CLI and the Session Manager Plugin for the AWS CLI.
With this document, we can connect to a Linux instance and see the command run automatically. See the following screenshot:
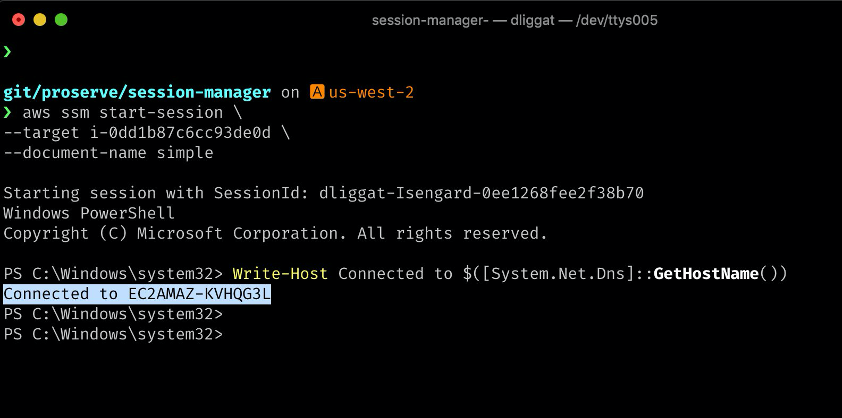
The following screenshot shows the command on a Windows instance:
Any subsequent updates to the session document require you to provide a document version:
Parameterize the command
Rather than entirely embedding the command in the document, we can pass in a parameter to enable customization of the shellProfile script. For example, you could use this parameter to pass a secret name for an AWS Secrets Manager lookup on the instance, which avoids embedding a secret in the session document.
We can also optionally embed the entire command as the parameter. See the following document:
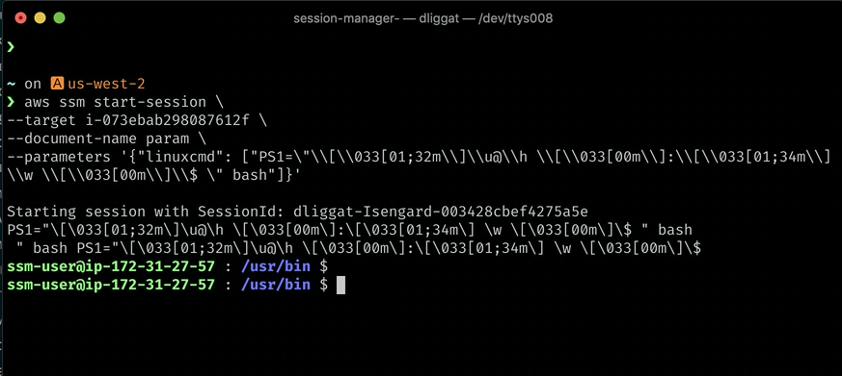
We can use this, for example, to run a different shell on login such as bash, rather than the default shell sh used by Session Manager. See the following screenshot:

We can also customize other aspects of the environment, such as the PS1 variable used by bash:
Bring your entire .bashrc
We can also go further with Configurable Shell Profiles. Many technical professionals have accumulated a series of convenience functions and aliases in a local ~/.bashrc file. For example, see the following code:
With Configurable Shell Profiles, we can transport this entire file into Session Manager sessions. To avoid any difficulty with escaping single or double quotes, a straightforward technique is to base64 encode it locally and base64 decode remotely, using the linuxcmd variable as a transport mechanism. See the following screenshot:
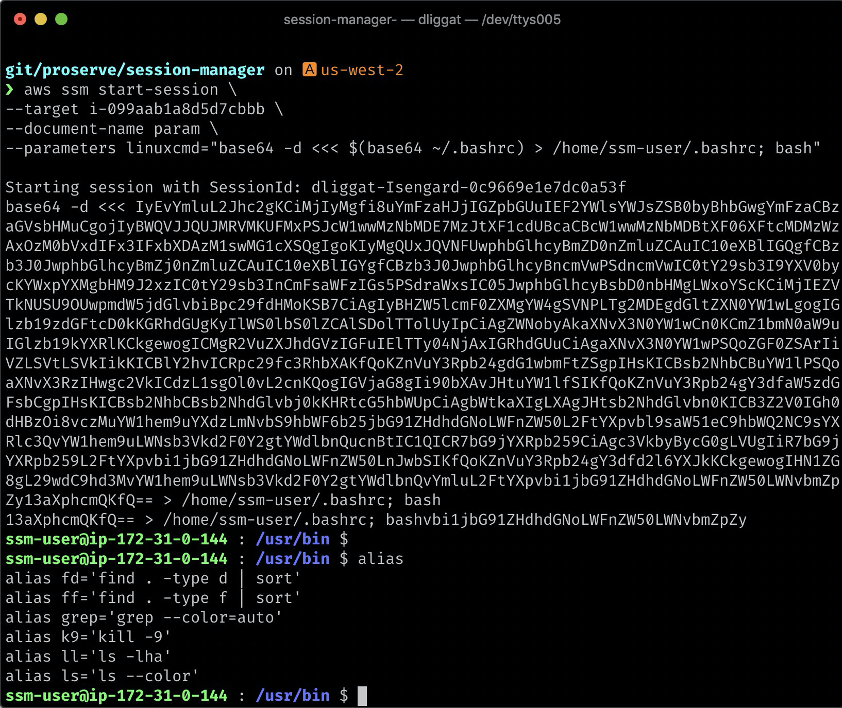
My .bashrc aliases and functions now exist in the EC2 instance. This gives us the best of both worlds: the secure and convenient connectivity of Session Manager, and the familiarity of a local shell environment.
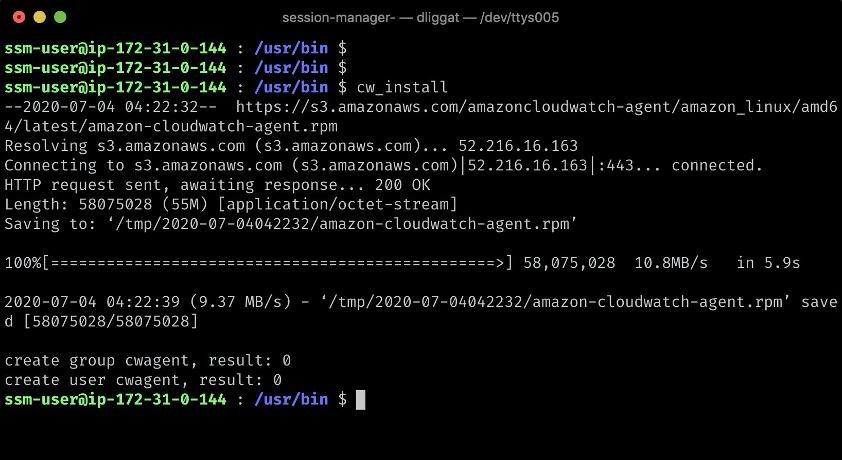
With the command line interface environment in place, we can now make full use of existing convenience functions brought in from ~/.bashrc – for example, to install the unified CloudWatch Logs agent. See the following screenshot:
Conclusion
We have demonstrated how to create Session Manager sessions that are aligned to the conventions you use in your own local environment. We hope you find this feature useful, and that it makes you feel more at home in Session Manager sessions. To get started with AWS Systems Manager Session Manager, visit the product documentation page.
About the Authors
![]()
Dave Liggat is a Senior Cloud Infrastructure Architect on with Amazon Web Services (AWS) Professional Services, and is based in Vancouver, Canada. He is focused on helping public sector customers achieve their mission using cloud computing.

Sushil Mohite is a Software Engineer with AWS Systems Manager. He is passionate about building simple intuitive solutions for complex problems.