AWS Cloud Operations Blog
Build a scheduler as a service with Amazon CloudWatch Events, Amazon EventBridge, and AWS Lambda
There are multiple ways to build a scheduler as a service in AWS. In this blog post, we provide step-by-step instructions for building a scheduler as a service with Amazon CloudWatch Events and Amazon EventBridge with AWS Lambda. We also demonstrate how to build a dynamic API scheduler using EventBridge and Lambda.
CloudWatch Events deliver a near-real-time stream of system events that describe changes in AWS resources. Using simple rules that you can quickly set up, you can match events and route them to one or more target functions, or streams. You can also use CloudWatch Events to schedule automated actions that self-trigger at certain times using cron or rate expressions. For more information, check schedule expressions for rules documentation.
Amazon EventBridge is a serverless event bus that makes it easy to connect applications together using data from your applications, integrated software as a service (SaaS) applications, and AWS services. Amazon EventBridge extends its predecessor, Amazon CloudWatch Events, and provides a near-real-time stream of system events that describe changes to your AWS resources. It allows you to respond quickly to operational changes and take corrective action. You write rules to indicate which events are of interest to your application and what automated actions to take when a rule matches an event. You can set up scheduled events using the popular Unix cron syntax. Scheduled events are generated on a periodic basis and invoke any of the supported target AWS services.
AWS Lambda lets you run code without provisioning or managing servers. You pay only for the compute time you consume. With Lambda, you can run code for virtually any type of application or backend service, all with zero administration. You upload your code and Lambda takes care of everything required to run and scale your code with high availability. You can set up your code to automatically trigger from other AWS services or call it directly from any web or mobile app.
Build scheduler with AWS Lambda functions using CloudWatch Events
The following diagram shows the solution architecture.

Figure 1: Build scheduler with CloudWatch Events
Create a Lambda function
1. Sign in to the AWS Lambda console and choose Create function.
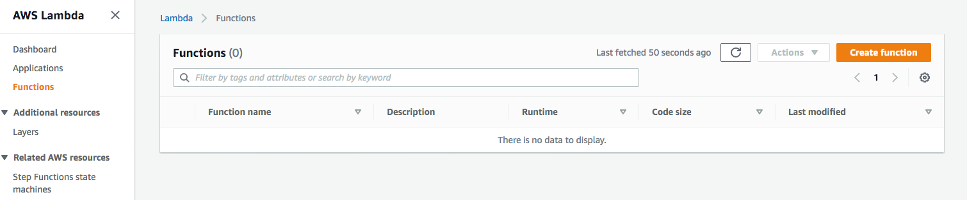
Figure 2: AWS Lambda console with Functions selected
2. In the Create function section, do the following:
- Choose Author from scratch.
- For Function name, enter Scheduler-with-CloudWatchEvents.
- For Runtime, choose Node.js 12.x.
- Under Permissions, choose Create a new role with basic Lambda permissions.
3. Choose Create function.
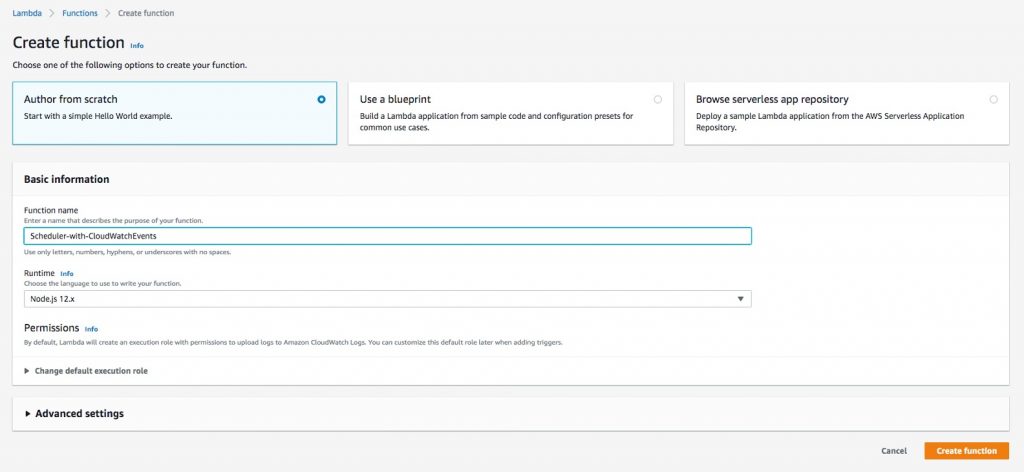
Figure 3: Creating a Lambda function with Node.js 12x runtime
4. Copy the following code snippet, paste it under Function code, and then choose Deploy.
exports.handler = async (event) => {
  console.log('EVENT: Lambda scheduler with CloudWatch Events');
  console.log('EVENT DETAILS:', JSON.stringify(event));
};
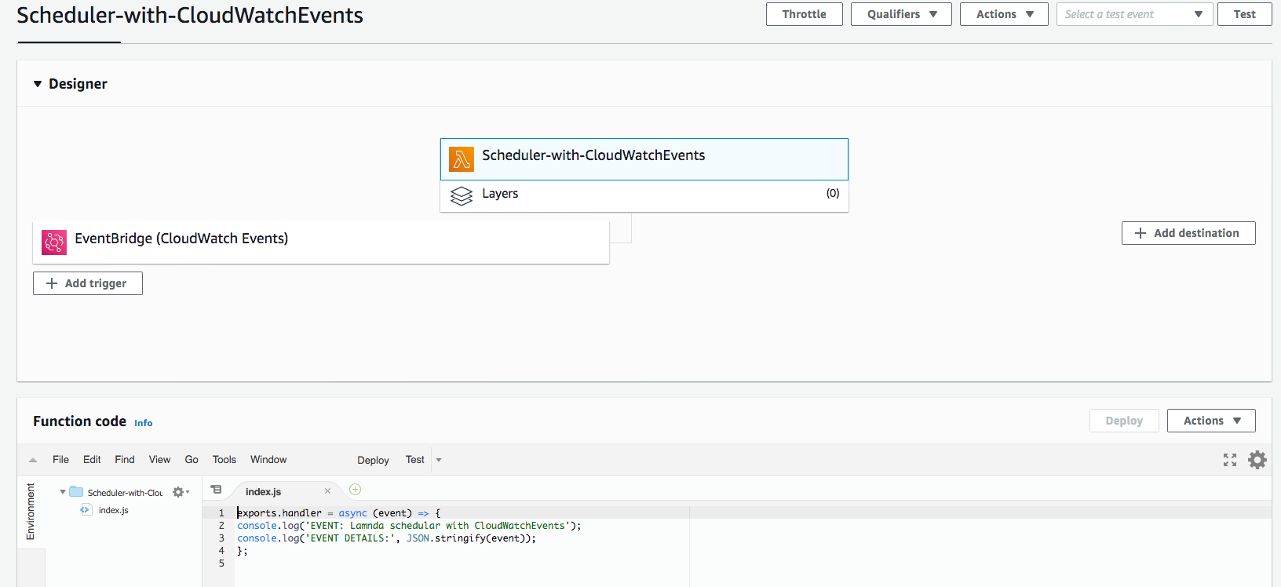
Figure 4: Snippet of Lambda function code
Schedule the Lambda function with CloudWatch Events
1. Sign in to the Amazon CloudWatch console.
2. In the left navigation pane, choose Events, and then choose Get Started.
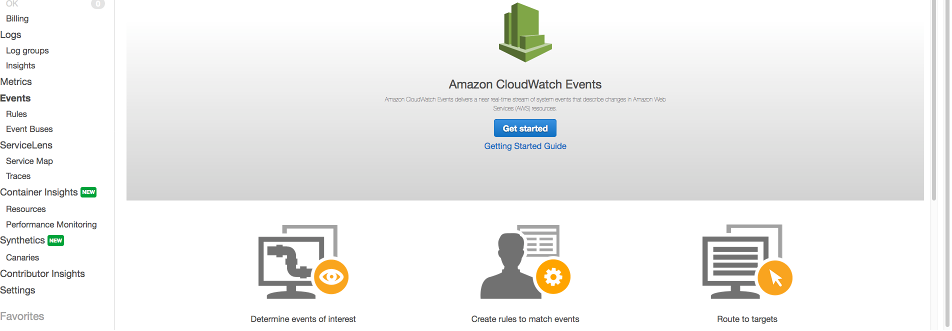
Figure 5: CloudWatch console with Events selected
For this example, we invoke the Scheduler-with-CloudWatchEvents Lambda function every 5 minutes.
1. In Step 1: Create rule, do the following:
- Under Event Source, choose Schedule.
- For Fixed rate of, enter 5 minutes.
- Under Targets, choose Lambda function. For Function, choose the Scheduler-with-CloudWatchEvents Lambda function.
- Choose Configure details.
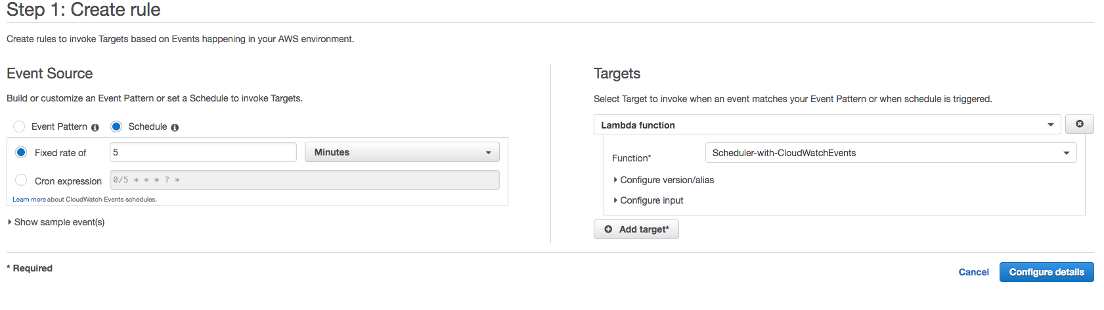
Figure 6: Create rule page of the CloudWatch console
2. In Step 2: Configure rule details, for Name, enter CloudWatchEventScheduler, and then choose Create rule.
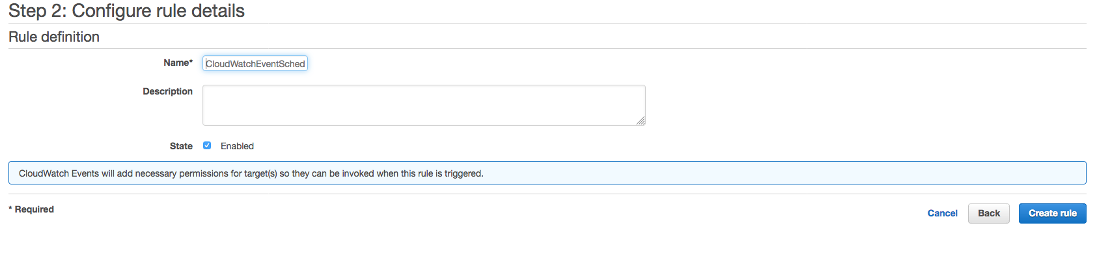
Figure 7: Configure CloudWatch rule details
Validate CloudWatch Events scheduler
1. In the AWS Lambda console, choose the lambda-scheduler-with-cloudwatchevents function that you created in the previous step.
2. Choose the Monitoring tab to see Lambda invocations every 5 minutes.
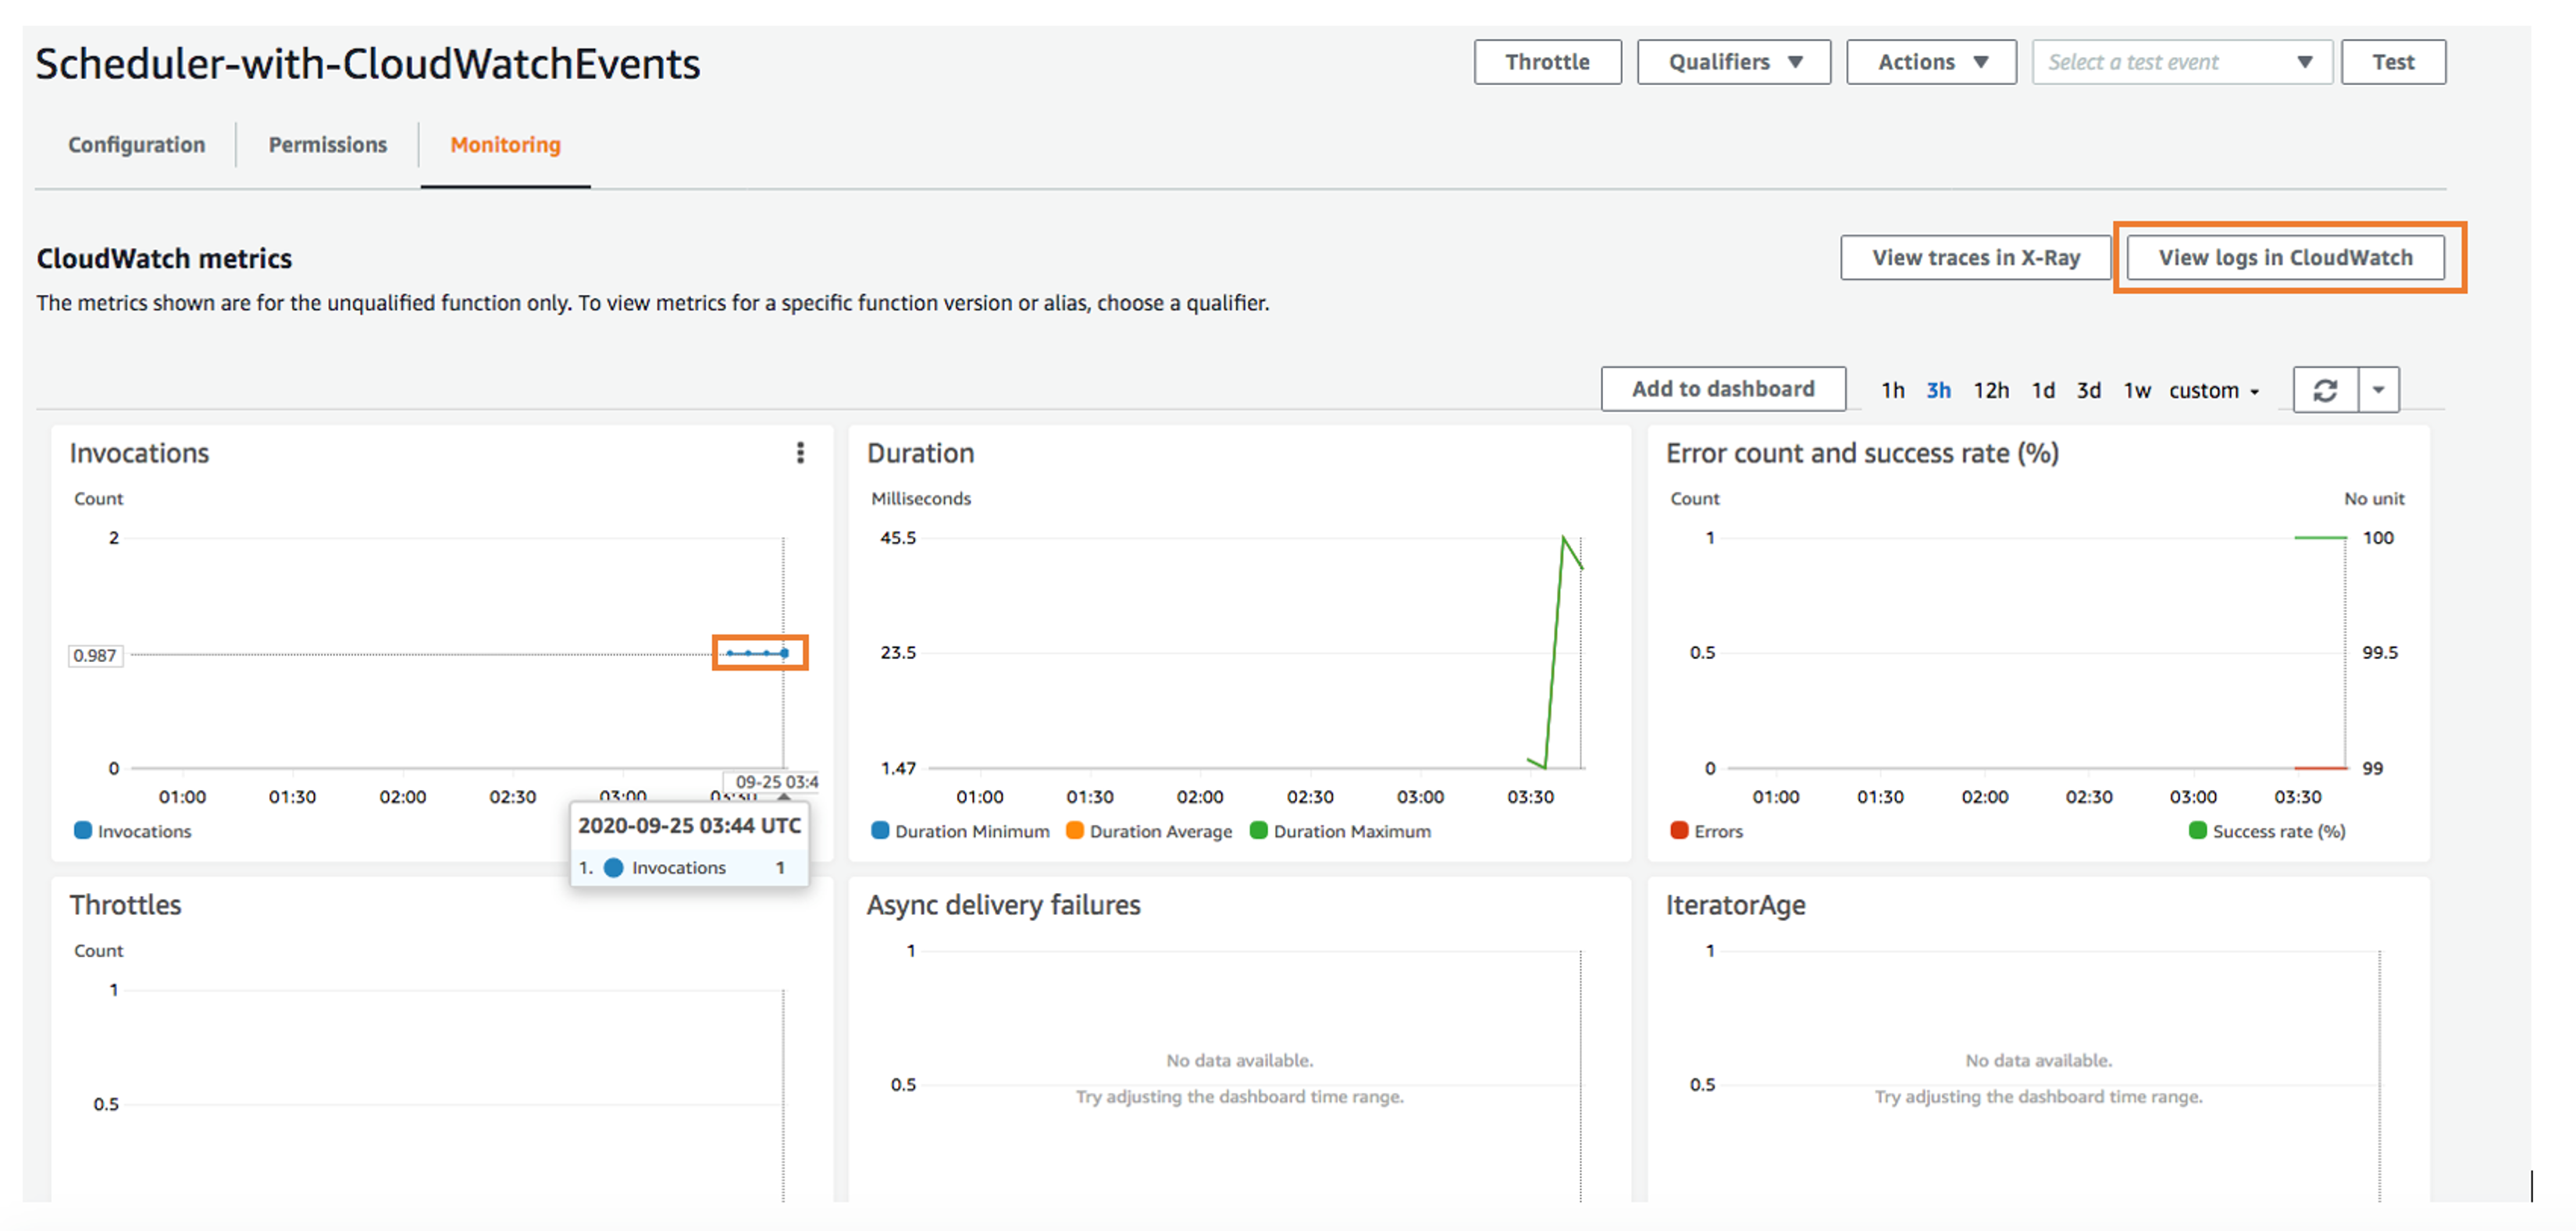
Figure 8: Lambda function monitoring with CloudWatch Events rule
3. Choose View logs in CloudWatch and then choose your Lambda function log group.
Figure 9 shows the event details of successful Lambda invocations every 5 minutes.
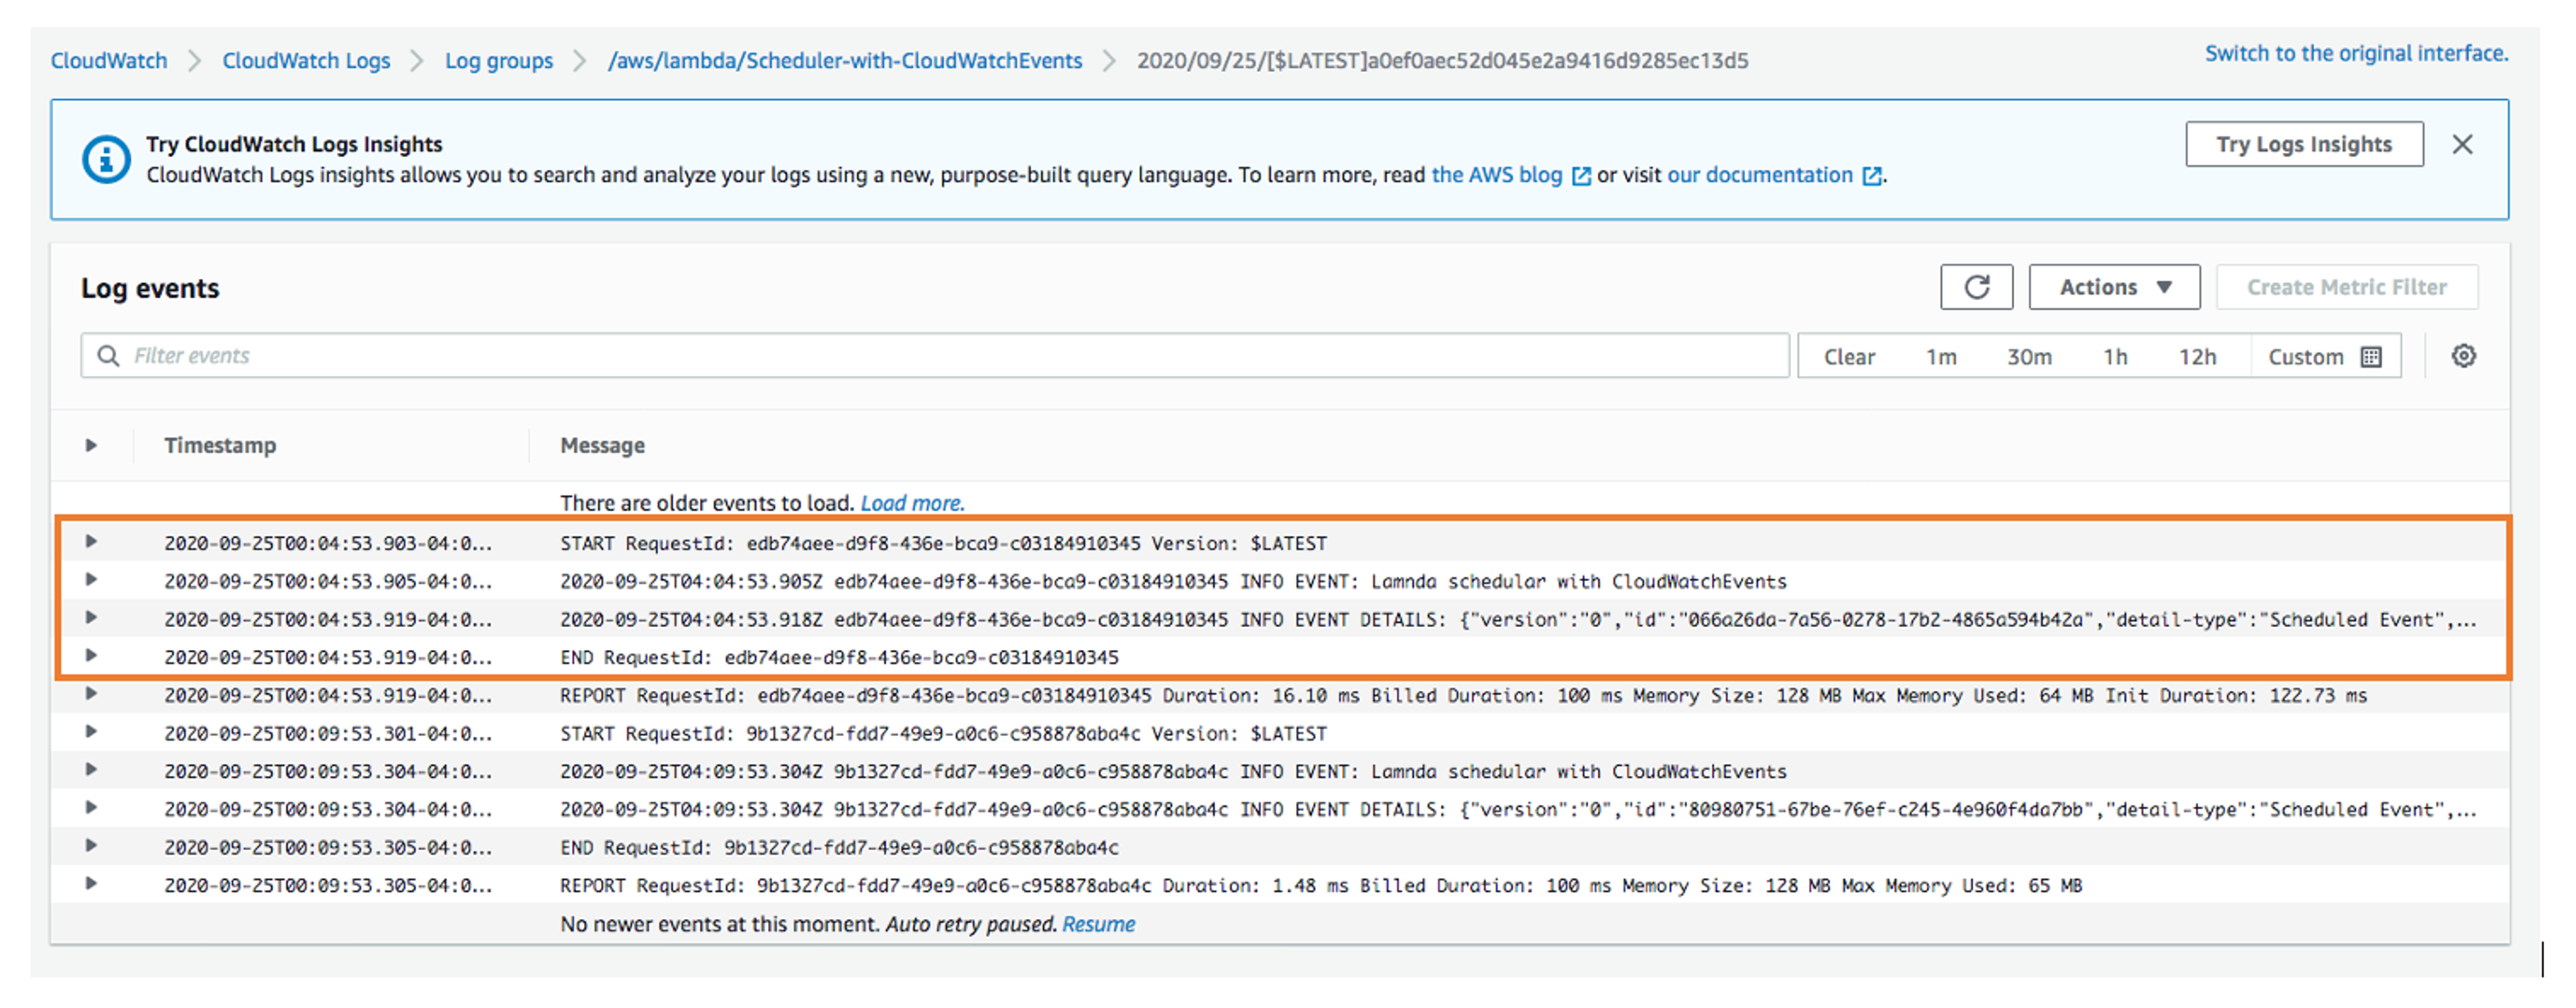
Figure 9: Log events in the CloudWatch console
Your Lambda scheduler with CloudWatch Events is now ready. You can also schedule cron jobs by using Lambda with CloudWatch Events.
Build scheduler with AWS Lambda functions using Amazon EventBridge
The following diagram shows the solution architecture.
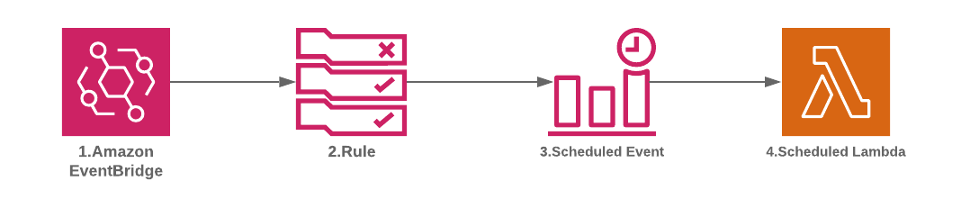
Figure 10: Build scheduler with EventBridge
Create a Lambda function
1. Sign in to the AWS Lambda console and choose Create function.
2. In the Create function section, do the following:
- Choose Author from scratch.
- For Function name, enter Scheduler-with-EventBridge.
- For Runtime, choose Node.js 12.x.
- Under Permissions, choose Create a new role with basic Lambda permissions.
3. Choose Create function.
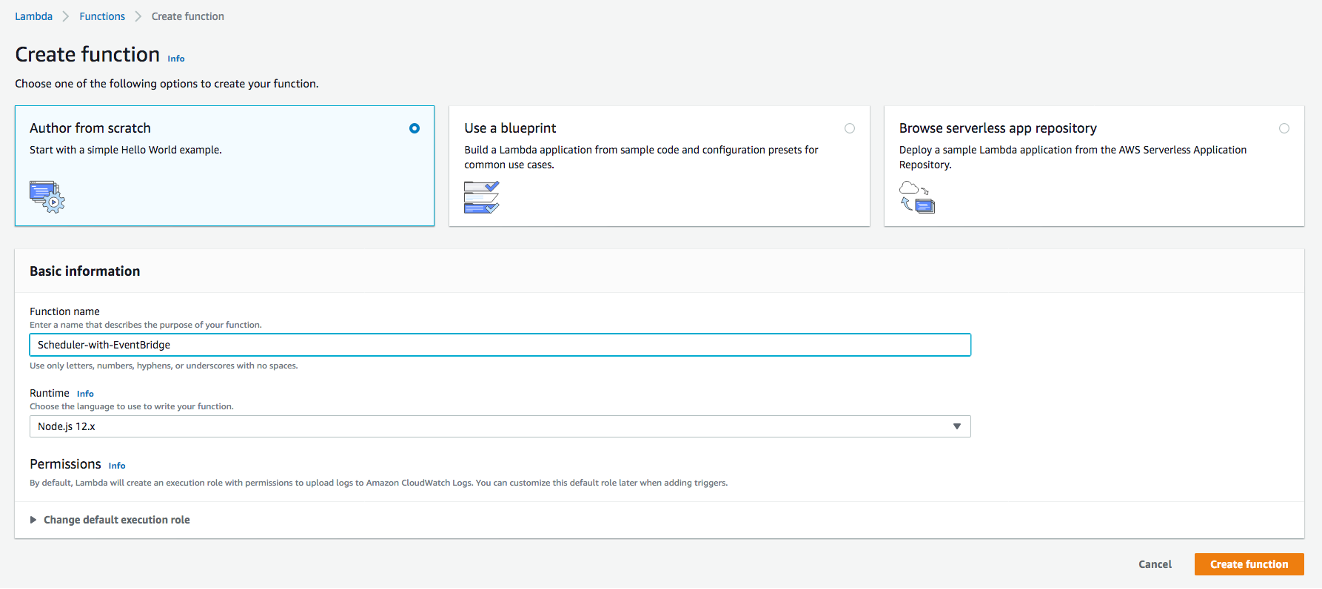
Figure 11: Creating a Lambda function to log event details with Node.js 12x runtime
4. Copy the following code snippet, paste it under Function code, and then choose Deploy.
exports.handler = async (event) => {
  console.log('EVENT: Lambda scheduler with EventBridge');
  console.log('EVENT DETAILS:', JSON.stringify(event));
};

Figure 12: Snippet of Lambda function code for EventBridge events
Schedule the Lambda function with EventBridge
1. Sign in to the Amazon EventBridge console and choose Create rule.
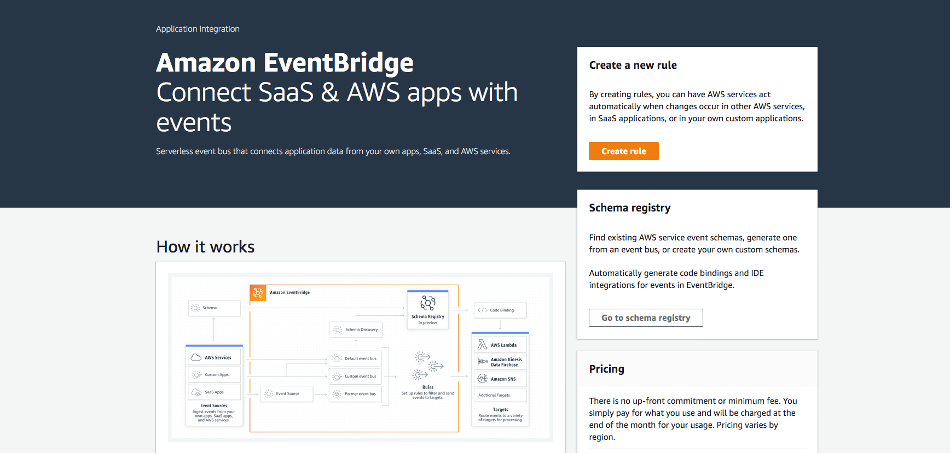
Figure 13: EventBridge main console page
For this example, we invoke the Scheduler-with-EventBridge Lambda function every 5 minutes.
1. In the Create rule section, do the following:
- Under Name and description, enter EventbridgeScheduler.
- Under Define pattern, choose Schedule.
- For Fixed rate of, enter 5 minutes.
- Under Select event bus, choose AWS default event bus.
- Under Select targets, choose Lambda function and then choose the Scheduler-with-EventBridge Lambda function.
2. Choose Create.
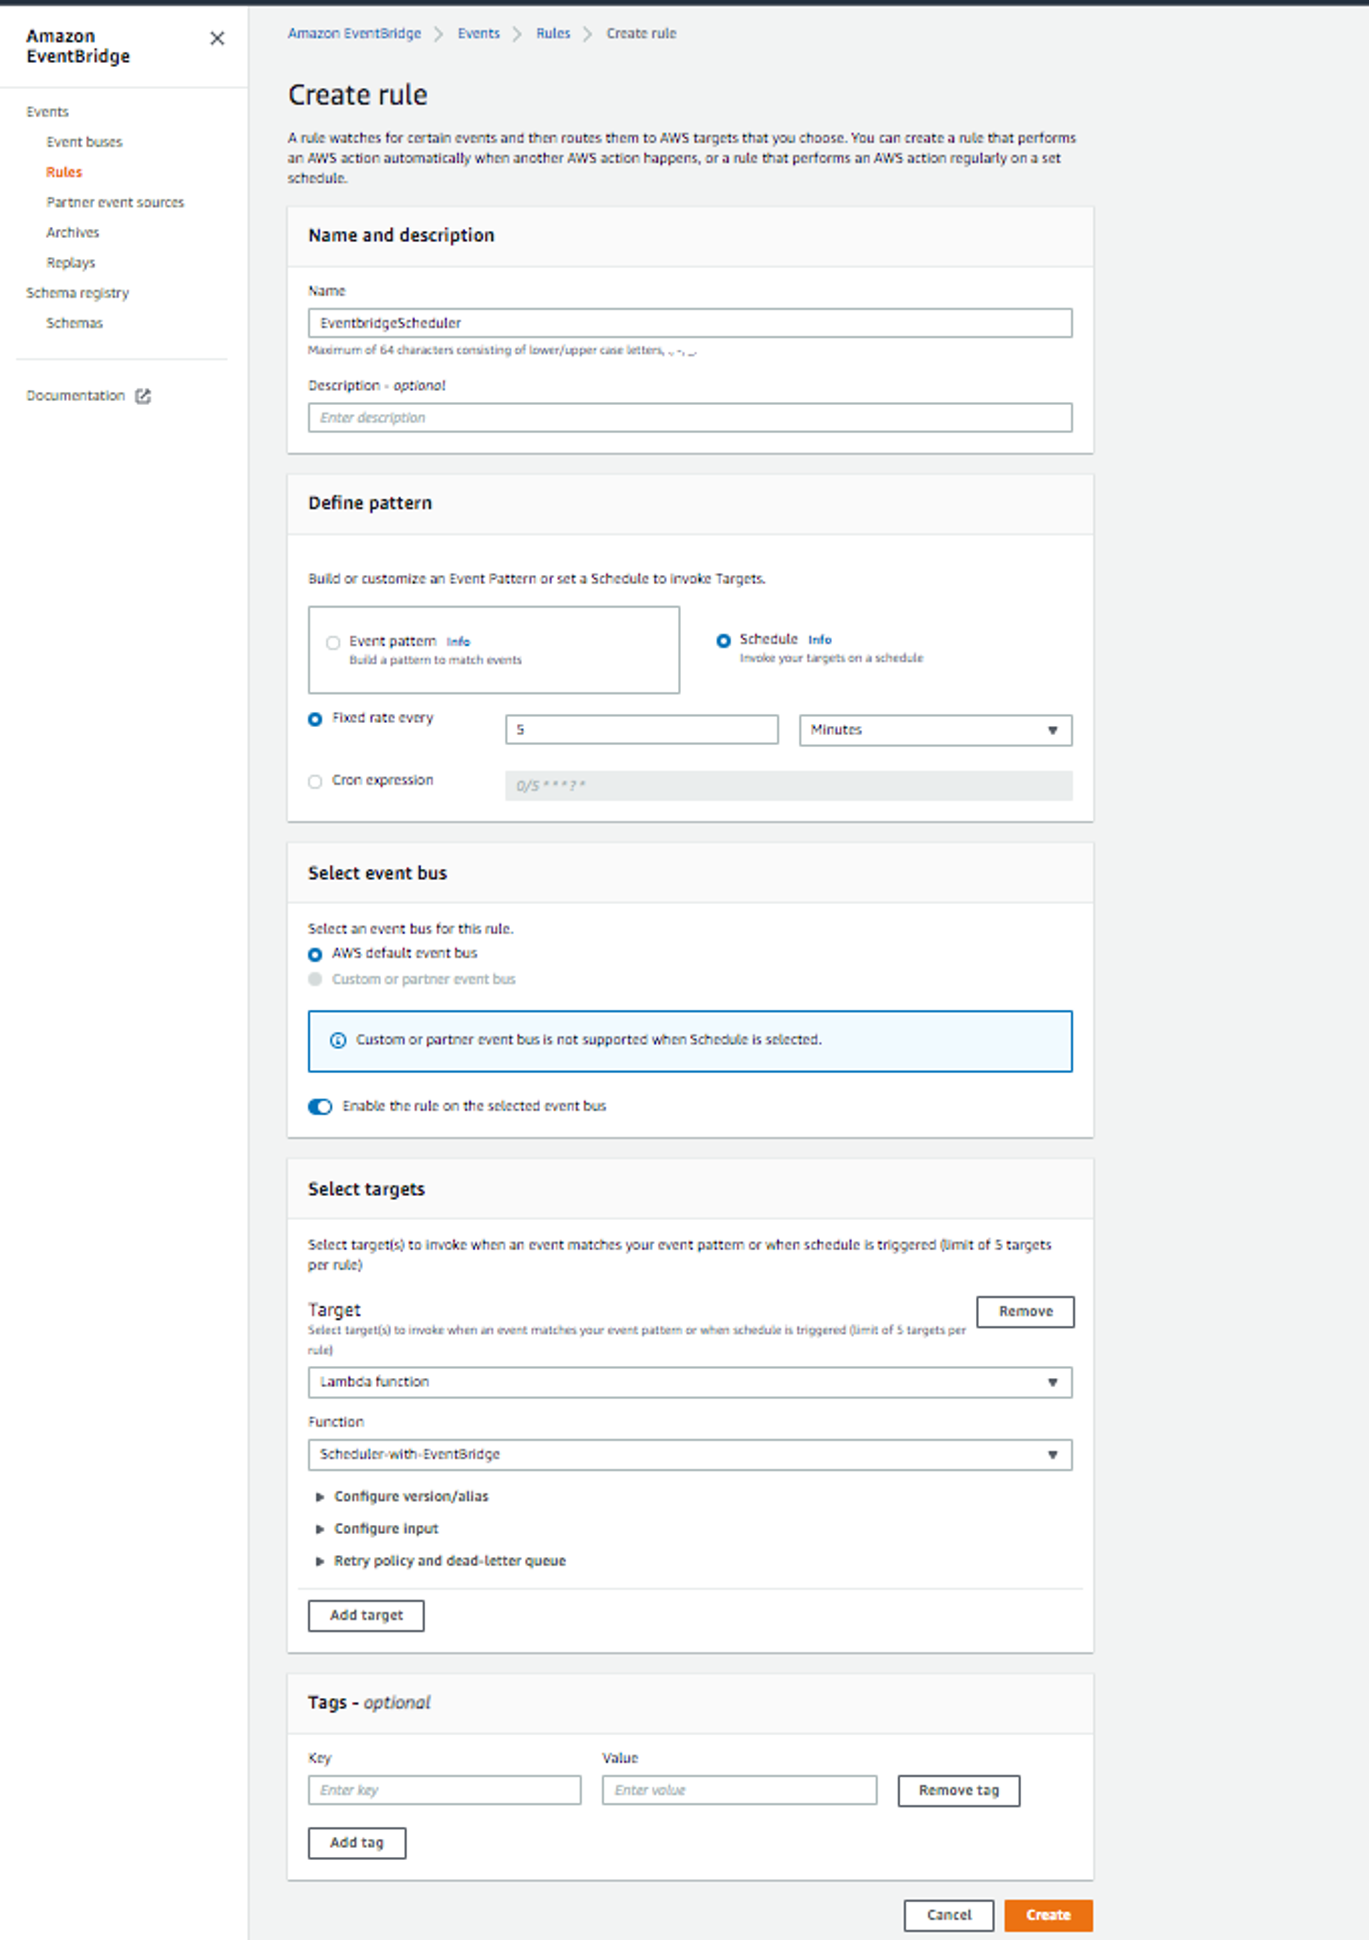
Figure 14: Creating the EventBridge rule
Validate EventBridge scheduler
1. In the Lambda console, choose the Scheduler-with-EventBridge function that you created in the previous step. Choose the Monitoring tab to see Lambda invocations every 5 minutes.
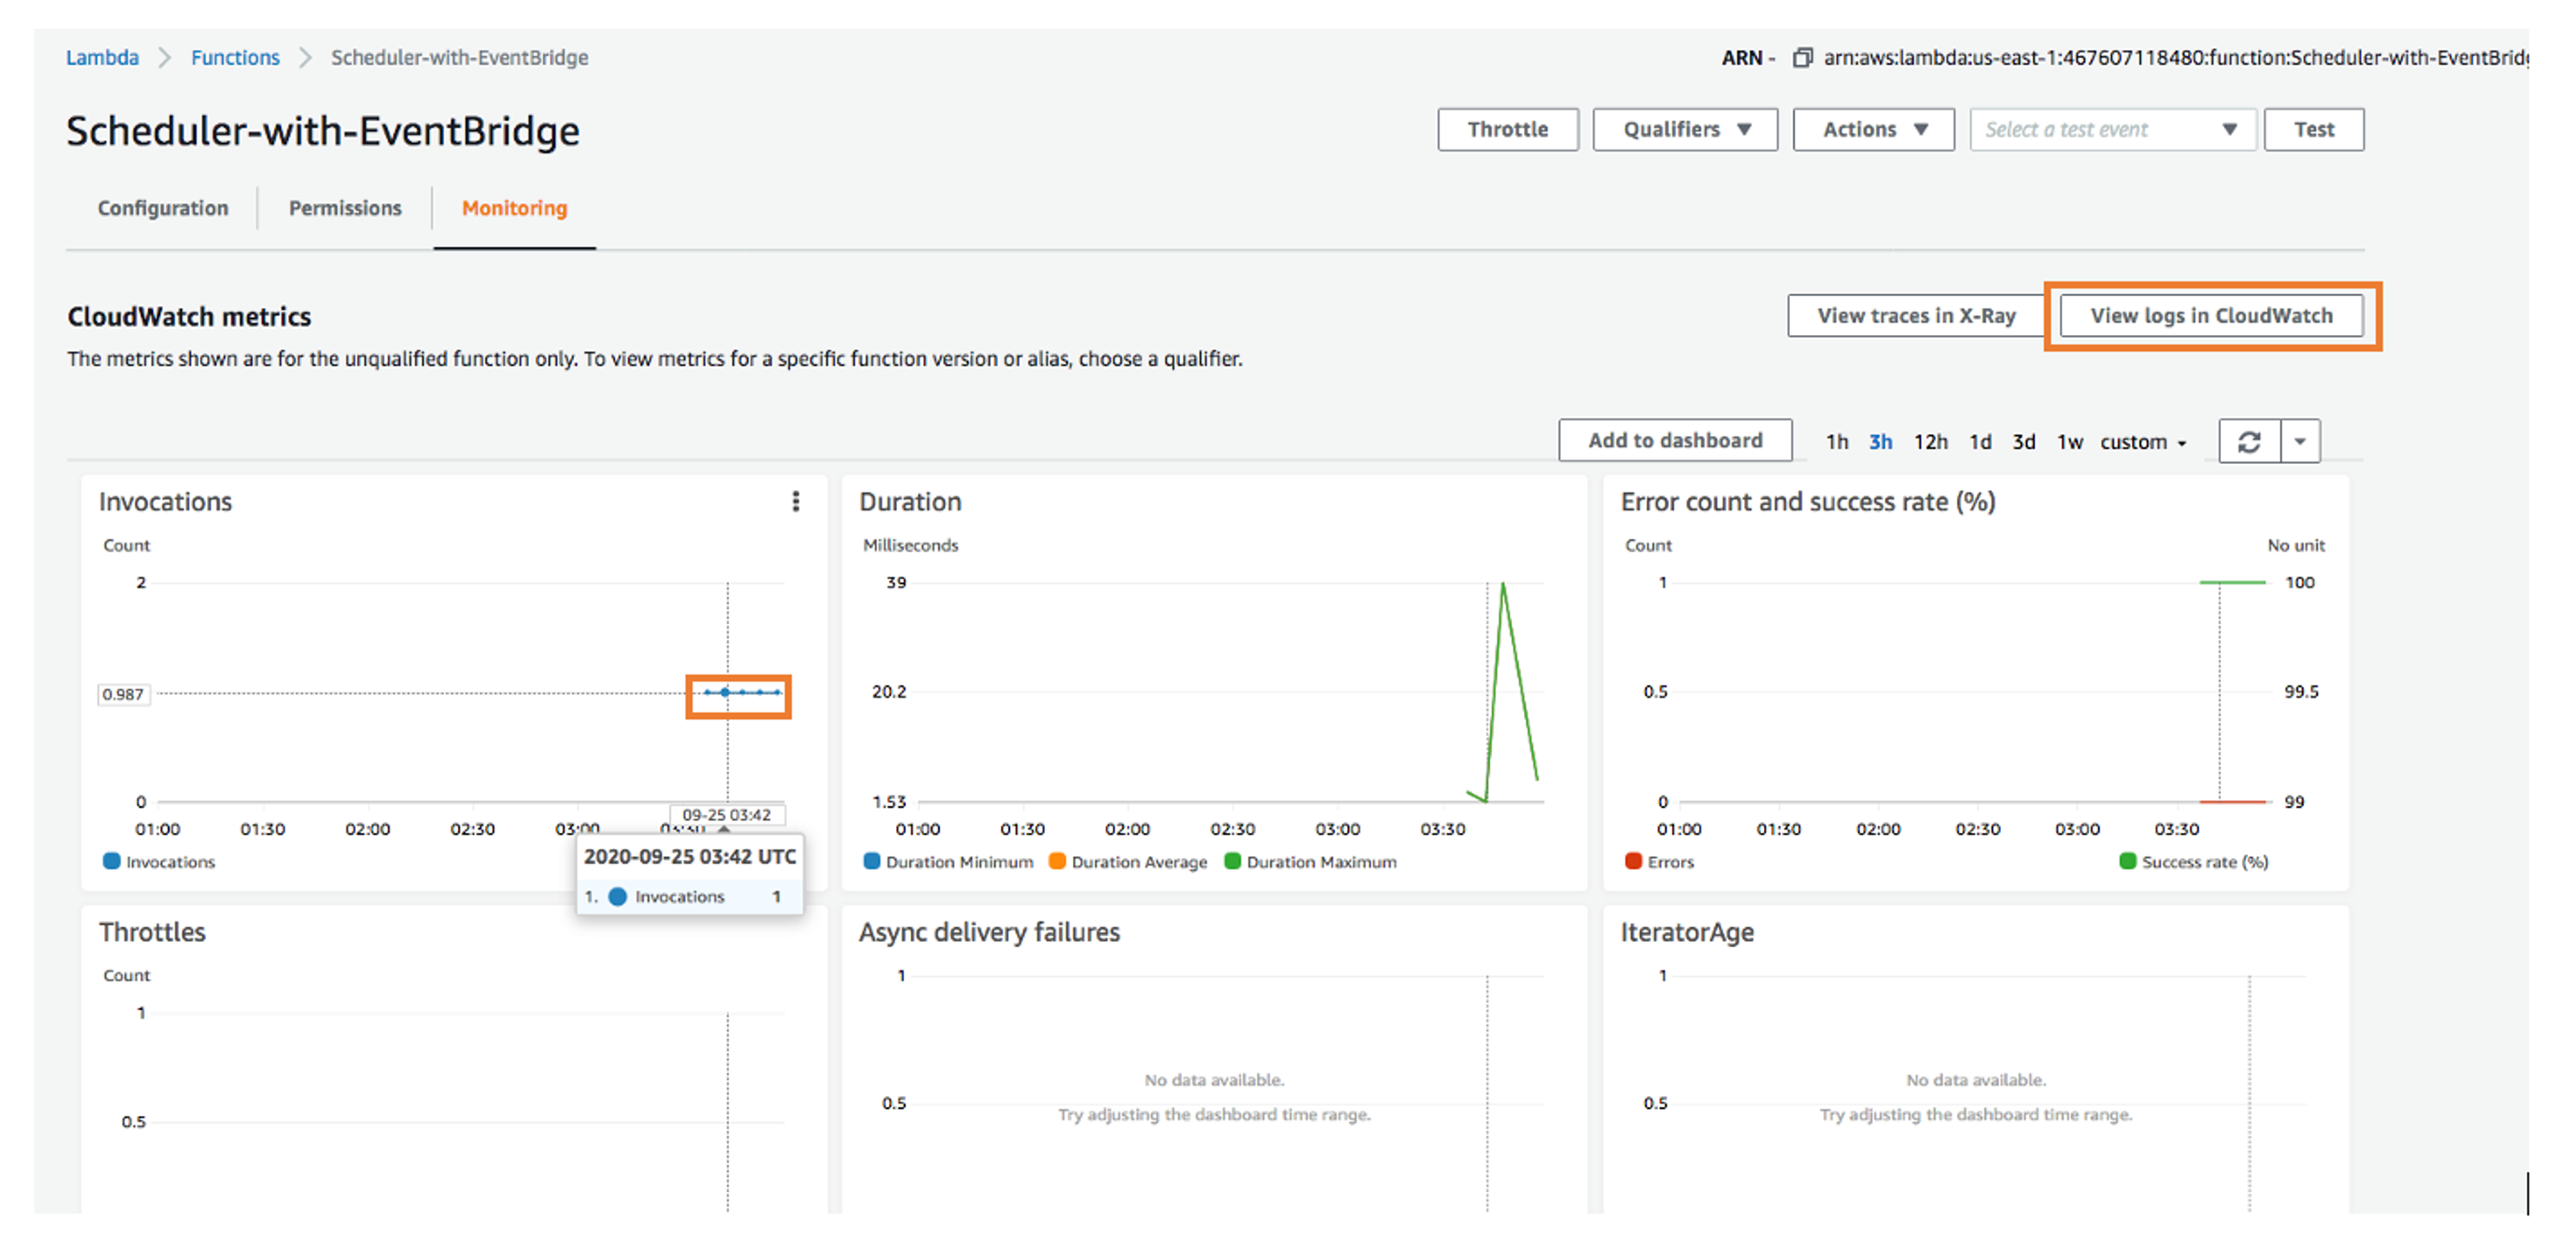
Figure 15: Lambda function monitoring with EventBridge rule
2. Choose View logs in CloudWatch and then choose your Lambda function log group.
Figure 16 shows the event details of successful Lambda invocation every 5 minutes.

Figure 16: EventBridge events displayed in the CloudWatch Logs section of the console
Your Lambda scheduler with EventBridge is now ready. You can also schedule cron jobs by using Lambda with EventBridge.
Building a dynamic API for scheduler-as-a-service
If your project needs a scheduler as a service and requires the ability to programmatically call an API to schedule a Lambda function to be invoked at a given time or frequency. You can create a scheduler function (Lambda function A) capable of setting rules on when to invoke a scheduled function (Lambda function B), as shown in Figure 17.

Figure 17: Building a dynamic API for scheduler-as-a-service
Step 1: Create handler
First, we create the Lambda function and EventBridge service objects along with the function for Lambda function A.
const AWS = require(‘aws-sdk’);
const eventBridge = new AWS.EventBridge();
const lambda = new AWS.Lambda();

module.exports.lambdaA = async (event) => {

};
Step 2: Add EventBridge rule
After we have set up the service objects, we will create the EventBridge rule inside of our Lambda handler. In this example, we are providing a static ruleName and ScheduleExpression. To make this dynamic, you can use values in the event to populate these fields.
// ...code from Step 1

module.exports.lambdaA = async (event) => {
  const ruleName = 'MyProgramaticRuleName';
  const ruleParams = {
    Name: ruleName,
    ScheduleExpression: 'cron(0/15 * * * ? *)',
  };

  const rule = await eventBridge.putRule(ruleParams).promise();

};
Step 3: Attach permissions
Next, we add permissions to this EventBridge rule to allow it to trigger Lambda function B. To do this, we use the RuleArn returned to us from the putRule API operation in the parameters we pass to lambda.addPermission.
module.exports.lambdaA = async (event) => {

  // ... code from Step 2

  const permissionParams = {
      Action: 'lambda:InvokeFunction',
      FunctionName: 'LambdaB',
      Principal: 'events.amazonaws.com',
      StatementId: ruleName,
      SourceArn: rule.RuleArn,
  }

  await lambda.addPermission(permissionParams).promise();

};
Step 4: Add target
After we have granted permissions to the rule, we can now set Lambda function B as the target so when this rule triggers, it will invoke our function with the provided input. In this example, we are using a static value for Input, but this can also be passed in from data found in the event. We need to update the Amazon Resource Name (ARN) reflect the ARN of our Lambda function B.
module.exports.lambdaA = async (event) => {

  // ... code from Step 3

  const targetParams = {
    Rule: ruleName,
    Targets: [
      {
        Id: `${ruleName}-target`,
        Arn: 'arn:aws:lambda:<region>:<account_id>:function:LambdaB',
        Input: '{ "data": "data for Lambda B" }',
      },
    ],
  };

  const result = await eventBridge.putTargets(targetParams).promise();

  return result;

};
Step 5: Validation
After the target has been added, the new scheduler Lambda function should look something like this:
module.exports.lambdaA = async (event) => {
  const ruleName = 'MyProgramaticRuleName';
  const ruleParams = {
    Name: ruleName,
    ScheduleExpression: 'cron(0/15 * * * ? *)',
  };

  const rule = await eventBridge.putRule(ruleParams).promise();

  const permissionParams = {
      Action: 'lambda:InvokeFunction',
      FunctionName: 'LambdaB',
      Principal: 'events.amazonaws.com',
      StatementId: ruleName,
      SourceArn: rule.RuleArn,
  };

  await lambda.addPermission(permissionParams).promise();

  const targetParams = {
    Rule: ruleName,
    Targets: [
      {
        Id: `${ruleName}-target`,
        Arn: 'arn:aws:lambda:<region>:<account_id>:function:LambdaB',
        Input: '{ "data": "data for Lambda B" }',
      },
    ],
  };

  const result = await eventBridge.putTargets(targetParams).promise();

  return result;

};
Deleting or disabling a scheduler
Use the following steps to delete or disable an Events rule.
1. Sign in to the CloudWatch console and choose Rules in the navigation pane.
2. To delete a rule, select the button next to the rule and choose Actions and then, Delete.
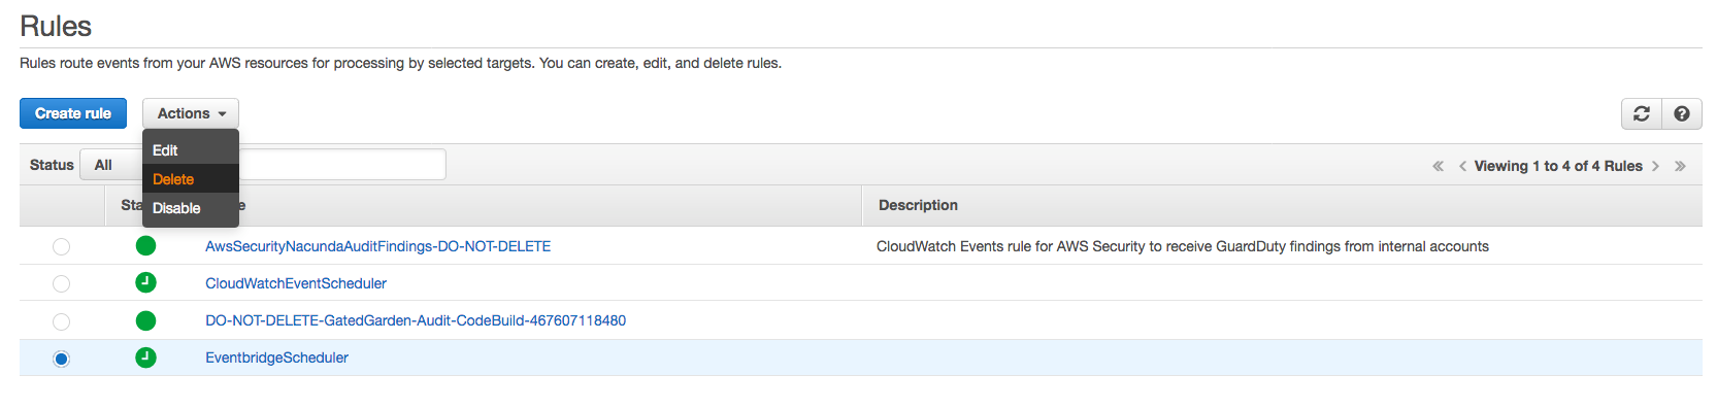
Figure 18 : Deleting Event Rule
3. To temporarily disable a rule, select the button next to the rule and choose Actions and then, Disable.

Figure 19: Disabling the event rule
Other scheduler options
Amazon Elastic Container Service (Amazon ECS) supports the ability to schedule tasks on either a cron-like schedule or in a response to CloudWatch Events. This support is available for Amazon ECS tasks using both the Fargate and EC2 launch types. For more information, check scheduled tasks (cron) in the Amazon ECS documentation for Fargate.
You can use AWS Batch for more complicated jobs. The service lets you define multi-stage pipelines where each stage depends on the completion of the previous one. For more information, check the AWS Batch documentation.
Conclusion
In this blog post, we’ve shown you how to build a scheduler as a service with Amazon CloudWatch Events and Amazon EventBridge. We have also demonstrated how to build a dynamic API scheduler using EventBridge and AWS Lambda. With the information in this post, you can now build your own scheduler-as-a-service solution in AWS. Amazon EventBridge is the preferred way to manage your events. CloudWatch Events and EventBridge are the same underlying service and API, but EventBridge provides more features. Changes you make in either CloudWatch or EventBridge appear in each console. For more information about automated scheduled actions using cron or rate expressions, check the Amazon EventBridge developer guide and Amazon CloudWatch Events developer guide.
About the authors
 Raghavarao Sodabathina is an Enterprise Solutions Architect at AWS, focusing on Data Analytics, AI/ML and Serverless platform. He engages with customers to create innovative solutions that address customer business problems and accelerate the adoption of AWS services. In his spare time, Raghavarao enjoys spending time with his family, reading books, and watching movies.
 Ryan Sonshine is a Cloud Application Architect at Amazon Web Services. He works with customers to drive digital transformations while helping them architect, automate, and re-engineer solutions to fully leverage the AWS Cloud.