AWS Compute Blog
Migrate encrypted Amazon EC2 instances across AWS Regions without sharing AWS KMS keys
At AWS, we’ve designed our global infrastructure with isolated AWS Regions to help you achieve high fault tolerance and stability for your applications. These AWS Regions are organized into partitions, each with distinct network and security boundaries.
As your business evolves, you might need to migrate workloads between AWS Regions. Perhaps you’re looking to reduce latency for users in new geographic areas, meet Region-specific compliance requirements, or you’re an ISV expanding your product’s availability. Whatever your motivation, cross-Region migration needs careful planning, especially when dealing with encrypted resources.
When migrating Amazon Elastic Compute Cloud (Amazon EC2) instances with encrypted Amazon Elastic Block Storage (Amazon EBS) volumes across AWS Regions with in the same account or a different account, you face a particular challenge: AWS Key Management Service (AWS KMS) keys are AWS Region-specific and cannot be shared across AWS Regions. This post provides a step-by-step approach to successfully migrate your encrypted EC2 instances without compromising your security posture by sharing your KMS keys.
Solution overview
The following diagram and steps are an overview of how an EC2 instance can be migrated to a different Region in a different account without sharing the KMS keys.
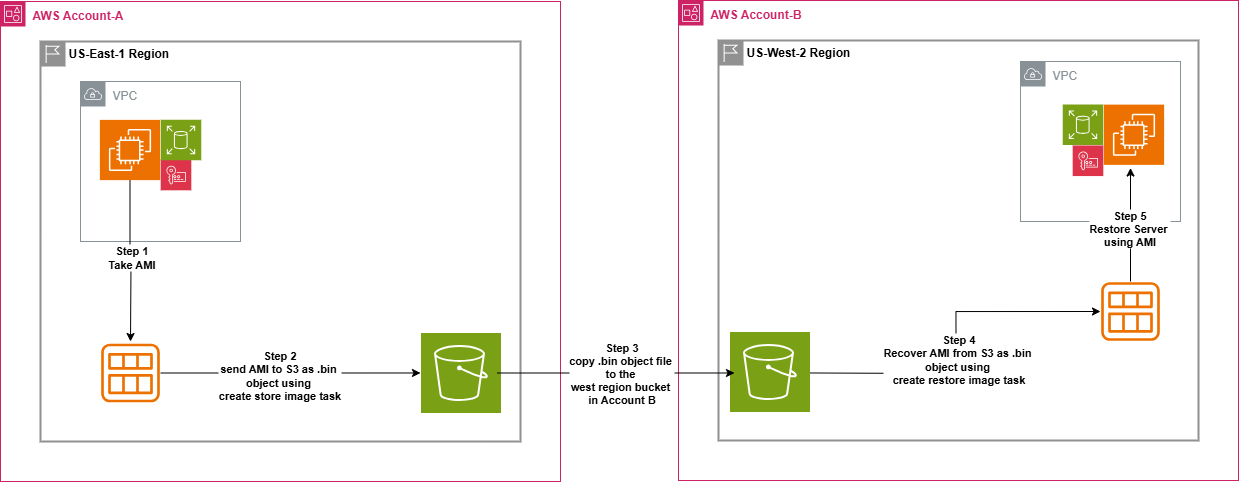
Figure 1:Design to migrate EC2 between two accounts
Prerequisites
The following prerequisites are necessary to complete this solution:
- Create an S3 bucket in both the source and target Region.
- Configure the target account Amazon S3 bucket with the following policy to copy the Amazon Machine Image (AMI) file between two accounts:
Implementation steps
Now based on the above architecture, you are implementing the follow steps to move your EC2 instance from the source account to the target account
- Create an AMI of the server that you want to move to a different Region in the same account or different account.
- Choose the server
- Choose Actions, Image and templates, and Create image.
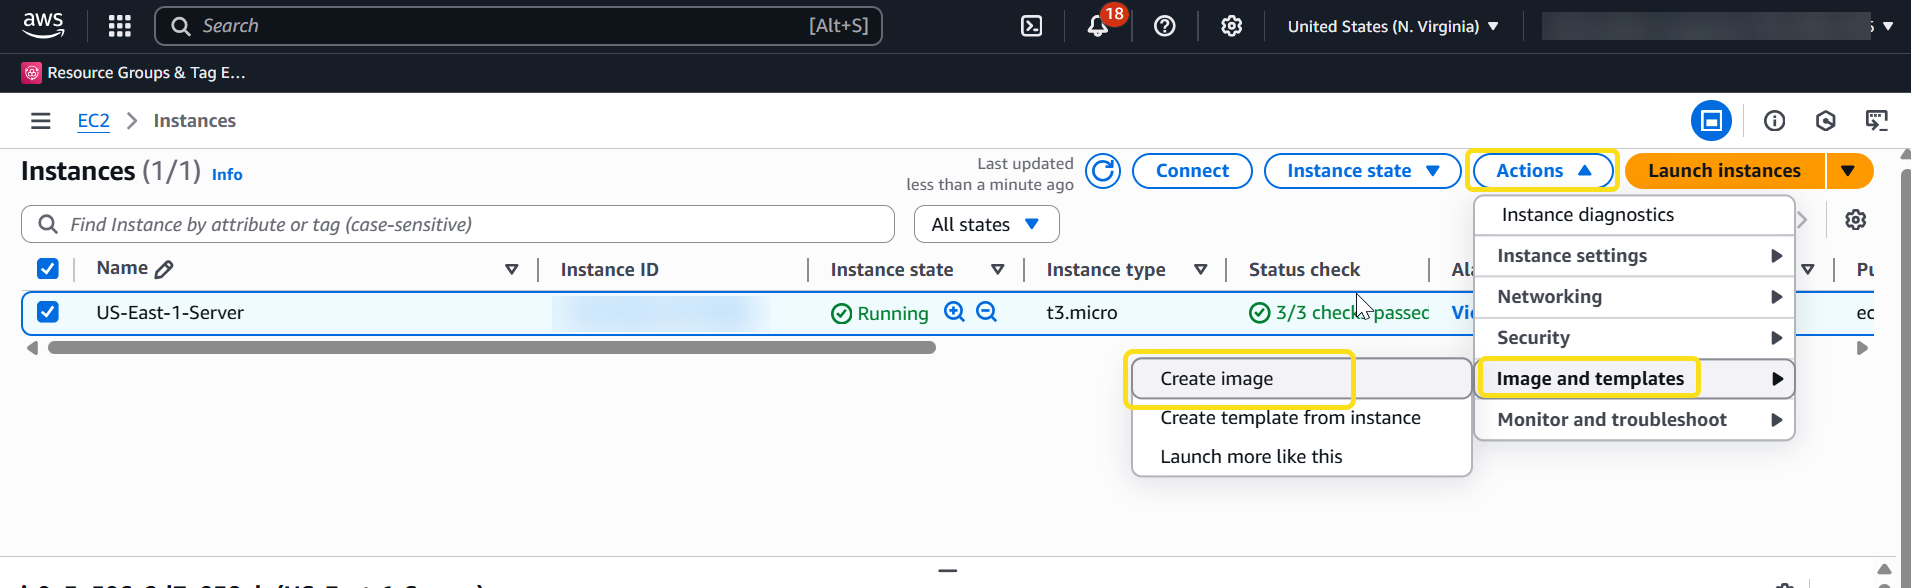
Figure 2: steps to create an AMI
- Fill the details and choose Create Image.
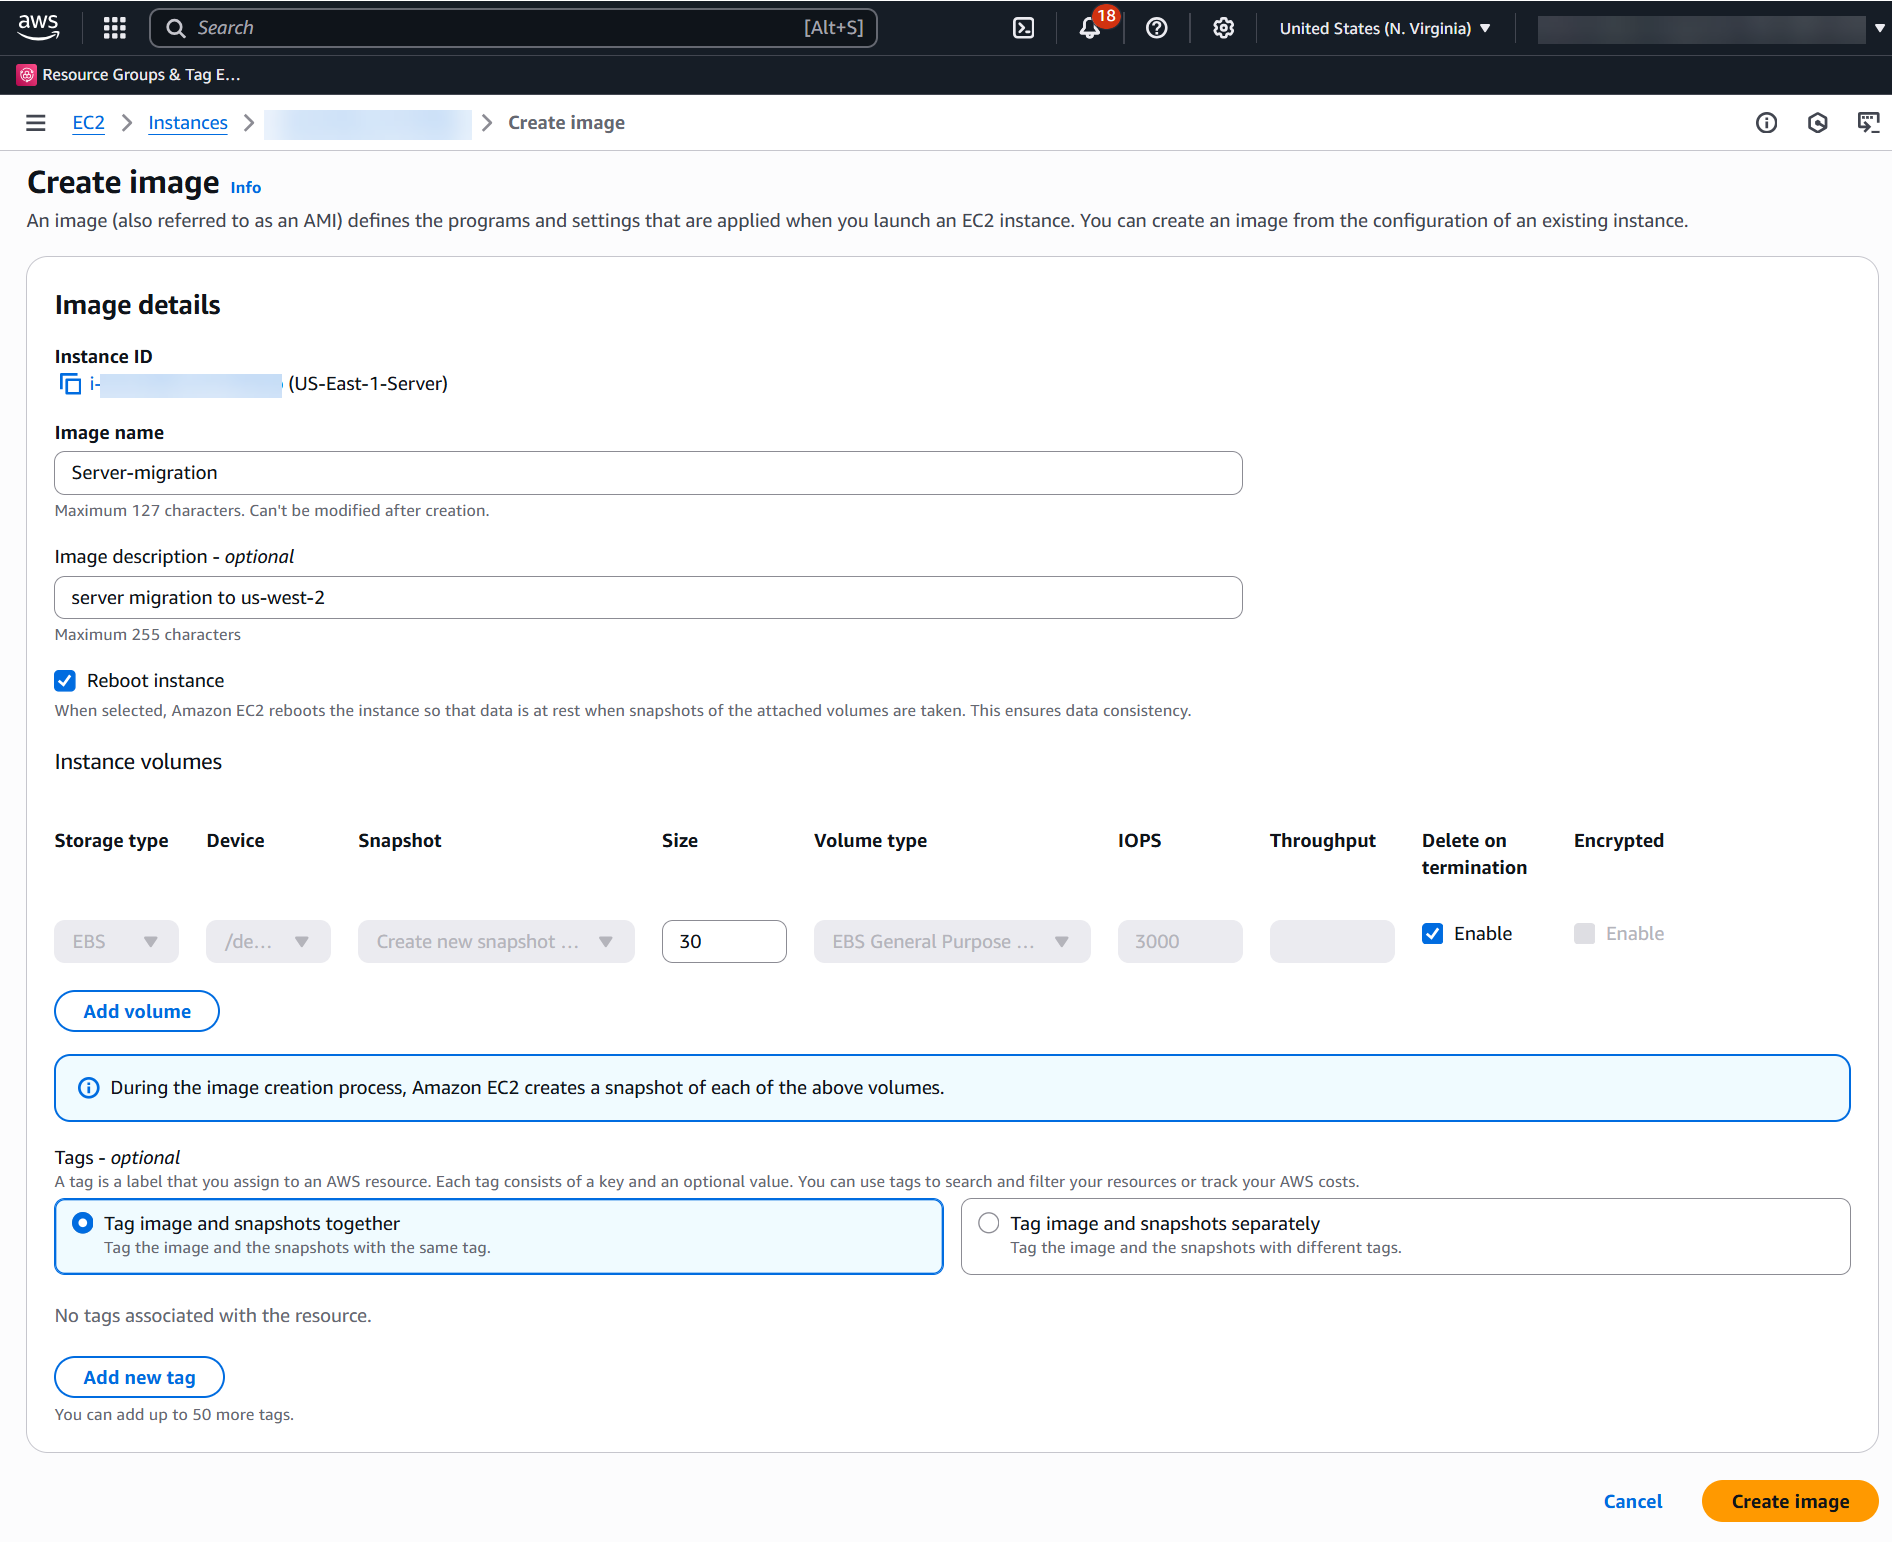
Figure 3: Confirming AMI creation attributes
- Check the status of the AMI by choosing AMI ID or under AMI on your left-hand side menu, wait until the status shows as Available.
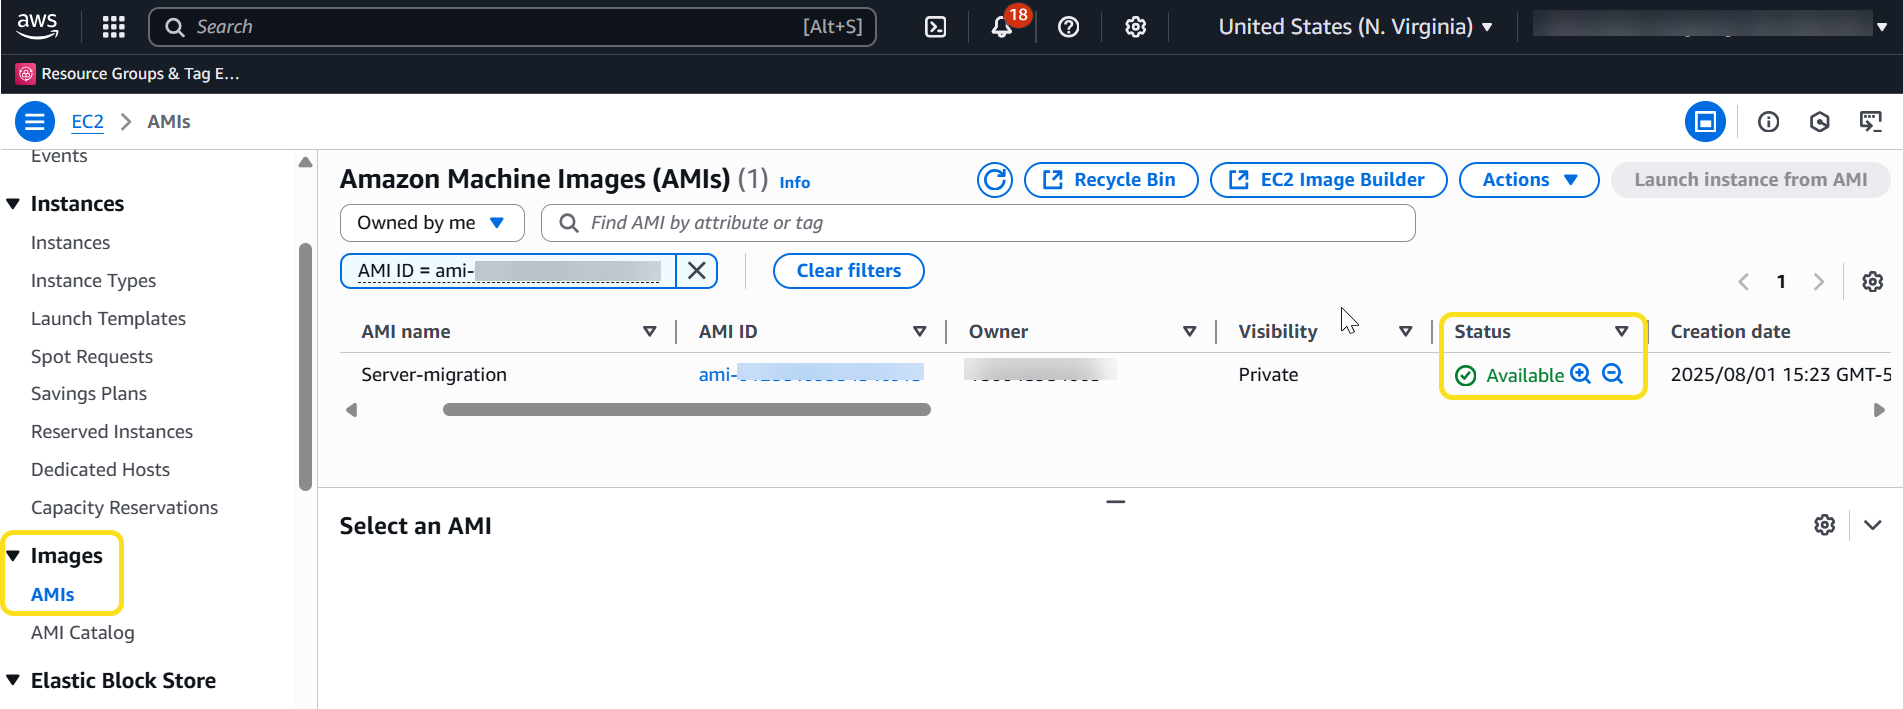
Figure 4: AMI availability status
- Run the following command using AWS CloudShell from the AWS console.
- You can check the status of the job using the following command to make sure it is completed.
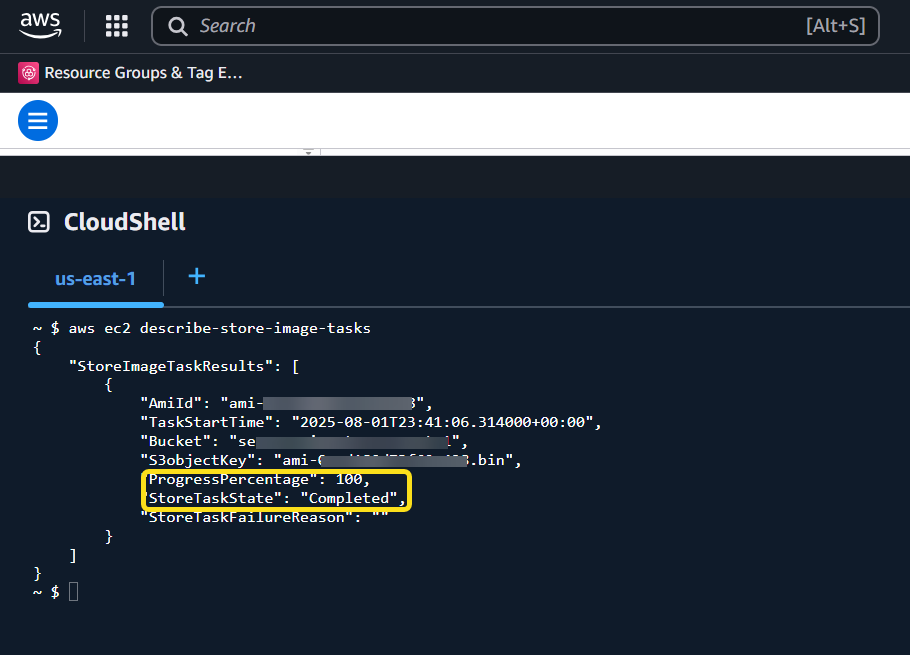
Figure 5: CloudShell command execution
- Now you can see your AMI bin file in the S3 bucket.
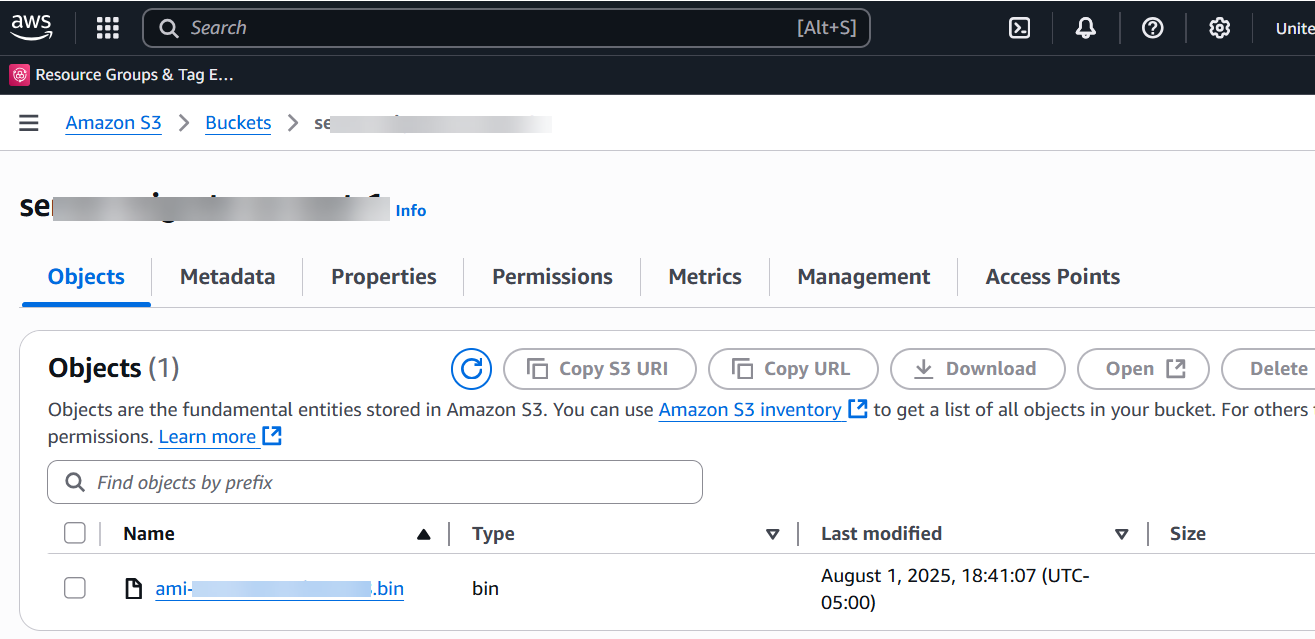
Figure 6: .bin file in the source S3 bucket
- Copy the AMI bin to the target S3 bucket using the following command from the CloudShell in the source account.
- When the copy job is completed, validate the AMI’s availability in .bin format in the target AWS account S3 bucket.
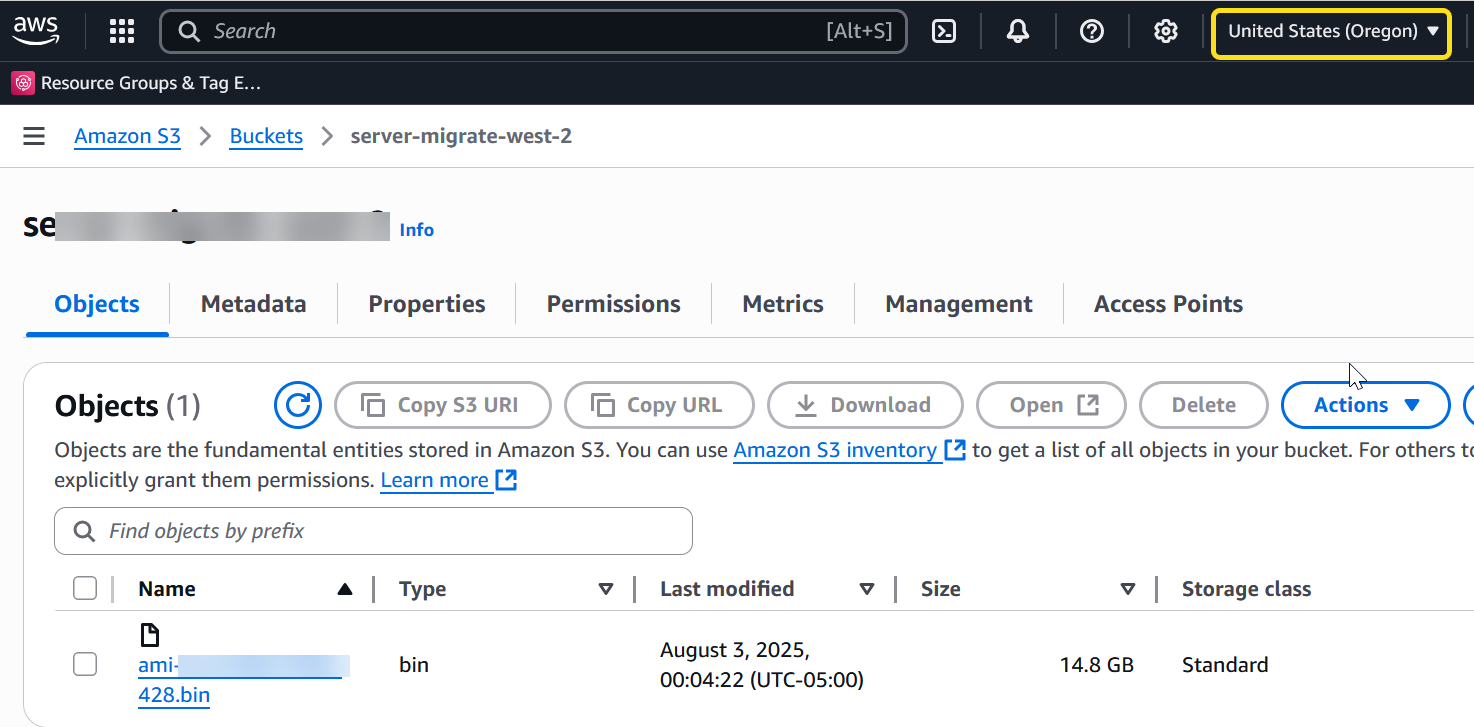
Figure 7: .bin file in the target S3 bucket
- Now restore the .bin file as an AMI in the target account by running the following command in the target account CloudShell.
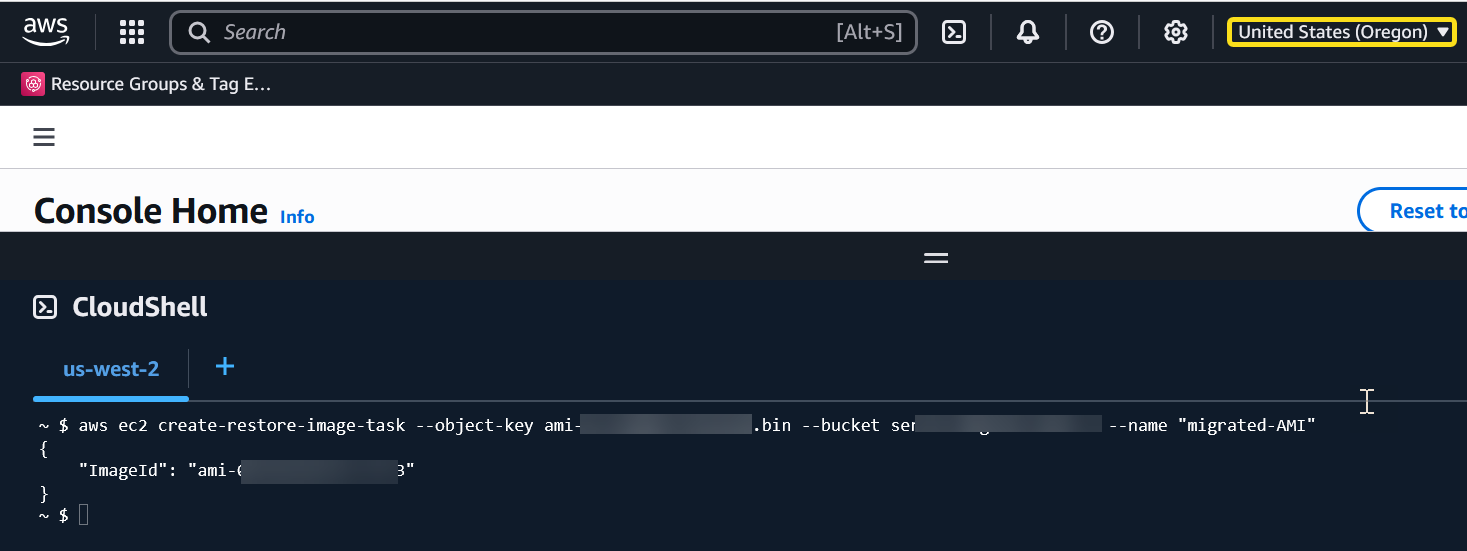
Figure 8: CloudShell command execution
- Check the availability of the AMI under the EC2 section in the target. You should find a new AMI ID along with the source Region information.
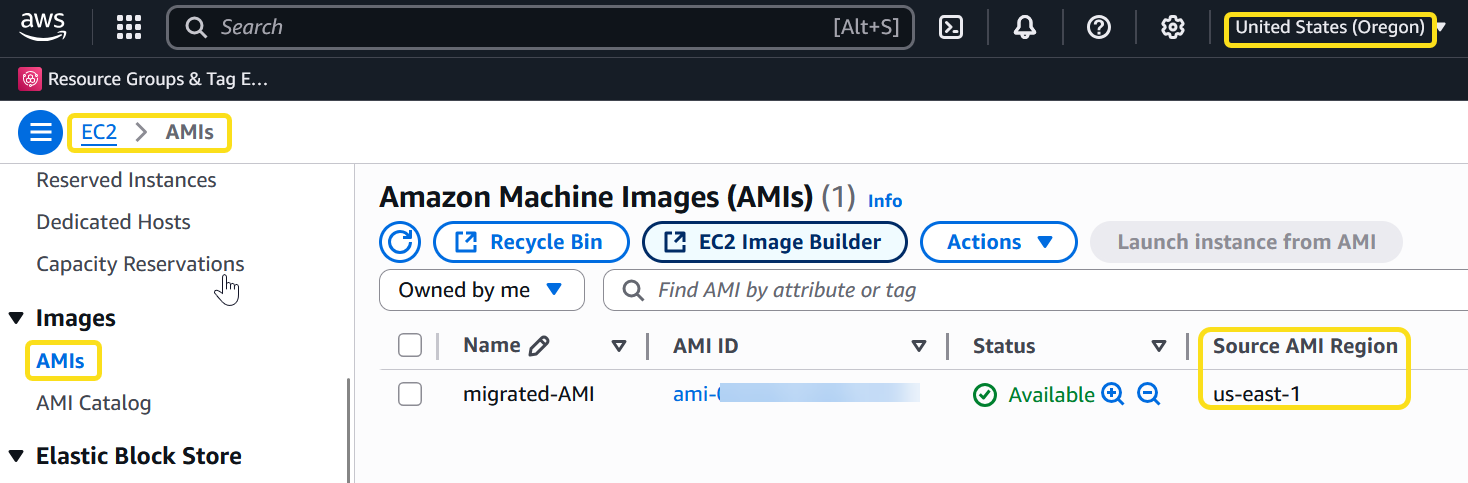
Figure 9: AMI created in the target account
- Launch the instance using the migrated AMI in the target Region.
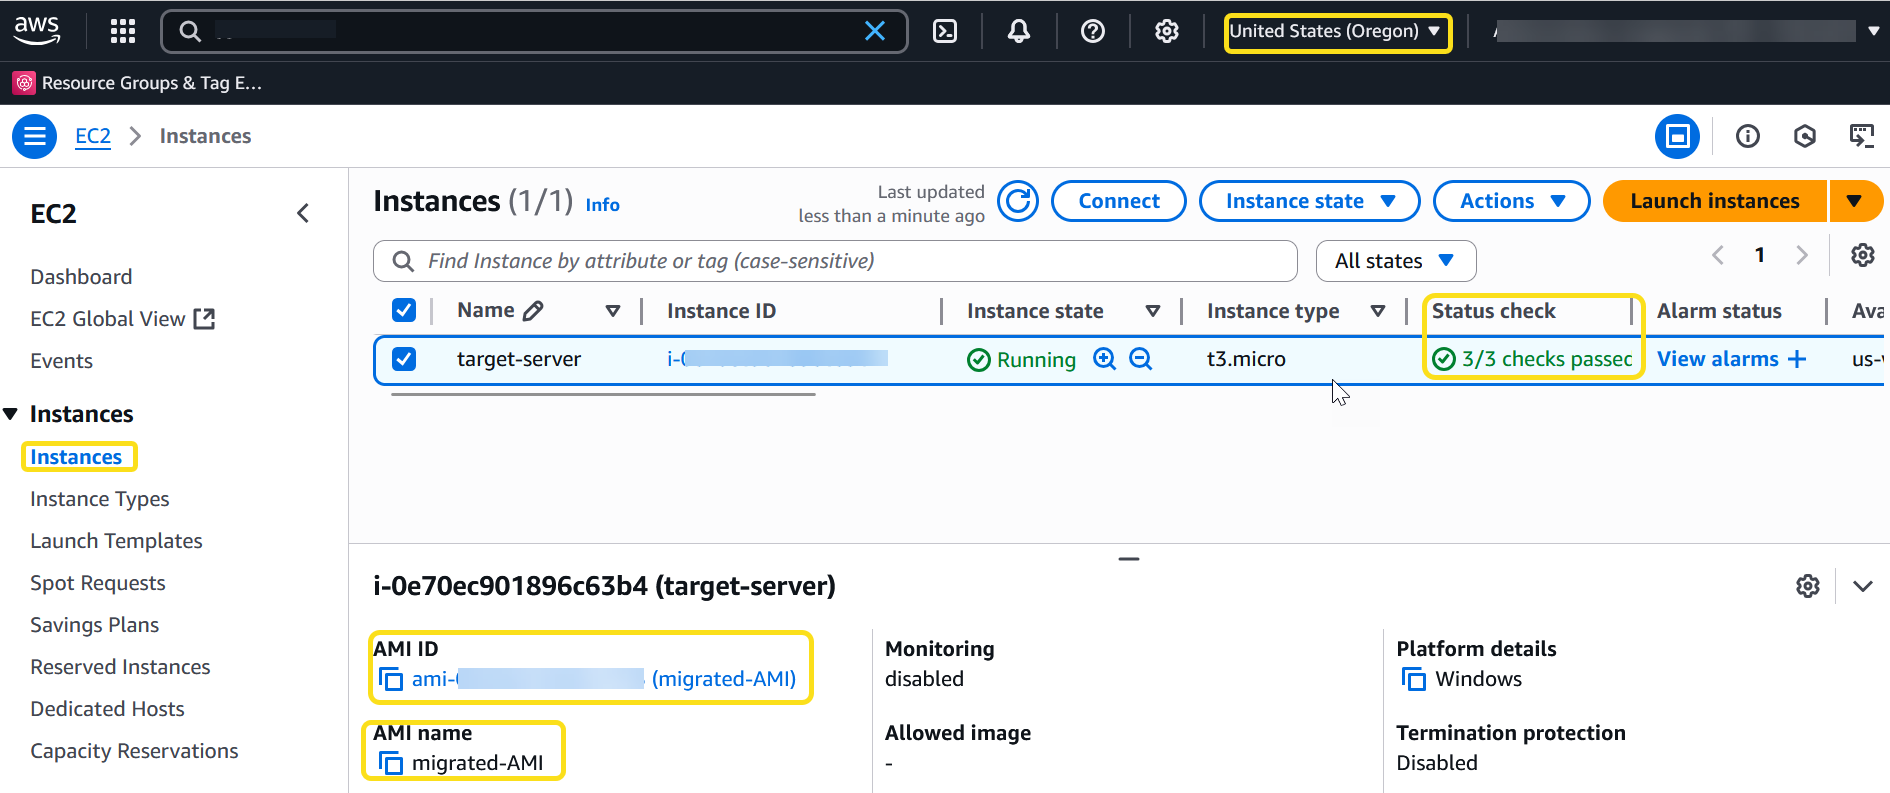
Figure 10: Launched EC2 instance in the target account
Limitations
Following are the limitations with this process:
- To store an AMI, your AWS account must either own the AMI and its snapshots, or the AMI and its snapshots must be shared directly with your account. You can’t store an AMI if it is only publicly shared.
- Only Amazon EBS-backed AMIs can be stored using these APIs.
- Paravirtual (PV) AMIs are not supported.
- The size of an AMI (before compression) that can be stored is limited to 5,000 GB.
- Quota on store image requests: 1,200 GB of storage work (snapshot data) in progress.
- Quota on restore image requests: 600 GB of restore work (snapshot data) in progress.
- For the duration of the store task, the snapshots must not be deleted and the AWS Identity and Access Management (IAM) principal doing the store must have access to the snapshots, otherwise the store process fails.
- You can’t create multiple copies of an AMI in the same S3 bucket.
- An AMI that is stored in an S3 bucket can’t be restored with its original AMI ID. You can mitigate this by using AMI aliasing.
- Currently the store and restore APIs are only supported by using the AWS Command Line Interface (AWS CLI), AWS SDKs, and Amazon EC2 API. You can’t store and restore an AMI using the Amazon EC2 console.
Clean up resources
When you have successfully deployed the server in the target Region you can delete the S3 buckets that were created for this migration. You can also terminate EC2 and delete associated EBS volumes and snapshots if you do not need them to avoid additional cost.
Conclusion
In this post, we showed you how to migrate an Amazon EC2 instances into another Region in a different account without sharing any AWS KMS keys in a secured manner.