AWS DevOps & Developer Productivity Blog
Managing Dev Environments with Amazon CodeCatalyst
An Amazon CodeCatalyst Dev Environment is a cloud-based development environment that you can use in CodeCatalyst to quickly work on the code stored in the source repositories of your project. The project tools and application libraries included in your Dev Environment are defined by a devfile in the source repository of your project.
Introduction
In the previous CodeCatalyst post, Team Collaboration with Amazon CodeCatalyst, I focused on CodeCatalyst’s collaboration capabilities and how that related to The Unicorn Project’s main protaganist. At the beginning of Chapter 2, Maxine is struggling to configure her development environment. She is two days into her new job and still cannot build the application code. She has identified over 100 dependencies she is missing. The documentation is out of date and nobody seems to know where the dependencies are stored. I can sympathize with Maxine. In this post, I will focus on managing development environments to show how CodeCatalyst removes the burden of managing workload specific configurations and produces reliable on-demand development environments.
Prerequisites
If you would like to follow along with this walkthrough, you will need to:
Have an AWS Builder ID for signing in to CodeCatalyst.
Belong to a space and have the space administrator role assigned to you in that space. For more information, see Creating a space in CodeCatalyst, Managing members of your space, and Space administrator role.
Have an AWS account associated with your space and have the IAM role in that account. For more information about the role and role policy, see Creating a CodeCatalyst service role.
Walkthrough
As with the previous posts in our CodeCatalyst series, I am going to use the Modern Three-tier Web Application blueprint. Blueprints provide sample code and CI/CD workflows to help make getting started easier across different combinations of programming languages and architectures. To follow along, you can re-use a project you created previously, or you can refer to a previous post that walks through creating a project using the blueprint.
One of the most difficult aspects of my time spent as a developer was finding ways to quickly contribute to a new project. Whenever I found myself working on a new project, getting to the point where I could meaningfully contribute to a project’s code base was always more difficult than writing the actual code. A major contributor to this inefficiency, was the lack of process managing my local development environment. I will be exploring how CodeCatalyst can help solve this challenge. For this walkthrough, I want to add a new test that will allow local testing of Amazon DynamoDB. To achieve this, I will use a CodeCatalyst Dev Environment.
CodeCatalyst Dev Environments are managed cloud-based development environments that you can use to access and modify code stored in a source repository. You can launch a project specific Dev Environment that will automate check-out of your project’s repo or you can launch an empty environment to use for accessing third-party source providers. You can learn more about CodeCatalyst Dev Environments in the CodeCatalyst User Guide.
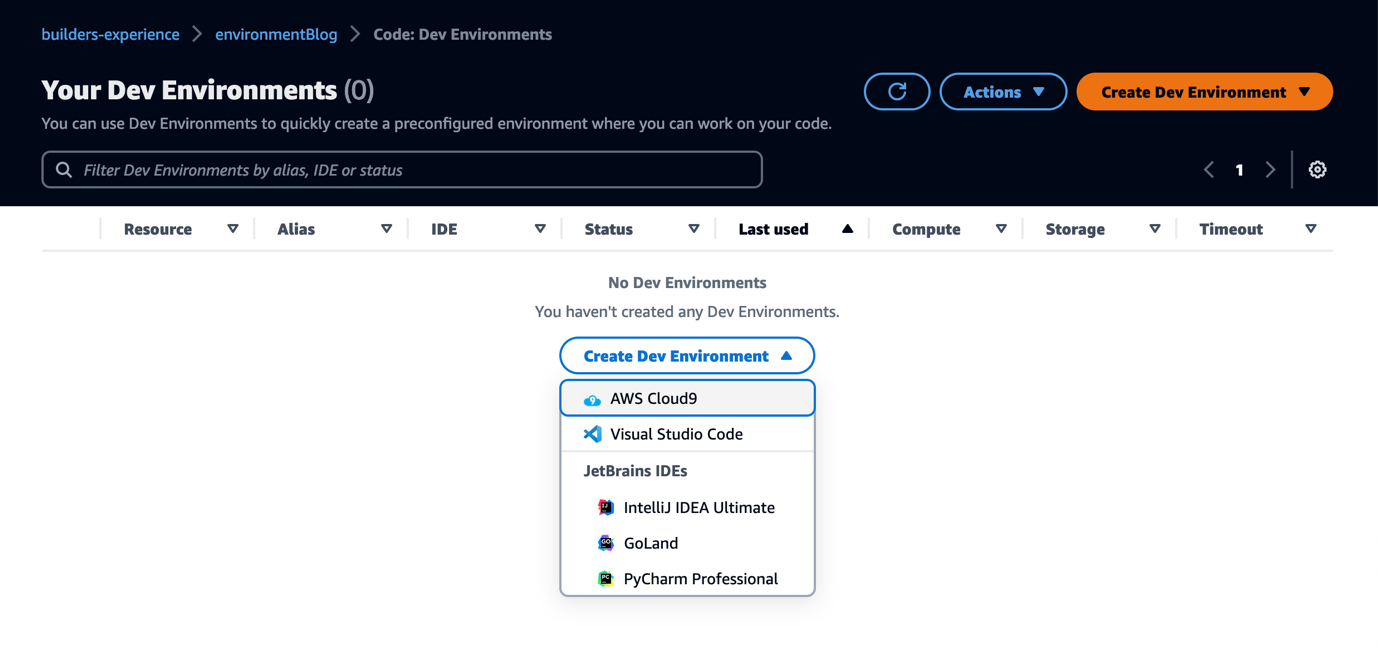
Figure 1. Creating a new Dev Environment
To begin, I navigate to the Dev Environments page under the Code section of the navigaiton menu. I then use the Create Dev Environment to launch my environment. For this post, I am using the AWS Cloud9 IDE, but you can follow along with the IDE you are most comfortable using. In the next screen, I select Work in New Branch and assign local_testing for the new branch name, and I am branching from main. I leave the remaining default options and Create.

Figure 2. Dev Environment Create Options
After waiting less than a minute, my IDE is ready in a new tab and I am ready to begin work. The first thing I see in my Dev Environment is an information window asking me if I want to navigate to the Dev Environment Settings. Because I need to enable local testing of Dynamodb, not only for myself, but other developers that will collaborate on this project, I need to update the project’s devfile. I select to navigate to the settings tab because I know that contains information on the project’s devfile and allows me to access the file to edit.
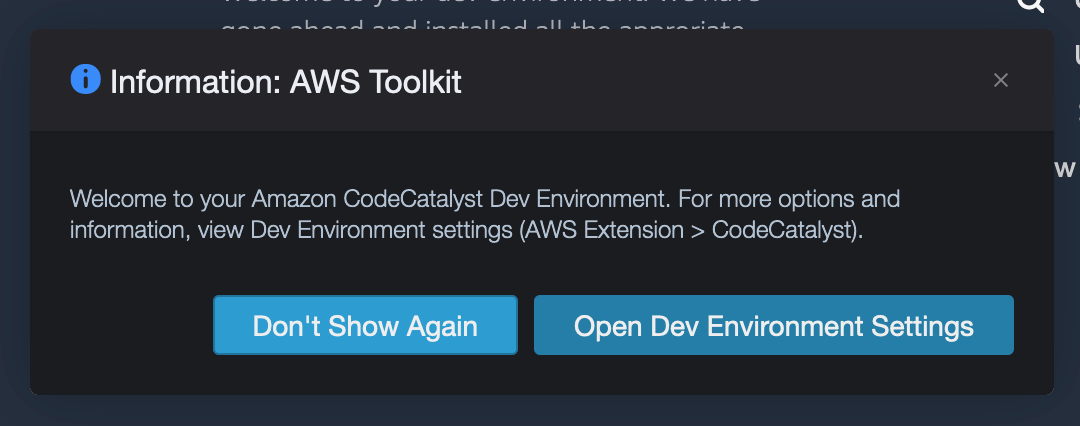
Figure 3. Toolkit Welcome Banner
Devfiles allow you to model a Dev Environment’s configuration and dependencies so that you can re-produce consisent Dev Environments and reduce the manual effort in setting up future environments. The tools and application libraries included in your Dev Environment are defined by the devfile in the source repository of your project. Since this project was created from a blueprint, there is one provided. For blank projects, a default CodeCatalyst devfile is created when you first launch an environment. To learn more about the devfile, see https://devfile.io.
In the settings tab, I find a link to the devfile that is configured. When I click the edit button, a new file tab launches and I can now make changes. I first add an env section to the container that hosts our Dev Environment. By adding an environment variable and value, anytime a new Dev Environment is created from this project’s repository, that value will be included. Next, I add a second container to the Dev Environment that will run DynamoDB locally. I can do this by adding a new container component. I use Amazon’s verified DynamoDB docker image for my environment. Attaching additional images allow you to extend the Dev Environment and include tools or services that can be made available locally. My updates are highlighted in the green sections below.
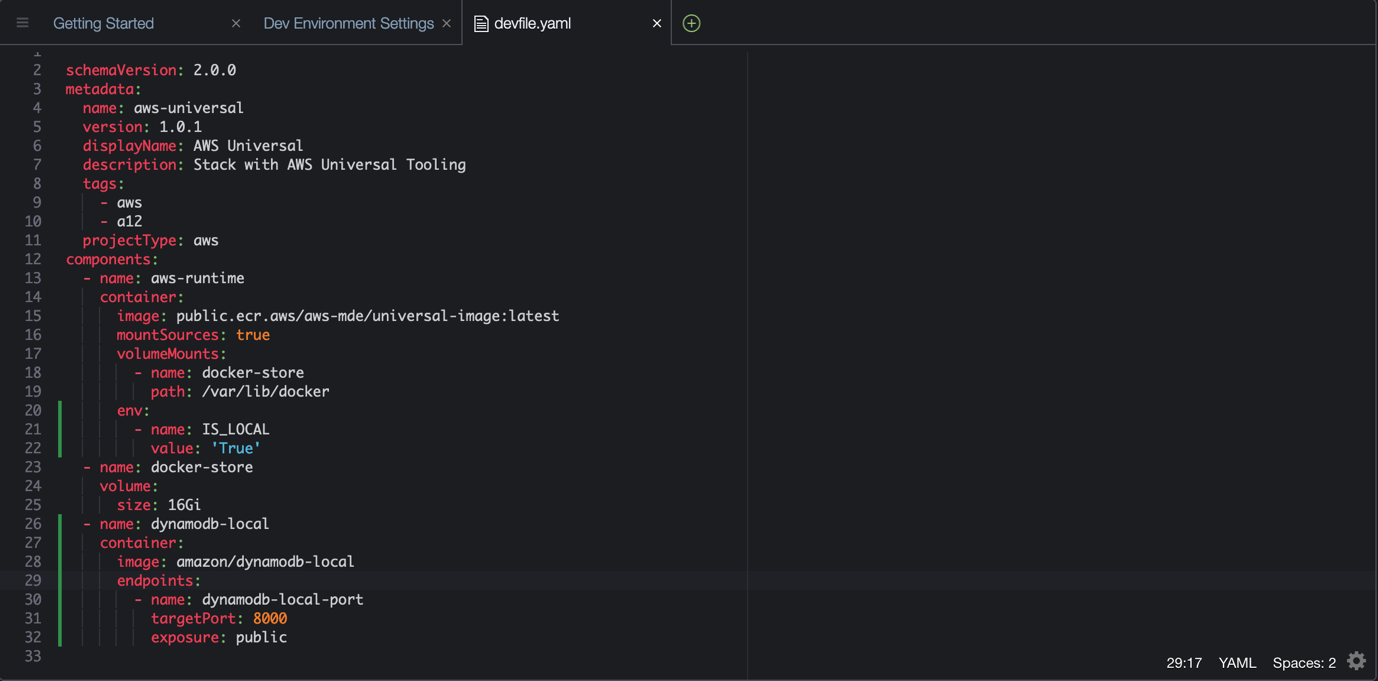
Figure 4. Example Devfile
I save my changes and navigate back to the Dev Environment Settings tab. I notice that my changes were automatically detected and I am prompted to restart my development environment for the changes to take effect. Modifications to the devfile requires a restart. You can restart a Dev Environment using the toolkit, or from the CodeCatalyst UI.
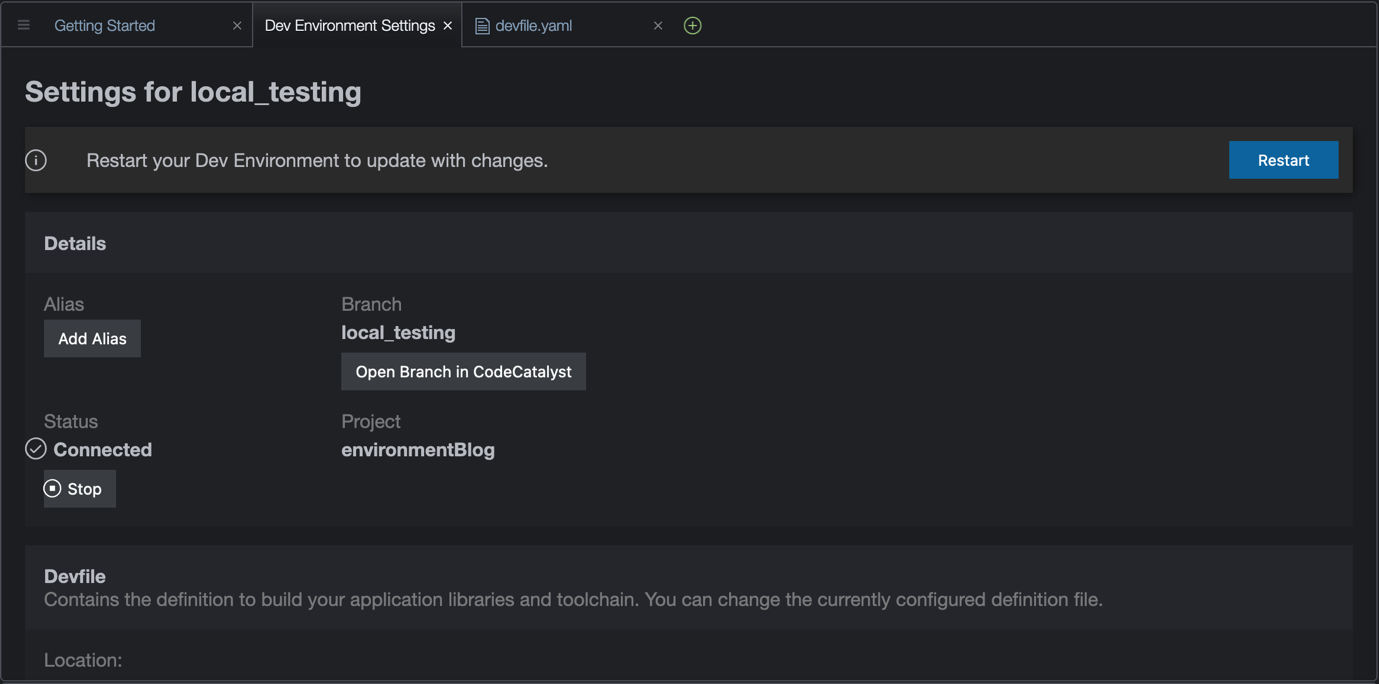
Figure 5. Dev Environment Settings
After waiting a few seconds for my Dev Environment to restart, I am ready to write my test. I use the IDE’s file explorer, expand the repo’s ./tests/unit folder, and create a new file named test_dynamodb.py. Using the IS_LOCAL environment variable I configured in the devfile, I can include a conditional in my test that sets the endpoint that Amazon’s python SDK ( Boto3 ) will use to connect to the Dynamodb service. This way, I can run tests locally before pushing my changes and still have tests complete successfully in my project’s workflow. My full test file is included below.
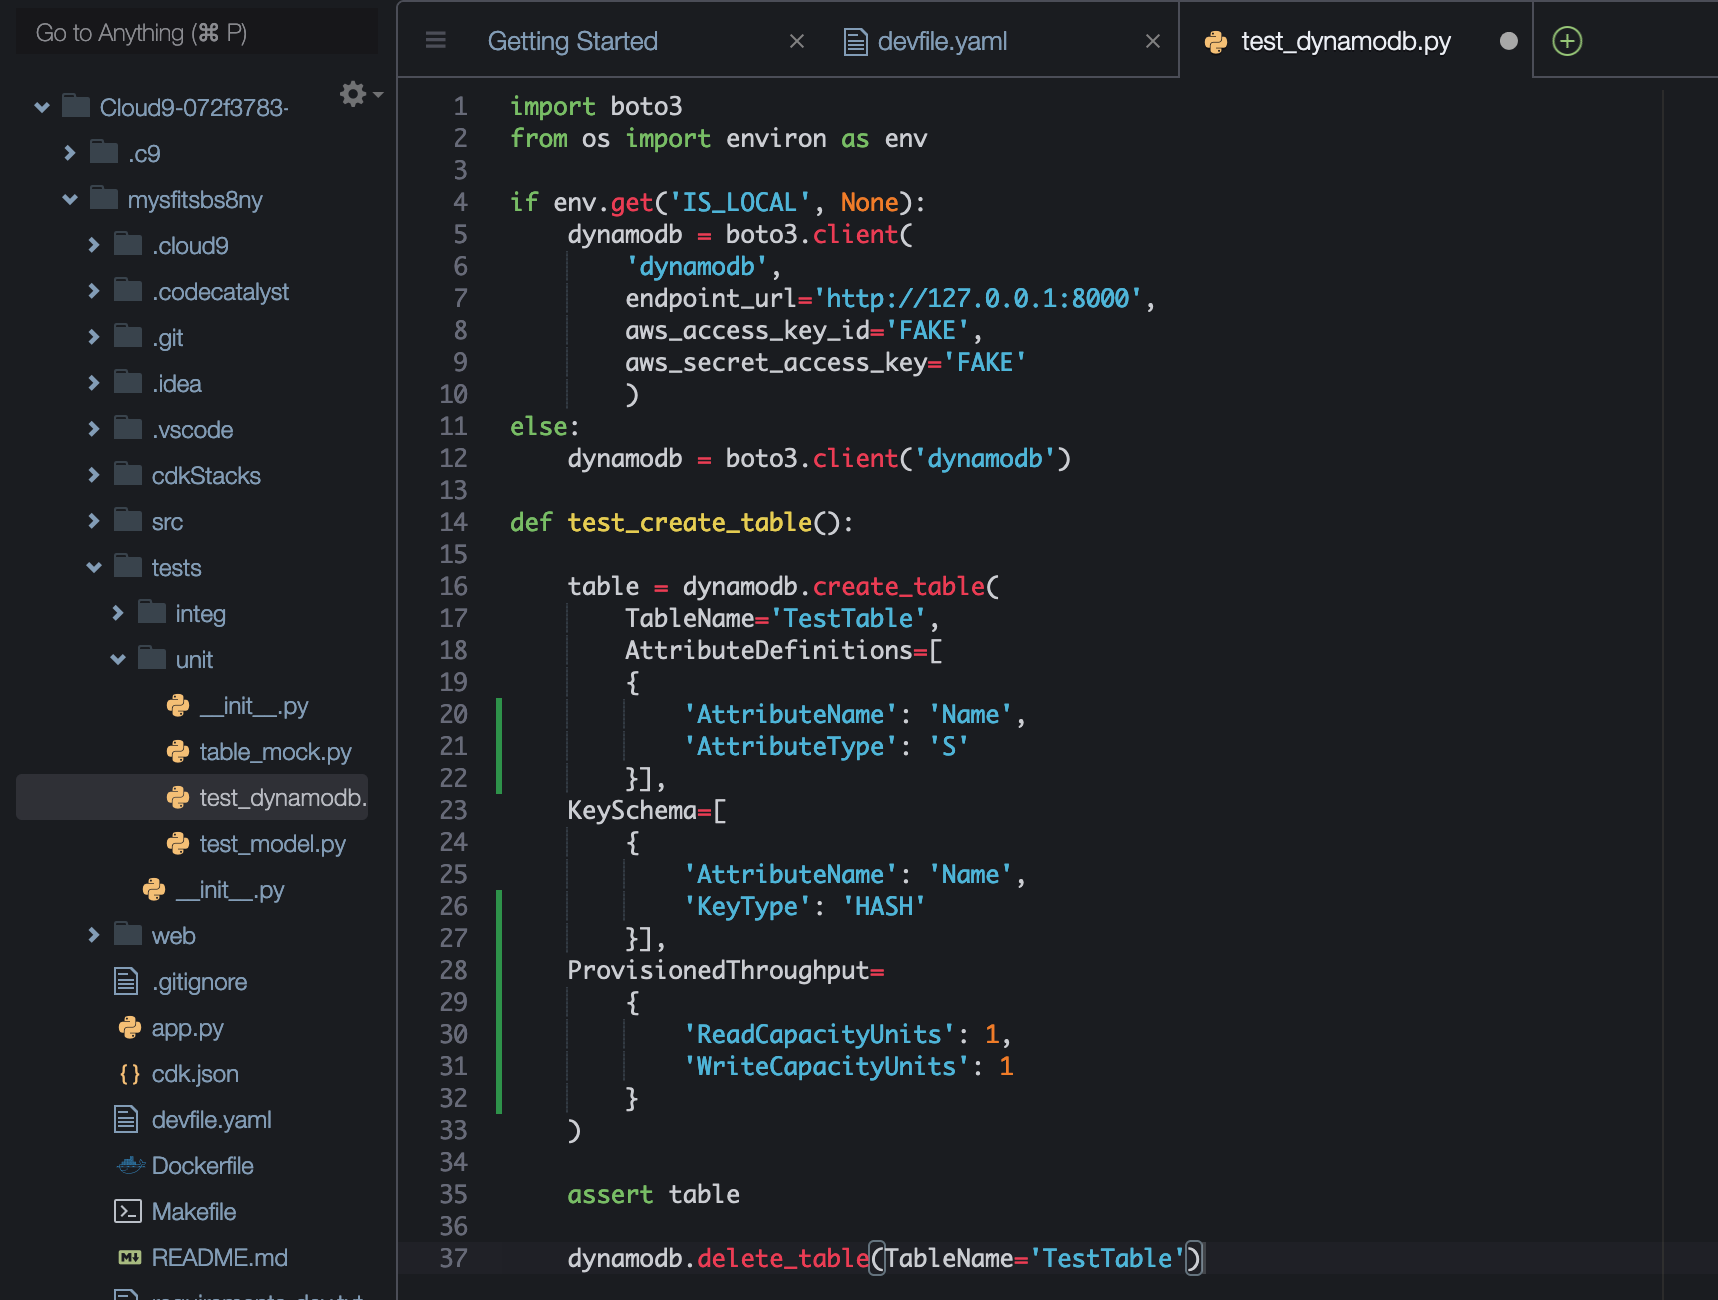
Figure 6. Dynamodb test file
Now that I have completed my changes to the Dev Environment using the devfile and added a test, I am ready to run my test locally to verify. I will use pytest to ensure the tests are passing before pushing any changes. From the repo’s root folder, I run the command pip install -r requirements-dev.txt. Once my dependencies are installed, I then issue the command pytest -k unit. All tests pass as I expect.

Figure 7. Pytest test results
Rather than manually installing my development dependencies in each environment, I could also use the devfile to include commands and automate the execution of those commands during the Dev Environment lifecycle events. You can refer to the links for commands and events for more information.
Finally, I am ready to push my changes back to my CodeCatalyst source repository. I use the git extension of Cloud9 to review my changes. After reviewing my changes are what I expect, I use the git extension to stage, commit, and push the new test file and the modified devfile so other collaborators can adopt the improvements I made.
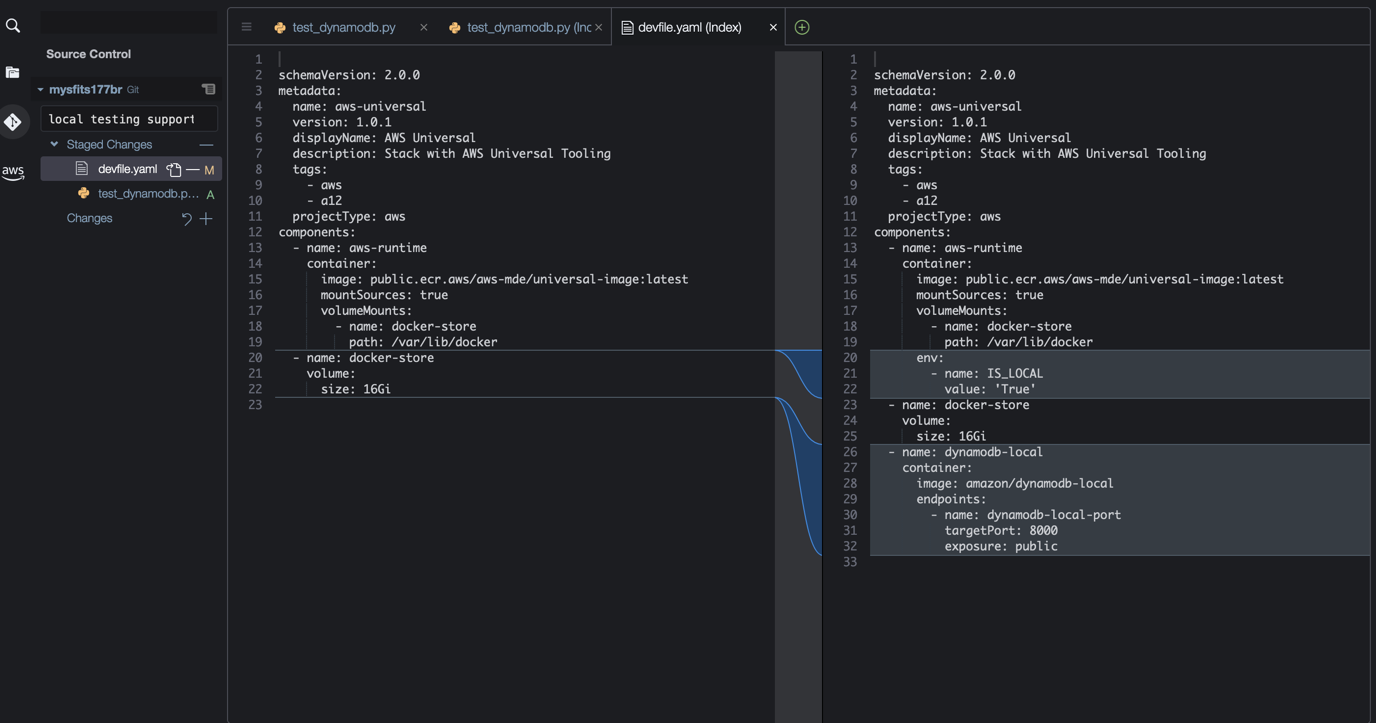
Figure 8. Changes reviewed in CodeCatalyst Cloud9 git extension.
Cleanup
If you have been following along with this workflow, you should delete the resources you deployed so you do not continue to incur charges. First, delete the two stacks that CDK deployed using the AWS CloudFormation console in the AWS account you associated when you launched the blueprint. These stacks will have names like mysfitsXXXXXWebStack and mysfitsXXXXXAppStack. Second, delete the project from CodeCatalyst by navigating to Project settings and choosing Delete project.
Conclusion
In this post, you learned how CodeCatalyst provides configurable on-demand Dev Environments. You also learned how devfiles help you define a consistent experience for developing within a CodeCatalyst project. Please follow our DevOps blog channel as I continue to explore how CodeCatalyst solve Maxine’s and other builders’ challenges.
About the author: