AWS Partner Network (APN) Blog
Using Bitbucket Pipelines and OpenID Connect to Deploy to Amazon S3
By Galyna Zholtkevych, Software Engineer at Atlassian
When using Bitbucket Pipelines, developers store their credentials in Bitbucket to access their cloud resources.
The new OpenID Connect (OIDC) feature outlined in this post provides a more streamlined approach to managing login credentials for Amazon Web Services (AWS) and increases velocity for developers.
Storing secrets in your Git app has a few potential drawbacks:
- When there are script errors, there’s risk of secrets leaking into code.
- When secrets change or need to be rotated, you have to manually update it in Bitbucket.
- It can be a compliance issue in highly-regulated industries.
Bitbucket Pipelines recently introduced an integration with OIDC and AWS resources. With this integration, Bitbucket Pipelines users can authenticate with Amazon Simple Storage Service (Amazon S3), Amazon CloudFront, and other AWS resources without having to store secret tokens in Bitbucket.
OpenID Connect is an identity layer above the Oauth 2.0 protocol. There are several reasons why using OICD is better for developers compared with using secret keys:
- More secure: If your secret keys leak, unauthorized users can use your access keys to get access to your AWS resources. OpenID relies on your AWS ‘Role ARN’ which, even if leaked, doesn’t give access to your AWS resources.
- Easier to manage: To manage the security risk, when cloud admins generate secret keys for users, they grant granular permissions based on the user’s needs. This means having to create many user-key pairs. Role-based permissions in OpenID still benefit from granular permissions but are less restrictive. Admins have fewer permission levels to manage.
- No updates needed: When you need to change your secret key, or when AWS disables a key due to inactivity, you don’t need to update your keys across your apps because OpenID doesn’t rely on access keys.
Bitbucket is a source code management tool by Atlassian, an AWS DevOps Competency Partner. Bitbucket Pipelines is an integrated CI/CD tool within Bitbucket Cloud that enables developers to execute builds right from within Bitbucket.
This post takes you through deploying a website to Amazon S3 and CloudFront using OIDC with Bitbucket Pipelines.
Prerequisites
In order to use OpenID Connect on AWS-related Bitbucket Pipes, you need to configure Bitbucket Pipelines as a web identity provider (IdP) on AWS and create an AWS Identity and Access Management (IAM) role. Here’s how to set it up:
- Step 1: Configure Bitbucket Pipelines as an IdP on AWS.
- Step 2: Create an IAM role.
- Step 3: Use the AWS Bitbucket Pipe with Bitbucket Pipelines OpenID Connect.
Step 1: Configure Bitbucket Pipelines as an Identity Provider on AWS
Configuring Bitbucket Pipelines as an IdP in IAM enables Bitbucket Pipelines to issue authentication tokens to users to connect to AWS.
In your Bitbucket repo, go to Repository Settings > OpenID Connect. Note the provider URL and the Audience variable on that screen.
- Provider URL: https://api.bitbucket.org/2.0/workspaces/YOUR_WORKSPACE/pipelines-config/identity/oidc – This is the issuer URL for authentication requests. This URL issues a token to a requester automatically as part of the workflow. See more detail about issuer URL in RFC.
- Audience: ari:cloud:bitbucket::workspace/ari:cloud:bitbucket::workspace/84c08677-e352-4a1c-a107-6df387cfeef7 – This is the recipient the token is intended for. See more detail about audience in RFC.
Next, navigate to the IAM dashboard > Identity Providers > Add provider, and paste in the above info. This tells AWS that Bitbucket Pipelines is a token issuer.
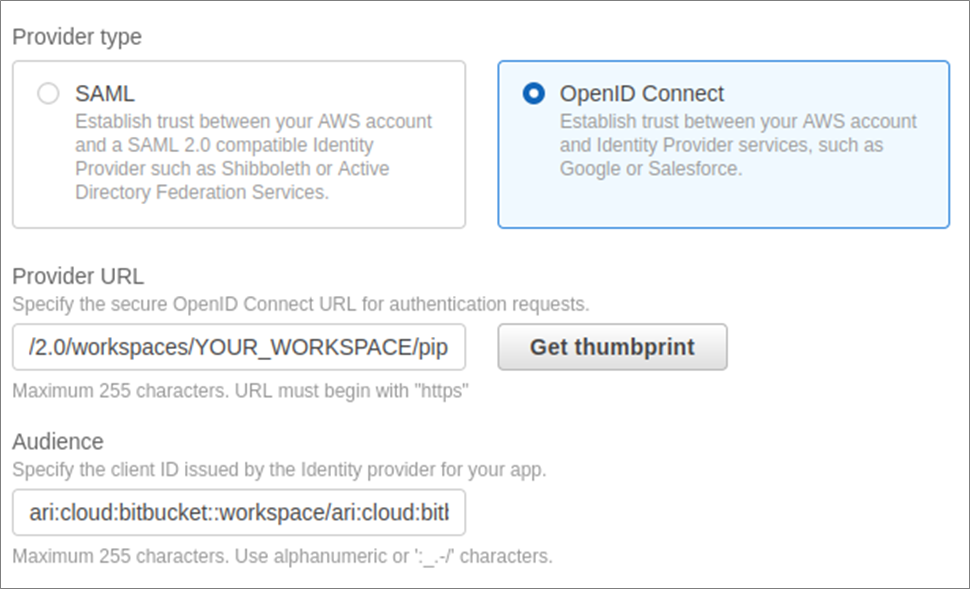
Figure 1 – Configure Bitbucket Pipelines as an Identity Provider on AWS.
Step 2: Create an IAM Role
Once you’ve enabled Bitbucket Pipelines as a token issuer, you need to configure permissions for those tokens so they can execute actions on AWS.
To create an IAM web identity role, navigate to the IAM dashboard > Roles > Create Role, and choose the IdP and audience you just created.
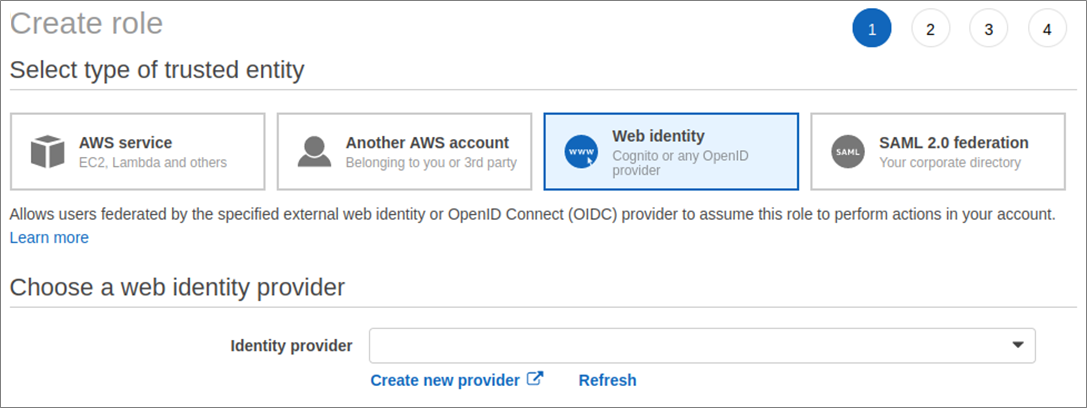
Figure 2 – Create an IAM role.
Next, select the permissions to attach to the role.
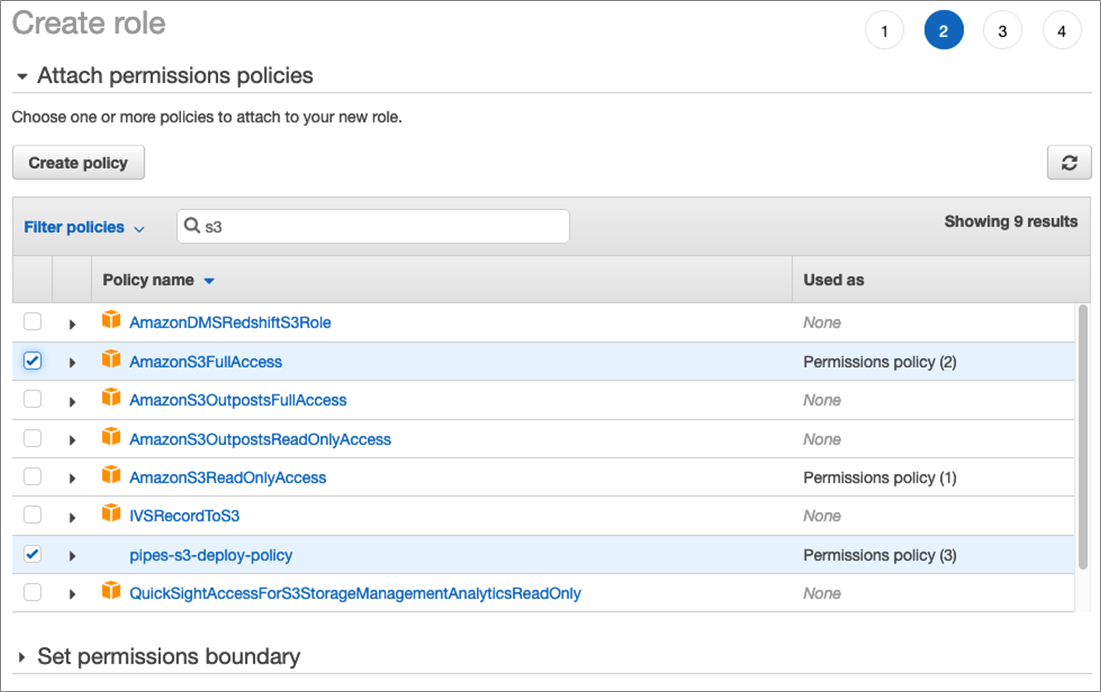
Figure 3 – Assign permissions to the role.
Name your role; in our example, we name it AwesomeOIDCRole.
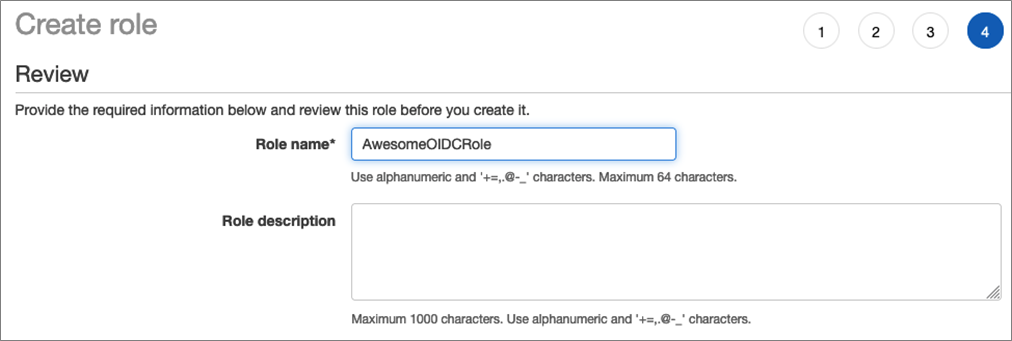
Figure 4 – Name the role.
After adding a role, copy the Amazon Resource Name (ARN) of the role created: arn:aws:iam::000000000000:role/AwesomeOIDCRole, and create AWS_OIDC_ROLE_ARN as a repository variable or deployment variable in the target Bitbucket repository.
Step 3: Use the AWS Bitbucket Pipe with Bitbucket Pipelines OIDC
Now that you’ve set up Bitbucket as an IdP and given permissions to the tokens created, you need to enable OIDC in your Bitbucket Pipeline yaml file so you can authenticate to AWS without using AWS secret keys.
Bitbucket Pipes provide a simple way to configure a pipeline when you want to connect to third-party services from Bitbucket. They are snippets of code you paste into your yaml file and customize your inputs. You can see the Amazon S3 pipe here.
Let’s go over how to run a pipeline build to deploy to S3 with Bitbucket Pipelines OIDC.
Include flag oidc: true in the step and provide the AWS_OIDC_ROLE_ARN variable to the pipe. oidc: true declares you are using the OIDC authentication method, while AWS_OIDC_ROLE_ARN declares the role created in the previous step that contains all of the necessary permissions to deal with AWS resources.
Here’s a code snippet of the pipelines yaml file with the S3 pipe:
Here’s another example of a pipeline using the CloudFront pipe build to invalidate CloudFront distribution with OIDC:
By deploying to your S3 bucket and invalidating CloudFront distribution together, you can deploy a website to S3. For more details, check out the full deploy example with a general authentication method.
The final pipeline yaml would look like the following:
That’s it! You can now deploy more securely to AWS without configuring environment access and secret keys in Bitbucket Pipelines.
Cleaning Up
After the pipeline executes, Bitbucket will clean up pipeline resources automatically. If you ran any test runs, you can delete any test files in S3 and Amazon CloudFront.
Conclusion
In this post, we walked through a step-by-step guide on how to deploy a website to Amazon S3 and Amazon CloudFront using OpenID Connect (OICD) with Bitbucket Pipelines.
To find out more, visit the related links below. If you’d like help with Bitbucket pipes or OpenID Connect, or you have an issue or feature request, let us know in the Bitbucket Community.
Related links:
The content and opinions in this blog are those of the third-party author and AWS is not responsible for the content or accuracy of this post.
.

.
Atlassian – AWS Partner Spotlight
Atlassian is an AWS DevOps Competency Partner whose collaboration and productivity software helps teams organize, discuss, and complete shared work.
Contact Atlassian | Partner Overview
*Already worked with Atlassian? Rate the Partner
*To review an AWS Partner, you must be a customer that has worked with them directly on a project.