AWS Marketplace
Publishing AMI products in AWS Marketplace in the AWS European Sovereign Cloud
Ready to reach customers with strict sovereignty requirements? The AWS European Sovereign Cloud is a new independent Amazon Web Services (AWS) partition designed to help public sector organizations and customers in highly regulated industries meet their evolving sovereignty needs. AWS partitions are isolated groupings of AWS Regions and services that operate independently with their own set of endpoints, resource identifiers, and security boundaries.
This post is the second in a three-part series on listing software products in AWS Marketplace in the AWS European Sovereign Cloud:
Part 1: Registering as a seller — covers account setup and seller registration.
Part 2: Publishing Amazon Machine Image (AMI) products (this post).
Part 3: Publishing software as a service (SaaS) products (coming soon).
At the time of writing, AWS Marketplace in the AWS European Sovereign Cloud supports two listing types: SaaS and AMI products.
Prerequisites
Before you begin, make sure you’ve completed the following:
- Complete the seller registration for AWS Marketplace in the AWS European Sovereign Cloud: If you haven’t registered as a seller yet, follow the steps in part one of this blog post series, AWS Marketplace in the European Sovereign Cloud: Register as a Seller, before continuing. After your seller account is active, return here to proceed.
- An AMI product: If you’re onboarding a completely new product or want to create your product from scratch using a fresh Amazon Elastic Compute Cloud (Amazon EC2) instance, you can follow these instructions to create and prepare the AMI and additionally please ensure your AMI follows security best practices. If your AMI is already available in AWS Marketplace or has just been created, proceed with the next steps.
- A workstation with the AWS Command Line Interface (AWS CLI): If you determine that you need to transfer the AMI across partitions while following this post, you will need a workstation with the AWS CLI installed and properly configured with your AWS credentials. Alternatively, you can use the AWS Management Console, but this post provides instructions using the AWS CLI because it’s the more effective approach.
Understanding AMI listing workflow
The process includes three key steps:
- Listing your AMI product in the AWS European Sovereign Cloud catalog through AWS Partner Central. Use your commercial seller account to navigate to AWS Partner Central. Switch to the AWS Marketplace – European Sovereign Cloud catalog to create and manage your AWS European Sovereign Cloud listing.
- Testing your AMI product in the AWS European Sovereign Cloud partition.
- (Optional) Modifying and updating your AMI product listing.
Step-by-step walkthrough for publishing your AMI product
To publish your AMI product in the AWS European Sovereign Cloud, complete the following steps:
- Sign in the AWS console using your AWS Marketplace seller account and visit the AWS Partner Central console.
- Under Build in the left navigation menu, choose Server products.
- In the navigation bar at the top of the page, choose AWS Marketplace – European Sovereign Cloud.
If you can’t choose AWS Marketplace – European Sovereign Cloud, it means your registration for the AWS European Sovereign Cloud catalog is incomplete. Review part one of this blog post series, the AWS Marketplace in the European Sovereign Cloud: Register as a Seller blog post.
- The system might display the Entering AWS Marketplace – European Sovereign Cloud dialog box. Choose Continue.
- Validate that AWS Marketplace – European Sovereign Cloud is now displayed as the target catalog, as highlighted in the following screenshot.
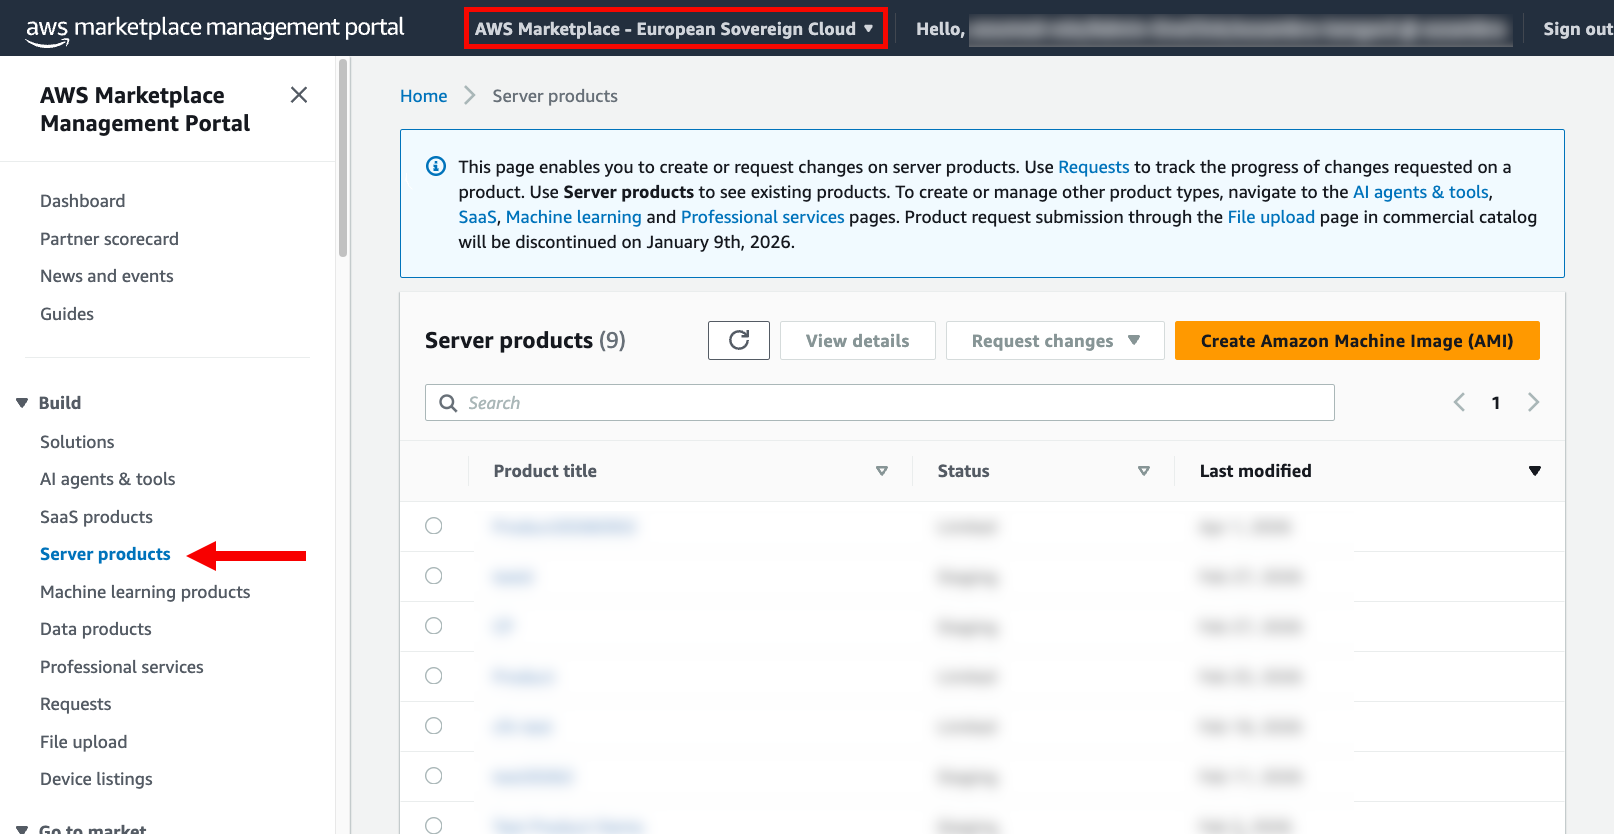
Figure 1: Server products screen
Note: If you’re onboarding a completely new AMI product or want to create your AMI product from scratch using a fresh EC2 instance, follow the instructions in tasks 1–4 at Lab: Prepare and scan your AMI.
If your AMI is already available in AWS Marketplace or has just been created, proceed with the next steps.
- In the upper right corner of the server products section, choose Create Amazon Machine Image
- In the Product title, ID, and code section, fill in your product title and choose Generate product ID and product code, as shown in the following screenshot.
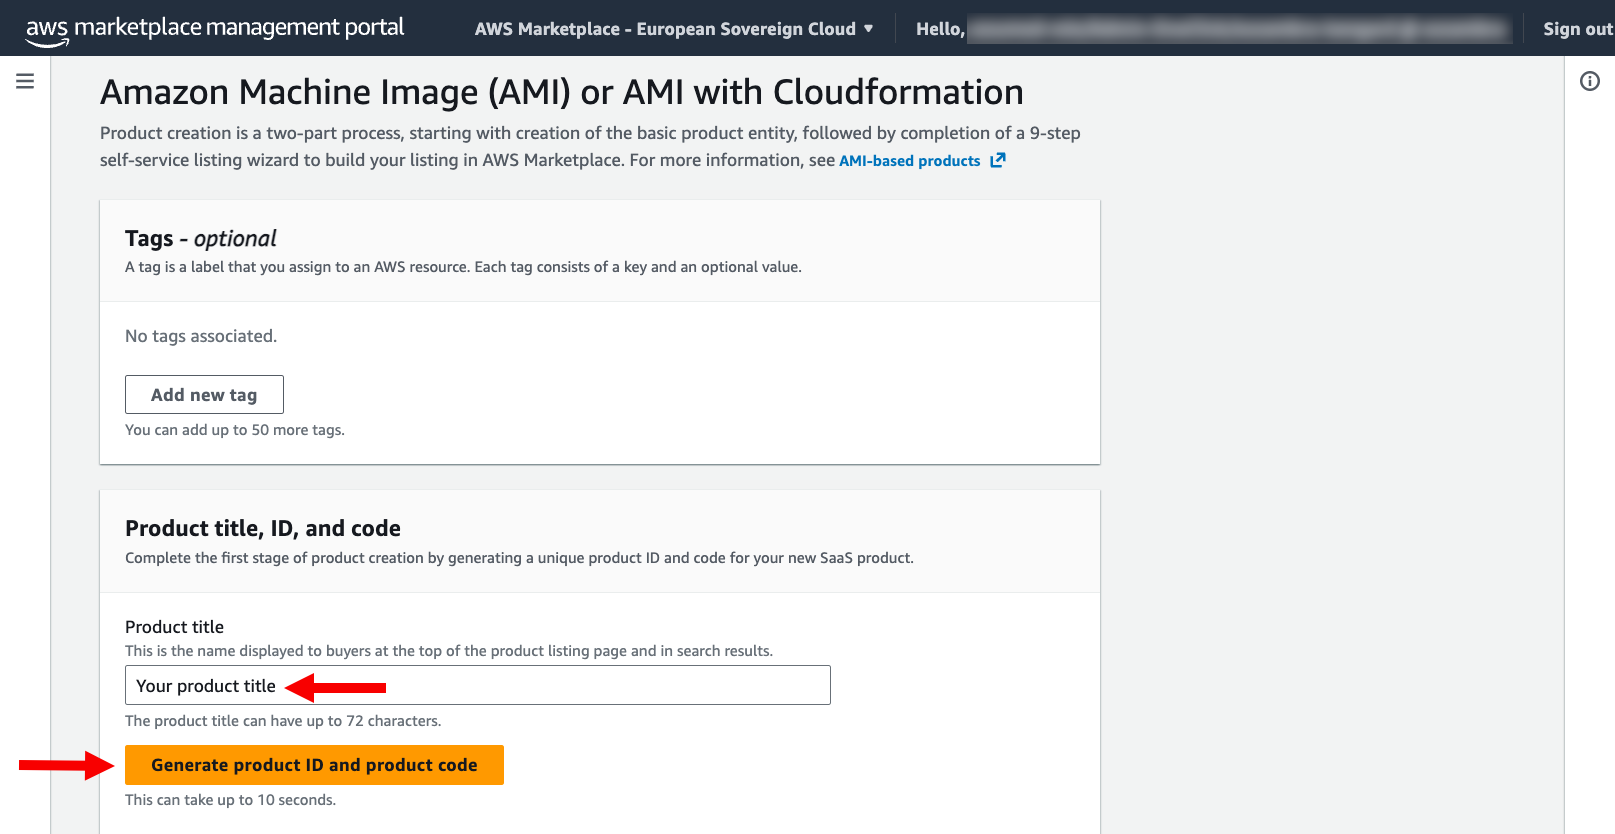
Figure 2: Enter product title and choose the button to continue
- After the ID and product code are generated, choose Continue to wizard.
- Follow all steps in the wizard to get your product to limited state. A “limited” state means that the product is in the catalog but is only visible to you as the seller for testing and review purposes. The wizard requests the same information as the information required to list AMI products in the commercial catalog. If you require support during the wizard, you can consult Create the listing in the documentation or Task 2: Submit your listing in the “List AMI products priced by the hour” lab in the AWS Marketplace Seller workshop.
After you conclude the wizard, it typically takes 15–20 minutes for the automated validation process to review your product and get it to limited status. You can find the status under Your AMI Product, as shown in the following screenshot.
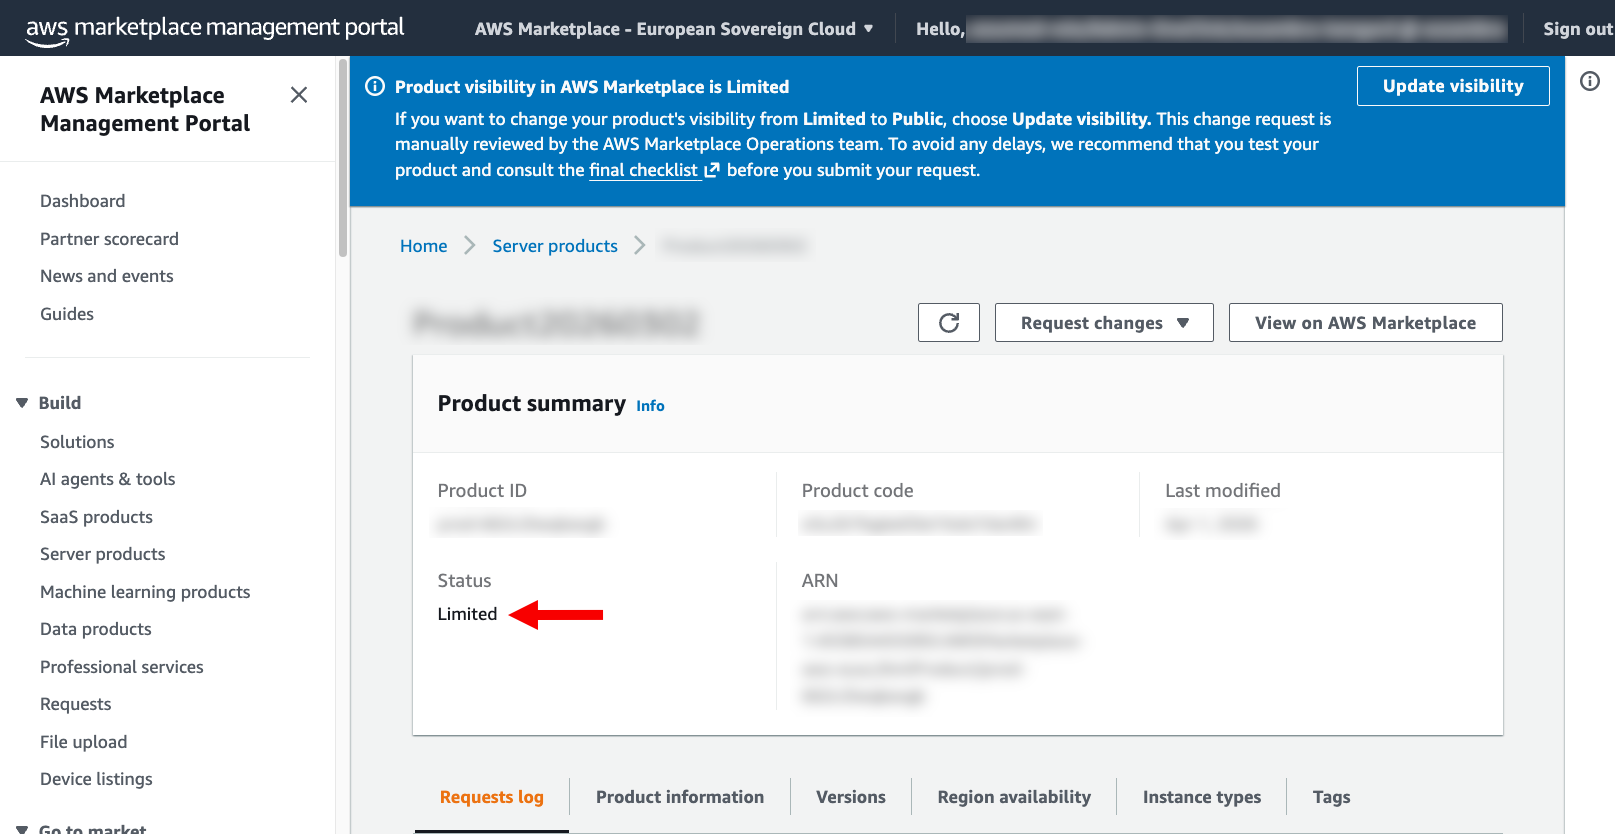
Figure 3: The process succeeded and the product status is limited
Monitor your product request status by choosing Requests under Build in the left navigation menu, as shown in the following screenshot. Don’t move to the next sections in this post before your request status is displayed as Succeeded.
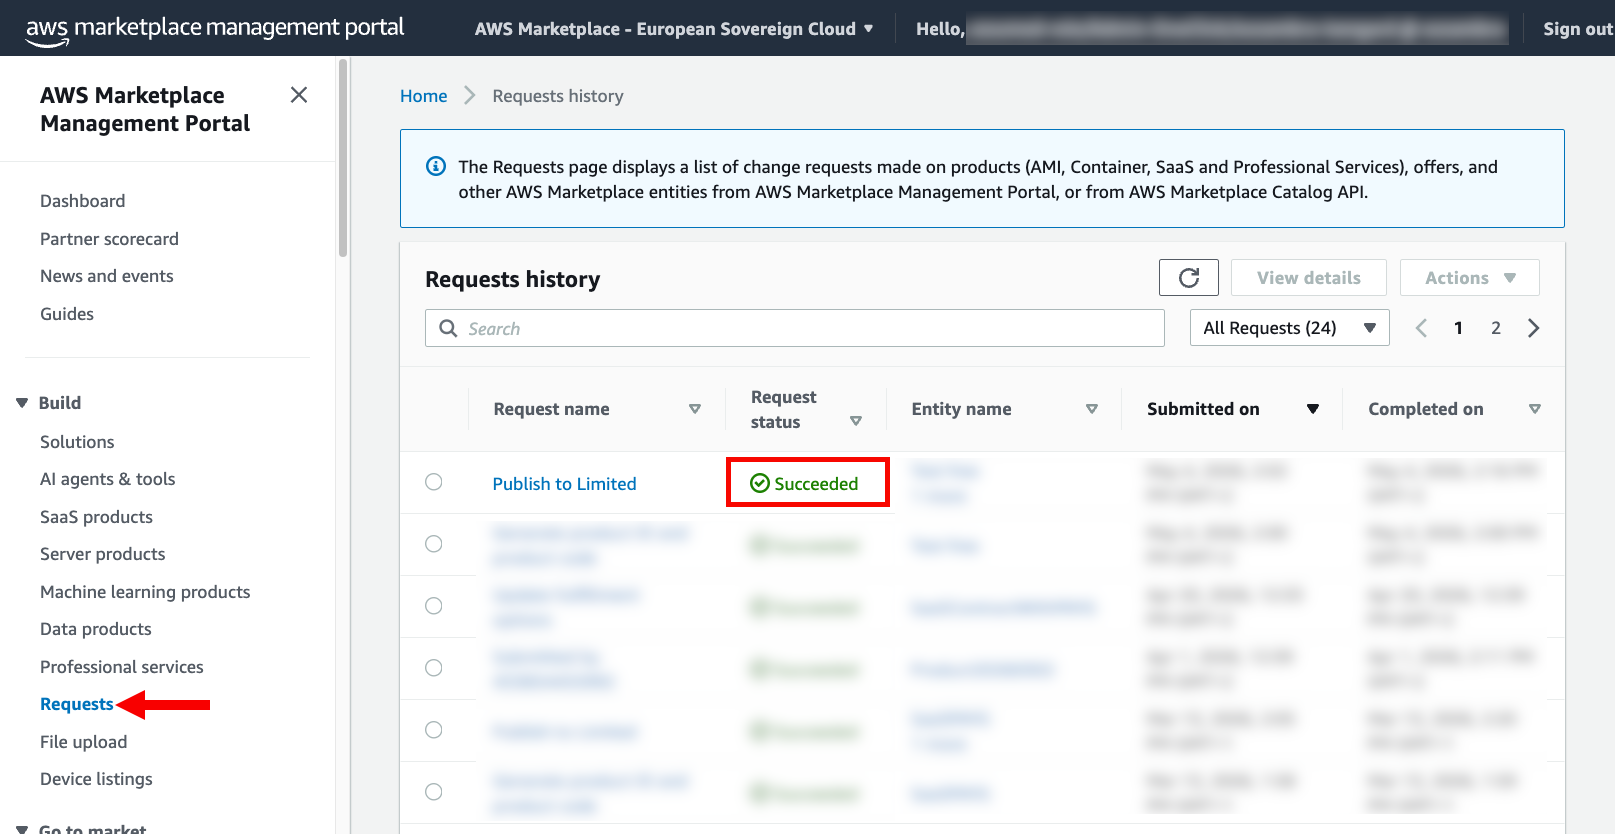
Figure 4: The request status is Succeeded
Testing your AMI product in the AWS European Sovereign Cloud partition
After your product reaches limited status, test it by subscribing and launching to confirm proper functionality in the AWS European Sovereign Cloud partition. Follow these steps:
- Sign in to the AWS European Sovereign Cloud console.
- Visit the AWS Marketplace console and search for your product.
- Select your product. In the upper right corner, choose View purchase options.
- Scroll to the bottom of the page and choose Subscribe. You should see a banner stating that AWS Marketplace is processing your request, as shown in the following screenshot. The subscription process can take a minute to complete

Figure 5: You successfully purchased a product
- Choose Launch your software and follow the wizard until your product is deployed.
- Perform relevant tests to validate all use cases of your software that are fully supported in the European Sovereign Cloud
After completing the preceding steps, if your product doesn’t work as expected, review Modifying your AMI product to work in the European Sovereign Cloud partition later in this post before continuing. Otherwise, continue with the next step.
- Sign in the AWS console using your AWS Marketplace seller account and visit the AWS Partner Central console.
- Choose Server products in the navigation menu and select your product and validate AWS Marketplace – European Sovereign Cloud is selected as the target catalog.
- Choose your product and on the Request changes dropdown list, choose Update product visibility, as shown in the following screenshot.
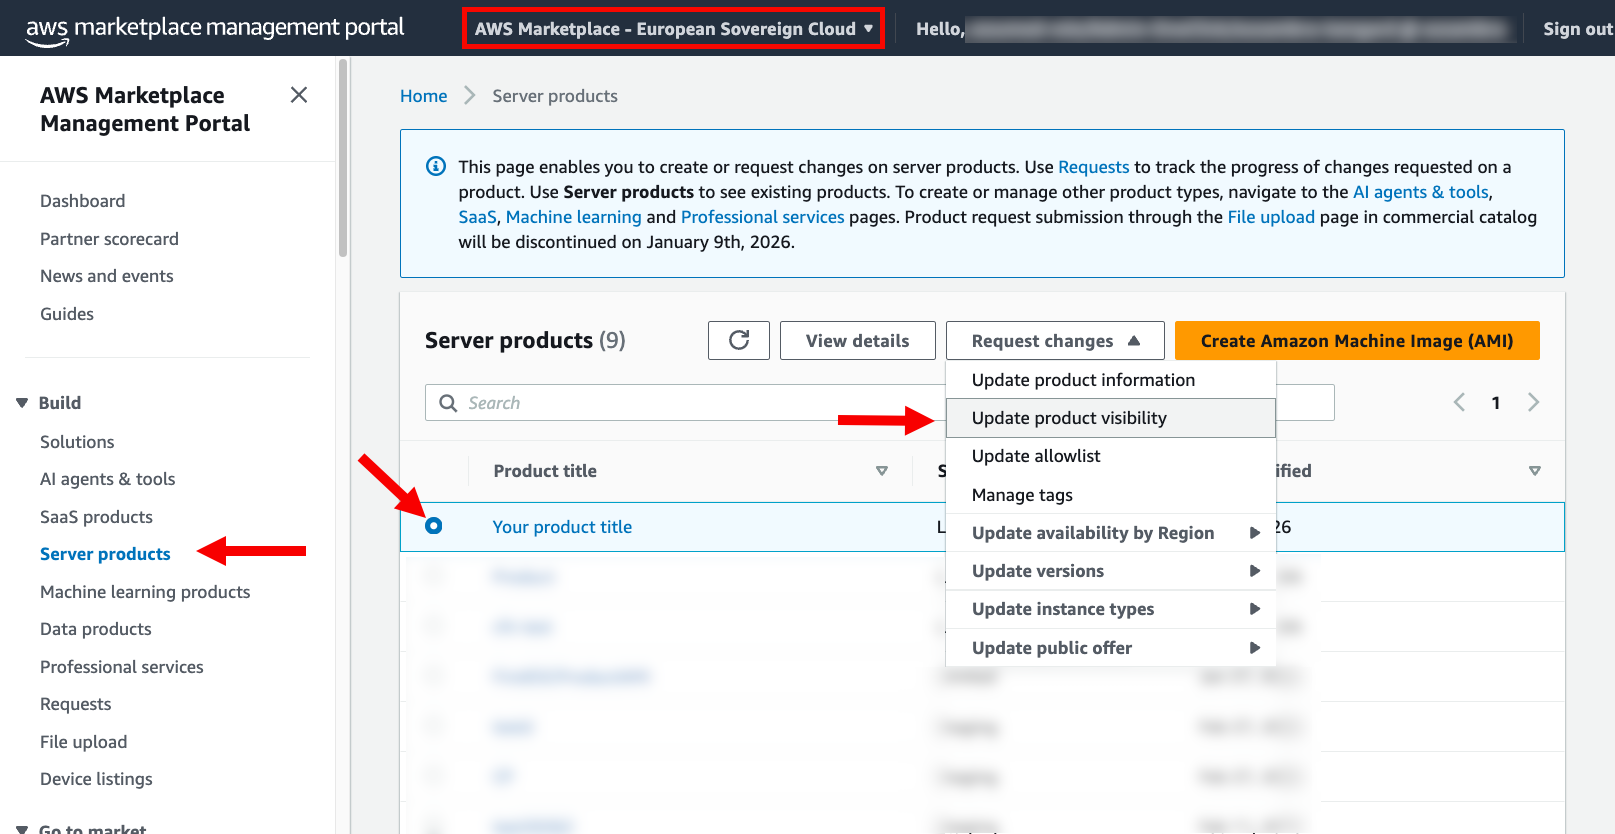 Figure 6: Update product visibility
- Set visibility options to Public, set the public price in EUR, and choose Submit.
AWS Marketplace will validate your product and, if necessary, the operations team may communicate the next steps with you.
Modifying your AMI product to work in the European Sovereign Cloud partition
The European Sovereign Cloud partition continues to expand its service offerings to match commercial partition capabilities, but this is a newly created partition and only a subset of AWS services and features are available at the time of this writing. You might need to modify your product to work correctly in the new European Sovereign Cloud partition.
If your product requires changes to function properly in the European Sovereign Cloud environment, you have two options:
- Option 1 – Make the changes directly in the EC2 instance running your product in the European Sovereign Cloud, create a new AMI, transfer the AMI to the commercial partition, and submit the new AMI as a new version of your product.
- Option 2 – Start your product in the commercial partition, make the required changes, create a new AMI, and submit the new AMI as a new version of your product.
Option 1: Modify your AMI product in the European Sovereign Cloud and transfer to the commercial partition
If you decide to follow this option, you will make modifications directly in your running AWS European Sovereign Cloud instance, then transfer the updated AMI back to the commercial partition for the new version submission.
In Testing your AMI product in the AWS European Sovereign Cloud partition earlier in this post, you subscribed and launched your product in the European Sovereign Cloud partition. Building on that process, you can directly make any necessary modifications and, after successful testing, complete the following steps to update your product:
- Create an Amazon Simple Storage Service (Amazon S3) bucket in the AWS European Sovereign Cloud partition. This bucket will store the AMI for transfer between partitions:
AWS_REGION="eusc-de-east-1"
SOURCE_BUCKET="<source-bucket-name>"
aws s3 mb "s3://$SOURCE_BUCKET"- Create a new AMI with the changes you’ve made to your product. It may take some minutes:
INSTANCE_ID="<your-instance-id>"
AMI_NAME="<your-ami-name>"
aws ec2 stop-instances --instance-ids "$INSTANCE_ID"
aws ec2 wait instance-stopped --instance-ids "$INSTANCE_ID"
AMI_ID=$(aws ec2 create-image \
   --instance-id "$INSTANCE_ID" \
   --name "$AMI_NAME" \
   --query 'ImageId' \
   --output text)
aws ec2 wait image-available --image-ids "$AMI_ID"
echo "AMI creation completed. AMI ID: $AMI_ID"- Export the AMI to the S3 bucket you created in step 1. This AMI will be transferred to the commercial partition:
AMI_FILE_NAME=$(aws ec2 create-store-image-task \
   --image-id "$AMI_ID" \
   --bucket "$SOURCE_BUCKET" \
   --query 'ObjectKey' \
--output text)- Download the AMI to later upload it in the commercial partition:
SOURCE_S3_URL="s3://$SOURCE_BUCKET/$AMI_FILE_NAME"
TEMP_FILE="temp.bin"
aws s3 cp "$SOURCE_S3_URL" "./$TEMP_FILE"- Create an S3 bucket in the commercial partition to upload the AMI. Confirm you’re using the credentials for your AWS Marketplace seller account and that you’re targeting US East (N. Virginia) – us-east-1 as the Region:
AWS_REGION="us-east-1"
TARGET_BUCKET="<target-bucket-name>"
aws s3 mb "s3://$TARGET_BUCKET"- Upload the AMI to the S3 bucket:
aws s3 cp "./$TEMP_FILE" "s3://$TARGET_BUCKET/"- Restore the AMI from the S3 bucket into Amazon EC2:
RESTORED_AMI_NAME="restored-ami-name"
RESTORED_AMI_ID=$(aws ec2 create-restore-image-task \
   --object-key "$TEMP_FILE" \
   --bucket "$TARGET_BUCKET" \
   --name "$RESTORED_AMI_NAME" \
   --query 'ImageId' \
   --output text)
echo “AMI restored completed. AMI ID: $RESTORED_AMI_ID”- Check that your restored AMI is available in the Amazon EC2 console in the commercial partition.
- Visit Server products in AWS Partner Central and validate that AWS Marketplace – European Sovereign Cloud is selected as the target catalog.
- Select your AMI product. To share the new AMI, on the Request changes dropdown list, choose Update versions and then Add new version, as shown in the following screenshot.
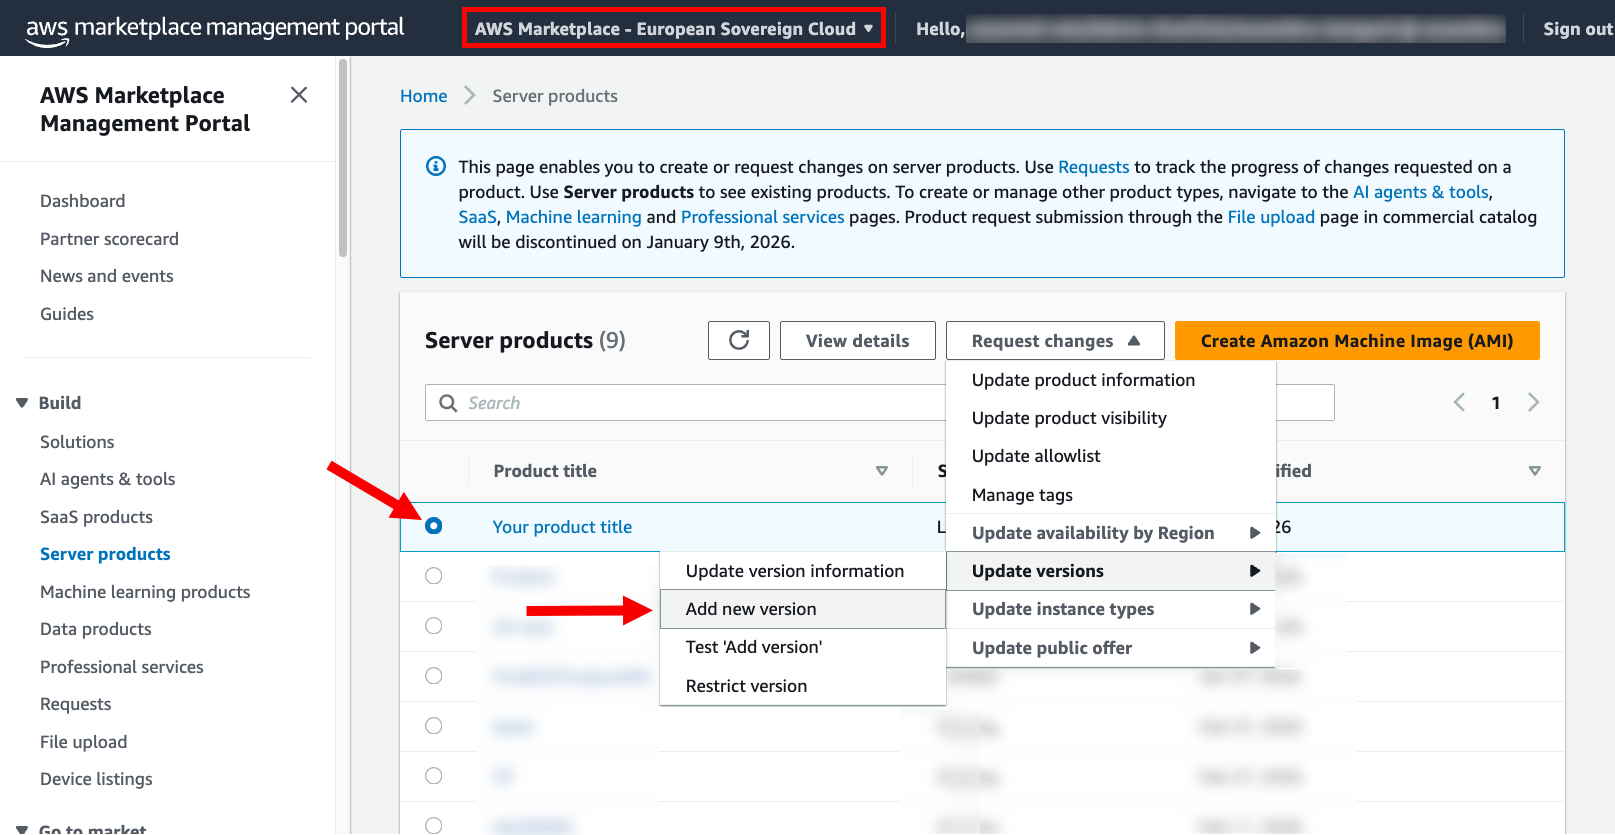 Figure 7: Choose Add new version
- Update the Amazon Machine Image (AMI) ID with the AMI ID you obtained in step 7.
- Update or fill in any other fields required to add the new version. For additional details on the process, consult the Add a new version section in the AWS Marketplace Seller Guide.
- Scroll to the bottom of the page and choose Add version. It may take several minutes until the new version of your product is created.
- After the new version is created, return to the AWS Marketplace console in the European Sovereign Cloud partition and launch the new version of your product.
- If you still need to modify your product, repeat the same process.
When your product works as expected, restrict all versions you created during testing before making your working version public. Follow these steps:
- Sign in the AWS console using your AWS Marketplace seller account and visit the AWS Partner Central console.
- Choose Server products in the navigation menu and validate AWS Marketplace – European Sovereign Cloud is selected as the target catalog.
- Select your product and on the Requests changes dropdown list, choose Update versions and then Restrict version, as shown in the following screenshot.
 Figure 8: Choose Restrict version
- Select all versions you created while testing your product and choose Submit.
After all test versions have been restricted, you’re ready to make your product public. Return to the Testing your AMI product in the AWS European Sovereign Cloud partition section in this post and resume the instructions at step 8.
Option 2: Modify your AMI product in the commercial partition and submit new version
If you prefer to work in your commercial partition or haven’t yet deployed to the European Sovereign Cloud partition, you can make modifications to your product directly in the commercial partition. For this, you need to start an EC2 instance with your product AMI and make any necessary or desired modifications. Next, create a new AMI containing the changes and follow the steps listed in Option 1: Modify your AMI product in the European Sovereign Cloud and transfer to the commercial partition starting at step 9.
Conclusion
You’ve completed the AMI listing process and published your product in AWS Marketplace in the AWS European Sovereign Cloud. To learn more about the AWS European Sovereign Cloud, AWS European Sovereign Cloud documentation and stay tuned for the third post in this series, covering how to publish SaaS products in AWS Marketplace in the AWS European Sovereign Cloud.