AWS for M&E Blog
Using Amazon IVS and MediaConvert in a post processing workflow
Amazon Interactive Video Service (Amazon IVS) can now record live streams to Amazon Simple Storage Service (Amazon S3). This allows you to save previous live streams to Amazon S3 for later re-use. Pairing this with AWS Elemental MediaConvert HLS ingest allows customers to use broadcast-grade features such input clipping, stitching, SCTE-35 insertion, and image overlay to rebrand, monetize, and repackage their replay stream.
This post shows how to create a workflow for automating Amazon IVS auto-recordings and ingesting into MediaConvert. We stitch leaders and bumpers to the beginning and end of the Amazon IVS asset and overlay an image (sometimes called a bug) over the asset using MediaConvert. We use MediaConvert to produce an Automated Adaptive Bitrate (ABR) DASH output, along with an SD proxy MP4 file.
Prerequisites:
- Access to an AWS Account, that has full permissions to AWS Elemental MediaConvert and Amazon IVS.
- Live stream to Amazon IVS. Check streaming configuration documentation here.
- A pre-and-post slate video. Check file format compatibility here.
- An image overlay. Check file format requirements here.
Set up Amazon IVS:
Set up recording configuration:
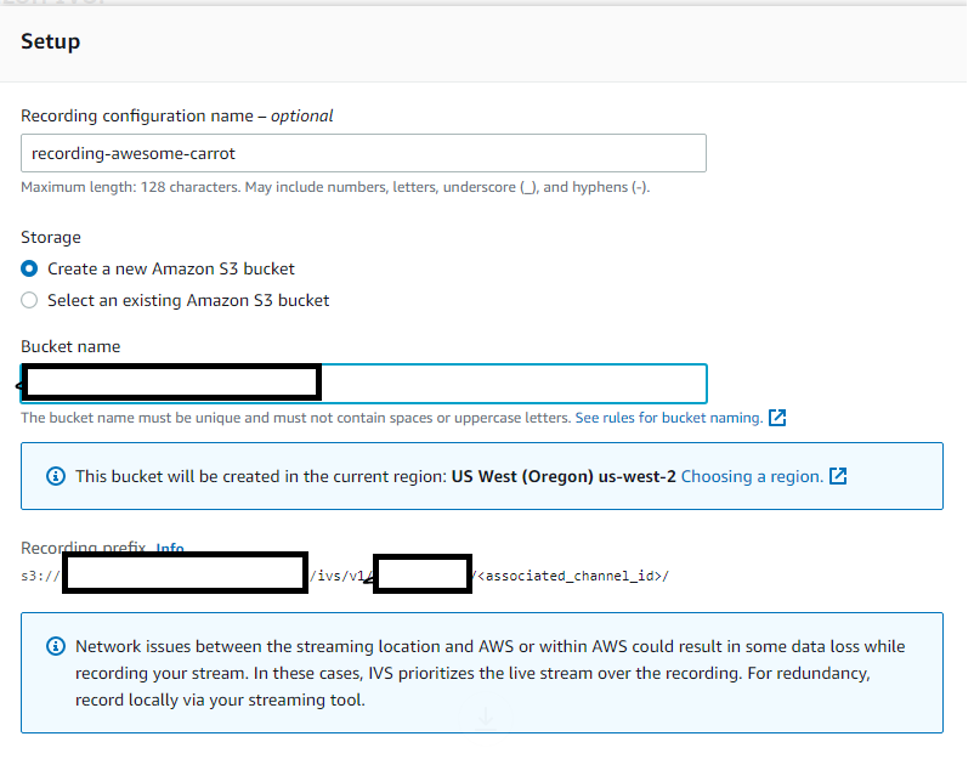
We want to set up a recording configuration first. This allows you to save your configuration for other channels you may create later on.
- Open Amazon IVS in the AWS Management Console.
- In the navigation pane, click Recording configurations, and the Create recording configuration.
– Select whether you would like to create a new Amazon S3 bucket, or use an existing one. - Choose Create configuration.
Amazon IVS Setup Image 1-1
Set up channel configuration:
Next, we create an Amazon IVS channel to get endpoints to send to. We can also select our recording configuration created from the previous section.
- Open Amazon IVS in the AWS Management Console.
- In the navigation pane, click on Channels, and then Create channel.
– For channel configuration, choose Default configuration.
Amazon IVS Setup Image 1-2
- Under the Record and store streams section, choose the Auto-record to S3 option.
– Select the configuration you created in the Set up recording configuration section.
Amazon IVS Image 1-3
- Choose Create channel.
Once your channel is created take note of your Ingest server, Stream Key and the channel ARN. You need these later in the workflow setup.
Set up MediaConvert:
Set up a Job template:
To simplify the job creation process we use a Job template. In our setup, we create a DASH output, using MediaConvert’s Automated ABR feature along with an SD proxy MP4 output. You can find the template we created on GitHub.
For more information on Job templates, check out the documentation.
- Open AWS Elemental MediaConvert in the AWS Management Console.
- In the navigation pane, click on Job templates.
- You can import the example Job template from GitHub, by clicking the Import template button or you can create your own.
- Provide a name to the job template.
– Take note of the name as you need it later. - Choose Create.
Set up Amazon EventBridge and AWS Lambda:
Amazon EventBridge and AWS Lambda are the glue that hooks Amazon IVS and MediaConvert together. Amazon IVS supports sending events to EventBridge. We then trigger a Lambda function to take the Amazon IVS recorded asset and create a job using the job template we created, along with some additional settings to stitch bumpers and image overlays. It is important to note we use the full HLS manifest produced by Amazon IVS as a MediaConvert input. MediaConvert uses the variant manifest with the highest bandwidth tag in the manifest.
Create function and permissions – AWS Lambda
- Open AWS Lambda in the AWS Management Console.
- In the navigation bar, choose Functions, then Create function.
- Choose Author from scratch.
- Under Basic Information.
– Give the function a name.
– Choose Python 3.8 as your runtime library.
– For the Execution role, choose Create a new role with basic Lambda permissions. - Choose Create function.
- Once the Lambda function has been created, select the Configuration tab.
- In left-hand navigation window, choose Permissions.
- Under the Execution role, select the Role name, this takes you to the IAM console.
- Under the Permissions tab, click Attach policy.
- Search for the AWSElementalMediaConvertFullAccess policy, select the checkbox.
– Note: This gives the Lambda function the ability to access the all MediaConvert API and pass any IAM role to MediaConvert. You can always create your own policy to limit this role to only execute against specific API calls or only pass specific IAM roles. - Search for the AmazonS3ReadOnlyAccess policy, select the checkbox.
– Note: This gives the Lambda function the ability to access all objects in all buckets for the account. You can create your own policy to limit this role to only allow access to a specific bucket. - Choose the Attach policy.
Apply code – AWS Lambda
- Open AWS Lambda in the AWS Management Console.
- In the navigation bar, choose Functions.
- Choose your Function you created in the previous section.
- Copy and paste the GitHub code into the Code source editor.
- Search for the following variables and replace with your specific account and workflow information.
- mediaconvert_client, your account-specific MediaConvert API endpoint.
- role_arn, the role ARN you use to assign to a MediaConvert job.
- preroll_path, the Amazon S3 path to your desired pre-roll input file.
- postroll_path, the Amazon S3 path to your desired post-roll input file.
- previously_recorded_image, the Amazon S3 path to your desired image overlay input file.
- job_template, the job template you created in the Setting up MediaConvert section.
Amazon EventBridge
- Open Amazon CloudWatch in the AWS Management Console.
- In the navigation bar Events, click on Rules.
- Choose Create rule.
- Under Event Source, select Interactive Video Service (IVS) as the Service Name.
- Under the Event Pattern Preview, choose the Edit link.
- Use the following JSON.
– Replace the channel ARN with your own channel ARN.{ "source":[ "aws.ivs" ], "resources":[ "<ARN from setting up channel configuration>" ], "detail":{ "recording_status":[ "Recording End" ] } }
Put it all together:
Send a stream to Amazon IVS
Once we have all the parts, we need to send a stream to Amazon IVS. Check out the documentation and other blog post for How-to guides. You need the Ingest server and Stream Key provided by Amazon IVS from the previous sets.
Once the stream stops, the auto archive feature begins to process. Once Amazon IVS sends the End Recording message to EventBridge, this triggers our Lambda function to create a MediaConvert job.
Stop the solution:
To stop the solution, delete or disable your EventBridge rule created in Amazon CloudWatch.
Delete the solution:
You can use the following documentation on deleting AWS resources used by this solution.
- Deleting and AWS Lambda function
- Disable Recording in Amazon Interactive Video Service
- Delete or disable your EventBridge rule
- Delete a role in Amazon Identify and Access Management
- Delete a MediaConvert job template
Note: Do not forget to delete any files that you have stored on Amazon S3.
Summary
With this solution, we showed you how to configure a serverless workflow between Amazon Interactive Video Service and AWS Elemental MediaConvert. This is just a starting point for you to expand and customize your own workflow.
AWS offers the most purpose-built services for direct-to-consumer (D2C) & streaming to help companies reliably deliver, monetize, and support live and on-demand media over the internet, and bring unparalleled experiences to screens everywhere. Explore https://aws.amazon.com/media/direct-to-consumer-d2c-streaming/ to learn more.
If you have questions, feedback, or would like to get involved in discussions with other community members, visit the AWS Developer Forums: Media Services.