AWS Database Blog
Replace SQL Server Agent Job with AWS Step Functions
If you’re migrating from Microsoft SQL Server to Amazon Aurora PostgreSQL, you might have discovered that the SQL agent jobs cannot be easily moved. The job agent tools are not supported for Aurora PostgreSQL. You can overcome this limitation though, by using AWS Step Functions to replace a SQL agent job.
In this blog post I show how to create a step function to replace a SQL agent job that runs a SQL stored procedure.
Steps to implement the solution
The code and the AWS CloudFormation template to implement this solution can be found in this GitHub Amazon Repository.
To create the solution, I provision the following using the CloudFormation template:
- An Amazon RDS for SQL Server database from a publicly available snapshot.
- An IAM role for the state machine.
- The Step Functions activity.
- The Step Functions state machine.
- Amazon CloudWatch Events rule to start the Step Functions state machine.
After the above Resources have been provisioned using the CloudFormation template, I do following:
- Implement a worker program for the Step Function.
- Run the worker program for the Step Function.
Prerequisites and assumptions
To use this solution yourself, you need:
- An AWS account that provides access to AWS services. In this blog post, the services are configured in the same VPC to simplify networking considerations.
- The Eclipse IDE, which you can download.
Additionally
- The default master user name for the RDS database as AWSUser. You select the master password while creating an AWS CloudFormation stack
When you use AWS CloudFormation, you manage related resources as a single unit called a stack. You create, update, and delete a collection of resources by creating, updating, and deleting stacks. All the resources in a stack are defined by the stack’s AWS CloudFormation template.
Step 1: Create CloudFormation Stack
- Download the StepFunctionCloudFormation.yml from the GitHub Amazon Repository.
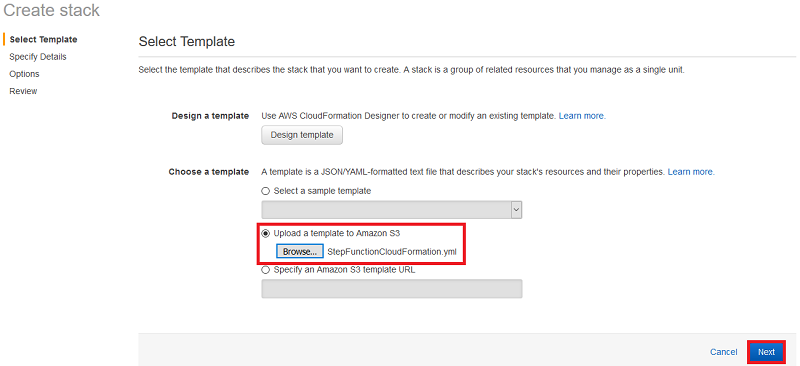
- Sign in to the AWS Management Console and open the CloudFormation console. Choose Create Stack as shown below.

- Upload the StepFunctionCloudFormation.yml file as shown below, and then choose Next.
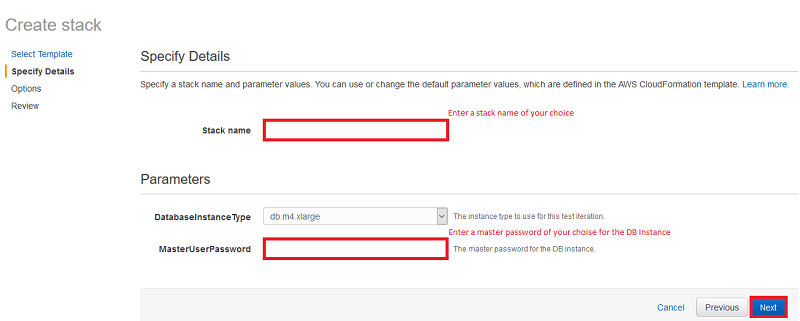
- On the details page, provide:
- A Stack Name
- A master user password for the database
Choose Next as shown below.
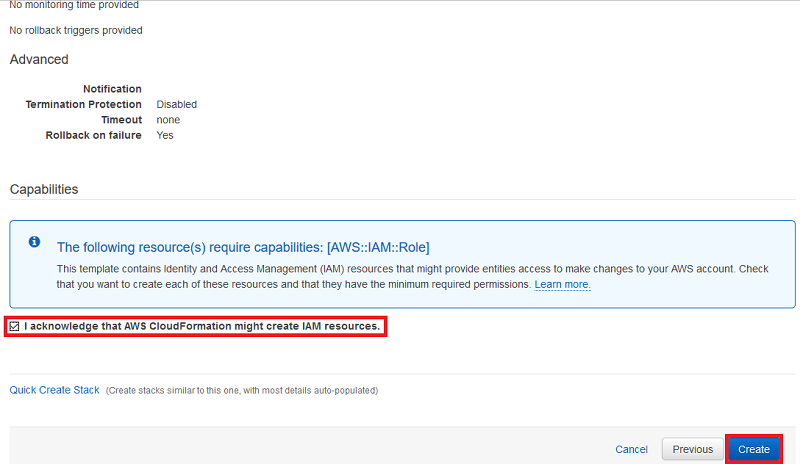
- Choose Next until you are on the Review Details page. Acknowledge the creation of IAM resources and choose Create as shown below.
It can take a while for the CloudFormation Stack to complete. After the CloudFormation stack has completed, you must verify that the resources have been created. If the CloudFormation stack does not complete, please check the events for the CloudFormation stack on the AWS Management Console.
Step 2: Verify the step function activity
The Step Function Activity should be created after the CloudFormation script is complete. You can check creation of the step function activity by going to the Step Functions console with the following:
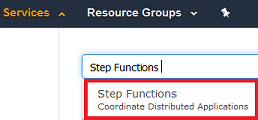
- Sign in to the AWS Management Console and choose the Services link on the upper-left side.
- Enter Step Functions in the text box. You should see the result for Step Functions. Choose it as shown below.
3. After you are in the Step Function console, check that the Step Function activity was created. Take note of the activity Amazon Resource Number (ARN) as shown below. You will need this when you implement the worker later.

Step 3: Verify the Step Function state machine
The Step Functions state machine is created after the CloudFormation script is complete. Check that the Step Functions state machine was created by doing the following:
- Sign in to the AWS Management Console, as shown below and choose Services on the upper-left side.
- Enter Step Functions in the text box. You should see the result for Step Functions. Choose it, as shown below.

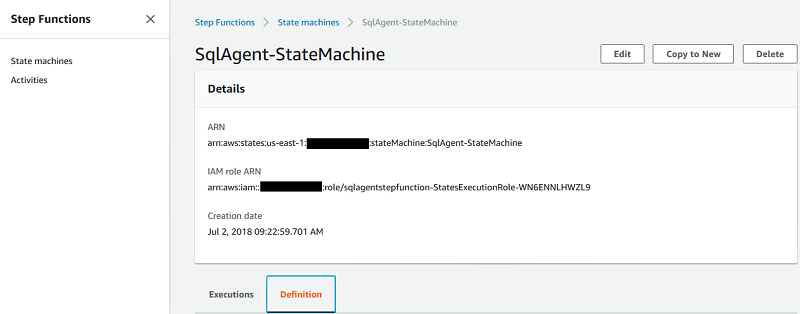
- After you are in the Step Functions console, you should see the state machines page by default. Choose SqlAgent-StateMachine, as shown below.
 You will see the details of the SqlAgent-StateMachine including the IAM role ARN as shown below.
You can also check the definition of the state machine as shown below by choosing the Definition tab.
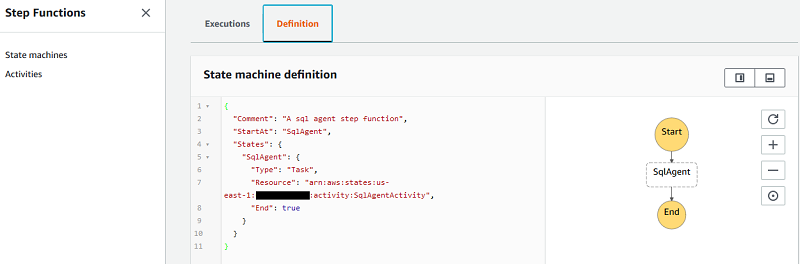
When this state machine is launched, the system begins with the state referenced in the field (“StartAt” :“SqlAgent”). A task state (“Type”: “Task”) represents a single unit of work performed by a state machine. The Resource field is a URI, especially an ARN that uniquely identifies the specific task to execute. In the above definition the task is SqlAgentActivity. As this state has an (“End”: true) field, the execution stops and returns a result.
NOTE: All work in the state machine will be done by an activity task. A task can be an activity or a Lambda function. I chose the activity task for our solution because our SQL Stored procedure in the SQL agent job takes at least 10 minutes to complete. AWS Lambda has a hard time out limit of 5 minutes, so it’s not suitable to replace this particular SQL agent job.
Step 4: Customize an Amazon RDS for SQL Server database from a publicly available snapshot
A SQL Server database on RDS is created after the CloudFormation script is complete. Verify this on the CloudFormation console by doing the following:
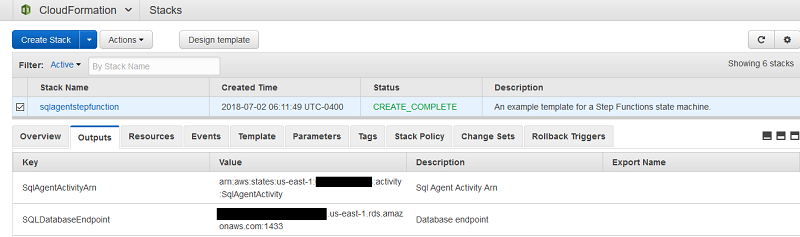
- On the CloudFormation console, choose the Outputs tab. Make a note of the SQLDatabaseEndpoint and the SqlAgentActivityArn values. You will need these when you implement the worker later.
- To view the SQL Job you are replacing, use SQL Server Management Studio to access the SQL RDS instance you created. For instructions on connecting to a RDS instance running SQL Server using SQL Server Management Studio, see the RDS user guide.
NOTE: If you are not able to access the SQL RDS instance via SQL Server Management Studio, open the port that your RDS instance is listening on within your security group. If you are using the CloudFormation template provided with this blog, then the port number is 1433.
To open the port that your RDS instance is listening on within your security group, follow these steps:
- Open the Amazon RDS console at https://console.aws.amazon.com/rds/.
- Select Instances from the navigation pane on the left side of the RDS console window.
- Select the particular DB instance you want to modify.
- On the page for the DB instance scroll down until you see the Connect section on the page. Under Security group rules, select the security group you would like to modify. Choose it as shown below.

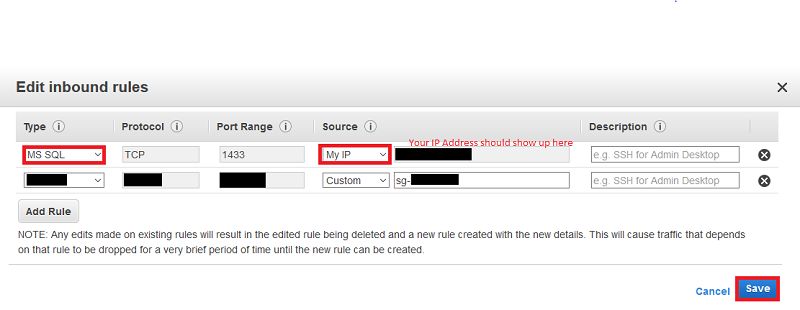
- On the Security Groups page, select the security group you want to modify, select the Inbound tab and choose Edit, as shown below. You will then see the Edit inbound rules dialog box.

- Choose Add Rule. A row is added for a new rule.
- Select the values as MS SQL for the Type and My IP for the Source drop down lists as shown below. This also populates the Protocol, Port Range, and IP Address text box under source. After you are done choose Save. This should allow inbound access to port 1433 from your machine.
- After you are connected to the SQL RDS instance do the following:
- In Object Explorer, expand the DB instance.
- Expand SQL Server Agent, and then expand Jobs.
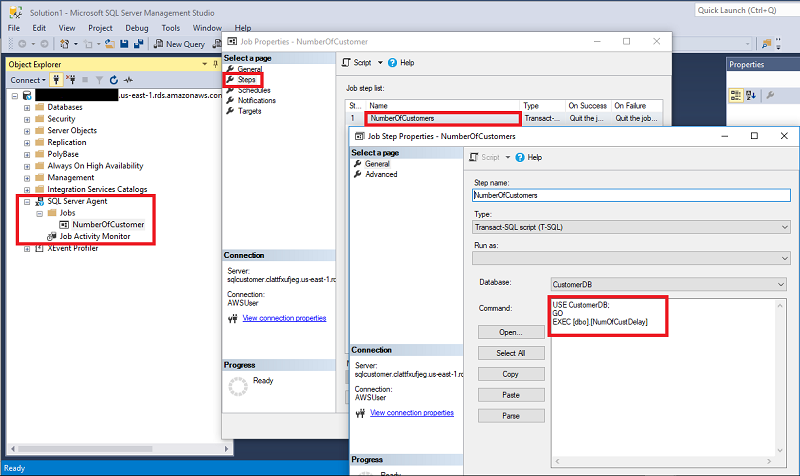
- Right-click on the NumberOfCustomer job, and then choose Properties.
- In Properties choose Steps.
- In Steps, double click on step with name NumberOfCustomers. You see the step executes the NumberofCustDelay stored procedure as shown below. This stored procedure returns the number of customers in the table and induces a wait time for 10 minutes. Its scheduled to be run by the SQL agent every 2 hours.
Step 5: Verify CloudWatch event rule to start execution of Step Functions state machine
The CloudWatch Event rule is created after the CloudFormation script is complete. Use the AWS Management Console, as shown below to check that the CloudWatch Event rule is created.
- Sign in to the AWS Management Console and choose Services on the upper-left side.
- Enter CloudWatch in the text box. When you see the CloudWatch entry, as shown below, choose it.
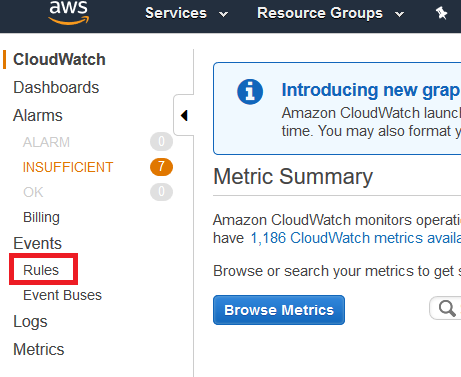
- On the CloudWatch console, choose Rules, in the left navigation pane as shown below.
- On the Rules page, choose the rule with “CloudWatchEventRule” as shown below.
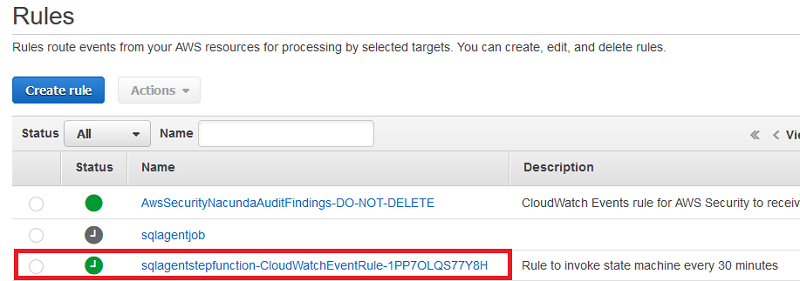
You should see the Summary of the rule. Make sure the rule targets the Step Function state machine SqlAgent-StateMachine under Resource Name as shown below. The CloudWatch rule below will invoke the SqlAgent-StateMachine every 30 minutes similar to a scheduled job agent.
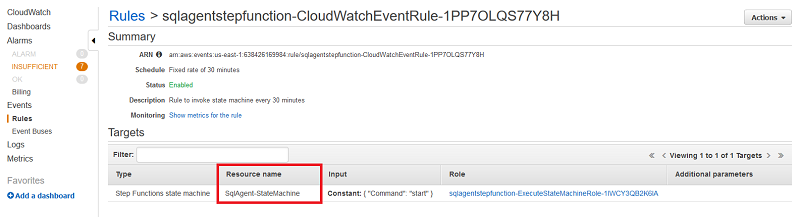
NOTE: It might take up to 30 minutes after the successful completion of the CloudFormation script for the CloudWatch Event rule to start.
Step 6: Implement a worker program for the Step Functions
In this step, you implement a worker program. To get started, download the sqljobstepfunction project to your machine and then follow the remaining steps.
- Download the sqljobstepfunction project.
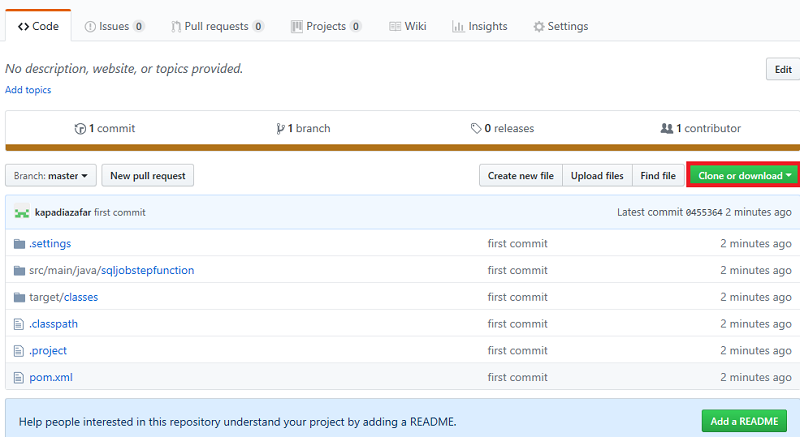
- Go to this GitHub Amazon Repository link.
- Choose Clone or download button as shown below.
- After you choose the download button, an option to Download ZIP appears. Choose it as shown below.
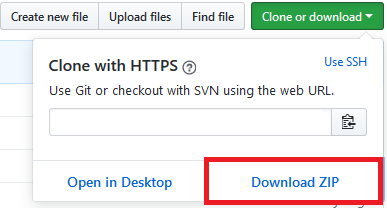
- Save the .ZIP file and uncompress it.
2. After you have downloaded and uncompressed the project, import the project in Eclipse IDE. The instructions to import the project in Eclipse IDE are on the Eclipse.org web site.
3. After you have imported the project in Eclipse, look for the SQLJobApp.java class as shown below.
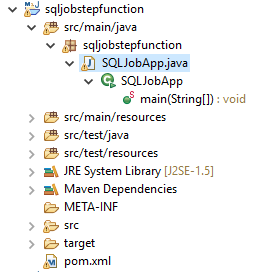
- Double click the SQLJobApp.java class to open it in the Eclipse main code pane. You should see the Java code shown below.
The Java code in the worker program is responsible for the following:
- Polling step functions for activities using the GetActivityTask API action.
- Performing the work of the activity by executing the NumOfCustDelay stored procedure using JDBC.
- Returning the results using the SendTaskSuccess and SendTaskFailure API actions.
NOTE: The class in this example assumes that you have setup AWS Credentials as explained in the toolkit user guide.
- In the code above do the following:
- Enter your database endpoint you noted in Step 1 and the Master Database Password you chose while creating the CloudFormation stack in the connection string as shown below.
- In the parameter list of the GetActivityTaskRequest().withActivityArn() constructor, replace the ACTIVITY_ARN value with the ARN you noted from Step 3 earlier as shown below.
- Build the project in Eclipse.
Though you are running this worker program from a local machine, you can host activities on Amazon EC2, on Amazon ECS, or even on mobile devices.
Step 7: Running the worker
To have the worker poll your state machine for activities, you must run the worker. In Eclipse run the SqlJobApp.java. To get started, follow these steps:
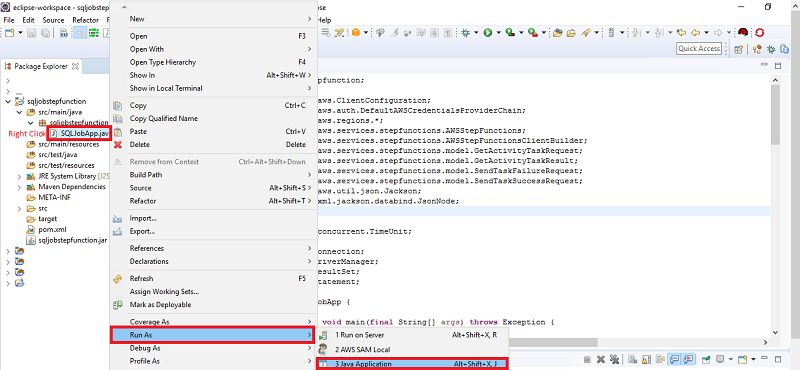
- Run the SQLApp.java program by following these steps, as shown in the screenshot below.
- Right Click the SQLJobApp.java class
- From the menu select Run As
- Select Java Application
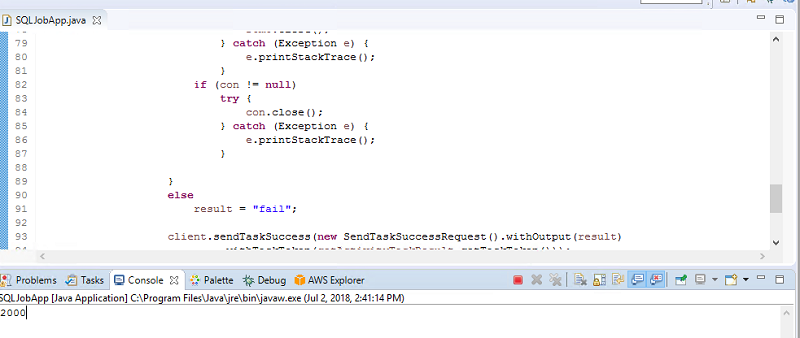
After the Java program succeeds you should see it on the Eclipse IDE console and the AWS Management Console for the SqlAgent-StateMachine page as shown below.
Eclipse IDE Console:
AWS Management Console:
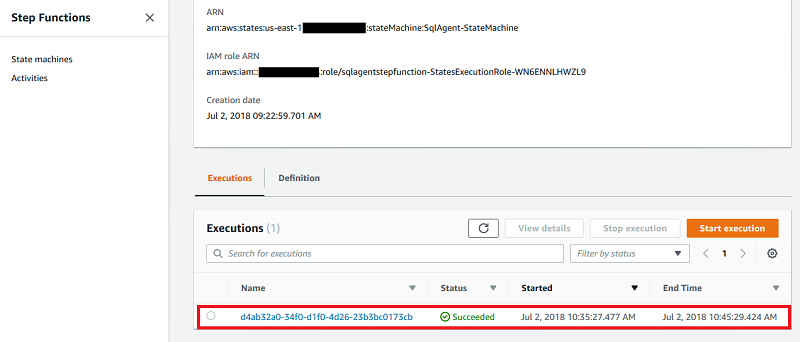
NOTE: It might take up to 30 minutes after the successful completion of the CloudFormation script for the SqlAgent-StateMachine to start.
Conclusion
In this blog post, I showed a complete solution to replace a SQL agent job that runs a stored procedure with an AWS step function. Though this example is specific to SQL Server, the concept can be applied to other databases such as Amazon Aurora PostgreSQL.
If you have comments about this blog post, submit them in the Comments section below. If you have questions about implementing the solution in this post, you can leave them in the Comments section too.
Additional Reading
If you found this post useful, you may also be interested in Picking Your First Database to Migrate to Amazon RDS or Amazon Aurora with PostgreSQL-compatibility.
About the Author
 Zafar Kapadia is a cloud application architect at Amazon Web Services. He works on Application Development and Optimization projects. He is also an avid cricketer and plays in various local leagues.