Artificial Intelligence
Transforming rare cancer research with Amazon Quick: Integrating biomedical databases for breakthrough discoveries
Rare cancer research generates heterogeneous data across genomic sequencing pipelines, clinical trial registries, biomarker repositories, and peer-reviewed literature. Integrating these sources for a single investigation typically requires custom ETL pipelines, manual schema reconciliation, and iterative querying across disconnected systems—a process that can take weeks before any analysis begins.
Amazon Quick Research addresses this integration challenge by providing a unified research environment. It ingests structured and unstructured data from multiple sources, including publicly available biomedical databases such as PubMed, and applies large language model (LLM)-driven synthesis to generate cited, versioned research reports.
In this post, we walk through how to use Amazon Quick Research to integrate biomedical data sources for rare cancer research. The walkthrough uses pediatric sarcoma as the research domain and draws on publicly available datasets from PubMed and other open biomedical repositories. It covers the end-to-end workflow: defining a research objective, configuring data sources, reviewing the AI-generated research plan, running the investigation, and iterating on results using the revision and versioning system.
Capabilities
Amazon Quick Research is an agentic research workflow within Amazon Quick that orchestrates multi-source data retrieval and LLM-based synthesis. The core components are:
- Research objective parsing – The agent interprets a natural language research question and breaks it into structured sub-topics for parallel investigation.
- Multi-source data ingestion – Supports web search (publicly indexed sources including PubMed, ClinicalTrials.gov, and open-access journals), file uploads (PDF, Word, Excel, PowerPoint), and Amazon Quick assets (Spaces, dashboards, knowledge bases, and datasets). Sources are processed and indexed when the research project is created.
- AI-generated research plan – Before running, the agent produces a structured plan that lists the topics it will investigate, the sources it will query per topic, and the analytical approach. You can review and revise this plan before committing to a full run.
- Cited report generation – Output is a structured report with inline citations traceable to source documents or URLs. Each statement includes a provenance link, and the “Understand the statement” feature exposes the evidence chain behind individual conclusions.
- Versioned revision workflow – You can annotate specific statements with revision comments (up to 400 characters). Submitting a revision starts a new research run scoped to the annotated sections, increments the version number, and preserves prior versions for comparison.
- Export formats – Reports are exportable as PDF or Word. Summary variants (Executive, General, Custom) let you tailor output length and citation density for different audiences.
Spaces provides the data organization layer that feeds Amazon Quick Research. A Space is a logical container that groups up to 10,000 files alongside Amazon Quick dashboards, topics, and knowledge bases. Files are indexed on upload and made available as a retrieval corpus for research runs. Supported formats include Word, Excel, PowerPoint, PDF, CSV, TXT, RTF, JSON, YAML, XML, and HTML. For this walkthrough, a Space is populated with publicly available cancer genomics datasets and PubMed abstracts to serve as the internal knowledge corpus alongside live web search.
Walkthrough
This walkthrough shows how to integrate biomedical data sources for rare cancer research using Amazon Quick. You create a Space, start Quick Research, and generate a cited report.
The following video walks through the steps:
Note: Amazon Quick is a paid service. Following this walkthrough creates billable resources. To avoid ongoing charges, finish the cleanup steps at the end of this post.
Prerequisites
Before you start this walkthrough, you need the following:
- An active AWS account.
- Access to Amazon Quick with permissions to create Spaces and Research projects.
- Basic familiarity with biomedical research terminology.
Part 1: Create a space
- Open Amazon Quick and choose Spaces in the main navigation.
- Choose Create space to add the required files for the research.
- Choose Add knowledge.
- Select from file uploads, dashboards, or knowledge bases.
Add the name for the Space at the top of the page.
Confirm your Space appears in the Spaces list with a green checkmark or Ready status. Choose the Space name to verify that all uploaded files are listed and show Indexed status.
Part 2: Create a research project
On the Amazon Quick home page, choose Quick Research. Choose New Research to start a structured workflow that guides you from objective setting through final report generation.
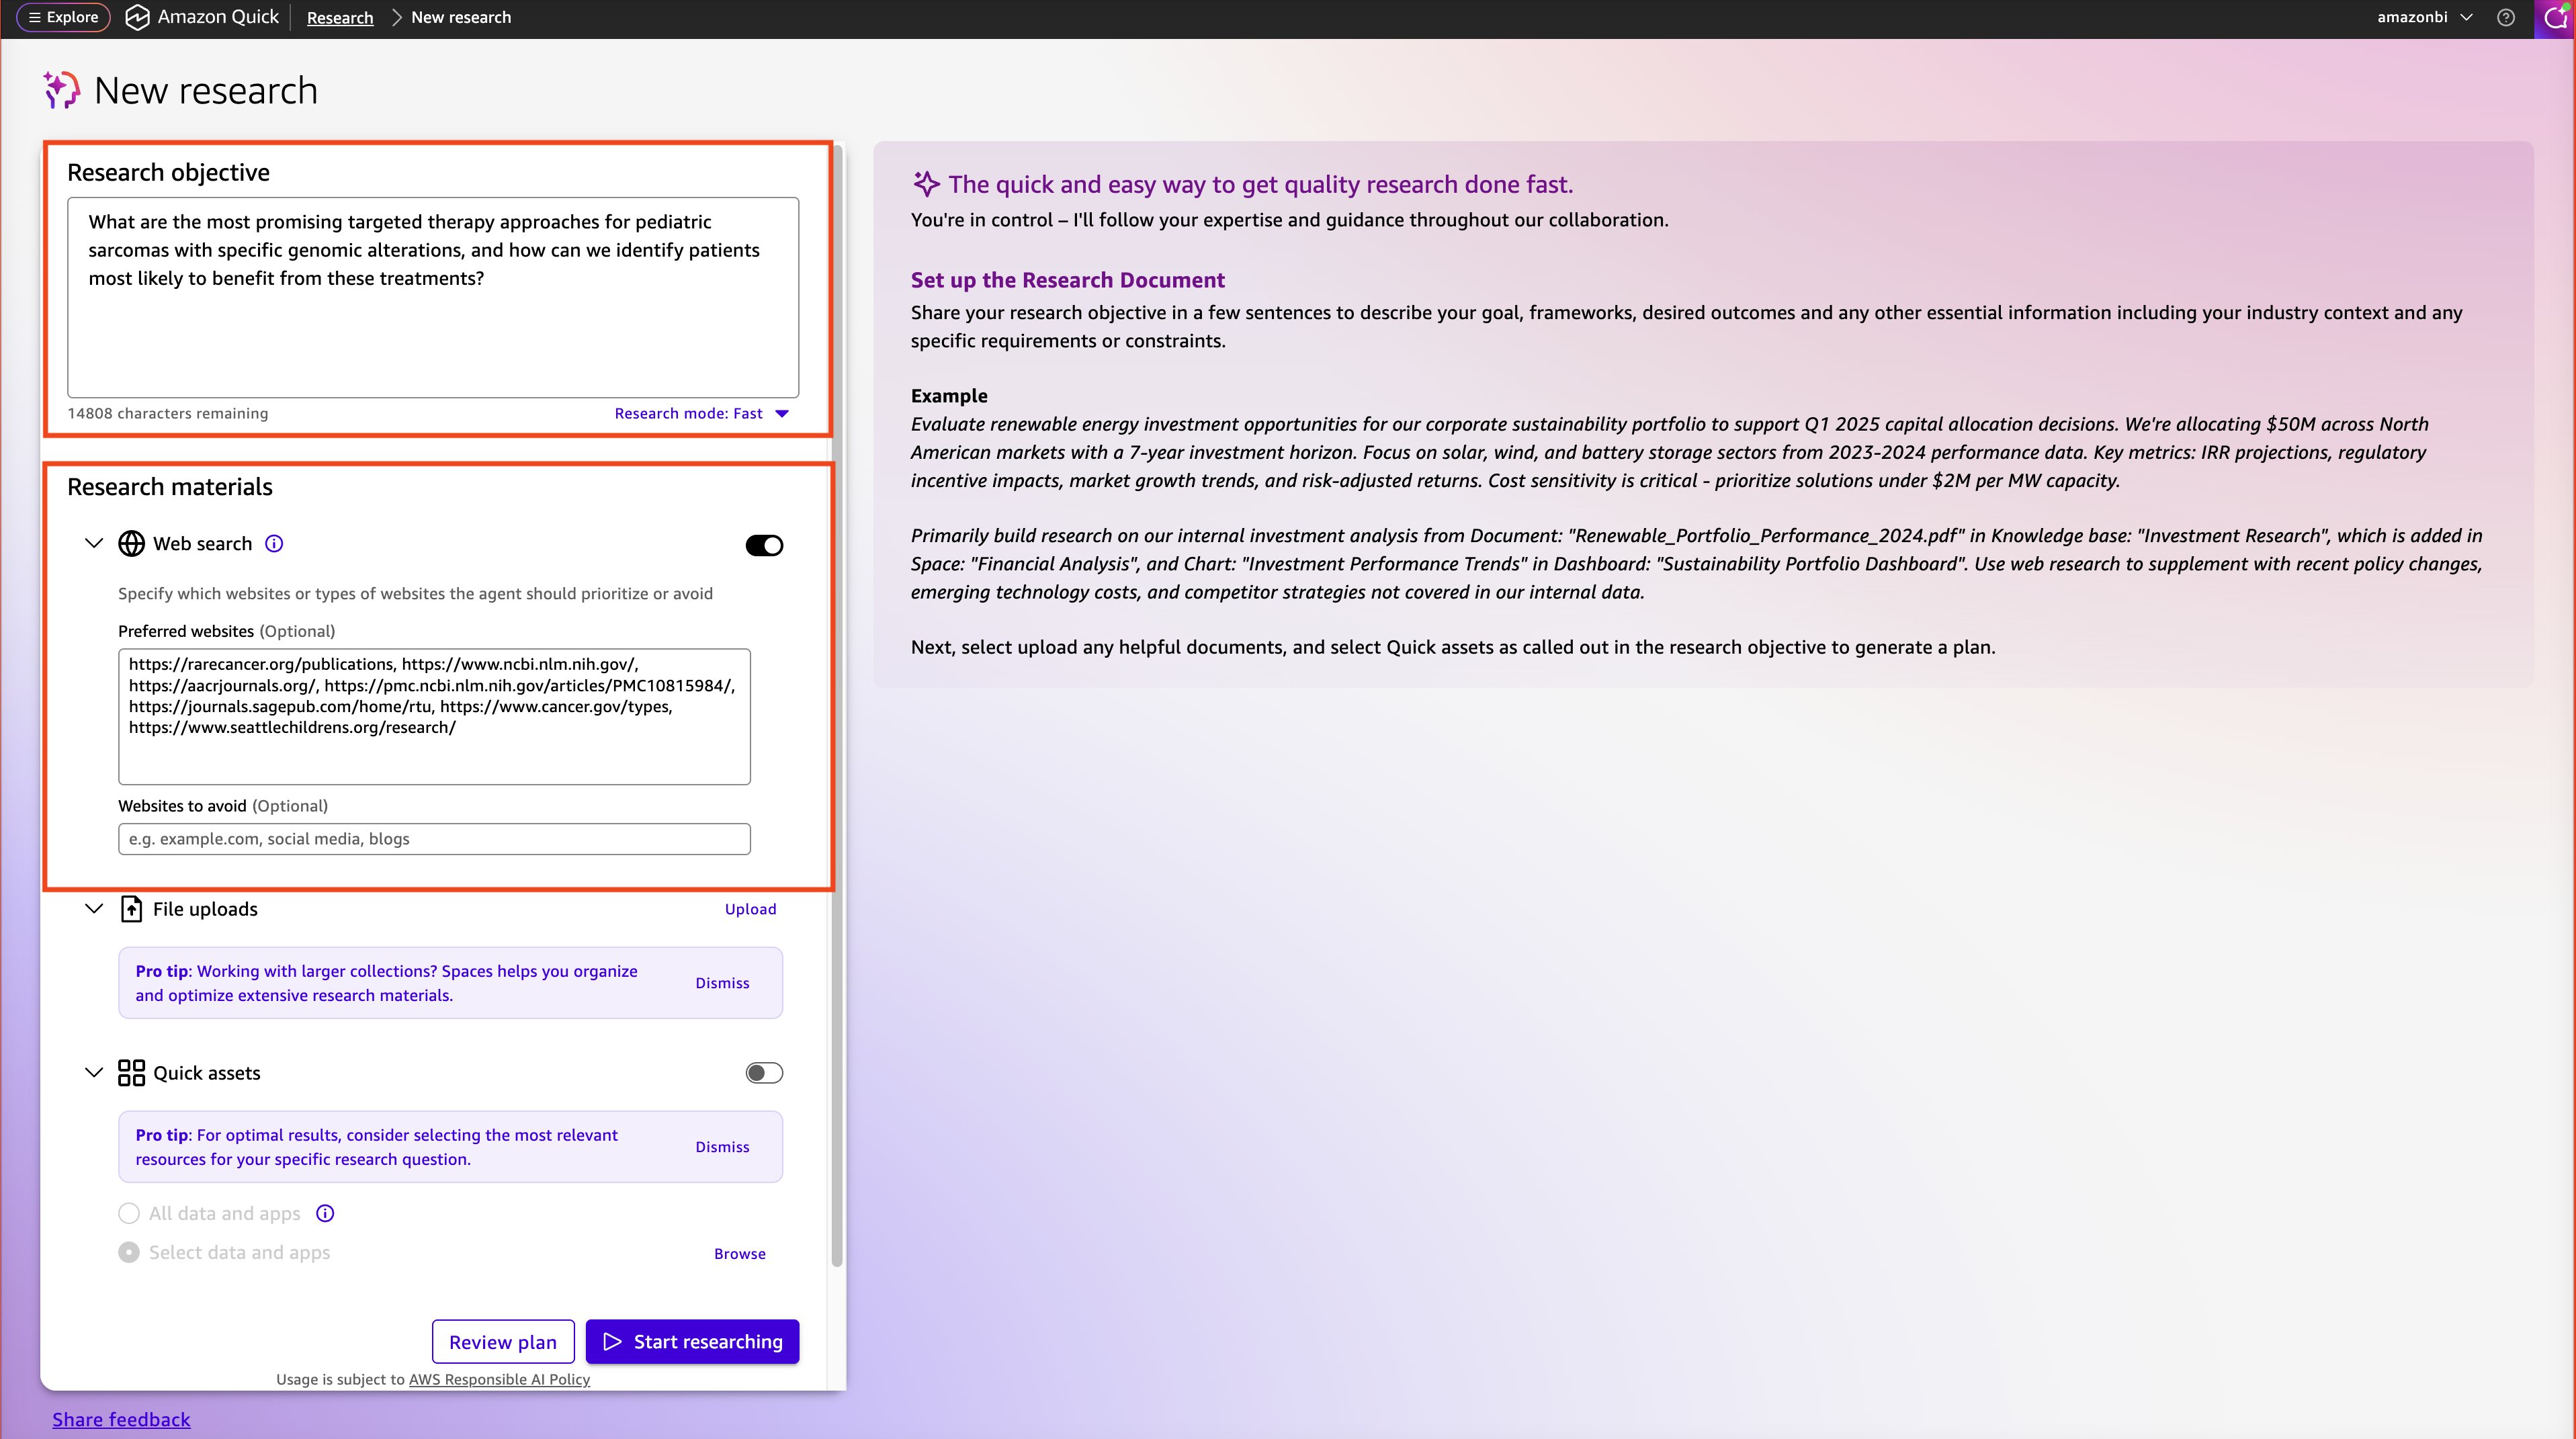
Part 3: Define the objective
Enter the research objective in the text field. A focused, specific question produces better results.
Example objective:
What are the promising targeted therapy approaches for pediatric sarcomas with specific genomic alterations, and how can we identify patients who may benefit from these treatments?
State your research goal and specify the scope of your investigation. The AI agent helps refine your research question and suggests additional angles you might want to explore based on the available data sources.
Part 4: Data source selection and integration
Choose the data sources to include in the research:
- Web search – Enable web search to pull from publicly indexed sources such as PubMed, ClinicalTrials.gov, and open-access journals. Add specific URLs as needed:
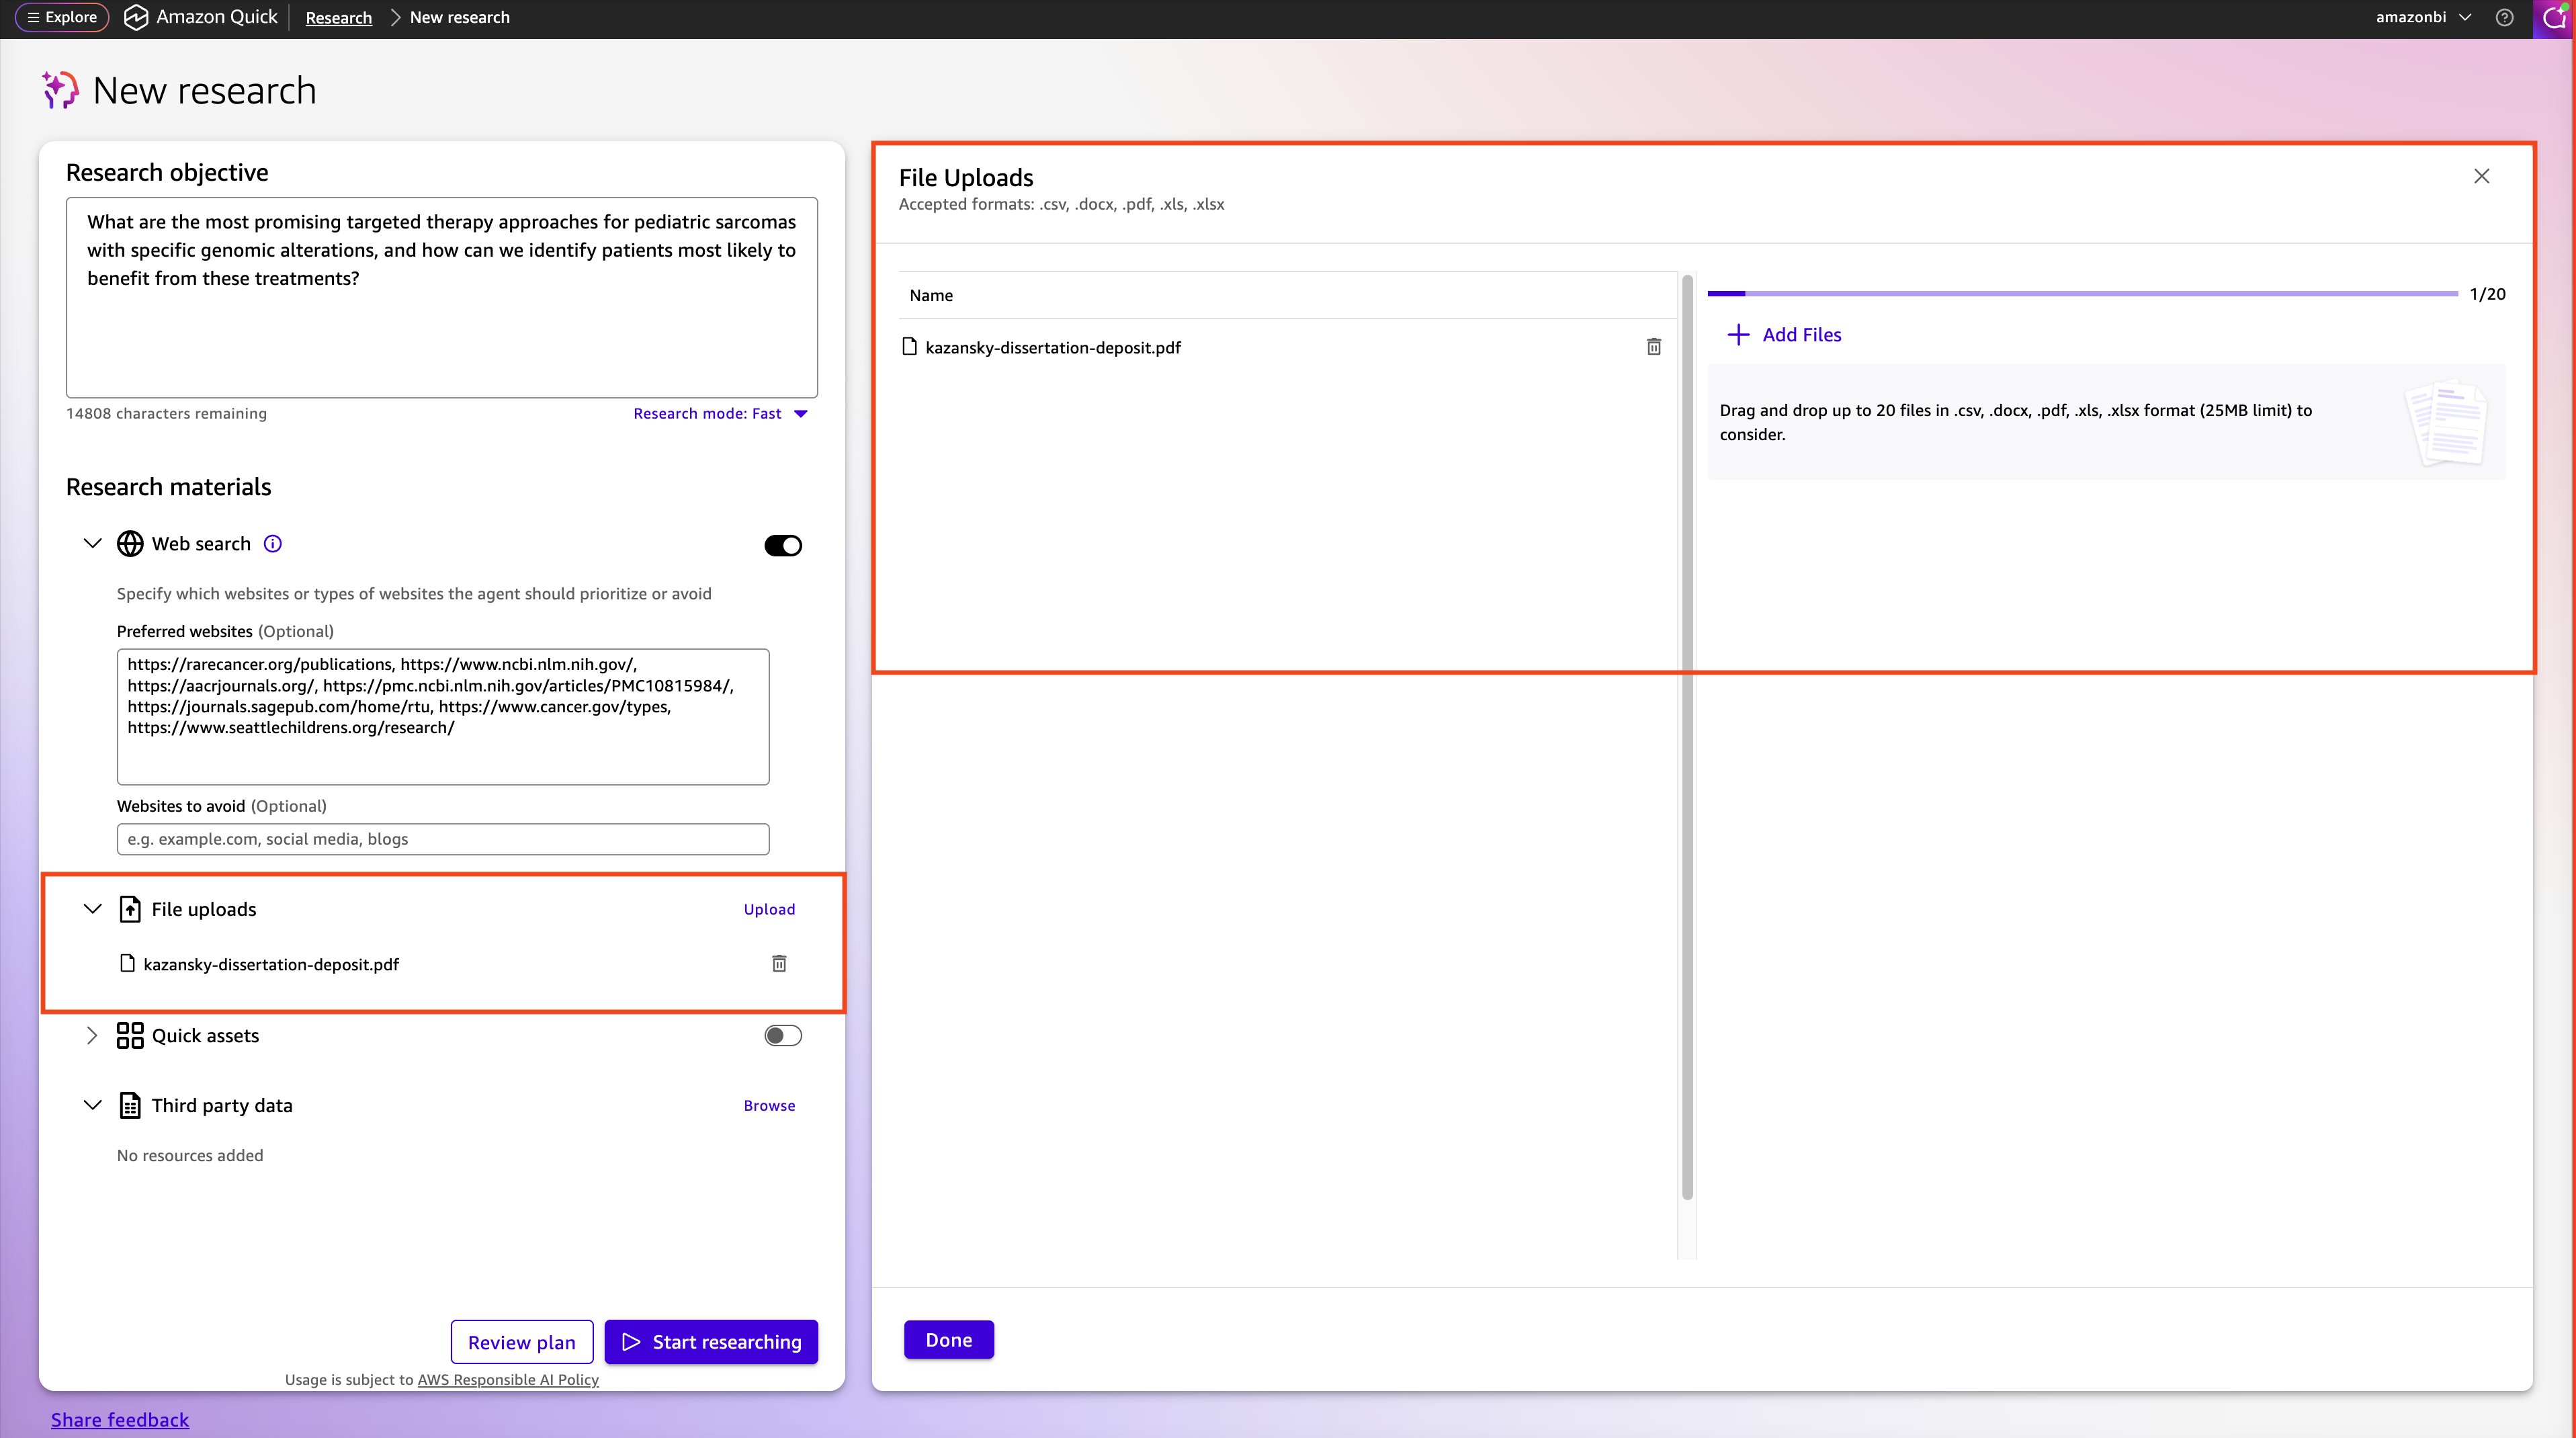
- Choose File upload to add specific documents. Link Quick Research to your existing data spaces to include internal documents, reports, and knowledge bases in the research. Here, you can combine external web sources with your organization’s proprietary information.
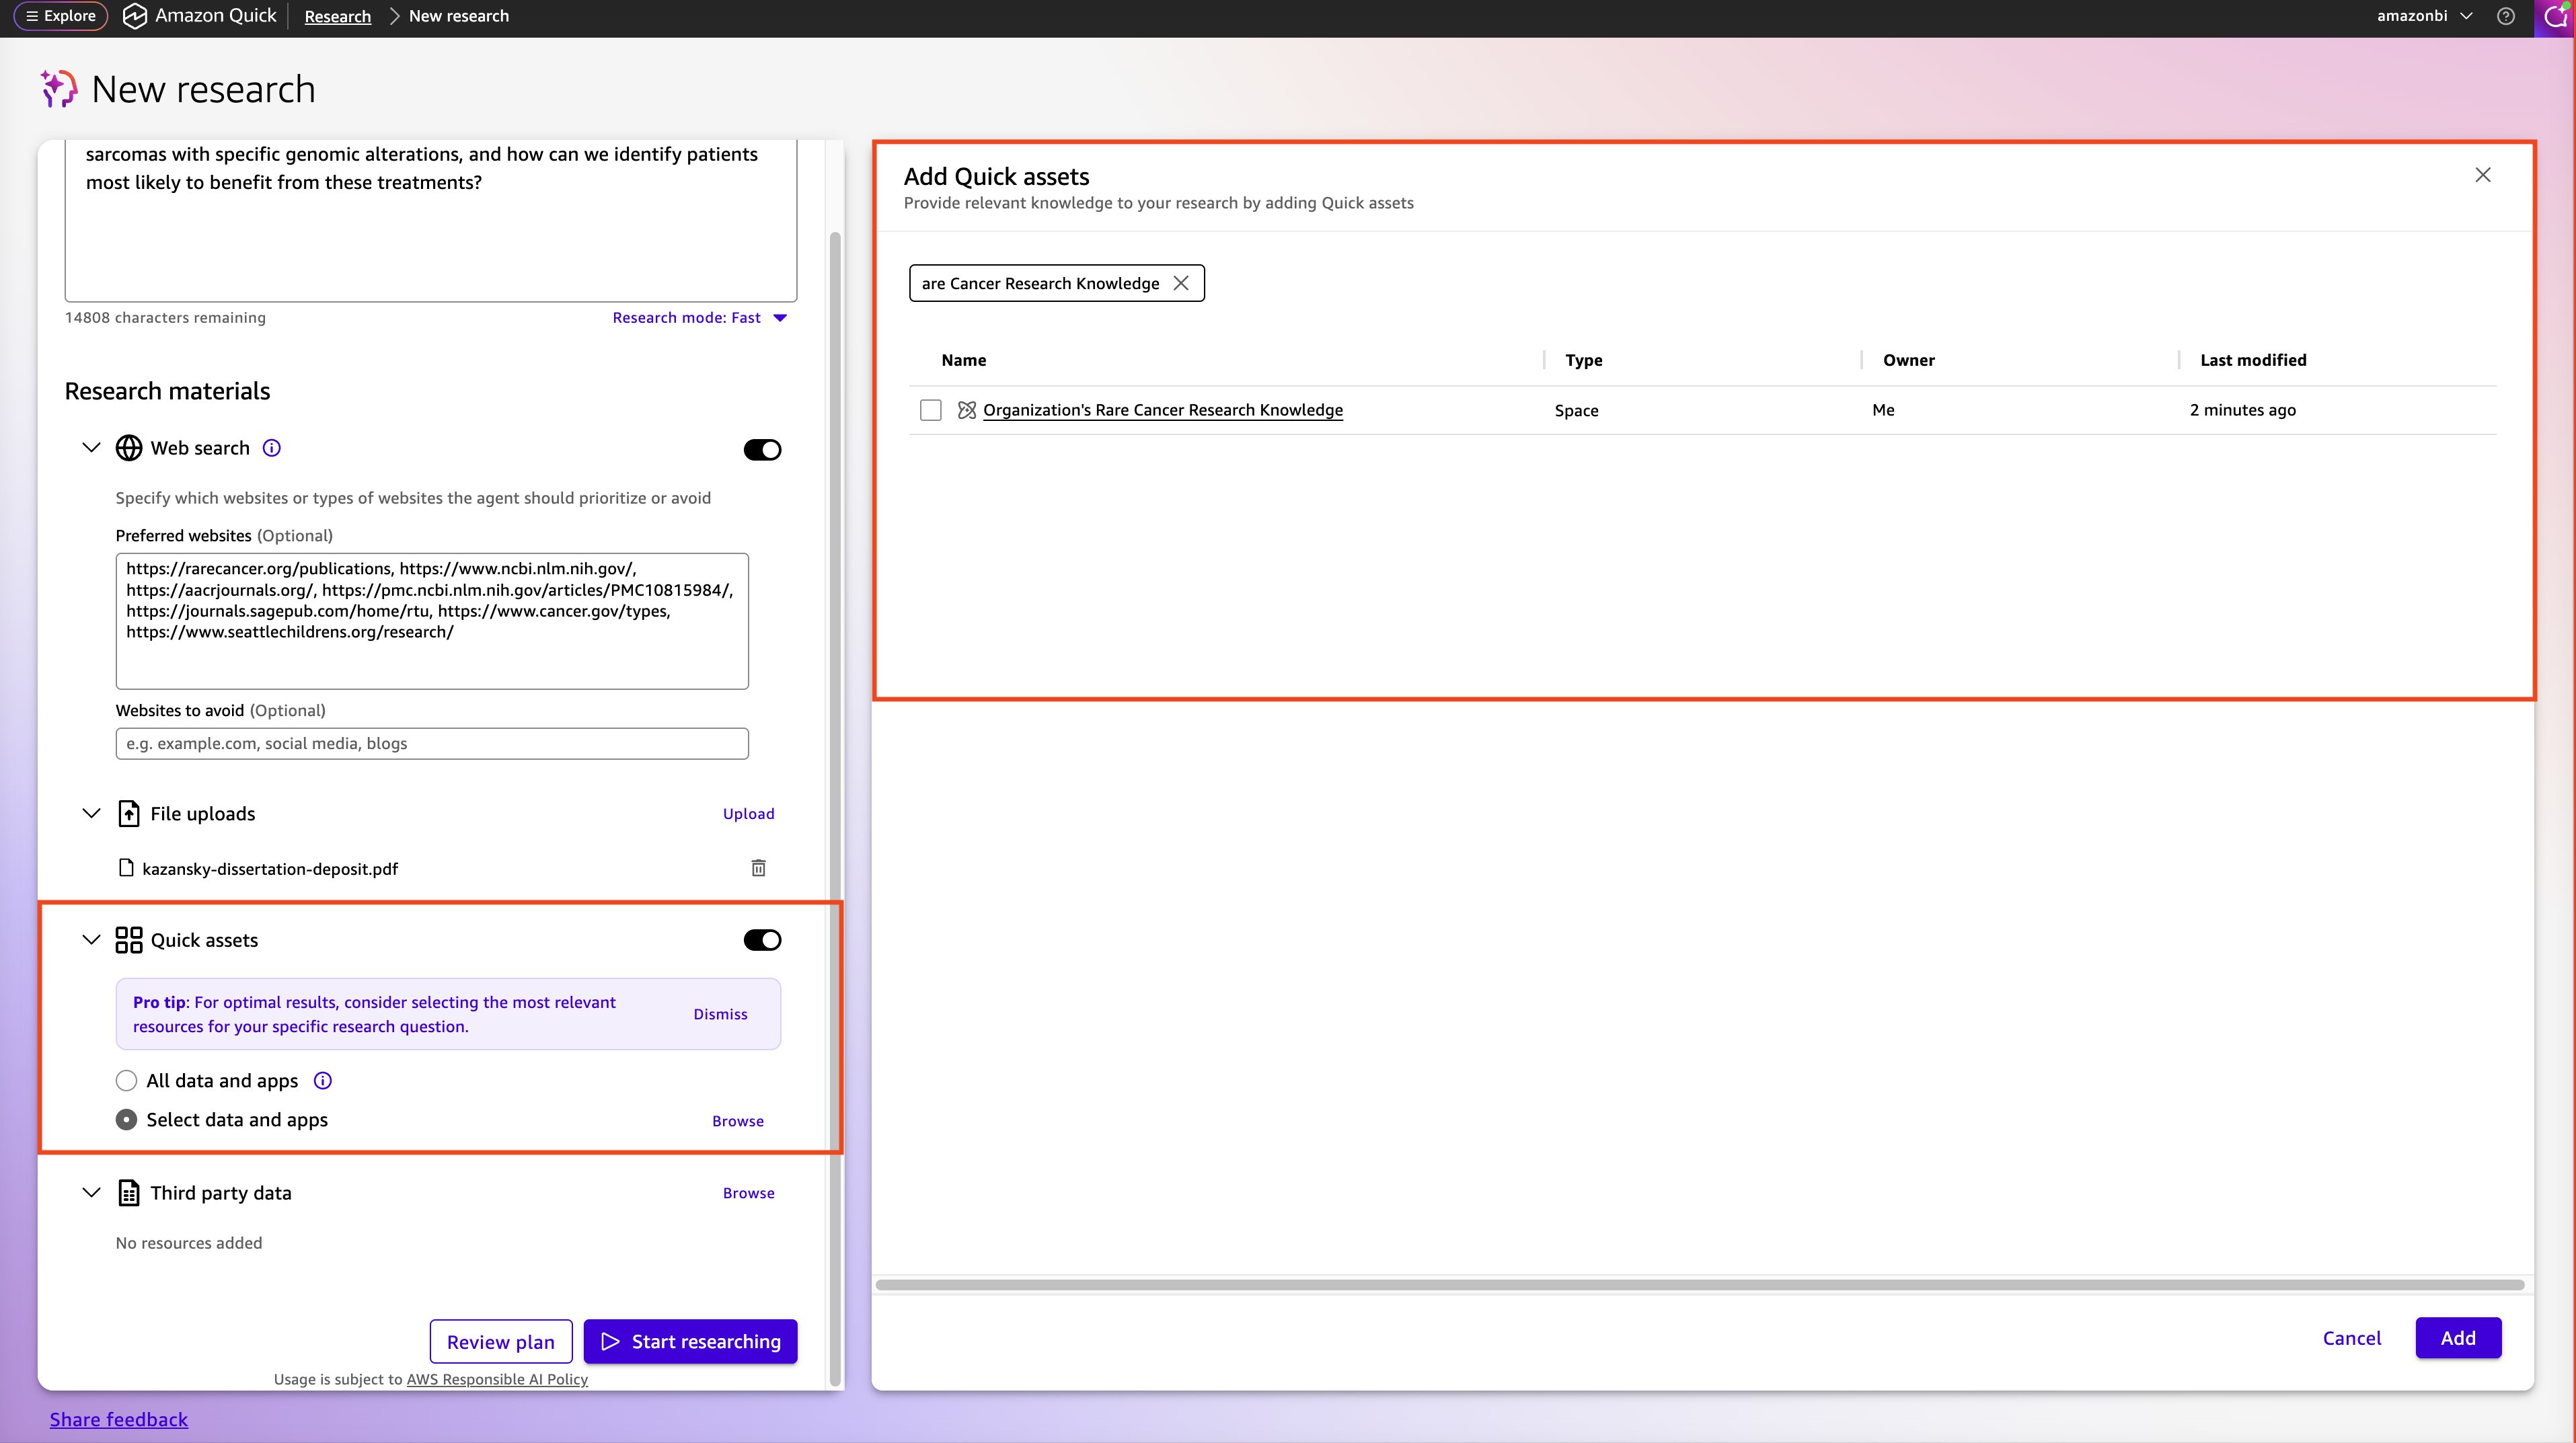
- Choose Quick assets to include data spaces, dashboards, and knowledge bases. These are collections of files, documents, and analytics organized in Quick for fast access and analysis.
Quick Research automatically identifies relevant data sources from connected repositories. For this pediatric sarcoma investigation, the system recognizes connections between:
- Genomic mutation data and drug target databases
- Clinical outcome data and treatment protocol literature
- Biomarker profiles and patient response patterns
- Historical trial data and current therapeutic options
Part 5: AI-powered plan
Quick Research generates a structured plan before running. Review the topics that the agent will investigate:
- Topic 1: Genomic-guided targeted therapies for pediatric sarcomas – patient selection and treatment approaches.
- Topic 2: Genomic landscape of pediatric sarcomas – mutations, gene fusions (for example, PAX3), and subtypes including rhabdomyosarcoma, Ewing sarcoma, and osteosarcoma.
- Topic 3: Current FDA-approved targeted therapies – mechanisms of action, efficacy, and genomic profiles.
- Topic 4: Future directions – gene editing, cell-based therapies, novel drug delivery systems, and preclinical research.
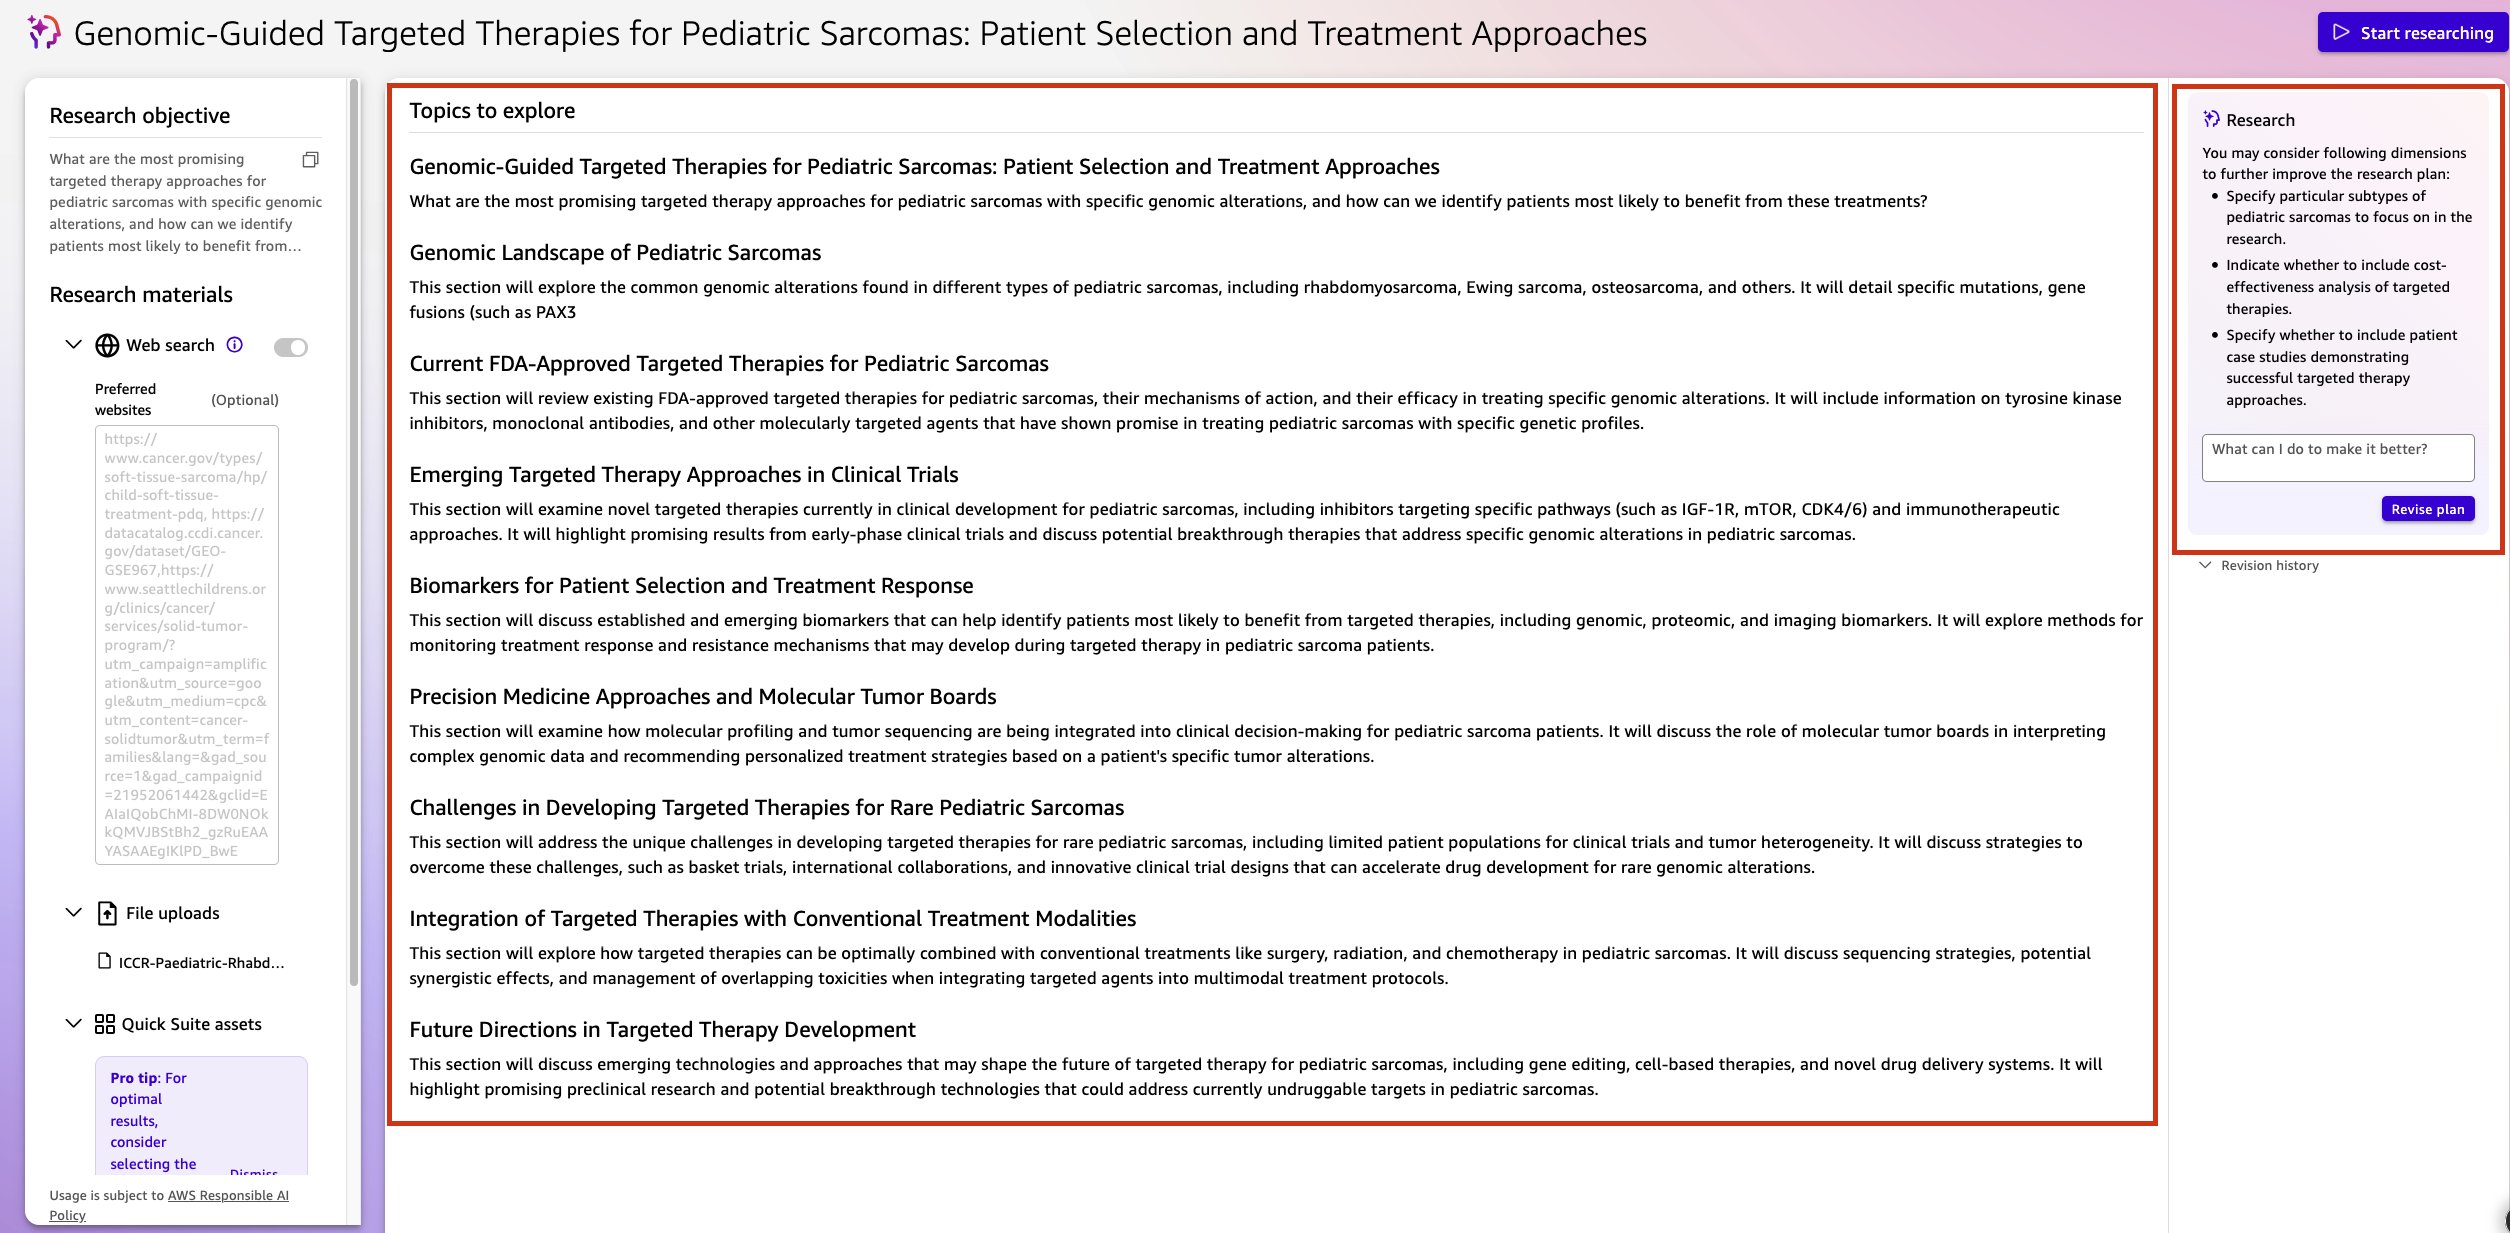
Part 6: Revise the plan (optional) and start research
- Choose Revise Plan to refine the scope before running.
- Add specific areas of focus, such as:
Add a section on specific mutations and gene fusionAdd comparative analysis between different approaches
When you are satisfied with the plan, choose Start Researching.
Confirm that you see a progress indicator and the message Research in progress. The status should change from Not started to In progress.
Part 7: Review the report
Quick Research synthesizes findings into a structured report that includes:
- An executive summary with key discoveries and clinical implications.
- Detailed analysis sections with supporting data visualizations.
- Evidence-based recommendations for future research directions.
- Cited sources and methodology transparency.
- Actionable next steps for clinical implementation.
- Sources.
This process takes about 20–30 minutes to finish.
1. Access the finished research
- Choose Research in the main navigation.
- Look for your research project status. It should show Complete.
- Choose your finished research project.
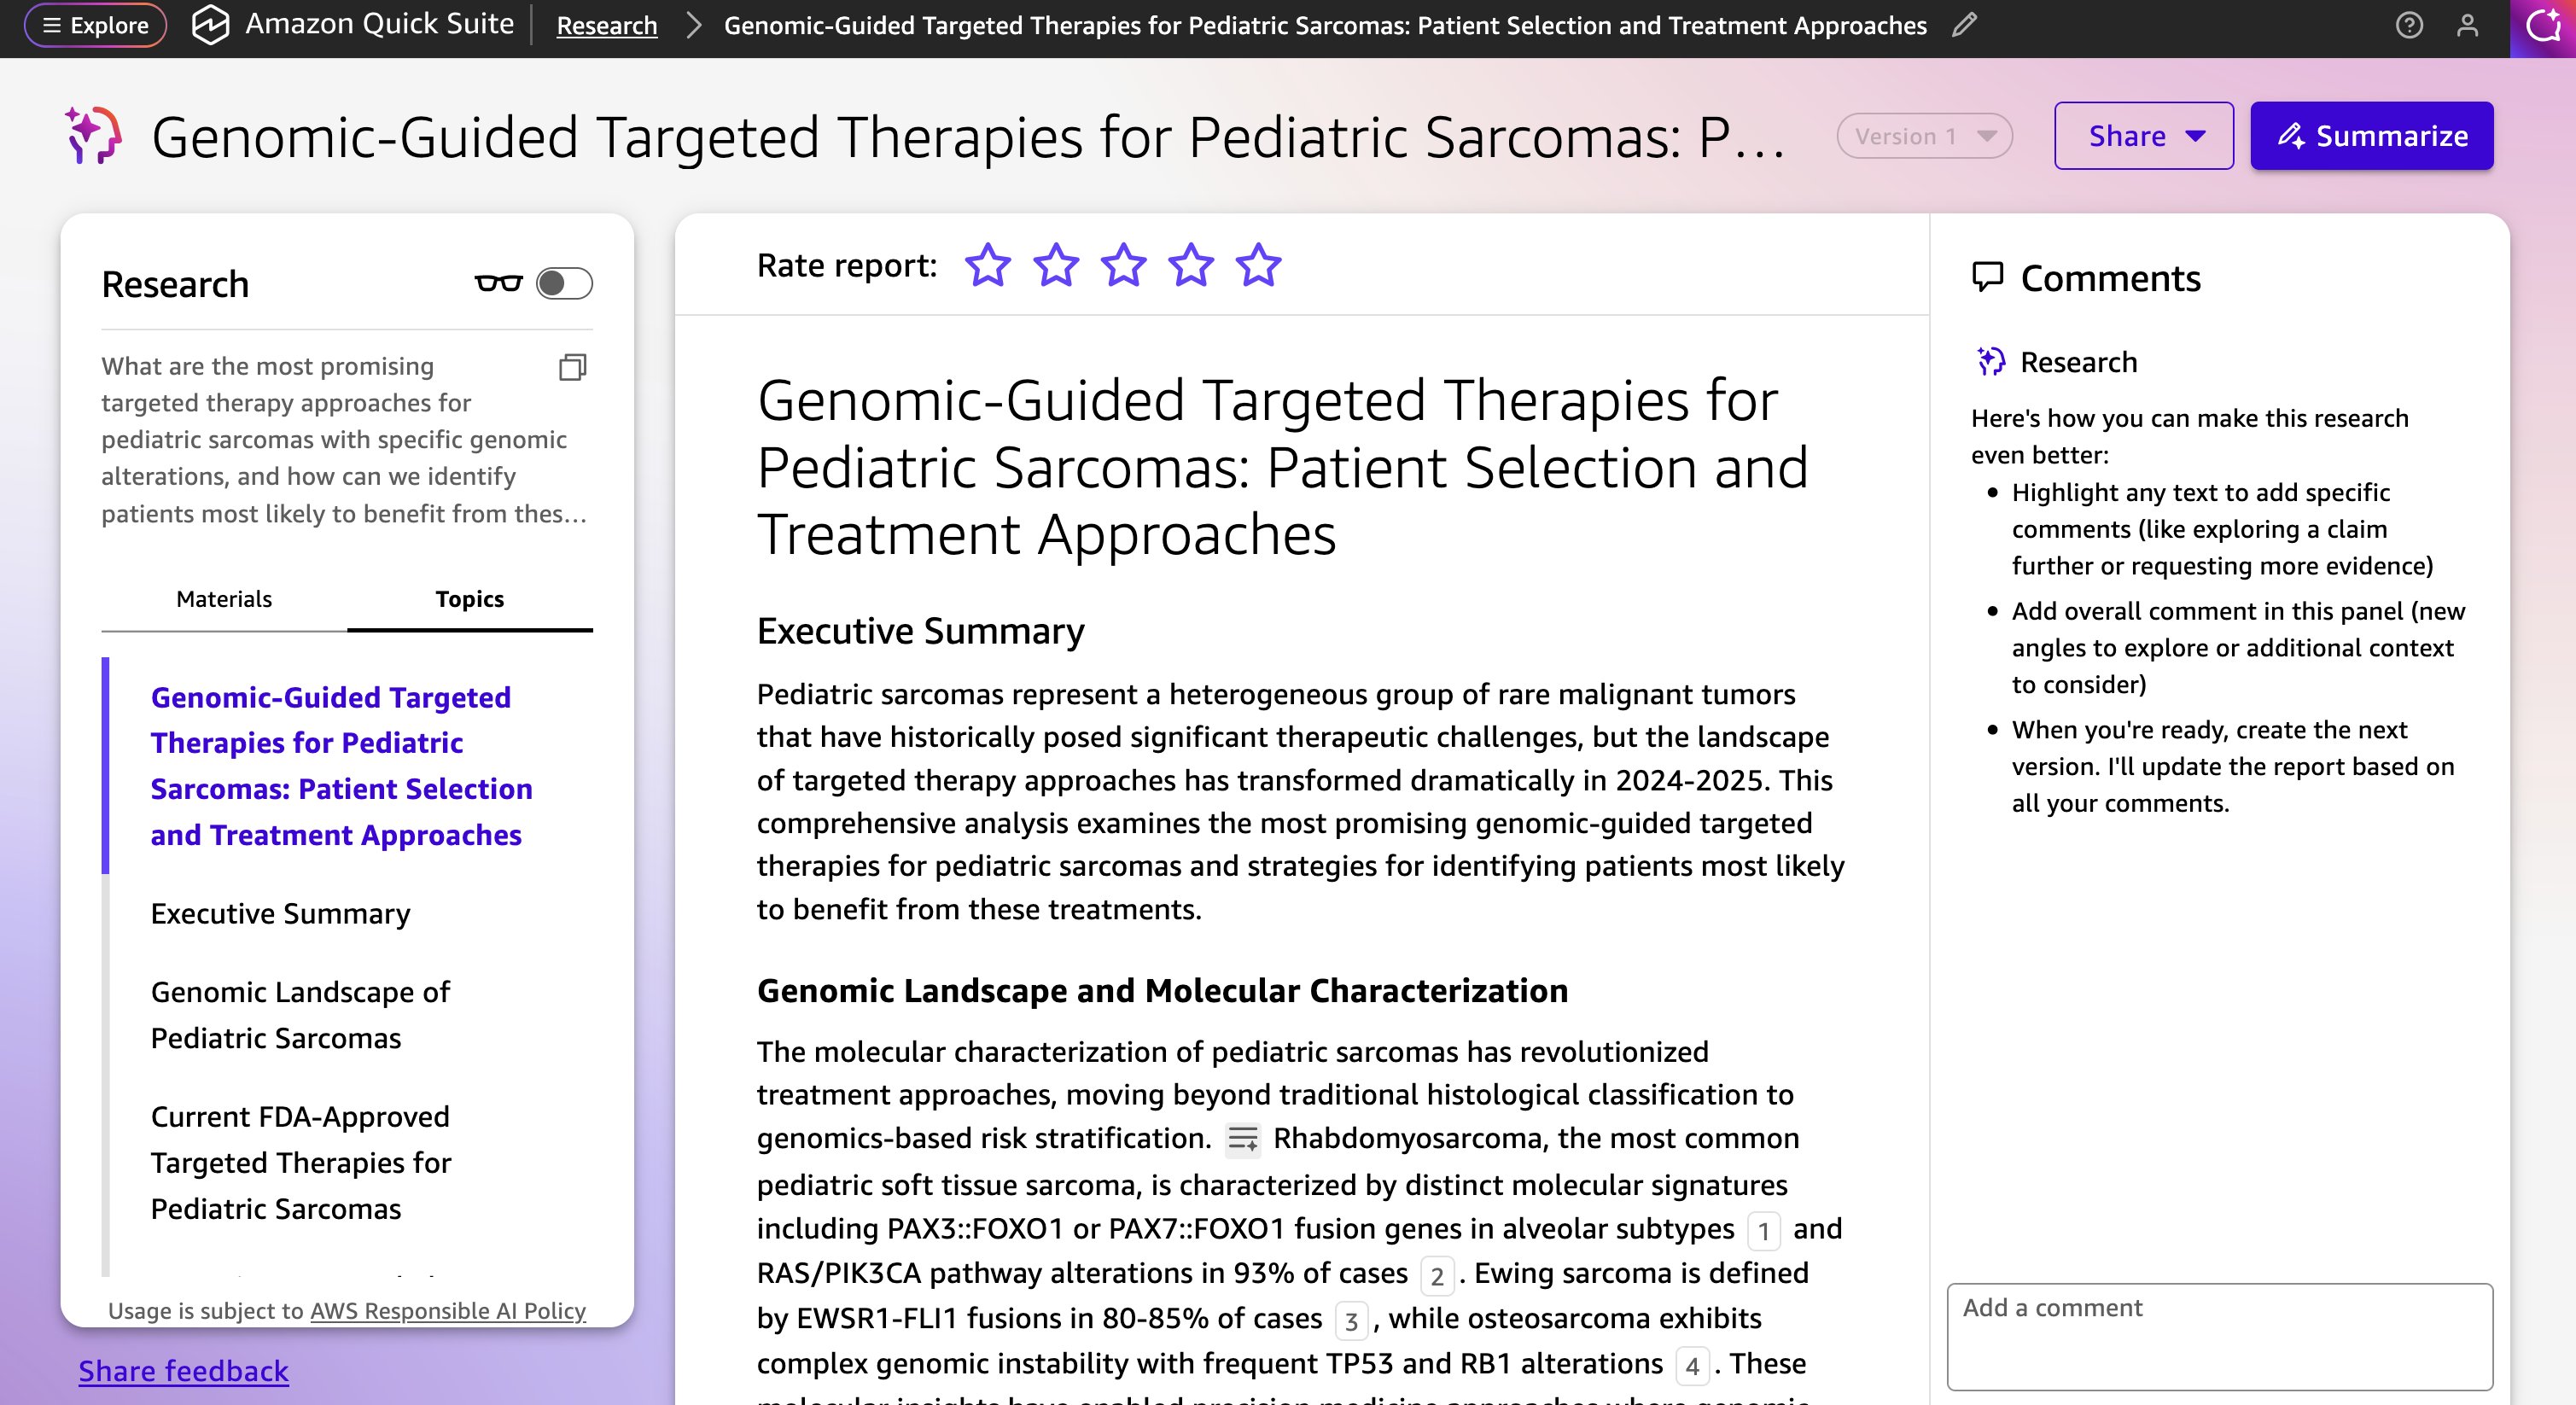
2. Navigate the research report
The report synthesizes information from all selected sources in a structured format.
- Use the Topics tab in the left pane to move between major sections.
- Review supporting evidence and source references within each section.
- Use the Download, Summarize, and Share buttons in the upper-right corner as needed.
- Choose Reading mode to hide sidebars and focus on content.
3. Examine citations
Citations provide direct access to source materials for verification and deeper investigation.
- Look for numbered citations throughout the report.
- Choose a citation number to view source details.
- Notice that the pop-up shows the source article and a hyperlink to the original page.
4. Understand statement analysis
Statement analysis shows the reasoning behind research conclusions and provides transparency in the analysis process.
- Look for the Understand the statement icon (three horizontal lines and a plus).
- Choose the icon next to any statement in the report.
- Review the explanation window, which shows:
- How the statement was determined.
- A summary of evidence.
Part 8: Update research
To refine the research with additional focus areas, add revision comments directly in the report.
1. Add comments for revision
Quick Research uses your comments for revision in subsequent runs.
- In the research report, select text to expand or revise.
- In the Research pane on the right, add comments (up to 400 characters):
Need deeper investigation on "specific topic area"
2. Start the revision process
- Choose the Revise button (becomes available after you add comments).
- Confirm that the Review revision started message appears.
- Quick Research analyzes the existing content and applies the comments.
Research typically takes 20–40 minutes to finish, and the version increments (for example, Version 2) when revision is finished.
3. Review version history
Version control maintains a clear audit trail of the research process and preserves previous iterations.
- Notice that the version number has incremented.
- Compare different versions to see how the feedback was incorporated.
- Track the evolution of the research through versions.
4. Use the summarize feature
Different summary formats serve different audience needs and presentation contexts.
- Choose the Summarize button in the upper right.
- Choose a summary type:
- Executive Summary: VP-oriented, 2-page maximum, no citations.
- General Share Out: Business-friendly, 6-page maximum, essential citations.
- Custom Summary: Tailored format up to 5,000 characters.
5. Download and share
Multiple download formats support different use cases, from formal presentations to collaborative review.
- Use the Download button to get:
- PDF format for presentations.
- Word format for collaborative editing.
- Use the Share button to distribute the research with team members.
Clean up
The following steps permanently delete your research reports and all files uploaded to Spaces. If you want to preserve any research findings or uploaded data, export the reports (PDF or Word format) and download any important files before you proceed.
After your research is finished, you can delete the research document and the assets you created with the following steps:
- Delete the report:
- Choose the report.
- Choose Actions.
- Choose Delete.
- Delete the assets:
- Open the Spaces section in the Amazon Quick console.
- Locate the space you want to remove and choose the More actions (•••) menu next to the space’s name.
- Choose Delete to remove the space.
Deleting these resources stops all associated charges.
Conclusion
In this post, we showed how Amazon Quick Research can integrate publicly available biomedical databases with your own research corpus to support rare cancer investigation. With Quick Research, your team can ask complex questions in natural language that span multiple data sources, identify subtle correlations through AI-powered analytics, and synthesize findings from diverse datasets to support regulatory submissions, funding applications, and clinical decision-making. The result is faster research and more comprehensive, evidence-based insights that can inform clinical decisions, guide future research investments, and improve outcomes for patients facing rare cancer diagnoses.
To get started with your own biomedical datasets:
- Visit the Amazon Quick product page to start a trial and create your first research Space.
- Read the Amazon Quick Research documentation for detailed walkthroughs and best practices.
Have questions or want to share your research success story? Leave a comment, or join the AWS for Industries: Healthcare and Life Sciences community.