使用 AWS Amplify 构建 Flutter 移动应用程序 - 第 1 部分
创建适用于 iOS 和 Android 的行程规划器应用程序


模块 1:创建 Flutter 应用程序
概述
在本模块中,我们将从创建一个新的 Flutter 移动应用程序开始。然后,在应用程序中添加 Amplify 包和其他依赖项。接下来,根据功能优先方法创建应用程序文件夹结构。然后,创建应用程序将用于定义路线和颜色的常量。最后,使用 Amplify CLI 为应用程序预配云后端
要完成的目标
- 创建 Flutter 应用程序
- 添加应用程序依赖项
- 创建应用程序文件夹结构
- 定义应用程序路线和颜色的常量
- 为应用程序创建 Amplify 后端
最短完成时间
15 分钟
操作步骤
创建新的 Flutter 应用程序
步骤 1:在终端运行以下命令,创建 Flutter 应用程序。
flutter create amplify_trips_planner --platforms=ios,android步骤 2:使用 VSCode 打开新创建的 Flutter 应用程序。您可以在终端运行以下命令来完成此步骤。
cd amplify_trips_planner
code . -r
添加应用程序依赖项
步骤 1:更新应用程序根目录中的文件 pubspec.yaml,添加以下 Amplify 包。
  amplify_api: ^1.0.0
  amplify_auth_cognito: ^1.0.0
  amplify_authenticator: ^1.0.0
  amplify_flutter: ^1.0.0
amplify_storage_s3: ^1.0.0步骤 2:应用程序将使用其他依赖项实现其功能,例如状态管理、图像选取器和导航。更新应用程序根目录中的文件 pubspec.yaml,添加以下包作为依赖项。
  cached_network_image: ^3.2.3
  cupertino_icons: ^1.0.5
  flutter_riverpod: ^2.1.3
  go_router: ^7.0.0
  image_picker: ^0.8.0
  intl: ^0.18.0
  path: ^1.8.3
  riverpod_annotation: ^2.0.1
uuid: ^3.0.7步骤 3:为了改进编码体验,我们将使用一组开发依赖项,例如,代码检查包(可鼓励良好的编码习惯)和代码生成包(可简化状态管理实施)。更新应用程序根目录中的文件 pubspec.yaml,添加以下包作为 dev_dependencies。
  amplify_lints: ^3.0.0
  build_runner:
  custom_lint:
  flutter_test:
    sdk: flutter
  riverpod_generator: ^2.1.3
  riverpod_lint: ^1.1.5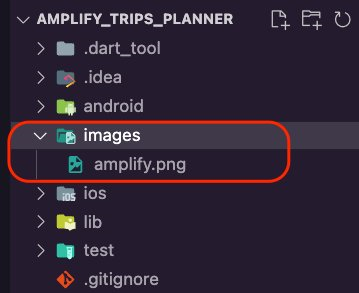
.475c5857281340bb1b377b617fb6101faab4eab6.png)
步骤 5:更新文件 pubspec.yaml,将其添加到 assets 部分。
flutter:
  uses-material-design: true
  assets:
- images/amplify.pngThe pubspec.yaml file should look like the this:
name: amplify_trips_planner
description: A new Flutter project.
version: 1.0.0+1

environment:
  sdk: ">=3.0.2 <4.0.0"

dependencies:
  amplify_api: ^1.0.0
  amplify_auth_cognito: ^1.0.0
  amplify_authenticator: ^1.0.0
  amplify_flutter: ^1.0.0
  amplify_storage_s3: ^1.0.0
  cached_network_image: ^3.2.3
  cupertino_icons: ^1.0.5
  flutter:
    sdk: flutter
  flutter_riverpod: ^2.1.3
  go_router: ^7.0.0
  image_picker: ^0.8.0
  intl: ^0.18.0
  path: ^1.8.3
  riverpod_annotation: ^2.0.1
  uuid: ^3.0.7


dev_dependencies:
  amplify_lints: ^3.0.0
  build_runner:
  custom_lint:
  flutter_test:
    sdk: flutter
  riverpod_generator: ^2.1.3
  riverpod_lint: ^1.1.5

flutter:
  uses-material-design: true
  assets:
- images/amplify.png步骤 6:在终端运行以下命令,安装已添加到 pubspec.yaml 文件中的依赖项。
flutter pub get步骤 7:更新目标 iOS 平台,为此需前往 ios/ 文件夹,并将 Podfile 更改为目标 iOS 平台 13.5 或更高版本。
platform :ios, '13.5'
步骤 8:更新目标 Android SDK,为此需前往 android/app/ 文件夹,并修改 build.gradle 文件,将目标 Android SDK 版本更新到 24 或更高版本。
minSdkVersion 24
创建应用程序文件夹结构
本指南将使用功能优先方法创建应用程序结构。我们将为每个应用程序功能创建一个文件夹,在该文件夹中,我们可以将层添加为子文件夹。
步骤 1:在 lib 文件夹中新建一个文件夹并将其命名为 features,然后在 features 文件夹中新建一个文件夹并将其命名为 trip。

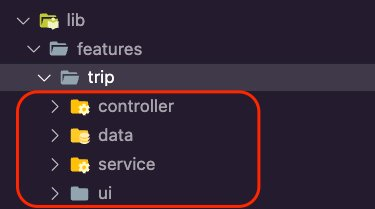
步骤 2:在 trip 文件夹中创建以下新文件夹:
- service:与 Amplify 后端连接的层。
- data:这将是提取网络代码(特别是 service)的存储库层。
- controller:这是一个抽象层,用于连接 UI 和存储库。
- ui:在此处创建应用程序将呈现给用户的窗口部件和页面。
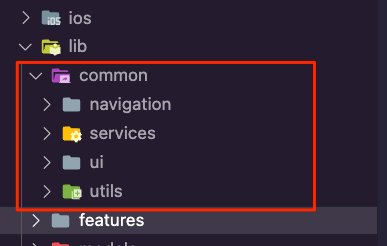
步骤 3:在 lib 文件夹中新建一个文件夹并将其命名为 common。我们将使用此文件夹存储在应用程序功能之间共享的代码。

步骤 4:在 common 文件夹中创建以下新文件夹:
- ui:在此处创建应用程序将呈现给用户的窗口部件和页面。
- navigation:将使用此文件夹定义应用程序路线。
- services:将在其中创建与 Amplify 后端连接的服务。
- utils:此文件夹将包含应用程序经常使用的常量,例如颜色。
定义路线和颜色的常量
步骤 1:在 lib/common/navigation 文件夹中创建一个文件夹并将其命名为 router,然后在 router文件夹中新建一个 dart 文件并将其命名为 routes.dart。

步骤 2:打开 routes.dart 文件并使用以下代码更新该文件。我们将使用以下 enum 创建应用程序的路线。
enum AppRoute {
  home,
  trip,
  editTrip,
}步骤 3:在 lib/common/utils 文件夹中新建一个 dart 文件并将其命名为 colors.dart。

步骤 4:打开 colors.dart 文件并使用以下代码更新该文件,以创建用于设置应用程序颜色的常量变量。
import 'package:flutter/material.dart';
const Map<int, Color> primarySwatch = {
  50: Color.fromRGBO(255, 207, 68, .1),
  100: Color.fromRGBO(255, 207, 68, .2),
  200: Color.fromRGBO(255, 207, 68, .3),
  300: Color.fromRGBO(255, 207, 68, .4),
  400: Color.fromRGBO(255, 207, 68, .5),
  500: Color.fromRGBO(255, 207, 68, .6),
  600: Color.fromRGBO(255, 207, 68, .7),
  700: Color.fromRGBO(255, 207, 68, .8),
  800: Color.fromRGBO(255, 207, 68, .9),
  900: Color.fromRGBO(255, 207, 68, 1),
};
const MaterialColor primaryColor = MaterialColor(0xFFFFCF44, primarySwatch);
const int primaryColorDark = 0xFFFD9725;为应用程序创建 Amplify 后端
步骤 1:前往应用程序的根文件夹,然后在终端运行以下命令,为应用程序预配 Amplify 后端。
amplify init步骤 2:输入 Amplify 项目的名称,或者接受建议的名称,并按下 Enter。
? Enter a name for the project amplifytripsplanner
The following configuration will be applied:

Project information
| Name: amplifytripsplanner
| Environment: dev
| Default editor: Visual Studio Code
| App type: flutter
| Configuration file location: ./lib/

? Initialize the project with the above configuration? (Y/n) 步骤 3:再次按下 Enter 以接受自动生成的选项并选择 AWS 身份验证方法。在本例中,我们使用的是 AWS 配置文件。Amplify CLI 将初始化后端并将项目连接到云。
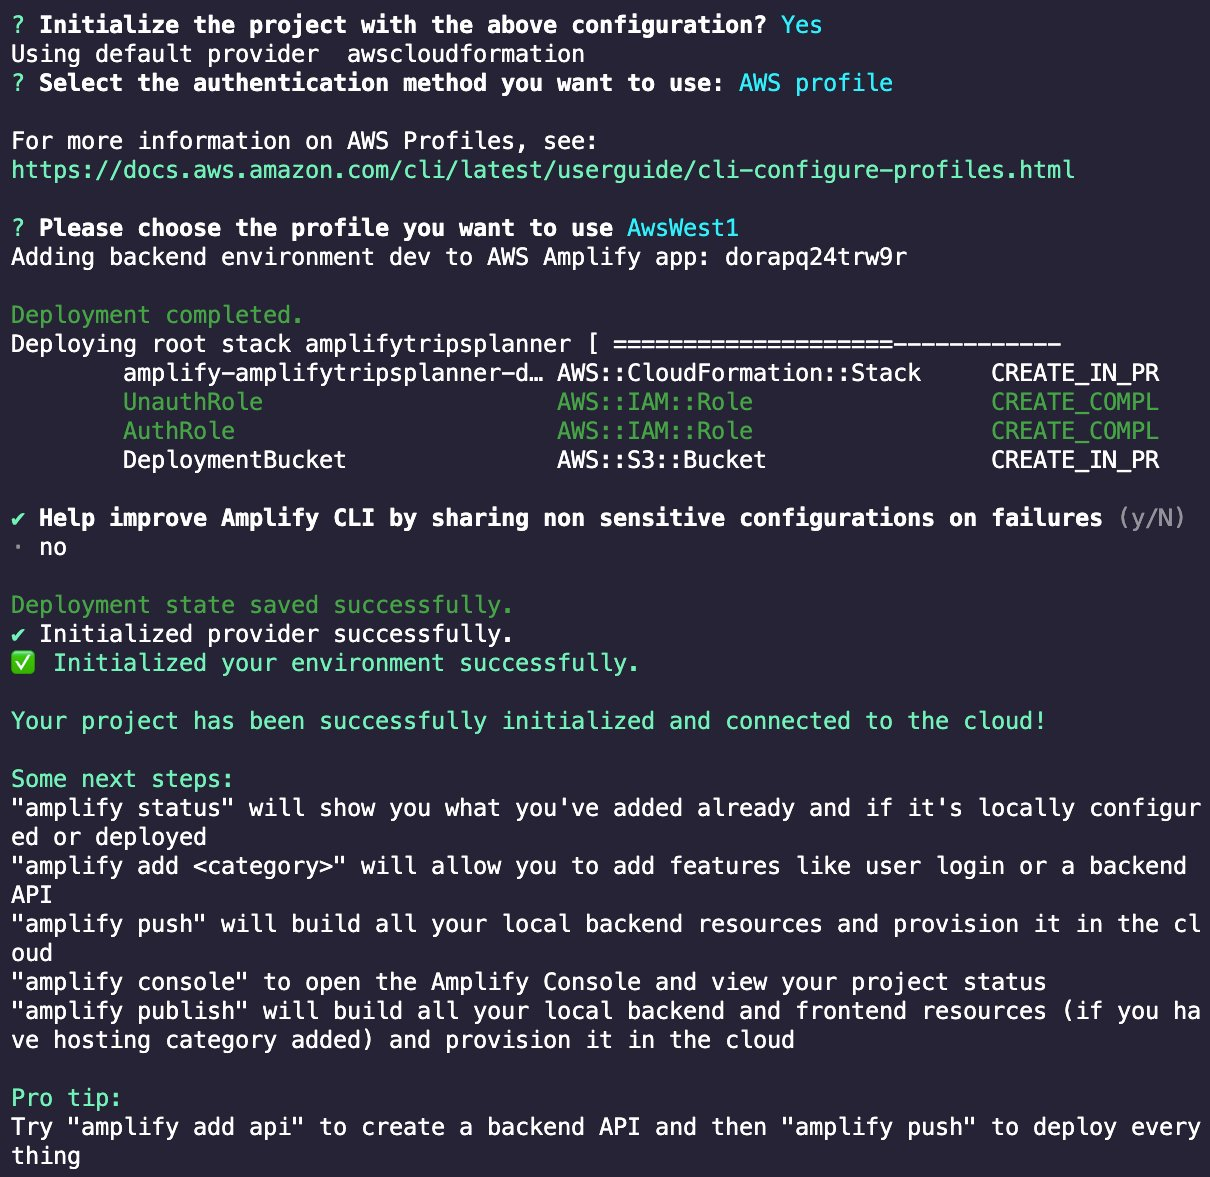
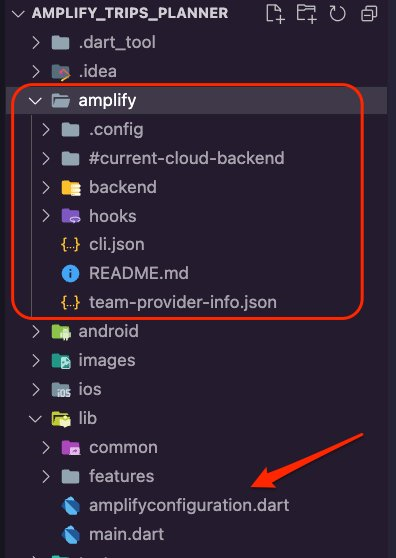
Amplify CLI 将在应用程序的根文件夹中添加一个名为 Amplify 的新文件夹,该文件夹包含 Amplify 项目和后端详细信息。此外,还将在 lib/ 文件夹中添加一个新的 dart 文件 (amplifyconfiguration.dart)。应用程序将使用此文件了解如何在运行时访问所预配的后端资源。
结果
在本模块中,您学会了如何创建 Flutter 应用程序。还学会了如何使用功能优先方法设置其文件夹结构。此外,您还为应用程序创建了用来设置路线和颜色的常量变量。最后,您使用 Amplify CLI 为应用程序预配了云后端。
添加 Amplify 身份验证