Artificial Intelligence
Predict customer churn with no-code machine learning using Amazon SageMaker Canvas
Understanding customer behavior is top of mind for every business today. Gaining insights into why and how customers buy can help grow revenue. But losing customers (also called customer churn) is always a risk, and insights into why customers leave can be just as important for maintaining revenues and profits. Machine learning (ML) can help with insights, but up until now you needed ML experts to build models to predict churn, the lack of which could delay insight-driven actions by businesses to retain customers.
In this post, we show you how business analysts can build a customer churn ML model with Amazon SageMaker Canvas, no code required. Canvas provides business analysts with a visual point-and-click interface that allows you to build models and generate accurate ML predictions on your own—without requiring any ML experience or having to write a single line of code.
Overview of solution
For this post, we assume the role of a marketing analyst in the marketing department of a mobile phone operator. We have been tasked with identifying customers that are potentially at risk of churning. We have access to service usage and other customer behavior data, and want to know if this data can help explain why a customer would leave. If we can identify factors that explain churn, then we can take corrective actions to change predicted behavior, such as running targeted retention campaigns.
To do this, we use the data we have in a CSV file, which contains information about customer usage and churn. We use Canvas to perform the following steps:
- Import the churn dataset from Amazon Simple Storage Service (Amazon S3).
- Train and build the churn model.
- Analyze the model results.
- Test predictions against the model.
For our dataset, we use a synthetic dataset from a telecommunications mobile phone carrier. This sample dataset contains 5,000 records, where each record uses 21 attributes to describe the customer profile. The attributes are as follows:
- State – The US state in which the customer resides, indicated by a two-letter abbreviation; for example, OH or NJ
- Account Length – The number of days that this account has been active
- Area Code – The three-digit area code of the customer’s phone number
- Phone – The remaining seven-digit phone number
- Int’l Plan – Whether the customer has an international calling plan (yes/no)
- VMail Plan – Whether the customer has a voice mail feature (yes/no)
- VMail Message – The average number of voice mail messages per month
- Day Mins – The total number of calling minutes used during the day
- Day Calls – The total number of calls placed during the day
- Day Charge – The billed cost of daytime calls
- Eve Mins, Eve Calls, Eve Charge – The billed cost for evening calls
- Night Mins, Night Calls, Night Charge – The billed cost for nighttime calls
- Intl Mins, Intl Calls, Intl Charge – The billed cost for international calls
- CustServ Calls – The number of calls placed to customer service
- Churn? – Whether the customer left the service (true/false)
The last attribute, Churn?, is the attribute that we want the ML model to predict. The target attribute is binary, meaning our model predicts the output as one of two categories (True or False).
Prerequisites
A cloud admin with an AWS account with appropriate permissions is required to complete the following prerequisites:
- Deploy an Amazon SageMaker For instructions, see Onboard to Amazon SageMaker Domain.
- Deploy Canvas. For instructions, see Setting up and managing Amazon SageMaker Canvas (for IT administrators).
- Configure cross-origin resource sharing (CORS) policies for Canvas. For instructions, see Give your users the ability to upload local files.
Create a customer churn model
First, let’s download the churn dataset and review the file to make sure all the data is there. Then complete the following steps:
- Sign in to the AWS Management Console, using an account with the appropriate permissions to access Canvas.
- Log in to the Canvas console.
This is where we can manage our datasets and create models.
- Choose Import.

- Choose Upload and select the
churn.csvfile. - Choose Import data to upload it to Canvas.

The import process takes approximately 10 seconds (this can vary depending on dataset size). When it’s complete, we can see the dataset is in Ready status.

- To preview the first 100 rows of the dataset, hover your mouse over the eye icon.

A preview of the dataset appears. Here we can verify that our data is correct.

After we confirm that the imported dataset is ready, we create our model.
- Choose New model.

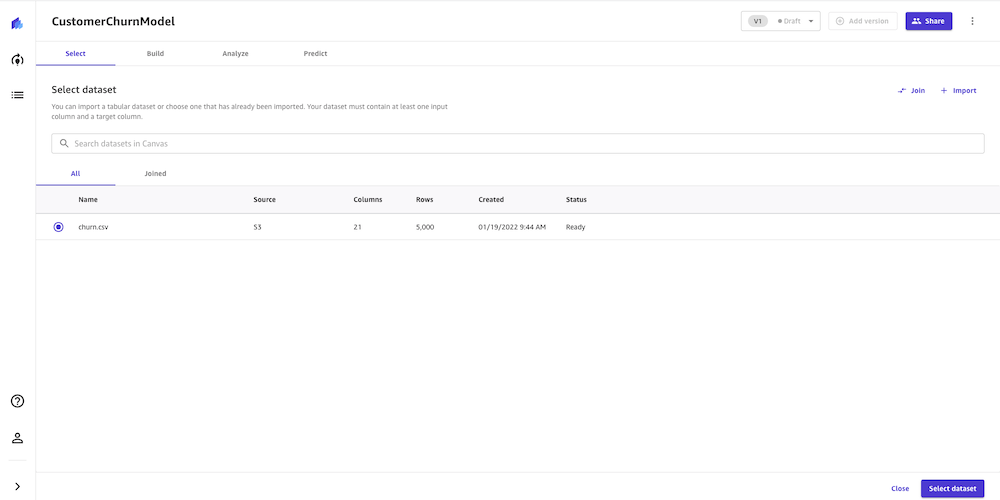
- Select the churn.csv dataset and choose Select dataset.
Now we configure the build model process.
- For Target columns, choose the
Churn?column.
For Model type, Canvas automatically recommends the model type, in this case 2 category prediction (what a data scientist would call binary classification). This is suitable for our use case because we have only two possible prediction values: True or False, so we go with the recommendation Canvas made.

We now validate some assumptions. We want to get a quick view into whether our target column can be predicted by the other columns. We can get a fast view into the model’s estimated accuracy and column impact (the estimated importance of each column in predicting the target column).
- Select all 21 columns and choose Preview model.
This feature uses a subset of our dataset and only a single pass at modeling. For our use case, the preview model takes approximately 2 minutes to build.

As shown in the following screenshot, the Phone and State columns have much less impact on our prediction. We want to be careful when removing text input because it can contain important discrete, categorical features contributing to our prediction. Here, the phone number is just the equivalent of an account number—not of value in predicting other accounts’ likelihood of churn, and the customer’s state doesn’t impact our model much.
- We remove these columns because they have no major feature importance.

- After we remove the
PhoneandStatecolumns, let’s run the preview again.
As shown in the following screenshot, the model accuracy increased by 0.1%. Our preview model has a 95.9% estimated accuracy, and the columns with the biggest impact are Night Calls, Eve Mins, and Night Charge. This gives us an insight into what columns impact the performance of our model the most. Here we need to be careful when doing feature selection because if a single feature is extremely impactful on a model’s outcome, it’s a primary indicator of target leakage, and the feature won’t be available at the time of prediction. In this case, few columns showed very similar impact, so we continue to build our model.

Canvas offers two build options:
- Standard build – Builds the best model from an optimized process powered by AutoML; speed is exchanged for greatest accuracy
- Quick build – Builds a model in a fraction of the time compared to a standard build; potential accuracy is exchanged for speed.
- For this post, we choose the Standard build option because we want to have the very best model and we are willing to spend additional time waiting the result.

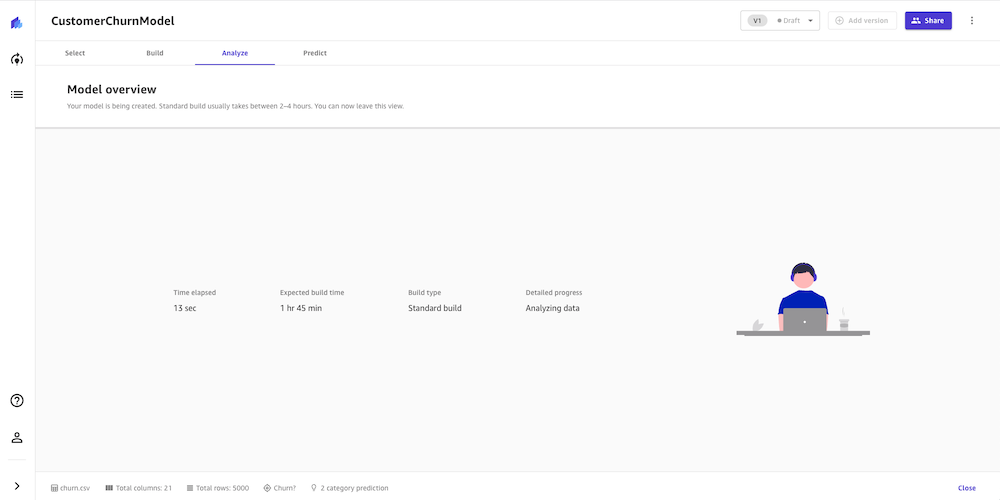
The build process can take 2–4 hours. During this time, Canvas tests hundreds of candidate pipelines, selecting the best model to present to us. In the following screenshot, we can see the expected build time and progress.
Evaluate model performance
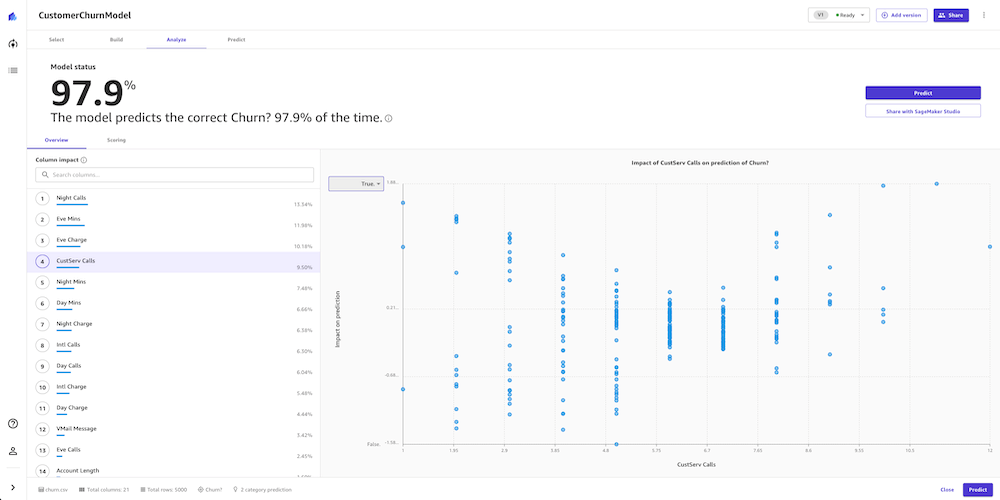
When the model building process is complete, the model predicted churn 97.9% of the time. This seems fine, but as analysts we want to dive deeper and see if we can trust the model to make decisions based on it. On the Scoring tab, we can review a visual plot of our predictions mapped to their outcomes. This allows us a deeper insight into our model.
Canvas separates the dataset into training and test sets. The training dataset is the data Canvas uses to build the model. The test set is used to see if the model performs well with new data. The Sankey diagram in the following screenshot shows how the model performed on the test set. To learn more, refer to Evaluating Your Model’s Performance in Amazon SageMaker Canvas.

To get more detailed insights beyond what is displayed in the Sankey diagram, business analysts can use a confusion matrix analysis for their business solutions. For example, we want to better understand the likelihood of the model making false predictions. We can see this in the Sankey diagram, but want more insights, so we choose Advanced metrics. We’re presented with a confusion matrix, which displays the performance of a model in a visual format with the following values, specific to the positive class—we’re measuring based on whether they will in fact churn, so our positive class is True in this example:
- True Positive (TP) – The number of
Trueresults that were correctly predicted asTrue - True Negative (TN) – The number of
Falseresults that were correctly predicted asFalse - False Positive (FP) – The number of
Falseresults that were wrongly predicted asTrue - False Negative (FN) – The number of
Trueresults that were wrongly predicted asFalse
We can use this matrix chart to determine not only how accurate our model is, but when it is wrong, how often that might be and how it’s wrong.

The advanced metrics look good. We can trust the model result. We see very low false positives and false negatives. These are if the model thinks a customer in the dataset will churn and they actually don’t (false positive), or if the model thinks the customer will churn and they actually do (false negative). High numbers for either might make us think more on if we can use the model to make decisions.
Let’s go back to Overview tab, to review the impact of each column. This information can help the marketing team gain insights that lead to taking actions to reduce customer churn. For example, we can see that both low and high CustServ Calls increase the likelihood of churn. The marketing team can take actions to prevent customer churn based on these learnings. Examples include creating a detailed FAQ on websites to reduce customer service calls, and running education campaigns with customers on the FAQ that can keep engagement up.
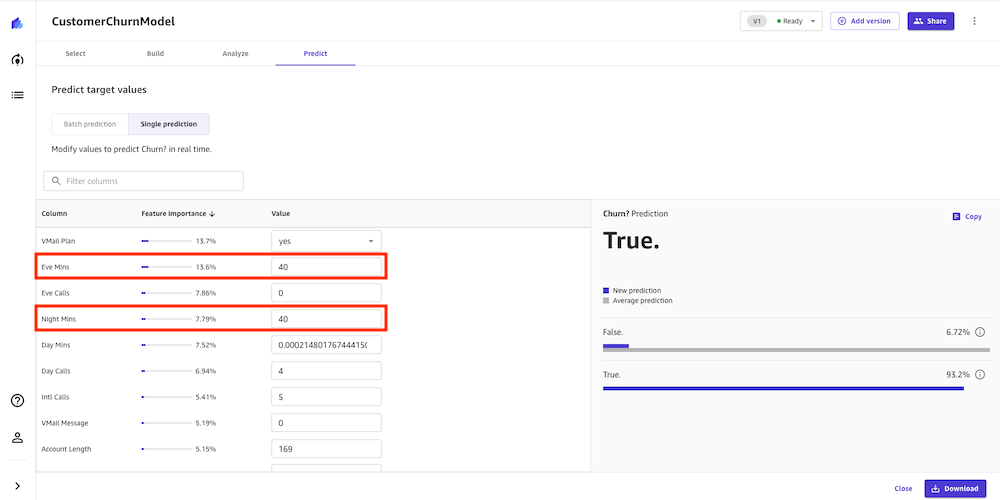
Our model looks pretty accurate. We can directly perform an interactive prediction on the Predict tab, either in batch or single (real-time) prediction. In this example, we made a few changes to certain column values and performed a real-time prediction. Canvas shows us the prediction result along with the confidence level.
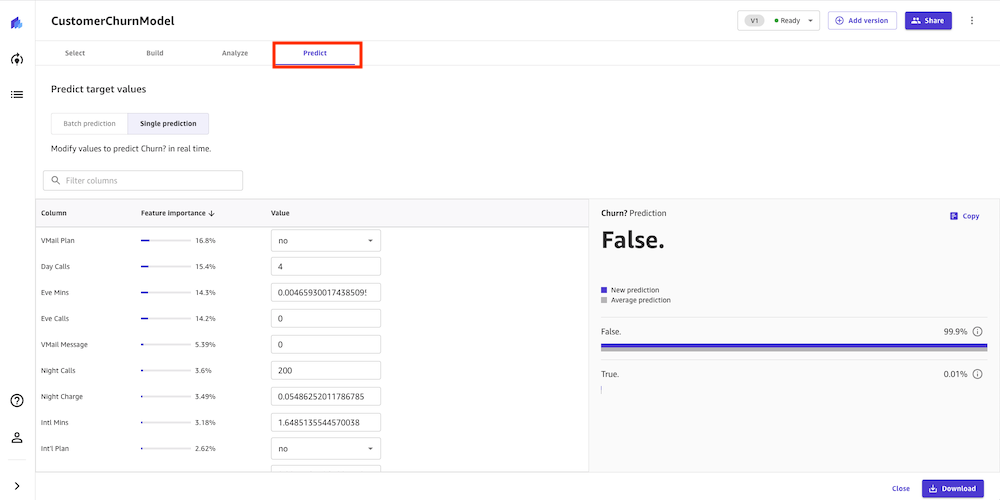
Let’s say we have an existing customer who has the following usage: Night Mins is 40 and Eve Mins is 40. We can run a prediction, and our model returns a confidence score of 93.2% that this customer will churn (True). We might now choose to provide promotional discounts to retain this customer.
Let’s say we have an existing customer who has the following the usage: Night Mins is 40 and Eve Mins is 40. We can run a prediction, and our model returns a confidence score of 93.2% that this customer will churn (True). We might now choose to provide promotion discounts to retain this customer.
Running one prediction is great for individual what-if analysis, but we also need to run predictions on many records at once. Canvas is able to run batch predictions, which allows you to run predictions at scale.
Clean up
To avoid incurring future session charges, log out of SageMaker Canvas.

Conclusion
In this post, we showed how a business analyst can create a customer churn model with SageMaker Canvas using sample data. Canvas allows your business analysts to create accurate ML models and generate predictions using a no-code, visual, point-and-click interface. A marketing analysist can now use this information to run targeted retention campaigns and test new campaign strategies faster, leading to a reduction in customer churn.
Analysts can take this to the next level by sharing their models with data scientist colleagues. The data scientists can view the Canvas model in Amazon SageMaker Studio, where they can explore the choices Canvas AutoML made, validate model results, and even productionalize the model with a few clicks. This can accelerate ML-based value creation and help scale improved outcomes faster.
To learn more about using Canvas, see Build, Share, Deploy: how business analysts and data scientists achieve faster time-to-market using no-code ML and Amazon SageMaker Canvas. For more information about creating ML models with a no-code solution, see Announcing Amazon SageMaker Canvas – a Visual, No Code Machine Learning Capability for Business Analysts.
About the Author
 Henry Robalino is a Solutions Architect at AWS, based out of NJ. He is passionate about cloud and machine learning, and the role they can play in society. He achieves this by working with customers to help them achieve their business goals using the AWS Cloud. Outside of work, you can find Henry traveling or exploring the outdoors with his fur daughter Arly.
 Chaoran Wang is a Solution Architect at AWS, based in Dallas, TX. He has been working at AWS since graduating from the University of Texas at Dallas in 2016 with a master’s in Computer Science. Chaoran helps customers build scalable, secure, and cost-effective applications and find solutions to solve their business challenges on the AWS Cloud. Outside work, Chaoran loves spending time with his family and two dogs, Biubiu and Coco.