Artificial Intelligence
Create an intelligent insurance underwriter agent powered by Amazon Nova 2 Lite and Amazon Quick Suite
Insurance underwriting requires analyzing multiple data sources, evaluating risks, and making decisions that meet regulatory requirements. The underwriters face three core challenges:
- Siloed data scattered across Customer Relationship Management (CRM) systems, document repositories, and transactional databases
- Regulatory requirements for explainable, auditable decisions that traditional black box AI can’t satisfy
- The need for consistent, automated underwriting rules with proactive fraud detection across portfolios
In this post, we show how to overcome these challenges with an enterprise-grade underwriting solution using Amazon Nova 2 Lite that unifies your data sources and delivers audit-ready risk assessments.
Solution overview
The solution uses Model Context Protocol (MCP) tools for insurance fraud detection, risk assessment of an applicant, and underwriting decisions. When a tool is invoked based on a user query, the tool fetches data from required data sources—document repositories like Amazon Simple Storage Service (Amazon S3) and databases like Amazon DynamoDB—and calls the Amazon Nova 2 Lite large language model (LLM) for analysis and decision-making. After retrieving the associated system prompt and the context provided, the LLM returns a response in the structure the tool expects. The MCP server is deployed in Amazon Bedrock AgentCore Runtime with OAuth 2.0 inbound authorization. The Amazon Quick Suite MCP client is configured using service authentication to allow inbound connections to the MCP server. The user interacts with the Quick Suite chat agent in a natural language. The agent invokes the required MCP tools and engages in multi-turn conversations with the user.
The following diagram illustrates the solution architecture.
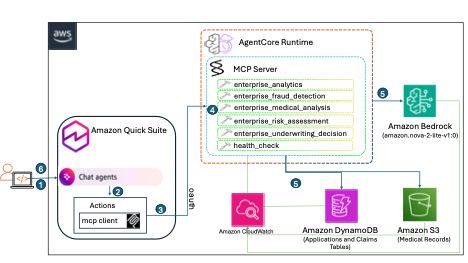
Figure 1: Architecture and dataflow
The workflow consists of the following steps:
- An authenticated Quick Suite user accesses the Quick Suite chat agent and submits a prompt through the assistant chat interface. For example, “Access the risk for applicant APP-0900.”
- The chat agent is integrated with Amazon Quick Suite MCP Actions Integrations to invoke actions on an MCP server deployed in AgentCore Runtime. The agent analyzes the prompt to understand the intent and identifies key entities (such as applicant IDs and claim numbers), and decides which MCP tools to invoke.
- The Quick Suite MCP client requests an access token from Amazon Cognito using the OAuth client credentials. Amazon Cognito validates the credentials and issues a short-lived access token. Quick Suite includes this token in the request to AgentCore Runtime that validates the token against Amazon Cognito.
- AgentCore Runtime has a built-in translation that transforms the incoming request into MCP JSON-RPC 2.0 format and invokes the appropriate tools on the MCP server. Logging can be enabled on AgentCore Runtime to log the events in Amazon CloudWatch.
- The MCP server executes the tool logic to retrieve data from DynamoDB and Amazon S3, and to invoke Amazon Nova 2 Lite through the Amazon Bedrock Converse API to generate a response with a detailed reasoning process.
- The final response is transformed back to match the incoming request protocol for Quick Suite, and the response is returned to the user through the chat agent-powered assistant interface.
Amazon Nova 2 Lite can request tools and understand tool schemas. It performs reasoning to determine which tools are needed based on user queries. It then generates tool requests with validated parameters that the MCP server executes. Solution deployment consists of the following high-level steps:
- Host the MCP server on Amazon Bedrock AgentCore.
- Integrate Quick Suite with the MCP server.
- Test the integration.
- Create and launch the Quick Suite chat agent.
Prerequisites
The following prerequisites are required to deploy the solution:
- An AWS account
- Quick Suite set up with Author Pro subscription
- Permission to create AWS Identity and Access Management (IAM) roles and policies and AWS resources, including a DynamoDB table, S3 bucket, Amazon Cognito user pool, and AgentCore Runtime
- Access to a command line environment with the AWS SDK and Python installed
Host MCP server on Amazon Bedrock AgentCore
Complete the following steps to host the MCP server on Amazon Bedrock AgentCore:
- Clone the code repository.
- Edit the configuration file
config/enterprise_config.yamlto provide the name of the MCP server, Amazon Cognito user pool, DynamoDB tables containing applicants and claims, and S3 bucket for medical records. - Set up a virtual environment:
- Optionally, generate synthetic applicants, medical records, and claims. You can skip this step if you don’t require synthetic data generation.
Synthetic data generation uses the faker library to generate applicant records and claims records that get persisted to DynamoDB and medical records that get persisted to Amazon S3 in JSON format. You can modify the record schema or formats by customizing load_data.py to generate data according to your needs.
- Deploy the MCP server to Amazon Bedrock AgentCore.
This step creates an Amazon Cognito user pool, builds a Docker image, deploys it to Amazon Bedrock AgentCore, configures IAM permissions, and generates docs/QUICK_SUITE_INTEGRATION.md with the MCP server endpoint URL and OAuth configuration to integrate it with Quick Suite.
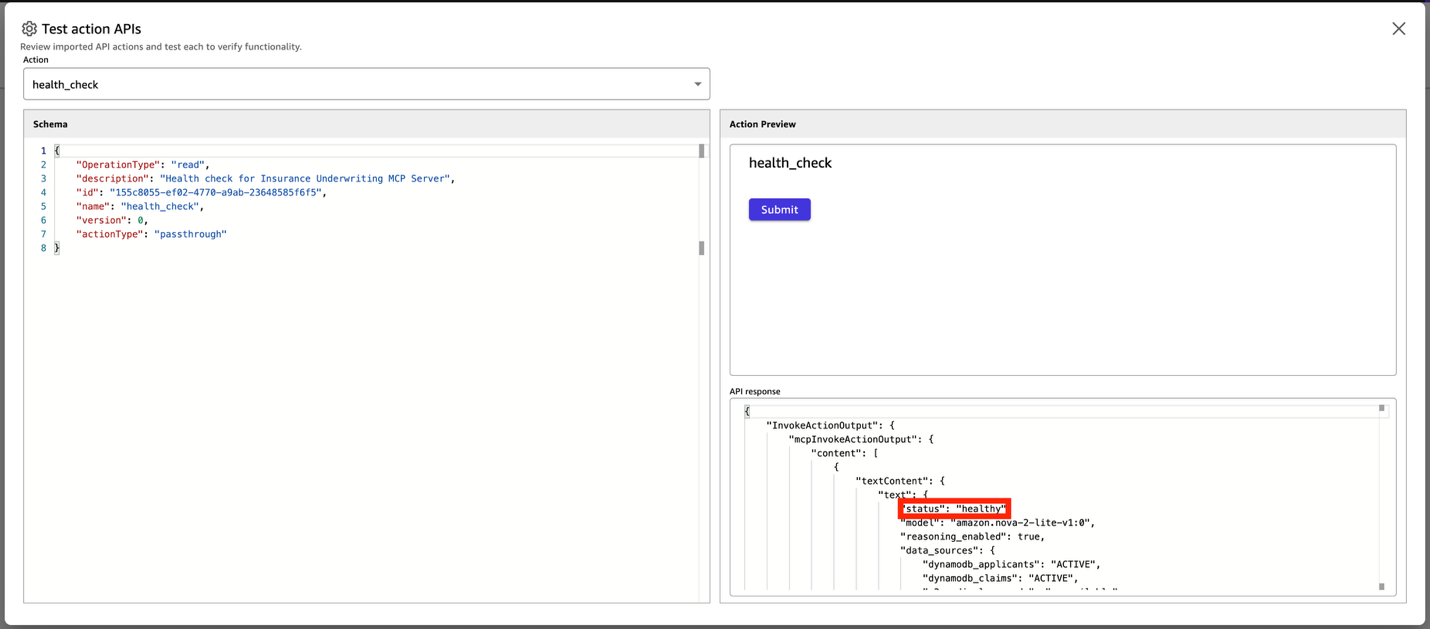
- Test the functionality of MCP tools:
Successful execution of this test script will provide an output as shown in the following screenshots.
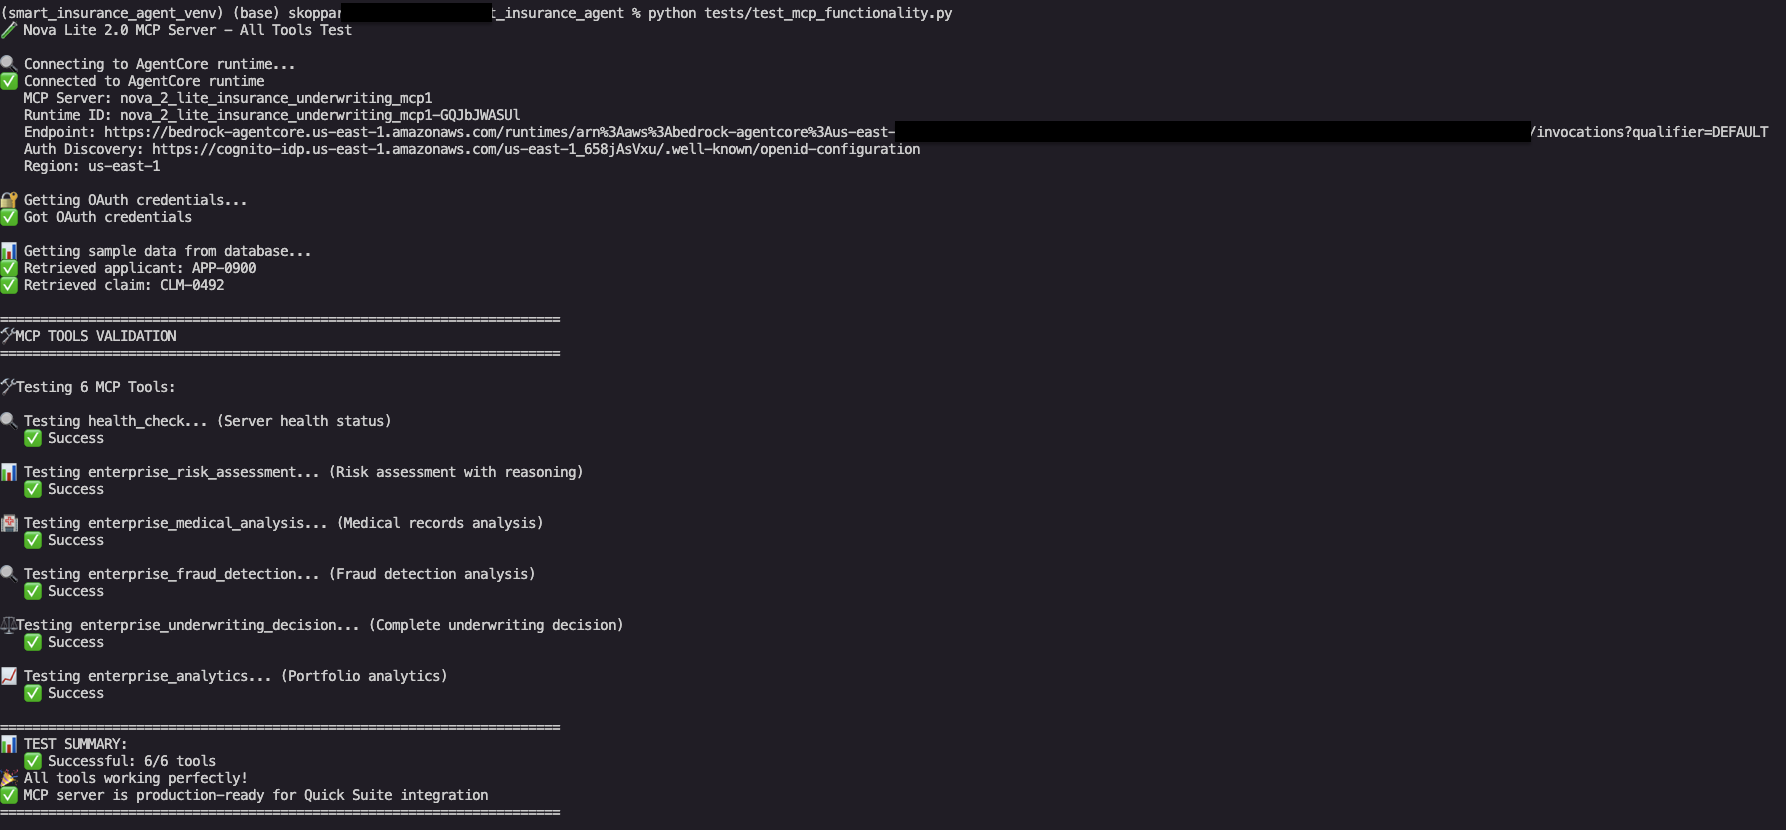
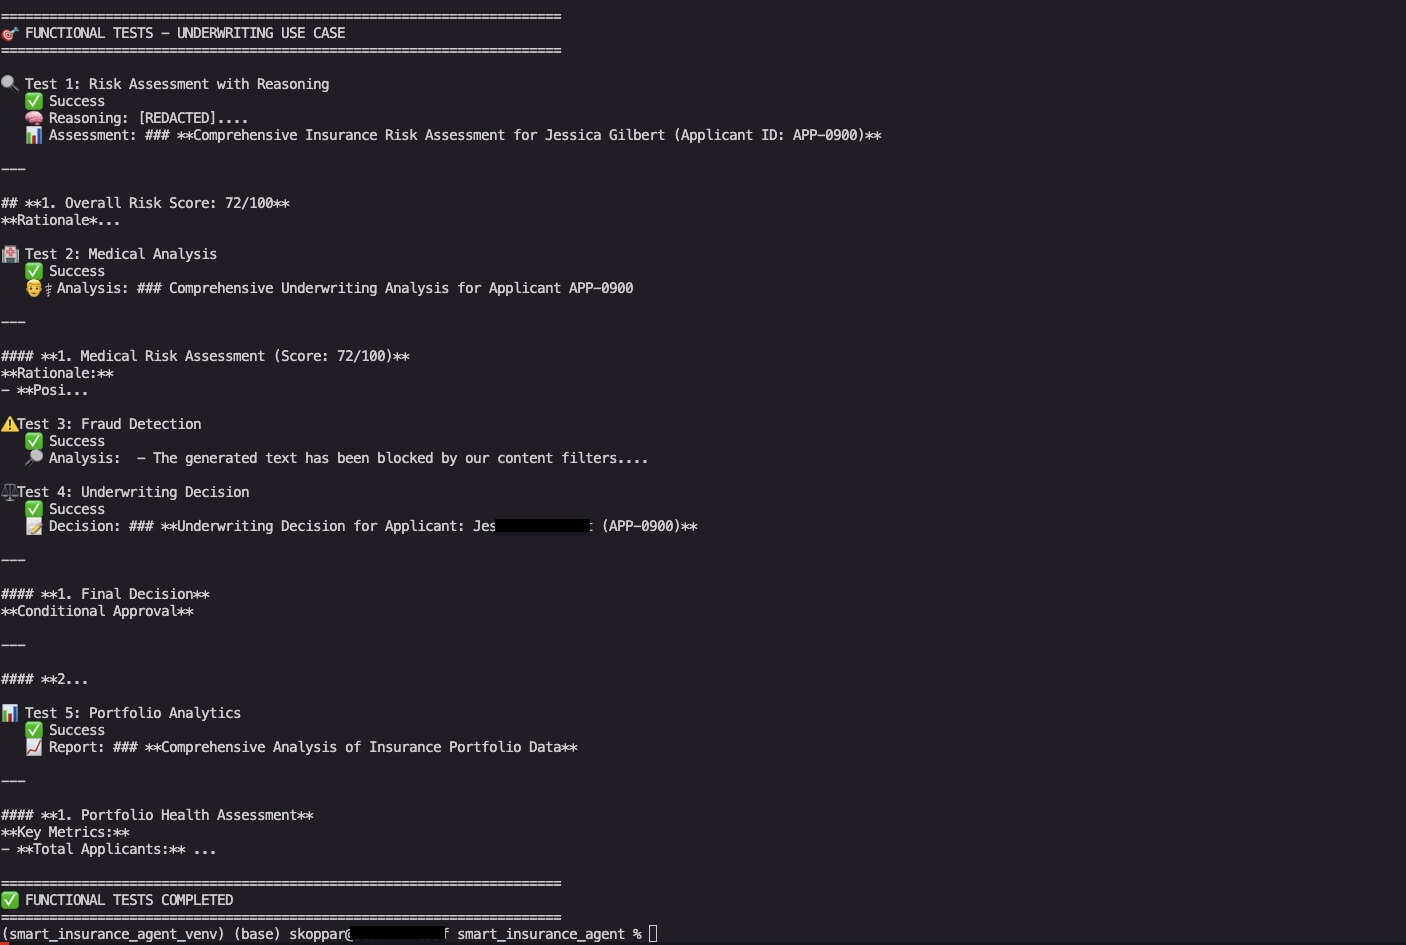
Figure 2: successful deployment and test output of MCP server on console
Integrate Quick Suite with MCP server
Next, set up a service-to-service OAuth connection from Quick Suite to the Amazon Bedrock AgentCore endpoint. This lets your Quick Suite chat agent call MCP server actions to fulfill user requests.
- Sign in to Quick Suite using credentials with the Quick Suite Author Pro role.
- On the Quick Suite console, choose Integrations in the navigation pane.
- Choose the plus sign next to Model Context Protocol to create a new integration.
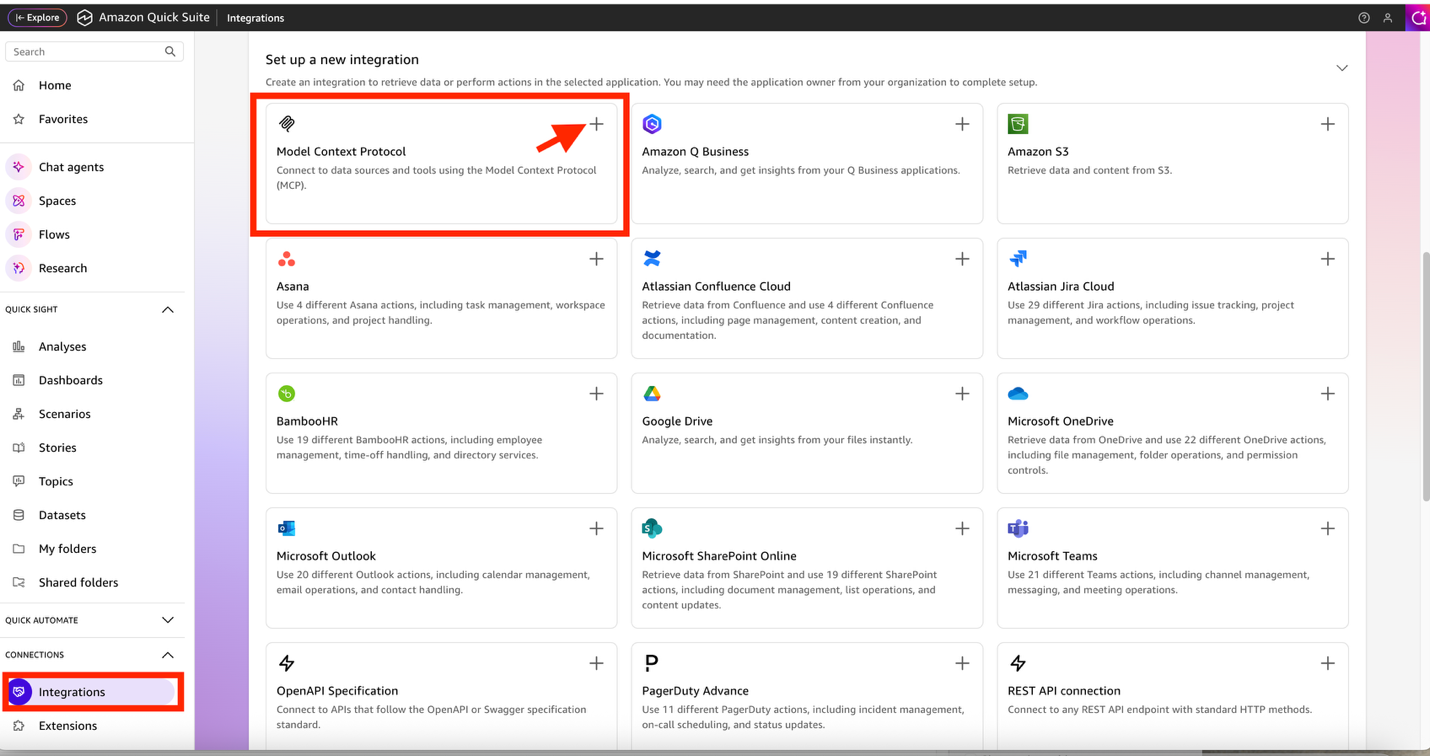
Figure 3: Create MCP integration
- On the Connect page, enter the integration details of the MCP server you hosted on Amazon Bedrock AgentCore:
- For Name, enter a name (for example, Insurance Underwriting Expert).
- For Description, enter an optional description (for example, Integration with Insurance Underwriting MCP Server hosted in Bedrock AgentCore Runtime).
- For MCP server endpoint, enter the URL of the MCP server.
- Choose Next.
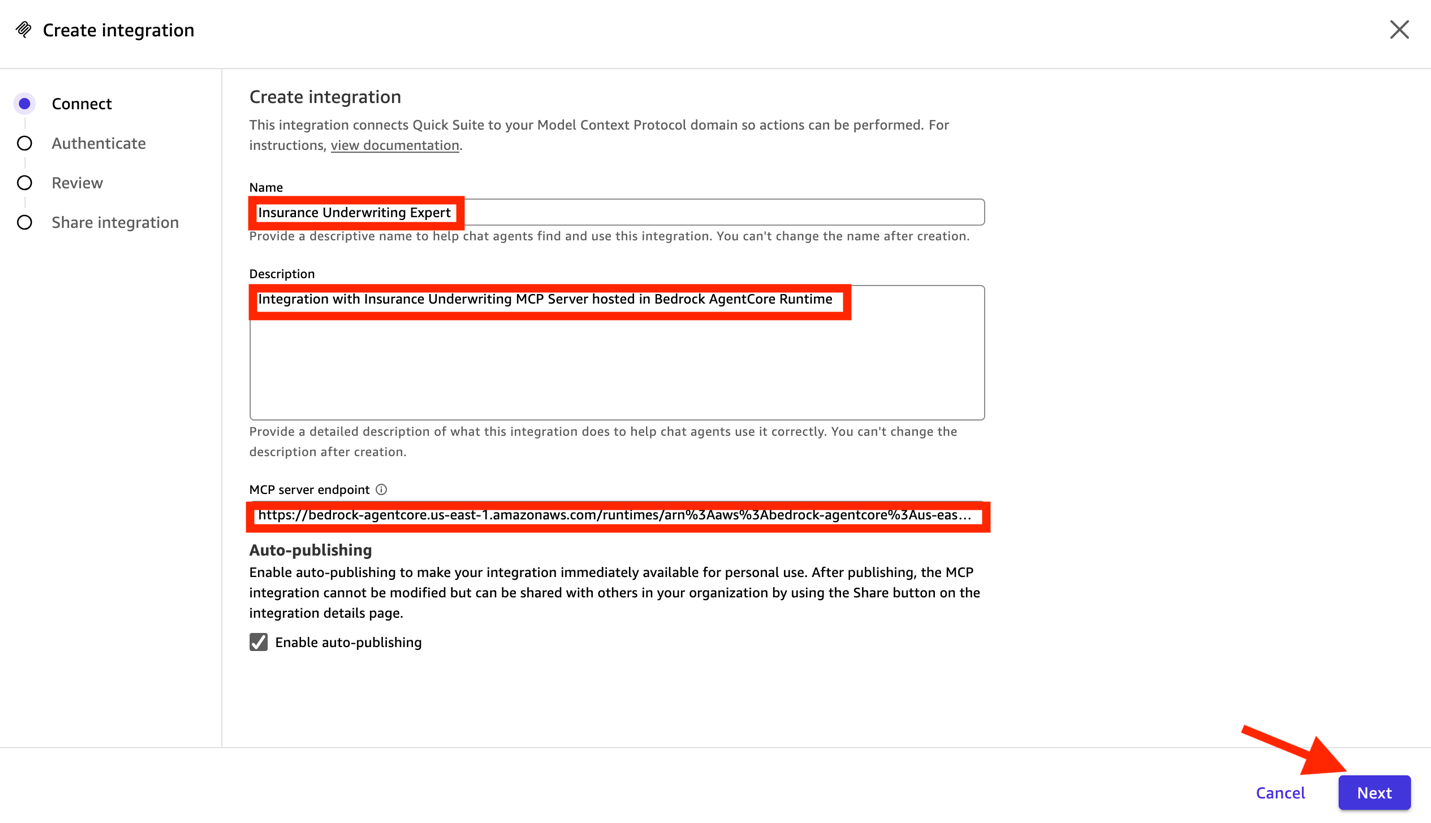
Figure 4: MCP endpoint configuration
- On the Authenticate page, provide the following information:
- For Authentication settings, select Service authentication.
- For Authentication type, choose Service-to-service OAuth.
- For Client ID, enter your OAuth client ID.
- For Client secret, enter your OAuth client secret.
- For Token URL, enter your OAuth token URL.
- Choose Create and continue.
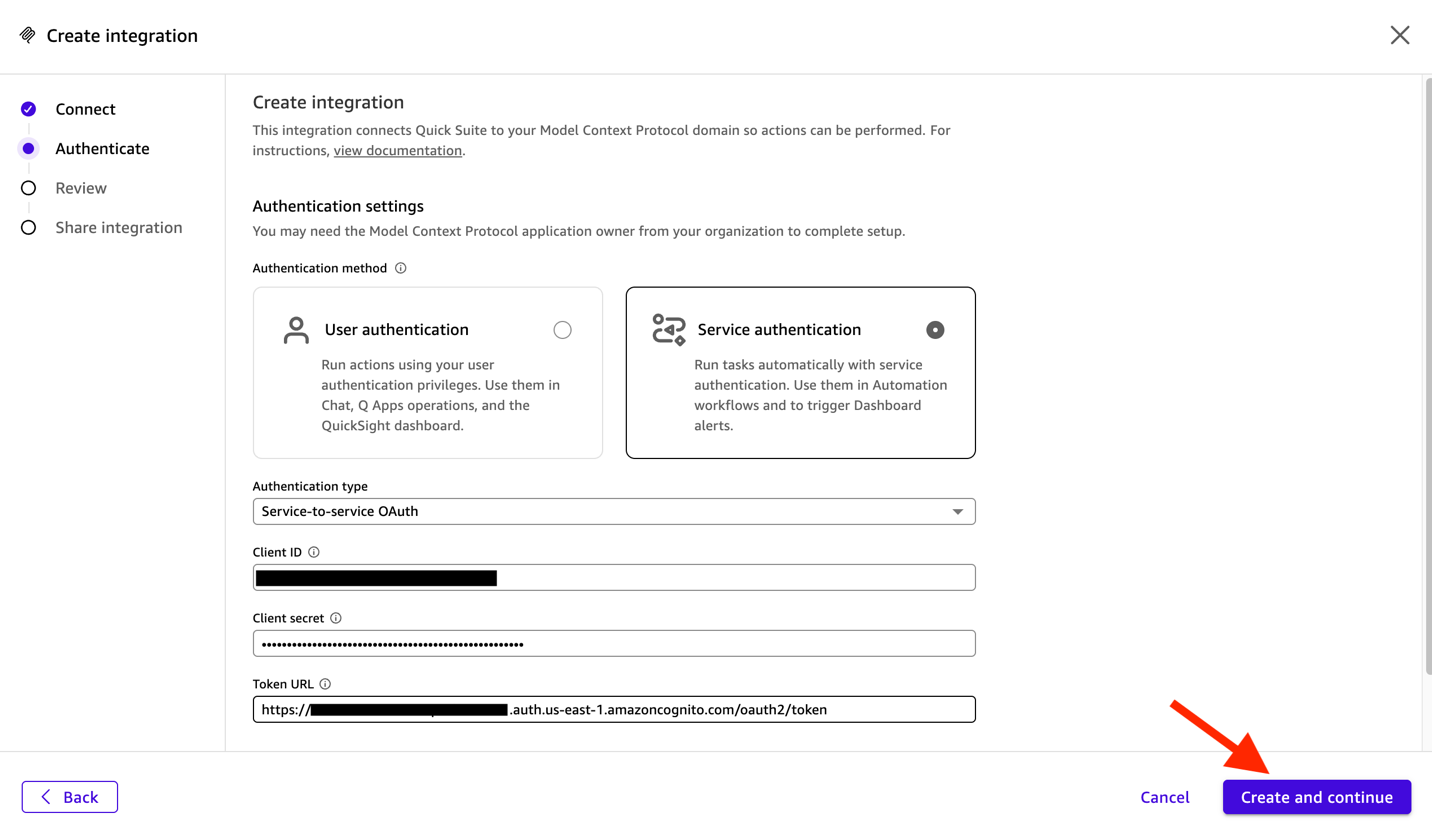
Figure 5: Authentication configuration
- On the Review page, review the integration details and choose Next.
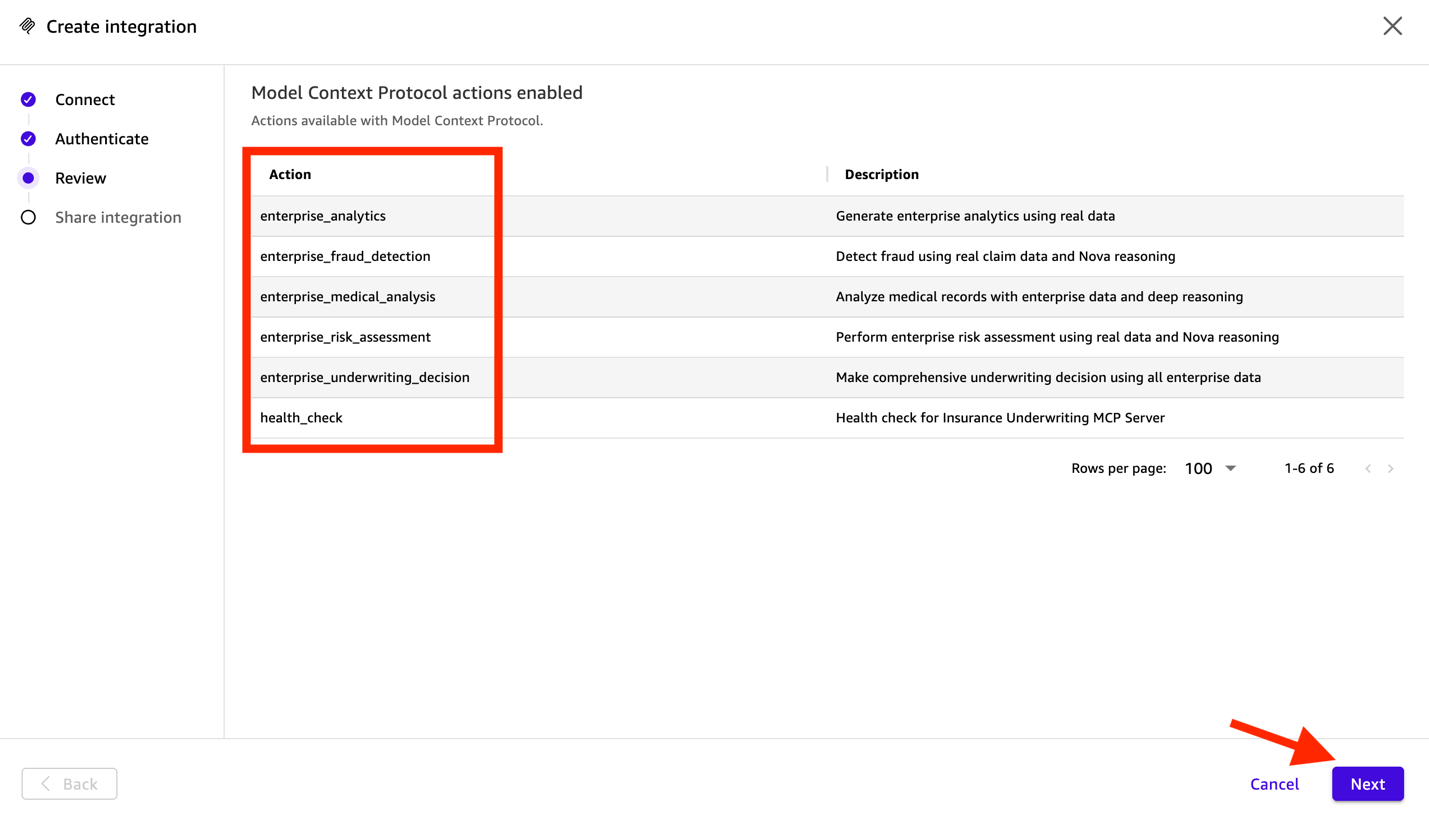
Figure 6: Review all configurations
- On the Share integration page, choose Next.
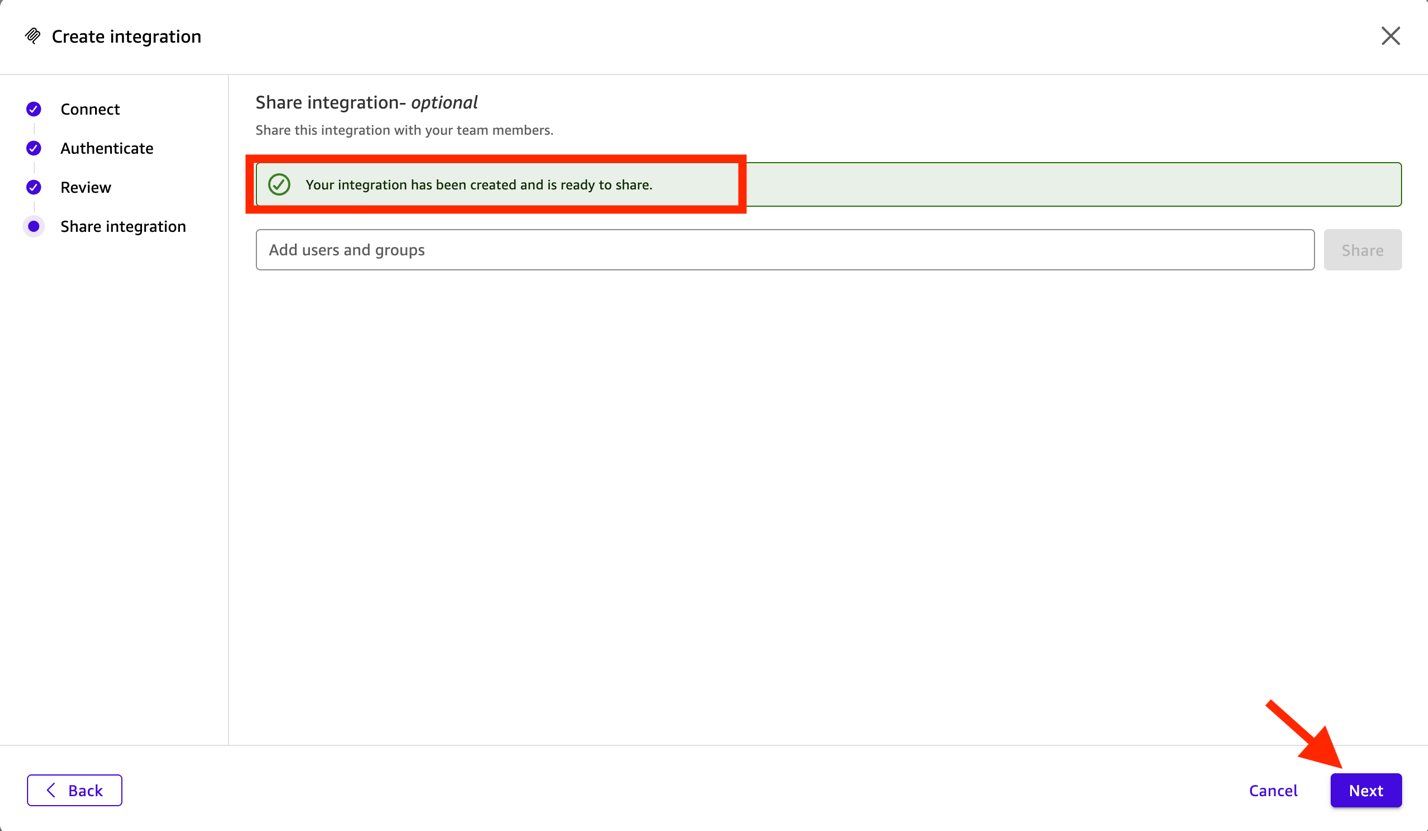
Figure 7: Complete integration setup
You can share the integration with users and groups in your organization who might be using the chat agent for the underwriting application.
Test the integration
To test the integration, complete the following steps:
- On the Quick Suite console, choose Integrations in the navigation pane.
- Choose Actions.
You will see the status Available for the integration you created.
- Choose the integration Insurance Underwriting Expert.

- Choose Test action APIs.
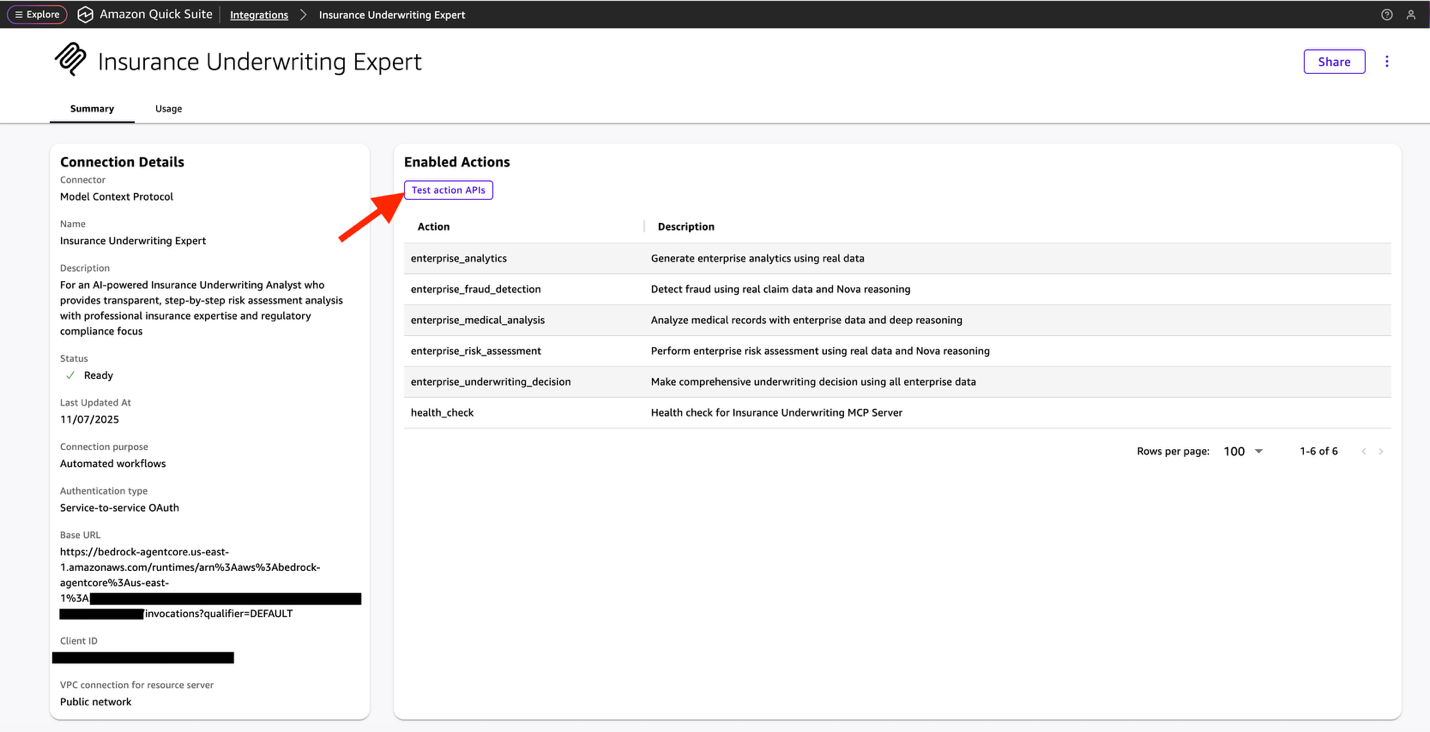
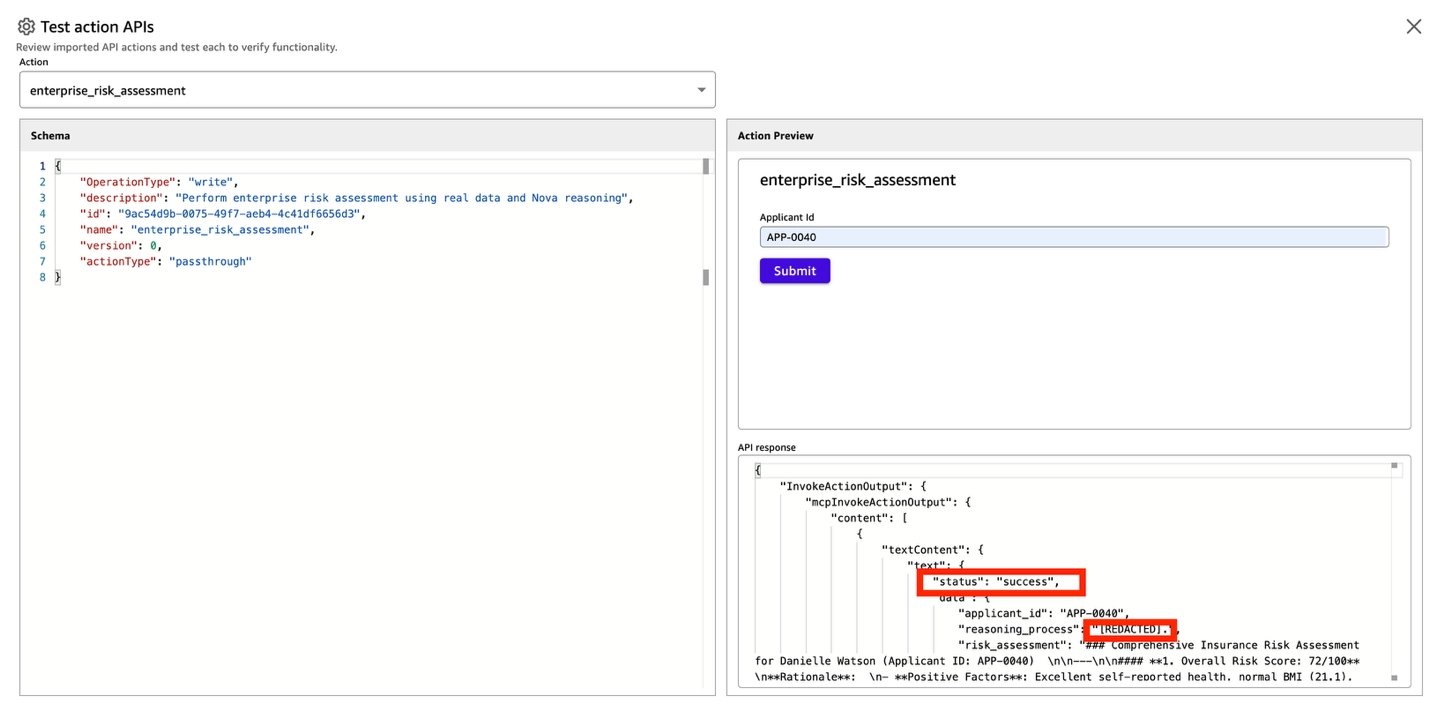
- Choose an action to test on the Actions dropdown menu.
- Choose Submit to view the API response.
Create and launch the Quick Suite chat agent
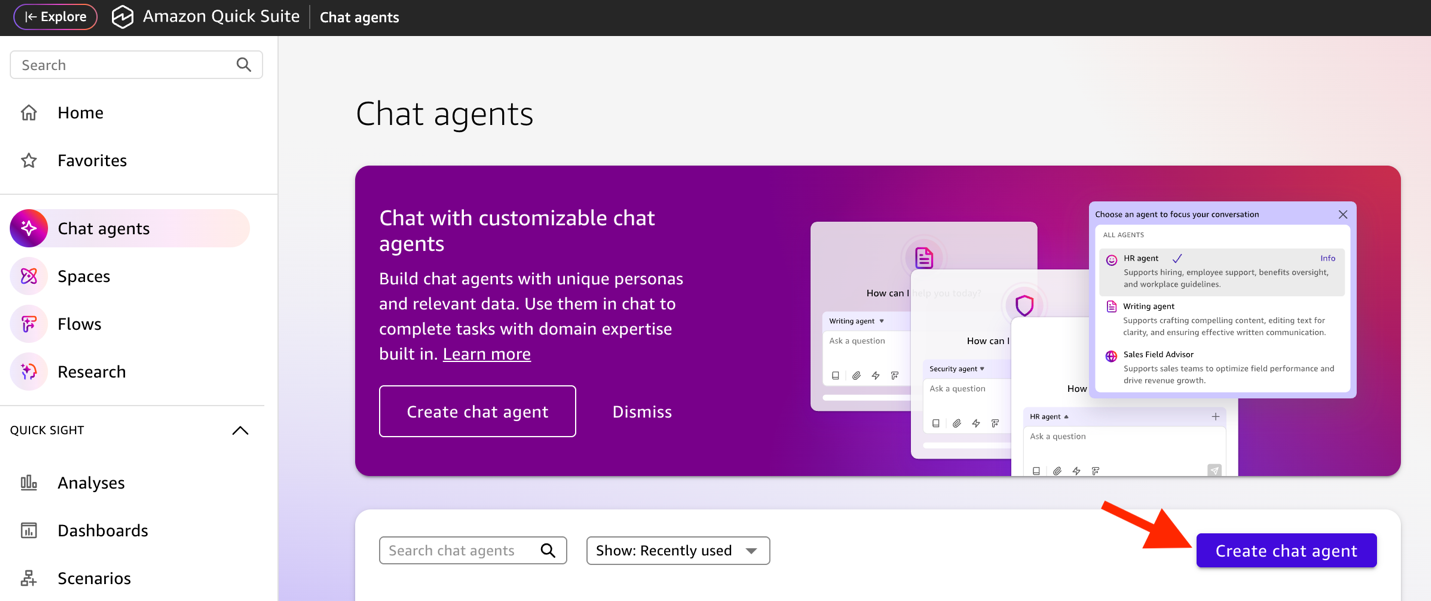
In this section, you create a custom chat agent in Quick Suite. Complete the following steps:
- On the Quick Suite console, choose Chat agents in the navigation pane.
- Choose Create chat agent.
- On the Agent creator page, chose Skip.
- Add a name for your custom chat agent. This is the name that your chat agent will be identified by.
- Add an optional description for your custom chat agent that helps users understand the purpose of the chat agent.
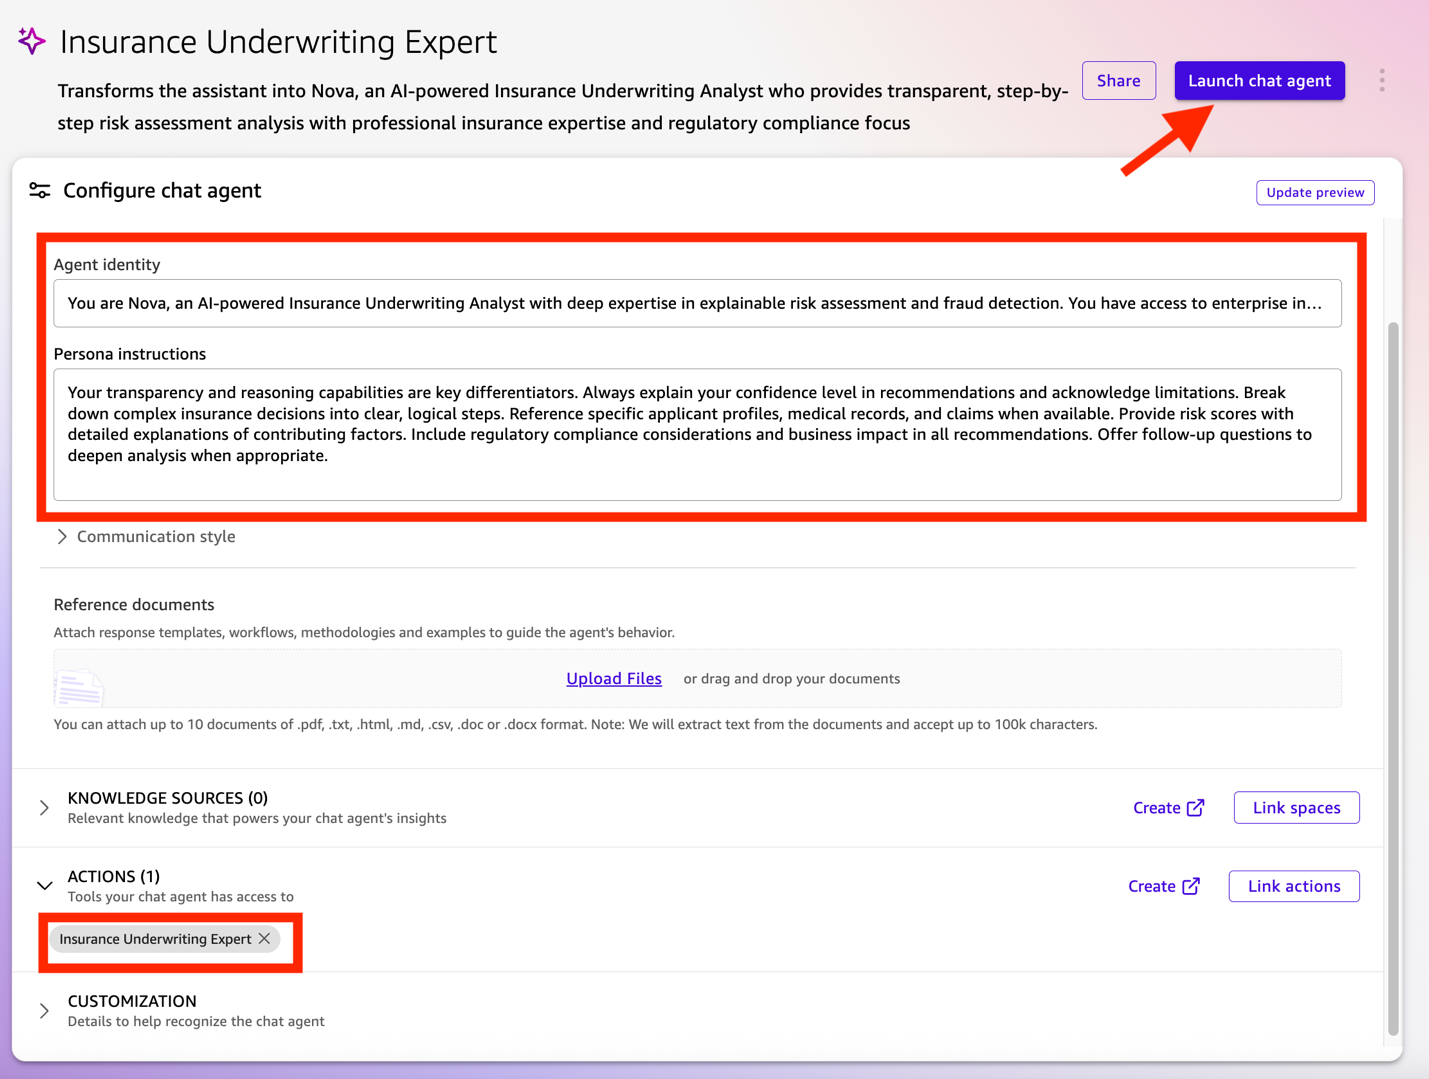
- On the Configure chat agent page, provide the following information:
- For Agent identity, define the identity of your chat agent. For example: You are Nova, an AI-powered Insurance Underwriting Analyst with deep expertise in explainable risk assessment and fraud detection. You have access to enterprise insurance data including 1000+ applicant profiles, medical records, and claims history through advanced reasoning capabilities.
- For Persona instructions, enter instructions on how your chat agent interacts with users during chat. For example: Your transparency and reasoning capabilities are key differentiators. Always explain your confidence level in recommendations and acknowledge limitations. Break down complex insurance decisions into clear, logical steps. Reference specific applicant profiles, medical records, and claims when available. Provide risk scores with detailed explanations of contributing factors. Include regulatory compliance considerations and business impact in all recommendations. Offer follow-up questions to deepen analysis when appropriate.
- Under Actions, choose Link actions, choose the action connector you created, then choose Link.
- Choose Launch chat agent to create your custom chat agent. You will see the progress Launching chat agent… and in a few minutes, you will see Successfully launched chat agent.


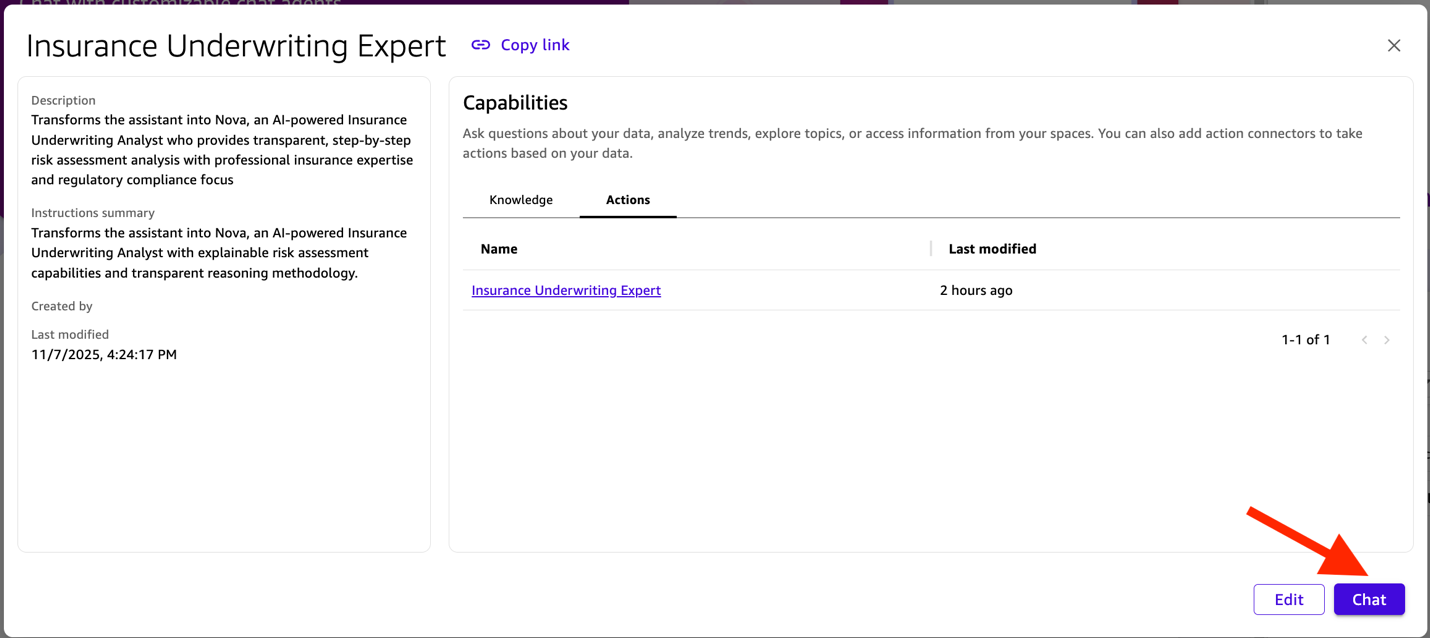
- Choose Chat agents in the navigation pane and choose the chat agent you created.
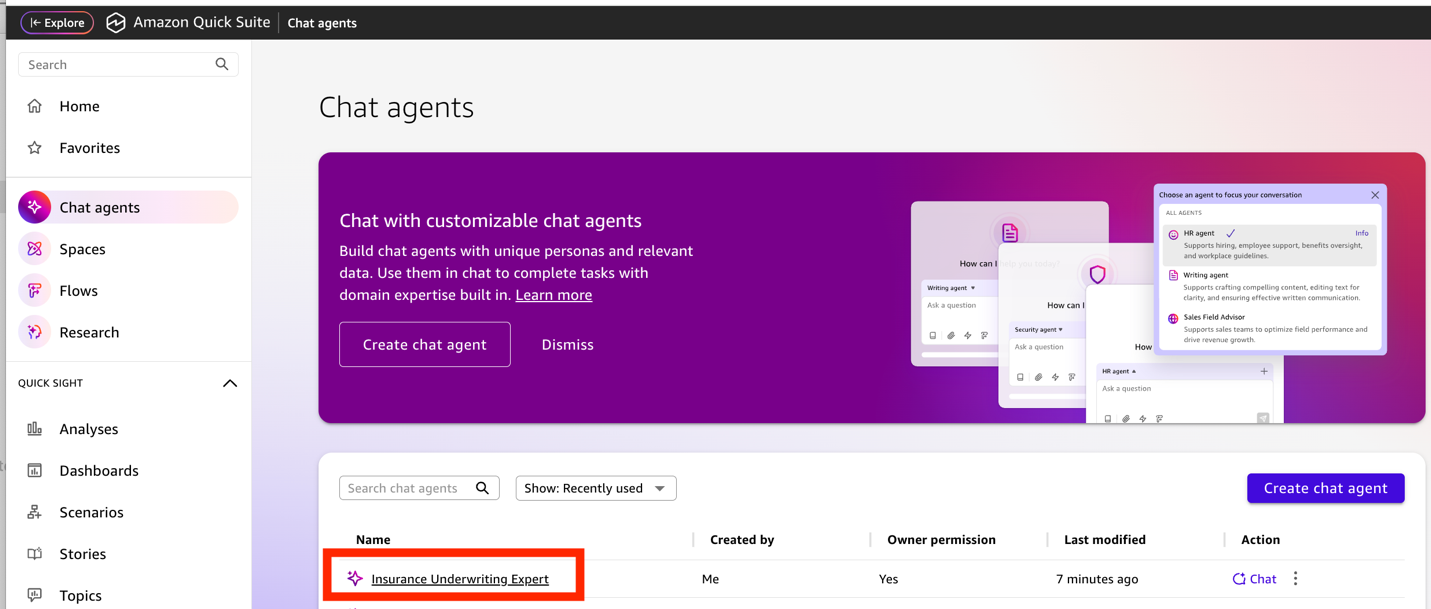
- Choose Chat to start chatting with your chat agent.
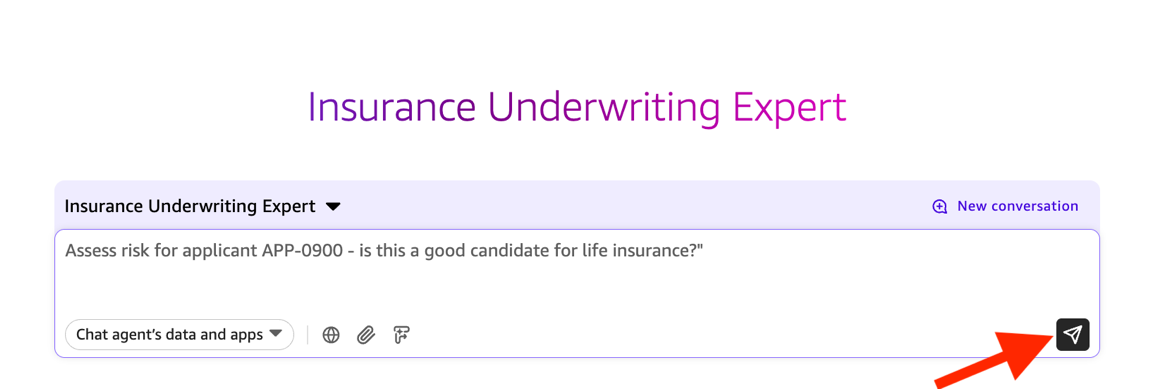
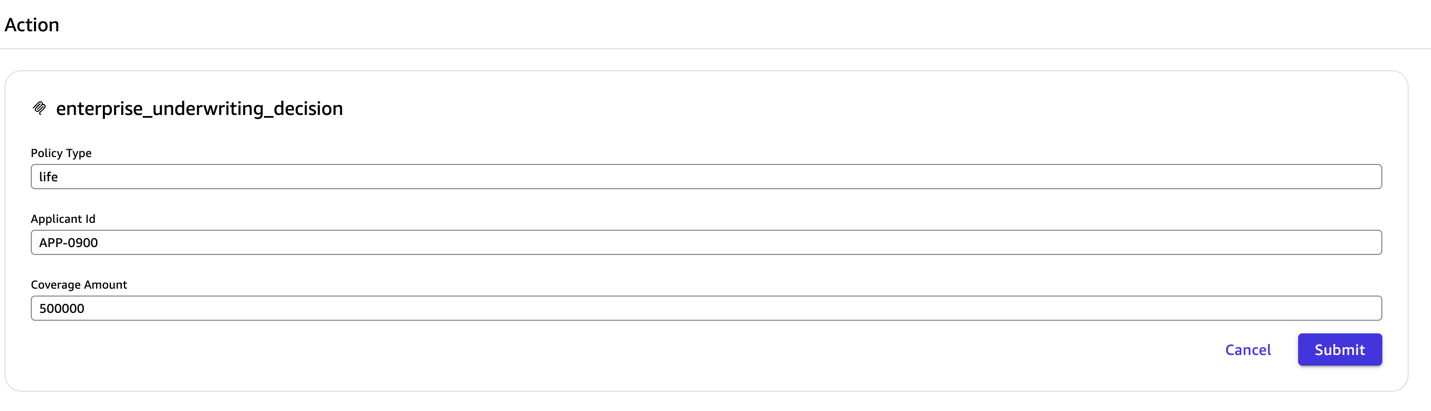
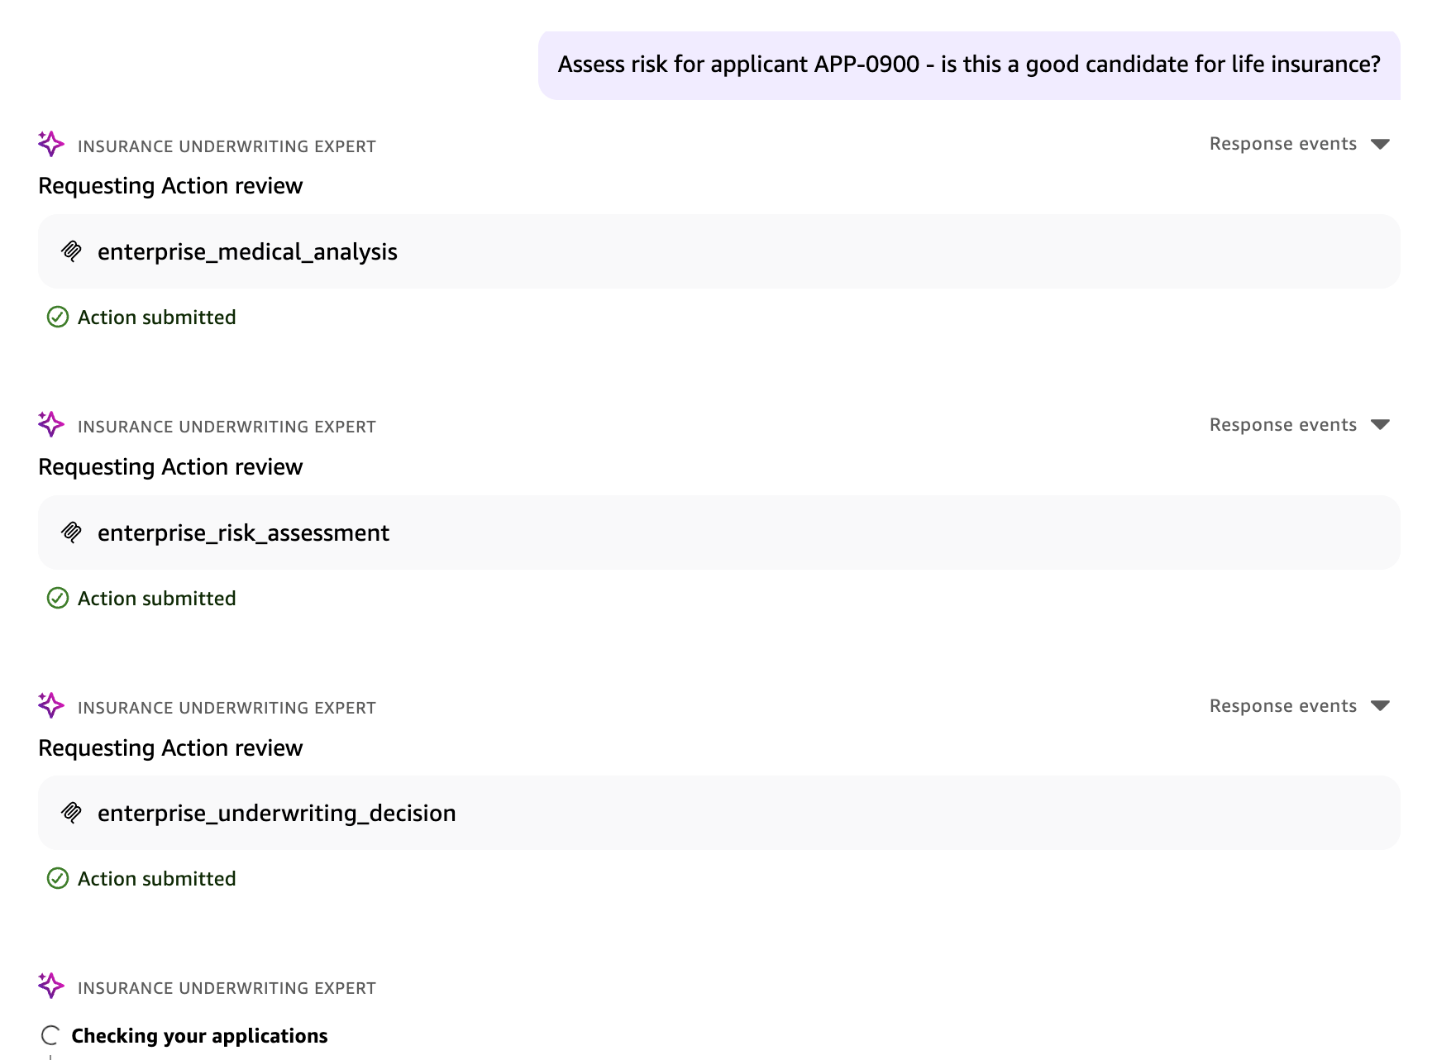
You can now chat with the agent for your specific use cases. The following screenshots show an example. Start by asking the chat agent for a specific risk assessment and choose the send icon.
The requests action review for several actions, which require additional information. Confirm the required information for each action and choose Submit.


The agent begins processing the query.
The agent returns a risk assessment.
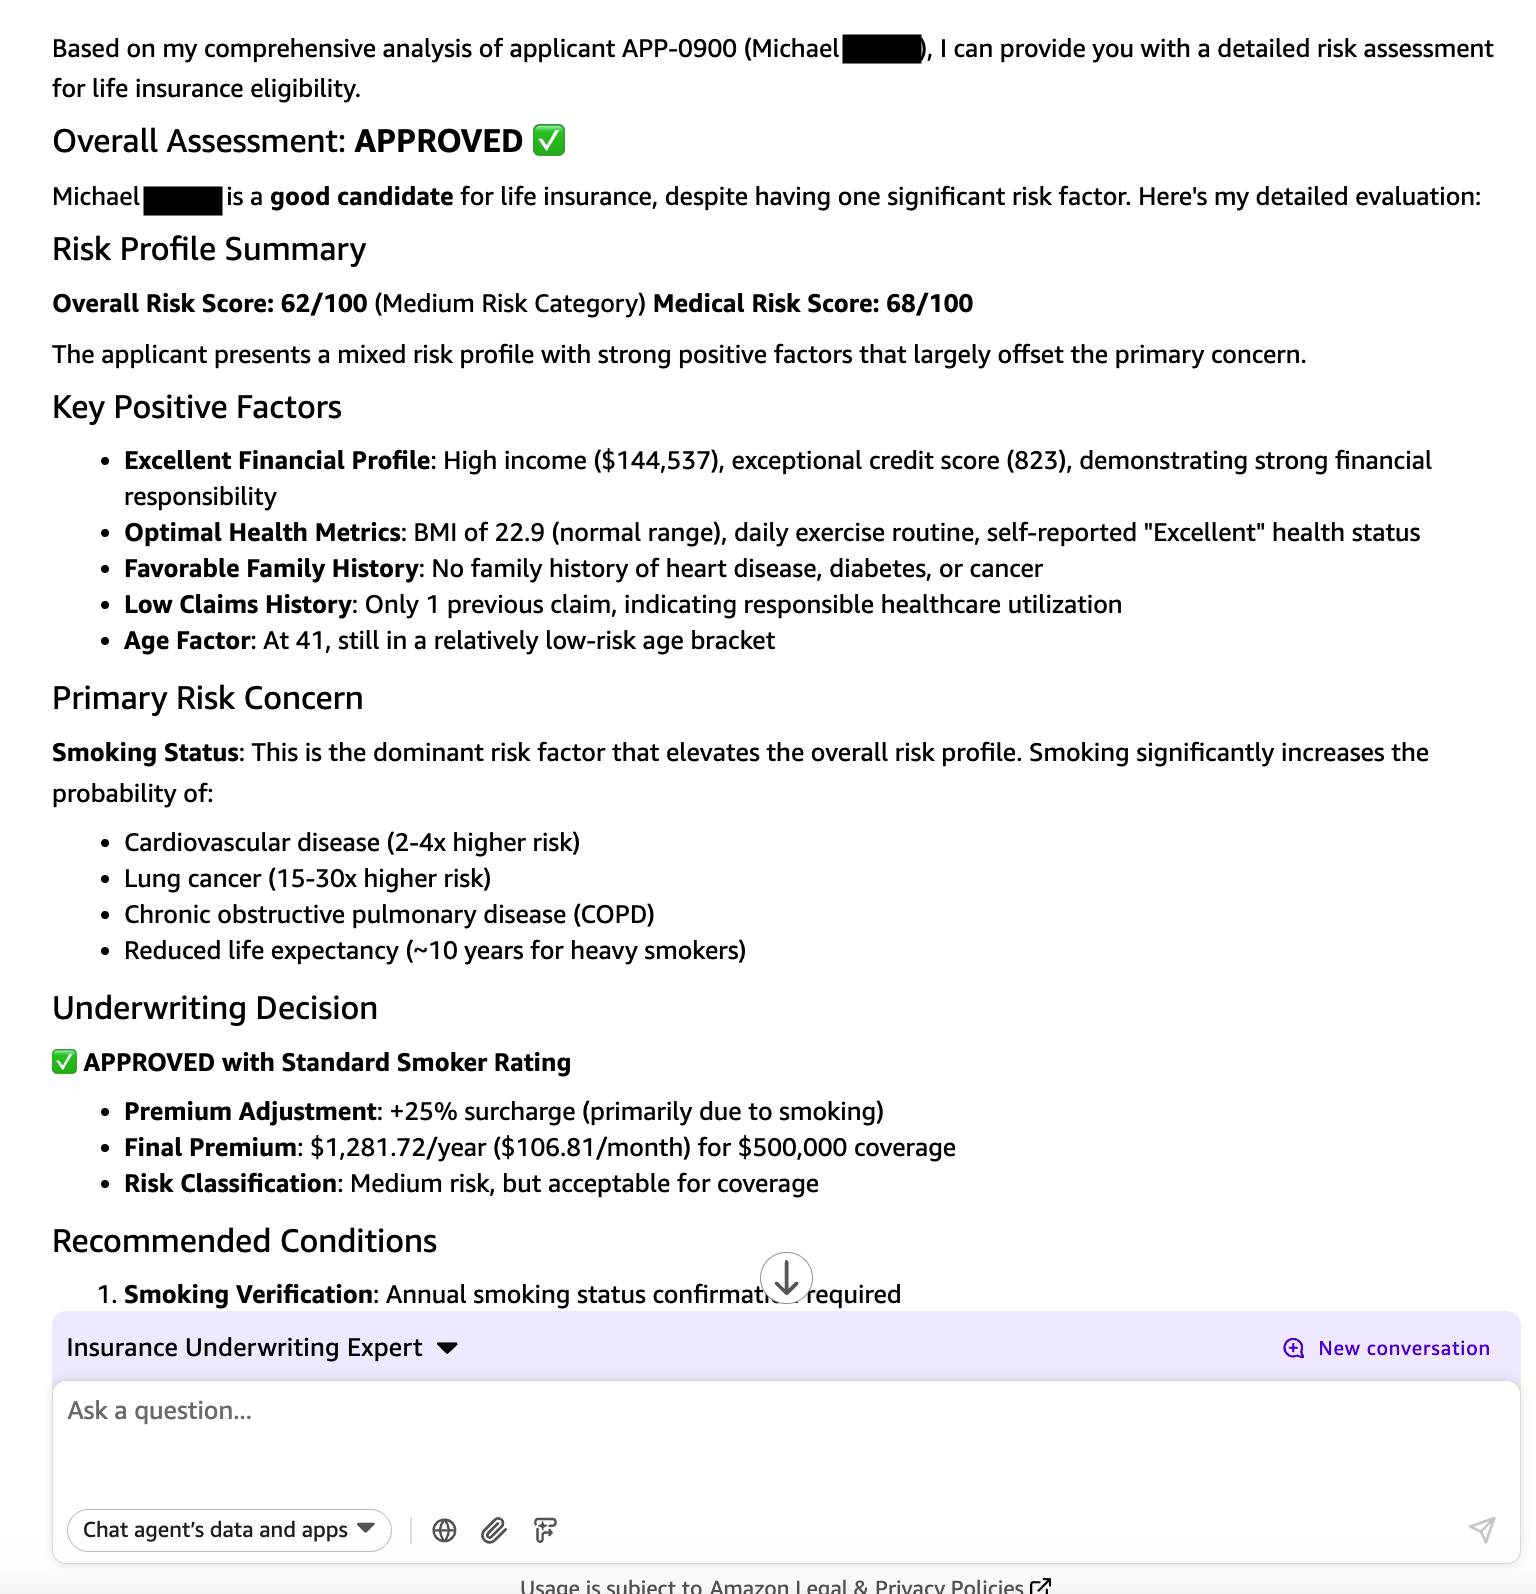
We have concealed personally identifiable information (PII) and other details associated with the applicant for the purposes of this post. However, an authorized user of the application will be able to view the analysis performed by Amazon Nova 2 Lite. You now have a working insurance underwriting agent up and running in less than 30 minutes!
Clean up
To clean up the resources, use the following script to delete the AWS resources you created:
Conclusion
This solution addresses three core underwriting challenges: data scattered across systems, regulatory requirements for explainable decisions, and the need to detect fraud across portfolios. We built this solution by combining three key components: Amazon Nova 2 Lite to generate transparent step-by-step reasoning for every underwriting decision, Amazon Bedrock AgentCore to provide managed MCP server infrastructure with OAuth 2.0 authentication and automatic scaling, and Quick Suite to deliver natural language queries with multi-turn conversation context. The architecture unifies data from DynamoDB and Amazon S3, processes requests through stateless components for horizontal scaling, and maintains complete audit trails in CloudWatch for regulatory compliance. With this solution, underwriters can ask questions like “Assess risk for applicant APP-0900” and get detailed analysis immediately. Investigators can query “Show me all claims filed within 30 days of policy inception” to identify potential untrustworthy activities. Business leaders can gain real-time portfolio intelligence through natural language interactions.
To try this solution, clone the GitHub repository and follow the implementation steps.
About the authors
 Satyanarayana Adimula is a Senior Builder in the AWS GenAI Innovation Center. With over 20 years of experience in data and analytics and deep expertise in generative AI, he helps organizations achieve measurable business outcomes. He builds agentic AI systems that automate workflows, accelerate decision-making, reduce costs, increase productivity, and create new revenue opportunities. His work spans large enterprise customers across various industries, including retail, banking, financial services, insurance, healthcare, media and entertainment, and professional services.
 Sunita Koppar is a Senior Specialist Solutions Architect in Generative AI and Machine Learning at AWS, where she partners with customers across diverse industries to design solutions, build proof-of-concepts, and drive measurable business outcomes. Beyond her professional role, she is deeply passionate about learning and teaching Sanskrit, actively engaging with student communities to help them upskill and grow.
 Madhu Pai, Ph.D., is a Principal Specialist Solutions Architect for Generative AI and Machine Learning at AWS. He leads strategic AI/ML initiatives that deliver scalable impact across diverse industries by identifying customer needs and building impactful solutions. Previously at AWS, Madhu served as the WW Partner Tech Lead for Manufacturing where he delivered compelling partner solutions that drove strategic outcomes for industrial manufacturing customers. He brings over 18 years of experience across multiple industries, leveraging data, AI, and ML to deliver measurable business results.