在 AWS Amplify 上部署 Web 应用程序
入门指南
模块 2:构建前端并连接 API
在本模块中,您将学习如何向 Amplify 项目添加 API
简介
在本模块中,您将为 Web 应用程序构建前端,并使用 GraphQL API 连接至 API(应用程序接口)。GraphQL 是一种 API 查询语言,可帮助您检索和更新应用程序中的数据。
学习内容
- 创建基础 React 前端应用程序
- 从应用程序调用 GraphQL API
- 从应用程序前端调用 API
完成时间
10 分钟
模块先决条件
- 具有管理员级访问权限的 AWS 账户**
- 推荐的浏览器:最新版 Chrome 或 Firefox
[**] 过去 24 小时内创建的账户可能尚不具有访问此教程所需服务的权限。
操作步骤
安装 Amplify 库
您需要安装 Amplify JavaScript 库 aws-amplify 和用于 React 的 Amplify UI 库 @aws-amplify/ui-react(包含 React UI 组件)。
运行以下命令来安装它们:
npm install aws-amplify @aws-amplify/ui-react您现在需要为应用程序创建前端。打开 src/index.js 文件,并将其所有内容替换为以下代码,以初始化 Amplify 库:
import React from 'react';
import ReactDOM from 'react-dom/client';
import './index.css';
import App from './App';
import reportWebVitals from './reportWebVitals';

import "@aws-amplify/ui-react/styles.css"; // Ensure React UI libraries are styled correctly
import { Amplify } from 'aws-amplify'
import awsconfig from './aws-exports'
Amplify.configure(awsconfig) // Configures the Amplify libraries with the cloud backend set up via the Amplify CLI

const root = ReactDOM.createRoot(document.getElementById('root'));
root.render(
  <React.StrictMode>
    <App />
  </React.StrictMode>
);

// If you want to start measuring performance in your app, pass a function
// to log results (for example: reportWebVitals(console.log))
// or send to an analytics endpoint. Learn more: https://bit.ly/CRA-vitals
reportWebVitals();使用 Amplify 添加 GraphQL API
现在,您要为应用程序添加一个 API。Amplify 使用 AWS AppSync 和 Amazon DynamoDB 来支持 GraphQL API。AppSync 是一项 GraphQL 托管服务,用于管理我们的 API,而 Amazon DynamoDB 是一个 NoSQL 数据库,将存储我们的 API 将要使用的数据。
要添加 API,请运行 amplify add api,并在此步骤中选择以下选项来回答问题(以 > 符号开头的行):
renbran@50ed3c3831ed amplify-app % amplify add api
? Select from one of the below mentioned services: GraphQL
? Here is the GraphQL API that we will create. Select a setting to edit or continue Continue
? Choose a schema template: Single object with fields (e.g., “Todo” with ID, name, description)

⚠️  WARNING: your GraphQL API currently allows public create, read, update, and delete access to all models via an API Key. To configure PRODUCTION-READY authorization rules, review: https://docs.amplify.aws/cli/graphql/authorization-rules

✅ GraphQL schema compiled successfully.

Edit your schema at /Users/renbran/amplify-app/amplify/backend/api/amplifyapp/schema.graphql or place .graphql files in a directory at /Users/renbran/amplify-app/amplify/backend/api/amplifyapp/schema
✔ Do you want to edit the schema now? (Y/n) · yesGraphQL Schema(模式)是对象及其字段的表示。您需要定义 GraphQL Schema,Amplify 将创建所需的 DynamoDB 表,并配置 GraphQL 来为您处理读取、写入、更新和删除。
如果输入 yes(是)进入立即编辑模式,默认编辑器将打开下一节所需的文件。
创建 GraphQL Schema
GraphQL Schema(模式)是对象及其字段的表示。您需要定义 GraphQL Schema,Amplify 将创建所需的 DynamoDB 表,并配置 GraphQL 来为您处理读取、写入、更新和删除。打开 amplify/backend/api/amplifyapp/schema.graphql 文件,将其内容替换为以下代码:
type Note @model @auth(rules: [{ allow: owner }]) {
  id: ID!
  text: String!
}此模式定义了一个 Note(笔记)类型,其中 id 和 text 为必填字段。它还包含 Amplify GraphQL 转换库中的一个指令:
@model:注释为 @model 的类型存储在 DynamoDB 中,并自动为其创建 CRUDL(创建、读取、更新、删除、列表)操作。
@auth:注释为 @auth 的类型受一组授权规则的保护。在这里,我们使用 owner(所有者)授权来确保只有笔记的所有者才能访问和修改它。
部署应用程序
现在,您可以通过运行 amplify push 来部署 Amplify Web 应用程序。此步骤会将应用程序上传至您的 AWS 账户,Amplify 将展示部署中的更改,并提示您确认是否部署:
✔ Successfully pulled backend environment dev from the cloud.
Current Environment: dev
┌──────────┬────────────────────┬───────────┬───────────────────┐
│ Category │ Resource name      │ Operation │ Provider plugin   │
├──────────┼────────────────────┼───────────┼───────────────────┤
│ Api      │ amplifyapp         │ Create.   │ awscloudformation │
└──────────┴────────────────────┴───────────┴───────────────────┘

? Are you sure you want to continue? Yes此时,系统会提示您配置身份验证提供程序。这是因为您已经在 GraphQL Schema 中指定了基于 owner(所有者)的验证规则。
接受所有默认值,使用简单的用户名和密码组合配置身份验证:
 Do you want to use the default authentication and security configuration?
 > Default configuration
 How do you want users to be able to sign in?
 > Username
 Do you want to configure advanced settings?
> No, I am done.确认身份验证设置后,针对随后的提示问题选择默认值:
更新前端以使用 API
要使用刚刚部署的新 API 和身份验证后端,请将 src/App.js 文件内容替换为以下代码:
import './App.css';
import { createNote, deleteNote} from './graphql/mutations'
import { listNotes } from './graphql/queries'
import { withAuthenticator, Button, Text, Flex, Heading } from "@aws-amplify/ui-react";
import { useCallback, useEffect, useState } from 'react';
import { API } from 'aws-amplify';

function App({ signOut }) {
  const [ notes, setNotes ] = useState([])

  const fetchNotes = useCallback(async () => {
    const result = await API.graphql({
      query: listNotes,
      authMode: 'AMAZON_COGNITO_USER_POOLS'
    })
    setNotes(result.data.listNotes.items)
  }, [setNotes])

  const handleCreateNote = useCallback(async () => {
    await API.graphql({
      query: createNote,
      variables: { input: { text: window.prompt("New note") } },
      authMode: 'AMAZON_COGNITO_USER_POOLS'
    })
    fetchNotes()
  }, [fetchNotes])

  const handleDeleteNote = useCallback(async (id) => {
    await API.graphql({
      query: deleteNote,
      variables: { input: { id: id } },
      authMode: 'AMAZON_COGNITO_USER_POOLS'
    })
    fetchNotes()
  }, [fetchNotes])

  useEffect(() => {
    fetchNotes()
  }, [fetchNotes])

  return (
    <Flex direction={"column"}>
      <Flex justifyContent={'space-between'}>
        <Heading level={1}>My notes</Heading>
        <Button onClick={signOut}>Sign Out</Button>
      </Flex>
      {notes.map(note => <Flex alignItems={'center'}>
        <Text>{note.text}</Text>
        <Button onClick={() => handleDeleteNote(note.id)}>Remove</Button>
      </Flex>)}
      <Button onClick={handleCreateNote}>Add Note</Button>
    </Flex>
  );
}

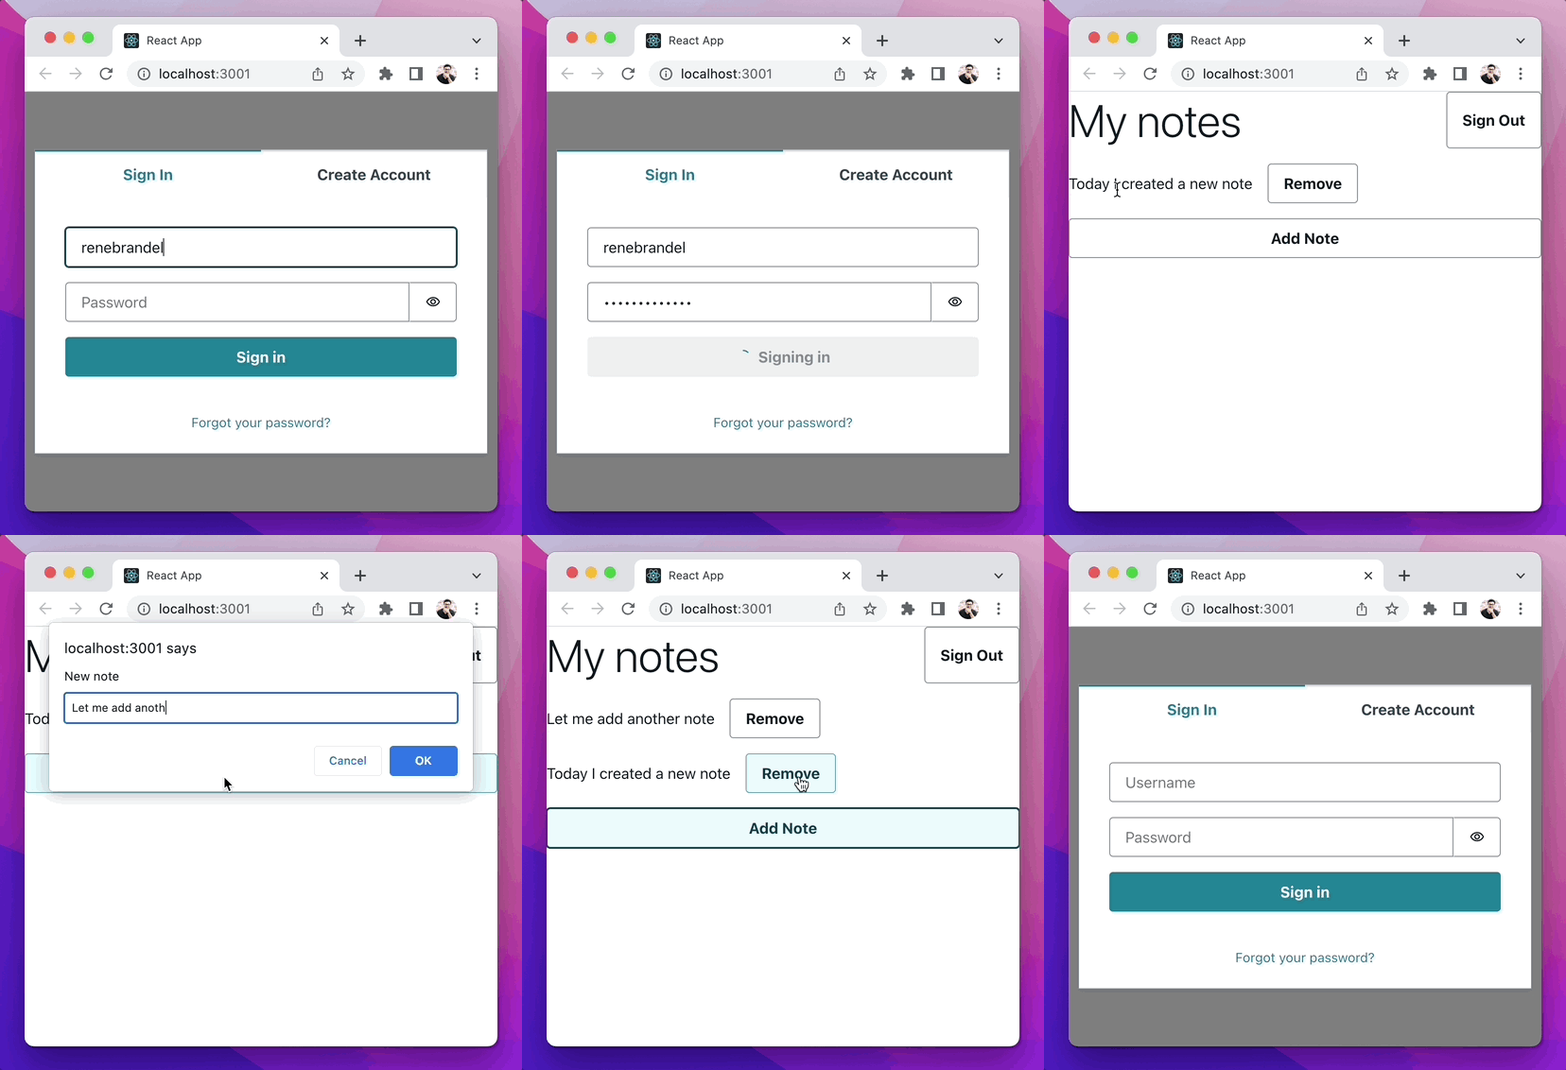
export default withAuthenticator(App);现在,您就拥有了一个正常运行的应用程序。通过多因素身份验证登录后,应用程序即可调用 API 来保存/更新/删除笔记。
测试应用程序
现在,您可以在本地运行应用程序进行测试:
npm start此命令将在 http://localhost:3000 上启动一个开发服务器,并在浏览器中打开该页面。在使用服务之前,系统会提示您注册,这些数据存储在您项目的 Congnito 数据库中,只有您才能访问。进入后,应用程序将只显示标题 Notes App(笔记应用程序)和 Sign In(登录)按钮,因为您还没有添加任何内容。接下来,您将在应用程序中添加 API。您可以使用 ctrl + c 来停止服务器。

只需几条 CLI 命令和几行代码,我们就创建了一个带登录流程的单页面应用程序。此应用程序目前只是一个基础框架,并且登录功能还无法使用。请在下面的章节中继续为应用程序添加功能。


