Modul 4: AWS Cloud9 IDE einrichten
TUTORIAL


Einrichten Ihrer AWS Cloud9 IDE
In diesem Modul konfigurieren Sie Ihre AWS-Cloud9-Umgebung
Was Sie erreichen werden
- Einrichtung einer AWS-Cloud9-Umgebung mithilfe der AWS CLI
- Verwendung der integrierten Tools
Implementierung
Wenn Sie bereits über eine IDE verfügen, ist dieses Modul optional.
AWS Cloud9 ist eine kostenlose, cloudbasierte integrierte Entwicklungsumgebung (IDE), mit der Sie Ihren Code ganz einfach über einen Browser schreiben, ausführen und debuggen können. Die IDE umfasst einen Code-Editor, einen Debugger und ein Terminal.
AWS Cloud9 ist mit wichtigen Tools für gängige Programmiersprachen wie JavaScript, Python, PHP und mehr vorinstalliert, sodass Sie zum Starten neuer Projekte keine Dateien installieren oder Ihren Entwicklungscomputer konfigurieren müssen. Da AWS Cloud9 IDE cloudbasiert ist, können Sie von Ihrem Büro, zu Hause oder von jedem beliebigen Ort aus mit einem mit dem Internet verbundenen Computer an Ihren Projekten arbeiten.
Benötigte Zeit
15 Minuten
Modul erfordert
- Einen Internet-Browser
- Ein AWS-Konto
- Einrichtung der AWS CLI
Hilfe anfordern
Erstellen einer Umgebung
In diesem Schritt verwenden Sie die AWS CLI, um eine AWS-Cloud9-Entwicklungsumgebung zu erstellen.
Melden Sie sich zunächst mit dem in Modul 3 erstellten Profil bei der AWS CLI an.
aws sso login --profile admin-1In Ihrem CLI-Fenster werden die folgenden Zeilen angezeigt:
aws sso login --profile admin-1
Es wird versucht, die SSO-Autorisierungsseite automatisch in Ihrem Standardbrowser zu öffnen.
Wenn sich der Browser nicht öffnet oder Sie ein anderes Gerät zur Autorisierung dieser Anfrage verwenden möchten, öffnen Sie die folgende URL:
https://device.sso.us-east1.amazonaws.com/
Geben Sie dann den Code ein:
XXXX-XXXX
Gehen Sie zum Browserfenster und erlauben Sie den Zugriff auf Ihre Daten. Wenn Sie zum CLI-Fenster zurückkehren, wird in der folgenden Meldung diese Zeile angezeigt:
Sie können nun die Umgebung mit dem Befehl <aws cloud9 create-environment-ec2> erstellen. Zusammen mit diesem Befehl fügen wir die folgenden Informationen hinzu:
- --name: Der Name der Umgebung. Für dieses Modul verwenden wir <getting-started>.
- --description: Eine optionale Beschreibung der Umgebung, bereitgestellt als Zeichenfolge.
- --instance-type: Der Typ der Amazon-EC2-Instance, den AWS Cloud9 startet und mit der neuen Umgebung verbindet. Für dieses Modul verwenden wir <t2.micro>, das in den ersten 12 Monaten durch das kostenlose Kontingent von AWS abgedeckt ist.
- --profile: Der Name des Administratorprofils, das Sie beim Einrichten der CLI konfiguriert haben. In diesem Tutorial haben wir <admin-1> verwendet.
Sie können nun die Umgebung mit dem Befehl <aws cloud9 create-environment-ec2> erstellen. Kopieren Sie den gesamten Befehl, indem Sie auf die Schaltfläche kopieren klicken, und fügen Sie ihn in Ihre CLI ein.
aws cloud9 create-environment-ec2 --name getting-started-2 --description "Getting started with AWS Cloud9." --instance-type t2.micro --profile admin-1Ein erfolgreicher Befehl gibt die ID Ihrer neuen AWS-Cloud9-Umgebung zurück:
{
„environmentId“: „8a34f51ce1e04a08882f1e811bd706EX“
}
Standardmäßig fährt AWS Cloud9 die Amazon-EC2-Instance für die Umgebung 30 Minuten nach dem Schließen aller Webbrowser-Instances, die mit der IDE für die Umgebung verbunden sind, herunter.
Tipps zur Problembehebung:
Wenn Sie das Argument --profile nicht angeben, erhalten Sie diese Meldung:
Anmeldeinformationen konnten nicht gefunden werden. Sie können Anmeldeinformationen konfigurieren, indem Sie „aws configure“ ausführen.
Wenn Sie aws configure ausführen, müssen Sie Zugriffsschlüssel bereitstellen, was für die meisten Anwendungsfälle nicht empfohlen wird. Wiederholen Sie stattdessen den ursprünglichen Befehl mit dem Argument --profile und die Anmeldeinformationen Ihres Benutzers werden automatisch zum Ausführen des Befehls verwendet.
Offene Umgebung
In Modul 2 dieses Tutorials haben wir einen Administratorbenutzer namens John erstellt, der eine Einladungs-E-Mail mit der URL des AWS-Zugriffsportals und seinem Benutzernamen erhalten hat. In Modul 3 haben wir die URL des AWS-Zugriffsportals verwendet, als wir das Profil admin-1 erstellt haben. Die erstellte Umgebung ist vorhanden, wenn wir uns mit der URL des AWS-Zugriffsportals der Organisation und den Anmeldeinformationen von John bei der Konsole anmelden.
Melden Sie sich mit Ihren Administratoranmeldeinformationen beim AWS-Zugriffsportal an.
Erweitern Sie Ihr AWS-Konto, um das AWS-Mitgliedskonto anzuzeigen, und wählen Sie dann das Mitgliedskonto aus, um den für das Konto bereitgestellten Berechtigungssatz anzuzeigen.
Wählen Sie den Link zur Managementkonsole, der dem Berechtigungssatz AdministratorAccess zugeordnet ist.

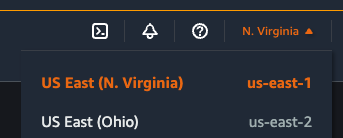
Bestätigen Sie in der oberen Navigationsleiste, dass Sie bei der AWS-Region angemeldet sind, in der sich Ihre Umgebung befindet. Für dieses Tutorial haben wir us-east-1 verwendet.
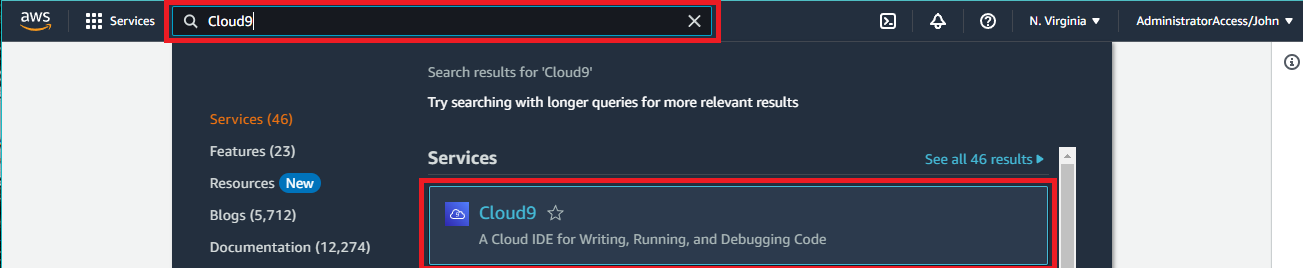
Geben Sie im Suchfeld Cloud9 ein. Wählen Sie dann Cloud9 aus der Liste der Services aus.
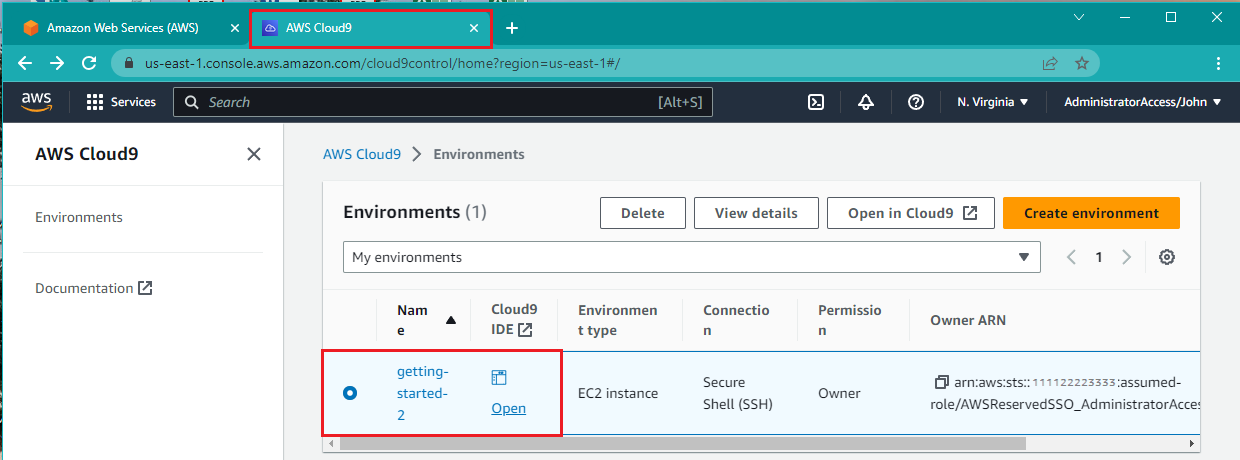
Die Konsole öffnet eine neue Browser-Registerkarte, auf der die Seite AWS-Cloud 9-Umgebungen angezeigt wird.
Wählen Sie in der Liste der Umgebungen die getting-started-2 environment aus, die Sie mit der CLI erstellt haben, und wählen Sie Öffnen aus.
Die Cloud9-IDE, die Sie in Modul 3 mithilfe der CLI erstellt haben, wird in einer anderen Registerkarte geöffnet.
Von hier aus können Sie mehr über Cloud9 erfahren oder mit dem Entwickeln, Testen und Ausführen von Anwendungen beginnen.

Erstellte Ressourcen löschen – optional
Wenn Sie nicht vorhaben, die in diesem Modul erstellte AWS-Cloud9-Entwicklungsumgebung zu verwenden, können Sie sie löschen, indem Sie den folgenden Befehl ausführen:
aws cloud9 delete-environment --environment-id <environmentID> --profile admin-1Der Befehl aws cloud9 delete-environment gibt keine Ausgaben zurück. Eine Möglichkeit, zu überprüfen, ob Ihre Umgebung gelöscht wurde, besteht darin, sich mit Ihren Administratoranmeldeinformationen bei der AWS-Konsole anzumelden, zu console.aws.amazon.com/cloud9 zu gehen und zu überprüfen, ob diese noch vorhanden ist. Wenn Sie nicht über die environmentID verfügen, können Sie die Umgebung auch von dort aus löschen.
Die vollständige Dokumentation zu diesem Befehl finden Sie in der AWS-CLI-Befehlsreferenz.
Zusammenfassung
Herzlichen Glückwunsch! Sie haben gelernt, wie Sie die AWS Cloud9 IDE einrichten. Weitere Informationen und Tutorials finden Sie in der AWS-Cloud9-Dokumentation. Sie können hier alle AWS-Cloud9- und CLI-Befehle anzeigen.
Dies ist das Ende des Tutorials zum Einrichten Ihrer AWS-Umgebung.