AWS News Blog
New for App Runner – VPC Support
|
|
With AWS App Runner, you can quickly deploy web applications and APIs at any scale. You can start with your source code or a container image, and App Runner will fully manage all infrastructure including servers, networking, and load balancing for your application. If you want, App Runner can also configure a deployment pipeline for you.
Starting today, App Runner enables your services to communicate with databases and other applications hosted in an Amazon Virtual Private Cloud (Amazon VPC). For example, you can now connect App Runner services to databases in Amazon Relational Database Service (Amazon RDS), Redis or Memcached caches in Amazon ElastiCache, or your own applications running in Amazon Elastic Container Service (Amazon ECS), Amazon Elastic Kubernetes Service (Amazon EKS), Amazon Elastic Compute Cloud (Amazon EC2), or on-premises and connected via AWS Direct Connect.
Previously, in order for your App Runner application to connect to these resources, they needed to be publicly accessible over the internet. With this feature, App Runner applications can connect to private endpoints in your VPC, and you can enable a more secure and compliant environment by removing public access to these resources.
Within App Runner, you can now create VPC connectors that specify which VPC, subnets, and security groups to use for private networking. Once configured, you can use a VPC connector with one or more App Runner services.
When connected to a VPC, all outbound traffic from your AppRunner service will be routed based on the VPC routing rules. Services will not have access to the public internet (including AWS APIs) unless allowed by a route to a NAT Gateway. You can also set up VPC endpoints to connect to AWS APIs such as Amazon Simple Storage Service (Amazon S3) and Amazon DynamoDB to avoid NAT traffic.
The VPC connectors in App Runner work similarly to VPC networking in AWS Lambda and are based on AWS Hyperplane, the internal Amazon network function virtualization system behind AWS services and resources like Network Load Balancer, NAT Gateway, and AWS PrivateLink.
Let’s see how this works in practice with a web application connected to an RDS database.
Preparing the Amazon RDS Database
I start by configuring a database for my application. To simplify capacity management for this database, I use Amazon Aurora Serverless. In the RDS console, I create an Amazon Aurora MySQL-Compatible database. For the Capacity type, I choose Serverless. For networking, I use my default VPC and the default security group. I don’t need to make the database publicly accessible because I am going to connect using private VPC networking. To simplify connecting later, I enable AWS Identity and Access Management (IAM) database authentication.
I start an Amazon Linux EC2 instance using the same VPC and default security group. To connect from the EC2 instance to the database, I need a MySQL client. I install MariaDB, a community-developed branch of MySQL:
Then, I connect to the database using the admin user.
I enter the admin user password to log in. Then, I create a new user (bookuser) that is configured to use IAM authentication.
CREATE USER bookuser IDENTIFIED WITH AWSAuthenticationPlugin AS 'RDS'; I create the bookcase database and give permissions to the bookuser user to query the bookcase database.
CREATE DATABASE bookcase;
GRANT SELECT ON bookcase.* TO 'bookuser'@'%’;
To store information about some of my books, I create the authors and books tables.
CREATE TABLE authors (
  authorId INT,
  name varchar(255)
 );

CREATE TABLE books (
  bookId INT,
  authorId INT,
  title varchar(255),
  year INT
);
Then, I insert some values in the two tables:
INSERT INTO authors VALUES (1, "Issac Asimov");
INSERT INTO authors VALUES (2, "Robert A. Heinlein");
INSERT INTO books VALUES (1, 1, "Foundation", 1951);
INSERT INTO books VALUES (2, 1, "Foundation and Empire", 1952);
INSERT INTO books VALUES (3, 1, "Second Foundation", 1953);
INSERT INTO books VALUES (4, 2, "Stranger in a Strange Land", 1961);
Preparing the Application Source Code Repository
With App Runner, I can deploy a new service from code hosted in a source code repository or using a container image. In this example, I use a private project that I have on GitHub.
It’s a very simple Python web application connecting to the database I just created. This is the source code of the app (server.py):
from wsgiref.simple_server import make_server
from pyramid.config import Configurator
from pyramid.response import Response
import os
import boto3
import mysql.connector

import os

DATABASE_REGION = 'us-east-1'
DATABASE_CERT = 'cert/us-east-1-bundle.pem'
DATABASE_HOST = os.environ['DATABASE_HOST']
DATABASE_PORT = os.environ['DATABASE_PORT']
DATABASE_USER = os.environ['DATABASE_USER']
DATABASE_NAME = os.environ['DATABASE_NAME']

os.environ['LIBMYSQL_ENABLE_CLEARTEXT_PLUGIN'] = '1'

PORT = int(os.environ.get('PORT'))

rds = boto3.client('rds')

try:
    token = rds.generate_db_auth_token(
        DBHostname=DATABASE_HOST,
        Port=DATABASE_PORT,
        DBUsername=DATABASE_USER,
        Region=DATABASE_REGION
    )
    mydb =  mysql.connector.connect(
        host=DATABASE_HOST,
        user=DATABASE_USER,
        passwd=token,
        port=DATABASE_PORT,
        database=DATABASE_NAME,
        ssl_ca=DATABASE_CERT
    )
except Exception as e:
    print('Database connection failed due to {}'.format(e))

def all_books(request):
    mycursor = mydb.cursor()
    mycursor.execute('SELECT name, title, year FROM authors, books WHERE authors.authorId = books.authorId ORDER BY year')
    title = 'Books'
    message = '<html><head><title>' + title + '</title></head><body>'
    message += '<h1>' + title + '</h1>'
    message += '<ul>'
    for (name, title, year) in mycursor:
        message += '<li>' + name + ' - ' + title + ' (' + str(year) + ')</li>'
    message += '</ul>'
    message += '</body></html>'
    return Response(message)

if __name__ == '__main__':

    with Configurator() as config:
        config.add_route('all_books', '/')
        config.add_view(all_books, route_name='all_books')
        app = config.make_wsgi_app()
    server = make_server('0.0.0.0', PORT, app)
    server.serve_forever()
The application uses the AWS SDK for Python (boto3) for IAM database authentication, the Pyramid web framework, and the MySQL connector for Python. The requirements.txt file describes the application dependencies:
To use SSL/TLS encryption when connecting to the database, I download a certificate bundle and add it to my source code repository.
Using VPC Support in AWS App Runner
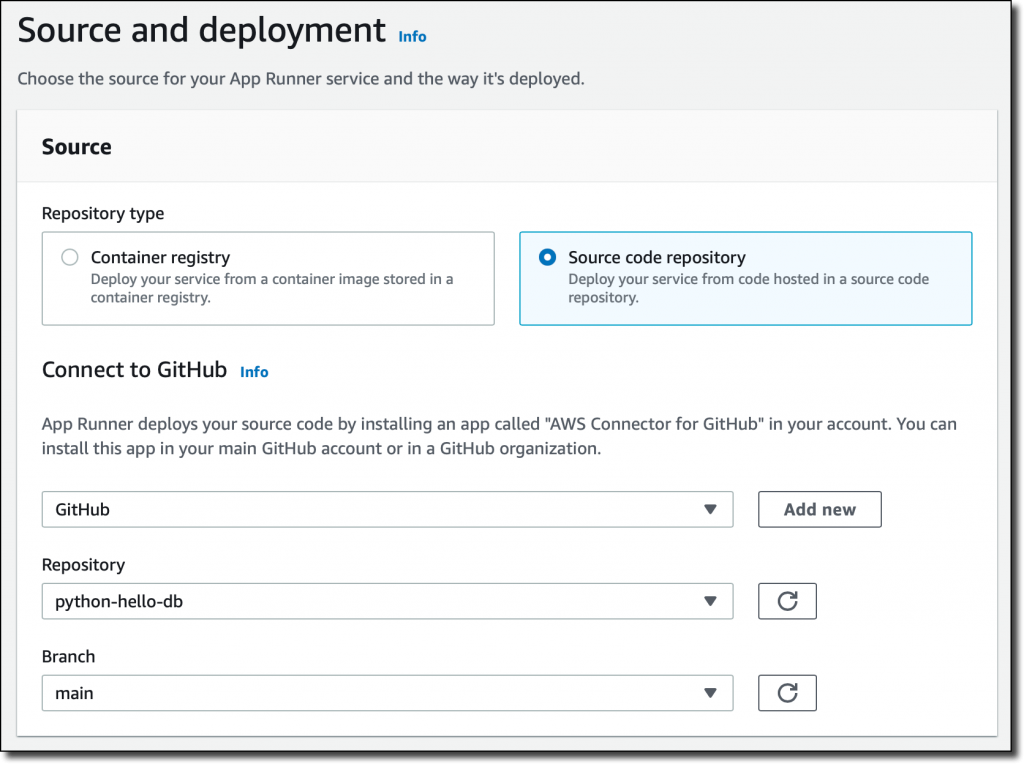
In the App Runner console, I select Source code repository and the branch to use.
For the deployment settings, I choose Manual. Optionally, I could have selected the Automatic deployment trigger to have every push to this branch deploy a new version of my service.
Then, I configure the build. This is a very simple application, so I pass the build and start commands in the console:
Build command – pip install -r requirements.txt
Start command –
python server.py
For more advanced use cases, I would add an apprunner.yaml configuration file to my repository as in this sample application.
In the service configuration, I add the environment variables used by the application to connect to the database. I don’t need to pass a database password here because I am using IAM authentication.
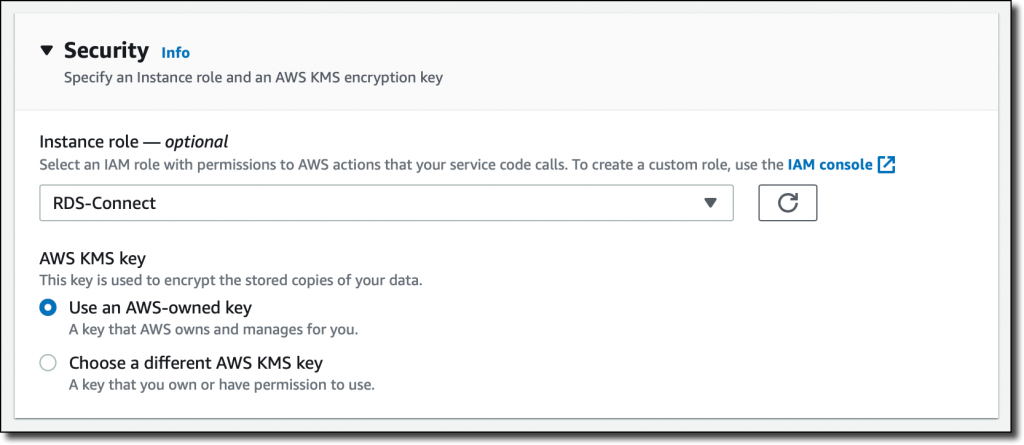
In the Security section, I select an IAM role that gives permissions to connect to the database using IAM database authentication as described in Creating and using an IAM policy for IAM database access.
Here’s the syntax of the IAM role. I find the database Resource ID in the Configuration tab of the RDS console.
{
    "Version": "2012-10-17",
    "Statement": [
        {
            "Effect": "Allow",
            "Action": [
                "rds-db:connect"
            ],
            "Resource": [
                "arn:aws:rds-db:<REGION>:<ACCOUNT>:dbuser:<DB_RESOURCE_ID>/<DB_USER>"
            ]
        }
    ]
}
For the role trust policy, I follow the instruction for instance roles in How App Runner works with IAM.
{
  "Version": "2012-10-17",
  "Statement": [
    {
      "Effect": "Allow",
      "Principal": {
        "Service": "tasks.apprunner.amazonaws.com"
      },
      "Action": "sts:AssumeRole"
    }
  ]
}
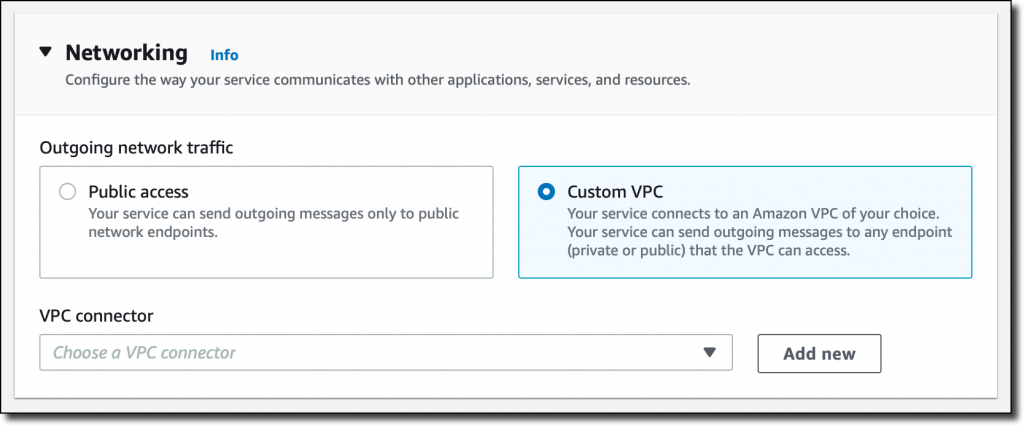
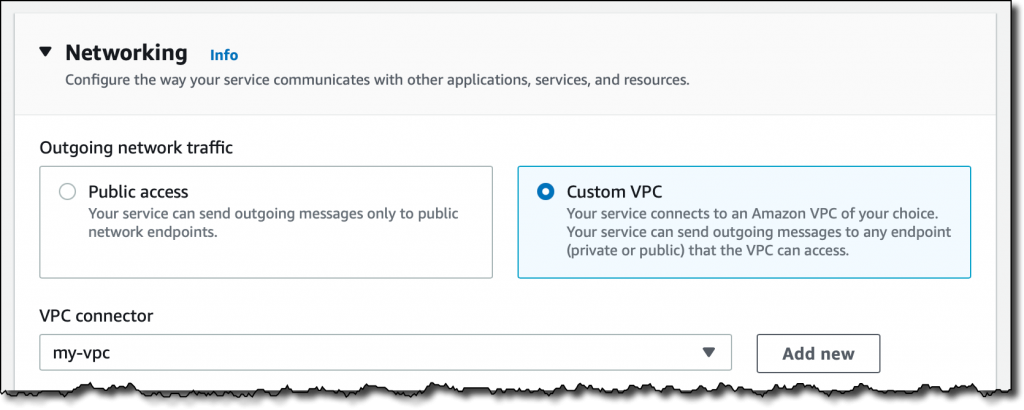
For Networking, I select the new option to use a Custom VPC for outgoing network traffic and then add a new VPC connector.
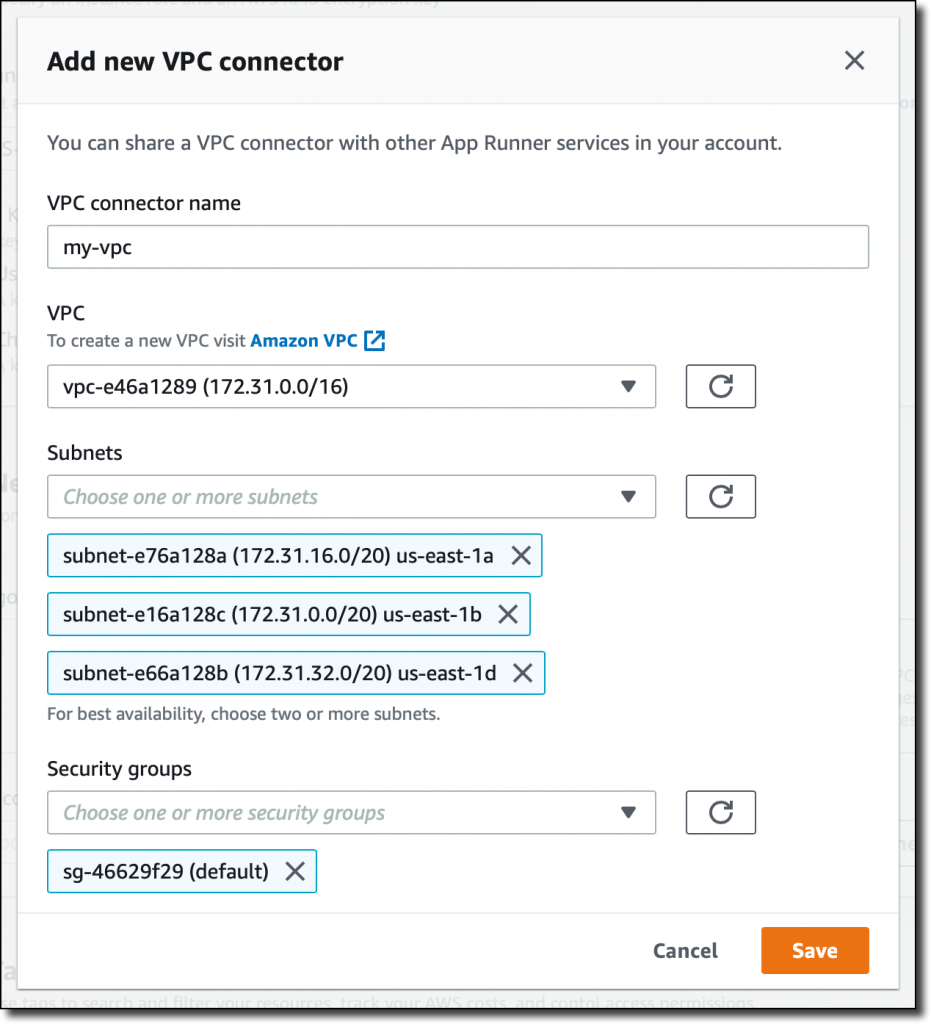
To add a new VPC connector, I write down a name and then select the VPC, subnets, and security groups to use. Here, I select all the subnets of my default VPC and the default security group. In this way, the App Runner service will be able to connect to the RDS database.
The next time, when configuring another application with the same VPC networking requirements, I can just select the VPC connector I created before.
 I review all the settings and then create and deploy the service.
After a few minutes, the service is running, and I choose the default domain to open a new tab in my browser. The application is connected to the database using VPC networking and performs a SQL query to join the books and authors tables and provide some reading suggestions. It works!
Availability and Pricing
VPC connectors are available in all AWS Regions where AWS App Runner is offered. For more information, see the Regional Services List. There is no additional cost for using this feature, but you pay the standard pricing for data transmission or any NAT gateway or VPC endpoints you set up. You can set up VPC connectors with the AWS Management Console, AWS Command Line Interface (AWS CLI), AWS SDKs, and AWS CloudFormation.
With VPC connectors, you can deploy your applications using App Runner and connect them to your private databases, caches, and applications running in a VPC or on-premises and connected via AWS Direct Connect.
To learn more about what happens under the hood, check out this post from the App Runner service team.
— Danilo

