Amazon Amplify でウェブアプリケーションをデプロイする
入門ガイド
モジュール 2: フロントエンドを構築し、API を接続する
このモジュールでは、Amplify プロジェクトに API を追加する方法を説明します
はじめに
このモジュールでは、ウェブアプリケーションのフロントエンドを構築し、GraphQL API を使用して API (アプリケーションプログラミングインターフェイス) に接続します。GraphQL は API のクエリ言語であり、アプリケーションのデータを取得および更新するのに役立ちます。
学習内容
- 基本的な React フロントエンドアプリケーションを作成する
- アプリケーションから GraphQL API を呼び出す
- アプリケーションのフロントエンドから API を呼び出す
所要時間
10 分
モジュールの前提条件
- 管理者レベルのアクセス権を持つ AWS アカウント**
- 推奨ブラウザ: Chrome または Firefox の最新バージョン
[**] 過去 24 時間以内に作成されたアカウントは、このチュートリアルに必要なサービスへのアクセス権限がまだ付与されていない可能性があります。
実装
Amplify ライブラリをインストールする
Amplify React ライブラリ @aws-amplify/ui-react (React UI コンポーネントを含む) をインストールする必要があります。
ライブラリをインストールするには、次のコマンドを実行します。
npm install @aws-amplify/ui-react次に、アプリケーションのフロントエンドを作成する必要があります。src/App.js file を開き、そのコンテンツ全体を次のコードに置き換えます。
import { withAuthenticator, AmplifySignOut } from '@aws-amplify/ui-react';
import Amplify from 'aws-amplify';
import awsExports from './aws-exports';

Amplify.configure(awsExports);

function App() {
  return (
    <div>
      <h1>Notes App</h1>
      <AmplifySignOut />
    </div>
  );
}

export default withAuthenticator(App);アプリケーションをテストする
これで、次のように、アプリケーションをローカルで実行してテストできます。
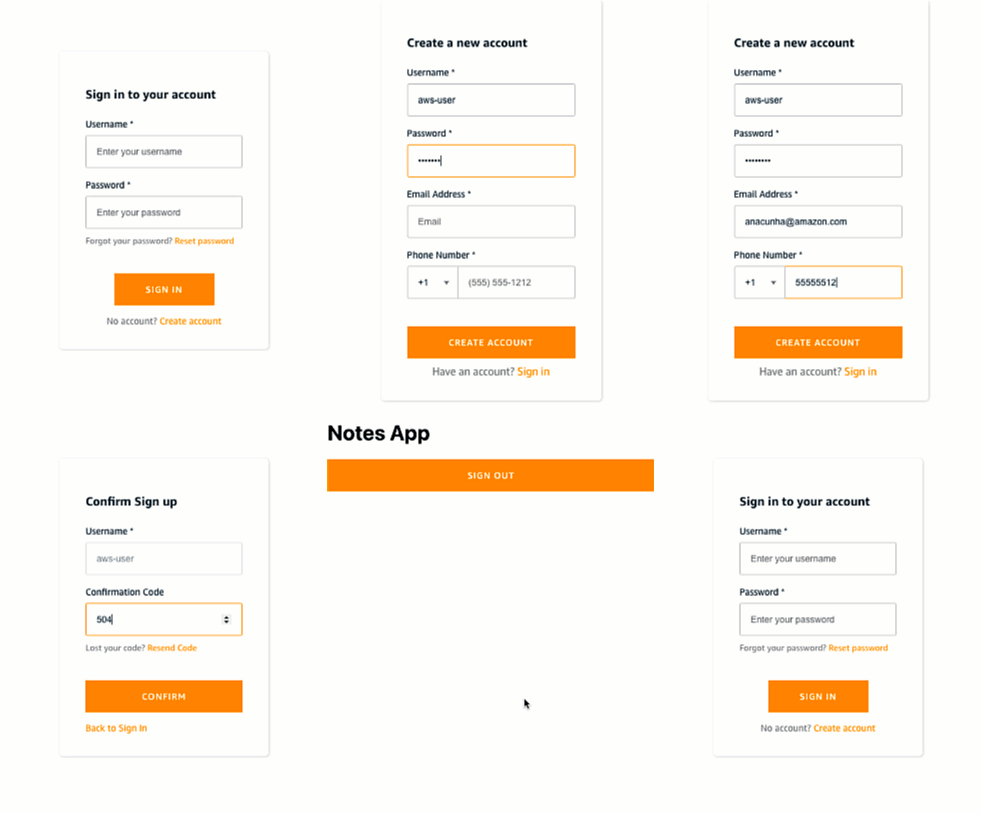
npm startこれにより、http://localhost:3000 で開発サーバーが起動し、ブラウザでページが開きます。サービスを使用する前にサインアップするように求められます。このデータはプロジェクトの Congnito データベースに保存されており、アクセスできるのはユーザーのみです。ログインすると、アプリケーションには Notes App の見出しと、まだ何も追加していないため [サインイン] ボタンのみが表示されます。次に、アプリケーションに API を追加します。ctrl + c を使用して、サーバーを再度停止できます。

ほんの数行の CLI コマンドと数行のコードで、ログインフローを含む実用的なシングルページアプリケーションを作成しました。このアプリケーションは単なるスケルトンであり、ログインはまだ機能しません。次のセクションで、アプリケーションに続けて機能を追加します。
Amplify で GraphQL API を追加する
次に、アプリケーションに API を追加します。Amplify は、AWS AppSync および Amazon DynamoDB を使用して GraphQL API を強化します。AppSync は API を処理するマネージド GraphQL サービスであり、Amazon DynamoDB は API が使用するデータを格納する NoSQL データベースです。
API を追加するには、amplify add api を実行し、質問に対して次のオプションを選択します (行は > 記号で始まります) - このステップでは、認証プロバイダーについて質問します。これは、将来のガイドで使用します。
GraphQL スキーマは、オブジェクトとそのフィールドの表現です。GraphQL スキーマを定義する必要があります。Amplify は必要な DynamoDB テーブルを作成し、読み取り、書き込み、更新、削除を処理するように GraphQL を設定します。amplify/backend/api/amplifyapp/schema.graphql ファイルを開き、内容を次のように置き換えます。
amplify add api

? Please select from one of the below mentioned services:
❯ GraphQL
  REST
? Provide API name: amplifyapp
? Choose the default authorization type for the API
  API key
❯ Amazon Cognito User Pool
  IAM
  OpenID Connect
? Do you want to configure advanced settings for the GraphQL API
? Do you want to use the default authentication and security configuration?
❯ Default configuration
  Default configuration with Social Provider (Federation)
  Manual configuration
  I want to learn more.
? How do you want users to be able to sign in?
 ◯ Email
❯◉ Username
 ◯ Phone number
? Do you want to configure advanced settings?
❯ No, I am done.
  Yes, I want to make some additional changes.
? Do you have an annotated GraphQL schema? No
? Choose a schema template:
❯ Single object with fields (e.g., “Todo” with ID, name, description)
  One-to-many relationship (e.g., “Blogs” with “Posts” and “Comments”)
  Objects with fine-grained access control (e.g., a project management app with owner-bas
ed authorization)
? Do you want to edit the schema now? YesGraphQL スキーマを作成する
GraphQL スキーマは、オブジェクトとそのフィールドの表現です。GraphQL スキーマを定義する必要があります。Amplify は必要な DynamoDB テーブルを作成し、読み取り、書き込み、更新、削除を処理するように GraphQL を設定します。amplify/backend/api/amplifyapp/schema.graphql ファイルを開き、内容を次のように置き換えます。
type Note @model @auth(rules: [{ allow: owner }]) {
  id: ID!
  text: String!
}このスキーマは、ID とテキストを必須フィールドとして含む Note タイプを定義します。また、Amplify の GraphQL 変換ライブラリの一部であるディレクティブも含まれています。
@model: @model でアノテーションが付けられたタイプは、DynamoDB に保存され、CRUDL (作成、読み取り、更新、削除、リスト) オペレーションが自動的に作成されます。
@auth: @auth でアノテーションが付けられたタイプは、一連の承認ルールによって保護されています。ここでは、所有者認証を使用して、Note の所有者のみがアクセスして変更できるようにしています。
アプリケーションをデプロイする
これで、amplify push を実行して、Amplify ウェブアプリケーションをデプロイする準備が整いました。これにより、アプリケーションが AWS アカウントにアップロードされ、Amplify によりデプロイされている変更が表示され、デプロイの確認が求められます。
✔ Successfully pulled backend environment dev from the cloud.

Current Environment: dev

┌──────────┬────────────────────┬───────────┬───────────────────┐
│ Category │ Resource name      │ Operation │ Provider plugin   │
├──────────┼────────────────────┼───────────┼───────────────────┤
│ Auth     │ amplifyapp6177aede │ Create    │ awscloudformation │
├──────────┼────────────────────┼───────────┼───────────────────┤
│ Api      │ amplifyapp         │ Create    │ awscloudformation │
└──────────┴────────────────────┴───────────┴───────────────────┘
? Are you sure you want to continue? Yes確認後、プロンプトが表示されたら、次のようにフォローアップ質問のデフォルト値を選択します。
? Do you want to generate code for your newly created GraphQL API Yes
? Choose the code generation language target javascript
? Enter the file name pattern of graphql queries, mutations and subscriptions src/graphql/**/*.js
? Do you want to generate/update all possible GraphQL operations - queries, mutations and subscriptions Yes
? Enter maximum statement depth [increase from default if your schema is deeply nested] 2デプロイには数分かかり、作成中のリソースのリストが表示されます。Amplify は次のアクションを実行しました。
- 3 種類すべての GraphQL 操作 (クエリ、ミューテーション、サブスクリプション) を使用して、AWS AppSync に基づく GraphQL API を作成しました。
- Note の作成、取得、更新に必要な GraphQL オペレーションを使用して、src/graphql/ フォルダ内にコードを生成しました。
- アプリケーションで作成された Note を保存するための DynamoDB テーブルを作成しました。
API を使用するようにフロントエンドを更新する
デプロイしたばかりの新しい API を使用するには、内容を次のコードに置き換えて src/App.js ファイルを更新します。
import { Component } from 'react';
import Amplify, { API, graphqlOperation } from 'aws-amplify';
import { createNote, deleteNote } from './graphql/mutations';
import { listNotes } from './graphql/queries';

import { withAuthenticator, AmplifySignOut } from '@aws-amplify/ui-react';
import awsExports from './aws-exports';

Amplify.configure(awsExports);

class AddNote extends Component {
  constructor(props) {
    super(props);
    this.state = { text: '' };
  }

  handleChange = (event) => {
    this.setState({ text: event.target.value });
  }

  handleClick = () => {
    this.props.addNote(this.state);
    this.setState({ text: '' });
  }

  render() {
    return (
      <div style={styles.form}>
        <input
          value={this.state.text}
          onChange={this.handleChange}
          placeholder="New Note"
          style={styles.input}
        />
        <button onClick={this.handleClick} style={styles.addButton}>Add Note</button>
      </div>
    );
  }
}

class NotesList extends Component {
  render() {
    return (
      <div>
        {this.props.notes.map(note =>
          <div key={note.id} style={styles.note}>
            <p>{note.text}</p>
            <button onClick={() => { this.props.deleteNote(note) }} style={styles.deleteButton}>x</button>
          </div>
        )}
      </div>
    );
  }
}

class App extends Component {
  constructor(props) {
    super(props);
    this.state = { notes: [] };
  }

  async componentDidMount() {
    var result = await API.graphql(graphqlOperation(listNotes));
    this.setState({ notes: result.data.listNotes.items });
  }

  deleteNote = async (note) => {
    const id = {
      id: note.id
    };
    await API.graphql(graphqlOperation(deleteNote, { input: id }));
    this.setState({ notes: this.state.notes.filter(item => item.id !== note.id) });
  }

  addNote = async (note) => {
    var result = await API.graphql(graphqlOperation(createNote, { input: note }));
    this.state.notes.push(result.data.createNote);
    this.setState({ notes: this.state.notes });
  }

  render() {
    return (
      <div style={styles.container}>
        <h1>Notes App</h1>
        <AddNote addNote={this.addNote} />
        <NotesList notes={this.state.notes} deleteNote={this.deleteNote} />
        <AmplifySignOut />
      </div>
    );
  }
}

export default withAuthenticator(App);

const styles = {
  container: { width: 480, margin: '0 auto', padding: 20 },
  form: { display: 'flex', marginBottom: 15 },
  input: { flexGrow: 2, border: 'none', backgroundColor: '#ddd', padding: 12, fontSize: 18 },
  addButton: { backgroundColor: 'black', color: 'white', outline: 'none', padding: 12, fontSize: 18 },
  note: { display: 'flex', justifyContent: 'space-between', alignItems: 'center', fontSize: 22, marginBottom: 15 },
  deleteButton: { fontSize: 18, fontWeight: 'bold' }
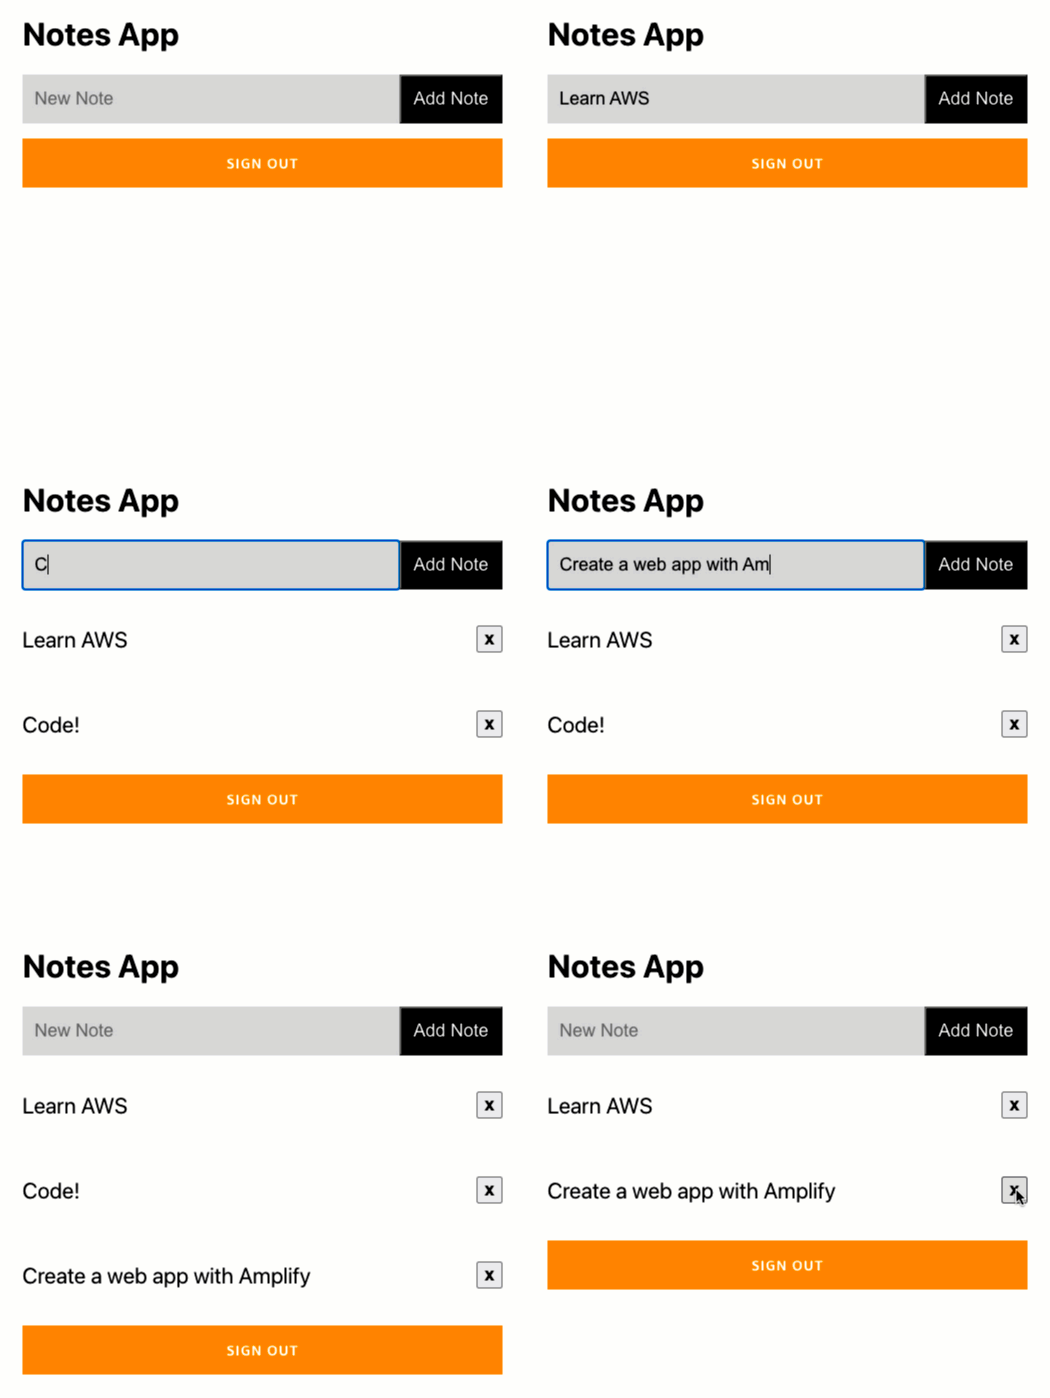
}これで、動作するアプリケーションができました。多要素認証でログインすると、アプリケーションは API と通信して、Note を保存/更新/削除できるようになります。ローカルでテストするには、npm start を再度実行して確認します。

まとめ
このモジュールでは、React フロントエンドアプリケーションを作成し、それに API を追加し、AWS アカウントに API をデプロイする方法を説明しました。次のモジュールでは、GitHub リポジトリからフロントエンドをデプロイする方法と、将来の変更を自動的にデプロイするように CI/CD パイプラインをセットアップする方法を説明します。
次回: デプロイを自動化する


