How to cost optimize Jenkins jobs on Kubernetes
Welcome. In this tutorial you will launch an Amazon EKS cluster with a managed node group running On-Demand instances for a Jenkins server. Then, you will set up another EKS managed node group running Spot Instances, and run a sample Jenkins build on those Spot Instances. You will also configure the build to retry in case Spot Instances are interrupted, when EC2 needs the capacity back.
| About this Tutorial | |
|---|---|
| Time | 30 minutes |
| Cost | Under $5 |
| Use Case | Compute, Containers |
| Products | EC2 Spot Instances, Amazon EKS |
| Level | 200 |
| Last Updated | February 8, 2021 |
Step 1: Setup Cloud9
1.1 — Log into the AWS Management Console and open the Elastic Beanstalk console.
Click on Create Application to create and configure your application.
Already have an account? Log in to your account
1.2 — In the Application information section, use sample-nodejs-app as the Application Name.
1.3 — In the Platform section, select Node.js for Platform and leave the defaults for the Platform branch and Platform Version.
Note: You might see a new version for Platform if we updated the defaults.
1.4 — In the Application code section, choose Sample Application.
We will be using the sample application provided by Elastic Beanstalk for this example, but you can upload your own code as well.
Click on Create Application.
1.5 — It might take few minutes while Elastic Beanstalk is creating a collection of AWS resources, including an Application Load Balancer and Amazon EC2 Autoscaling group, to deploy a version of your application environment.
1.6 — Once your application is deployed, you will be redirected to the environment page showing the health and details of the deployed version of your application.
Step 2: Edit the Compute Environment to use EC2 Spot Instances
2.1 — By default, Elastic Beanstalk creates compute environments with an Auto Scaling group (ASG) with single instance type and on-demand purchase option.
In this section, you modify the compute environment to use EC2 Spot Instances to achieve significant cost off of the On-Demand prices.
To modify the compute environment, click on Configuration on the left menu options under Samplenodejsapp-env.2.1 — b. On the Configure overview page, click edit on capacity settings.
sudo curl --silent --location -o "awscliv2.zip" "https://awscli.amazonaws.com/awscli-exe-linux-x86_64.zip" 2.2 — a. The application needs a minimum of 9 instances to function and should be able to scale up to 3x based on the load. Set the Min to 9 and Max to 27.
sudo unzip awscliv2.zip && sudo ./aws/install2.2 — b. We will use both On-Demand Instances and Spot Instances in our Auto Scaling group using the MixedInstancesPolicy. To configure it select Combine purchase options and instances for Fleet composition. Leave the Default for Maximum spot price.
Further information on MIxedInstancePolicy is available here.
sudo curl --silent --location -o /usr/local/bin/kubectl https://storage.googleapis.com/kubernetes-release/release/v1.19.6/bin/linux/amd64/kubectl2.3 — c. Because the sample application is stateless, fault tolerant and can handle an instance being interrupted, mostly Spot Instances will be used, with a small number of On-Demand Instances to provide a consistent baseline of compute. Set the On-Demand base to 3. Set the On-Demand above base to 0%, which means anything above the 3 On-Demand base Instances will run Spot Instances.
sudo chmod +x /usr/local/bin/kubectl2.4 — d. Selecting Instance types is an important part of following best practices when using EC2 Spot Instances with Auto Scaling groups. Because Spot Instances are spare On-Demand capacity and their availability at any given moment is dynamic and continually changes in real time, it’s important to be flexible with multiple Instance families, sizes, and generations, and multiple Availability Zones. Set the instance types to t2.large, t3a.large, t3.large, m5a.large, m5.large, and m4.large.
Hint: You can got to EC2 Console > Instance Types to find a list of Instance Types that meets your criteria by applying filters like vcpus and memory.
sudo curl --silent --location https://github.com/weaveworks/eksctl/releases/download/0.38.0/eksctl_Linux_amd64.tar.gz | tar xz -C /tmp
sudo mv -v /tmp/eksctl /usr/local/bin2.2 — e. Selecting multiple Availability Zones is important for high availability of the application and also for following Spot best practices and tapping into multiple capacity pools. Selct Any 3 for Availability Zones and select 3 availability zones from the dropdown for Placement.
curl -sSL https://raw.githubusercontent.com/helm/helm/master/scripts/get-helm-3 | bash2.2 — f. Leave the default setting for Scaling triggers and click Apply.
helm repo add jenkins https://charts.jenkins.ioStep 3: Access your Application
3.1 — Once your environment is healthy, click on the load balancer url for the application, as shown in the screenshot.
eksctl create cluster --version=1.19 --name=jenkins-cluster --node-private-networking --alb-ingress-access --region=us-west-2 --asg-access --without-nodegroup2.2 — f. Leave the default setting for Scaling triggers and click Apply.
helm repo add jenkins https://charts.jenkins.ioStep 4: Install Jenkins server on an On Demand nodegroup
Install Jenkins on the EKS cluster on the jenkins-server-ng nodegroup.
4.1 —Create a managed nodegroup running on On Demand EC2 instances to install Jenkins application.
Note: the creation of the managed nodegroup jenkins-server-ng to utilize On Demand EC2 instances.
The nodes in this nodegroup are identified with node-labels : lifecycle=OnDemand and intent=jenkins-server. The provisioning of the EKS nodegroup takes 2 to 5 minutes.
eksctl create nodegroup --cluster=jenkins-cluster --region=us-west-2 --name=jenkins-server-ng --managed --nodes=2 --node-labels="lifecycle=OnDemand,intent=jenkins-server"4.2 —Install Jenkins from helm charts.
Note the use of nodeSelector.intent=jenkins-server in the helm command to ensure the Jenkins application pods run on jenkins-server-ng nodegroup.
helm install cicd jenkins/jenkins --set nodeSelector.intent=jenkins-server --set rbac.create=true,controller.servicePort=80,controller.serviceType=LoadBalancer,controller.JCasC.enabled=false,controller.enableXmlConfig=true4.3 —Check if the Jenkins server is up.
Wait until you are seeing the pods are in the “Running” state, which might take about 2 minutes. You can use ctrl-c to exit from the command.
kubectl get pods -w4.4 —Get the service url to Jenkins:
echo $(kubectl get svc --namespace default cicd-jenkins --template "http://{{ range (index .status.loadBalancer.ingress 0) }}{{ . }}{{ end }}/login")4.5 —Open a new tab to login into Jenkins with the URL received in 4.4
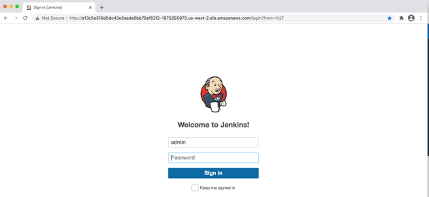
4.6 — Login with admin as username and password from this command:
printf $(kubectl get secret --namespace default cicd-jenkins -o jsonpath="{.data.jenkins-admin-password}" | base64 --decode);echo4.7 —Validate that the Jenkins application is running on the jenkins-server-ng nodegroup.
Note the label on the node as intent=jenkins-server indicating that the Jenkins is running on jenkins-server-ng nodegroup.
kubectl get nodes -o wide --show-labels $(kubectl get pod cicd-jenkins-0 -o jsonpath='{.spec.nodeName}') | grep intentStep 5: Install Jenkins agents on a EC2 Spot nodegroup
Configure Jenkins to run the Jenkins agents on jenkins-agents-spot-ng nodegroup.
5.1 — Create a managed nodegroup running on Spot Instances to install Jenkins agents with the following command:
Note the creation of the managed nodegroup jenkins-agents-spot-ng to utilize Spot Instances (--spot option). The nodes in this nodegroup are identified with node-labels : lifecycle=Ec2Spot and intent=jenkins-agents.
Notice that this particular nodegroup utilizes about 7 different instance types, all of which have 4vCPU and 16GB memory. Spot Best practice is to utilize as many similarly sized instance types to create the Spot nodegroup so that nodes are provisioned from a large number of Spot capacity pools to increase your chances of achieving the desired scale from spare capacity pools.
EKS managed node groups with Spot Instances provides you the advantage of utilizing Spot best practice of “Capacity Optimized” Spot allocation strategy, and a number of defaults including turning on “Capacity Rebalance”.
The provisioning of the EKS nodegroup takes 2 to 5 minutes.
eksctl create nodegroup --cluster=jenkins-cluster --region=us-west-2 --managed --spot --name=jenkins-agents-spot-ng --instance-types=m5.large,m5d.large,m4.large,t3.large,t3a.large,m5a.large,t2.large --node-labels="lifecycle=Ec2Spot,intent=jenkins-agents"5.2 — Get the service url from step 4.4 to Jenkins and log in.
Choose the Manage Jenkins menu, then Manage Node and Clouds option in the Jenkins tab.

5.3 — Click on Configure Clouds link.

5.4 — Click on Pod Templates to expand the default Pod template and click on Pod Template Details:

5.5 — Change the pod name to jenkins-agent. On the Node Selector add intent=jenkins-agents,lifecycle=Ec2Spot. Click Save.

Step 6: Setup Jenkins plugins for retry
Configure Jenkins for increased resilience by configuring automatic retries for the build process, in case a Spot Instance gets interrupted mid-build, when EC2 needs the capacity back.
Note that Naginator is one of the plugins in Jenkins to allow for a build retry.
6.1 — Choose the Manage Jenkins menu, then Manage Plugins option and select Available tab.


6.2 —In the filter field, enter Naginator.

6.3 —Check the box next to the Naginator result and click Install without restart.

6.4 — In the next page, check the box next to Restart Jenkins with installation is complete and no jobs are running box.
Note that this will restart Jenkins and will take 2 to 4 minutes. Once Jenkins comes up, login again using Step 4.4 thru 4.6.

Step 7: Setup a sample Continuous Integration (CI) pipeline in Jenkins
Setup a sample pipeline which will simulate a build and configure it for automatic retries.
7.1 — Get the service url to Jenkins and log in.
Choose the New Item menu.

7.2 —Enter name as Build-Sample, select Freestyle Project and click OK.

7.3 —Scroll to the Build section, click Add build step and select Execute shell.

7.4 — In the command box enter: sleep 3m; echo "Job completed successfully".

7.5 — Scroll to the Post-build Actions section, click Add post-build action and select Retry build after failure.
Note that we are adding a post build action to retry the build if there has been any failure in building. This is to increase the resilience of builds as the agents run on Spot Instances.

7.6 — Check the Fixed box and enter 20 for Fixed delay.
Note that we are waiting for 20 seconds between builds to allow for node recovery.

7.7 — Enter 3 as “Maximum number of successive failed builds."
Note that we are waiting for 3 successive failed builds to cancel the retry sequence.

7.8 — Click Save.
Note: You have created a new CI pipeline with Post Build action to retry the build pipeline fails.

Step 8: Run the sample CI pipeline in Jenkins
Run the sample pipeline setup and validate the Jenkins setup.
8.1 — Click on the Build Now button to the right of the Build-Sample in the project page.

8.2 —Enter name as Build-Sample, select Freestyle Project and click OK.

8.3 —In your Cloud9 IDE, get the pod name of the Jenkins agent.
Note that a new pod with name starting with default- comes up.
Note to use ctrl-c to exit from the command.
kubectl get pod -w8.4 — Notice that the build kicks off but is in waiting state.

8.5 — Validate that the Jenkins agent is running on the jenkins-agent-spot-ng nodegroup.
Note: use the name of the new pod that is created in this command. Notice the label on the node as intent=jenkins-agents indicating that the Jenkins agents is running on jenkins-agent-spot-ng nodegroup.
kubectl get nodes -o wide --show-labels $(kubectl get pod <<POD NAME>> -o jsonpath='{.spec.nodeName}') | grep intent8.6 — Click on #1 link under Build History, then click on Console Output.
Notice that the build executes successfully.


Step 9: Cleanup
Delete resources created
9.1 — Delete the installed Jenkins package.
helm delete cicd9.2 —Delete the managed Spot nodegroup.
eksctl delete nodegroup --cluster=jenkins-cluster --region=us-west-2 --name=jenkins-agents-spot-ng9.3 —Delete the managed On Demand nodegroup.
eksctl delete nodegroup --cluster=jenkins-cluster --region=us-west-2 --name=jenkins-server-ng9.4 —Delete the cluster.
The deletion of the cluster will wait until all of the nodegroups to be deleted before the deletion of the cluster takes place. This step could take 5 to 7 minutes to complete.
eksctl delete cluster --name=jenkins-cluster9.5 — Delete the Cloud9 environment.
Recommended next steps
Learn about Spot managed node groups
Learn about how Amazon EKS supports provisioning and managing EC2 Spot Instances in managed node groups applying Spot Instances best practices.
Deep dive to use Spot Instances with Amazon EKS
Deep dive using hands-on workshop to provision, manage, and maintain your Kubernetes clusters with Amazon EKS at any scale on Spot Instances.
Learn about Amazon EC2 Spot Instances
Learn more about how Amazon EC2 Spot Instances lets you take advantage of unused EC2 capacity in the AWS at up to a 90% discount compared to On-Demand prices.