Hosting WordPress on Amazon Lightsail is a cost-effective way to adopt the cloud and benefit from the security and scale of AWS.
Seahorse, a trusted AWS Partner, provide a simple seamless solution for migrating a WordPress site from an existing hosting provider (or localhost) to Amazon Lightsail. In addition, Seahorse provide a Management Console within WordPress to give users the ability to manage their AWS services. For users who operating at scale, a remote API Management console is provided.
What you will accomplish
In this tutorial, we'll guide you through the process of how to launch a clone of a WordPress
website on Amazon Lightsail using the Seahorse software on a free to use development
environment: Click here to download our Free Trial Software
In this tutorial, you will:
- Learn how to install and operate Seahorse's software on your existing WordPress website
- Understand the process involved in migrating your existing WordPress website to Amazon Lightsail
- Discover the benefits of using Amazon Lightsail as a WordPress hosting service by
trying a demo of your WordPress website for free
Notes:
- There are no charges for using WP on AWS Plugin or Amazon Lightsail for this tutorial.
- Your existing Website will not be affected and will remain in it's current location.
AWS experience
Beginner
Time to complete
10-20 minutes
Cost to complete
Free
Requires
AWS account
WP on AWS Plugin
Services used
Last updated
February 29, 2024
Step 1: Sign in to the administration dashboard of your WordPress website
Complete the following steps to sign in to the administration dashboard of your WordPress website.
If you are already signed-in, skip to step: Install Plugin.
Already have the Plugin installed, skip to step: User registration.
1.1 — In a browser, navigate to your site: http://example.com/wp-login.php
(replace example.com with the URL of your WordPress website).
1.2 — Log into your instance.
- For Username or Email Address, enter the relevant Administrator Username or Email.
- For Password, enter the default Administrator Password.
- Select Log In.

Step 2: Install the WP on AWS Plugin to your WordPress Site
Now you have logged-in to your WordPress Administration Dashboard, the required plugin can be installed.
Already have the Plugin installed, skip to step: User Registration.
2.1 — Download the Plugin zip file and upload it manually to your site. (Download WP on AWS Plugin here).
- Navigate to Plugin tab on the administrator sidebar menu
- Select Add New
- Select Upload Plugin
- Select the downloaded zip file
- Select Install Now
2.2 — When the Installation Process is complete, select Activate to activate the Plugin.


2.3 — Install via the WordPress Plugin Repository Search
- Navigate to the Plugin tab on the administrator sidebar menu
- Select Add New
- In the Search Plugins box, enter wp migrate 2 aws
- Scroll to the Correct Item
- Choose Install Now
2.4 — When the installation process is complete, choose Activate to activate the Plugin.


Step 3: User registration
In this step, you will enter your email address to register for your trial.
3.1 — Register your email on the WP on AWS Plugin interface.
- Navigate to the previously downloaded WP on AWS Plugin interface
- WP on AWS will use the default WordPress Administrator email address associated with your site. You will need to update this, if it is not the correct email address to use.
- Select Register Trial
Details of your cloned site with be emailed to the address provided so please ensure this is a valid and accessible address.

Step 4: Download the website database
In this step, you will prepare the Database, create an automated clone of your Website's Database. This clone will be used to import your website's content to AWS.
Already Downloaded the Database, skip to step: Prepare File System.
4.1 — In the WP on AWS Plugin interface, complete the following steps:
- Navigate to the Prepare Database Status section
- Choose Prepare Database
- The database download will be confirmed, and the database status will update.


Step 5: Prepare the website file system
In this step, you will create an automated clone of your website's file system. This includes your themes, plugins, /new-images, etc, and will be used to display your website's content on AWS.
Already Prepared the File System, skip to step: Clone file system.
5.1 — In the WP on AWS Plugin interface complete the following steps:
- Navigate to the File-System Preparation Status section
- If you don't see the Prepare File System option, verify the Database download status was updated to successful in the previous step.
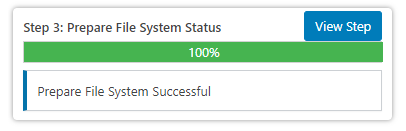
- Select Prepare File System
The progress is indicated by the Progress bar. Progress duration varies depending on the size of your file and the server on which it is hosted.
When completed, the file system preparation status will be updated.

Step 6: Clone the prepared file system
Now that your Website has been prepared, a copy can be uploaded to AWS. In this step, you will upload the clone of your Website. This includes your Database, Themes, Plugins and /new-images etc and will be used to create your cloned Website on AWS.
Already Cloned the File System, skip to step Launch your website.
6.1 — In the WP on AWS Plugin interface, complete the following steps:
- Navigate to the Clone to AWS Status section
- If you don't see the Clone Prepared File System option, verify the Prepare File System status was updated to Successful in the previous step.
- Select Clone to AWS
When complete, the Clone to AWS status will be updated. Progress duration may vary depending on the size of your file system and the server on which it is hosted.


Step 7: Launch your website on AWS
After a copy of your Website has been uploaded to AWS, it can now be launched. In this step, you will run a test migration to launch and view a clone of your Website in AWS Lightsail.
7.1 — In the WP on AWS Plugin interface
- Navigate to the Launch a Clone of This Website on AWS section
- If you don't see the Launch on AWS option, verify the Ensure Clone File System status was updated to Successful in the previous step.
- Select Launch on AWS
When the initial request is complete the IP address of your cloned website will be displayed but the website is still being compiled.
You will receive an email to the address associated with your license which contains links to view your website.
All Done! This temporary site will remain active for review for 6 hours after launch.


Conclusion
Congratulations! You migrated your WordPress website to run on Amazon Lightsail using Seahorse!
Ready to Progress with a Full Migration? Contact Seahorse Data, the Service Provider