Deploy a Web App Using AWS App Runner
TUTORIAL


Module 1: Prepare Your Deployment
In this module, you will use AWS CDK and AWS App Runner to deploy a web application
Overview
In this module you will create a CDK application that will create all the necessary infrastructure for AWS App Runner and deploy a sample container to it.
What you will accomplish
In this module, you will:
- Create a simple CDK application
- Define an IAM policy and role to allow access to other services
- Deploy a container using App Runner
Time to complete
15 minutes
Module prerequisites
- AWS account with administrator-level access*
- Recommended browser: The latest version of Chrome or Firefox
*Accounts created within the past 24 hours might not yet have access to the services required for this tutorial.
Implementation
Create the CDK app
First, make sure you have downloaded, and extracted, the example code for this guide referenced on the Introduction page (replace <EXAMPLE_CODE_URL> with the URL of the example code as referenced, and <DOWNLOADED_FILE_NAME> with the corresponding file name):
wget <EXAMPLE_CODE_URL>
unzip <DOWNLOADED_FILE_NAME>
cd getting-started-containers-app-runner-mainNext, ensure you have CDK v2 installed. If you do not have it installed, please follow the steps in the Get Started with AWS CDK guide.
cdk --versionWe will now create the skeleton CDK application using TypeScript as our language of choice:
mkdir infra
cd infra
cdk init app --language typescriptThis will output the following:
Applying project template app for typescript
# Welcome to your CDK TypeScript project!

This is a blank project for TypeScript development with CDK.

The `cdk.json` file tells the CDK Toolkit how to execute your app.

## Useful commands

* `npm run build` compile typescript to js
* `npm run watch` watch for changes and compile
* `npm run test` perform the jest unit tests
* `cdk deploy` deploy this stack to your default AWS account/region
* `cdk diff` compare deployed stack with current state
* `cdk synth` emits the synthesized CloudFormation template

Executing npm install...
✅ All done!Create the code for the resource stack
In this stack, you're going to create the following resources:
- App Runner service: This is how your container will be run.
- Output: This will display the URL of your service.
Deploy the container service
To deploy your service, you first need to import the correct modules (replace <CDK_VERSION> in the following code snippet with your CDK version, which you retrieved earlier):
npm i @aws-cdk/aws-apprunner-alpha@<CDK_VERSION>-alpha.0You will then edit the lib/infra-stack.ts file to add the dependencies at the top of the file:
import apprunner = require('@aws-cdk/aws-apprunner-alpha'); // Allows working with App Runner resources
import { DockerImageAsset } from 'aws-cdk-lib/aws-ecr-assets'; // Allows building the docker image and uploading to ECR
import * as path from "path"; // Helper for working with file pathsNext, you will need to define which container to use by creating an App Runner service. For this tutorial, we will be building the container image provided with the sample application in SampleApp and have CDK manage the build, upload, and deployment of the container for us. We will also be creating an empty IAM role to attach to the service for future tutorials. To create the service and IAM role, add the following code:
   // The code that defines your stack goes here

    //If you are running on a Mac using the new M1 chip, please change `../SampleApp` to `../../SampleApp`.
    const imageAsset = new DockerImageAsset(this, 'ImageAssets', {
      directory: path.join(__dirname, '../SampleApp'),
    });

    const service = new apprunner.Service(this, 'Service', {
      source: apprunner.Source.fromAsset({
        imageConfiguration: { port: 80 },
        asset: imageAsset
      })
    });

    new cdk.CfnOutput(this, "apprunner-url", {
      exportName: "apprunner-url",
      value: service.serviceUrl,
      description: "URL to access service"
});In the code above, you created a service with App Runner to run a container that CDK will build from the Dockerfile in the SampleApp directory. Before you can use CDK, it needs to be bootstrapped—this will create the required infrastructure for CDK to manage infrastructure in your account:
cdk bootstrapYou should see an output similar to:
⏳ Bootstrapping environment aws://0123456789012/<region>...
✅ Environment aws://0123456789012/<region> bootstrappedOnce the bootstrapping has completed, you will run CDK to deploy all the infrastructure required:
cdk deployYou should see an output similar to the following:
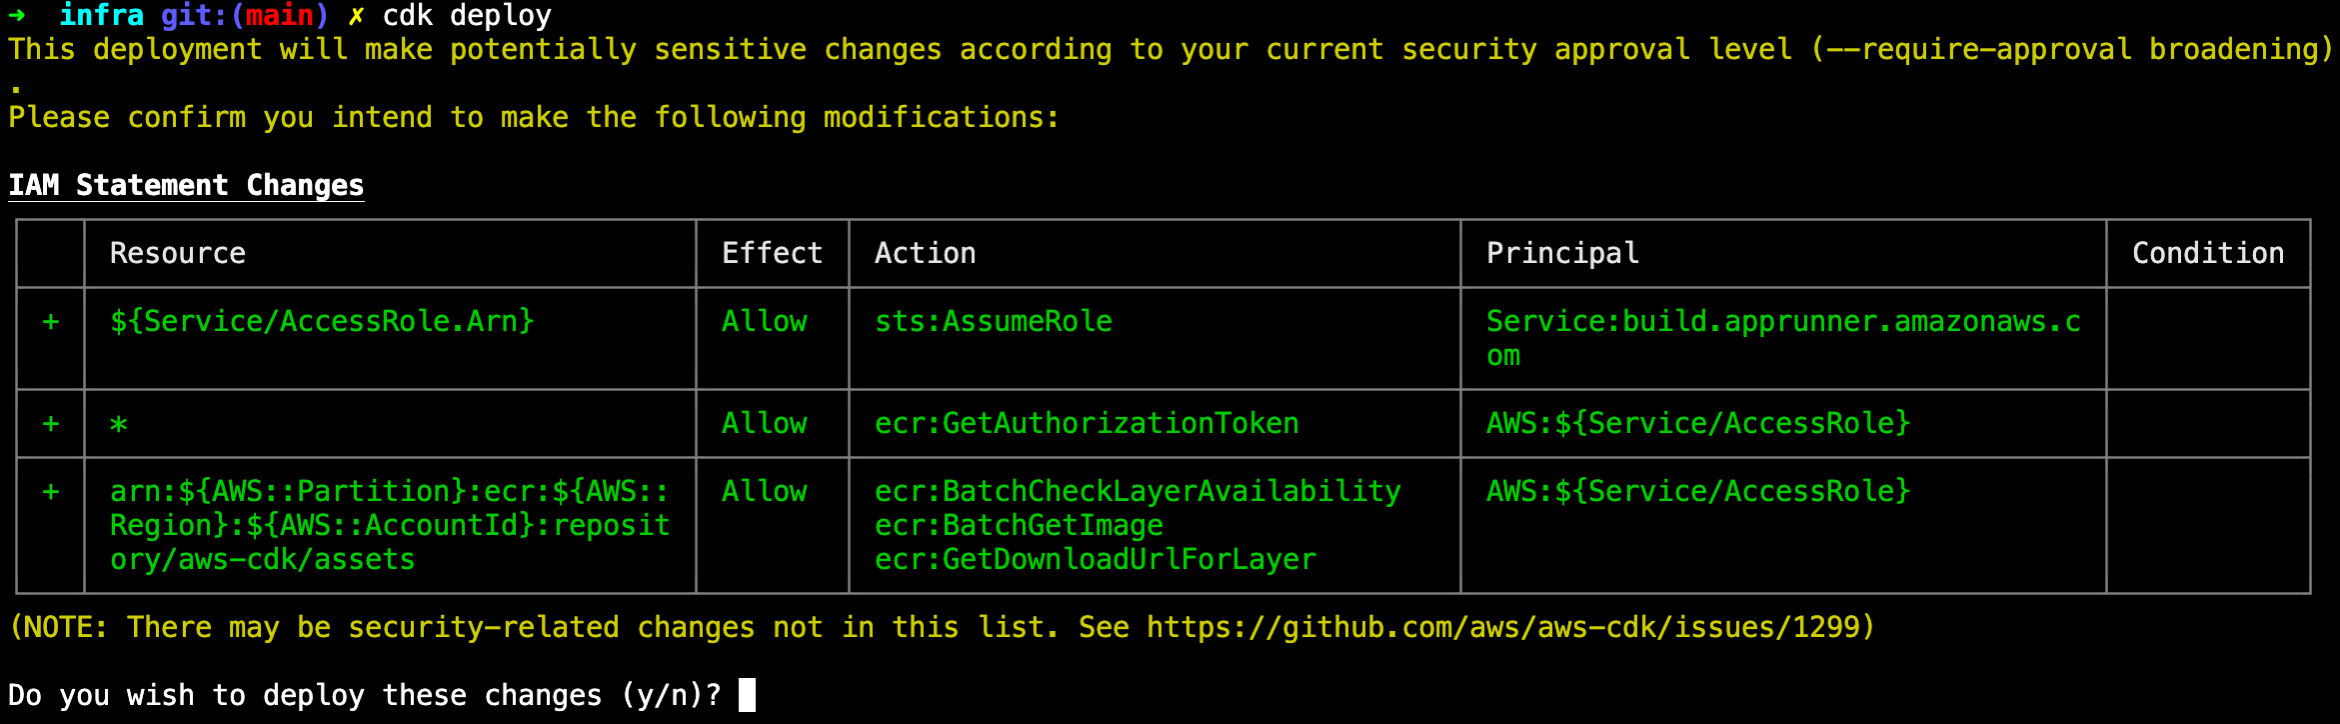
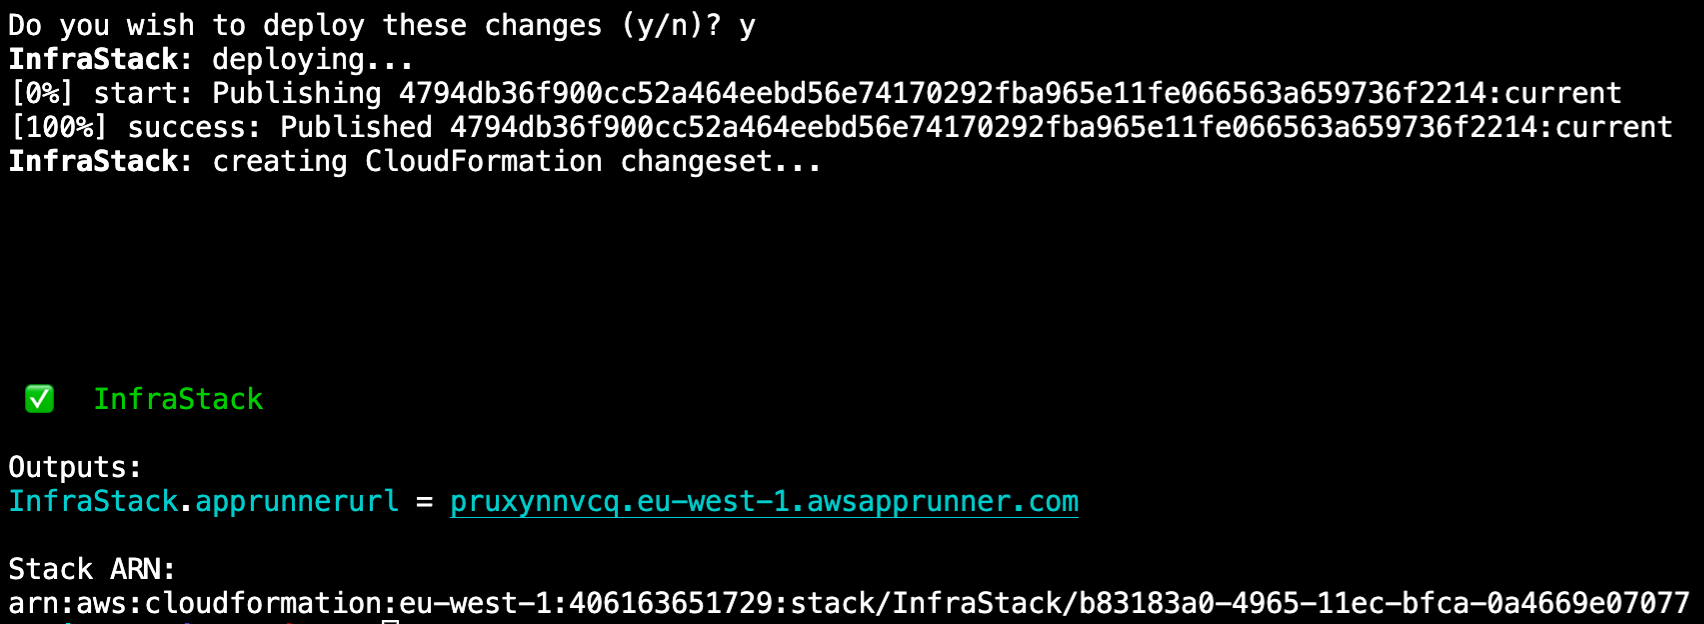
CDK will prompt you before creating the infrastructure because it will create infrastructure that changes security configuration—in this case, by creating IAM roles and security groups. Press y and then Enter to deploy. CDK will now set up all the infrastructure you defined. It will take a few minutes to complete. While it is running, you will see updates like this:

Once it completes, you will see an output with the link to the public URL to access your service, as shown in the following:
Conclusion
In this module, we covered how to use AWS App Runner with AWS CDK to deploy a container on AWS. Before you close this tutorial, we recommend destroying the infrastructure you just created after you have finished testing it. In the next module, we will learn how to clean up the resources used in this tutorial.
Up Next: Clean Up Resources