Launch a Linux Virtual Machine with Amazon Lightsail
TUTORIAL
Overview
Lightsail is one of the easiest ways to get started on AWS. It offers virtual servers, storage, databases, and networking, plus a cost-effective, monthly plan. It’s designed to help you start small, and then scale as you grow.
In this tutorial, you create an Amazon Linux instance in Amazon Lightsail in seconds. After the instance is up and running, you connect to it via SSH within the Lightsail console using the browser-based SSH terminal.
AWS experience
Beginner
Time to complete
10 minutes
Cost to complete
Free Tier eligible
Requires
- AWS account
- Recommended browser: The latest version of Chrome or Firefox
[**]Accounts created within the past 24 hours might not yet have access to the services required for this tutorial.
Last updated
Aug 23, 2022
Step 1: Create an Amazon Lightsail account
a. There are no charges for using Amazon Lightsail for this tutorial.
Already have an account? Sign-in
Step 2: Create an Amazon Linux instance in Lightsail
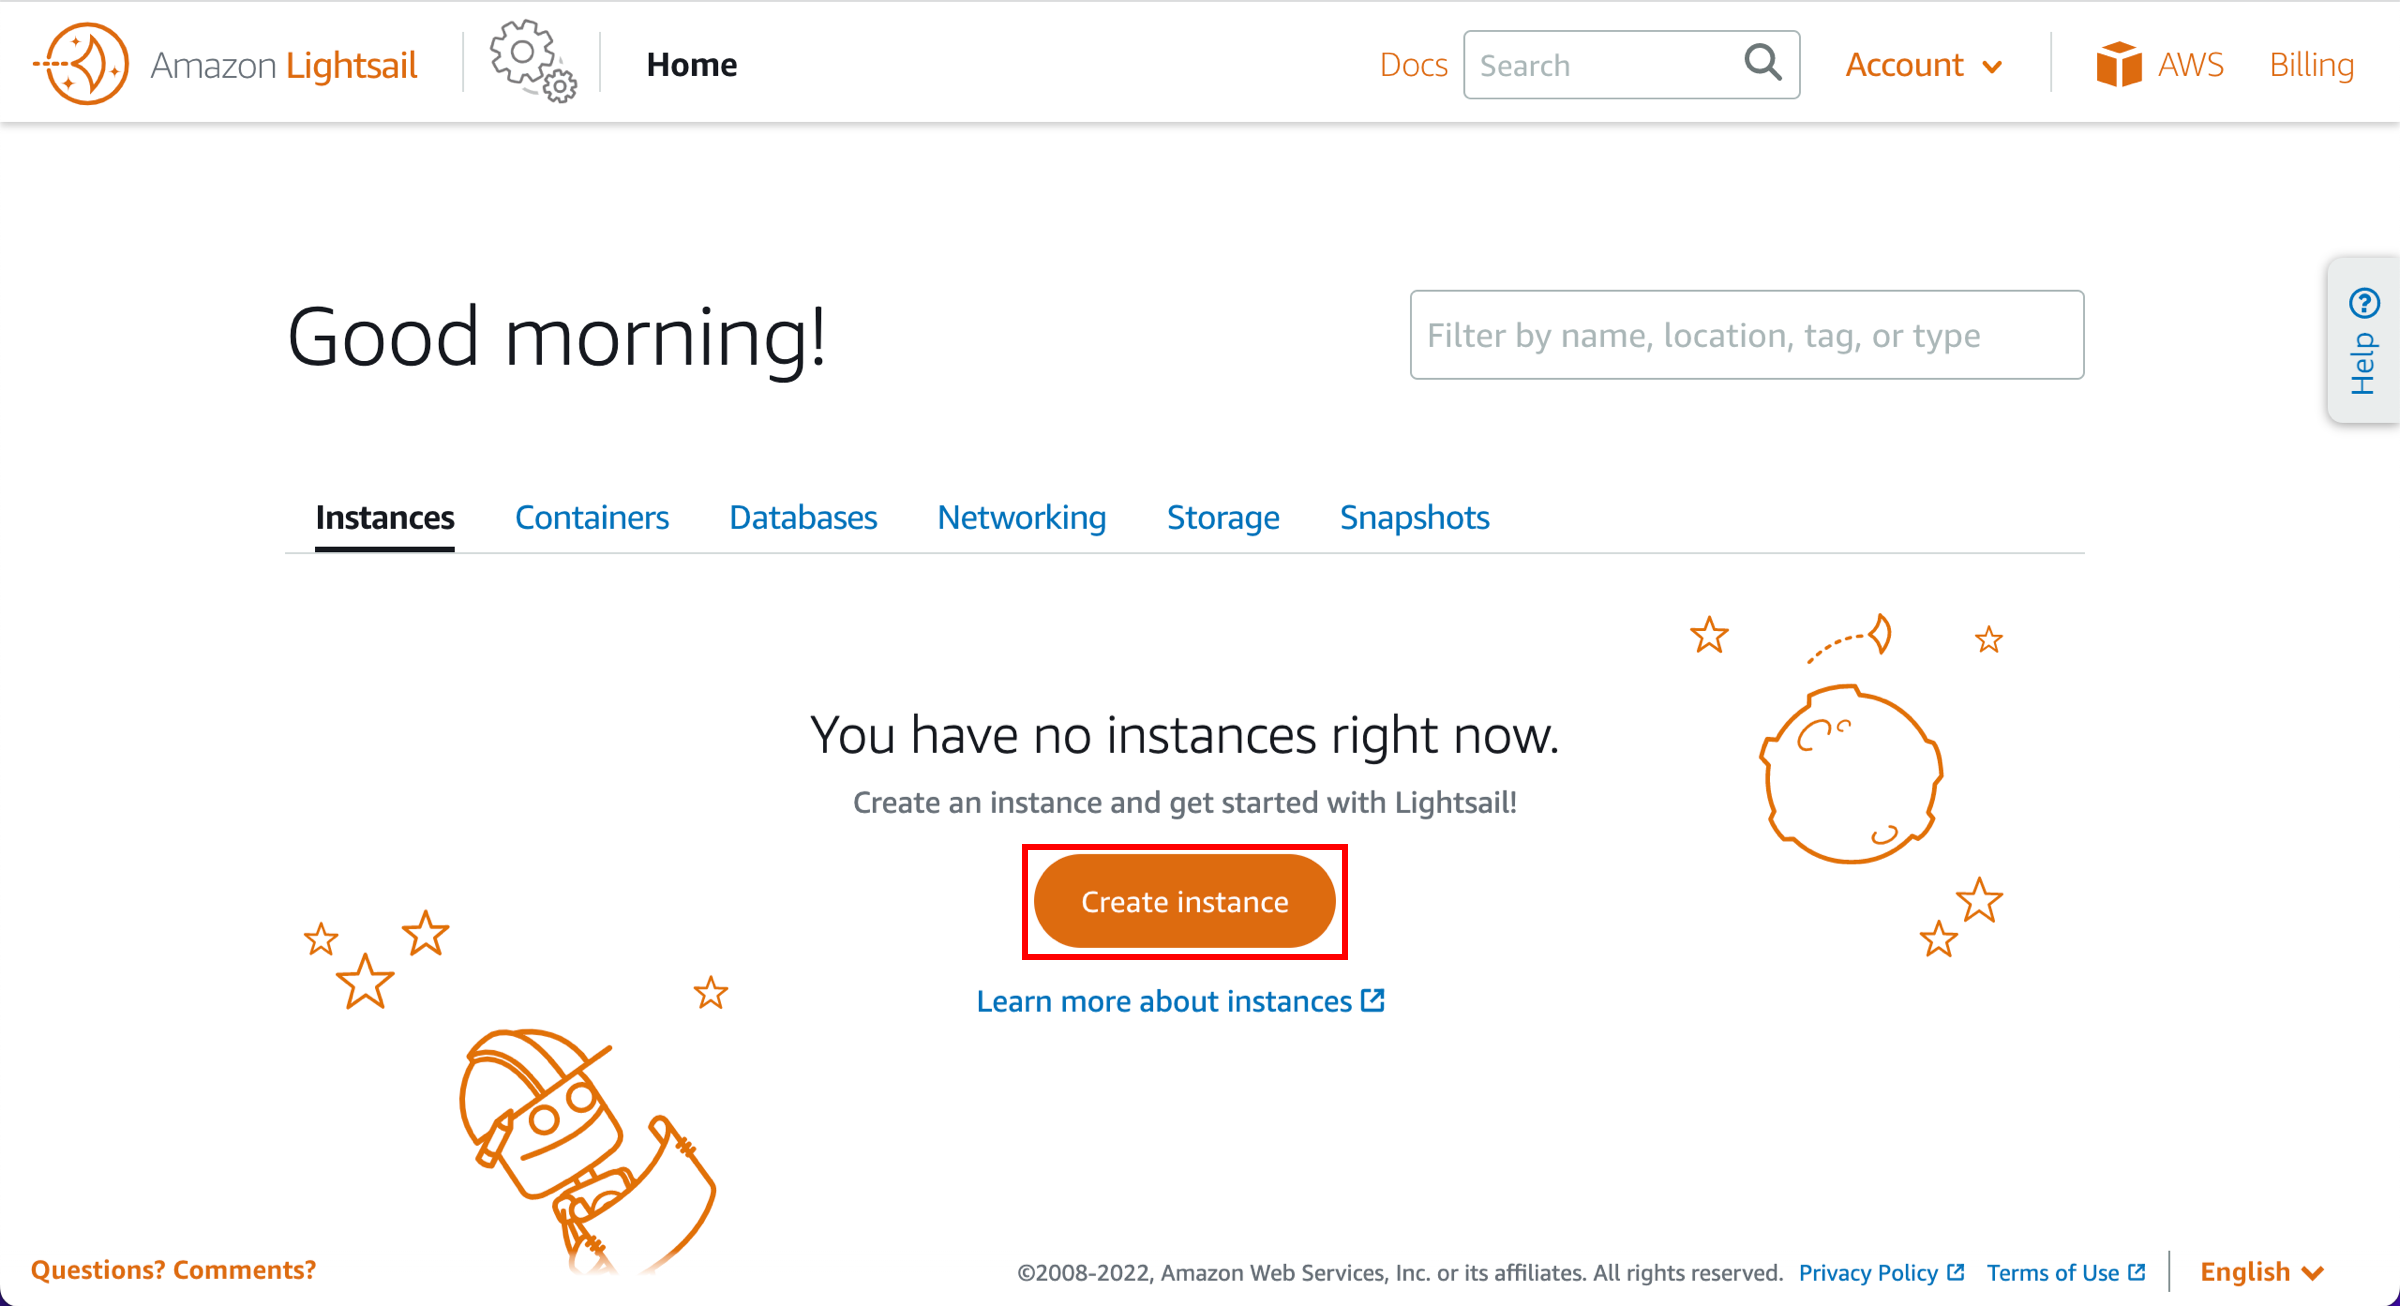
a. Choose Create instance in the Instances tab of the Lightsail home page.
Step 3: Configure your Amazon Lightsail instance
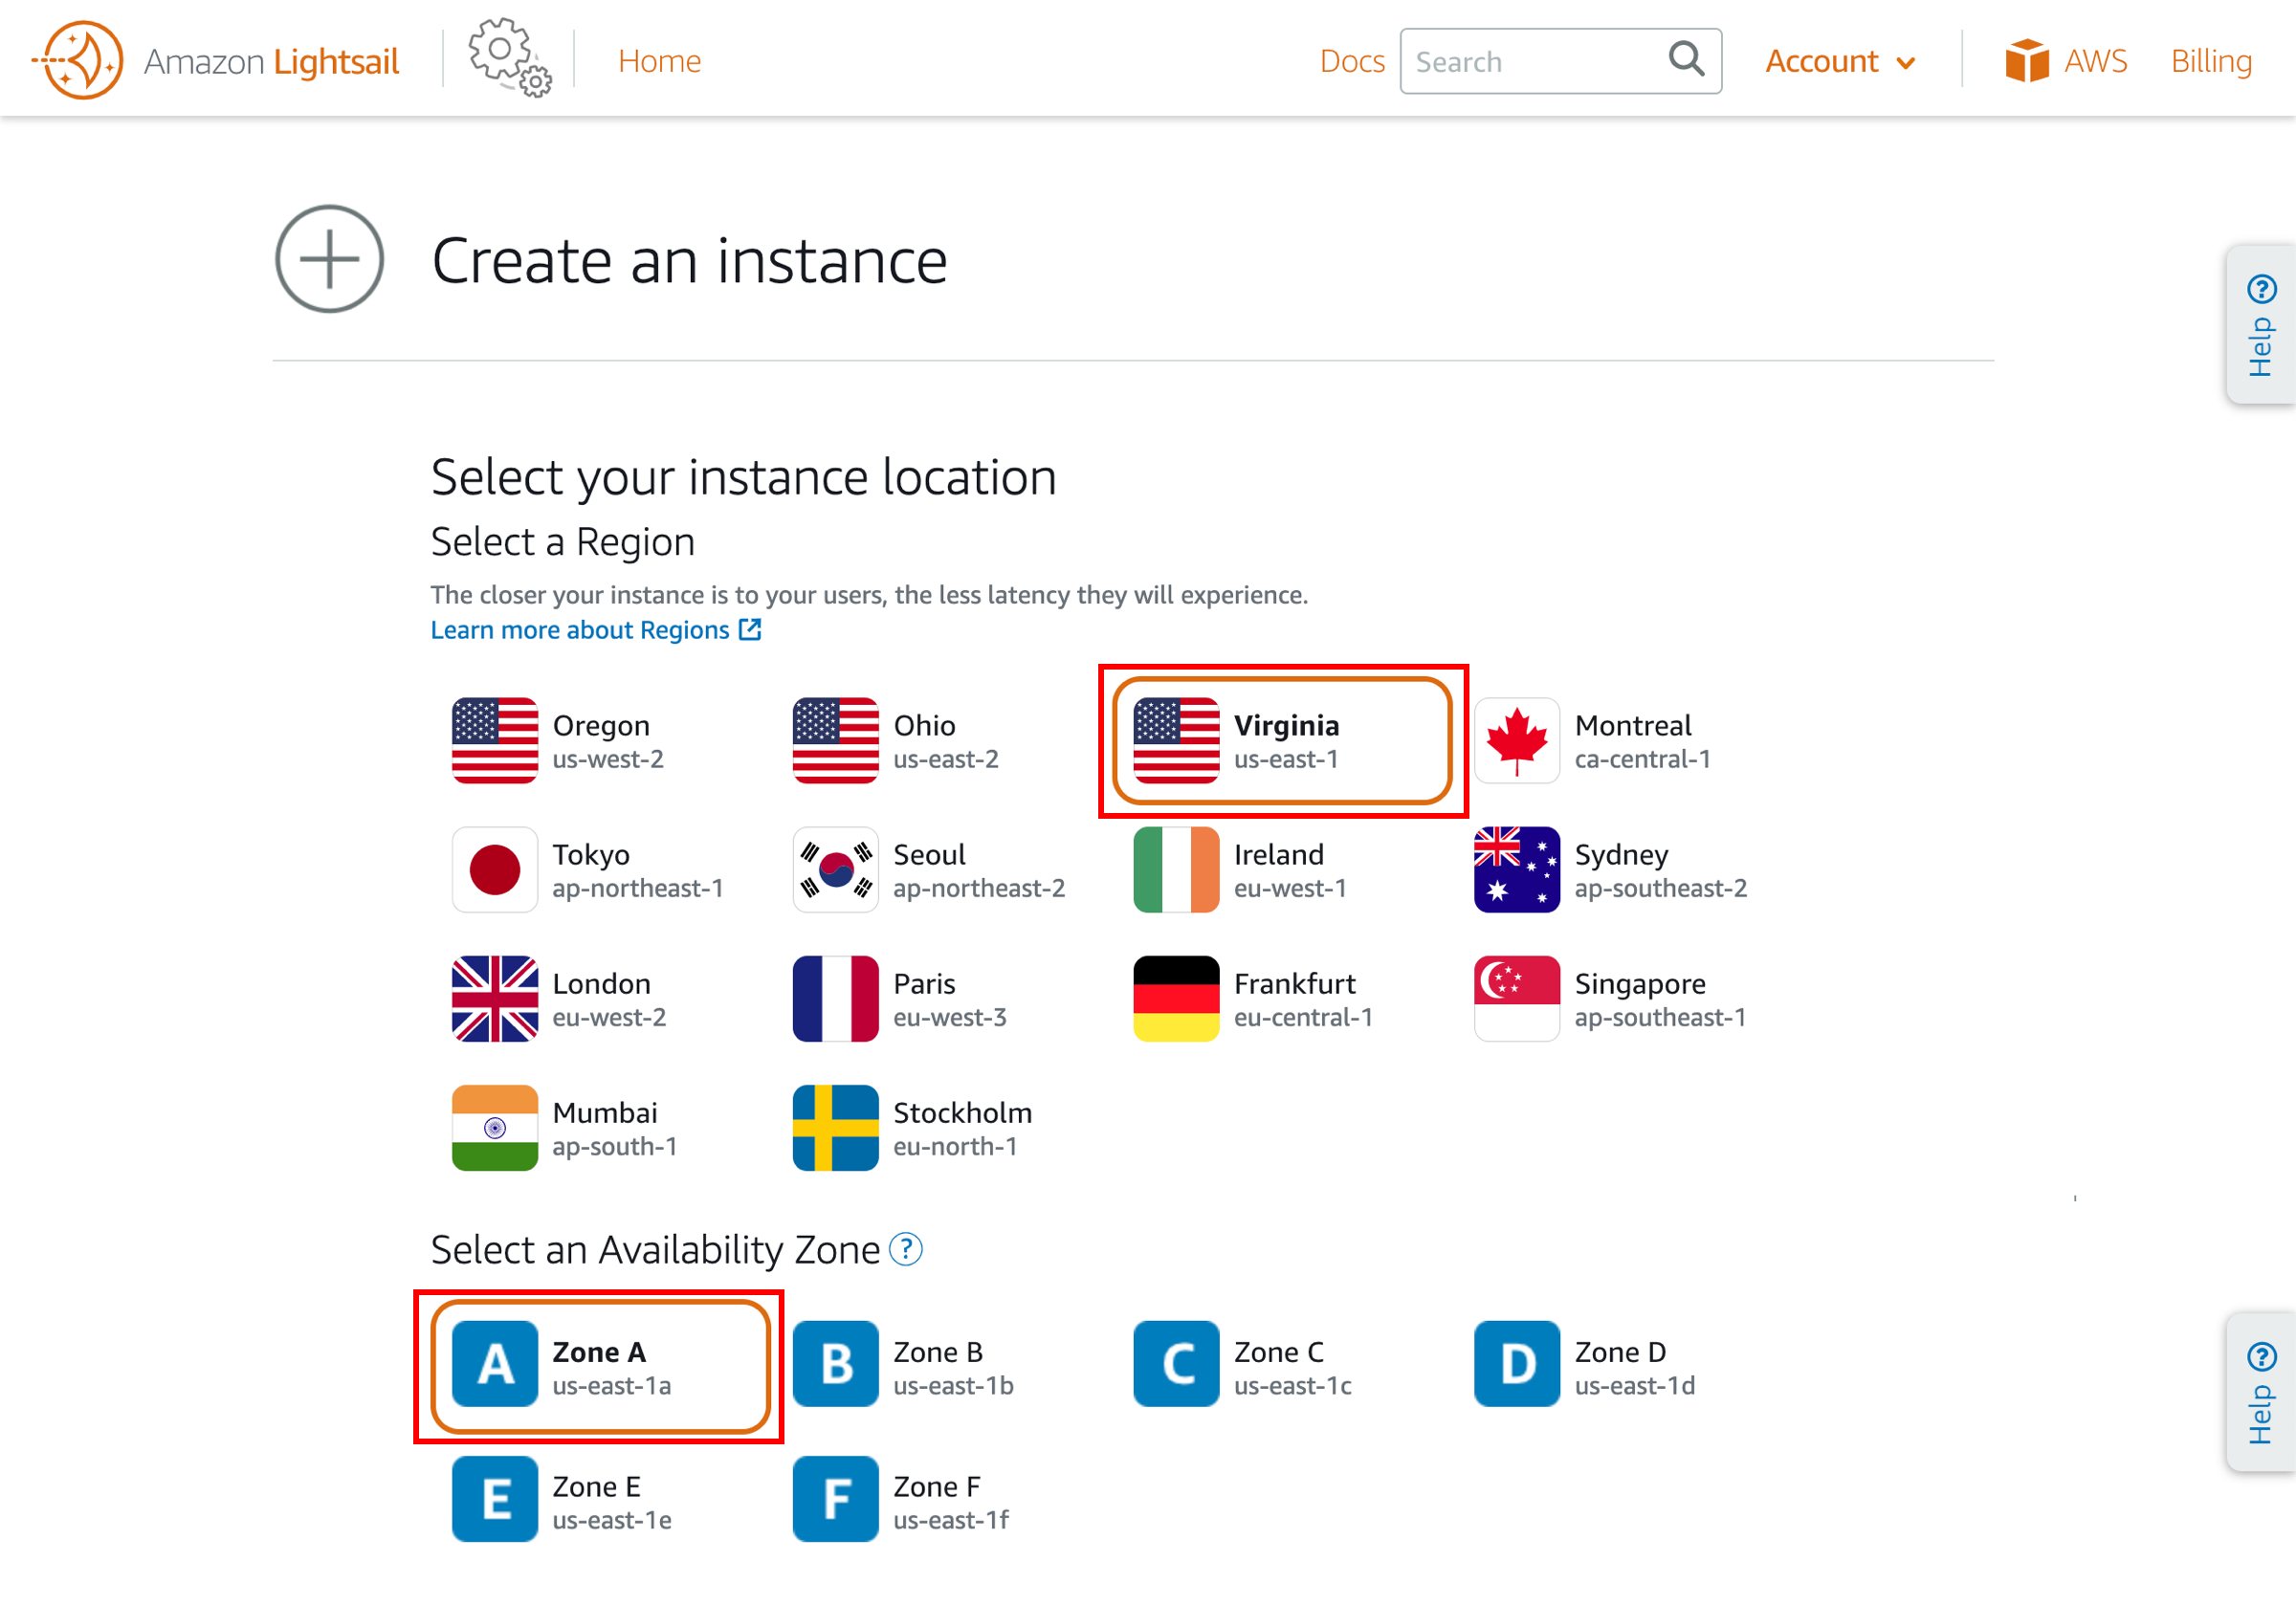
a. An AWS Region and Availability Zone is selected for you. Choose Change AWS Region and Availability Zone to create your instance in another location. Note: Static IP addresses can only be attached to instances in the same region.
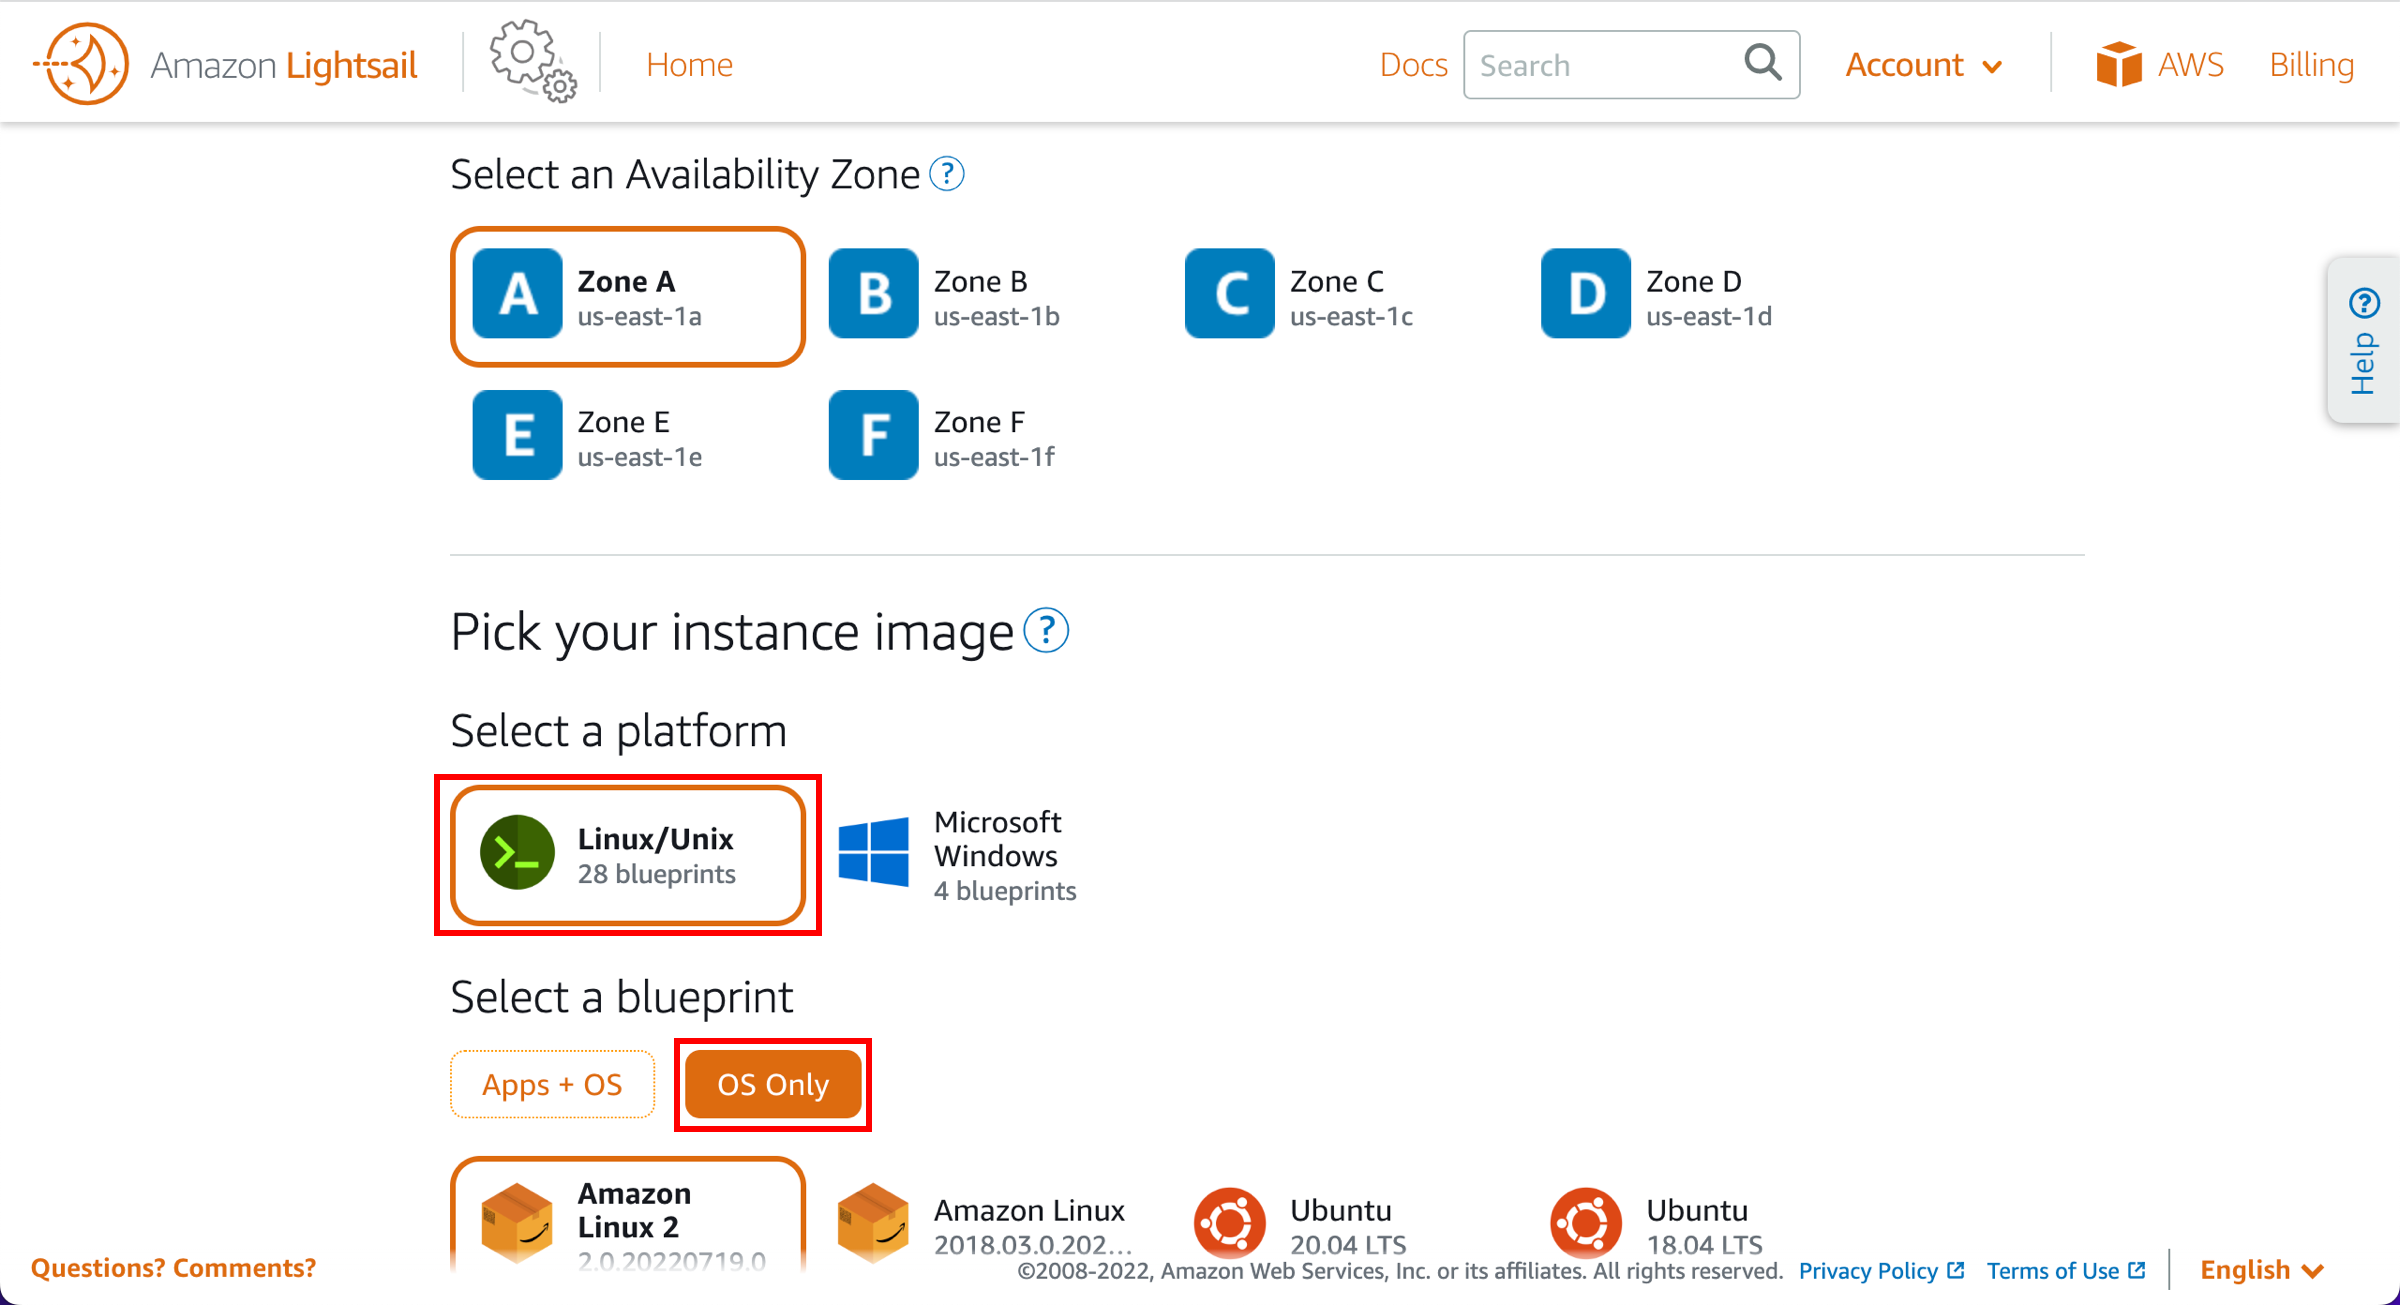
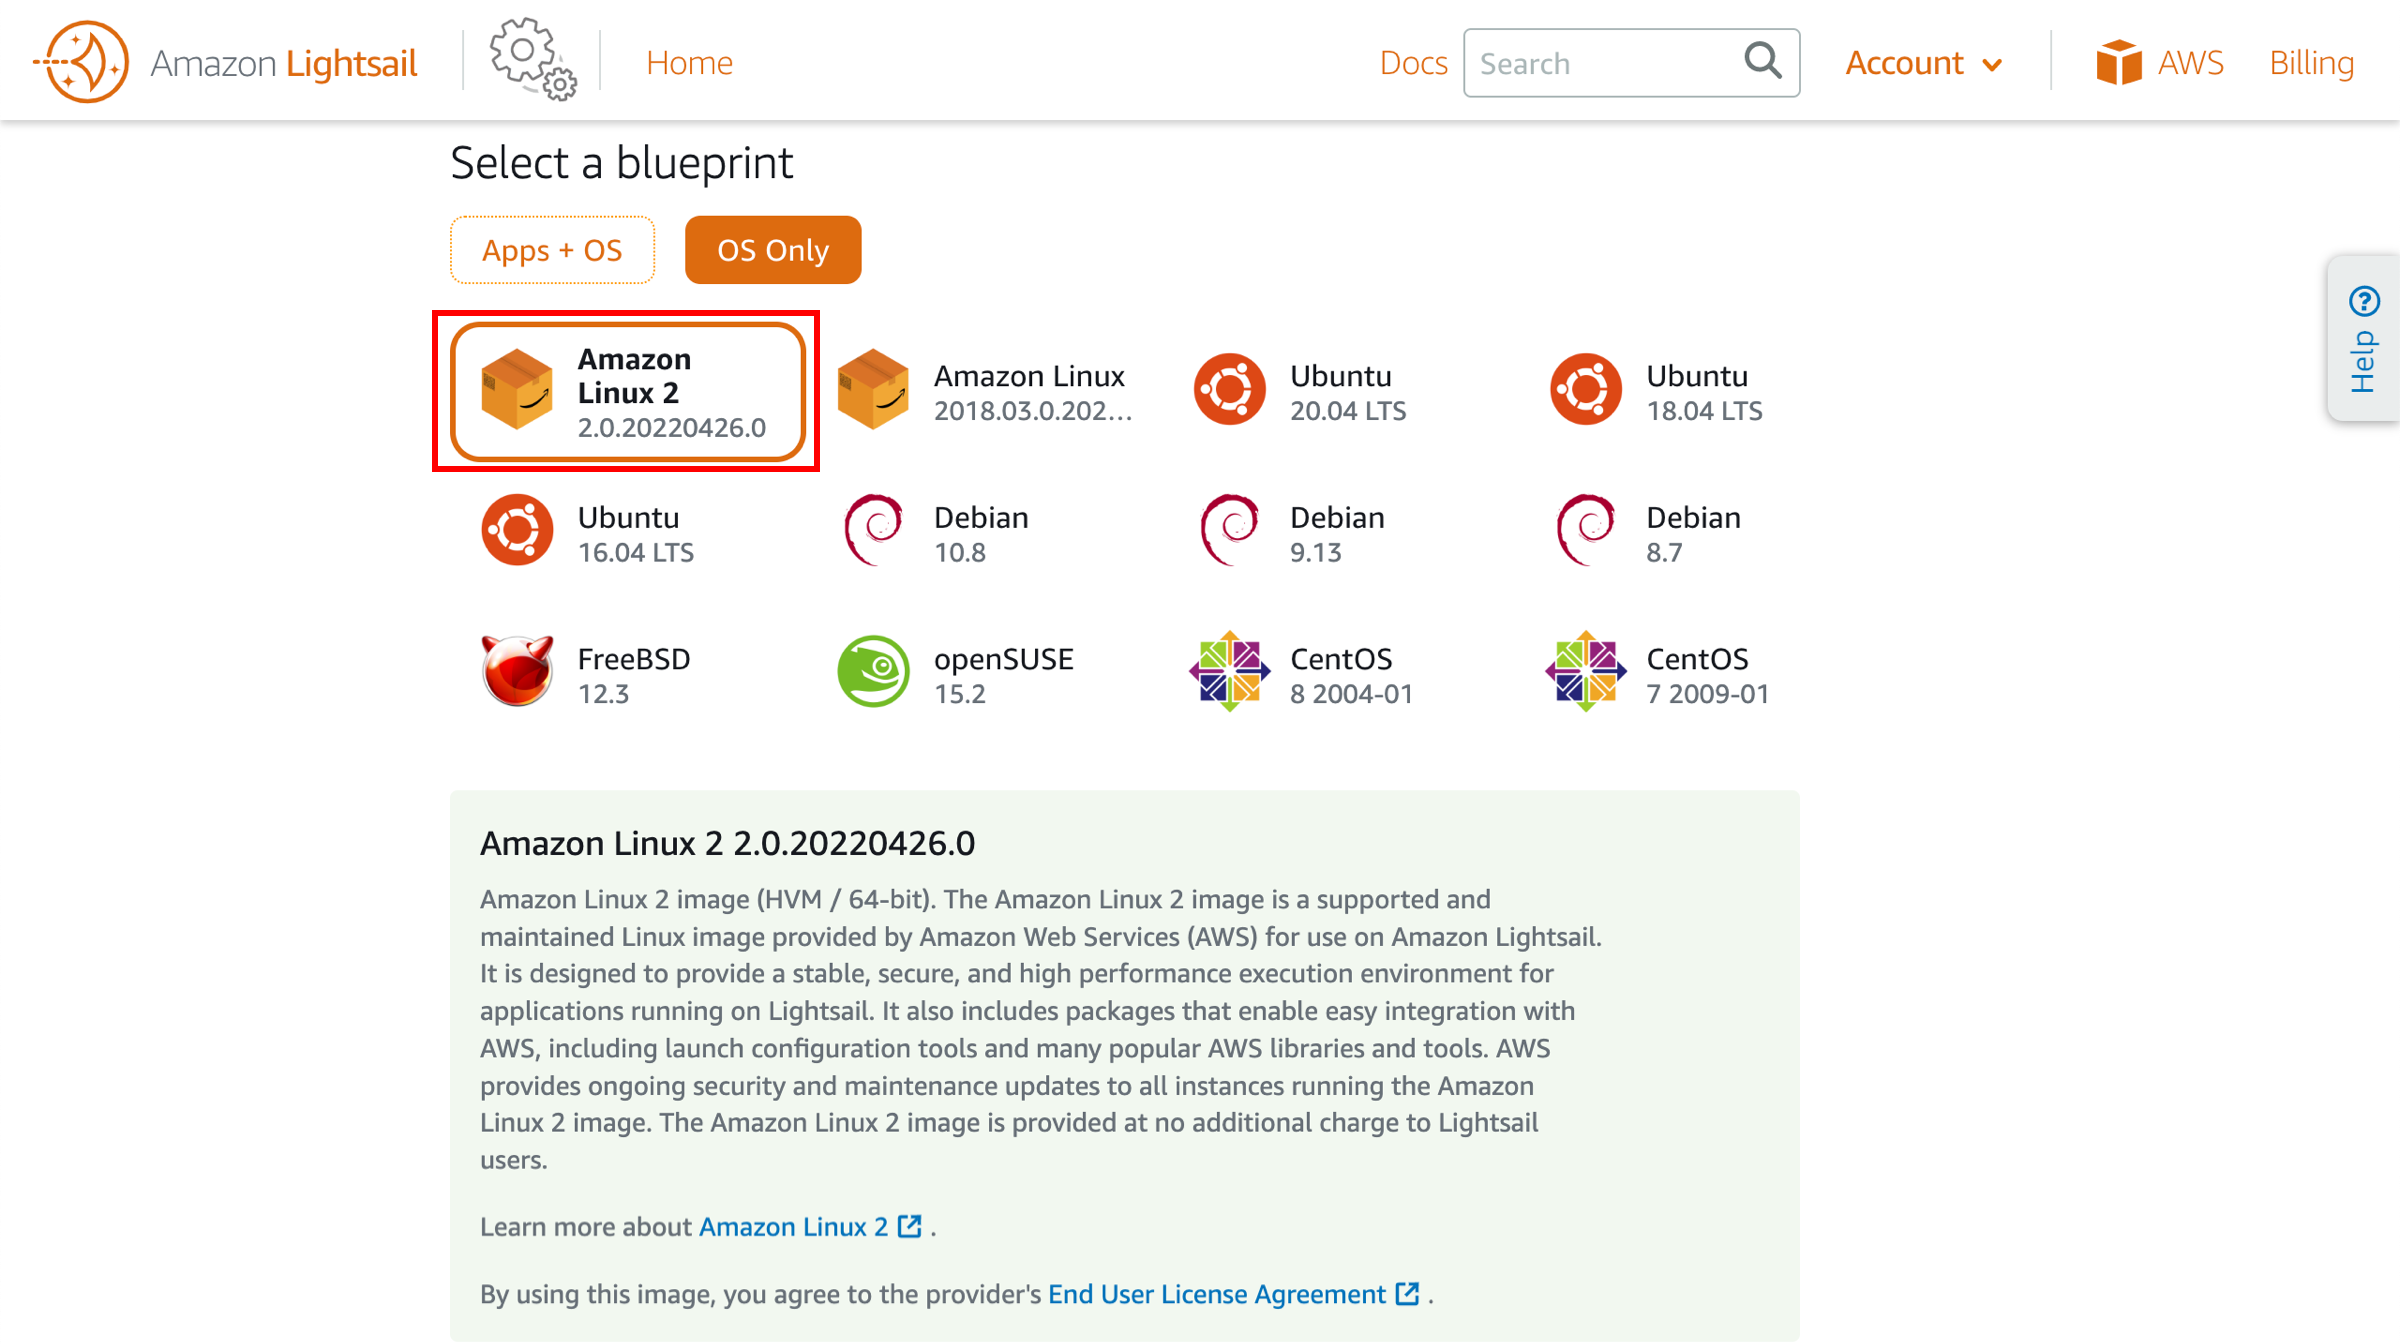
c. Choose the Amazon Linux 2 blueprint option.
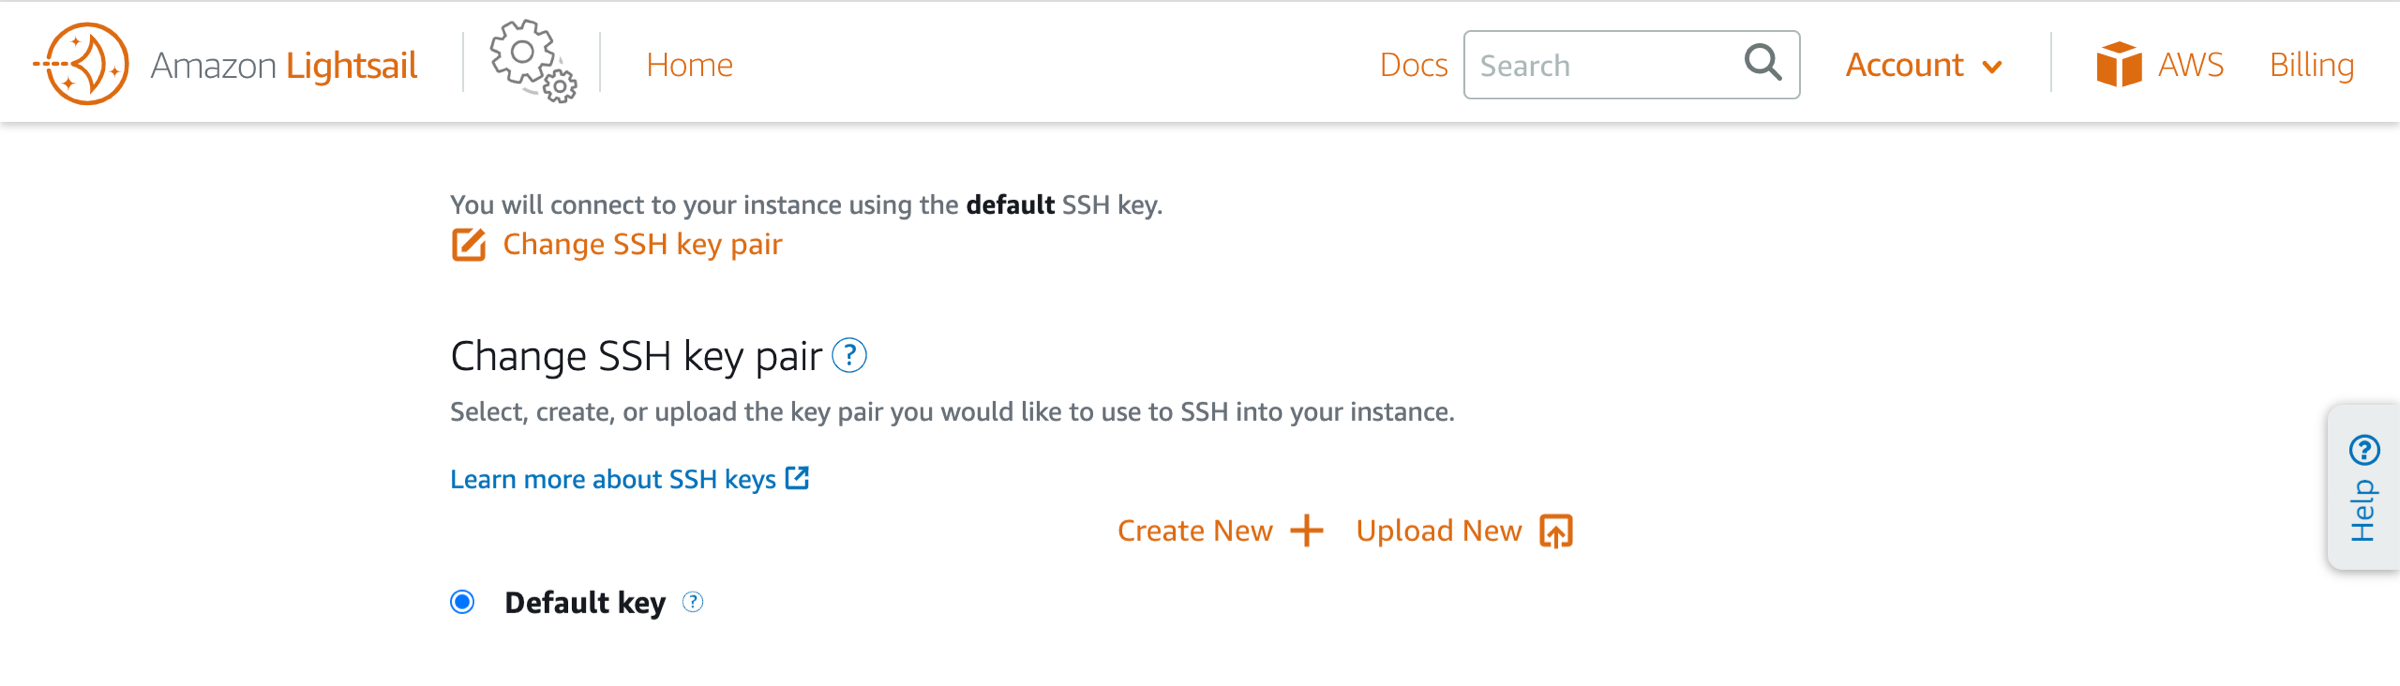
e. (Optional) Choose Change SSH key pair to select, create, or upload the key pair you would like to use to SSH into your instance.
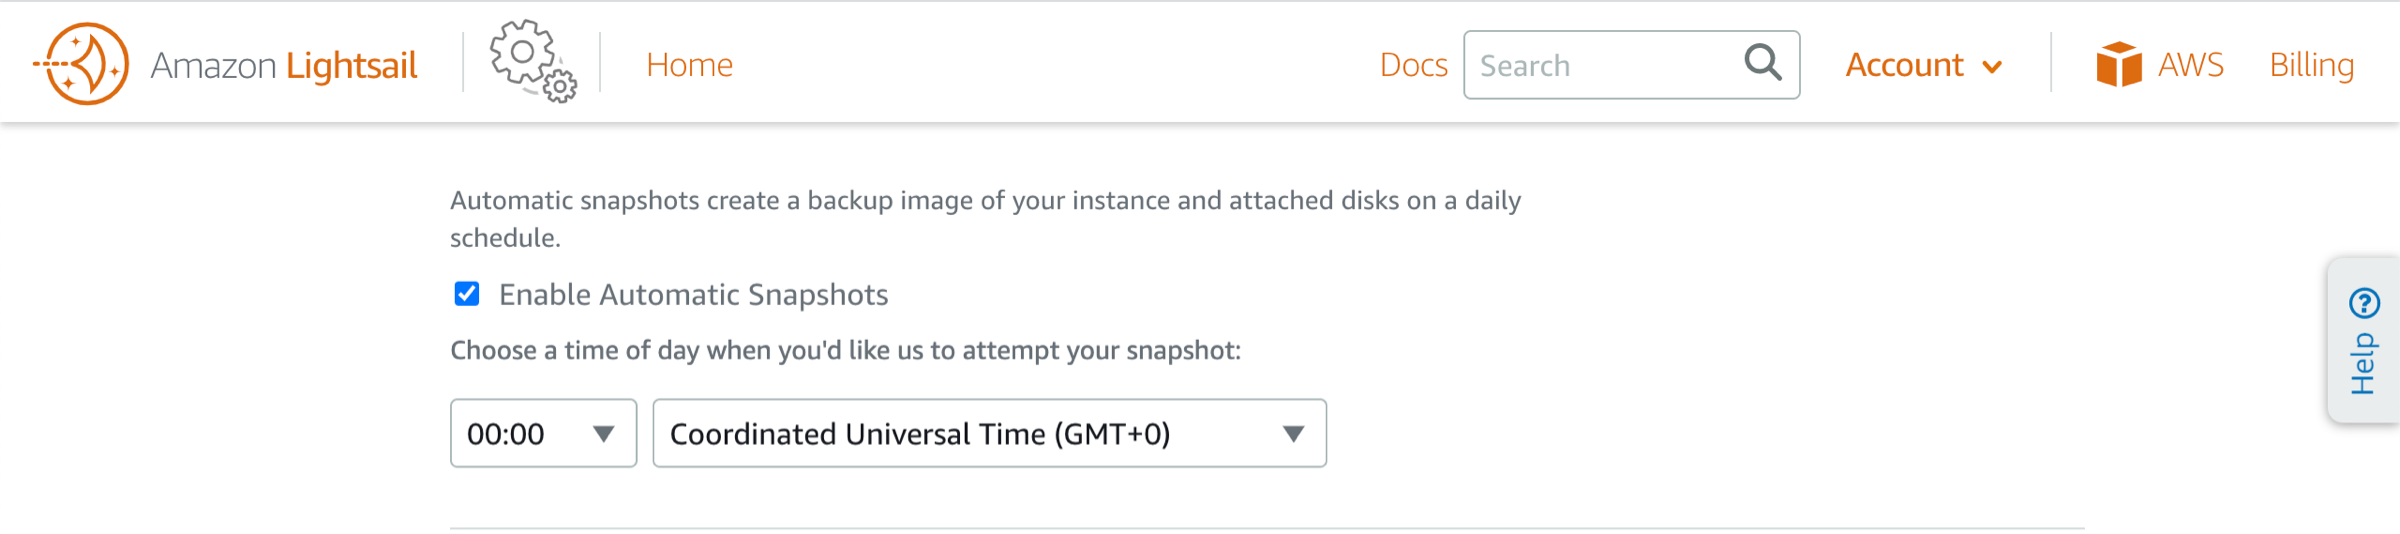
f. (Optional) Choose Enable Automatic Snapshots to automatically create a backup image of your instance and attached disks on a daily schedule.
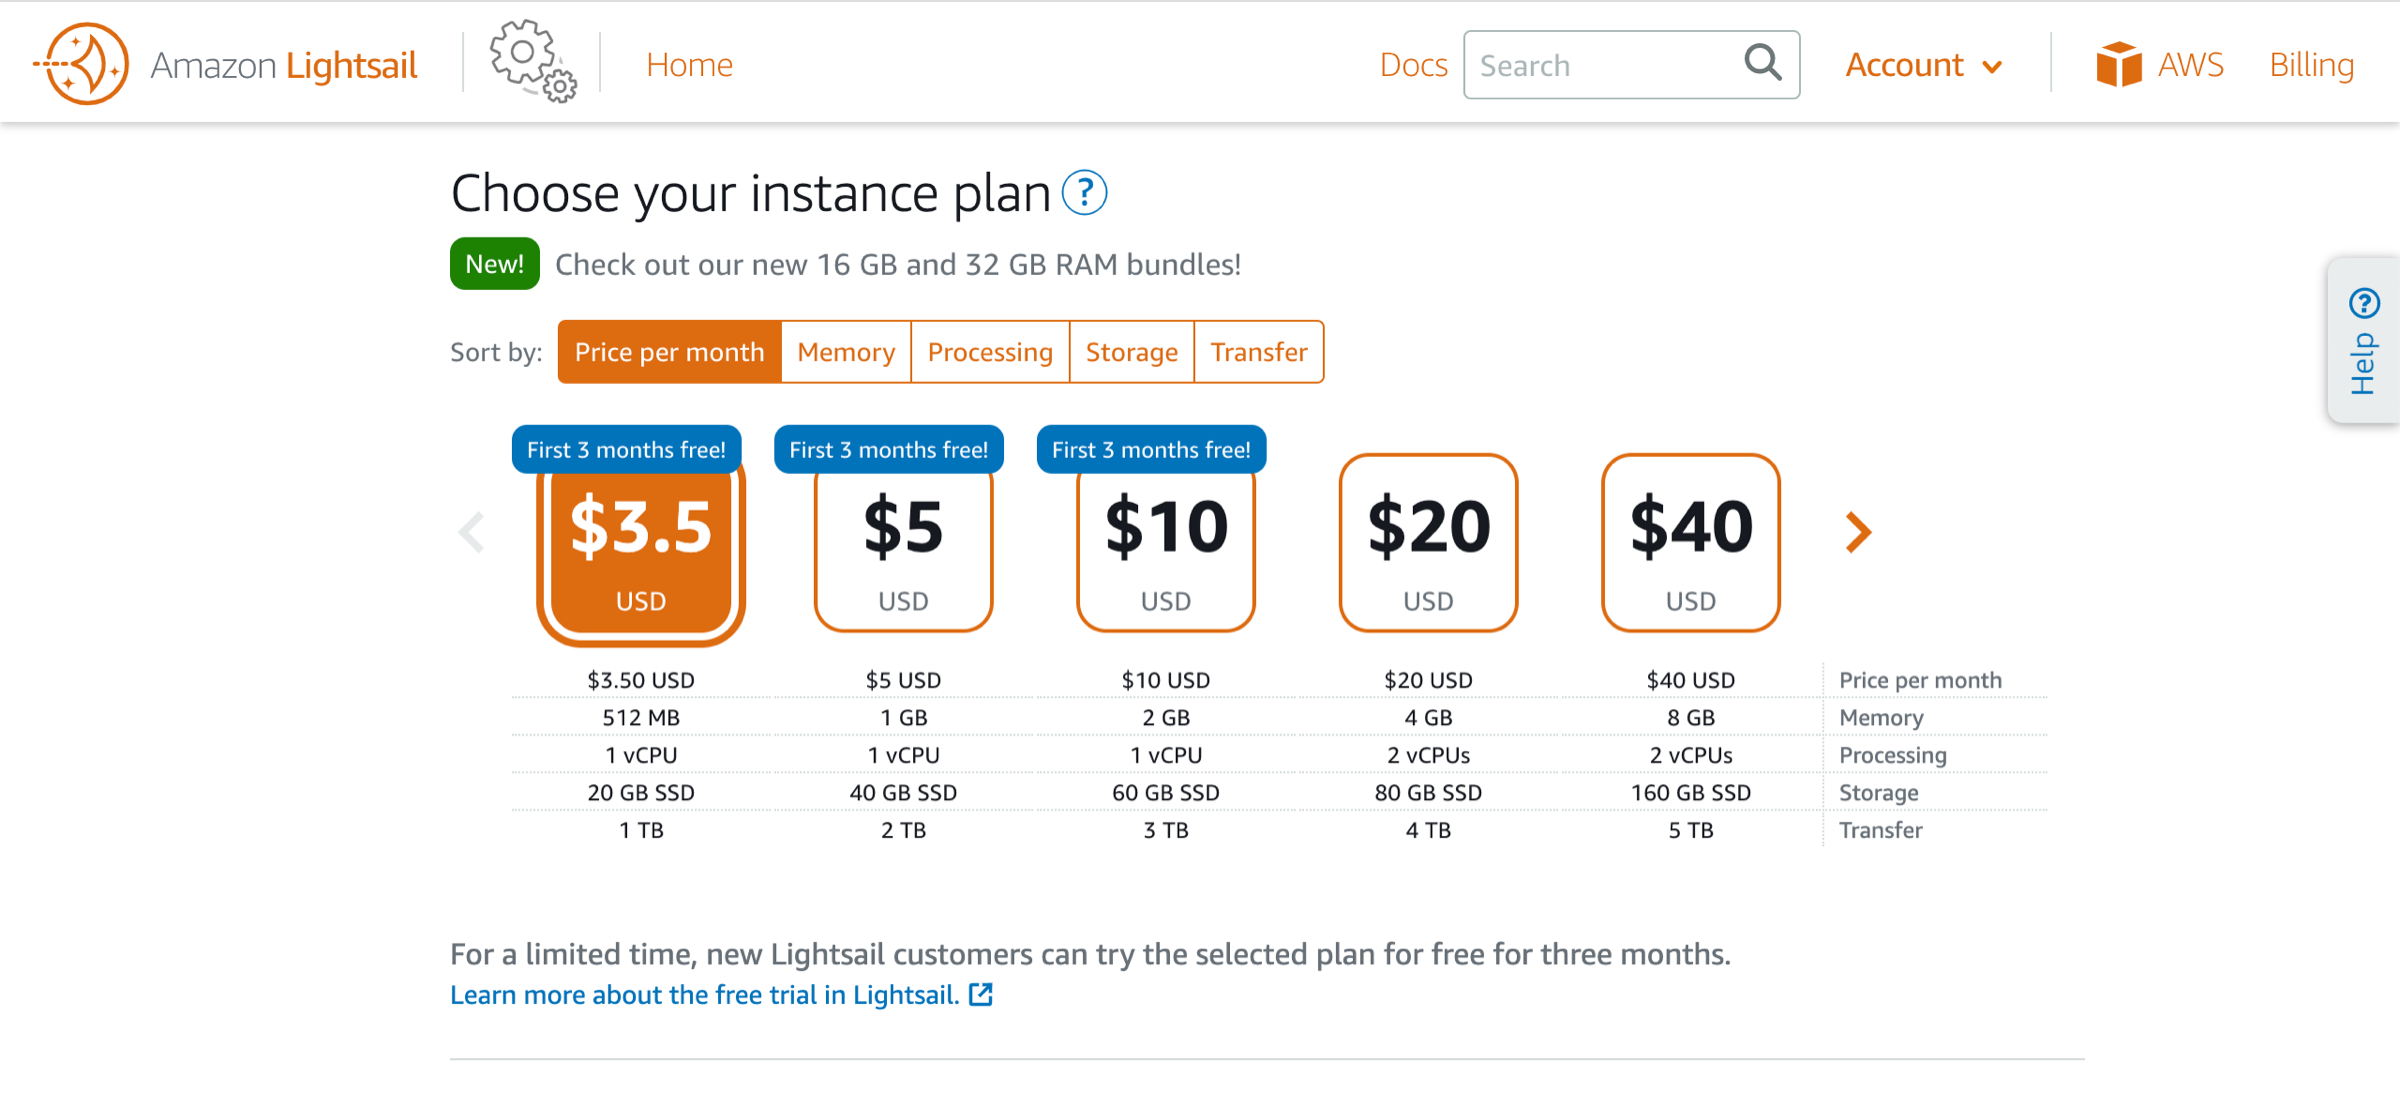
g. Choose your instance plan. You can try the $3.50 USD Lightsail plan free for the first three months (up to 750 hours). We'll credit the first three months to your account.
Learn more on our Lightsail pricing page.
h. Enter a name for your instance.

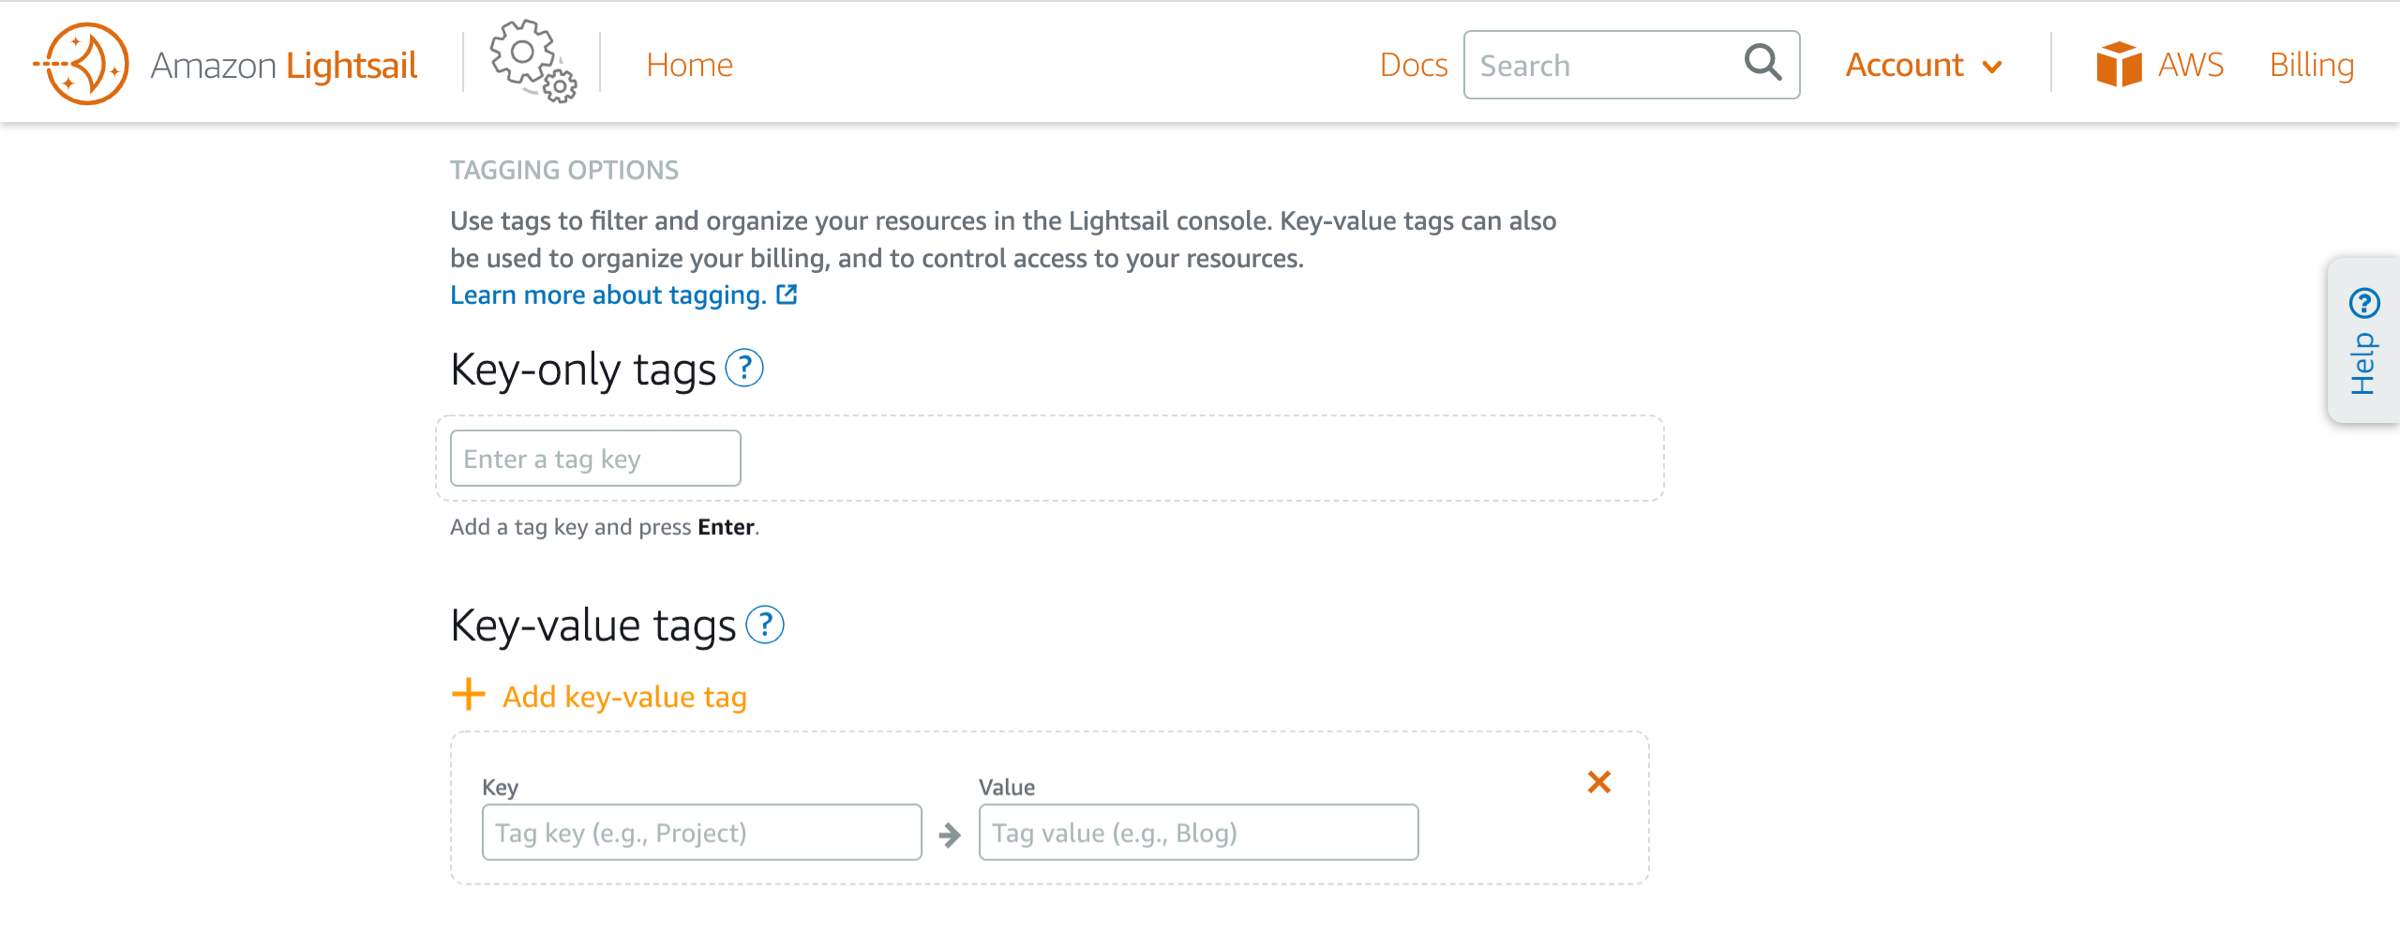
i. (Optional) Choose one of the following options to add tags to your instance:
- (Optional) Add key-only tags — Enter your new tag into the tag key text box, and press Enter. Choose Save when you’re done entering your tags to add them, or choose Cancel to not add them.
- (Optional) Create a key-value tag — Enter a key into the Key text box, and a value into the Value text box. Choose Save when you’re done entering your tags, or choose Cancel to not add them.
Key-value tags can only be added one at a time before saving. To add more than one key-value tag, repeat the previous steps.
For more information about key-only and key-value tags, see Tags in Amazon Lightsail.
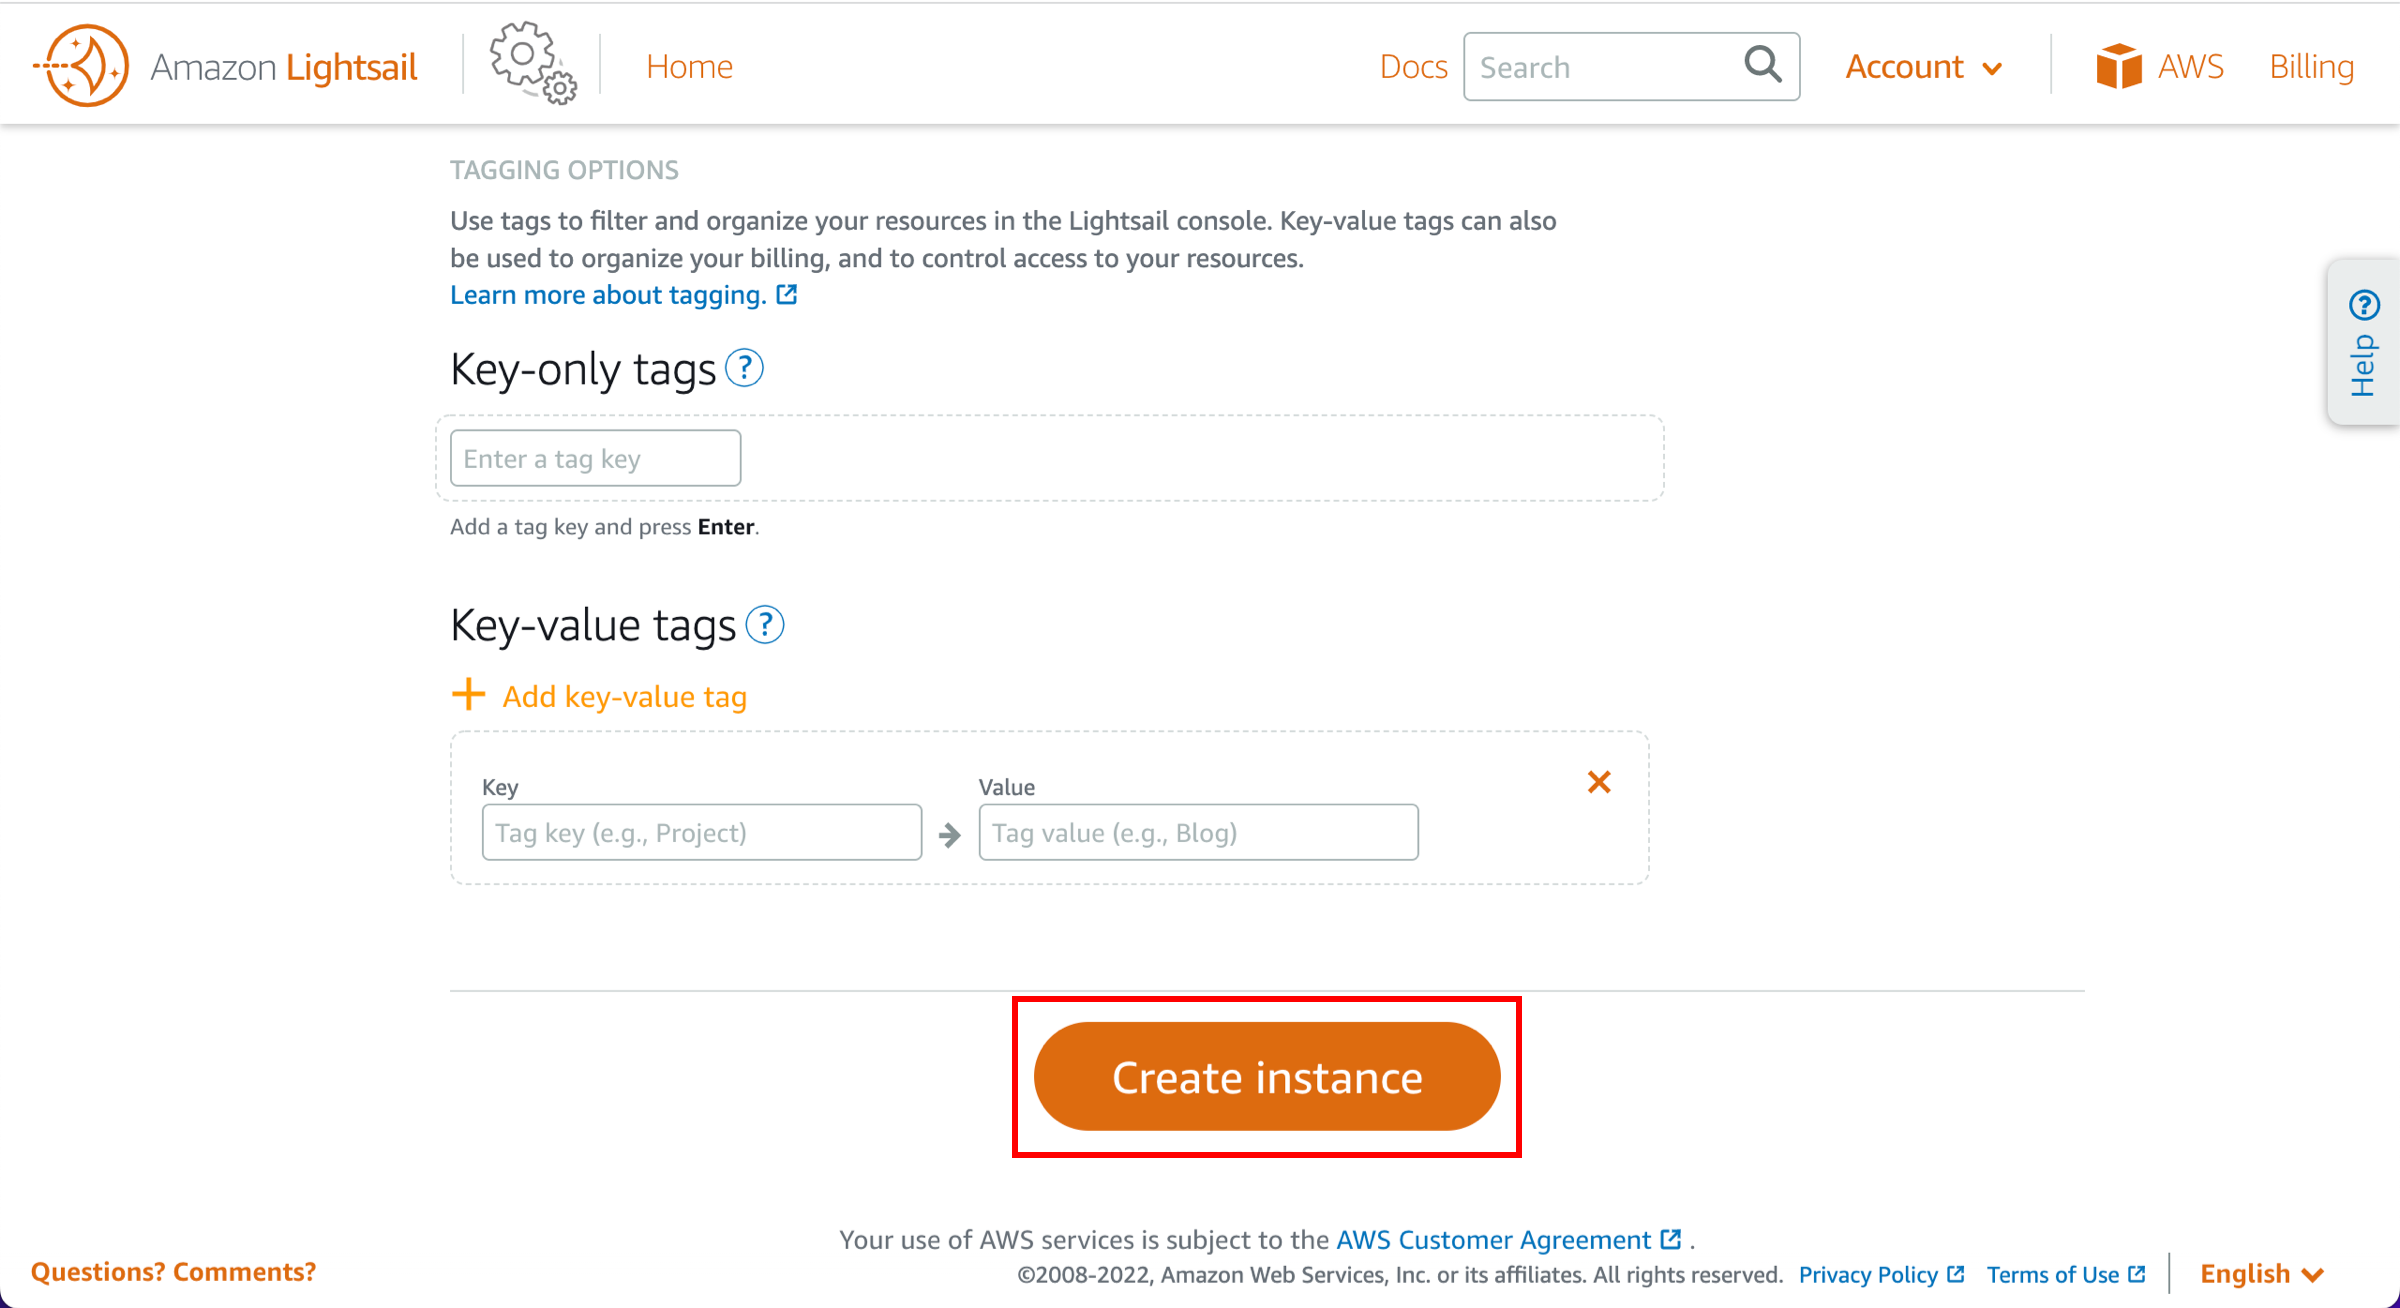
j. Choose Create instance.
Step 4: Connect your instance
Connect to your instance using the browser-based SSH terminal in Lightsail.
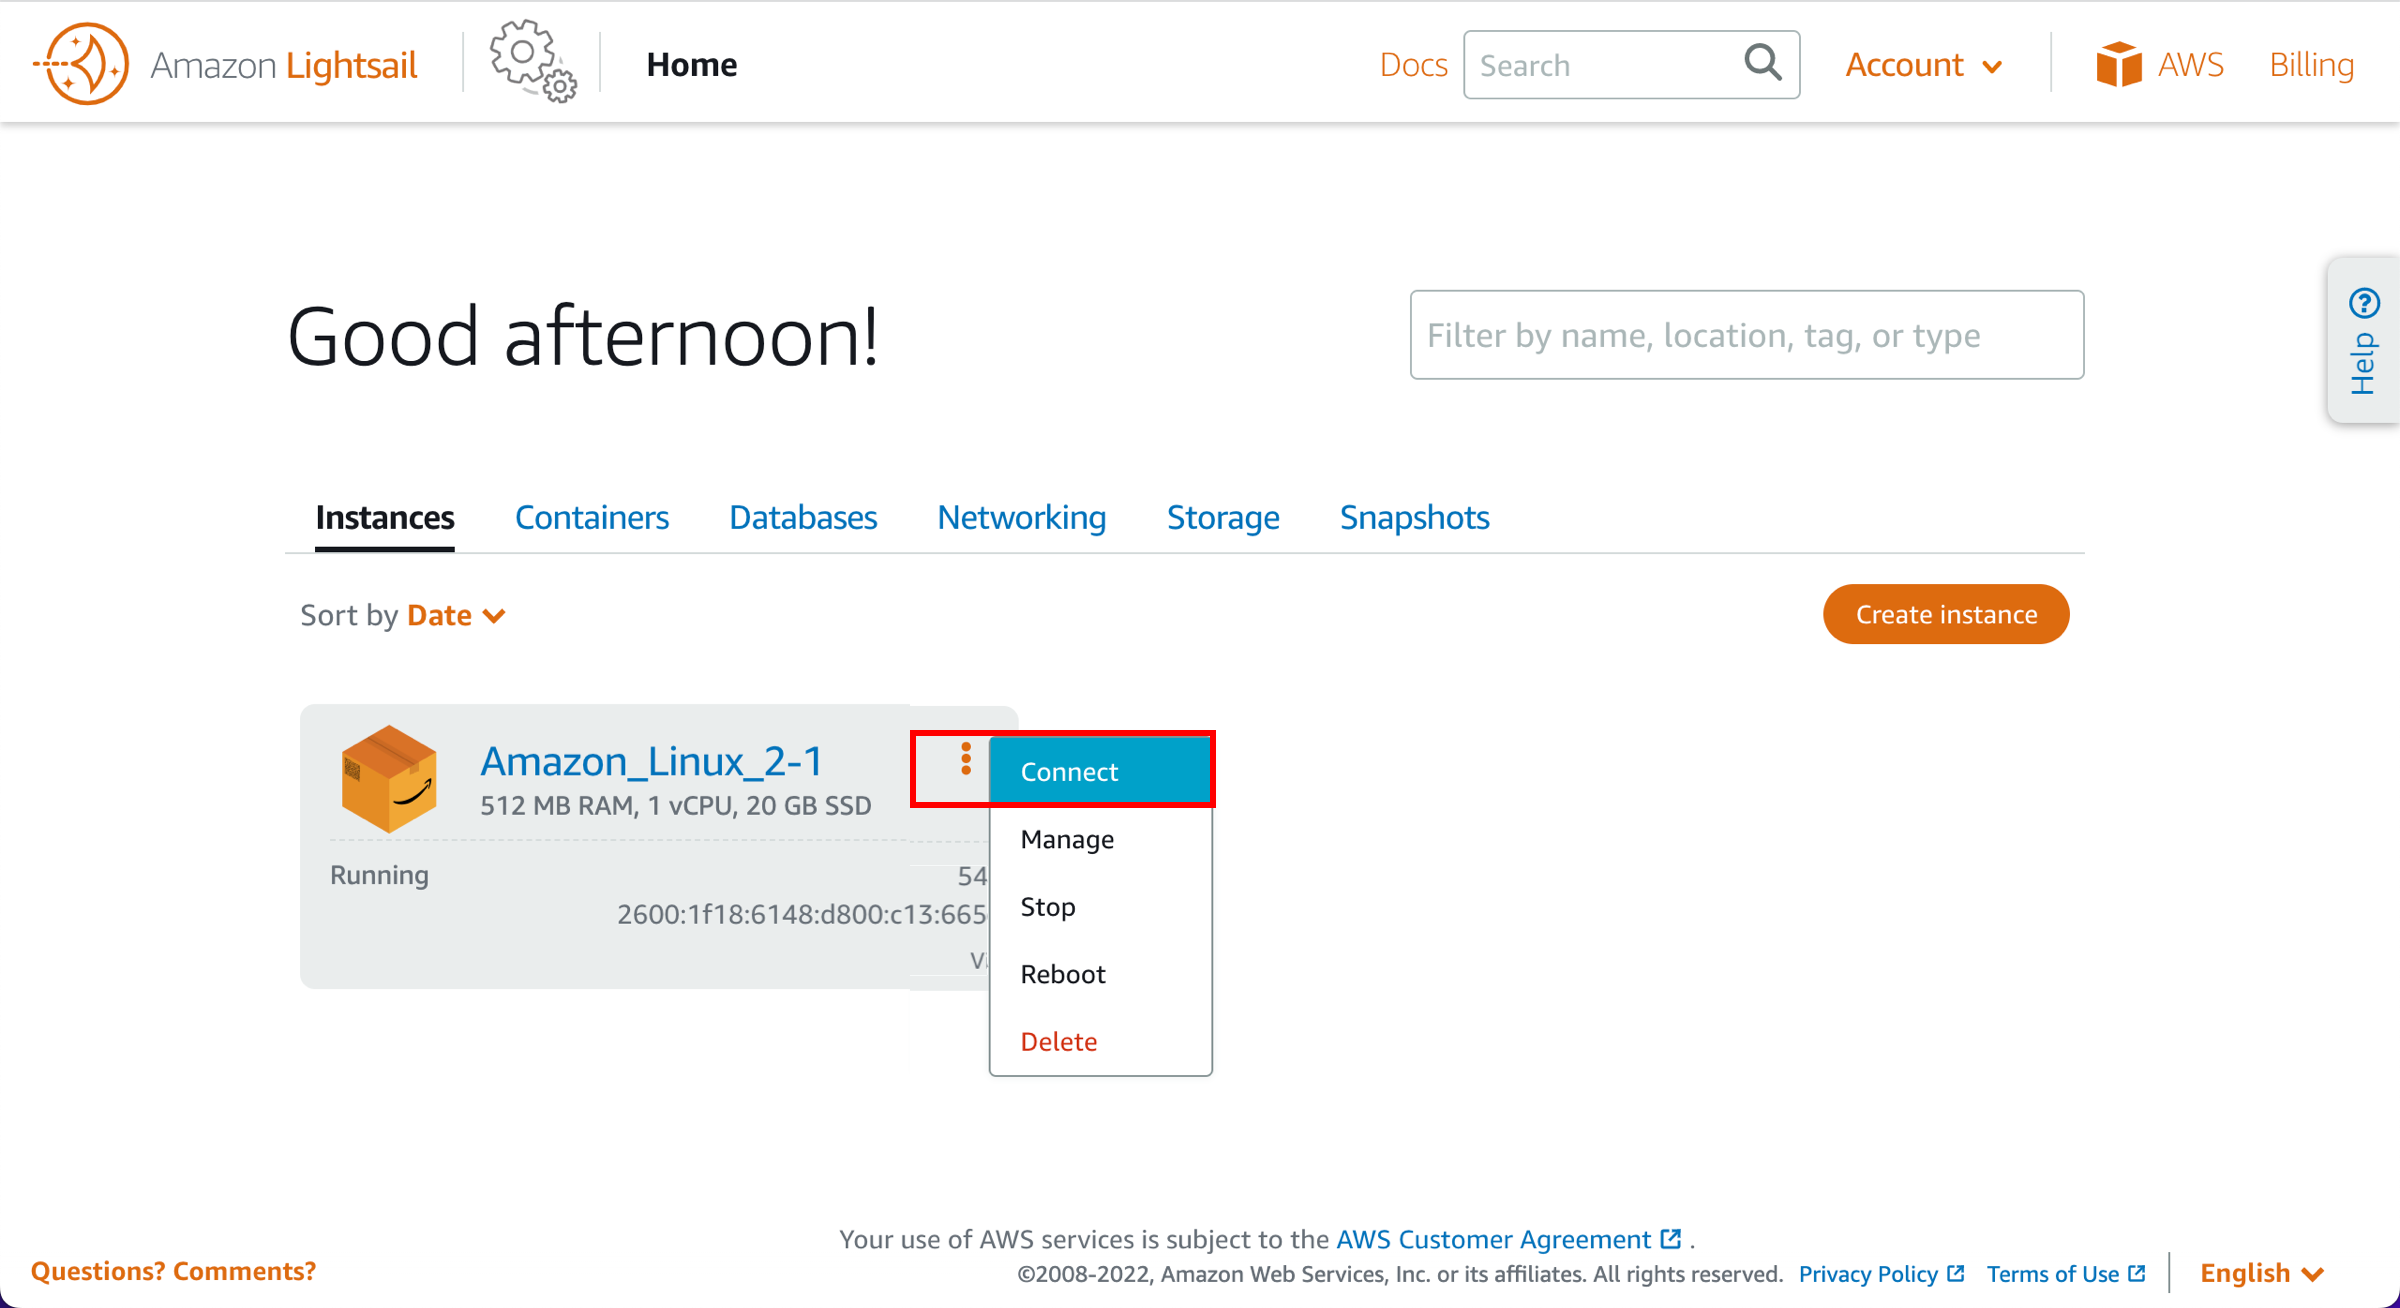
a. In the Instances tab of the Lightsail home page, choose the terminal icon, or the ellipsis (⋮) icon next to the Amazon Linux instance you just created.
The browser-based SSH terminal window appears. You can type Linux commands into the browser terminal, and manage your instance without configuring an SSH client.
Conclusion
Congratulations! You used Amazon Lightsail to easily spin up and configure a Linux instance.
Amazon Lightsail is great for developers, web pros, and anyone looking to get started on AWS in a quick and cheap way. You can launch instances, databases, and SSD-based storage; transfer data; and monitor your resources, and so much more in a managed way.
Whether you're an individual developer creating a project or a blogger creating a personal website, Amazon Lightsail is a great way for you to get started.
Next steps
Now that you have learned how to use Lightsail to spin up a Linux instance, review the following next steps to learn more about Lightsail's features, how to create a static IP for your instance, and how to create a snapshot of your instance for backup.