Amazon Lightsail is an easy-to-use virtual private server provider. Lightsail helps developers get started using AWS to build websites or web applications. In this tutorial, we show you how to launch a Lightsail instance using the PrestaShop Certified by Bitnami blueprint, and how to configure it.
PrestaShop Certified by Bitnami
PrestaShop is one of the most prolific e-commerce solutions in the world. It is free and open source software, with a community of over 1 million active members. It is designed to get your online store up and running quickly, with a preconfigured theme that enables you to start selling almost immediately along with a Live Configurator for easily customizing the look of your site.
| About this Tutorial | |
|---|---|
| Time | 30 minutes |
| Cost | Free |
| Use Case | Compute |
| Products | Amazon Lightsail |
| Level | 200 |
| Last Updated | April 1, 2021 |
Step 1: Create an Amazon Lightsail Account and instance
This tutorial is free tier eligible. Create a Lightsail account and then create a Lightsail instance.
1.1 — Login to your AWS account, or sign up using the links provided, and navigate to the Lightsail console.
Already have an account? Log in to your account
1.2 — Complete the following steps to get your PrestaShop instance up and running on Lightsail.
a. On the Lightsail home page, click on the Instances tab, and hit Create instance.
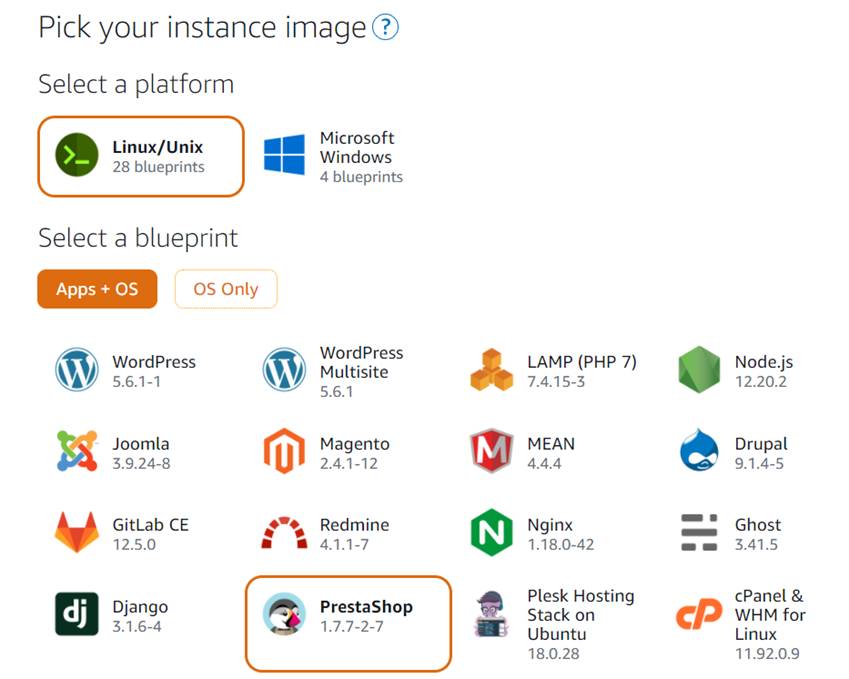
b. Choose Linux/Unix and the Prestashop blueprint (as shown in the following image).
c. Choose your instance plan, starting at the $3.50/mo bundle, which is free tier eligible.
d. Name your instance, then click: Create instance.
Step 2: Get the default application password for your PrestaShop website
Now that you launched the Prestashop instance, complete the following steps to get the default application password for your PrestaShop website.
2.1 — On the Instances tab of the Lightsail home page, choose the name of the PrestaShop instance you recently created.
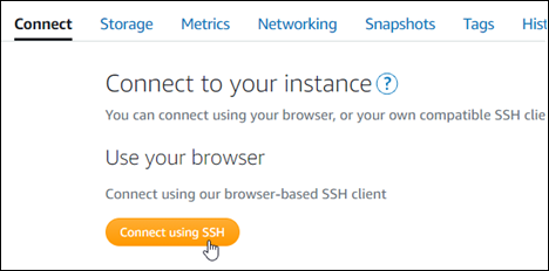
On the instance management page, under the Connect tab, choose Connect using SSH.
2.2 — After you are connected to your instance, enter the following command to get the defaul application password.
After you entered the command, you should see response similar to the following screenshot, which contains the default application password. Store this password in a safe place. You use it in the next section of this tutorial to sign in to the administration dashboard of your PrestaShop website.
cat $HOME/bitnami_application_password
Step 3: Attach a static IP address to your PrestaShop instance
The public IP address assigned to your instance when you first create it will change every time you stop and start your instance. You should create and attach a static IP address to your instance to ensure its public IP address doesn't change. Later, when you use a registered domain name, such as example.com, with your instance, you don’t have to update your domain’s DNS records every time you stop and start your instance.
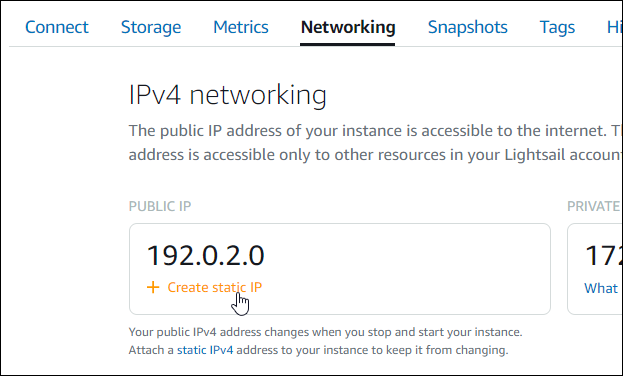
3.1 — In the Lightsail console, choose the Networking tab on your PrestaShop instance management page. Then choose Create static IP or Attach static IP (if you previously created a static IP that you can attach to your instance) and follow the instructions on the screen to create the static IP address and attach it to your instance.
If you need additional resources or help, please refer to this guide: Create a static IP and attach it to an instance in Amazon Lightsail.
3.2 — After the new static IP address is attached to your instance, you must complete the following steps to make the PrestaShop software aware of the new static IP address.
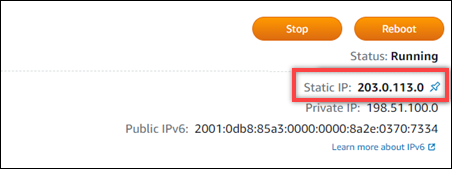
Make a note of the static IP address of your instance. It's listed in the header section of your instance management page.
3.3 — On the instance management page, under the Connect tab, choose Connect using SSH.
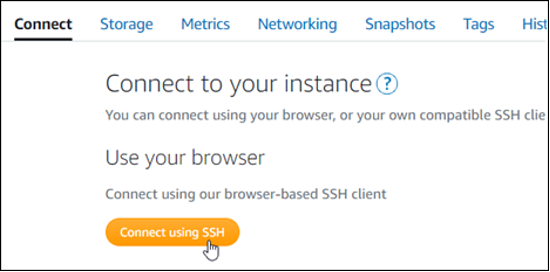
3.4 — After you're connected, enter the following command. Be sure to replace <StaticIP> with the new static IP address of your instance.
This can be seen in the following code blocks:
sudo /opt/bitnami/configure_app_domain --domain <StaticIP>sudo /opt/bitnami/configure_app_domain --domain 203.0.113.03.5 — You should see a response similar to the following example. The PrestaShop software should now be aware of the new static IP address.

Step 4: Sign in to the administration dashboard of your PrestaShop website
Complete the following steps to access your PrestaShop website and sign in to its administration dashboard. Use the default user name (user@example.com) and the default application password that you got earlier in this tutorial.
4.1 —Navigate to the Lightsail console and make note of the public IP or static IP address. This is listed in the header area od the instance management page.
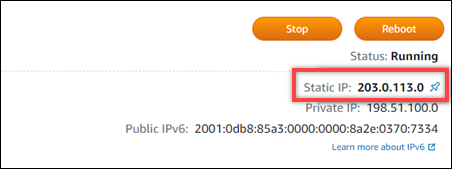
4.3 — Browse to the following address to access the sign in page for the administration dashboard of your PrestaShop website. Be sure to replace <InstanceIpAddress> with the public or static IP address of your instance.
http://<InstanceIpAddress>/administrationhttp://203.0.113.0/administration4.3 — Enter the default user name (user@example.com), the default application password you got earlier in this guide, and choose Log in.
After you've logged in, the PrestaShop administration board appears, as shown in the second screenshot.
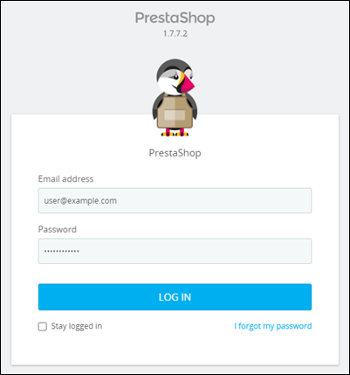
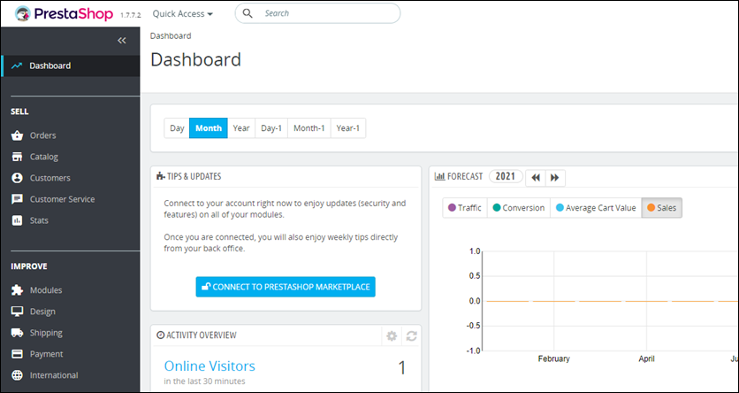
4.4 —After the Prestashop dashboard appears.
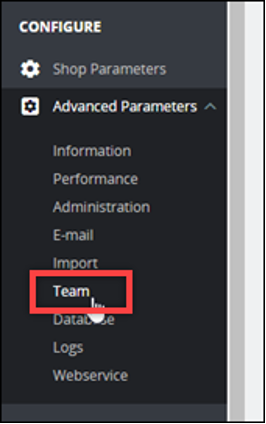
To change the default user name or password that you use to sign in to the administration dashboard of your PrestaShop website, choose Advanced Parameters in the navigation pane, and then choose Team. For more information, see Employees in the PrestaShop documentation. For more information about the administration dashboard, see Discovering the administration area in the PrestaShop documentation.
Step 5: Route traffic for your registered domain name to your PrestaShop website
To route traffic for your registered domain name, such as example.com, to your PrestaShop website, you add a record to the domain name system (DNS) of your domain. DNS records are typically managed and hosted at the registrar where you registered your domain. However, we recommend that you transfer management of your domain's DNS records to Lightsail so that you can administer it using the Lightsail console.
5.1 — On the Lightsail console home page, under the Networking tab, choose Create DNS zone, then follow the instructions on the page.
If you need additional help, see Creating a DNS zone to manage your domain’s DNS records in Amazon Lightsail.

5.2 —After your domain name is routing traffic to your instance, you must complete the following steps to make the PrestaShop software aware of the domain name.
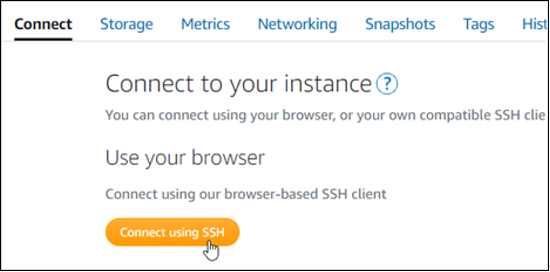
On the instance management page, under the Connect tab, choose Connect using SSH.
5.3 — After you're connected, enter the following command. Be sure to replace <DomainName> with the domain name that is routing traffic to your instance.
You can see how this should look in the following code blocks:
sudo /opt/bitnami/configure_app_domain --domain <DomainName>sudo /opt/bitnami/configure_app_domain --domain www.example.com5.4 — You should see a response similar to the following example. The PrestaShop software should now be aware of the domain name.

Step 6: Configure HTTPS for your PrestaShop website
Complete the following steps to configure HTTPS on your PrestaShop website. These steps show you how to use the Bitnami HTTPS configuration tool (bncert), which is a command line tool for requesting SSL/TLS certificates, setting up redirections (e.g. HTTP to HTTPS), and renewing certificates.
Important: The bncert tool will issue certificates only for domains that are currently routing traffic to the public IP address of your PrestaShop instance. Before starting with these steps, make sure that you add DNS records to the DNS of all domains that you want to use with your PrestaShop website.
6.1 — On the instance management page, under the Connect tab, choose Connect using SSH.

6.2 — After you're connected, enter the following command to start the bncert-tool.
You should see a response similar to the following screenshot.
sudo /opt/bitnami/bncert-tool
6.3 — Enter your primary domain name and alternate domain names separated by a space as shown in the following example.

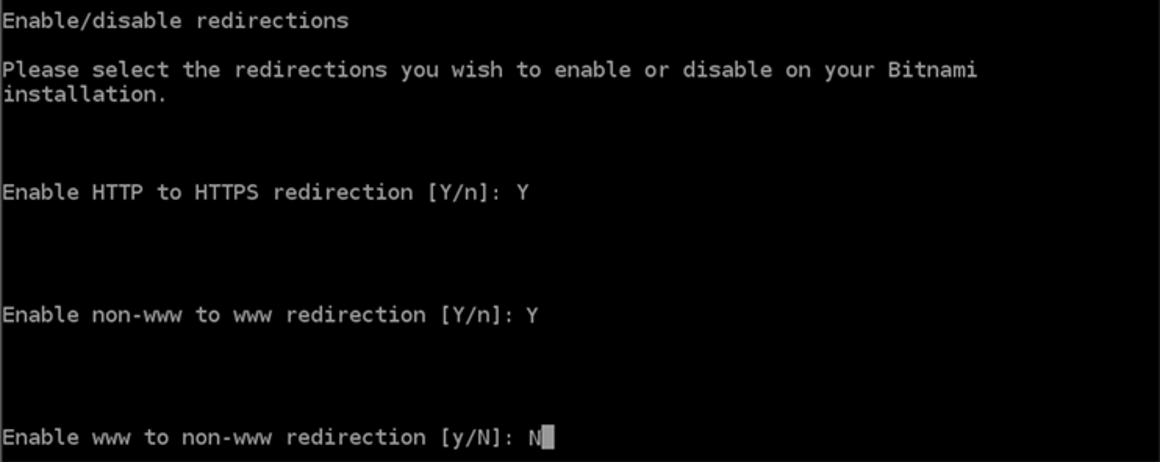
6.4 — The bncert tool will ask how you want your website's redirection to be configured. These are the options available:
- Enable HTTP to HTTPS redirection - Specifies whether users who browse to the HTTP version of your website (i.e., http:/example.com) are automatically redirected to the HTTPS version (i.e., https://example.com). We recommend enabling this option because it forces all visitors to use the encrypted connection. Type Y and press Enter to enable it.
- Enable non-www to www redirection - Specifies whether users who browse to the apex of your domain (i.e., https://example.com) are automatically redirected to your domain's www subdomain (i.e., https://www.example.com). We recommend enabling this option. However, you may want to disable it and enable the alternate option (enable www to non-www redirection) if you have specified the apex of your domain as your preferred website address in search engine tools like Google's webmaster tools, or if your apex points directly to your IP and your www subdomain references your apex via a CNAME record. Type Y and press Enter to enable it.
- Enable www to non-www redirection - Specifies whether users who browse to your domain's www subdomain (i.e., https://www.example.com) are automatically redirected to the apex of your domain (i.e., https://example.com). We recommend disabling this, if you enabled non-www redirection to www. Type N and press Enter to disable it.
Your selections should look like the following example.
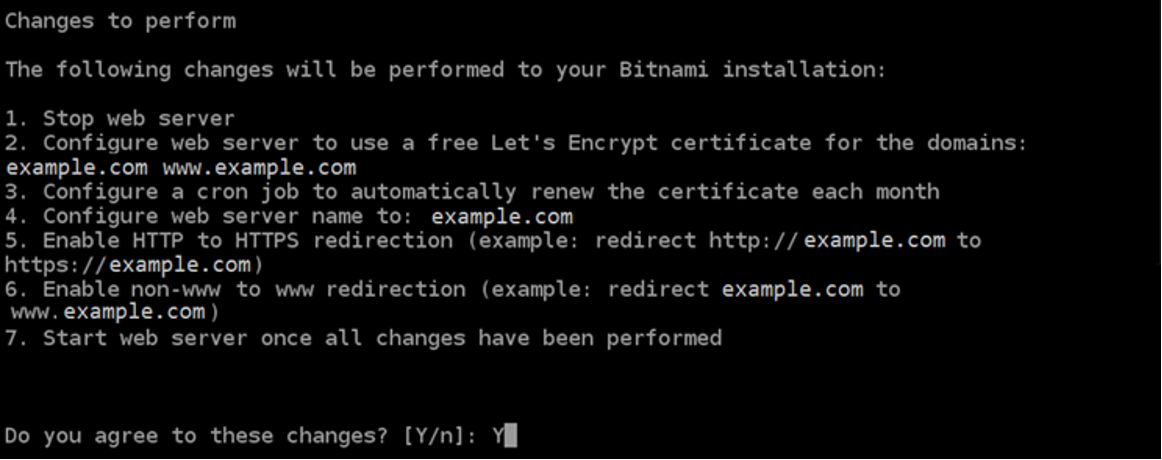
6.5 — The changes that are going to be made are listed. Type Y and press Enter to confirm and continue.
6.6 — Enter your email address to associate with your Let's Encrypt certificate and press Enter.

6.7 — Review the Let's Encrypt Subscriber Agreement. Type Y and press Enter to accept the agreement and continue.
The actions are performed to enable HTTPS on your instance, including requesting the certificate and configuring the redirections you specified. This is demonstrated in the secon screenshot.
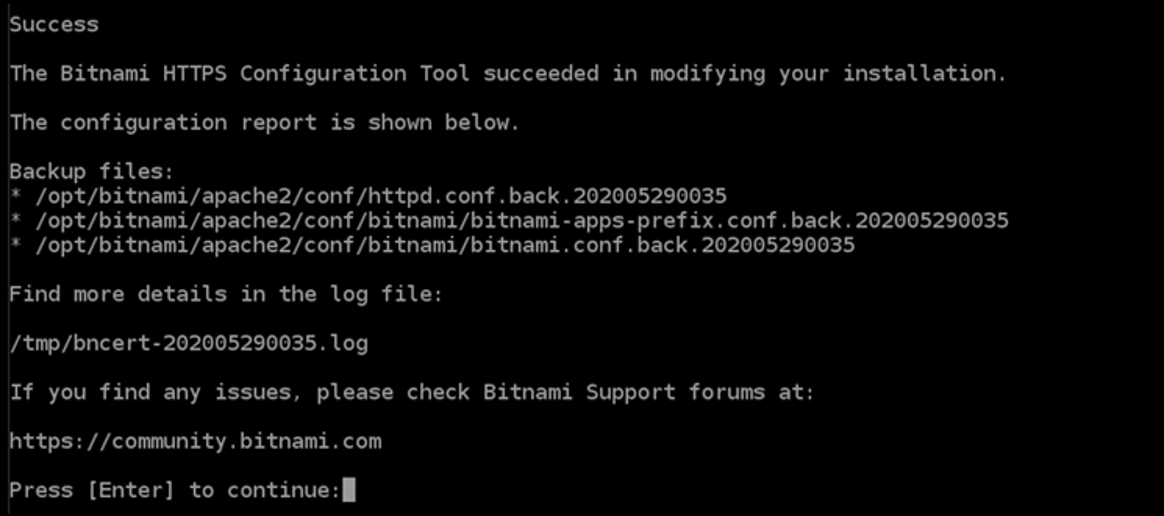
Your certificate is successfully issued and validated, and the redirections are successfully configured on your instance if you see a message similar to the following example. As shown in the third screenshot.
Lastly, the bncert tool will perform an automatic renewal of your certificate every 80 days before it expires. Continue to the next set of steps to finish enabling HTTPs on your PrestaShop website.


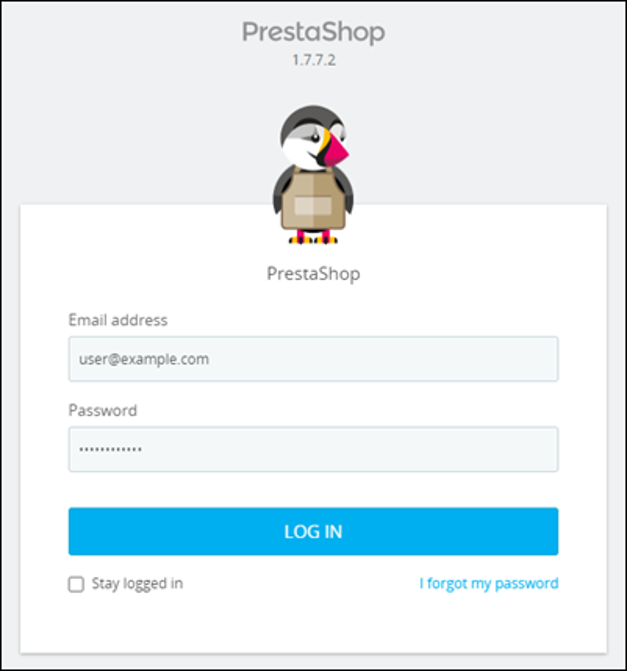
6.8 —Browse to the following address to access the sign in page for the administration dashboard of your PrestaShop website. Be sure to replace <DomainName> with the registered domain name that is routing traffic to your instance.
http://<DomainName>/administrationhttp://www.example.com/administration6.9 — Enter the default user name (user@example.com), the default application password you got earlier in this tutorial, and choose Log in.
The PrestaShop administration dashboard appears.
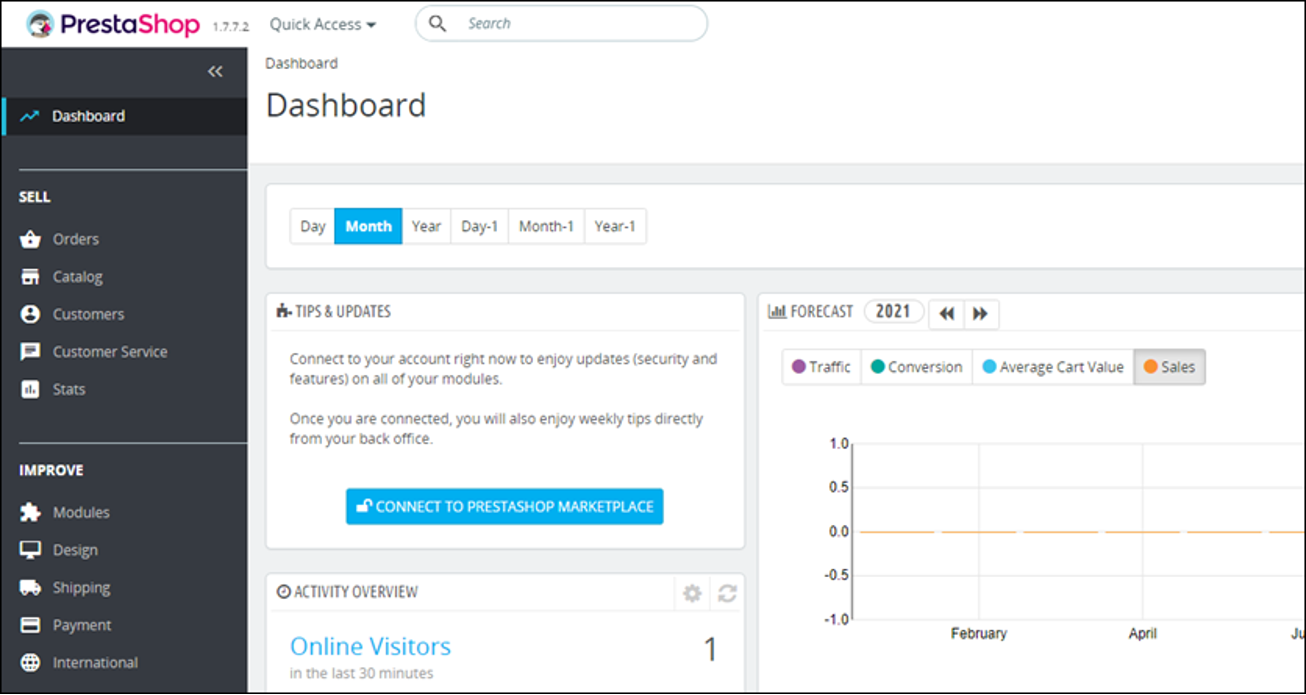
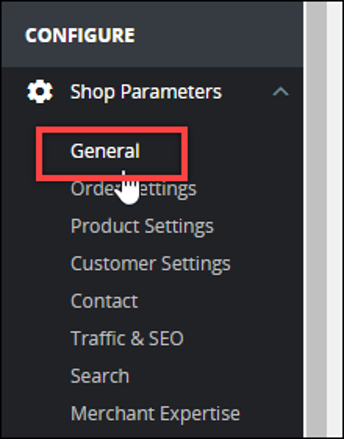
6.10 —Choose Shop Parameters in the navigation pane, and then choose General
6.11 — Choose Yes next to Enable SSL.
Scroll to the bottom of the page and choose Save.

6.12 —When the General page reloads, choose Yes next to Enable SSL on all pages.
Scroll to the bottom of the page and choose Save.
HTTPS is now configured for your PrestaShop website. When customers browse to the HTTP version (e.g., http://www.example.com) of your PrestaShop website, they will be automatically redirected to the HTTPS version (e.g., https://www.example.com).

Congratulations
Congratulations. You have successfully setup your Prestashop website with Amazon Lightsail.
Amazon Lightsail is a great choice to develop, build, and deploy a variety of applications like WordPress, websites, and blog platforms.
Recommended next steps
Read the documentation
Read the Bitnami documtation to learn how to perform administrative tasks on your PrestaShop. You can also read the PrestaShop documentation to learn how to administer your PrestaShop website.
Take a snapshot
After you configure your PrestaShop website the way you want it, create periodic snapshots of your instance to back it up.
Learn more
Learn more about virtual private servers and Amazon Lightsail.