Getting Started / Hands-on / ...
Publish a .NET Application to a Windows Server 2022 Instance in Amazon Lightsail
TUTORIAL
Overview
Amazon Lightsail is one of the easiest ways to get started with AWS. lt includes everything you need to launch your project quickly for a low, predictable price.
What you will accomplish
In this tutorial, you will:
- install the required server roles and features
- configure Visual Studio 2022 Community edition to connect to your instance
- publish the ASP.NET core web application template to your instance
Prerequisites
Before starting this tutorial, you will need:
- An AWS account: If you don't already have an account, follow the Setting Up Your AWS Environment guide for a quick overview.
AWS experience
Minimum time to complete
60 minutes
Cost to complete
Requires
*Accounts created within the past 24 hours might not yet have access to the services required for this tutorial.
Services used
Last updated
April 28, 2023
Implementation
Step 1: Create an Amazon Lightsail account
This tutorial is free tier eligible with Amazon Lightsail, but costs may apply.
Already have an account? Sign in
Step 2: Create a Windows Server 2022 instance in Amazon Lightsail
This tutorial requires that you create a Windows Server 2022 instance in Lightsail. To do so, follow the steps in the Launch a Windows Virtual Machine with Amazon Lightsail tutorial, but make sure to select Windows Server 2022 when choosing the operating system-only instance image.
Step 3: Install the required roles and features on your instance
a. On the Instances tab of the Lightsail home page, choose the RDP quick-connect icon for your Windows Server 2022 instance.
b. After the browser-based RDP client window opens, choose the Windows icon and open Server Manager.

c. Choose Local Server in the left navigation menu, then choose On next to IE Enhanced Security Configuration (choosing On turns it Off).
Turning off IE Enhanced Security Configuration will allow you to download resources later in this tutorial.

d. In the configuration prompt, choose to turn off the feature only for administrators, and then choose OK.

e. In Server Manager, choose Dashboard in the left navigation menu, then choose Add roles and features.

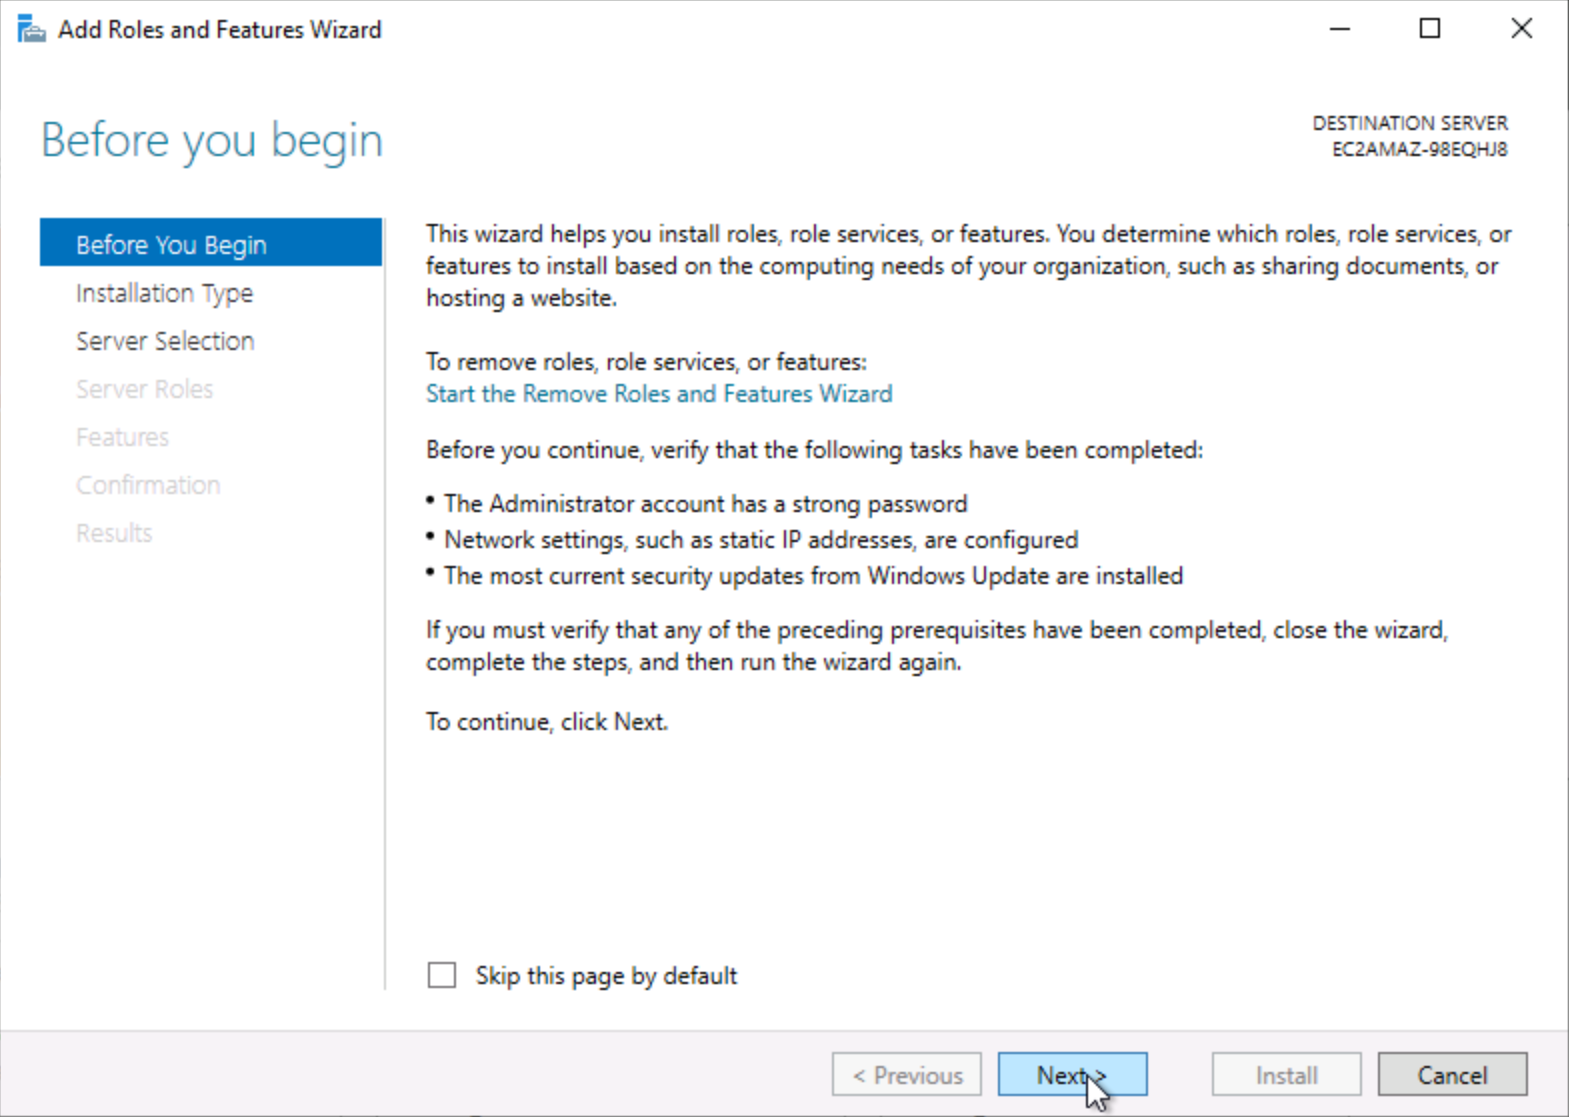
f. Choose Next in the Add Roles and Features Wizard.
g. Choose Role-based or feature-based installation in the Select installation type screen, and choose Next.

h. Choose Next in the Select destination server screen.

i. Choose Web Server (IIS) in the Select server roles screen. Choose Add features when you are asked if you would like to add the required features. Choose Next.

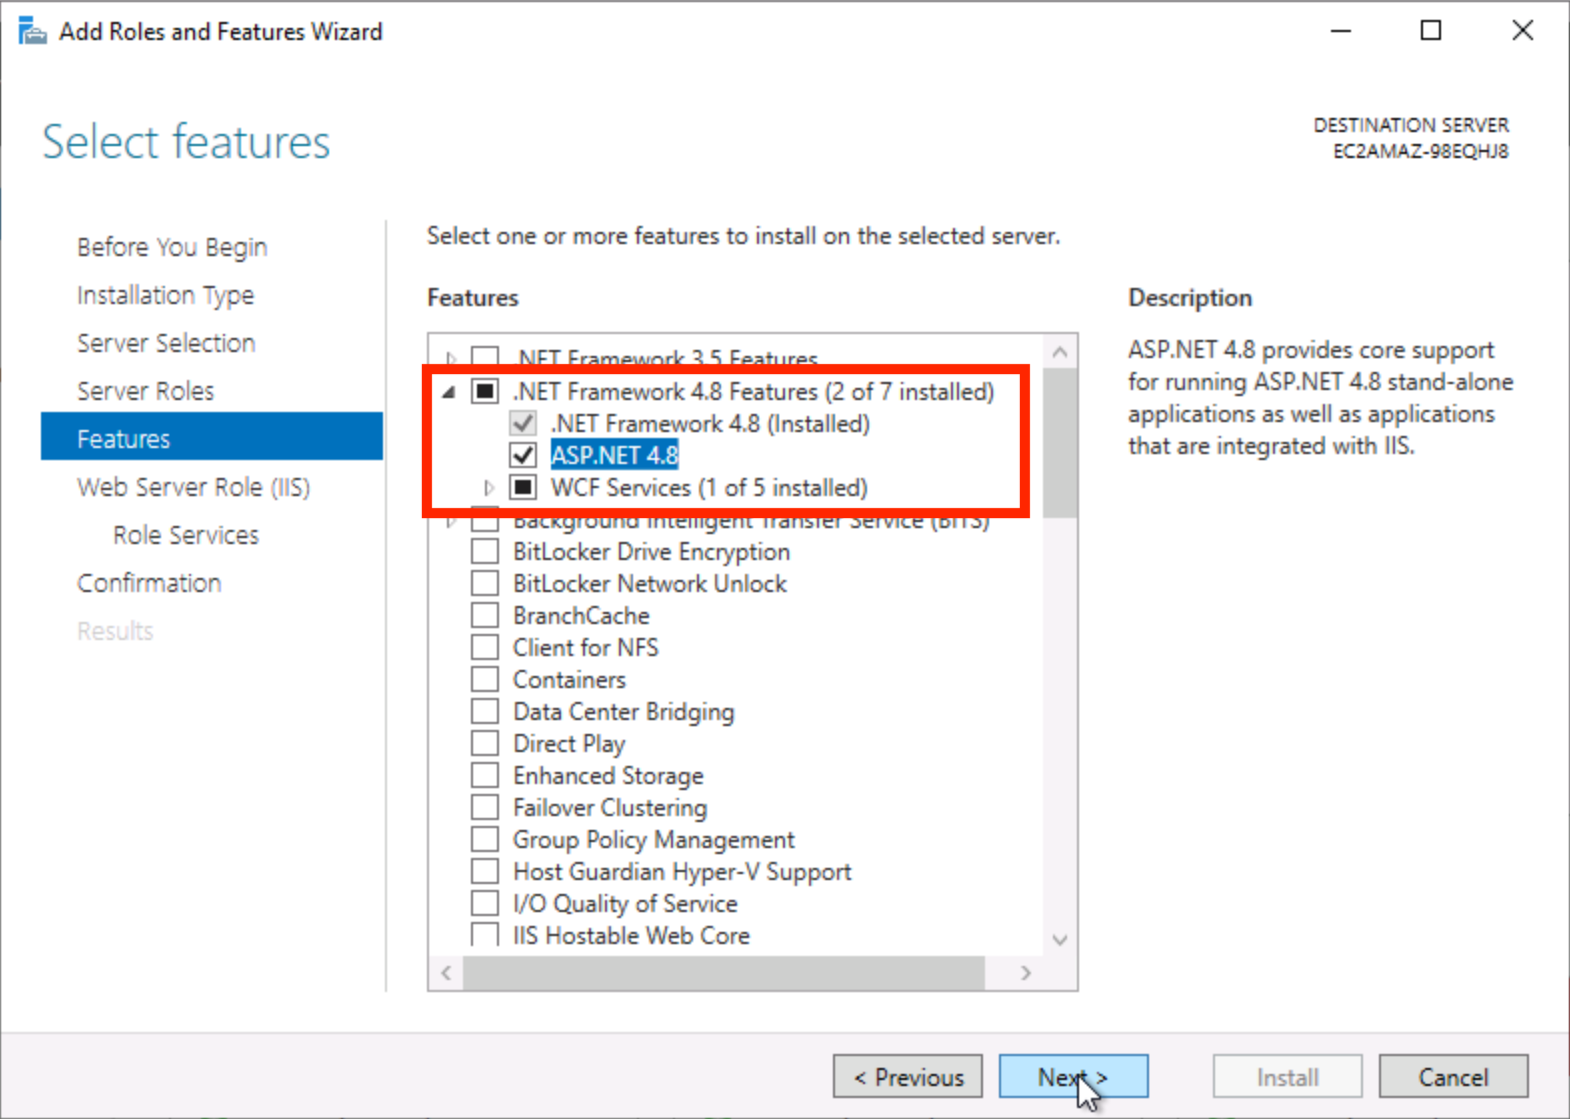
j. Choose the features highlighted in this screenshot in the Select features screen, and then choose Next.
k. Choose Next in the Web Server Role (IIS) screen.

l. Choose the role services highlighted in this screenshot under the Web Server service.

m. Choose the role services highlighted in this screenshot under the Performance and Security services.

n. Choose the role services highlighted in this screenshot under the FTP Server and Management Tools services.

o. Choose the role services highlighted in this screenshot under the Application Development service.

p. Choose Next after you confirm that you selected all of the correct role services highlighted in the previous steps.
q. Choose Restart the destination server automatically if required, and then choose Install in the Confirm installation selections screen.
The roles and features will require a few minutes to download and install.

Step 4: Install Web Deploy on your instance
You must install the Web Deploy 4.0 extension on your Windows Server 2022 instance to enable deployment of web applications and websites to your server.
a. On your Windows Server 2022 instance, open Internet Explorer and download Web Deploy 4.0.
b. After the download completes, choose Open file to start the installer.

c. Choose Next on the initial Setup Wizard screen.

d. Accept the terms in the license agreement, and choose Next in the Microsoft Web Deploy 4.0 Setup screen.

e. Choose Complete on the Choose Setup Type screen.

f. Choose Install to start the installation, then choose Finish to close the installer when the installation is complete.

Step 5: Install ASP.NET Core 6.0 Hosting Bundle
Because we’re going to publish an ASP.NET Core Web App to the Windows Server 2022 instance, you need to install the ASP.NET Core 6.0 Hosting Bundle.
a. On your Windows Server 2022 instance, open Internet Explorer and download ASP.NET Core 6.0 Hosting Bundle.

b. After the download completes, choose Open file.

c. Accept the terms in the license agreement, and choose Install in the Windows Server Hosting Setup screen.

d. After the installation completes, choose Close.

Step 6: Create an ASP.NET Core Web Application in Visual Studio 2022
In these steps, you will create an application using the ASP.NET Core Web App template in Visual Studio 2022 Community edition. To download and install Visual Studio 2022 Community edition, see the Visual Studio website.
a. Open Visual Studio 2022 Community edition on your local computer (not the Windows Server 2022 instance).
b. Choose Create a new project.

c. Choose C# in the language dropdown menu. Choose ASP.NET Core Web App in the list of available projects, and choose Next.

d. Choose a Project name, and choose Next.

e. On the Additional information screen, make sure the Framework selected is .NET 6.0, and choose Create.
After this step, you will have an ASP.NET core website project template that you can edit in Visual Studio. When you are done editing your project, continue to the next section to publish your project to your Windows Server 2022 instance.

Step 7: Publish your .NET application to your Windows Server 2022 instance
In these steps, you will configure Visual Studio to connect to your Windows Server 2022 instance so that you can publish your .NET core project to your server.
a. For publishing to work from a remote network, you need to add a firewall rule to your Windows Server 2022 instance. Open your Lightsail console and open the Networking tab of your instance. Choose + Add rule and enter 8172 as the port, then choose Create.

b. With your MVC project open in Visual Studio 2022 Community edition, choose Build, and choose Publish LightsailWebApp1.
If you named your project differently, then LightsailWebApp1 is replaced with the name you chose when creating your project.

c. Choose Web Server (IIS) and choose Next in the Publish screen.

d. Select Web Deploy and choose Next.

e. Get the public IP address of your Windows Server 2022 instance from the Lightsail console, then perform a reverse DNS lookup by running nslookup PublicIpAddress in PowerShell to get the public DNS name for your Windows Server 2022 instance’s IP address; this PublicHostname will be used in the next step as the server name.


f. On the next screen, enter the following information:
- Enter PublicHostname in the Server text box. Replace PublicHostname with the public DNS name of your Windows Server 2022 instance retrieved in the previous step.
- Enter Default Web Site in the Site name text box.
- This is name of the default website automatically configured when you installed Internet Information Services (IIS) on your Windows Server 2022 instance.
- Enter http://PublicHostname in the Destination URL text box. Replace PublicHostname with the public DNS name of your Windows Server 2022 instance retrieved in the previous step.
- Enter Administrator in the User name text box. This is the default administrator user name for your Windows Server 2022 instance.
- Enter the administrator password in the Password text box.
- You can get the administrator password by going to the instance’s management page in the Lightsail console, and choosing Retrieve default password under the Connect tab.
- You can get the administrator password by going to the instance’s management page in the Lightsail console, and choosing Retrieve default password under the Connect tab.


g. Choose Validate Connection to test the connection. You might get a certificate error like the one in the screenshot when connecting the first time. This is because the server uses a default certificate and you can safely accept it if the hostname displayed matches the one you intended to connect to.
A checkmark icon will appear if the validation is successful. If the validation is unsuccessful, confirm that you entered the correct information into the form (confirm the administrator password and the IP address).

h. Choose Finish, then choose Close when the Publish profile creation progress completes successfully.

i. Choose Publish in Visual Studio when you are ready to publish your project to your server.

j. The Output in Visual Studio will show a successful message if your project was successfully published to your server.

k. Browse to the PublicHostname of your Windows Server 2022 instance to confirm that the project was successfully published.
Your project was successfully published if you see a page similar to the following screenshot.

Step 8: Clean up resources
a. On the Instances tab of the Lightsail home page, choose the ellipsis (⋮) icon next to the Windows Server instance you just created and choose Delete.

b. Choose Yes, delete from the prompt.

Conclusion
Congratulations! You have published a .NET core web application to your Windows Server 2022 instance in Amazon Lightsail.
Amazon Lightsail is a great choice to develop, build, and deploy a variety of applications like content management systems, websites, and other platforms.