Four Steps to Run ECS Clusters on EC2 Spot Instances
In this tutorial, you will learn how to launch your first Amazon ECS cluster on Amazon EC2 Spot Instances using the Create Cluster wizard. An Amazon ECS cluster is a regional grouping of one or more container instances on which you can run tasks, within a logical grouping of containers. ECS Clusters enables users to choose from a wide variety of provisioning choices including EC2 Spot and On-Demand instances.
Manage Your AWS Resources
Step 1: Select a Cluster Template
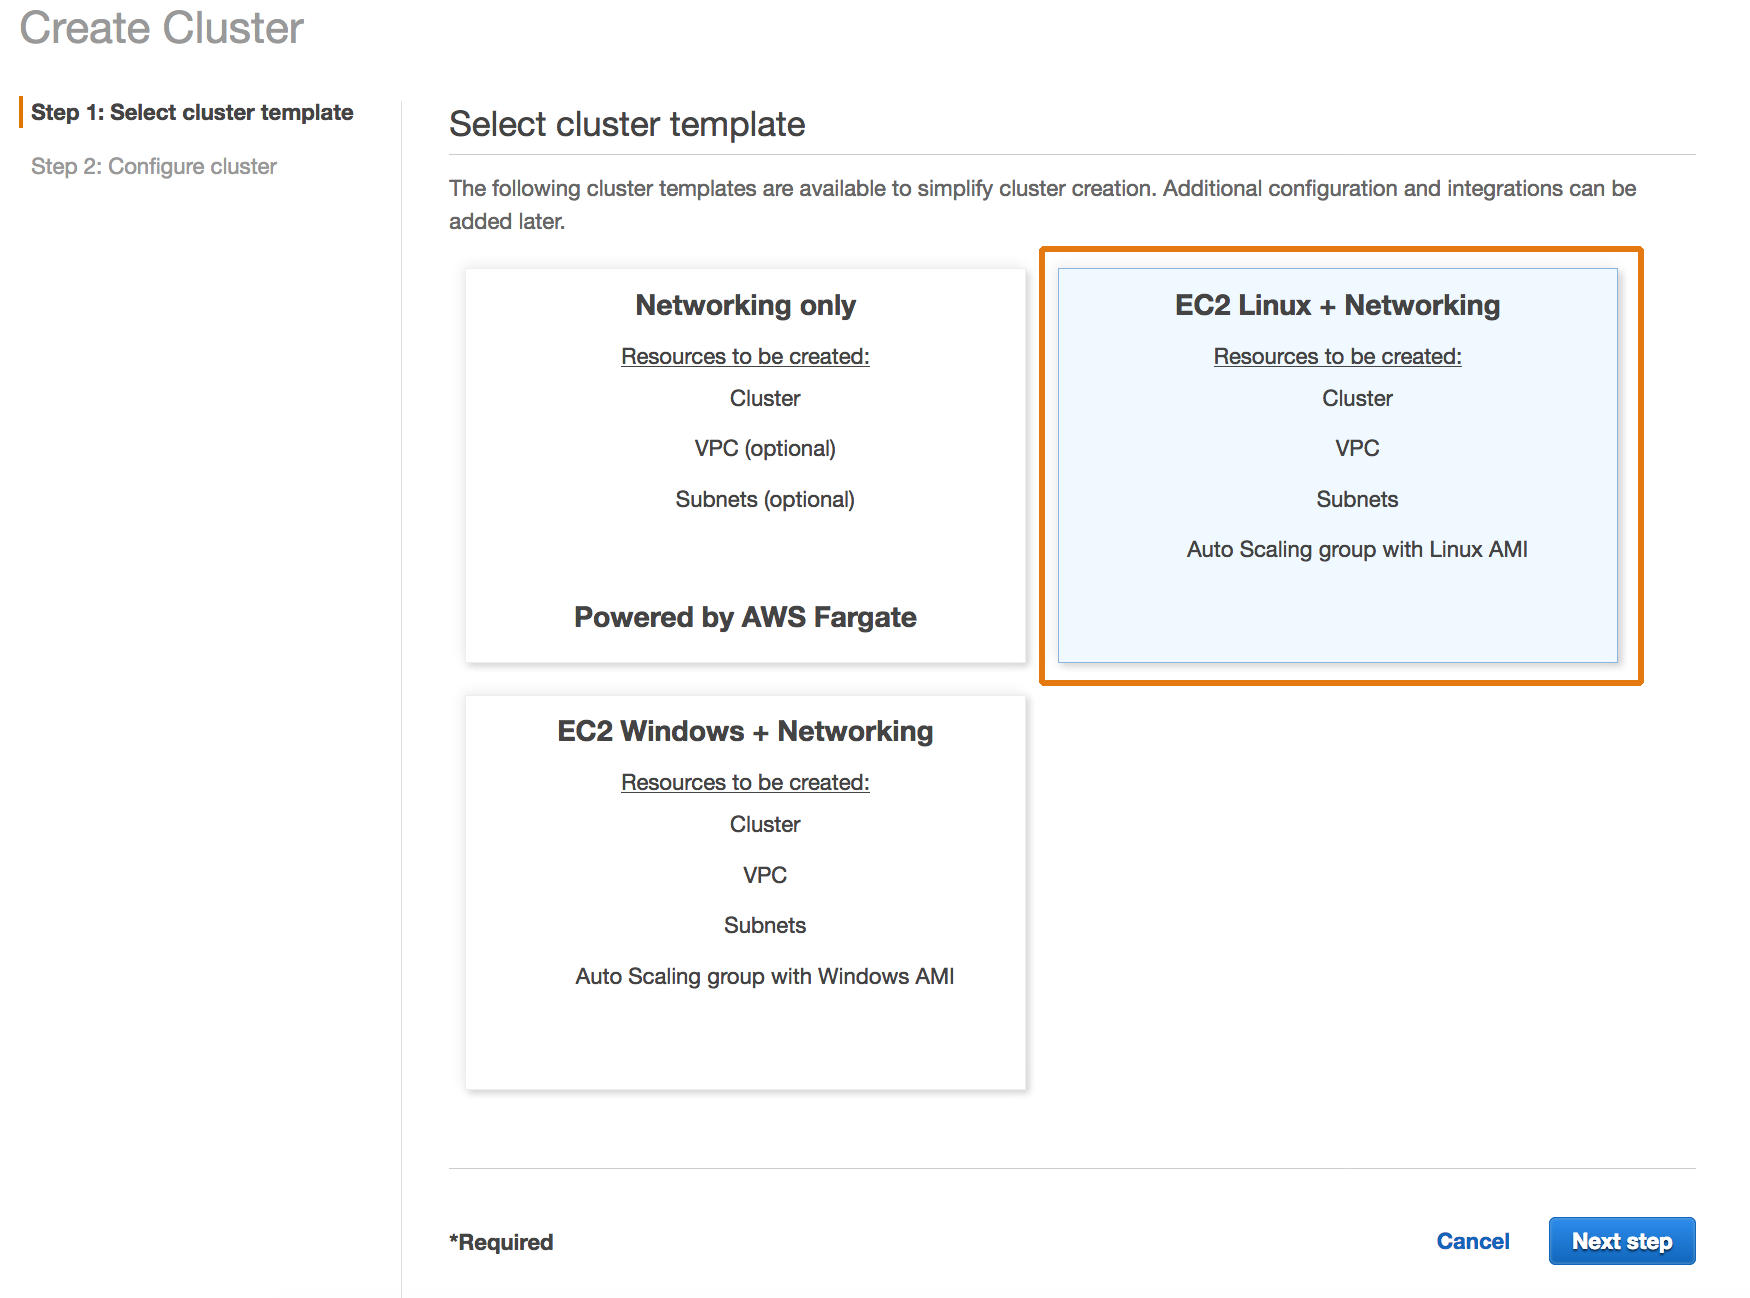
Login to the Amazon ECS console and launch the Create Cluster wizard. You will then see Linux or Windows options for launching EC2 Container instances as part of your ECS Cluster. Select EC2 Linux + Networking option to launch a cluster using the EC2 launch type with Linux container instances and click on Next. For more details on Windows and Fargate launch choices, please refer to documentation.

Step 2: Configure your Cluster
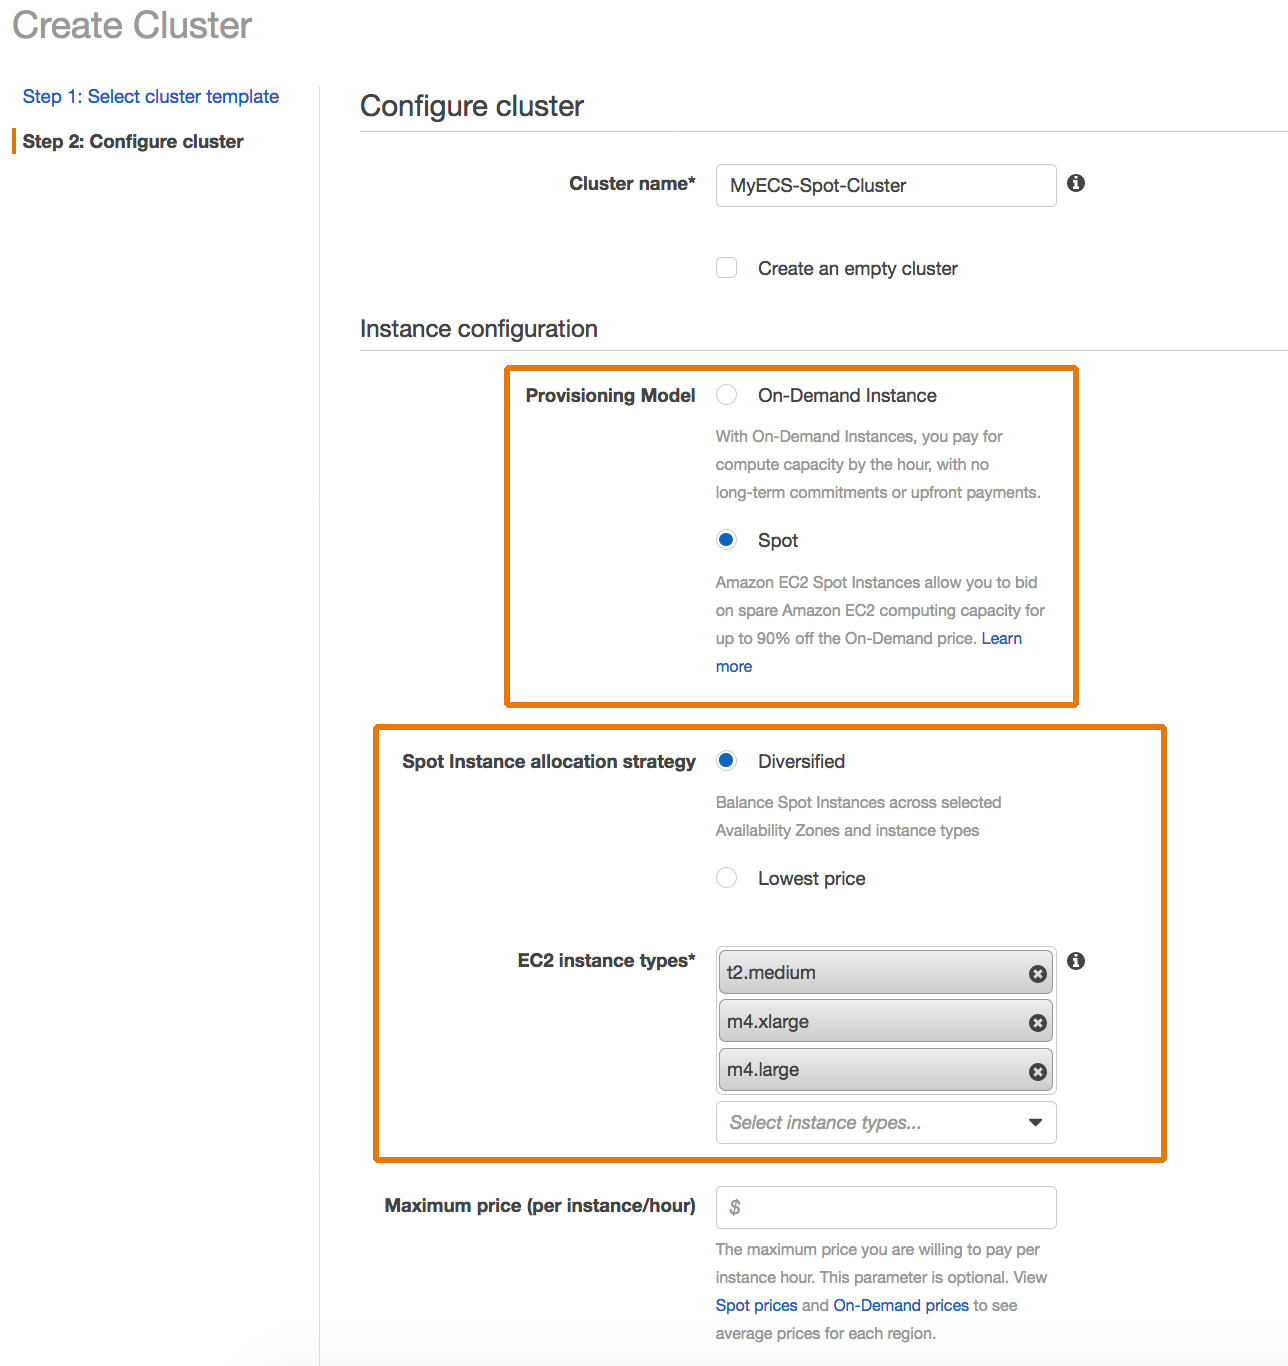
On the Configure cluster page, choose a Cluster name and select Spot in the Provisioning Model section of Instance Configuration. Provisioning model dictates how your instances are requested and provisioned.
Using an On-Demand model, an EC2 instance request is made, and the instance is provisioned for you at an On-Demand price. With EC2 Spot Instances, you obtain instances at up to a 90% discount off On-Demand price, for an average instance interruption rate of less than 5%. For more details on specific instance type interruption rates, please review Spot Instance Advisor.
Within the Spot provisioning model, you can provide an allocation strategy of either “Diversified” or “Lowest Price” which will define how the EC2 Spot Instances are provisioned. EC2 Spot Instances present a great choice for containers because of the nature of workload, which allows for interruptions. The recommended best practice is to select the “Diversified” strategy, to maximize provisioning choices, while reducing the costs. If you want to optimize costs and choose an instance that is lowest price, select the Lowest Price option.
Finally, you need to also specify desired EC2 instances types and select or create an IAM role for a Spot Fleet request before you click on Create.

Step 3: Create a New Task Definition
In this step, let’s create a sample task definition to run on the EC2 Spot instances powered ECS cluster. If you have published a Docker image to Amazon ECR or a public repository, you can use the image in your task definitions.
- Navigate to the Elastic Container Service in the menu and choose Task Definitions from the left-hand bar.
- Create new Task Definition.
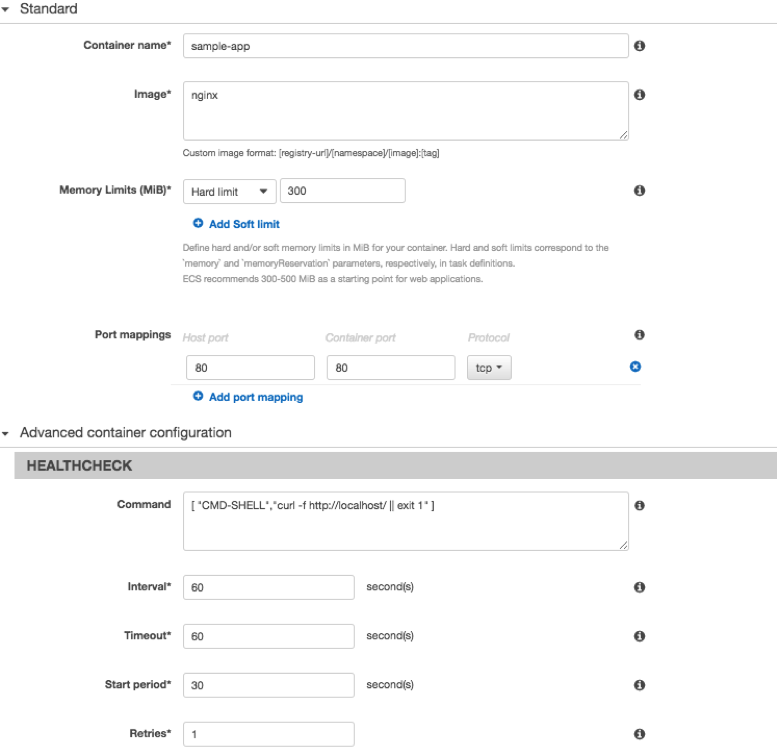
- Enter the values as shown below for Task Definition Name and Network mode and click on “Add Container”.
- Enter values as shown in screenshot, and click Add

Step 4: Configure your ECS service
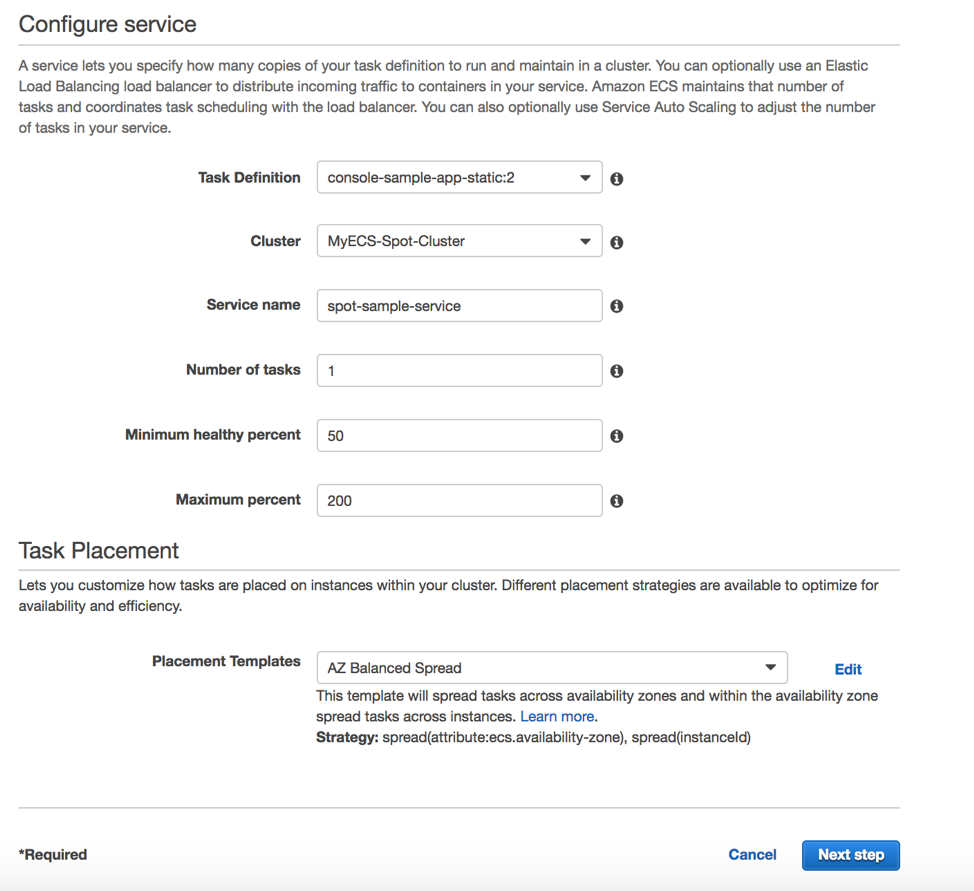
Now that you have created an ECS Cluster with EC2 Spot container instances running, let’s see how an ECS Service is created. Navigate to the Cluster, MyECS-Spot-Cluster, and click on “Create” button under “Services” tab. Click “Next Step”. Leave defaults in next pages, and complete creating service.
If you check the “Tasks” tab in the service, you will see that a single task is running on your ECS cluster powered by EC2 Spot instances.

Congratulations!
You have now learned how to create an Amazon Elastic Container Service (Amazon ECS) cluster on Amazon EC2 Spot Instances. EC2 Spot instances are a great fit for container workloads because of the inherent nature of fault-tolerance that is managed for containers by the ECS Service schedule. This enables you to optimize both scale and cost by leveraging EC2 Spot Instances for your workloads, enabling you to optimize your costs on the AWS cloud and scale your application's throughput up to 10X for the same budget.
Next Steps
Now that you have learned to deploy your Amazon ECS cluster on Amazon EC2 Spot Instances, try Amazon EC2 Spot Instances for other workloads.