Deliver Content Faster with Amazon CloudFront
TUTORIAL
Overview
In this tutorial, you will learn how to deliver content and decrease end-user latency of your web application using Amazon CloudFront. CloudFront speeds up content delivery by leveraging its global network of data centers, known as edge locations, to reduce delivery time by caching your content close to your end users. CloudFront fetches your content from an origin, such as an Amazon Simple Storage Service (Amazon S3) bucket, an Amazon Elastic Compute Cloud (Amazon EC2) instance, an Elastic Load Balancing (ELB) load balancer, or your own web server, when it's not already in an edge location. CloudFront can be used to deliver your entire website or application, including dynamic, static, streaming, and interactive content.
In the following steps, you will configure an Amazon S3 bucket as the origin and test your distribution using a web browser to ensure that your content is being delivered.
Everything done in this tutorial is free tier eligible.
AWS experience
Beginner
Time to complete
10 minutes
Cost to complete
Free Tier eligible
Requires
- AWS Account
- Recommended browser: The latest version of Chrome or Firefox
[**]Accounts created within the past 24 hours might not yet have access to the services required for this tutorial.
Last updated
July 1, 2022
Step 1: Prepare your content
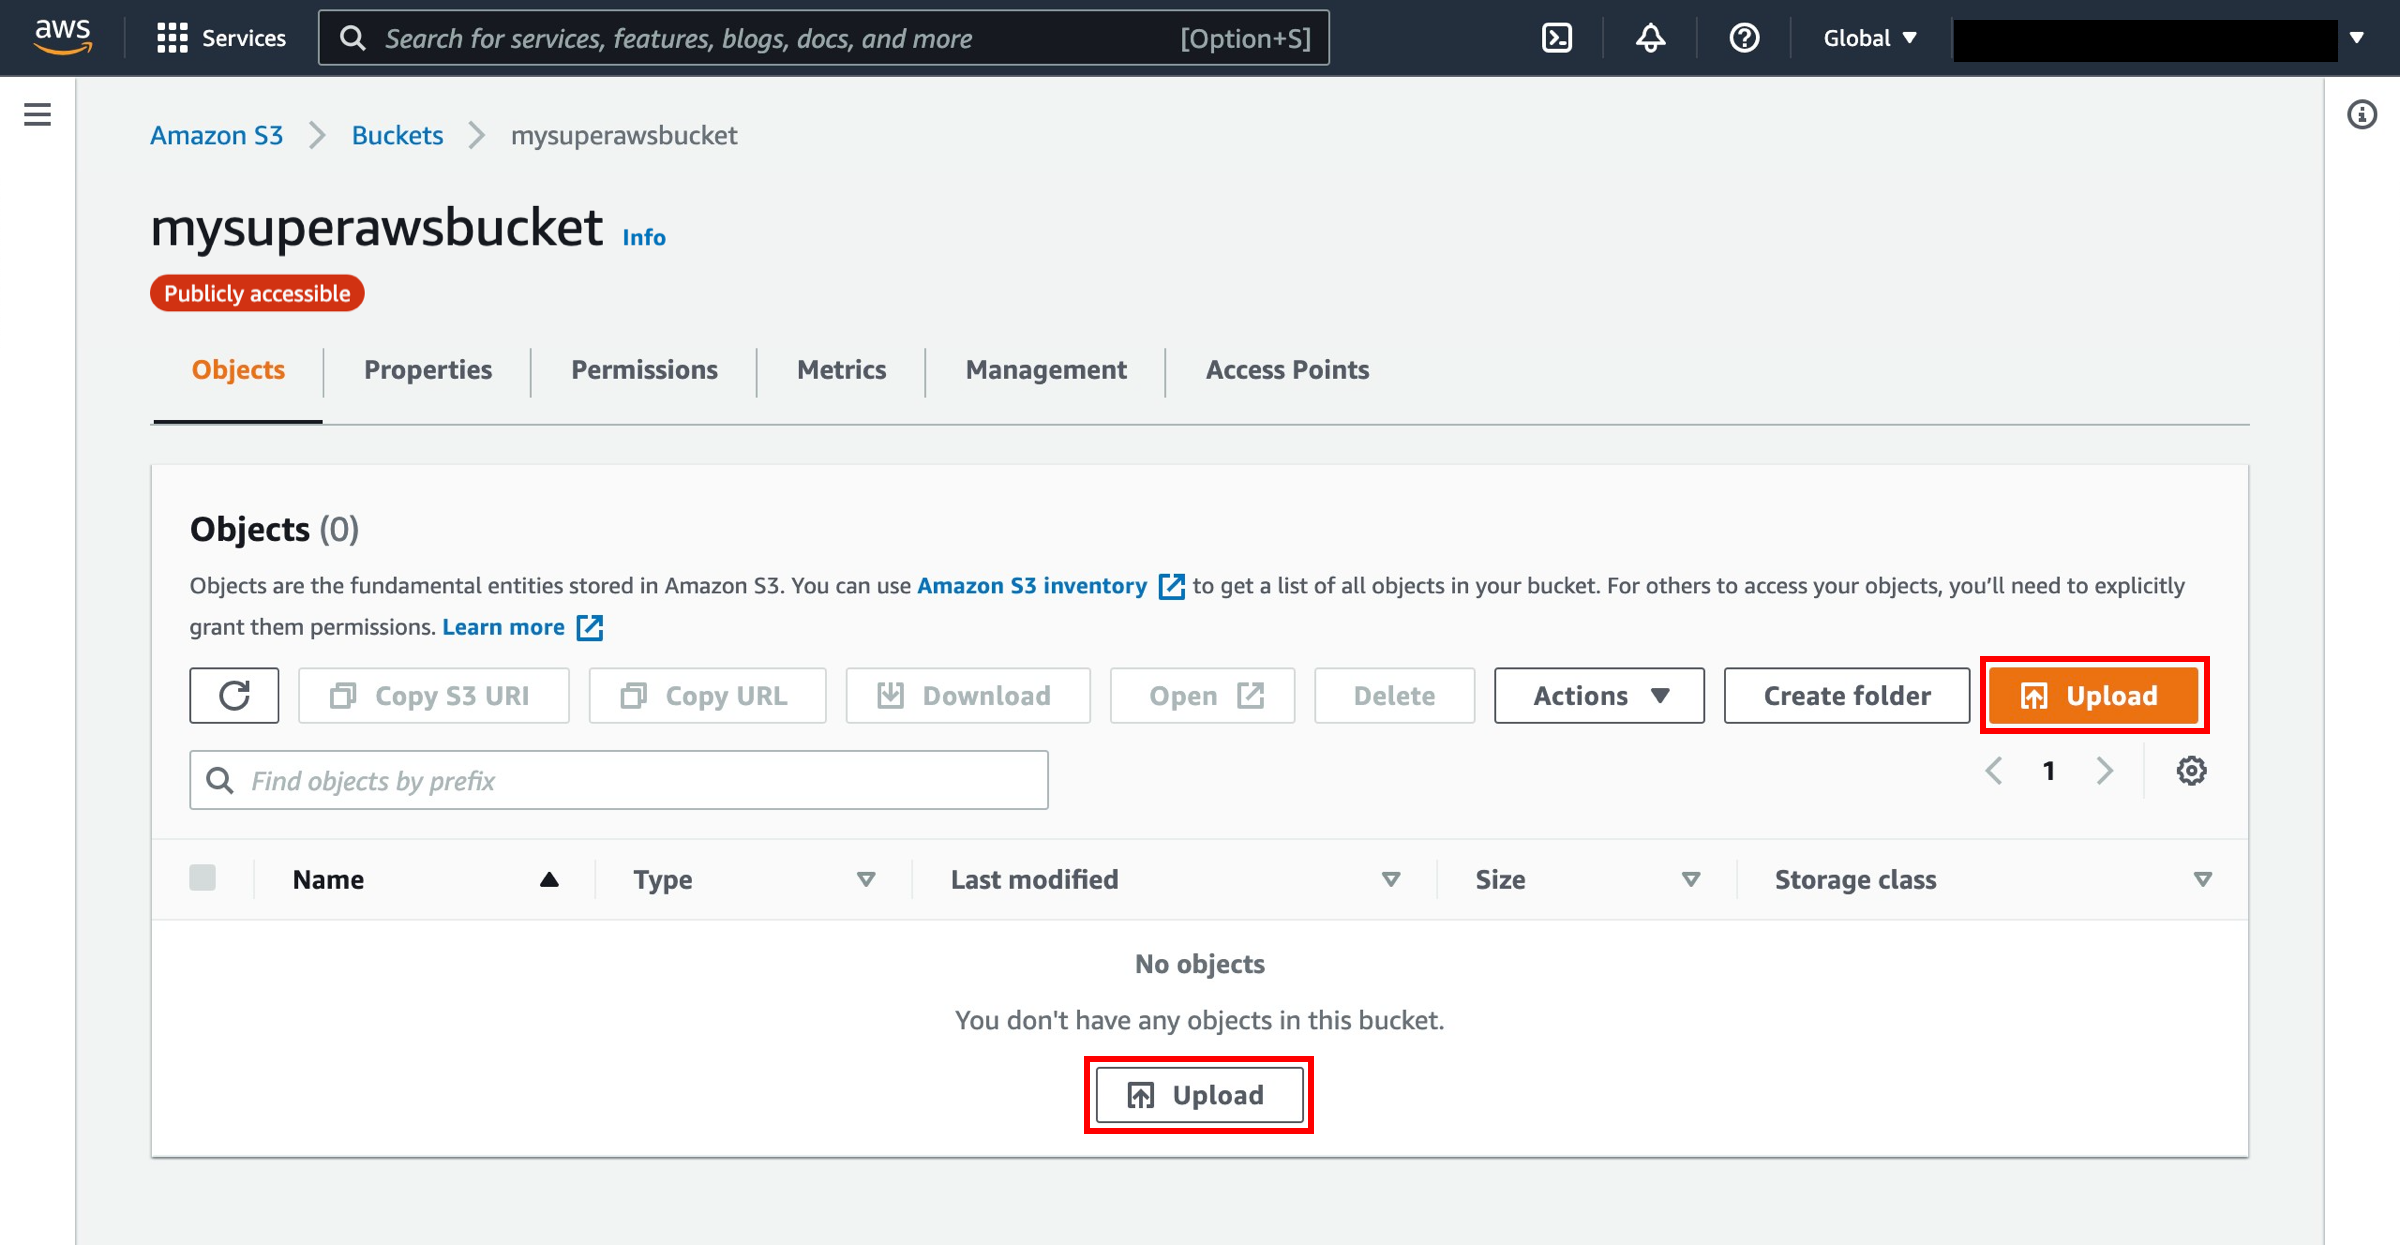
In this step, we will upload sample static content to an Amazon S3 bucket. In later steps, we will use this bucket as a CloudFront origin. Amazon S3 is a good choice for an Amazon CloudFront origin that includes static content such as images, videos, HTML pages, .css files, and .js files.
a. The sample image we will use in this tutorial is a PNG image called cloudfront-test-image.png. Select the button on the right to download the sample image, and make sure to save it as cloudfront-test-image.png.
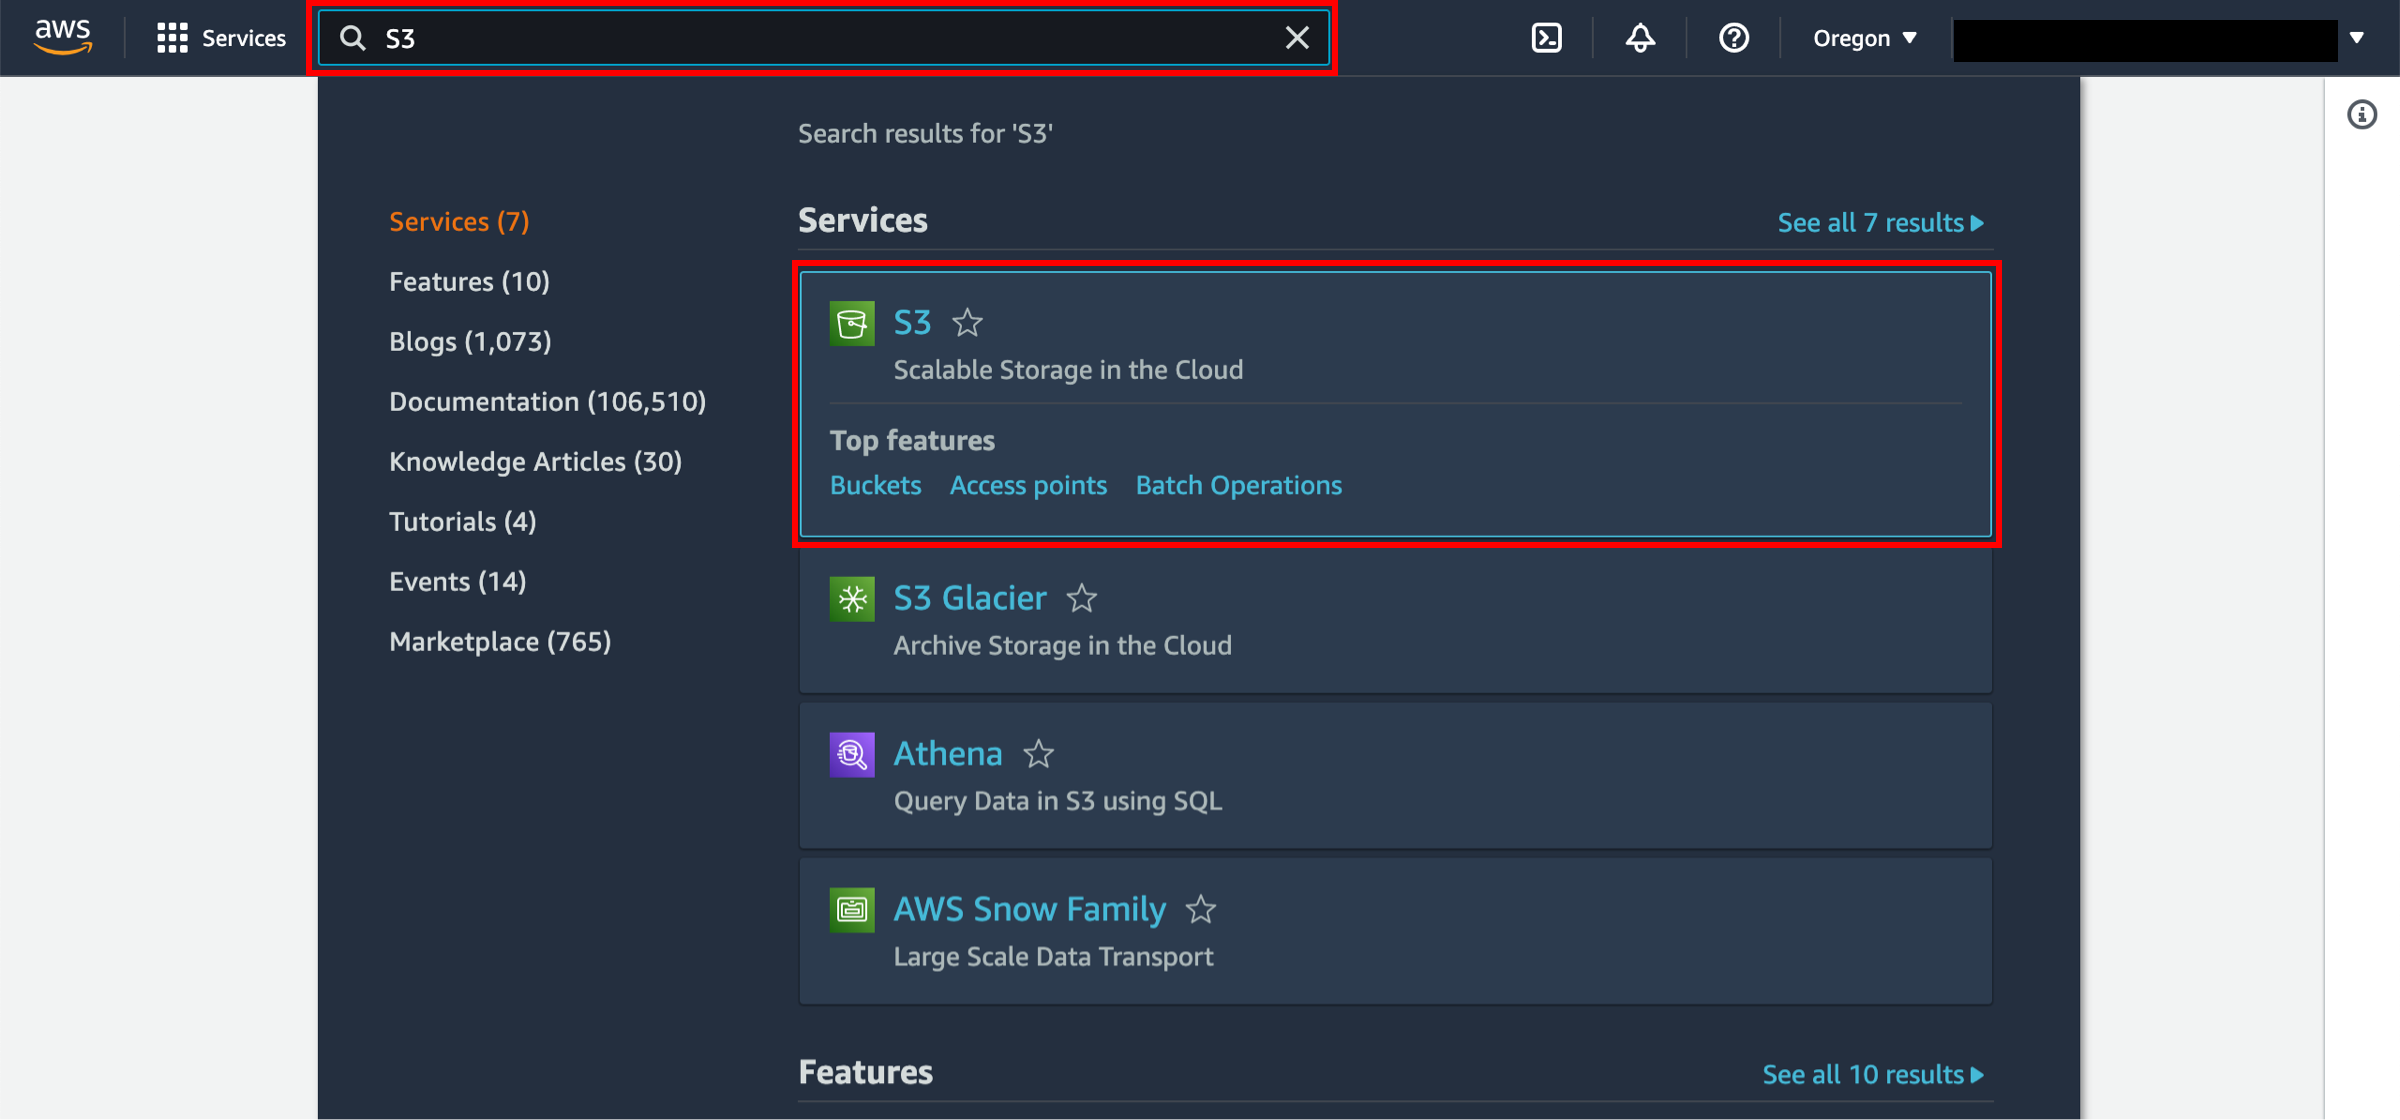
b. When you click here, the AWS management console will open in a new browser window. Type S3 in the search bar and select S3 to open the console.
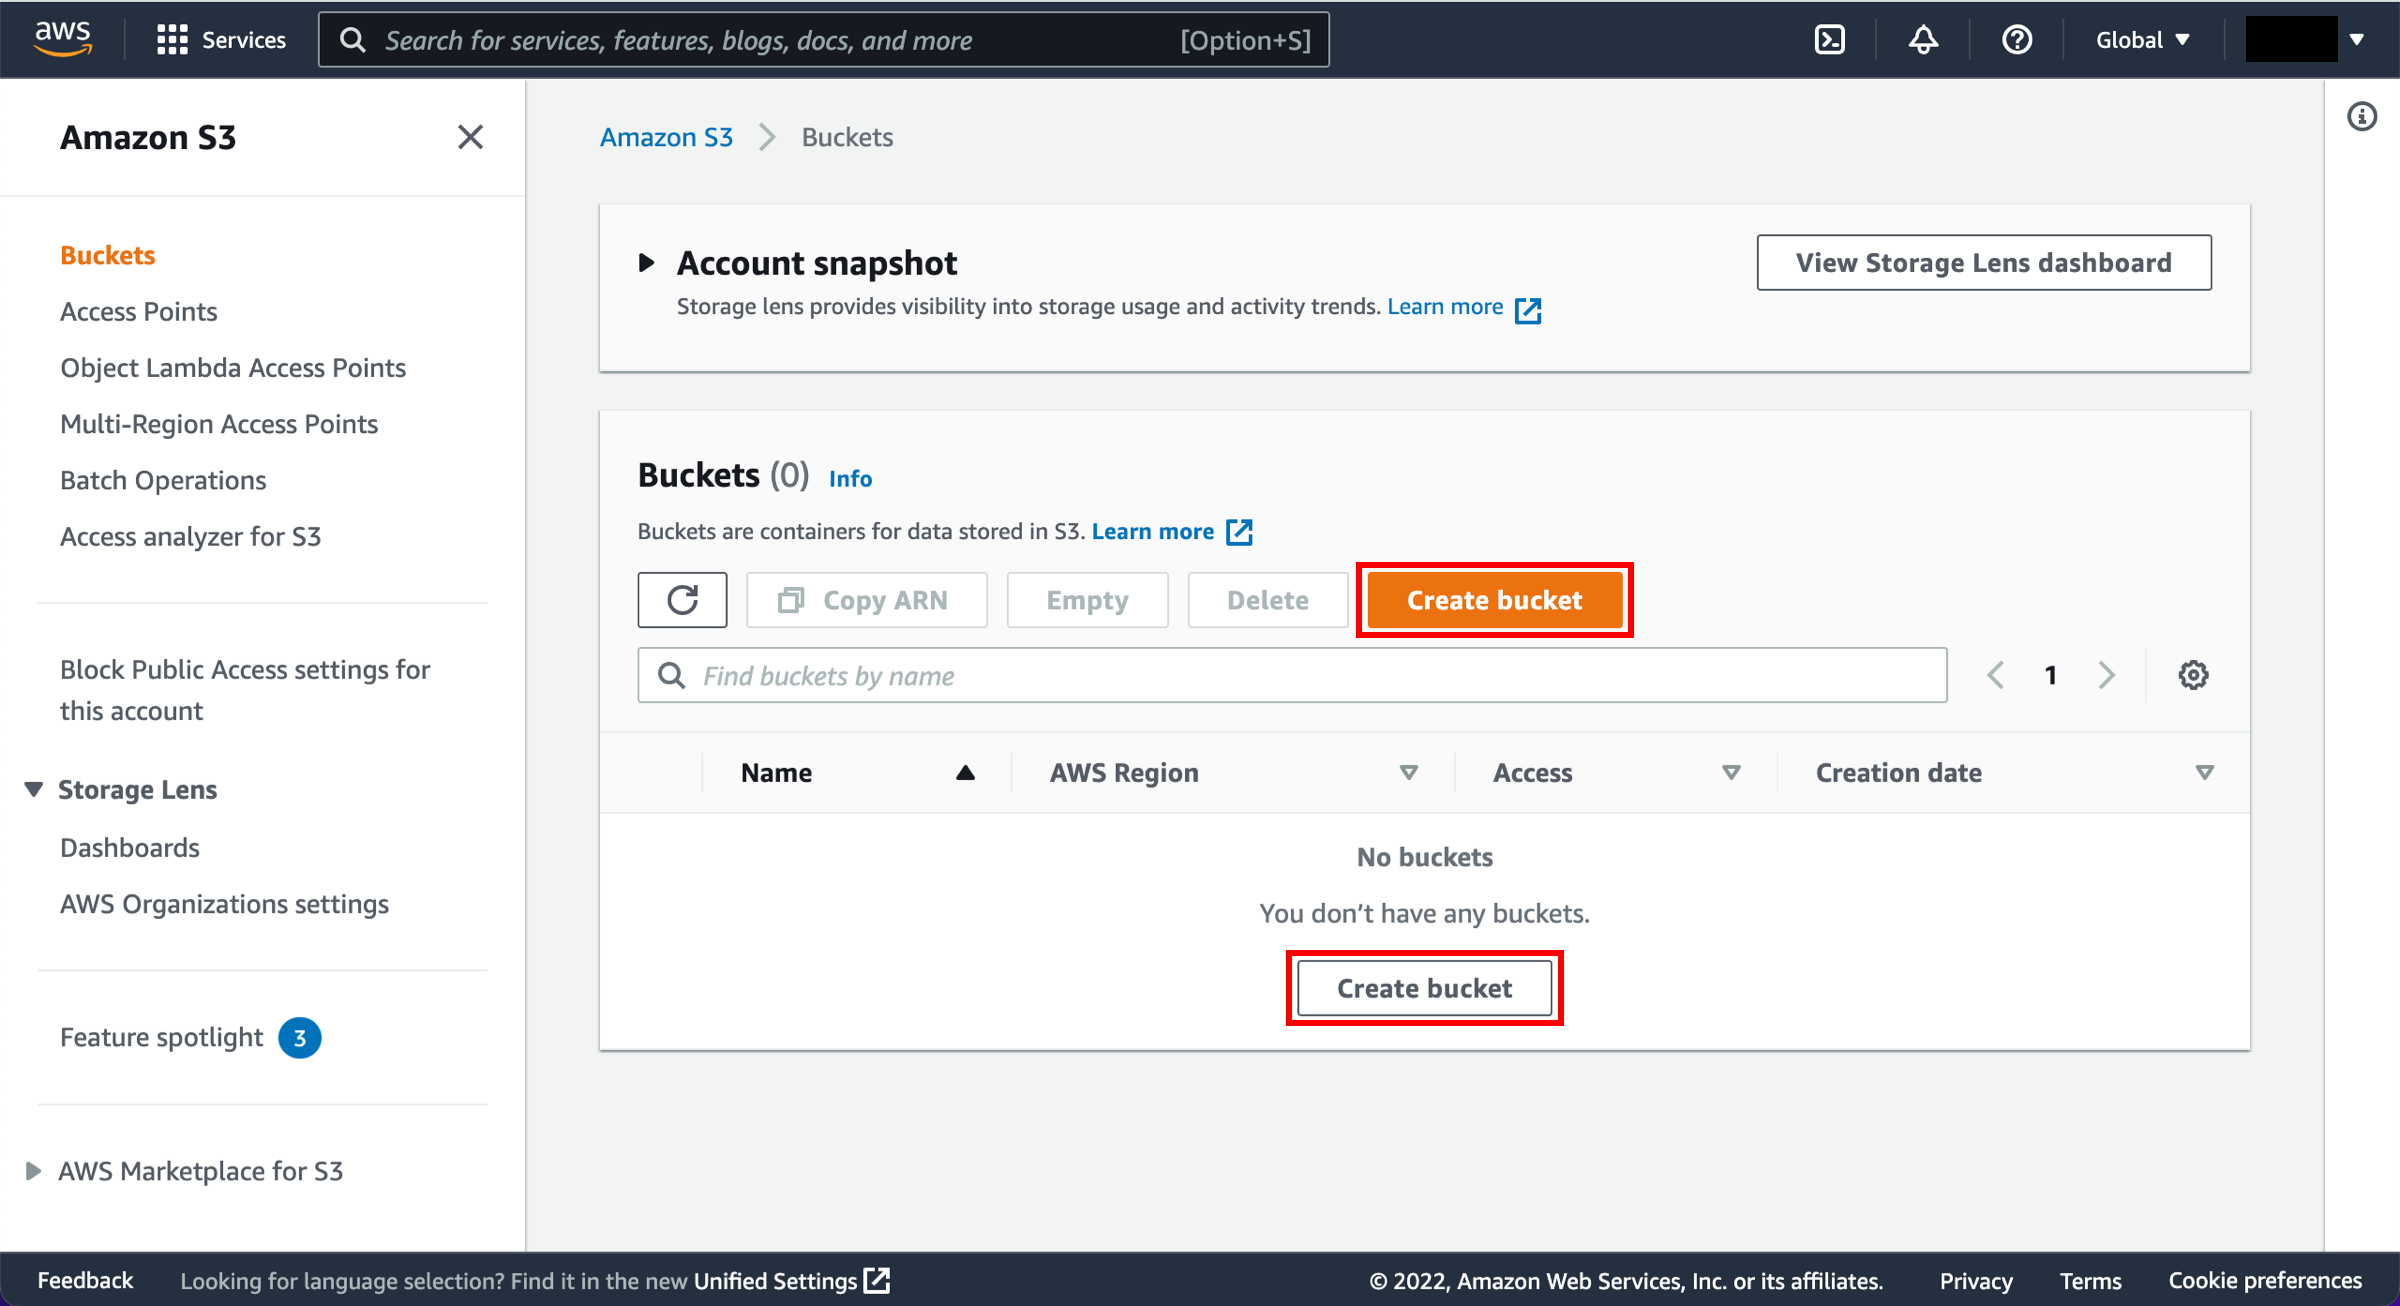
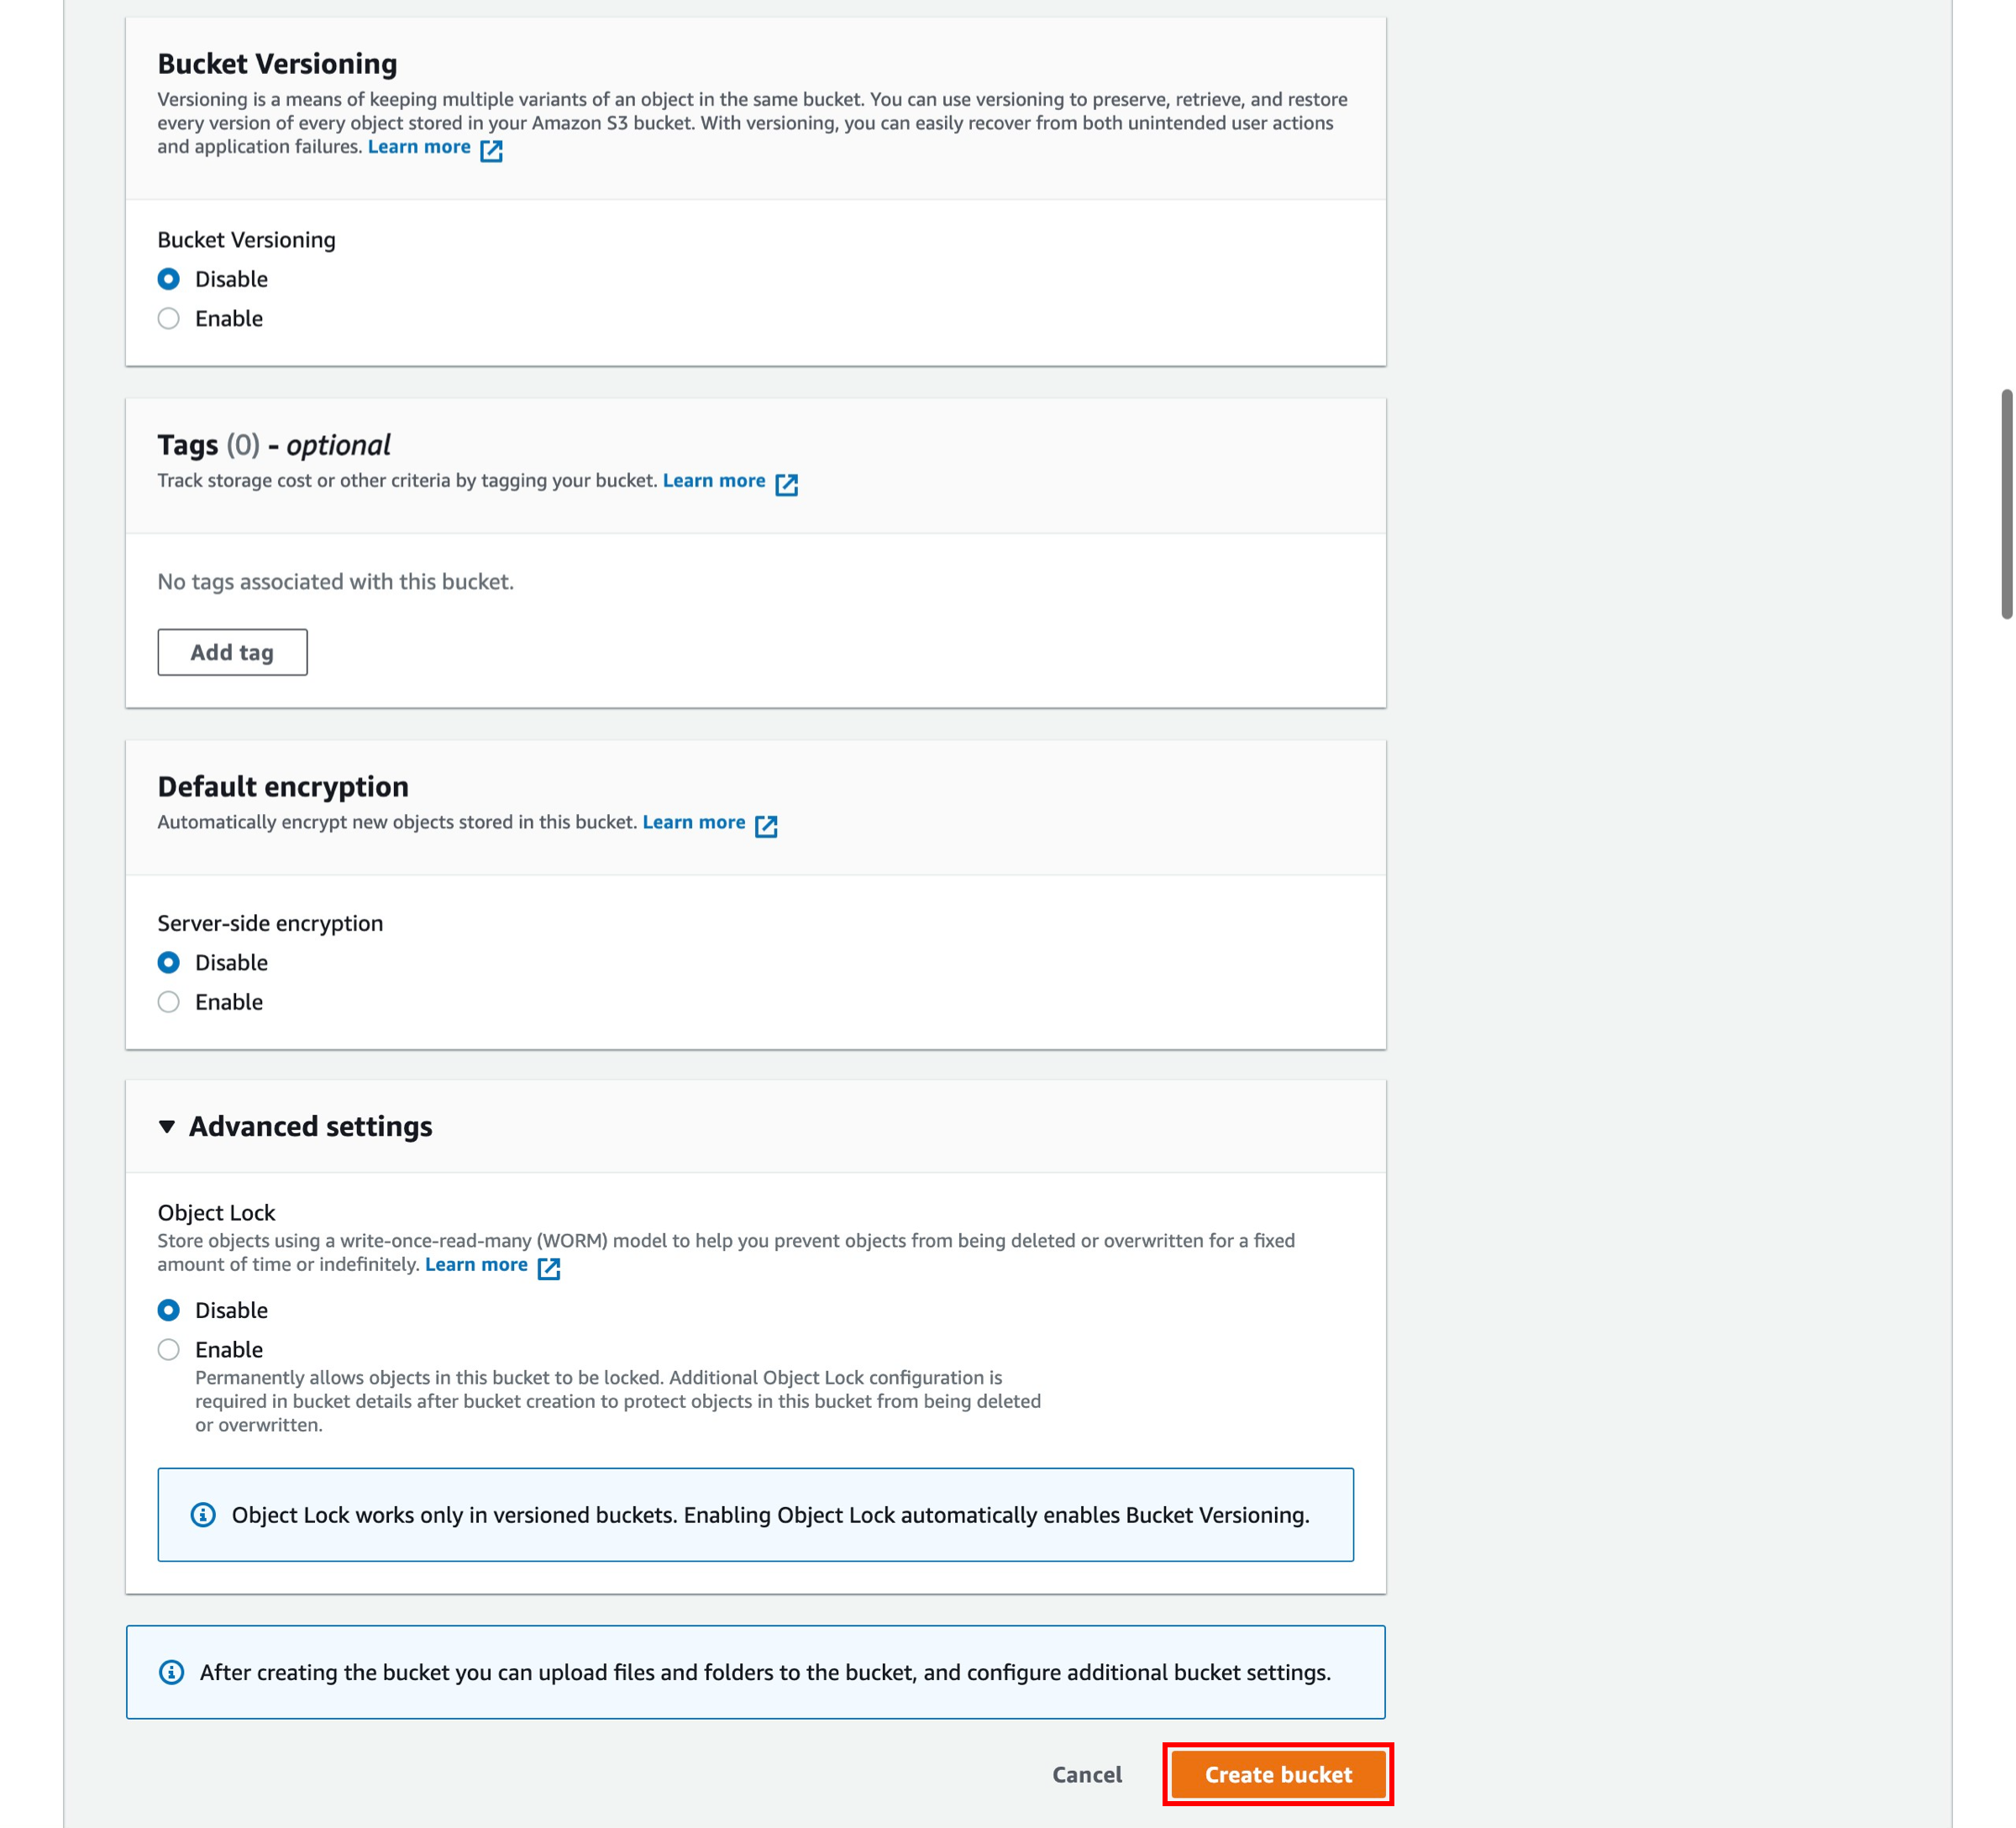
c. In the S3 dashboard, choose Create bucket.
If this is the first time you have created a bucket, you will see a screen that looks like the image pictured here.
If you have already created S3 buckets, your S3 dashboard will list all the buckets you have created.
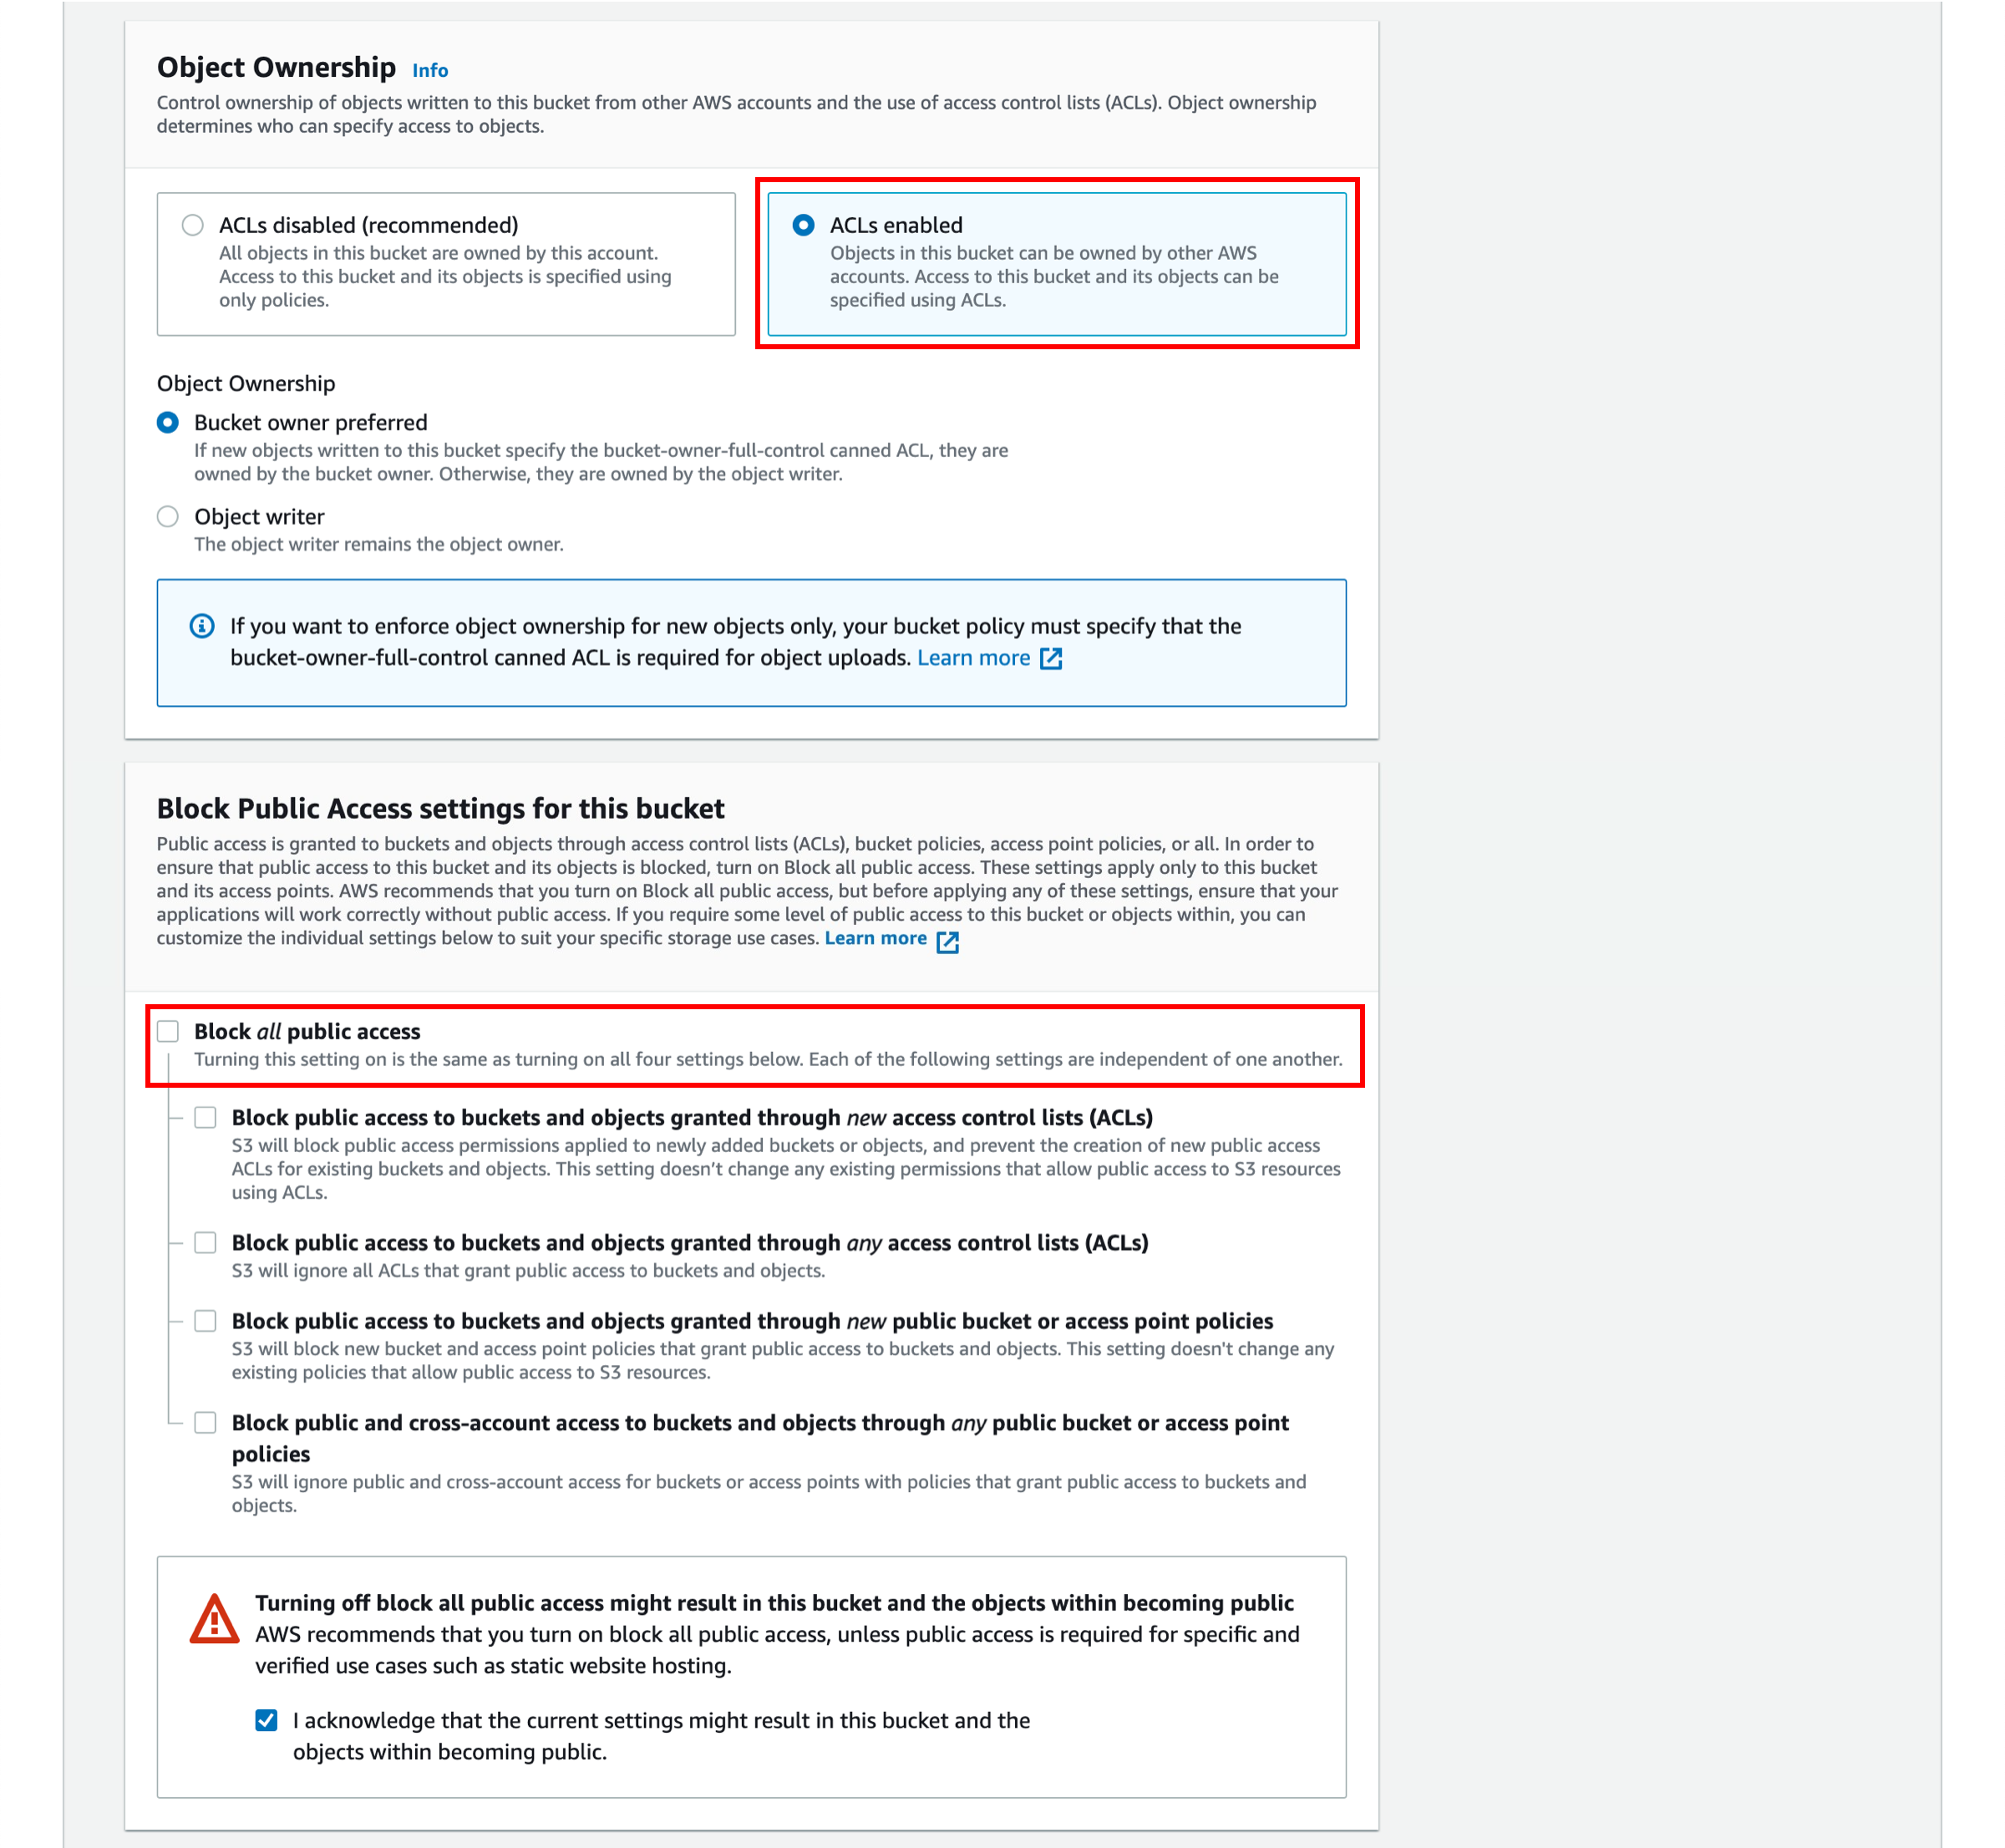
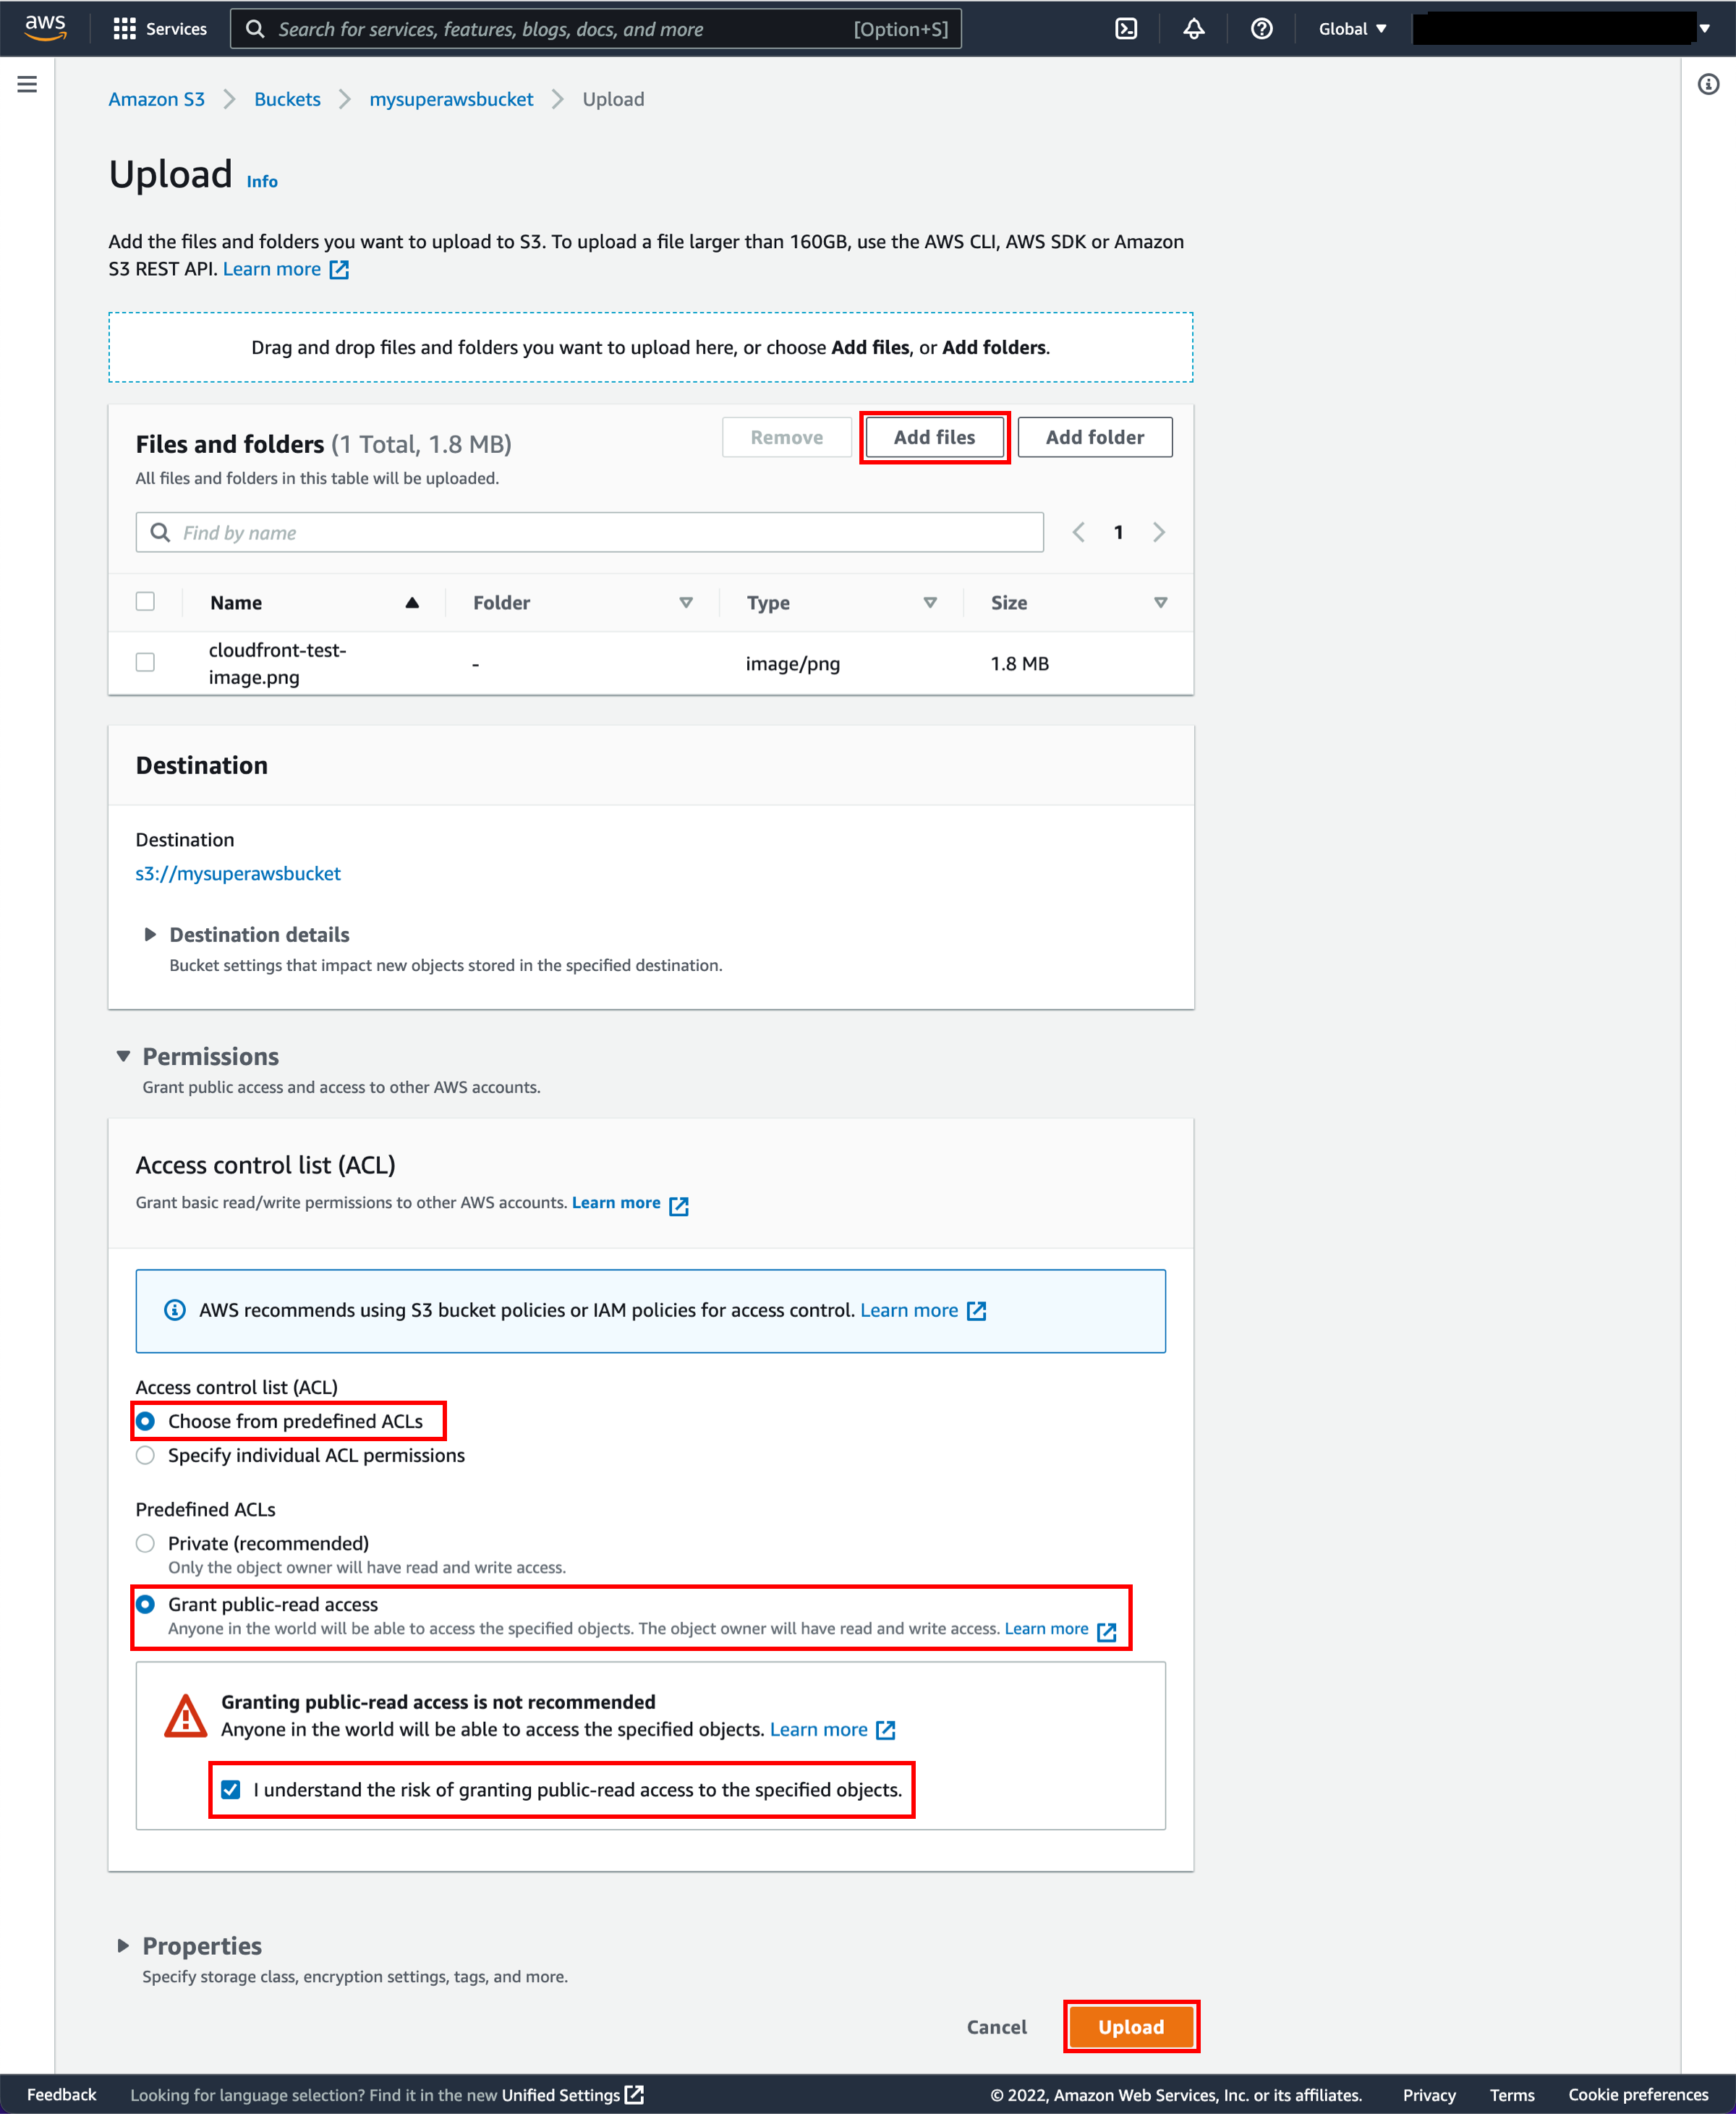
e. You have the ability to set permission settings for your S3 bucket. By default, S3 objects are set to private. You will need to make your image publicly readable. Select ACLs enabled under Object Ownership, deselect “Block all public access” and select the checkbox “I acknowledge that the current settings might result in this bucket and the objects within becoming public.”

Step 2: Enter the CloudFront console
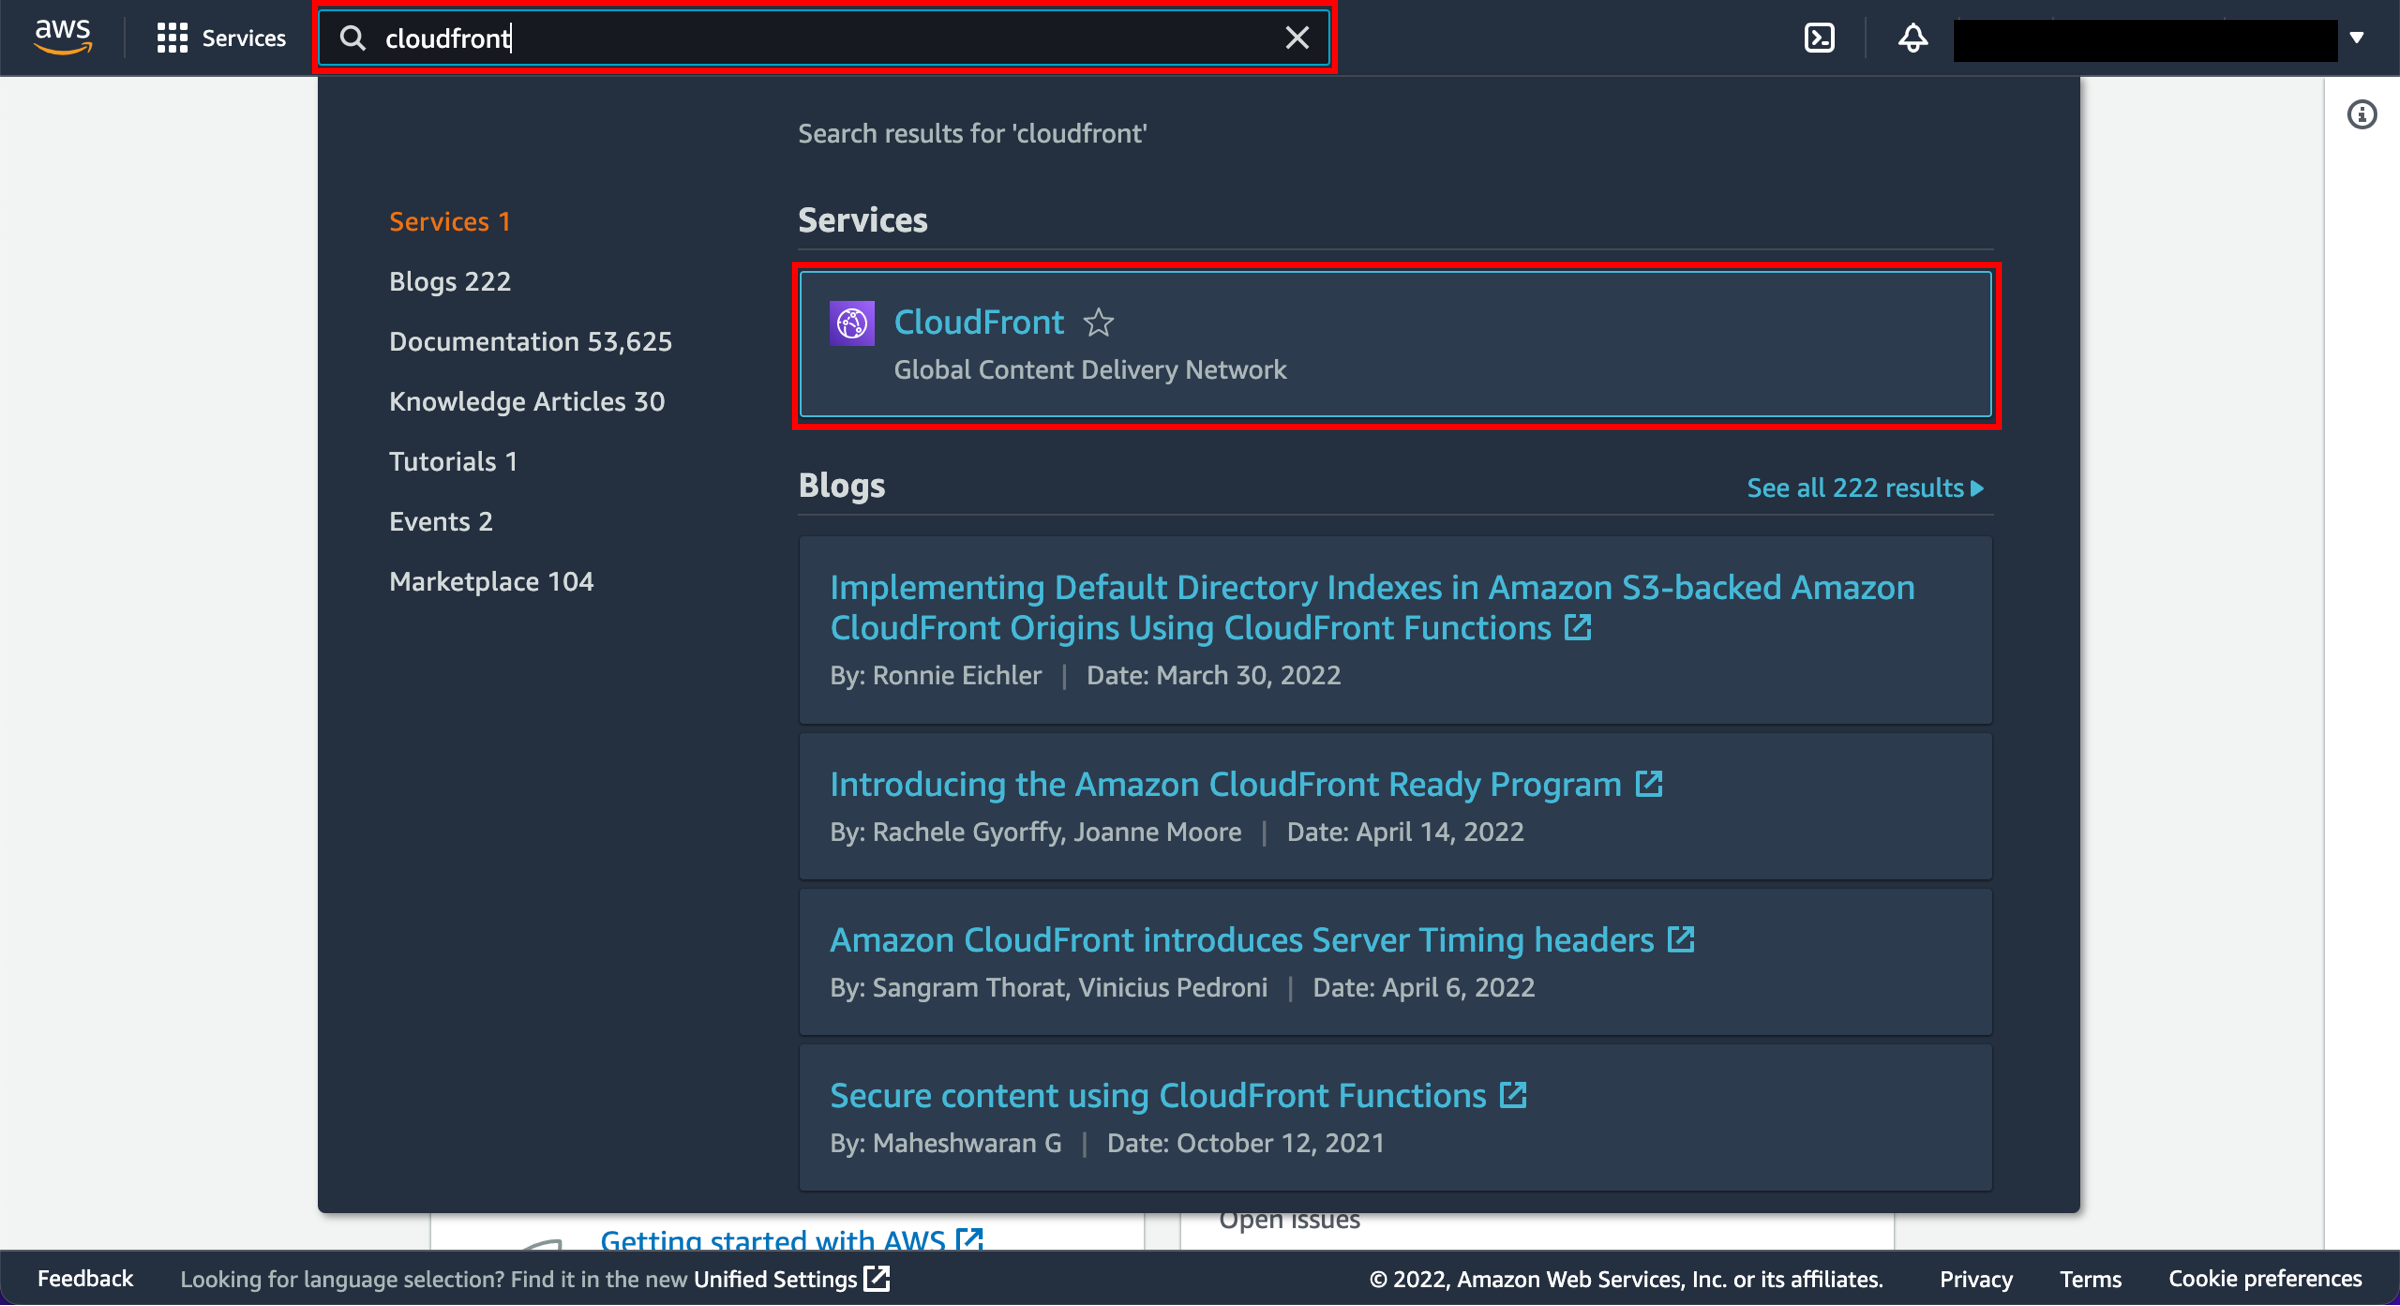
b. Select Create a CloudFront distribution.
Step 3: Configure a web distribution
Distribution settings:
- Price class: CloudFront has three Price Classes determined by the number of edge locations you want supported throughout the globe. By default, CloudFront uses all edge locations to ensure the best performance. For more information, see Amazon CloudFront Pricing.
- AWS WAF web ACL: If you want to allow or block HTTP and HTTPS requests based on criteria you specify, choose the web ACL to associate with this distribution. For more information, see the AWS WAF, AWS Firewall Manager, and AWS Shield Advanced Developer Guide.
- Alternate domain name (CNAME): CloudFront will automatically assign you a domain name when you create a web distribution (for example, http://abcdefghi888.cloudfront.net/filename.jpg). You can also specify your own domain name in the URLs for your objects (such as http://yourDomain.com/filename.jpg) once you update your DNS configuration to route DNS queries to your CloudFront distribution. For this tutorial, leave this field blank.
- Custom SSL certificate: CloudFront provides a default certificate or you can specify custom SSL certificate.
- Default root object: This is where you specify the object that you want CloudFront to request from your origin when a user requests just the root URL of your distribution. For example, a user requests http://www.example.com/, and you can specify that http://www.example.com/product-description.html is delivered. Specifying a default root object avoids exposing the contents of your distribution.
- Standard logging: CloudFront can log information about each request for an object and store the log files in an Amazon S3 bucket. There is no extra charge to enable logging, but you accrue Amazon S3 charges for storing and accessing files.
- Bucket for logs: If you specified an Amazon S3 bucket to store access logs in, CloudFront can record information about each user request for an object and store the files in the specified Amazon S3 bucket. You can enable or disable logging at any time. For more information about CloudFront access logs, see Access Logs.
- Log prefix: If you chose On for Logging, you can specify the string that you want CloudFront to prefix to the access log filenames for this distribution. For more information about CloudFront access logs, see Access Logs.
- Cookie logging: When using Amazon S3 as the origin for your objects, Amazon S3 doesn't process cookies, so unless your distribution also includes an Amazon EC2 or other custom origin, you need to select Off for the value of Cookie Logging. For more information about cookies, see Caching content based on cookies.
- Description: You can enter any comments that you want to save with the distribution.
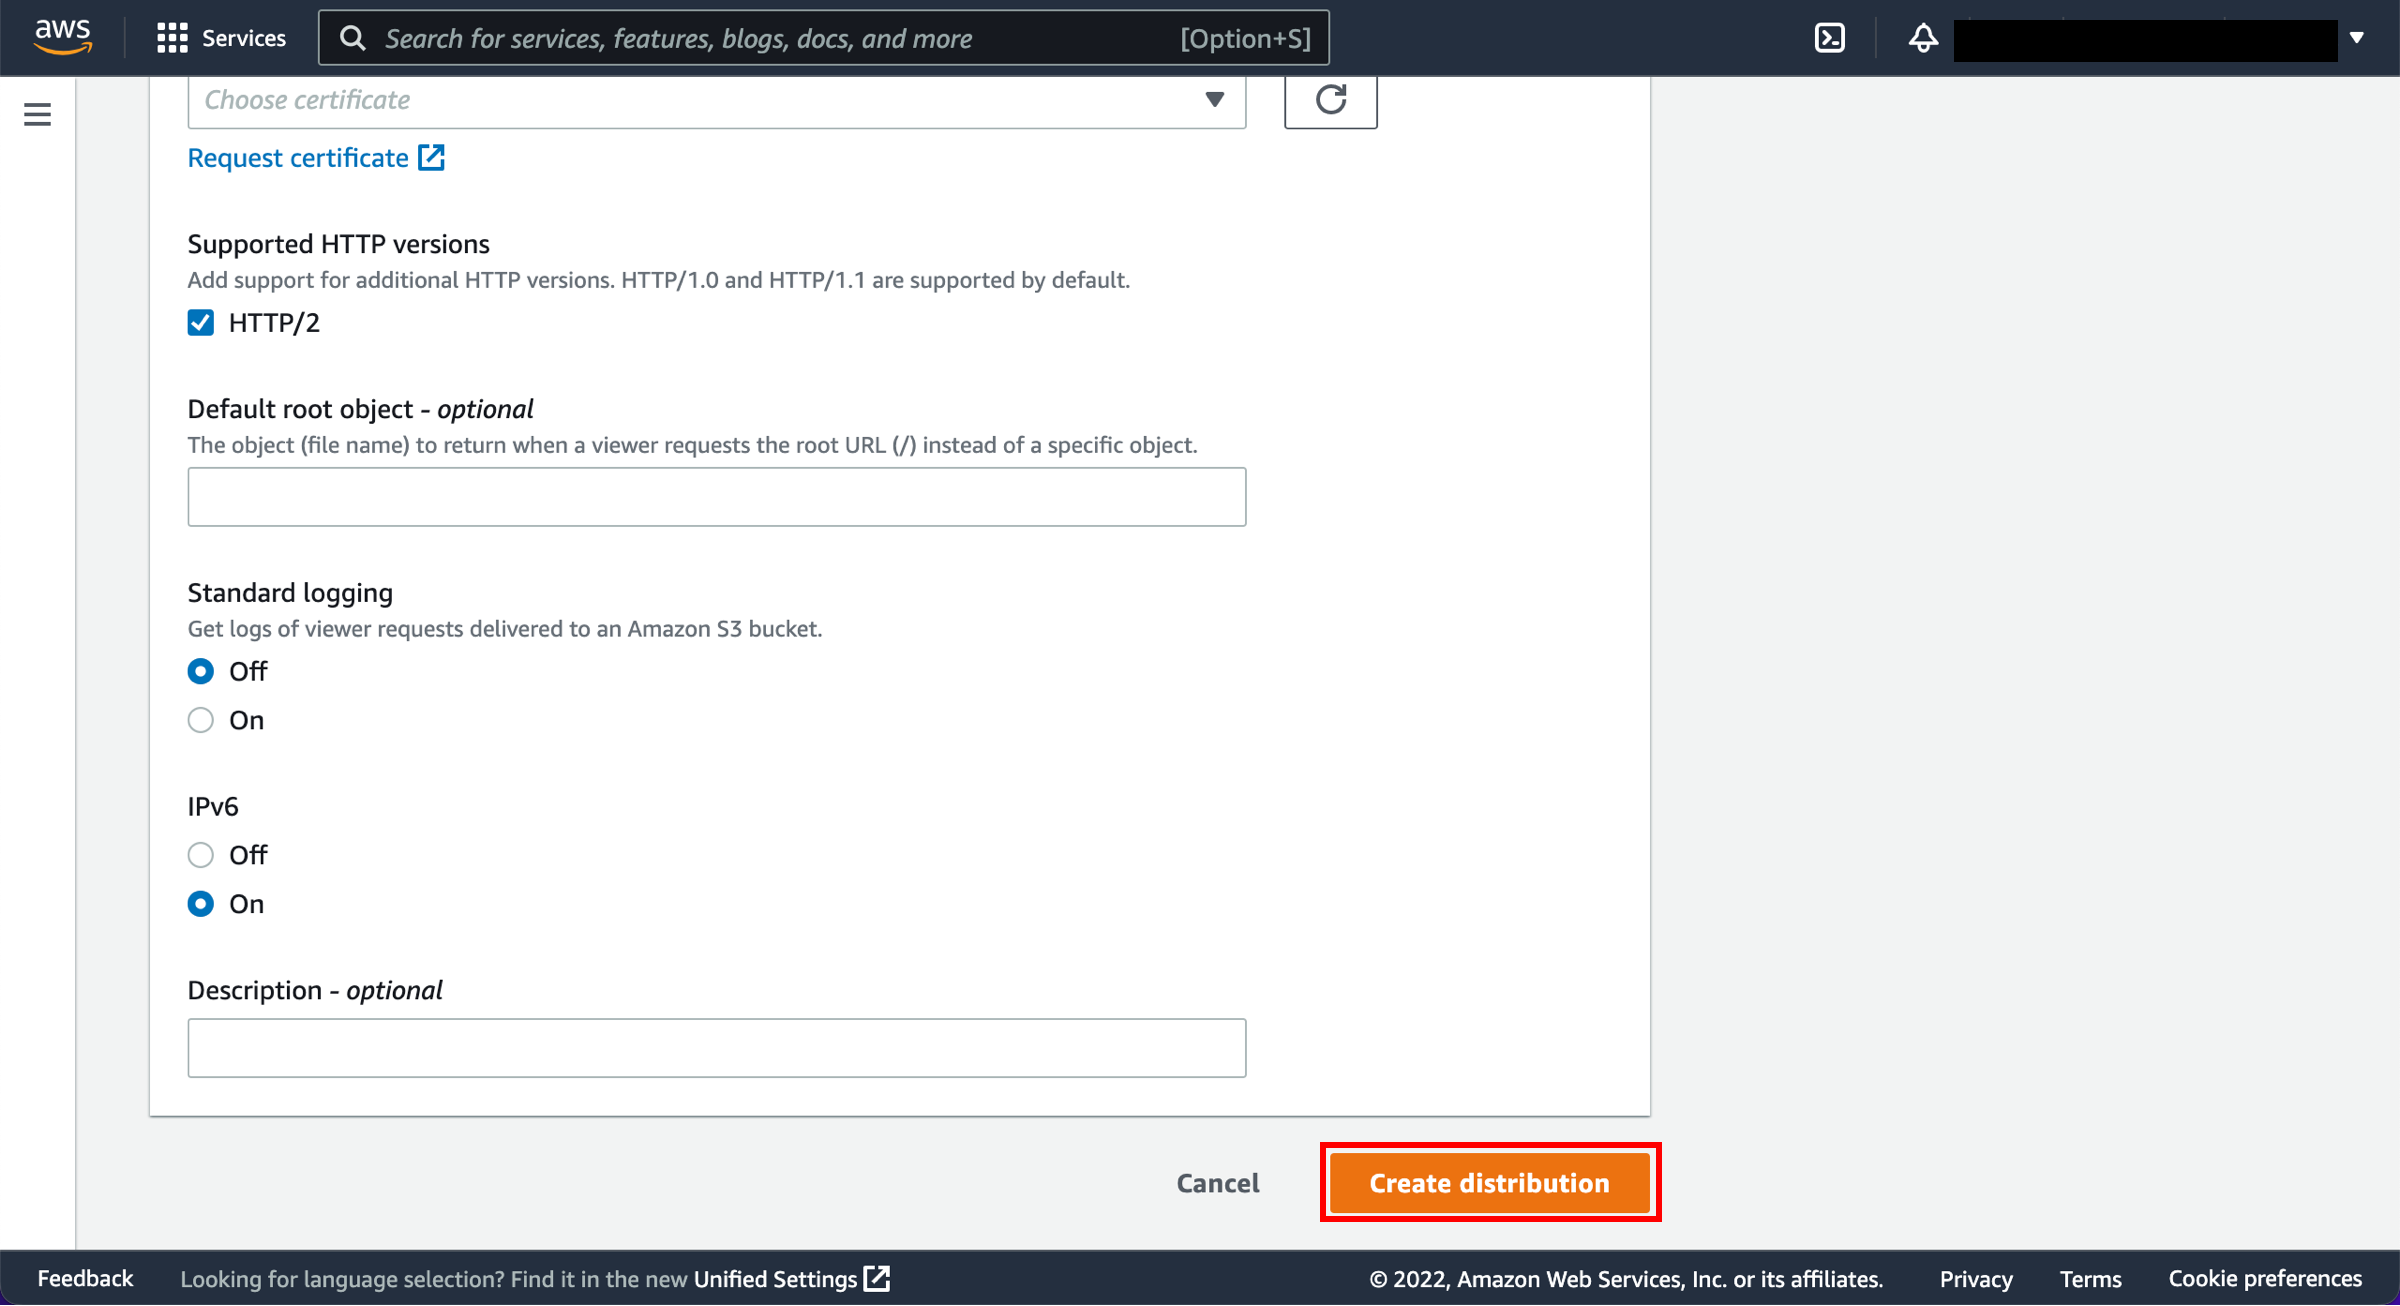
Step 4: Create a distribution
After this process is complete, your status column will change from In Progress to Enabled.
Note: This can take a few minutes to complete.
The domain name that CloudFront assigns to your distribution appears in your list of distributions. Keep this in mind, you will need it for the next step. Clicking on the Distribution ID field takes you to a page where you will see the full CloudFront domain under Domain Name.
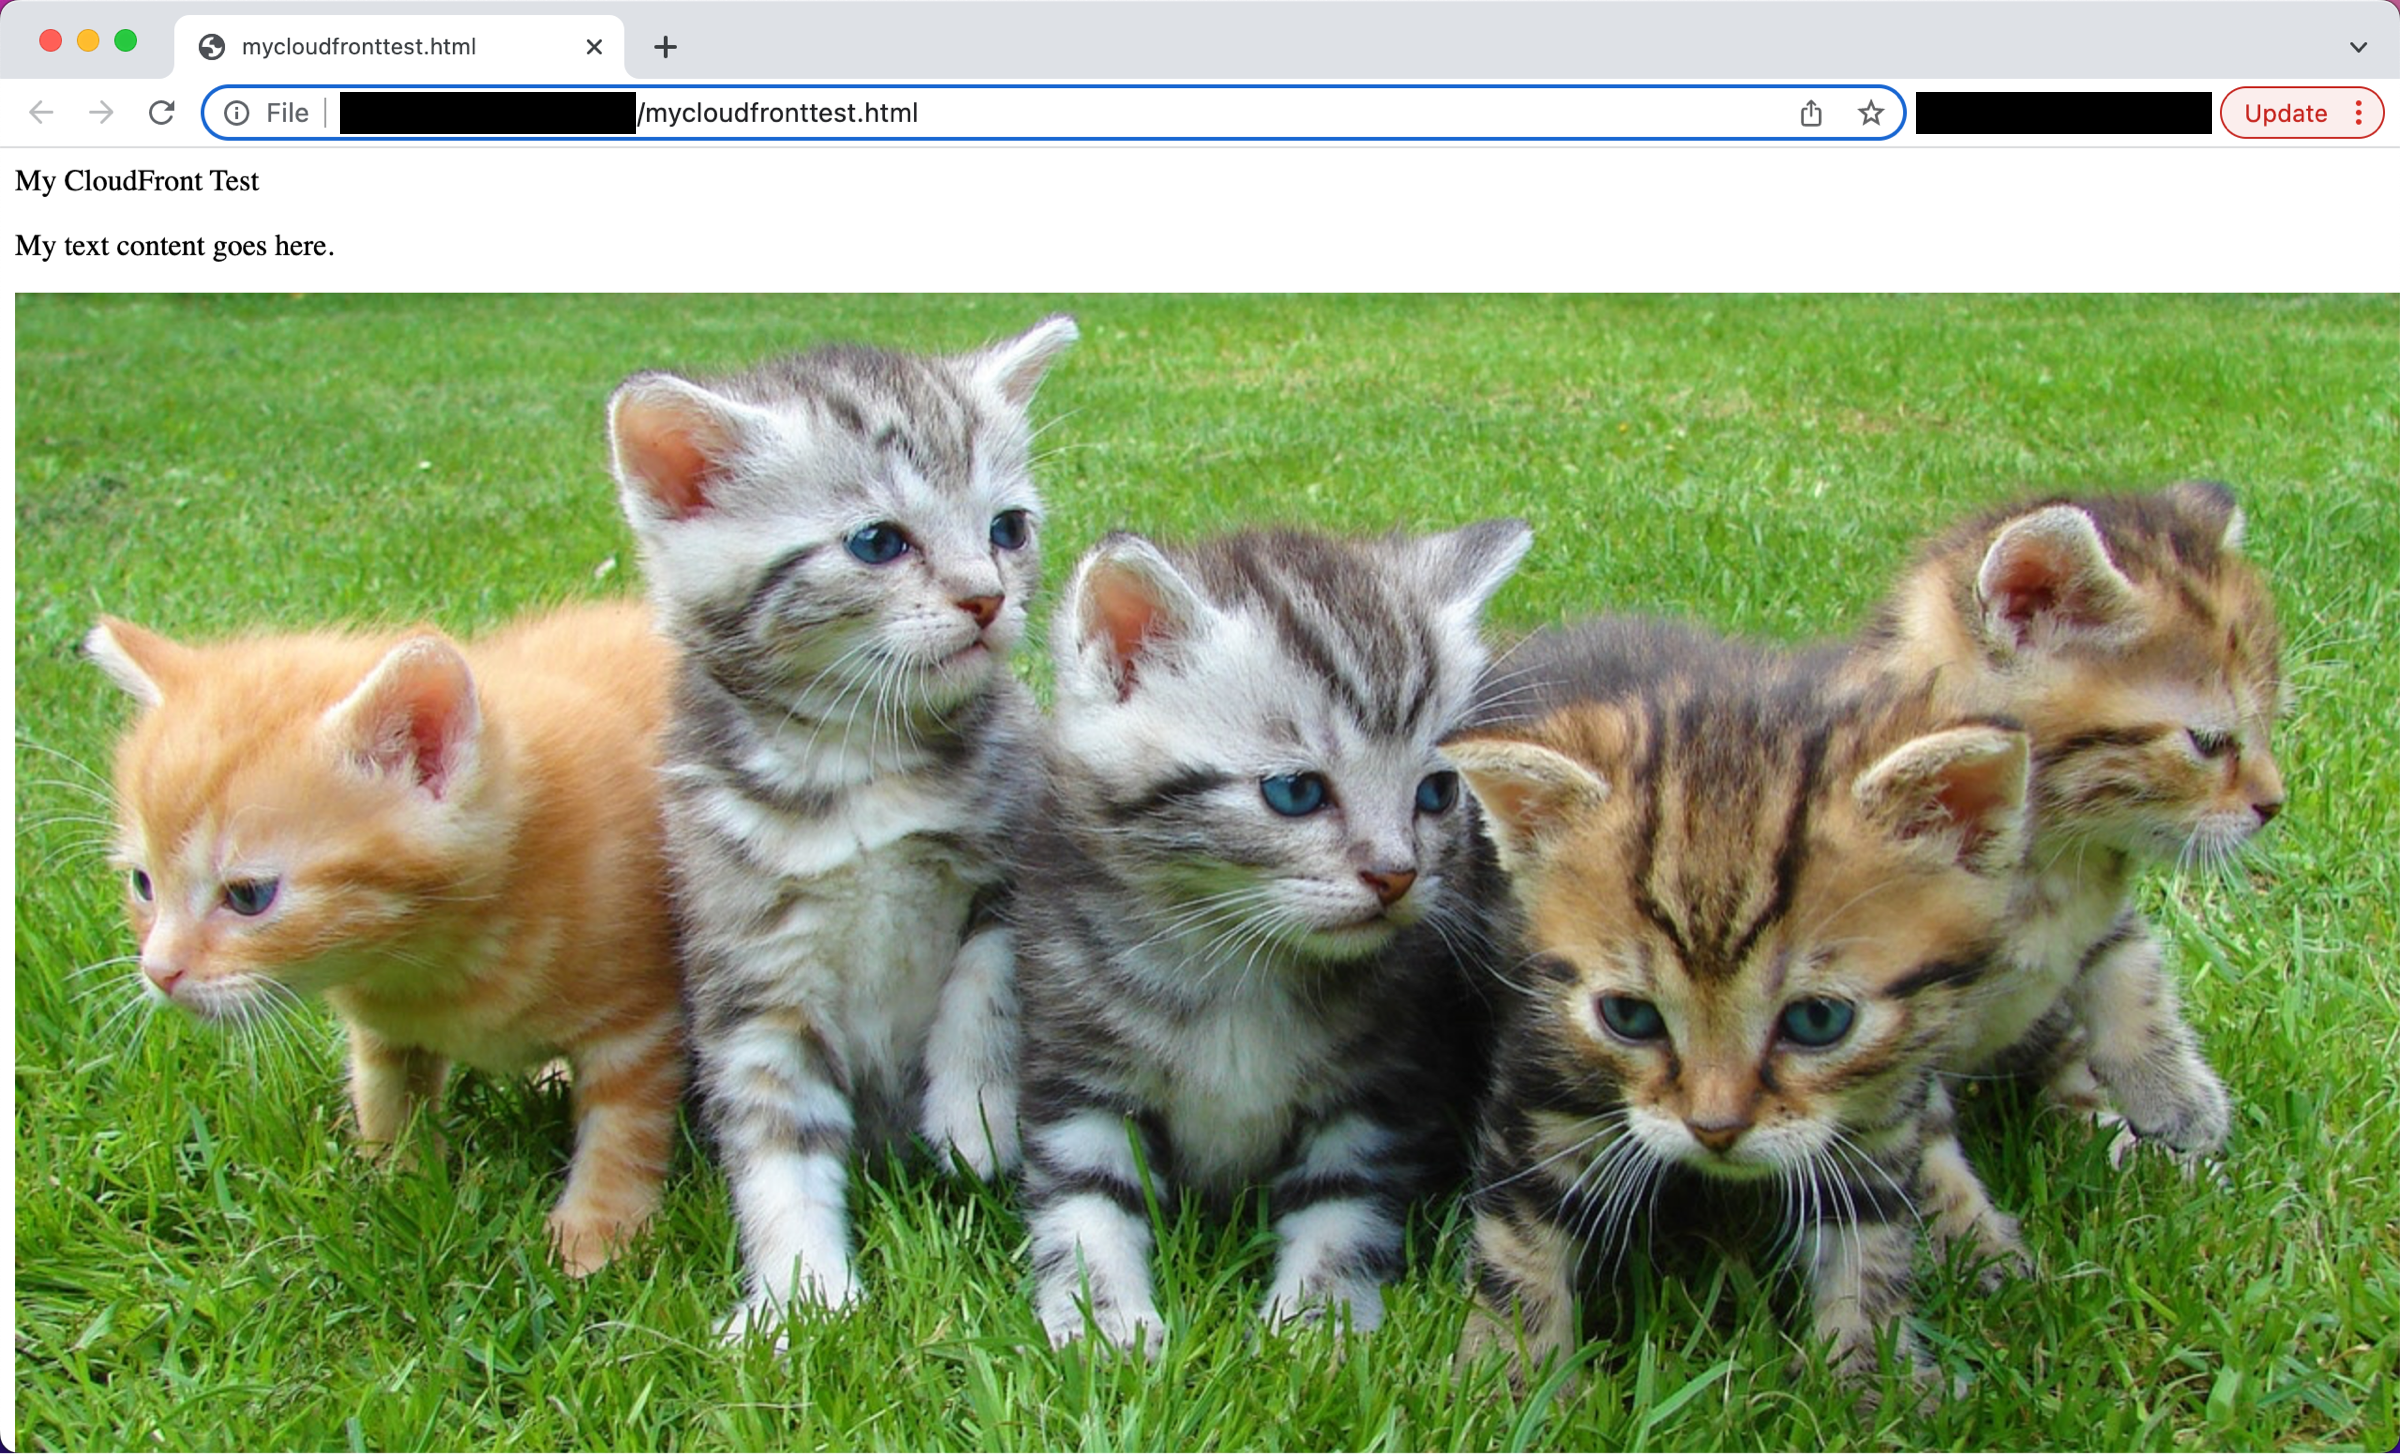
Step 5: Test your link
a. Open a text editor on your computer. Copy and paste the following HTML code:
<html>
<head>My CloudFront Test</head>
<body>
<p>My text content goes here.</p>
<p><img src="http://domain name/object name" alt="my test image">
</body>
</html>- Replace domain name with the domain name that CloudFront assigned to your distbribution, such as d111111abcdef8.cloudfront.net.
- Replace object name with the name of your image file in the Amazon S3 bucket - in our case, cloudfront-test-image.png.
- Save the text in a file as mycloudfronttest.html.
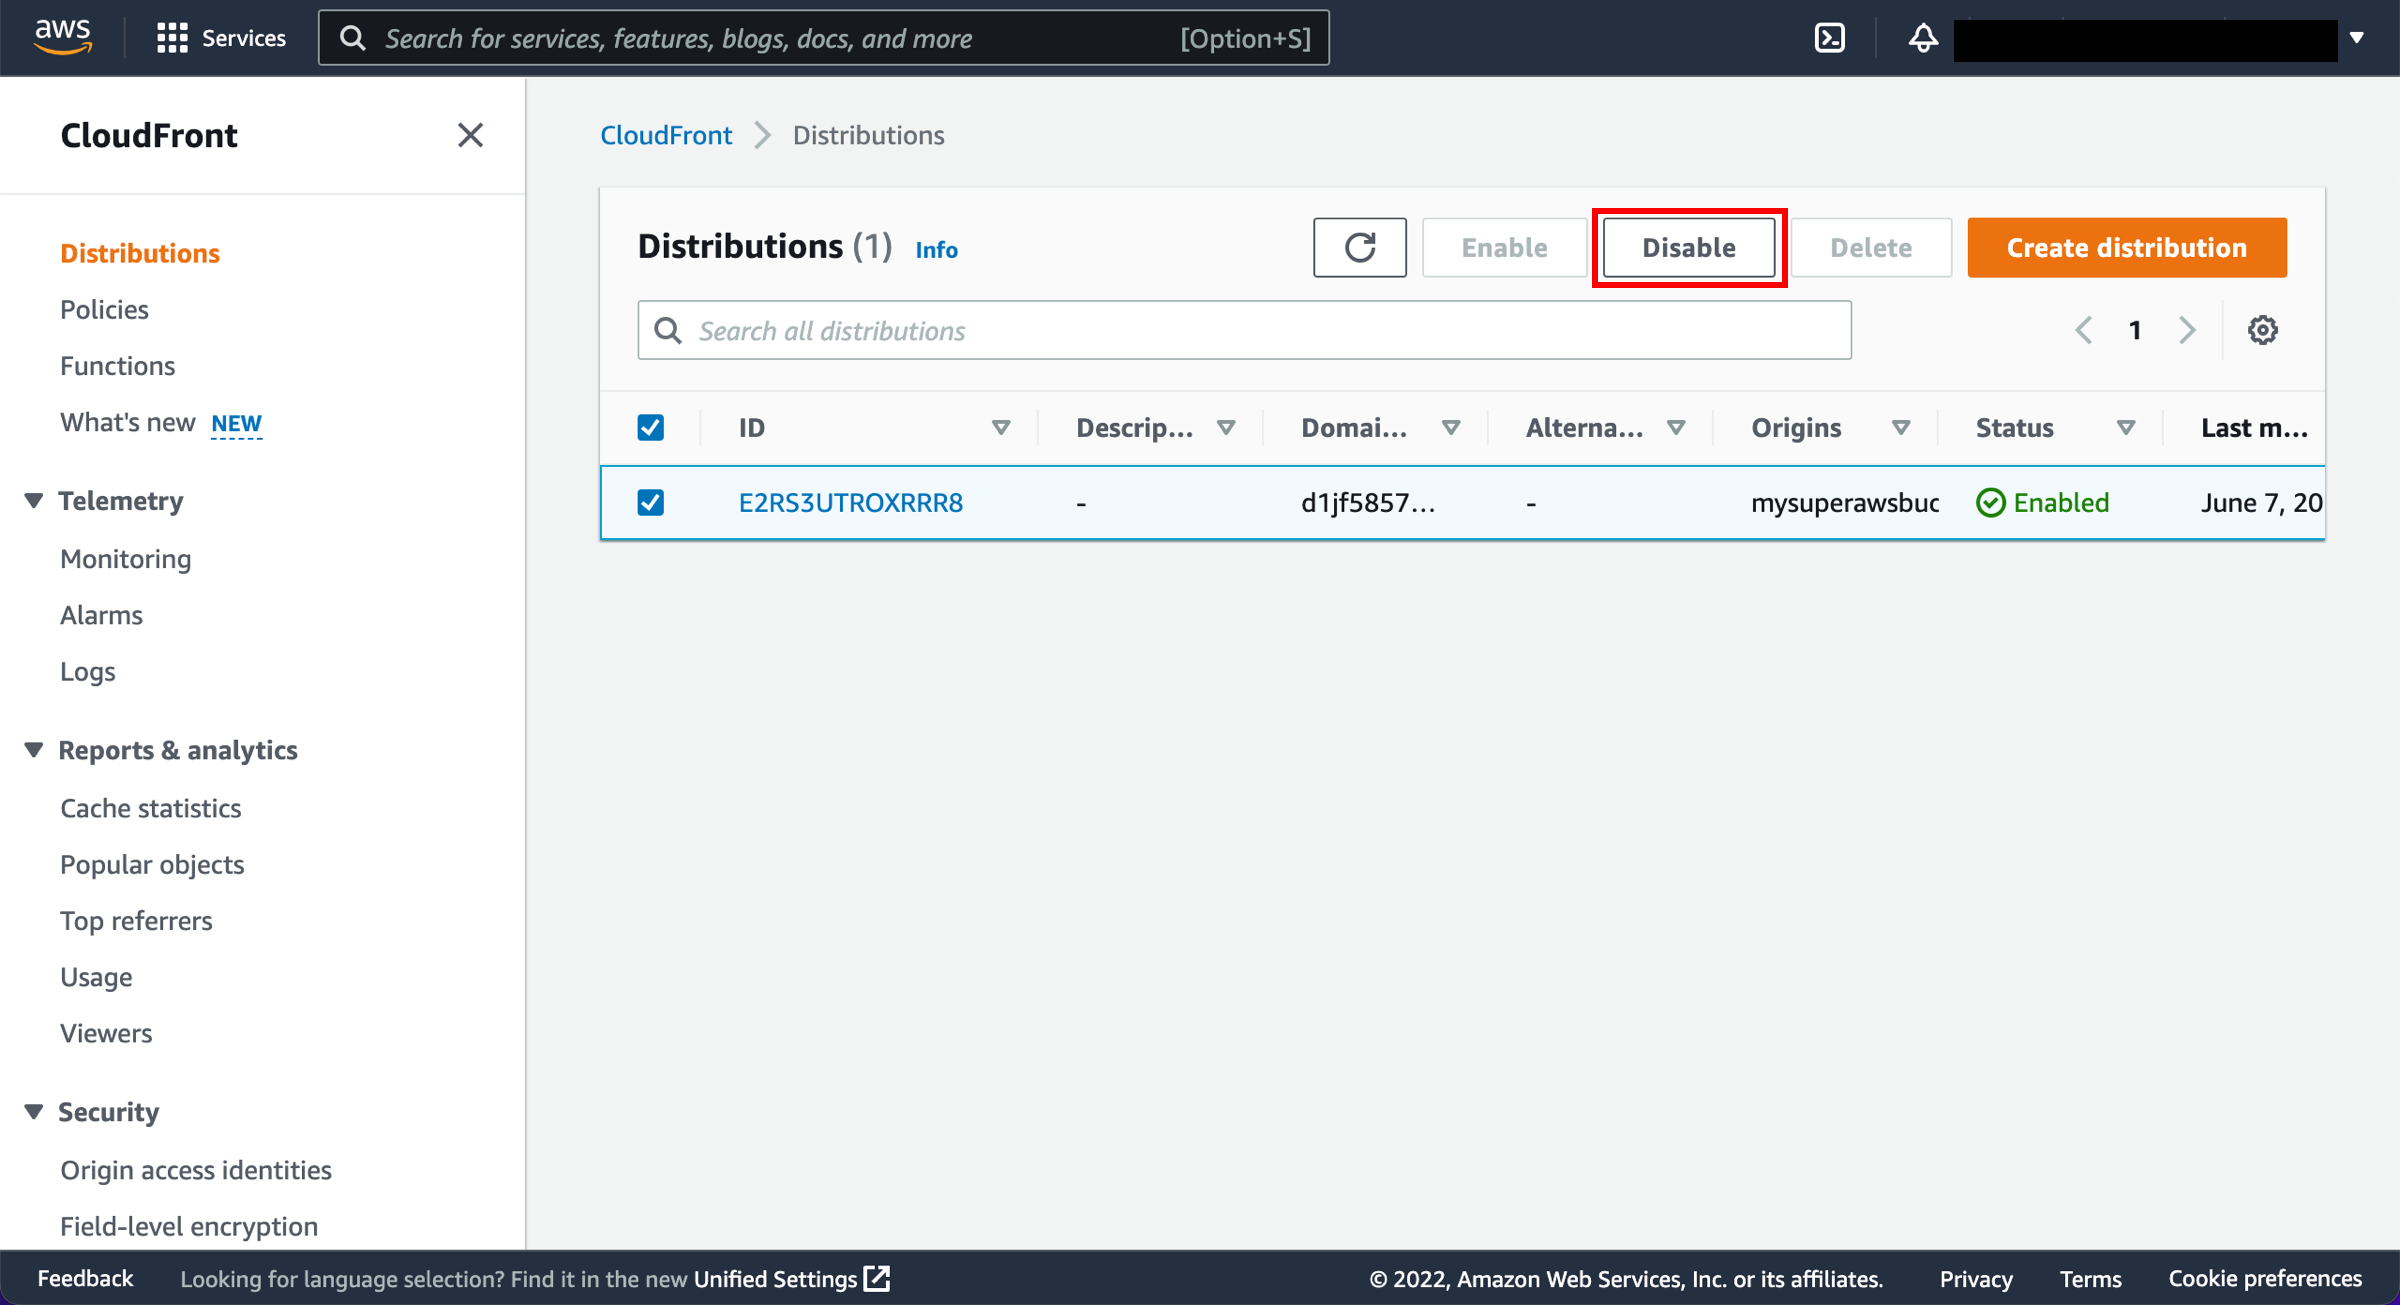
Step 6: Disable and delete your distribution
a. Select the checkbox next to the distribution you created and choose Disable.
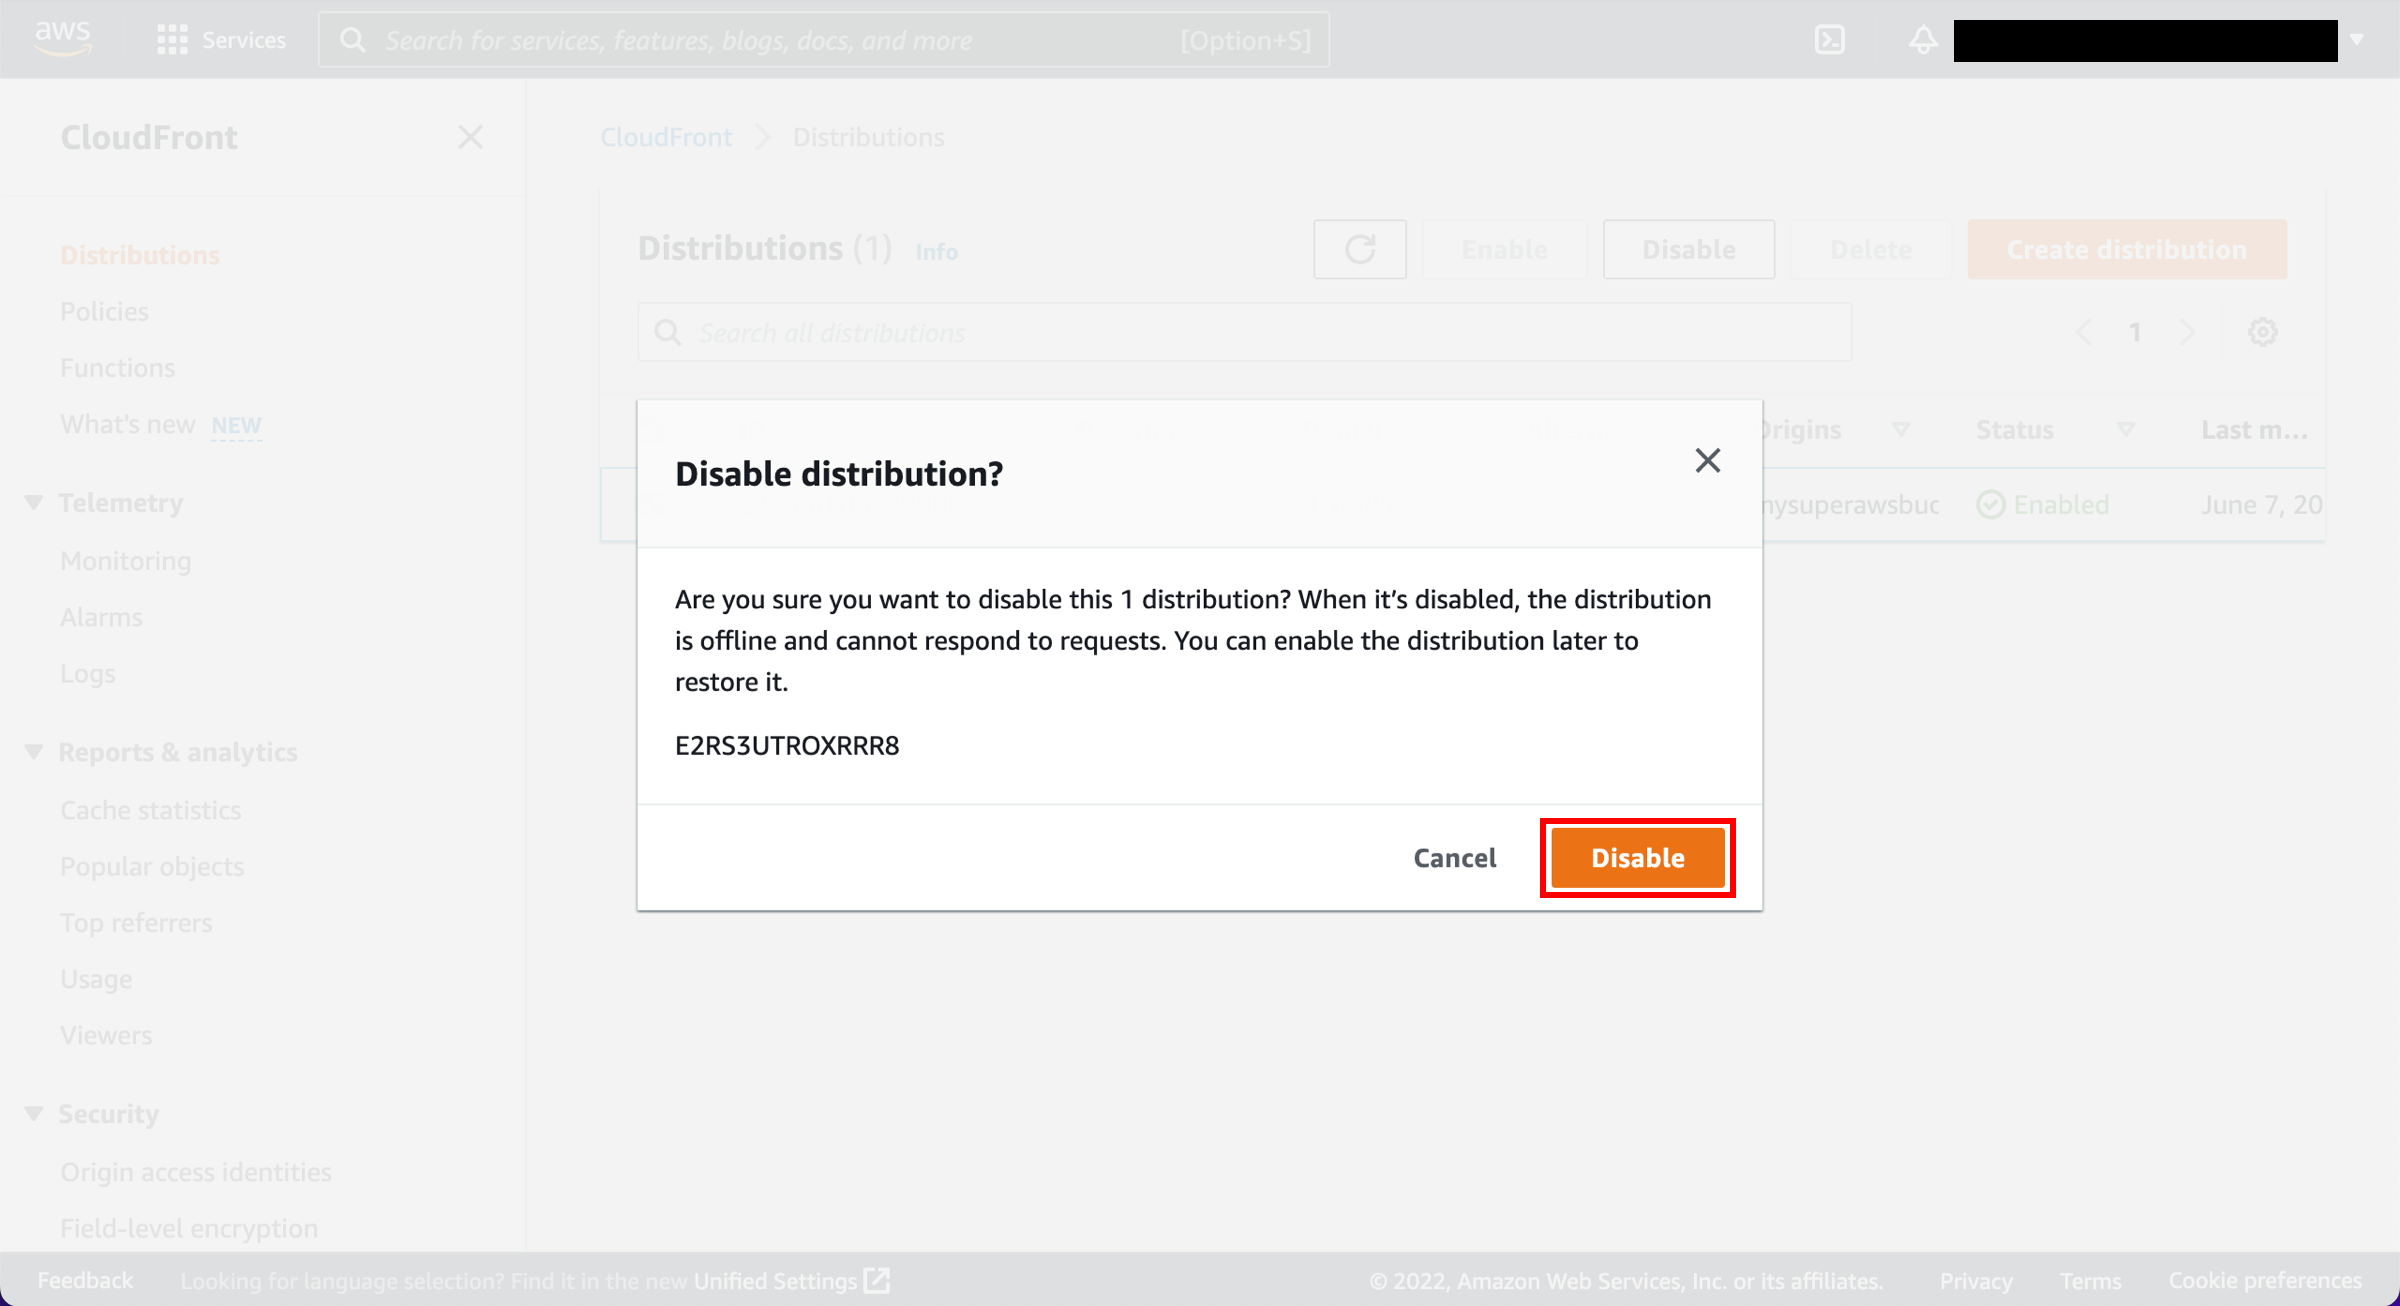
b. You will be asked to confirm. Choose Disable.
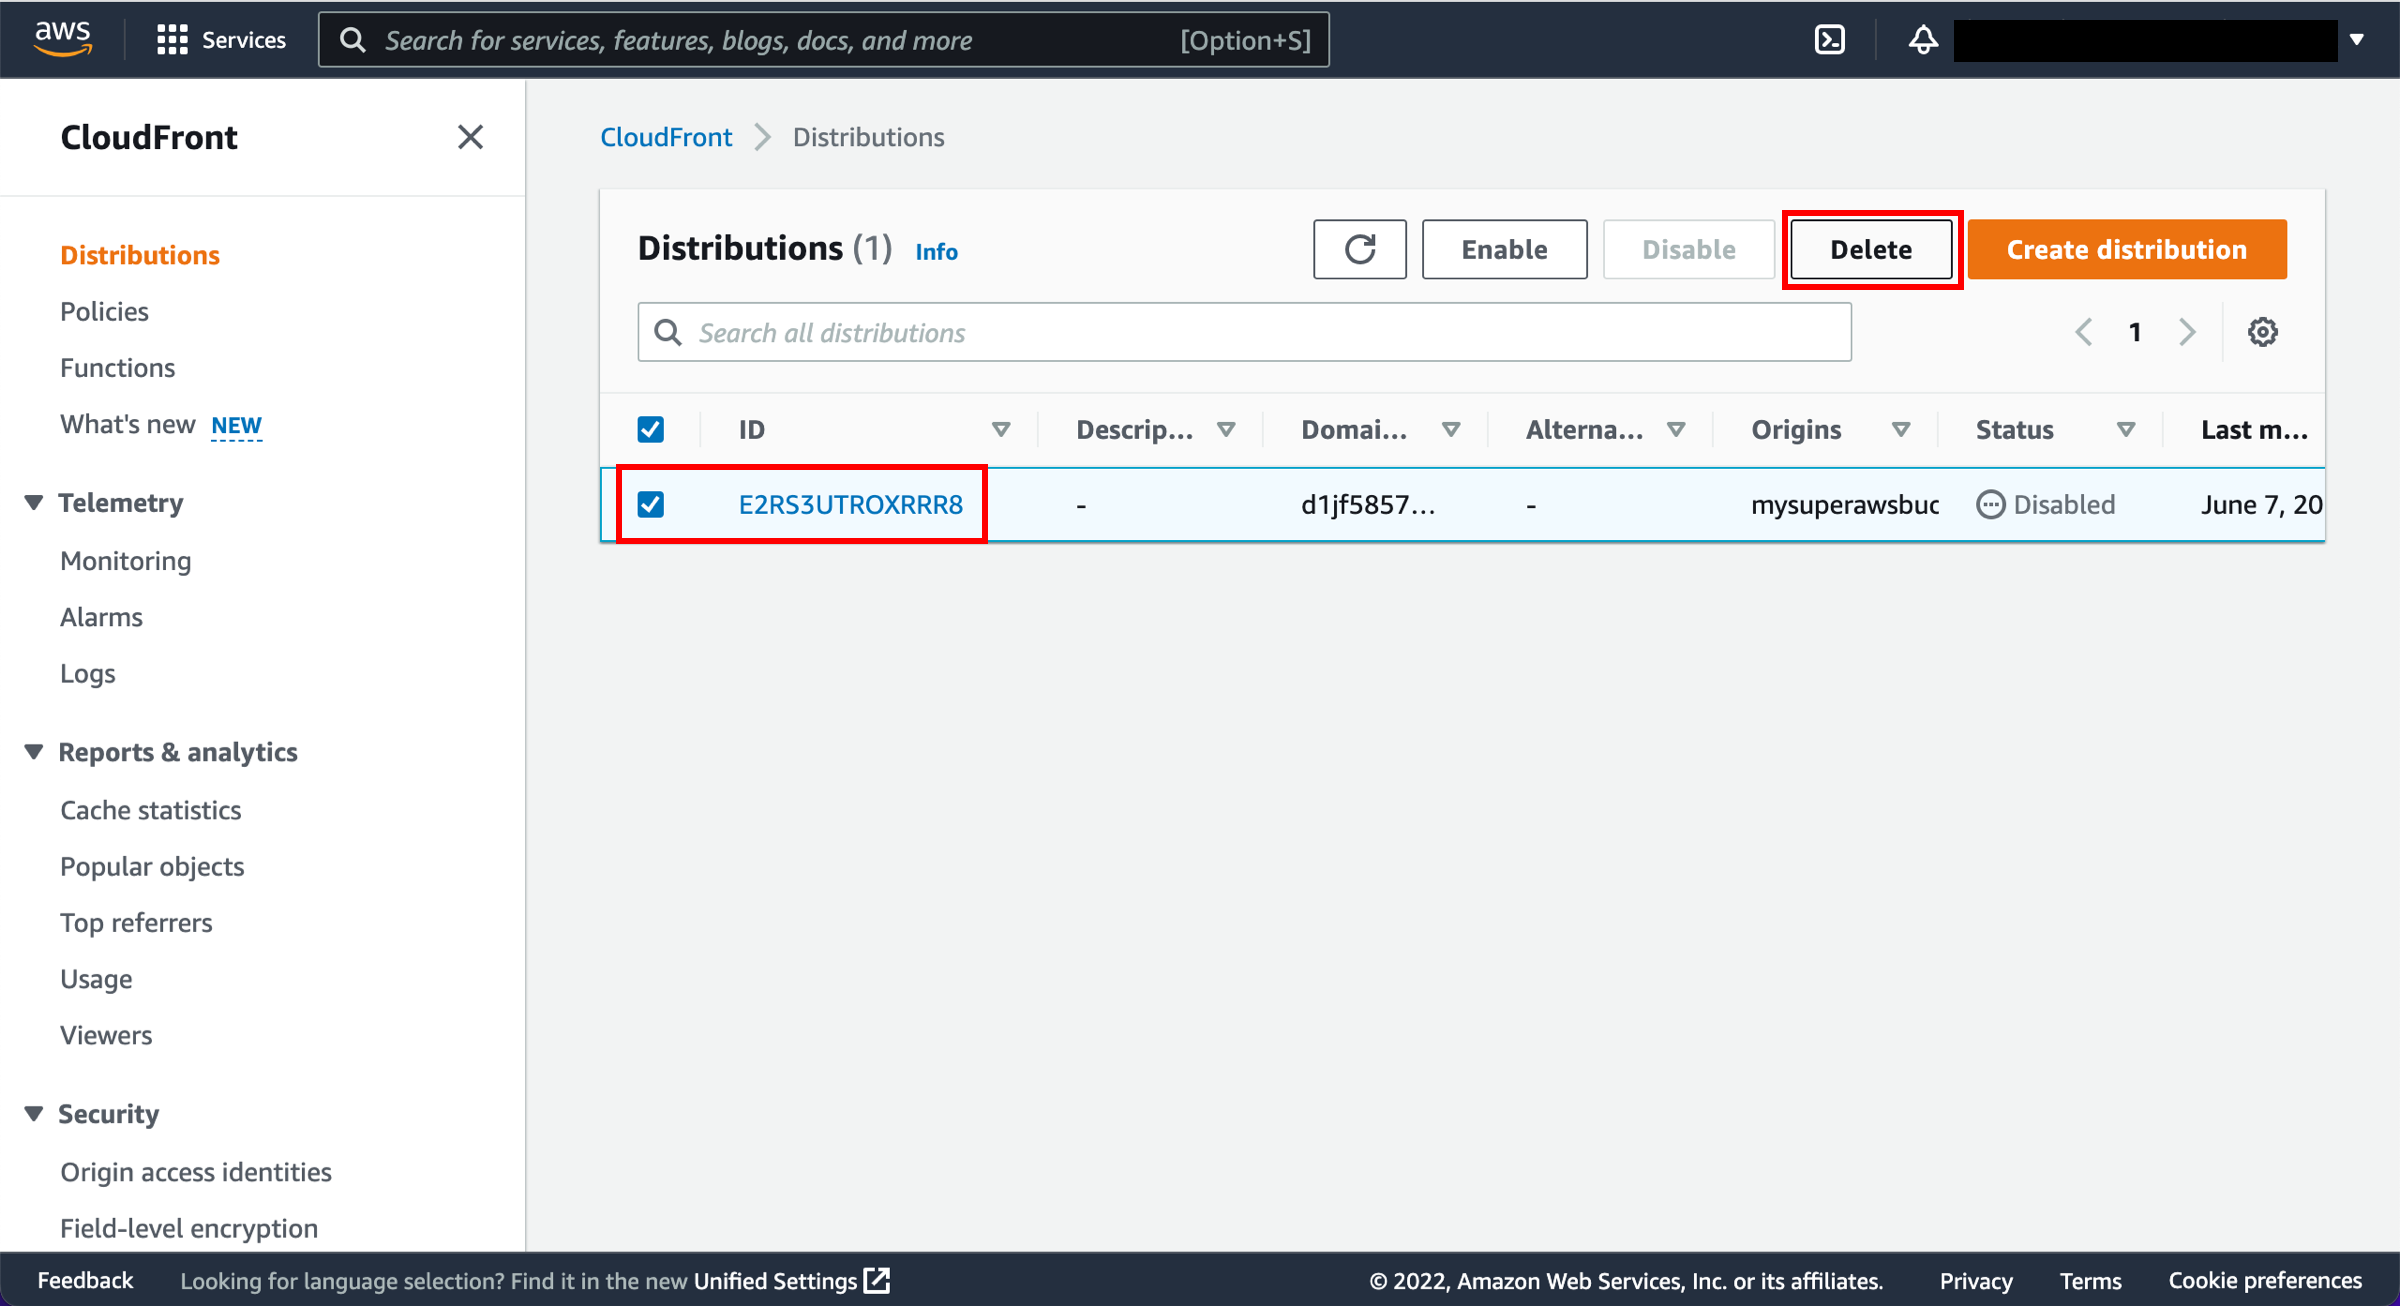
c. Select the checkbox next to the distribution you created and choose Delete.
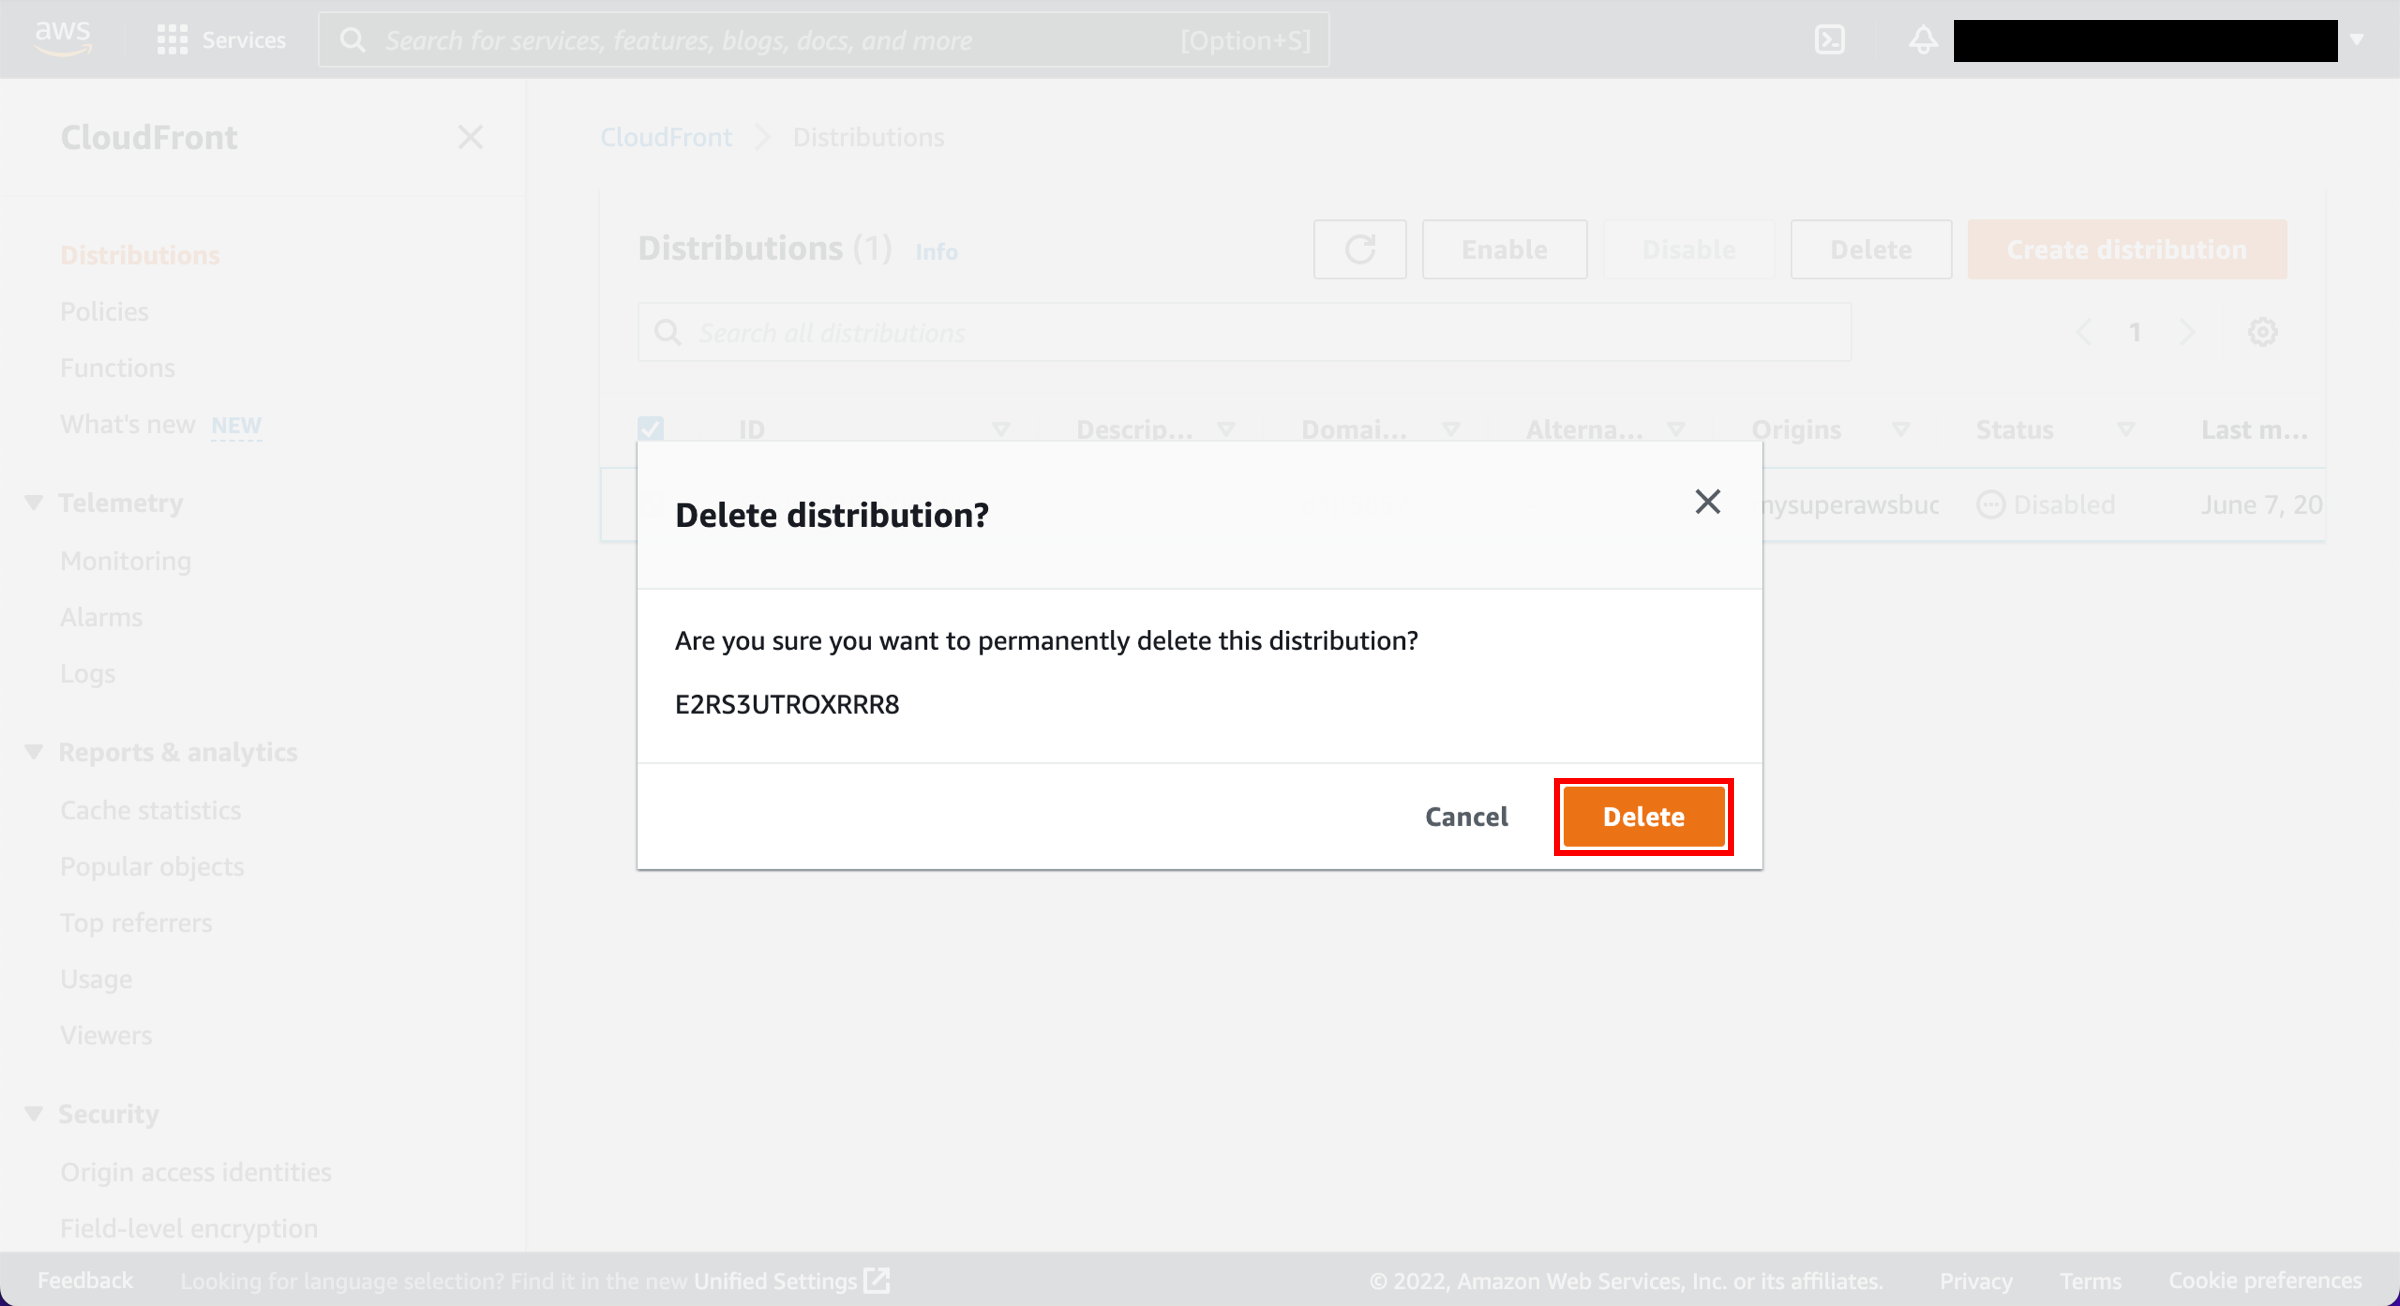
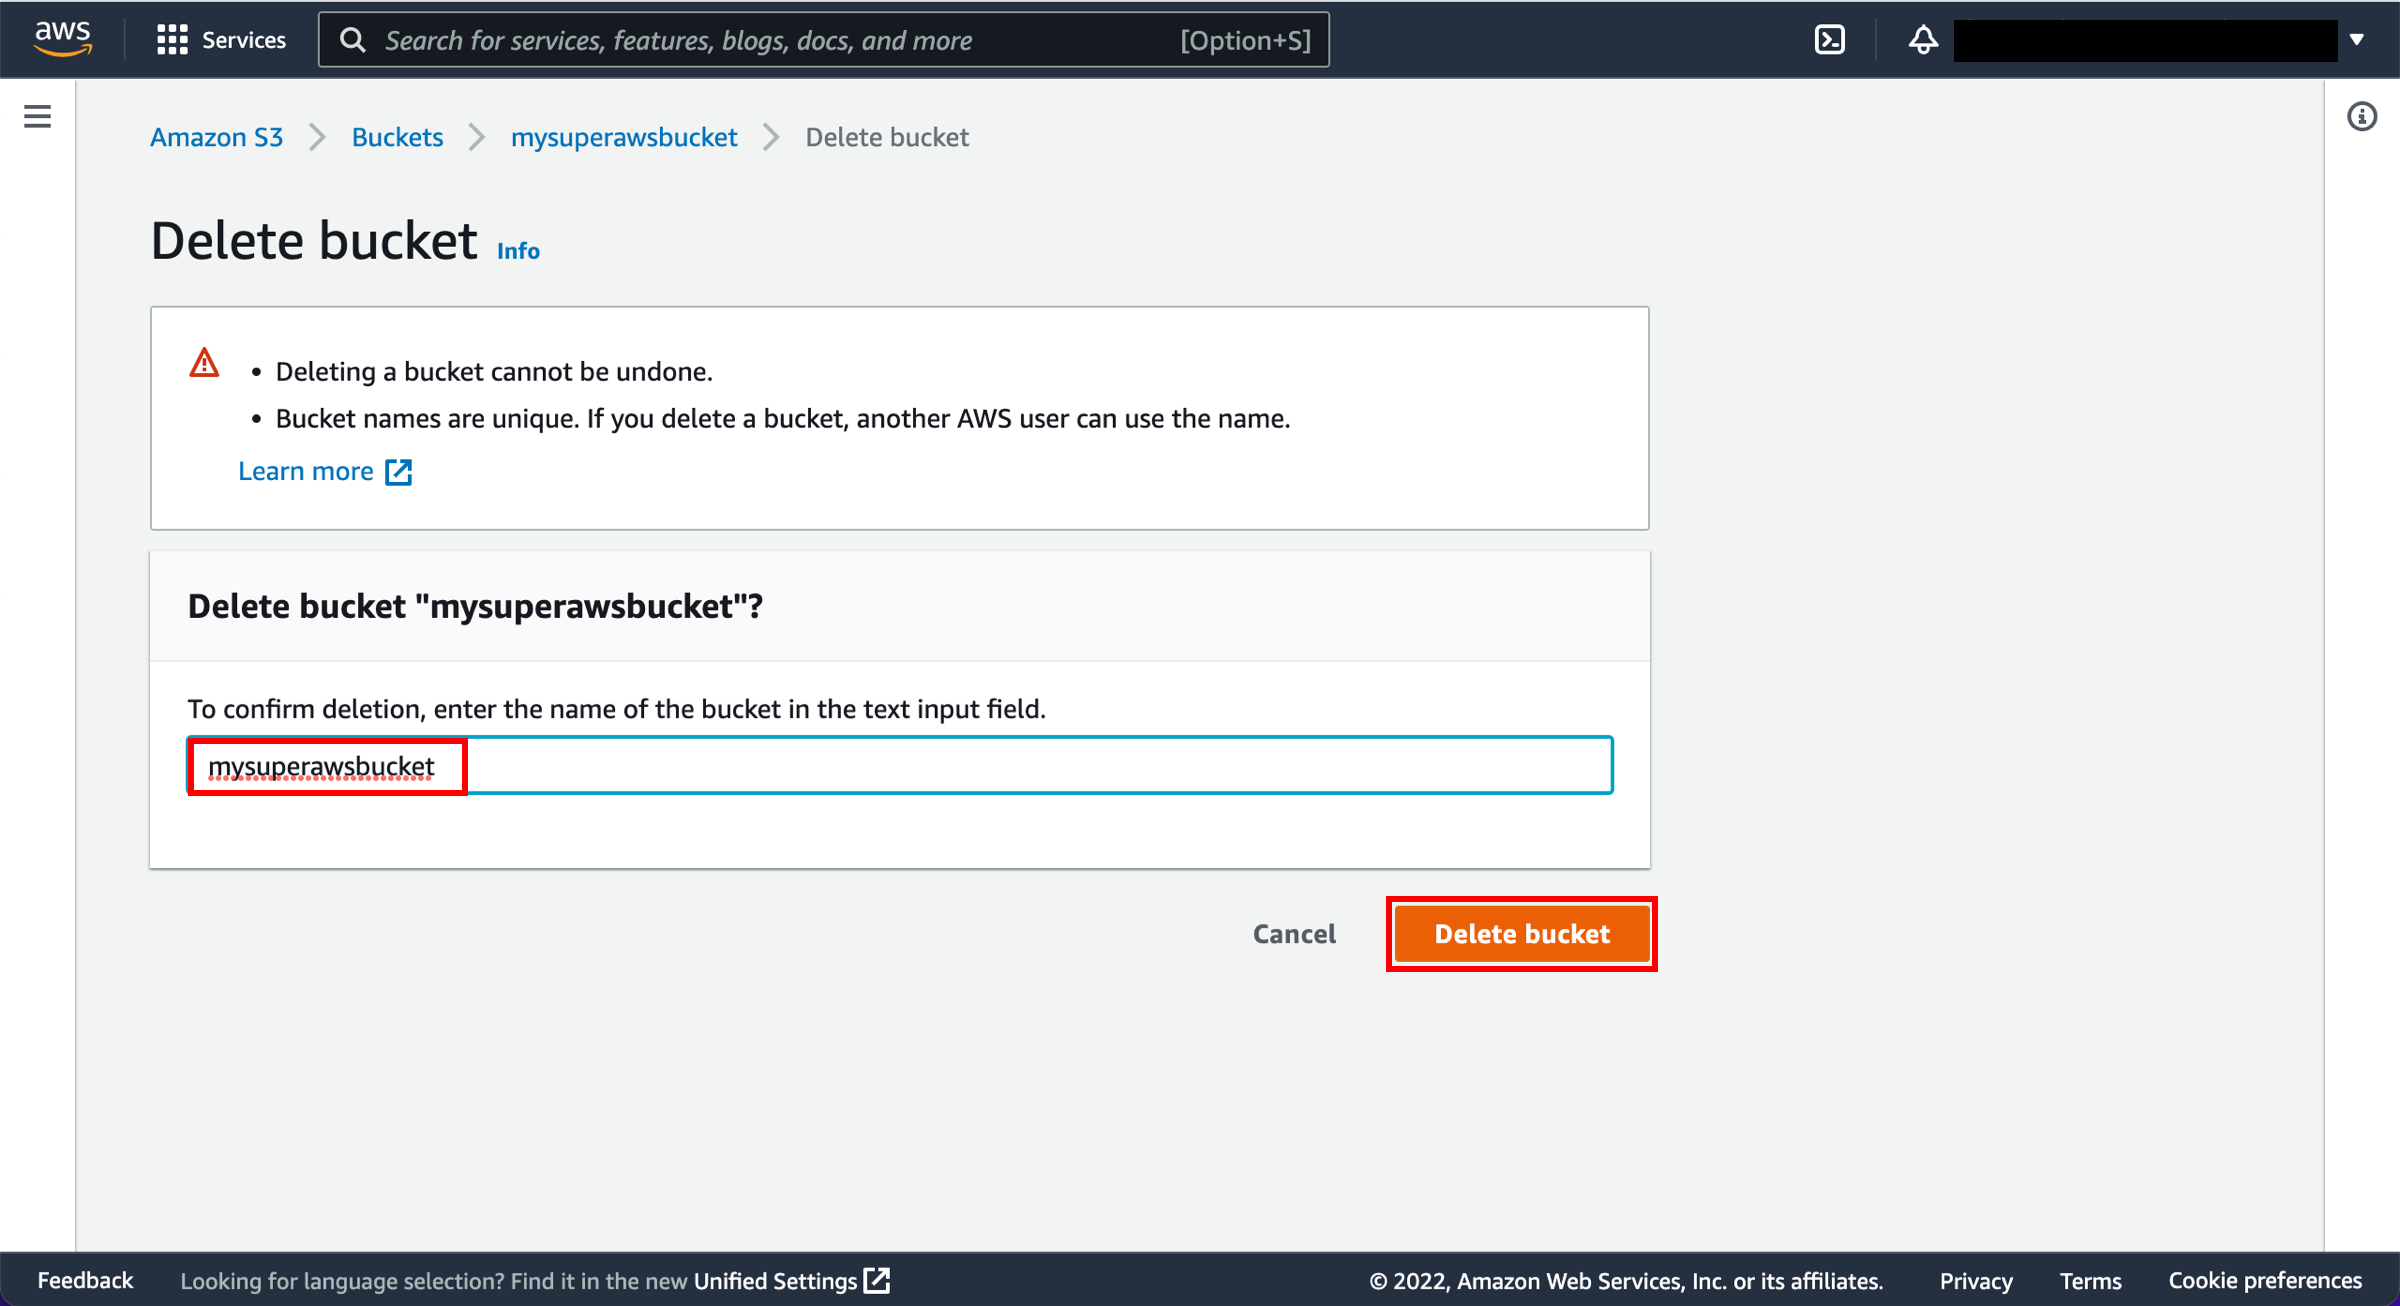
d. You will be asked to confirm. Choose Delete.
Step 7: Terminate resources
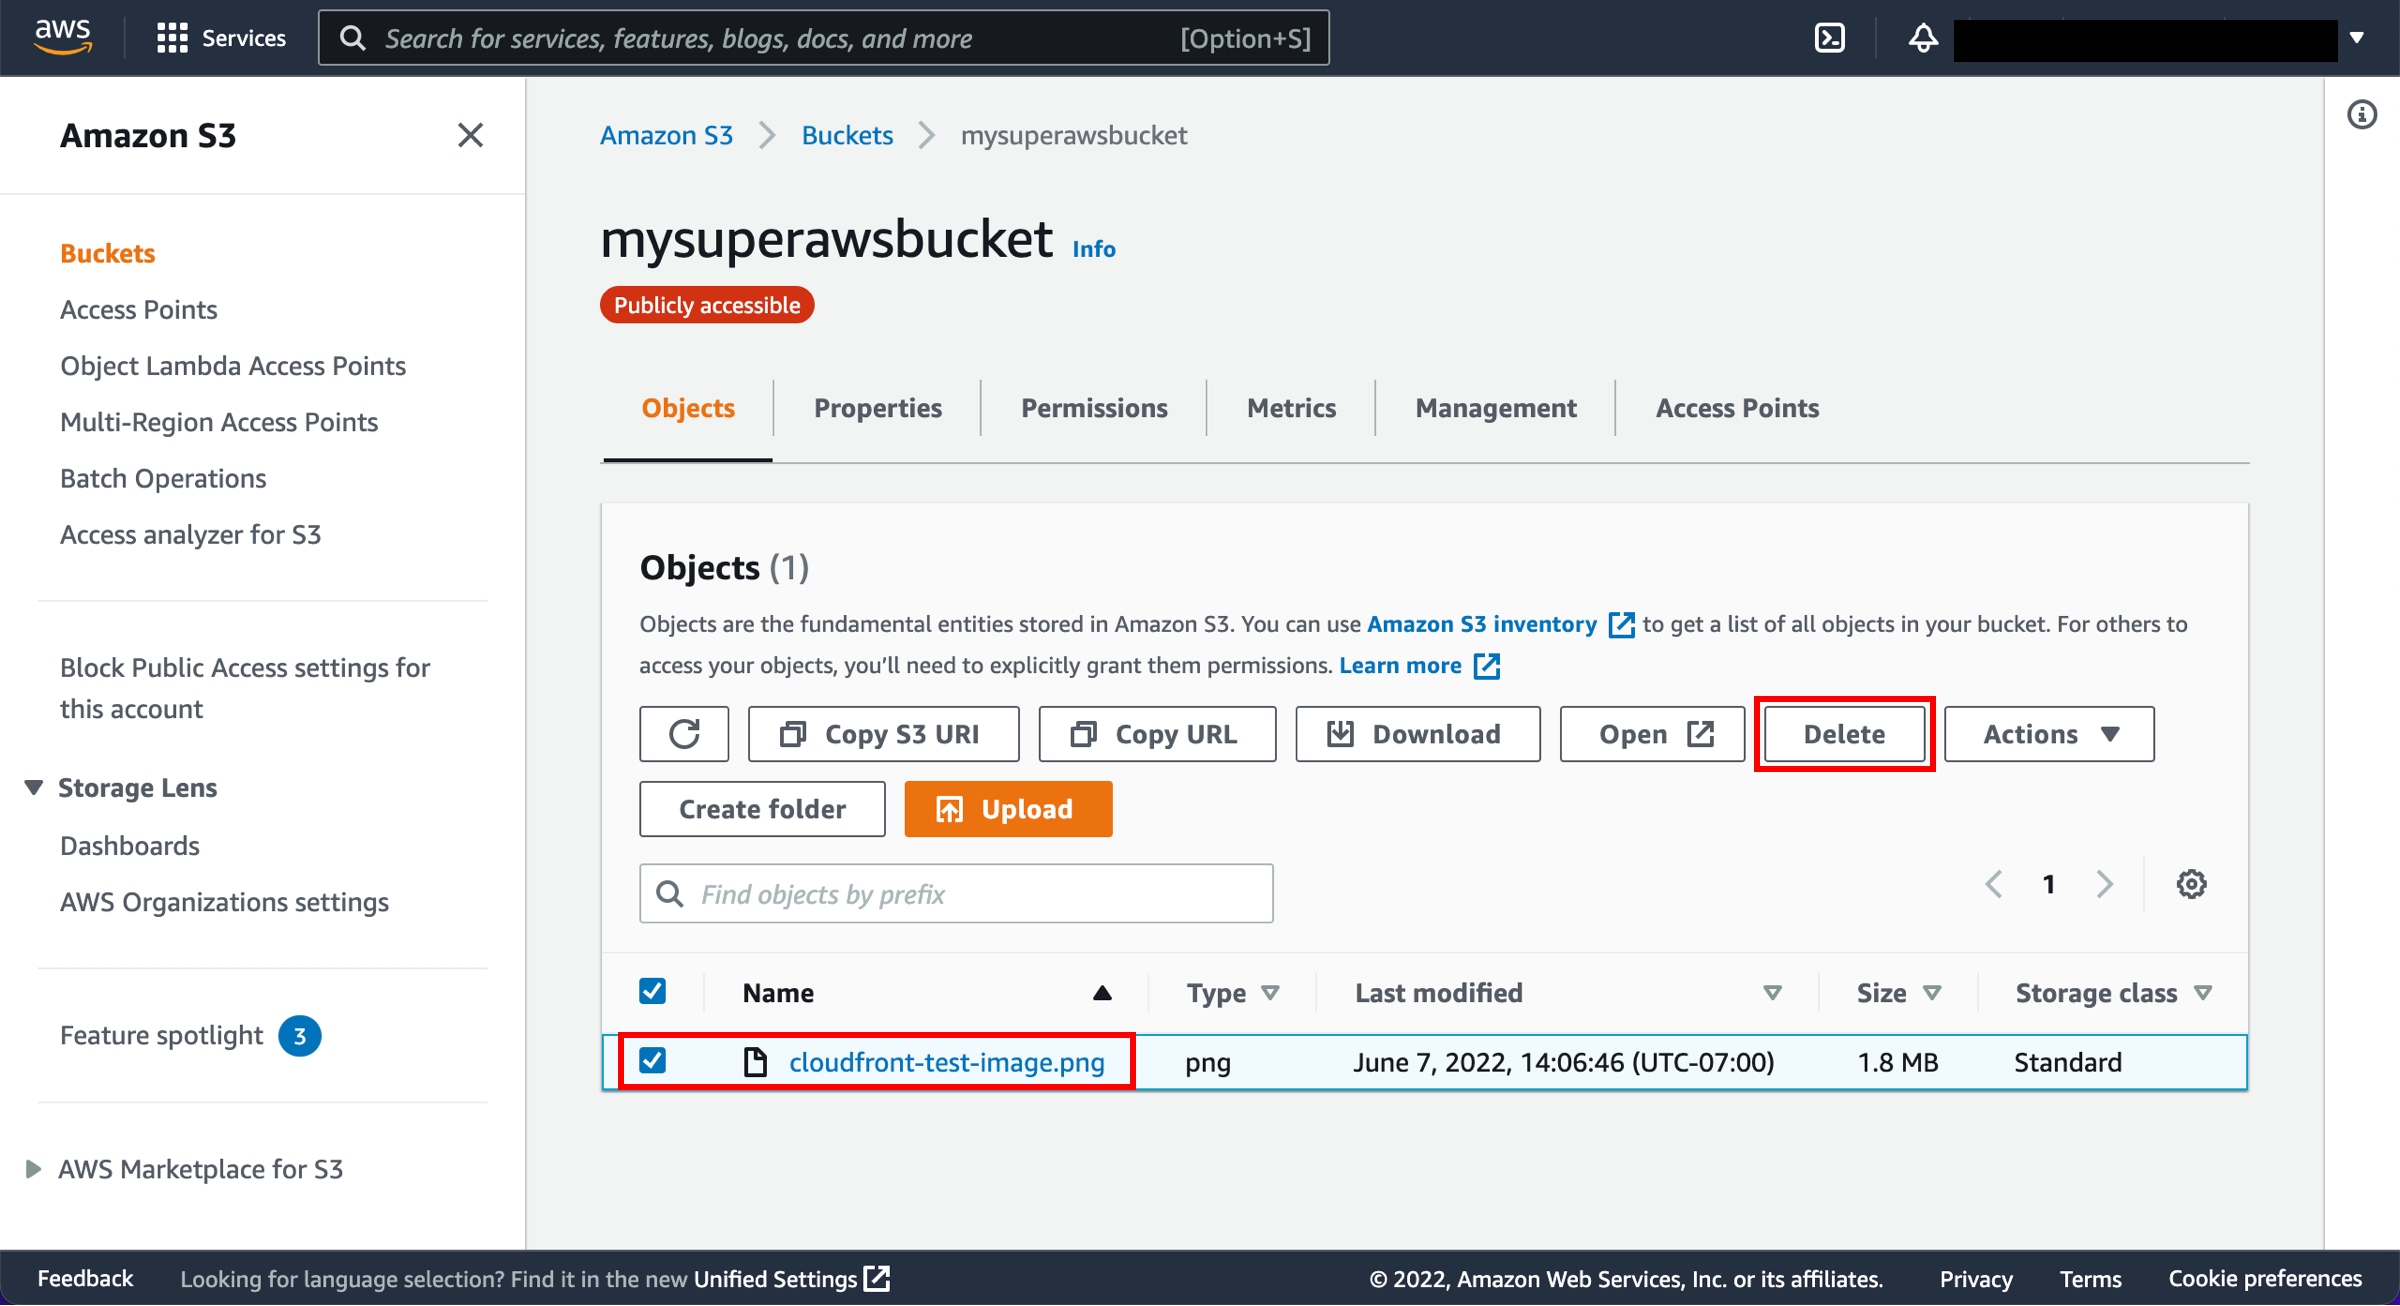
In this step, you will delete the sample file from your S3 bucket to avoid unnecessary charges.
a. In the upper navigation menu, begin typing S3 in the search bar and select S3 to open the console.
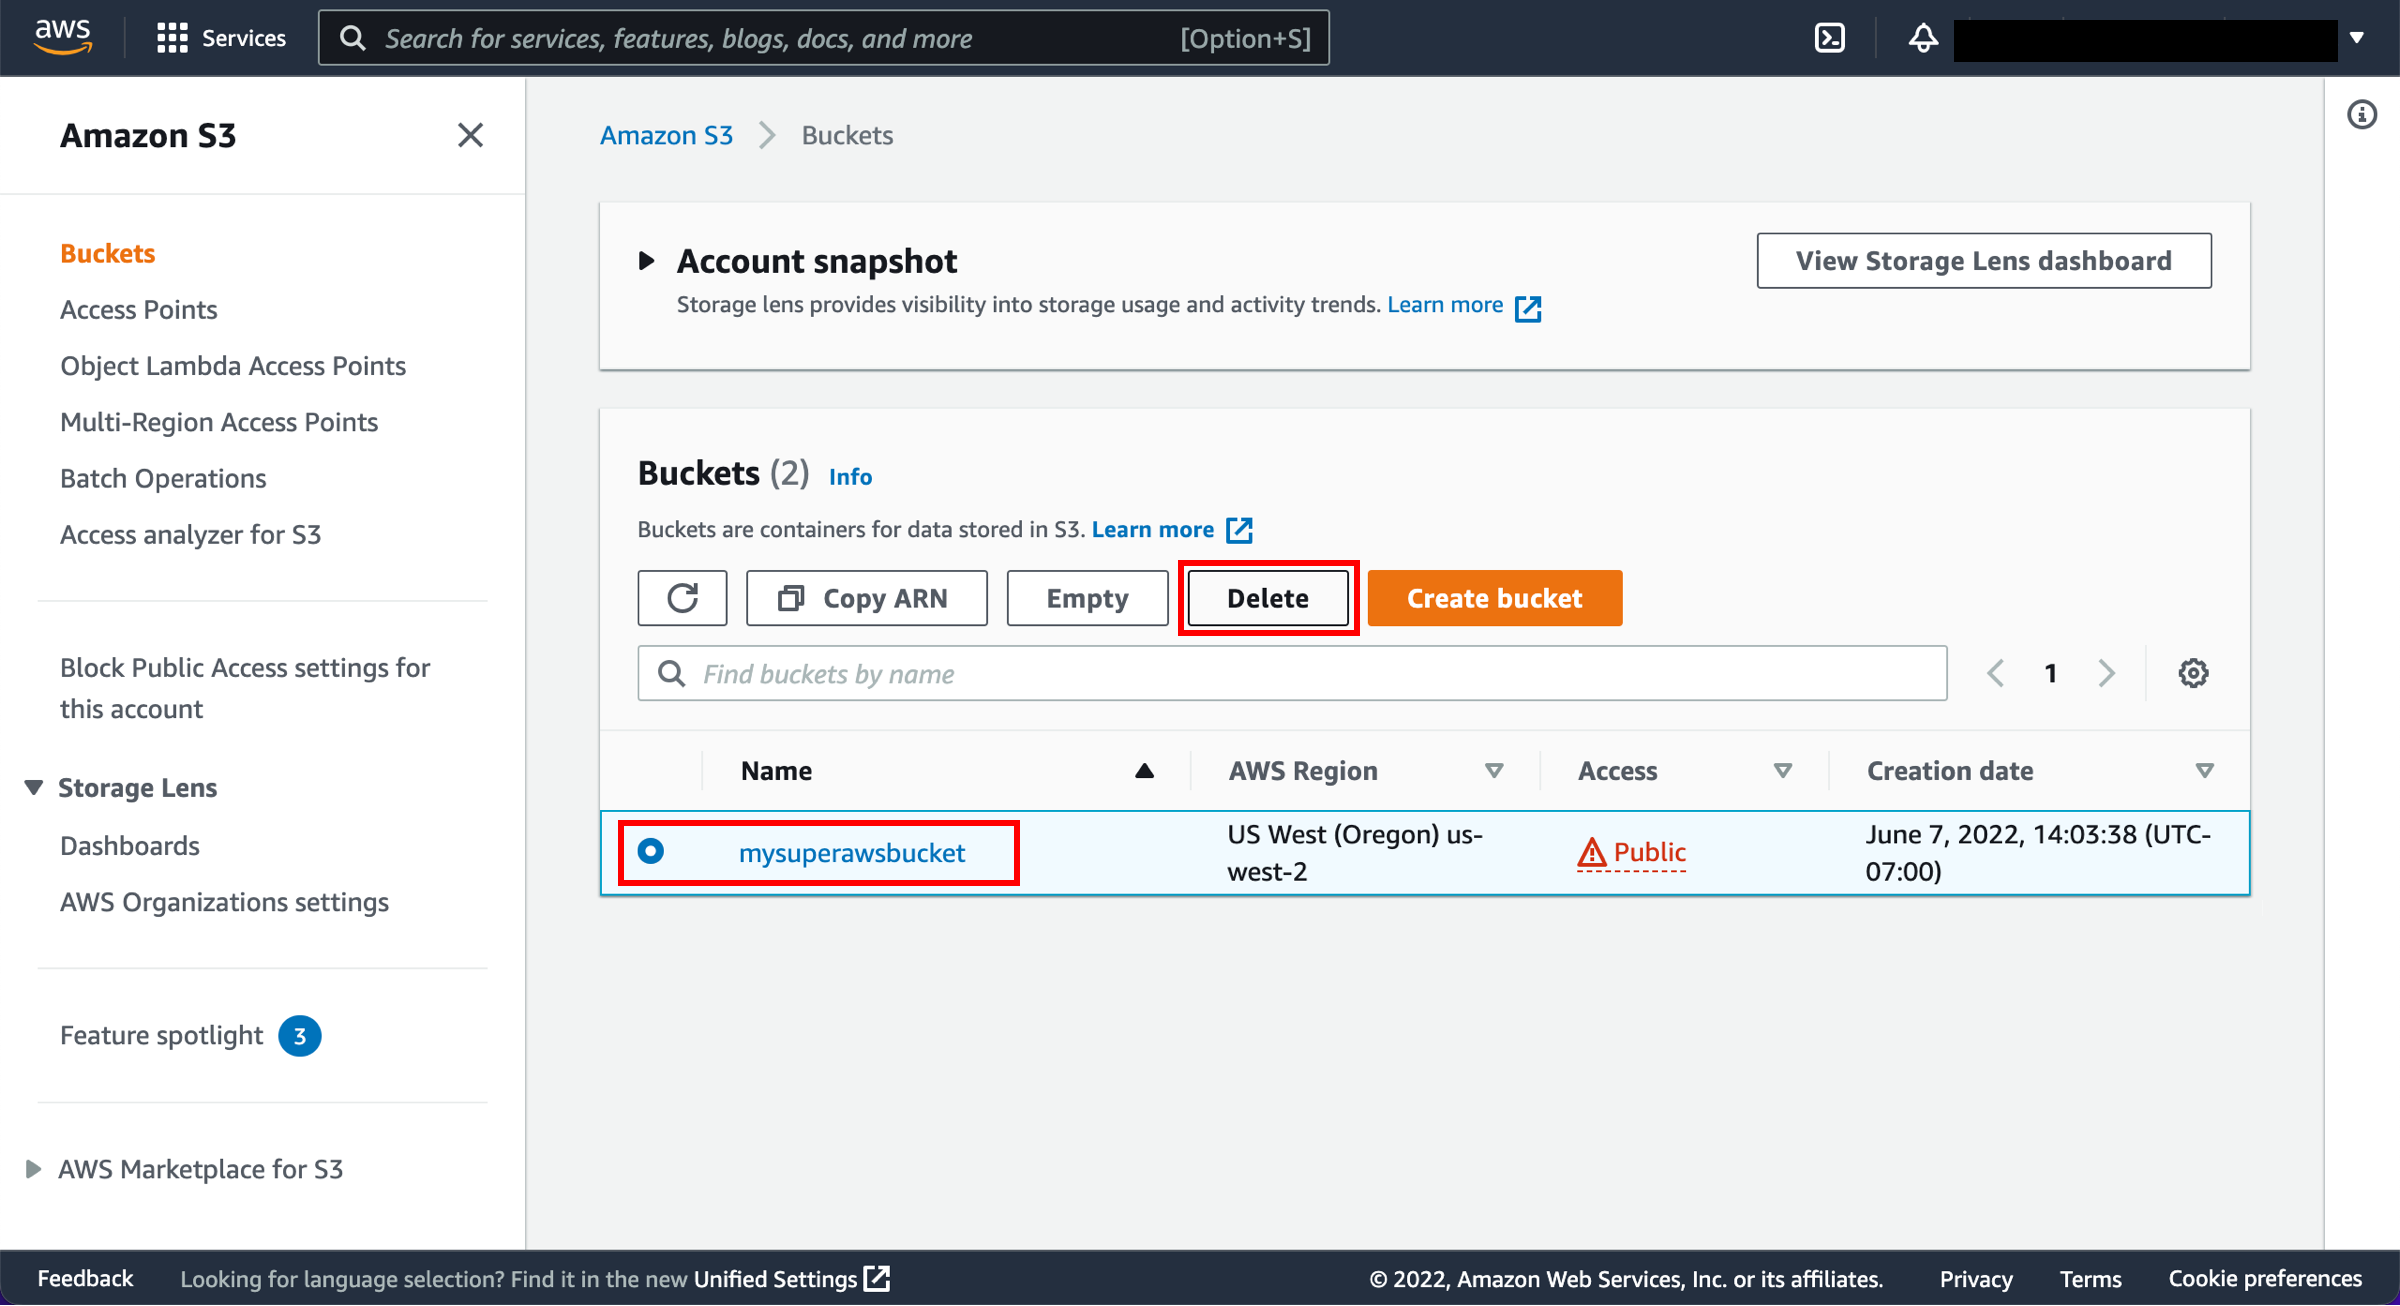
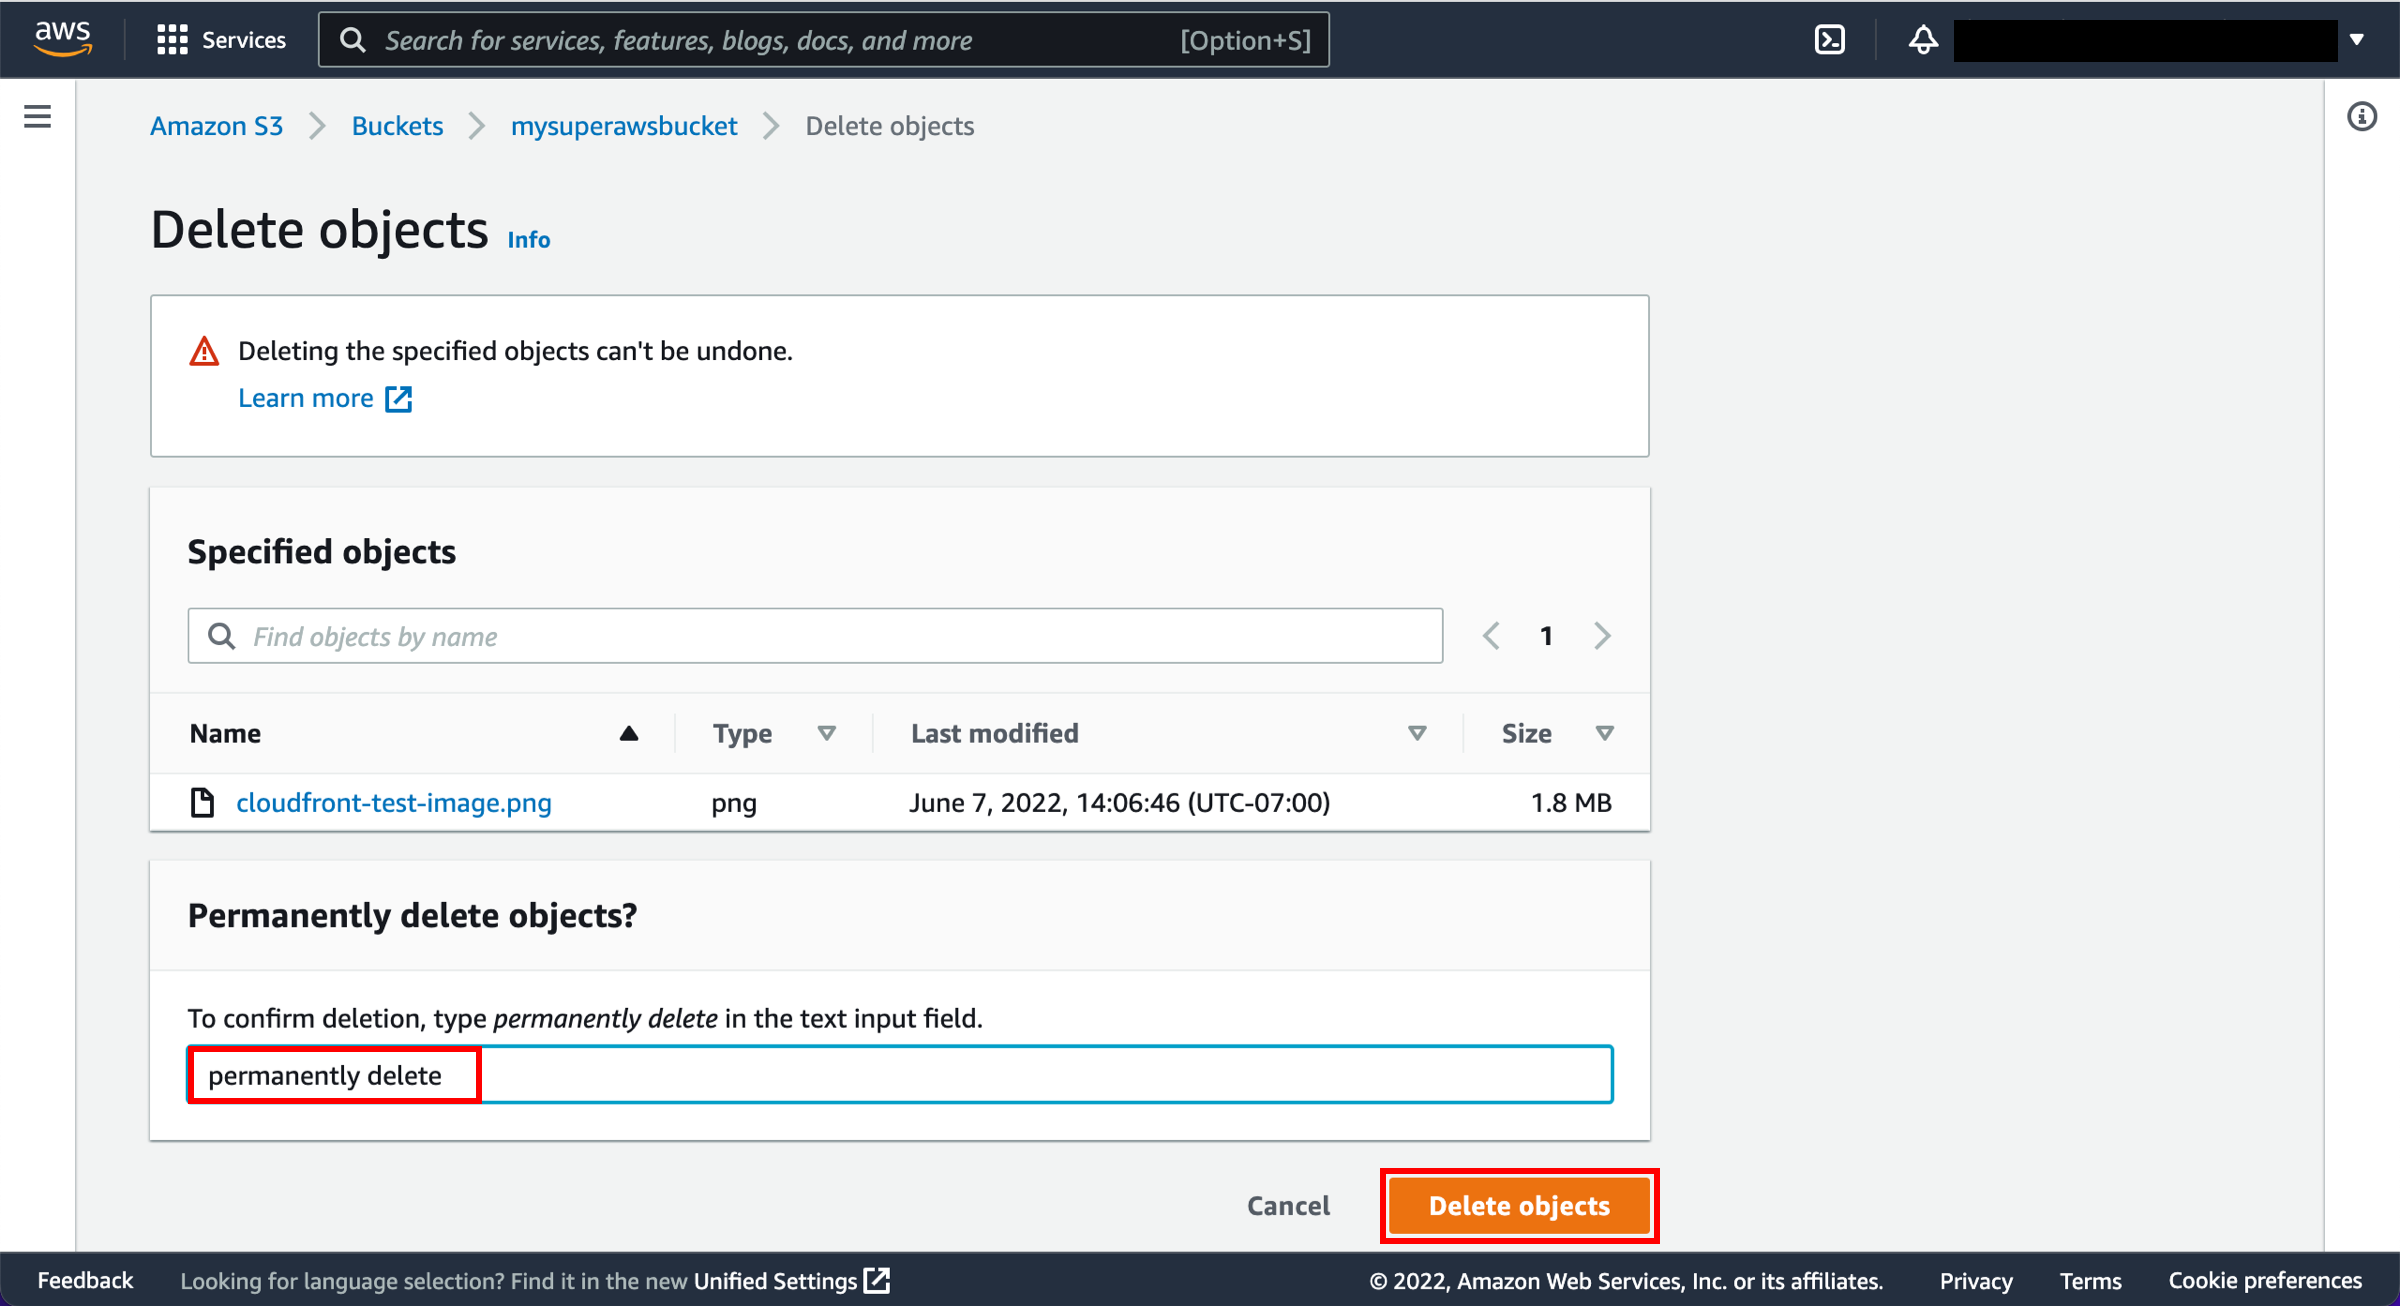
c. Select the cloudfront-test-image.png file contained within your bucket and choose Delete.

Conclusion
You created your first Amazon CloudFront web distribution and delivered a piece of static content hosted in the cloud through Amazon S3. With a few configuration changes, you can use CloudFront to deliver dynamic content, live events such as a meeting, conference, or concert, in real time over HTTP or HTTPS. Use Amazon Cloudfront to speed delivery of your entire website or application, including dynamic, static, streaming, and interactive content.