Serverless on AWS
Build and run applications without thinking about servers
Overview
AWS offers technologies for running code, managing data, and integrating applications, all without managing servers. Serverless technologies feature automatic scaling, built-in high availability, and a pay-for-use billing model to increase agility and optimize costs. These technologies also eliminate infrastructure management tasks like capacity provisioning and patching, so you can focus on writing code that serves your customers.
Benefits of Serverless on AWS
-
Eliminate operational overhead so your teams can release quickly, get feedback, and iterate to get to market faster.
-
With a pay-for-value billing model, resource utilization is automatically optimized and you never pay for over-provisioning.
-
With technologies that automatically scale from zero to peak demands, you can adapt to customer needs faster than ever.
-
Serverless applications have built-in service integrations, so you can focus on building your application instead of configuring it.
Serverless services on AWS
Modern applications are built serverless-first, a strategy that prioritizes the adoption of serverless services, so you can increase agility throughout your application stack. We’ve developed serverless services for all three layers of your stack: compute, integration, and data stores. Consider getting started with these services:
Use cases
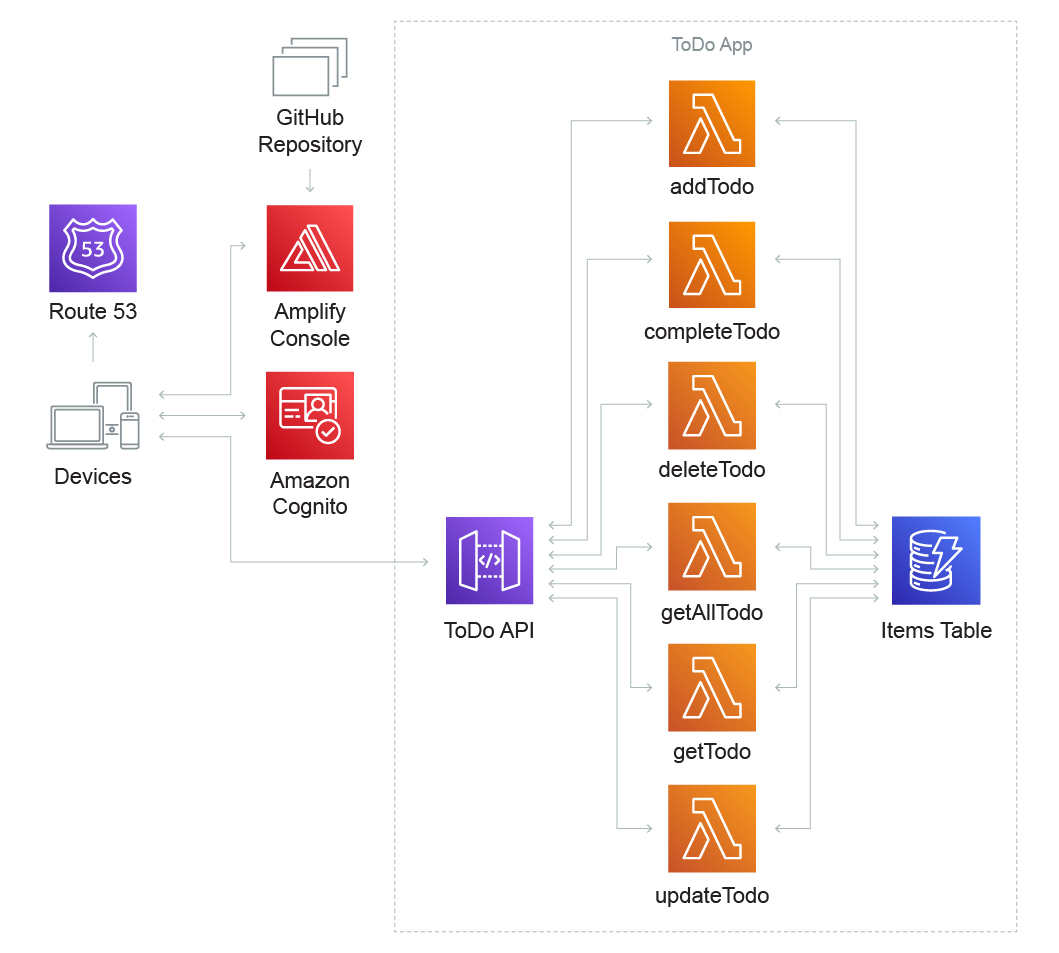
Build web applications
Build a simple “to-do list” web app that enables a registered user to create, update, view, and delete items. An event-driven web application may use AWS Lambda and Amazon API Gateway for its business logic and Amazon DynamoDB as its database, and AWS Amplify Console to host all static content.
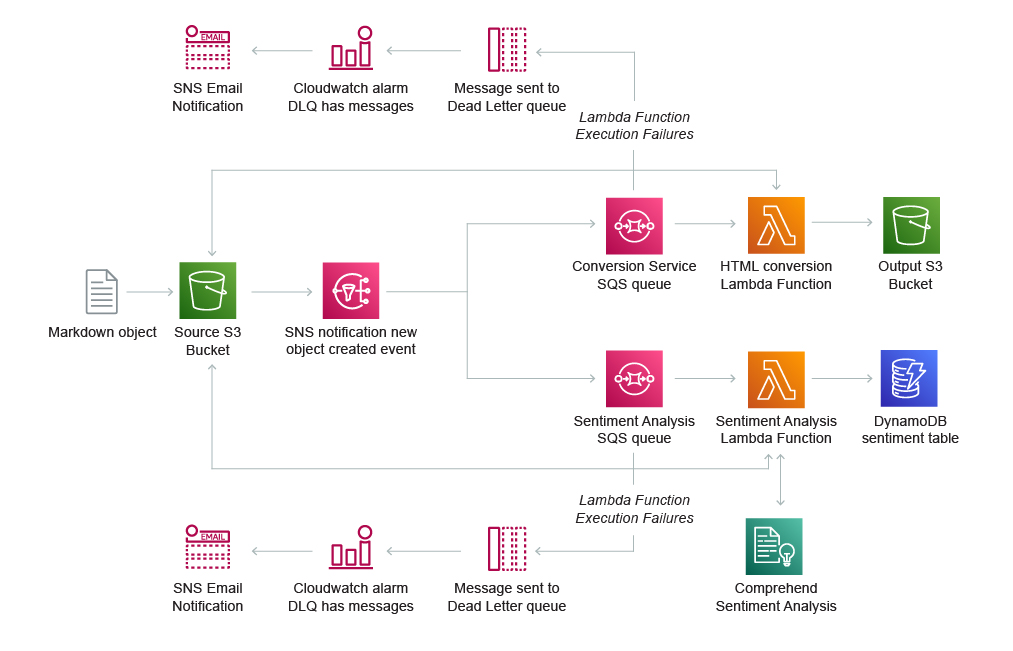
Process data at nearly any scale
Deliver notes from an interview in Markdown format to Amazon S3. Use S3 Events to trigger multiple processing flows - one to convert and persist Markdown files to HTML and another to detect and persist sentiment.
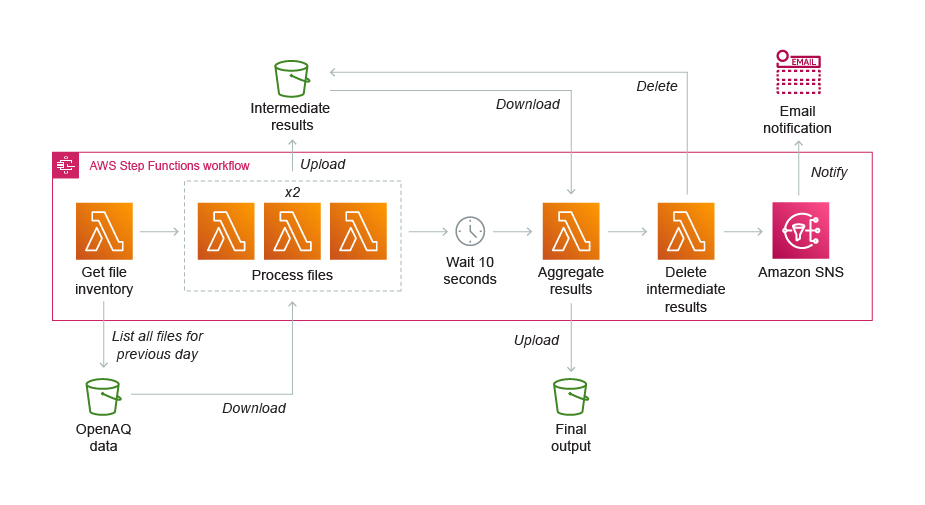
Automate batch processing
Schedule workflows on a recurring basis using an Amazon EventBridge rule. For example, you can generate the minimum, maximum, and average ratings for air quality measurements by orchestrating the Extract Transfer Load (ETL) workflow using AWS Step Functions and AWS Lambda.
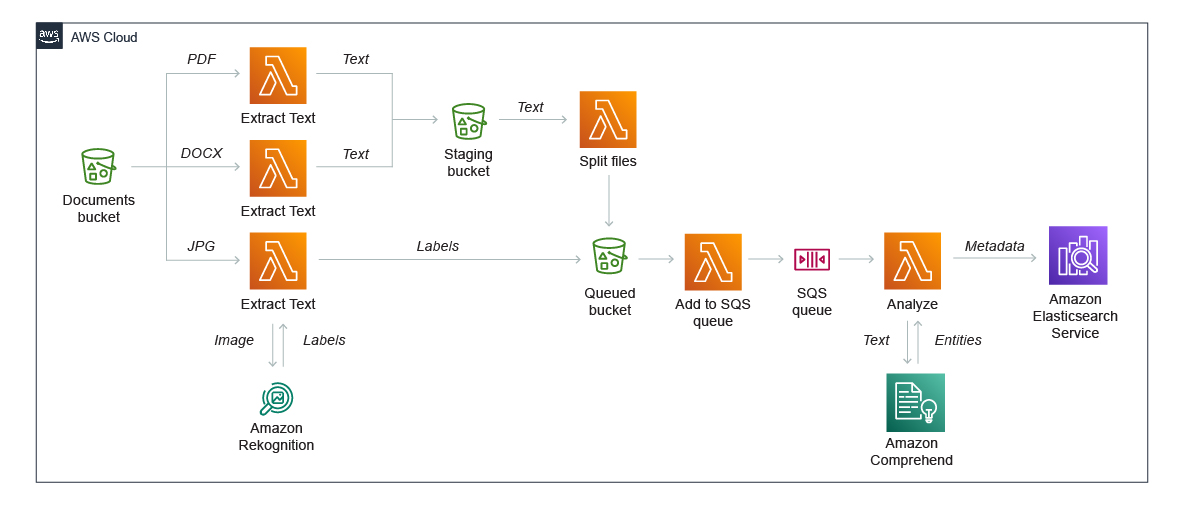
Index and store documents and images automatically
Use Amazon machine learning (ML) services like Amazon Comprehend and Amazon Rekognition to uncover information in unstructured data and send the results to Amazon OpenSearch (successor to Amazon Elasticsearch Service) for fast indexing. Patterns like this work well in ecommerce applications for tasks that support personalized customer experiences, such as clickstream analysis.
Get started with serverless on AWS
Did you find what you were looking for today?
Let us know so we can improve the quality of the content on our pages