Module 4: Set Up AWS Cloud9 IDE
TUTORIAL


Set Up Your AWS Cloud9 IDE
In this module, you will configure your AWS Cloud9 environment
What you will accomplish
- Set up an AWS Cloud9 environment using the AWS CLI
- Use the built-in tools
Implementation
If you already have an IDE, this module is optional.
AWS Cloud9 is a free, cloud-based integrated development environment (IDE) that lets you write, run, and debug your code using just a browser. The IDE includes a code editor, debugger, and terminal.
AWS Cloud9 comes prepackaged with essential tools for popular programming languages, including JavaScript, Python, PHP, and more, so you don’t need to install files or configure your development machine to start new projects. Because AWS Cloud9 IDE is cloud-based, you can work on your projects from your office, home, or anywhere using an internet-connected machine.
Time to complete
15 minutes
Module requirements
- An internet browser
- An AWS account
- AWS CLI set up
Step 1: Create an environment
In this step, you use the AWS CLI to create an AWS Cloud9 development environment.
1.1 - Sign in to the AWS CLI using the profile created in Module 3 by running the following command:
Note: The authentication steps are the same as what you did in Module 3 - Step 2.7
aws sso login --profile admin-1To create the environment, we will be using the standard create command and additional information.
- --name: The name of the environment. For this tutorial, we will use <getting-started>.
- --description: An optional description of the environment, provided as a string.
- --instance-type: The type of Amazon EC2 instance AWS Cloud9 will launch and connect to the new environment. For this tutorial, we will use <t2.micro>, which is covered by the AWS Free Tier for the first 12 months.
- --image-id: From December 04, 2023, you will be required to include this parameter. For this tutorial, we will use <resolve:ssm:/aws/service/cloud9/amis/amazonlinux-1-x86_64/ubuntu-22.04-x86_64>. For more information about this change, see the reference guide.
- --profile: The name of the administrator profile you configured when you set up the CLI in Module 3. In this tutorial, we used <admin-1>.
1.3 - Copy the entire command by selecting the copy button and paste it into your CLI:
aws cloud9 create-environment-ec2 --name getting-started --description "Getting started with AWS Cloud9." --instance-type t2.micro --image-id resolve:ssm:/aws/service/cloud9/amis/amazonlinux-1-x86_64/ubuntu-22.04-x86_64 --profile admin-1A successful command returns the ID of your new AWS Cloud9 environment:
{
"environmentId": "8a34f51ce1e04a08882f1e811bd706EX"
}
By default, AWS Cloud9 shuts down the Amazon EC2 instance for the environment 30 minutes after all web browser instances that are connected to the IDE for the environment have been closed.
Troubleshooting tips:
If you don't specify the -- profile argument you will receive this message:
- Unable to locate credentials. You can configure credentials by running "aws configure".
If you run aws configure you must supply access keys, which is not recommended for most use cases. Instead, repeat the original command with the --profile argument and the credentials for your user are automatically used to run the command.
Step 2: Open the environment
In Module 2, we created an administrative user named John who received an invitation mail that included the URL of the AWS access portal and his username.
In module 3, we used the AWS access portal URL when we created the admin-1 profile. The environment created is present when we sign-in to the console using the organization's AWS access portal URL and John's sign-in credentials.
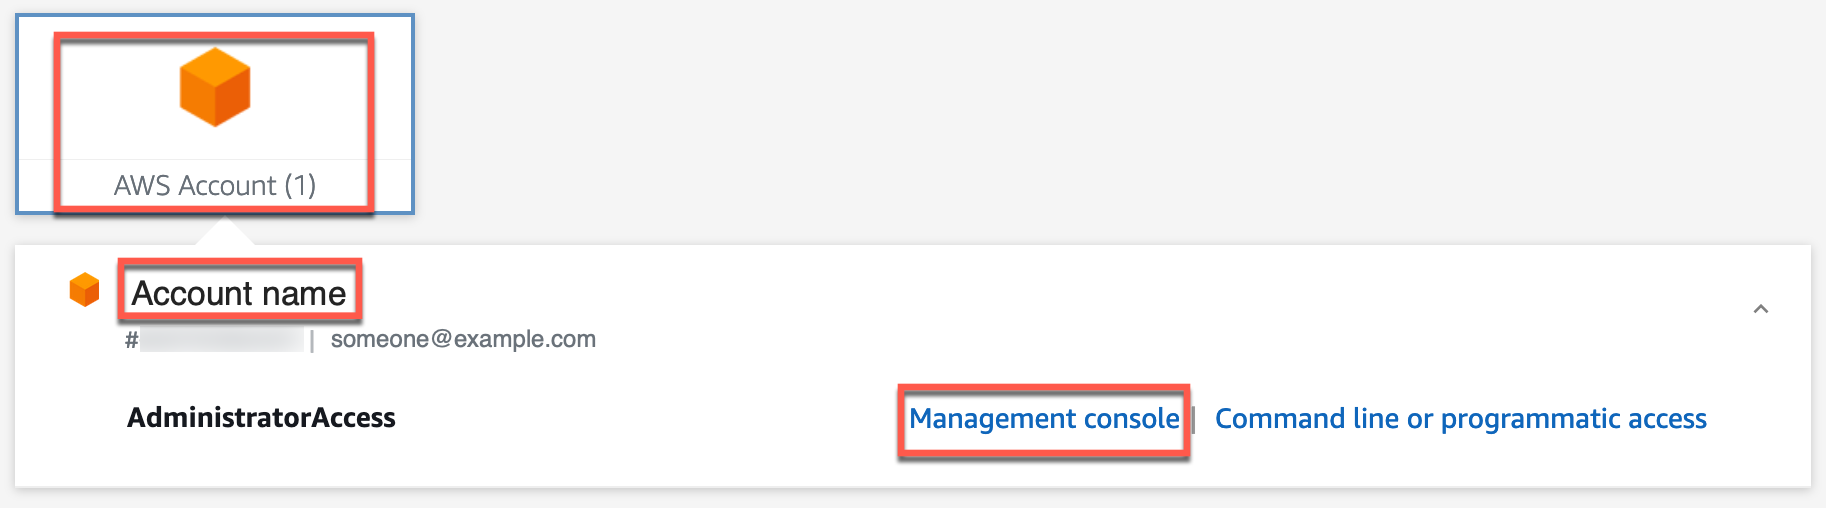
2.1 - In your browser, navigate back to the AWS access portal tab, and sign in using your administrator credentials.
2.2 - Select AWS Account, select your <account name>. Then, select Management console.
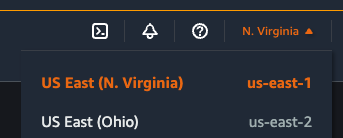
2.3 - In the top navigation bar, confirm that you are signed in to the AWS Region where your environment is located. For this tutorial we used us-east-1.
2.4 - In the search box, enter Cloud9. Then, select Cloud9 from the list of services.
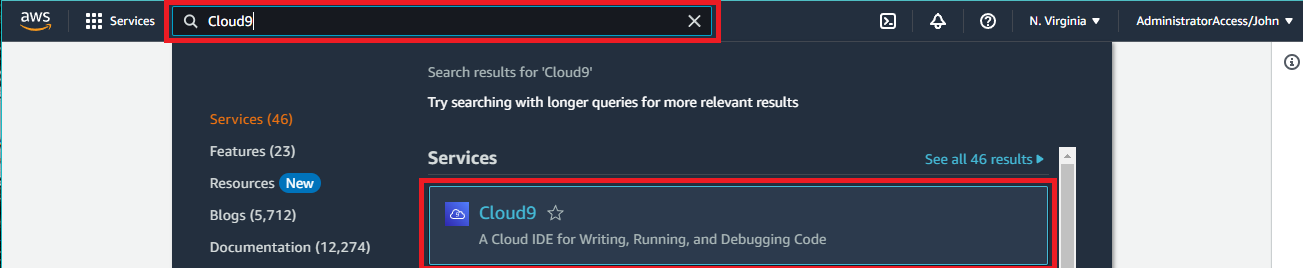
The console opens a new browser tab that displays the AWS Cloud9 Environments page.
2.5 - In the list of environments, select the getting-started-2 environment you created using the CLI, and choose Open.
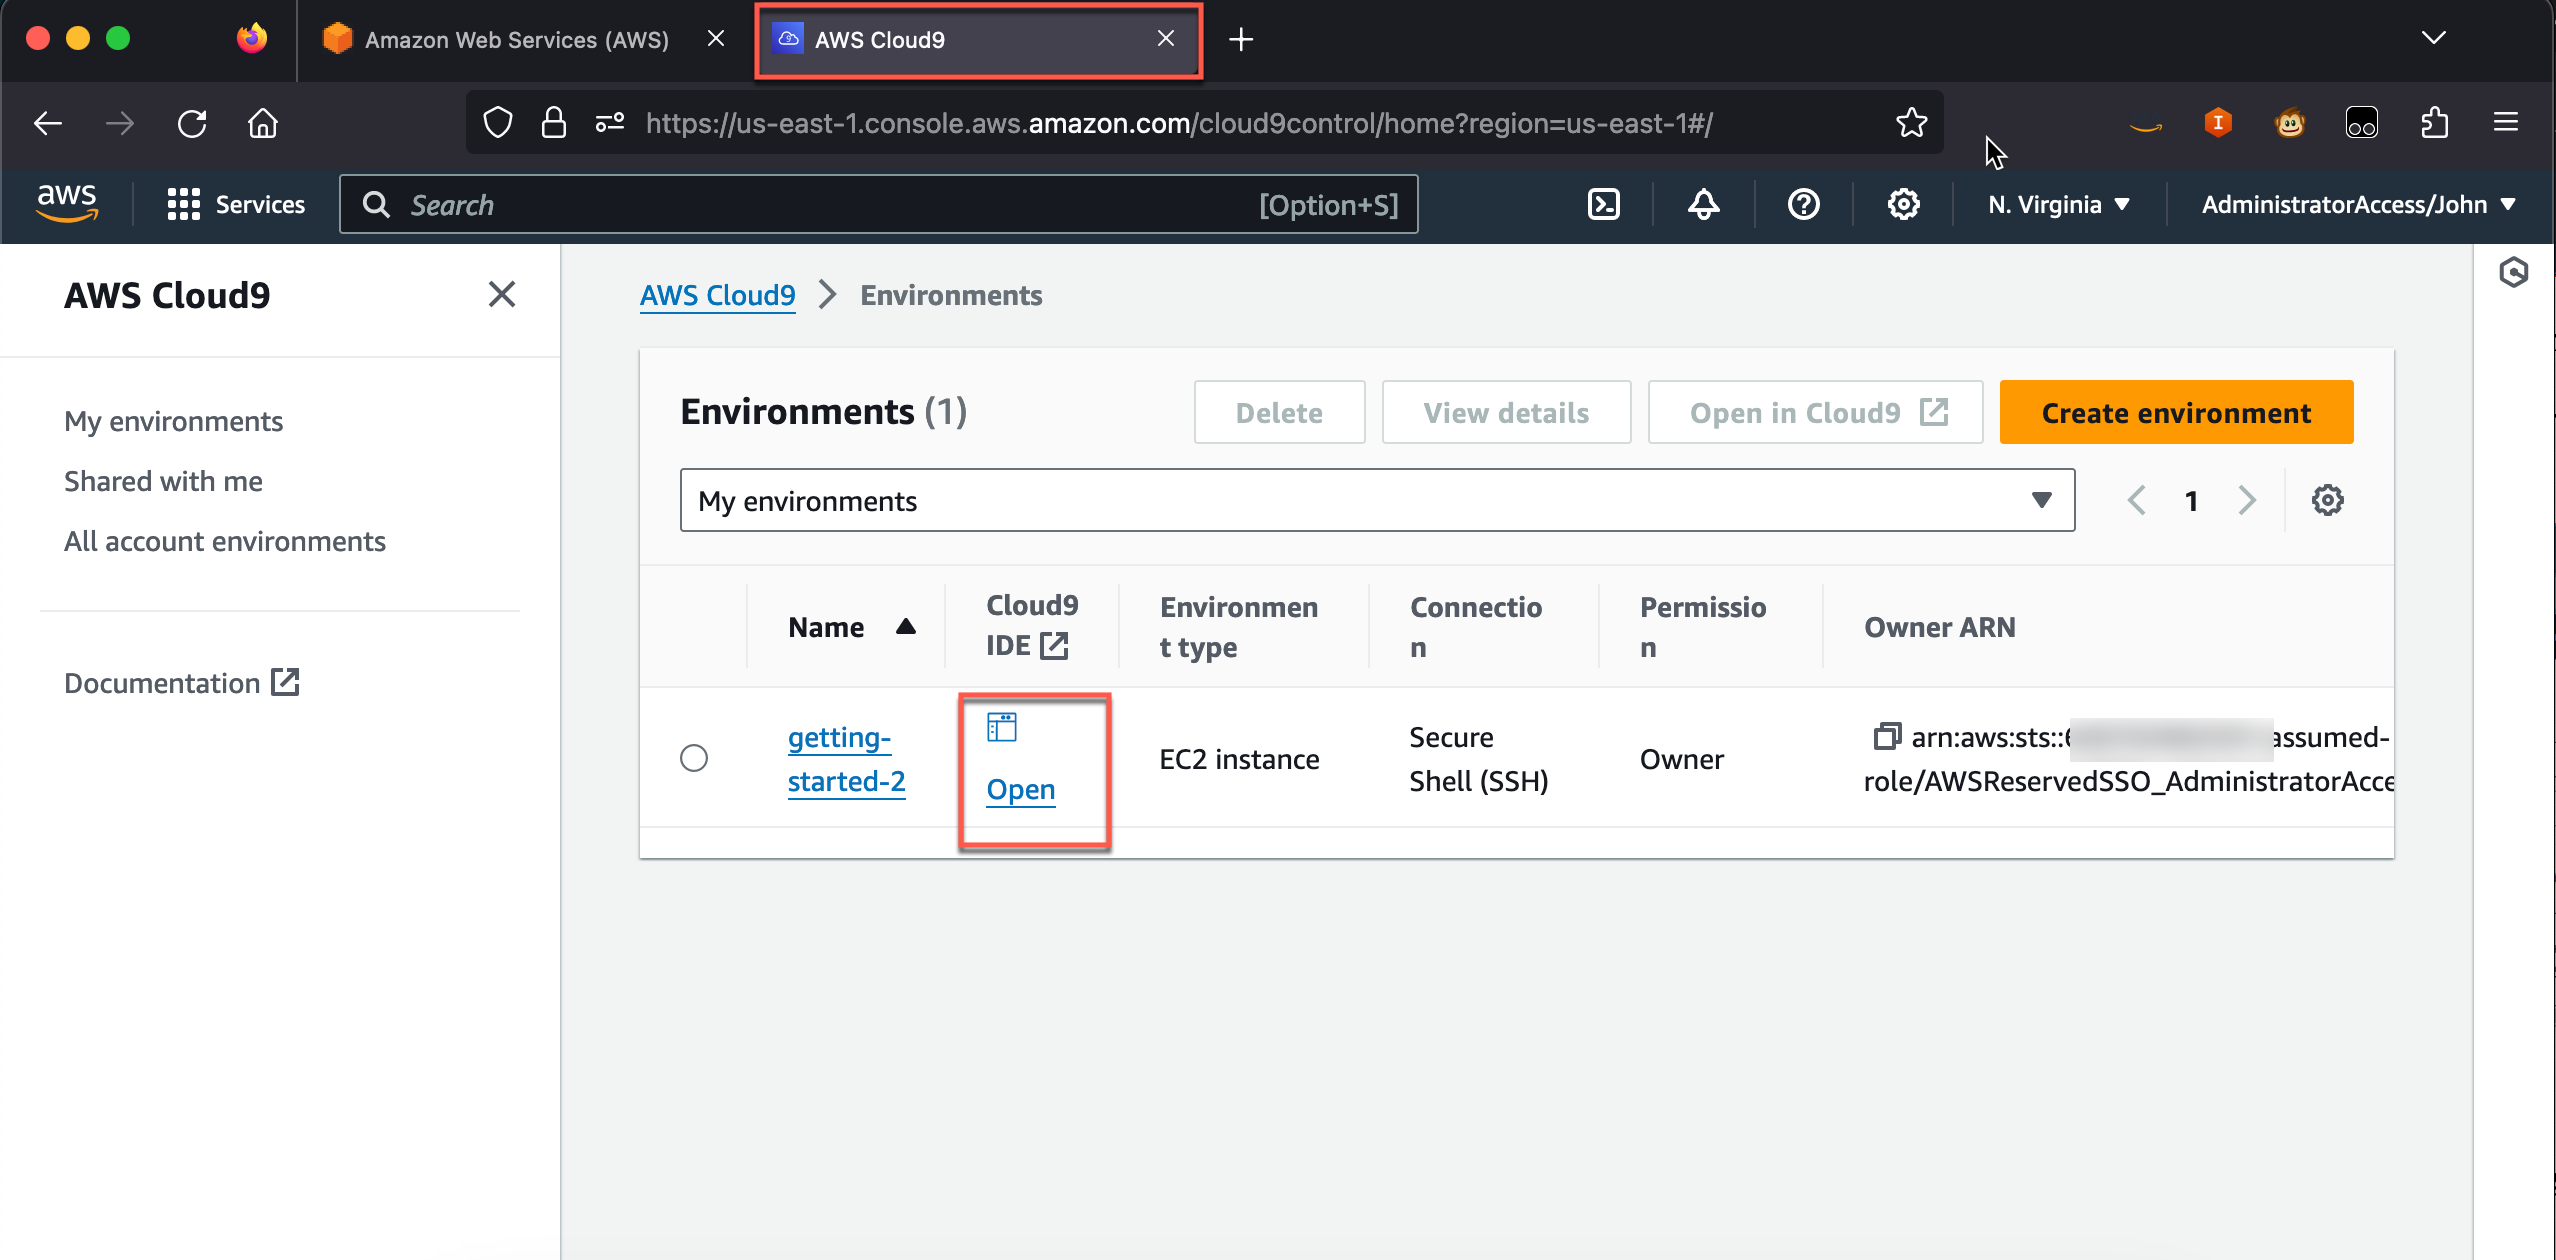
The Cloud9 IDE you created in module 3 using the CLI opens in another tab.
From here you can learn more about Cloud9 or get started developing, testing, and running applications.

Step 3: Delete created resources - Optional
If you don't plan to use the AWS Cloud9 development environment we created in this module, you can delete it by running the following command.
Note: You must add your <environmentID> in the following command.
aws cloud9 delete-environment --environment-id <environmentID> --profile admin-1The aws cloud9 delete-environment command does not return any outputs. A way to check if your environment has been deleted is to sign in to the AWS console using your admin credentials, go to console.aws.amazon.com/cloud9 and check if it's still there. You can also delete the environment from there if you don't have the environmentID.
The full documentation for this command can be found in the AWS CLI Command Reference.
Conclusion
Congratulations! You have learned how to set up the AWS Cloud9 IDE. Visit the AWS Cloud9 documentation for additional information and tutorials. You can see all AWS Cloud9 and CLI commands here.
This is the end of the Setting Up Your AWS Environment tutorial.