How to build AI-powered data solutions with AWS and Databricks
Exploring RAG to improve collaboration and streamline data workflows with Amazon Redshift, Amazon Bedrock, and Databricks
Overview
In today’s enterprise technology landscape, data usually lies at the core of innovation. From data warehouses to the recent use of data for all things machine learning, from training custom models to fine-tuning foundational models and providing context through retrieval augmented generation to large language models (LLMs), working with data spans many different teams and business units across the organization.
With the diverse range of use cases that data fulfills, enabling visibility and collaboration between the different parties involved in making it usable—from data scientists to data engineers and machine learning engineers—becomes a critical concern for organizations. This usually presents several challenges, arising from the many different technologies used to store the data and the differing workflows and developer experience requirements that engineers working with data expect.
In this tutorial, you will see how a common scenario where data stored on AWS must be queried by data scientists and developers, transformed into vectors by data engineers, and leveraged for retrieval augmented generation applications by ML engineers. We’ll explore how Databricks Data Intelligence Platform, together with Amazon Redshift and Amazon Bedrock, provides a unified and integrated solution that makes things easy and intuitive.
To get started, you must have an AWS account with enough permissions to deploy all required resources, including AWS Marketplace subscriptions, Amazon Redshift Serverless database, and access to Amazon Bedrock models.
Architecture and requirements
The high-level requirements are the following:
- Amazon Redshift is used as your source of truth and where a list of all your users exists.
- Data scientists will want to use the user data for analysis of preferences and demographics.
- Data engineers will need to convert user data to vectors in order for them to be used by a retrieval augmented application.
- Machine learning engineers will integrate a foundational LLM with the user vectorized data to provide context to an application that should be able to answer questions related to the users, for example: “How many users are named Cindy?”
To achieve this goal, you will use Databricks to query Redshift directly, to generate a vector query index for the user data using Amazon Bedrock embedding models, and query that vector index as part of a RAG chain.
Amazon Redshift: Our source of truth
Let’s start by creating a sample Amazon Redshift database that will be our single source of truth. This is a common scenario where data flows in and out of a central Data Warehouse that is the authoritative source of data, effectively unifying otherwise-siloed data from different systems and services.
In this example, you will use Amazon Redshift Serverless, which dramatically simplifies the effort of managing and scaling the underlying infrastructure of your Amazon Redshift cluster.
Go into Amazon Redshift and click “Create workgroup” in the Amazon Redshift Serverless dashboard. We’re going to create a new Workgroup and Namespace for our implementation:
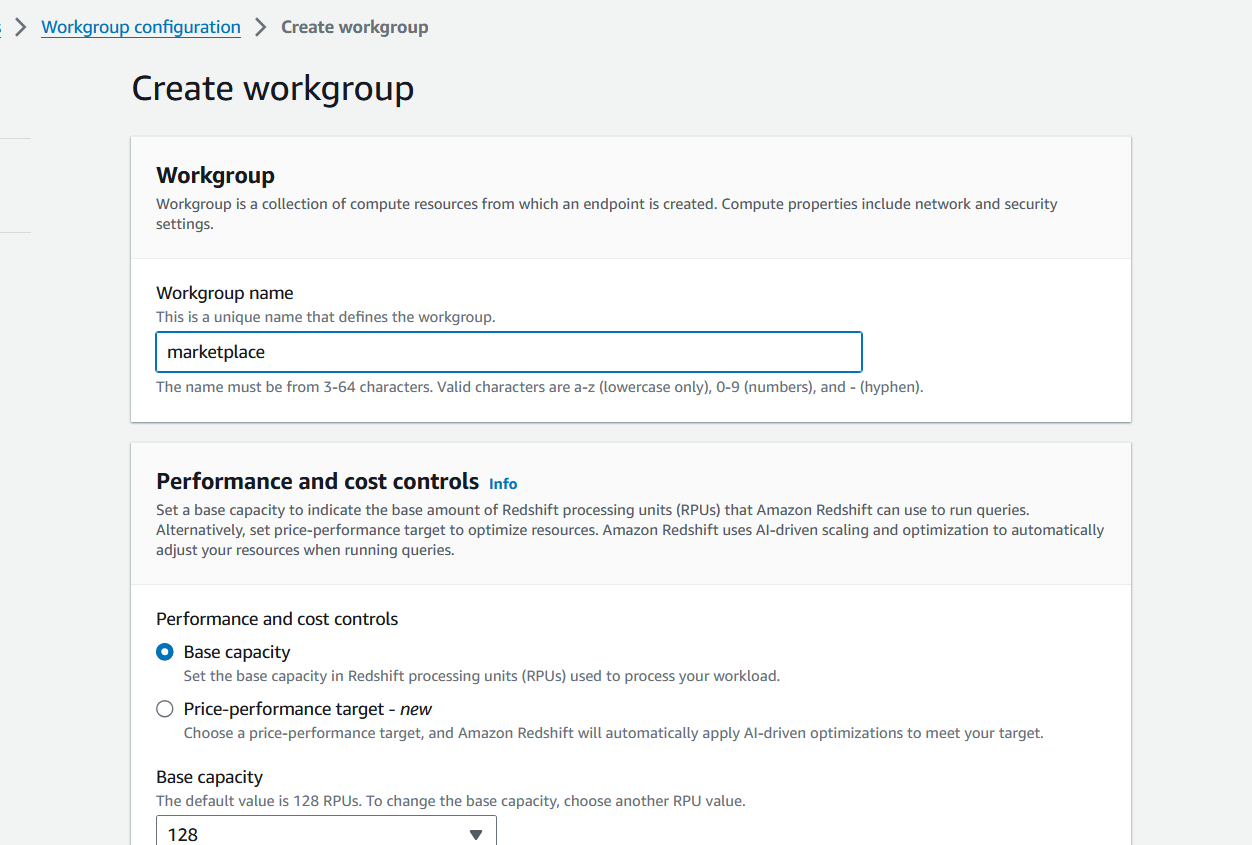
You will be asked for various configuration details, including your VPC network configuration and IAM role details in order for the service to access all required resources. For specific details on how to create your new Workgroup and Namespace, please refer to the official Amazon Redshift Management Guide Documentation.
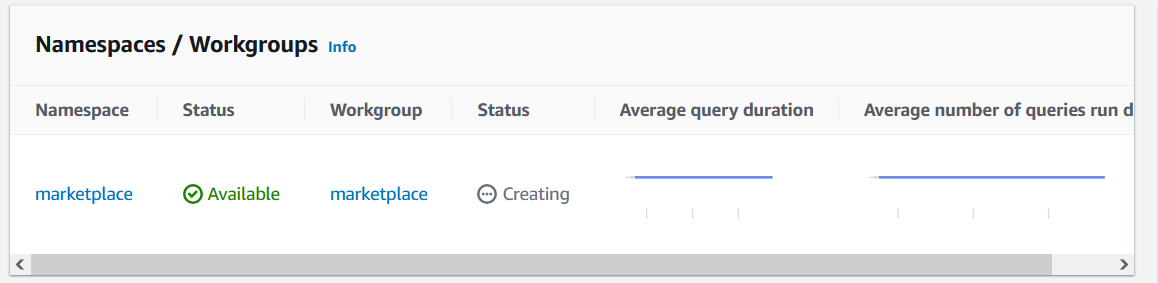
Your Workgroup and Namespace will enter Creating status and it will take a few minutes to finish provisioning.
Once done, make sure you are connected to a Database by looking at Database Connection and ensure you can see a Connected status. For details on how to establish this connection, have a look at this reference.
Amazon Redshift comes with some sample data readily available, which you can see by using the Query Editor that is available in the AWS Console:
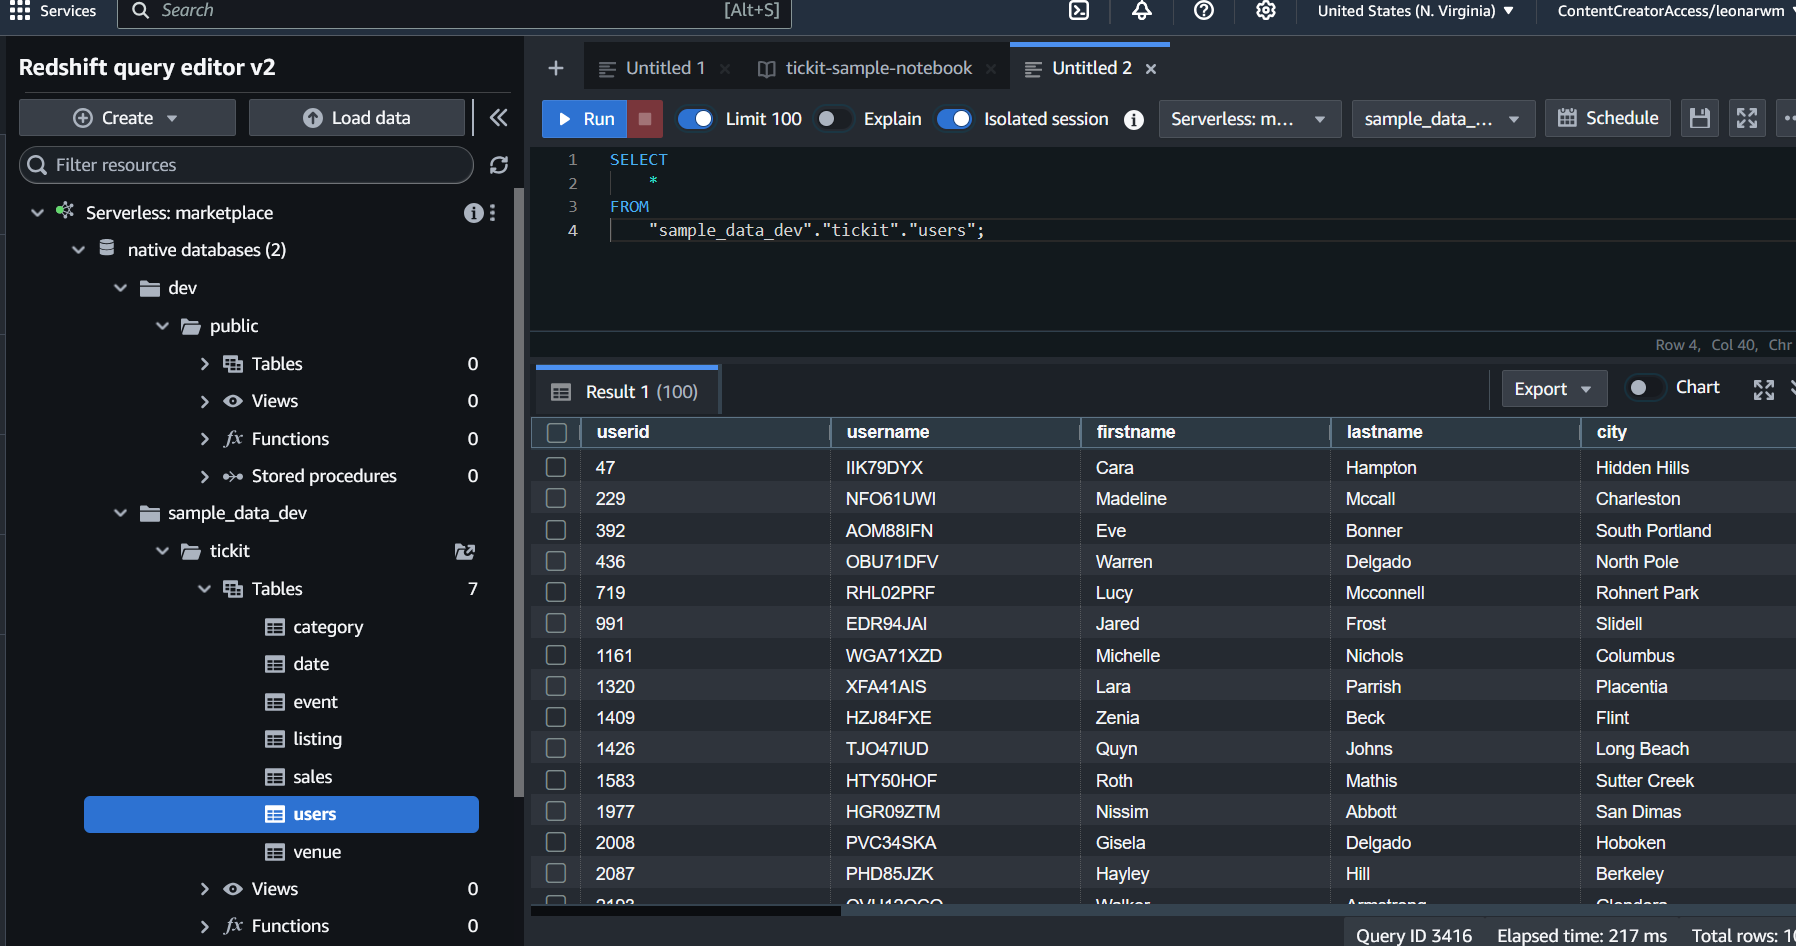
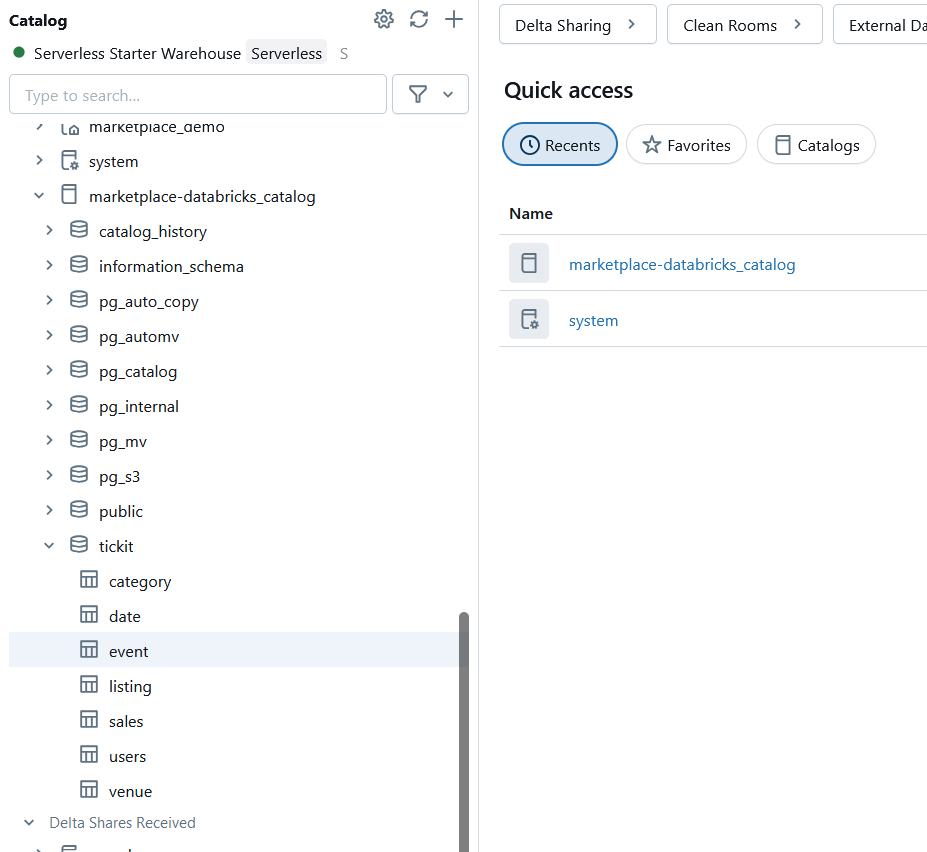
For the purposes of this tutorial, you will use the tickit sample data set. Specifically, we will work with the users table that, as previously defined in our high-level requirements, will be the source of context for a RAG application.
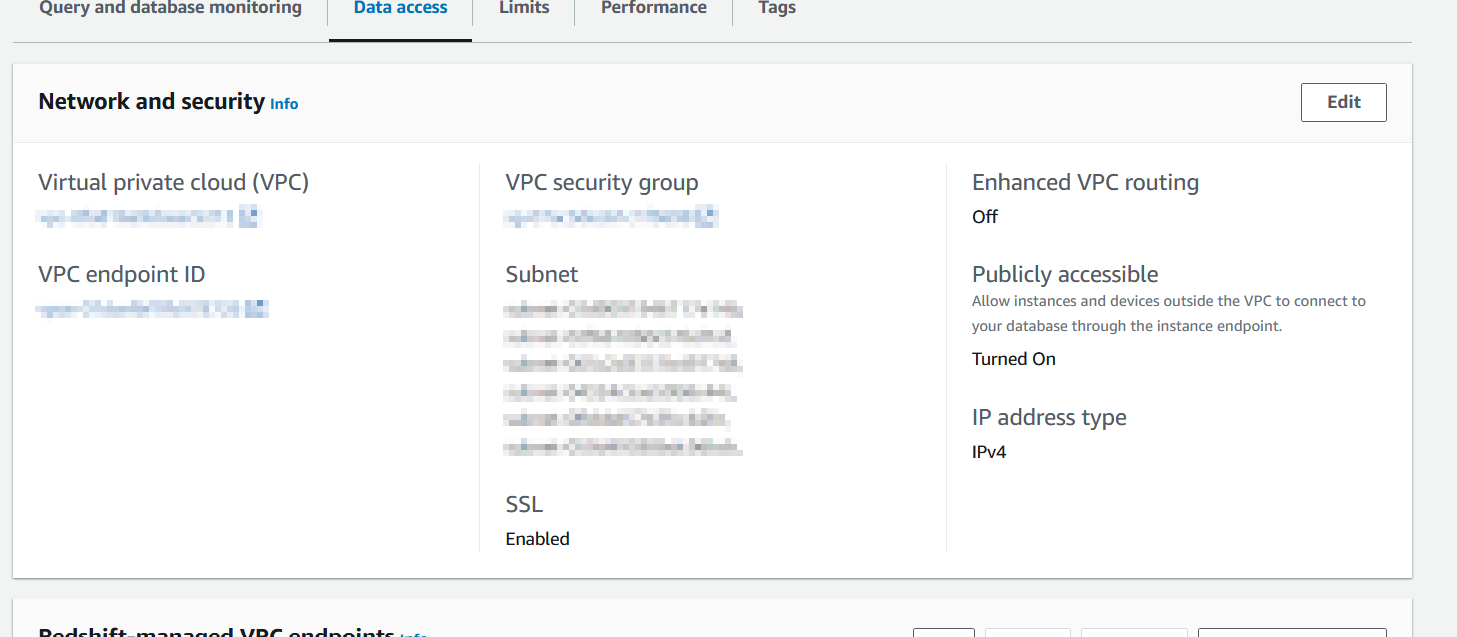
Note that for the purposes of this tutorial, we will need to enable Public Access on your Amazon Redshift service for Databricks to be able to connect to it. In production environments, this is not advisable and more secure options such as VPC peering and other forms of private access are recommended.
Enable Public access in the Network and Security options under Data Access in your Amazon Redshift service, and make sure to allow access to port 5439 in the Security Group shown in the console.
Databricks: Our integrated environment
In the humble opinion of your author, one of the most powerful and appealing characteristics of Databricks is the masterful way in which it integrates everything, from data sources to pipelines to notebooks and machine learning workflows. This is precisely why it fits so well to satisfy the requirements.
Start by signing up for Databricks Data Intelligence Platform in AWS Marketplace. You will be able to go through this full tutorial free of charge thanks to the 14-day free trial available when you sign up with your AWS account. The Databricks provisioning setup is very straightforward, and once done, you will have a Databricks workspace ready to go.
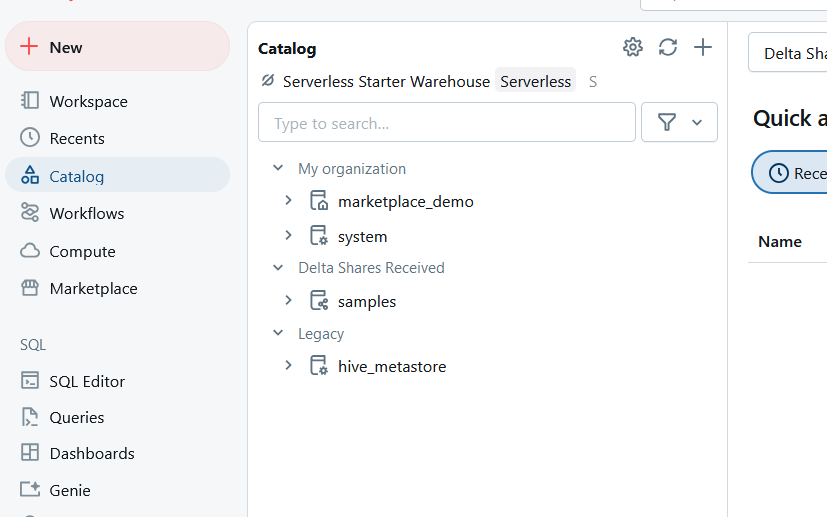
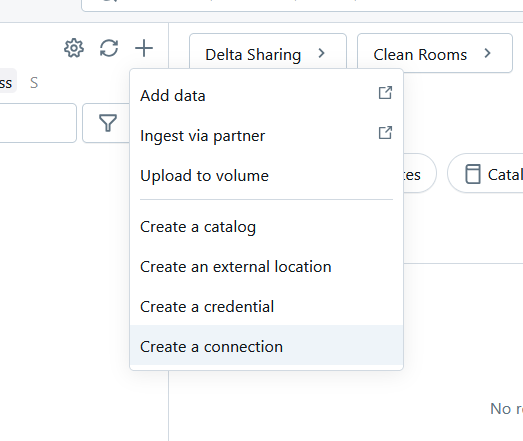
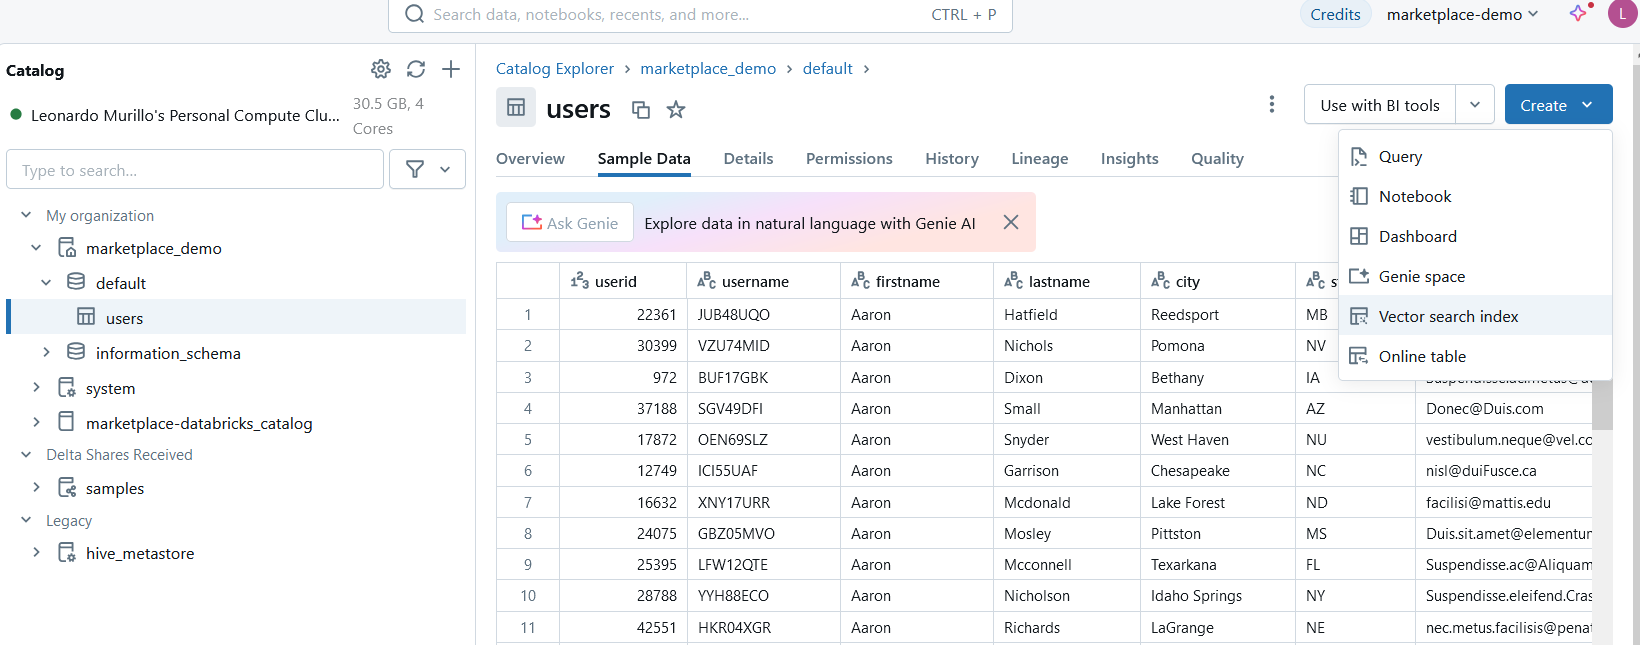
Once your workspace is ready to go, the first thing to do is connect the Amazon Redshift database as an external table to the Databricks Catalog. From the Catalog in your Databricks workspace, click the + icon on the right hand side of Catalog and select Create a connection.
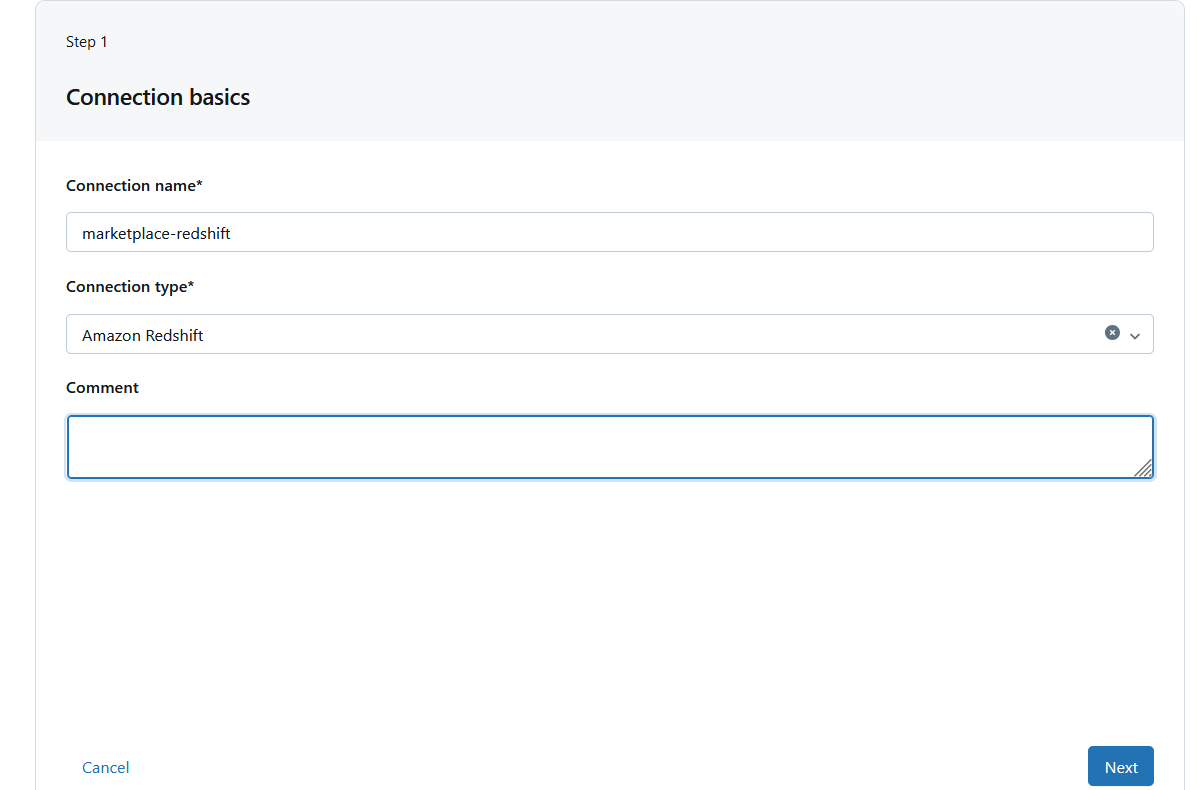
You will be asked to enter the connection details for the Amazon Redshift database. Give it a name and select Amazon Redshift for Connection type.
In Step 2, you will need to enter the authentication details to your Amazon Redshift Serverless service.
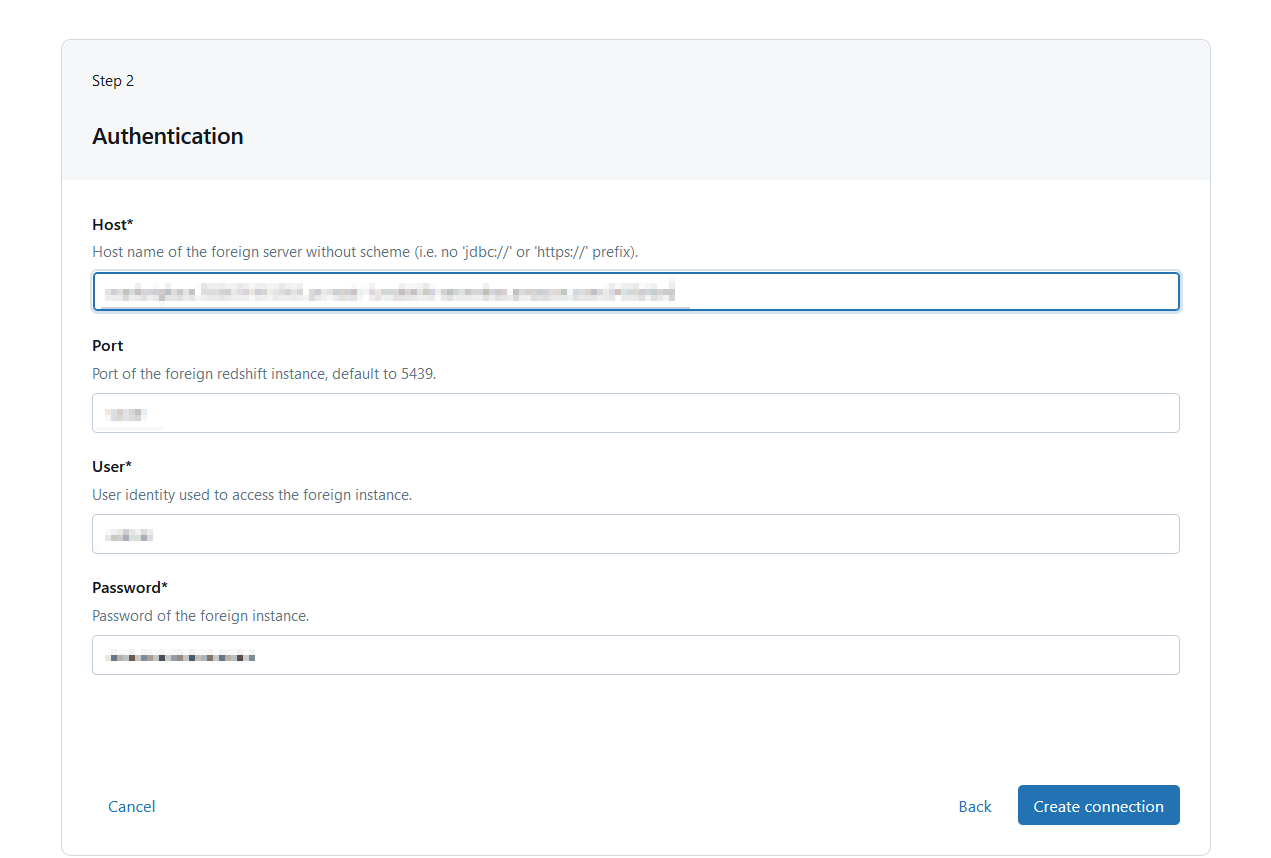
You can see the admin username and password in the Amazon Redshift console. Notice that in production environments using the Admin password is not recommended, and a user specifically created for Databricks with limited permissions is the suggested approach.
Now give the new connection in the catalog a name and select the database you want to connect to. As seen in the Amazon Redshift section above, you will be using the sample data available in the sample_data_dev database:
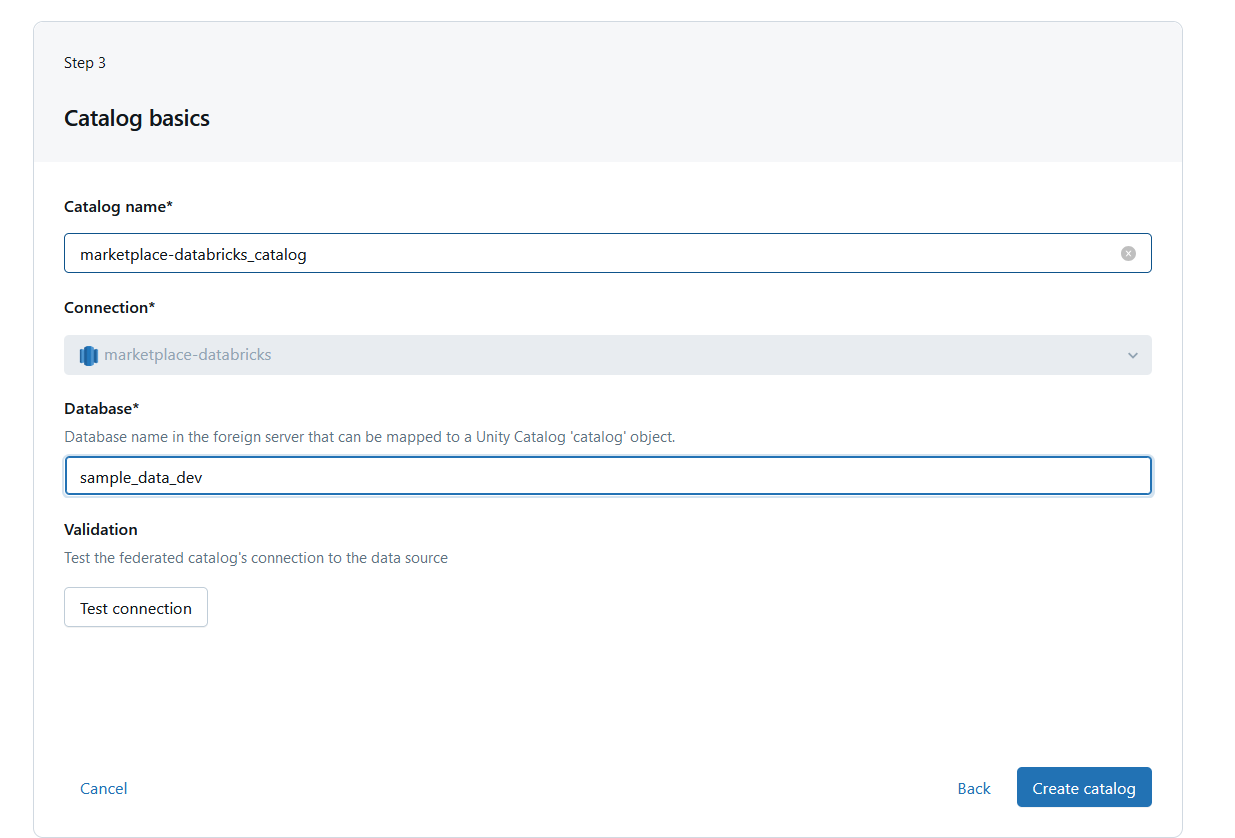
In the final configuration step, you can define which Databricks workspaces and users will have access to this external connection.
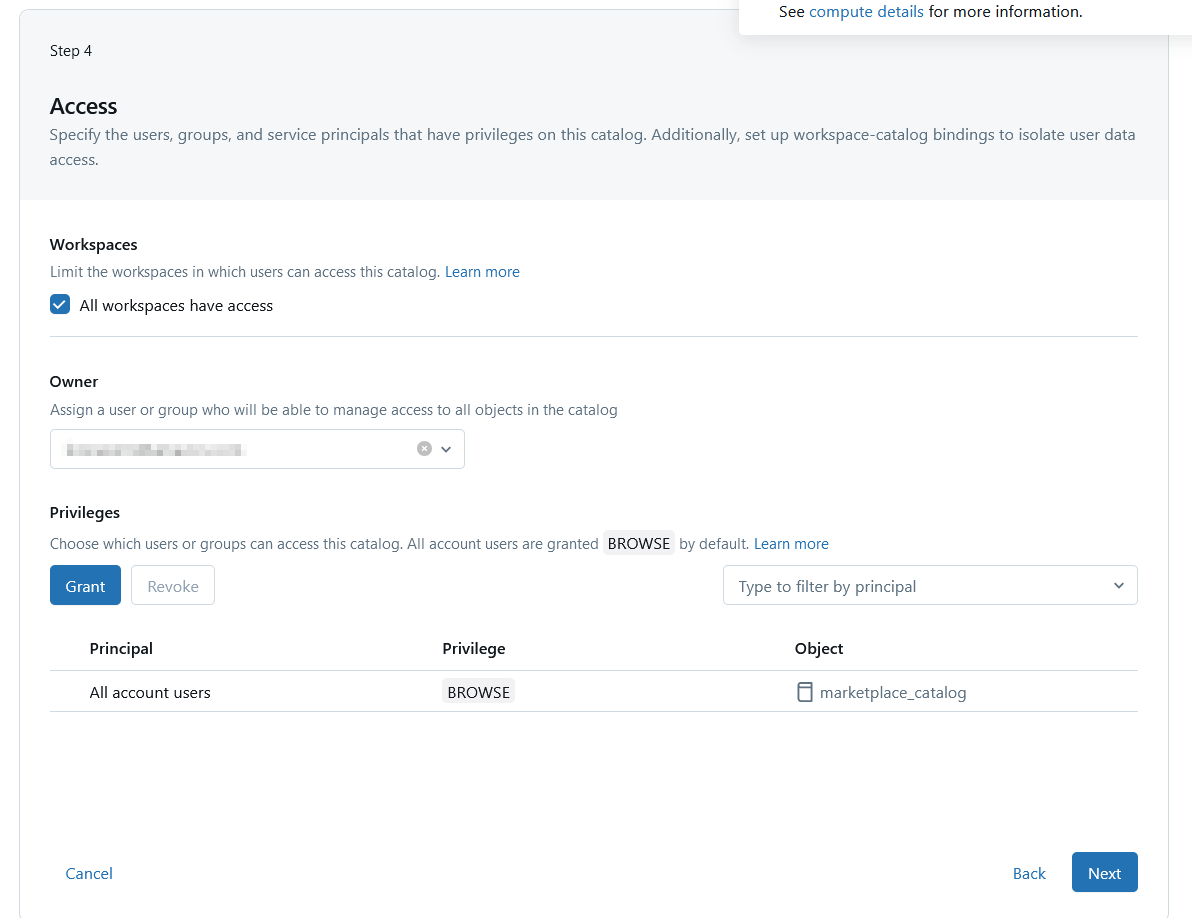
When you are done with configuring your new connection, you can use the Test Connection feature to ensure your Amazon Redshift service can be reached and successfully connect.
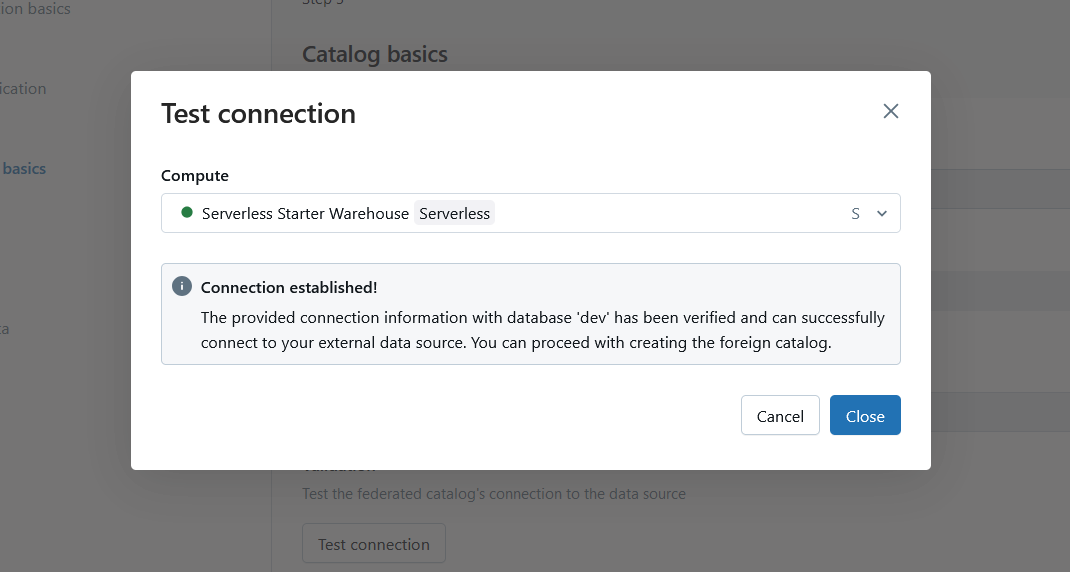
Once done, thanks to the powerful data federation capabilities of Databricks, you now can access your Amazon Redshift data directly from within Databricks.
Creating vectors for the users data
Step 1 – Move the data to a local table
Now you can query the user data directly from Amazon Redshift inside your Databricks workspace. In order to create vector embeddings for it, though, you will need to move this data over to a delta lake table that can satisfy the requirements for automated vector index creation.
Federation in Databricks is extremely powerful, and what could have taken a full pipeline to move data around, we can accomplish with a single SQL statement. For practical purposes, we are going to select all users in the Amazon Redshift users table, and create a local Databricks table to generate the vector embeddings using a single SQL query inside a Notebook. This also demonstrates the uniquely powerful capabilities that workspaces enable for cross-functional collaboration in teams.

In this simple query, a Spark job is run that effectively replicates the users table in a local Databricks table.
One of the requirements for creating a fully automated Vector Search Index is to enable change data feed on the table you are looking to vectorize. We can also do that by running a single SQL statement in a Notebook.

Step 2 – Create a model serving endpoint
Serving endpoints in Databricks allow for incredibly easy integration with Amazon Bedrock models for embedding or text generation. Before we can create a vector index for your users data we need to create an endpoint that will use Amazon Bedrock to generate those embeddings.
But, before doing this, we need to do some pre-configuration on AWS, including creating an instance profile and corresponding roles.
First, create a Role on AWS that provides Amazon EC2 instances with Amazon Bedrock access:
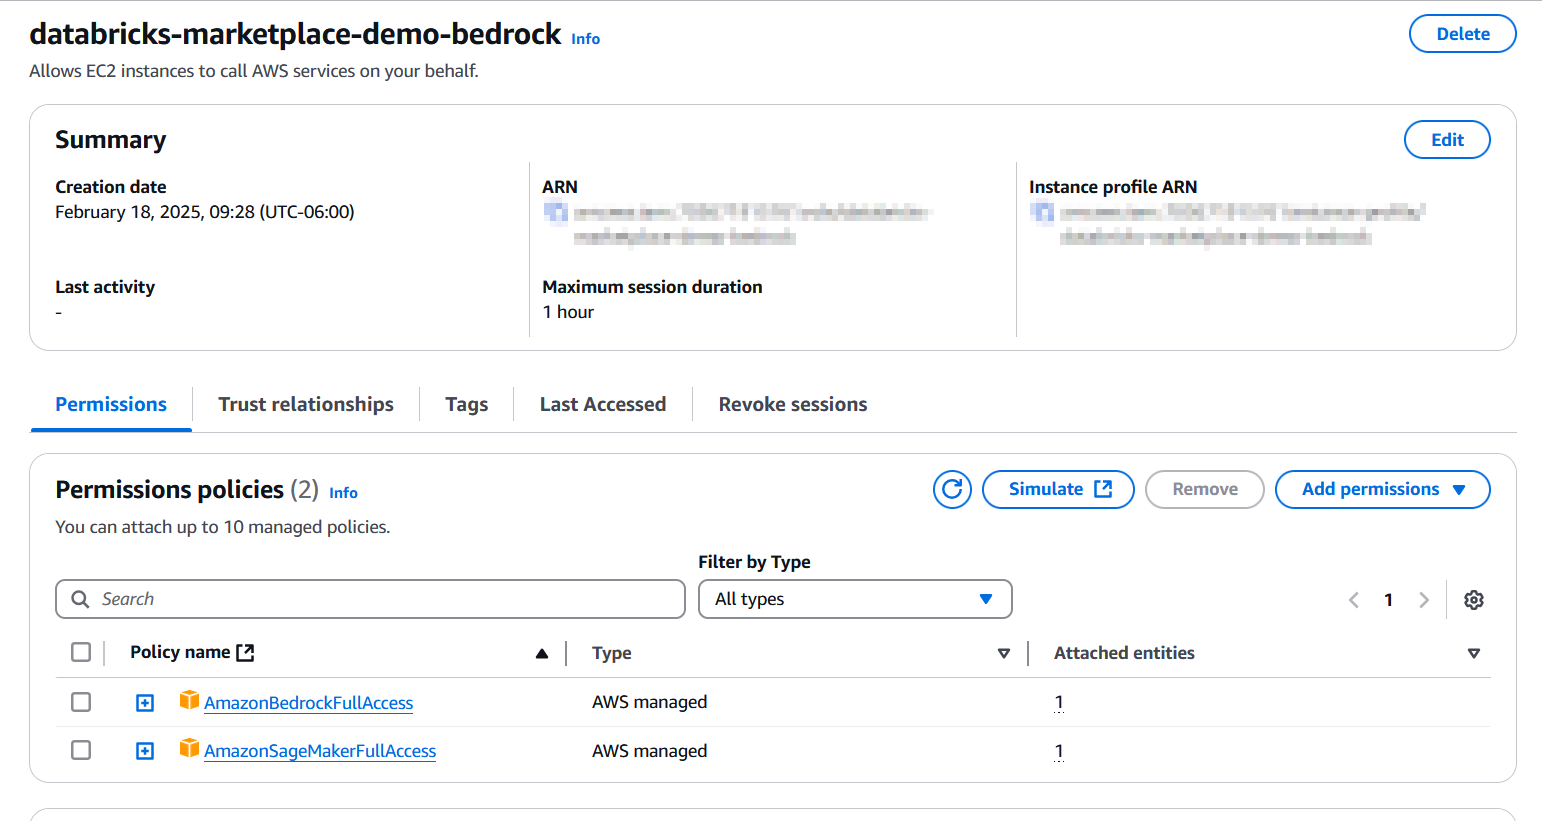
Make sure you grant your Databricks Role AssumeRole permission under Trust relationships. Once done, add the instance profile to your workspace. For specific details as to how to configure the profile and add it to your Databricks workspace, see this tutorial on instance profile creation and the documentation on managing instance profiles in your Databricks workspace.
You will also need to request access to the Amazon Bedrock models you will use prior to being able to configure your serving endpoint. To learn more about requesting access to models, this getting started tutorial is very helpful.
Once you’re done with these requirements, you’re ready to configure your Serving Endpoint integrated with Amazon Bedrock Foundation Models for embedding.
Click on “Serving” under Machine Learning in your Databricks Workspace and press Create Serving Endpoint.
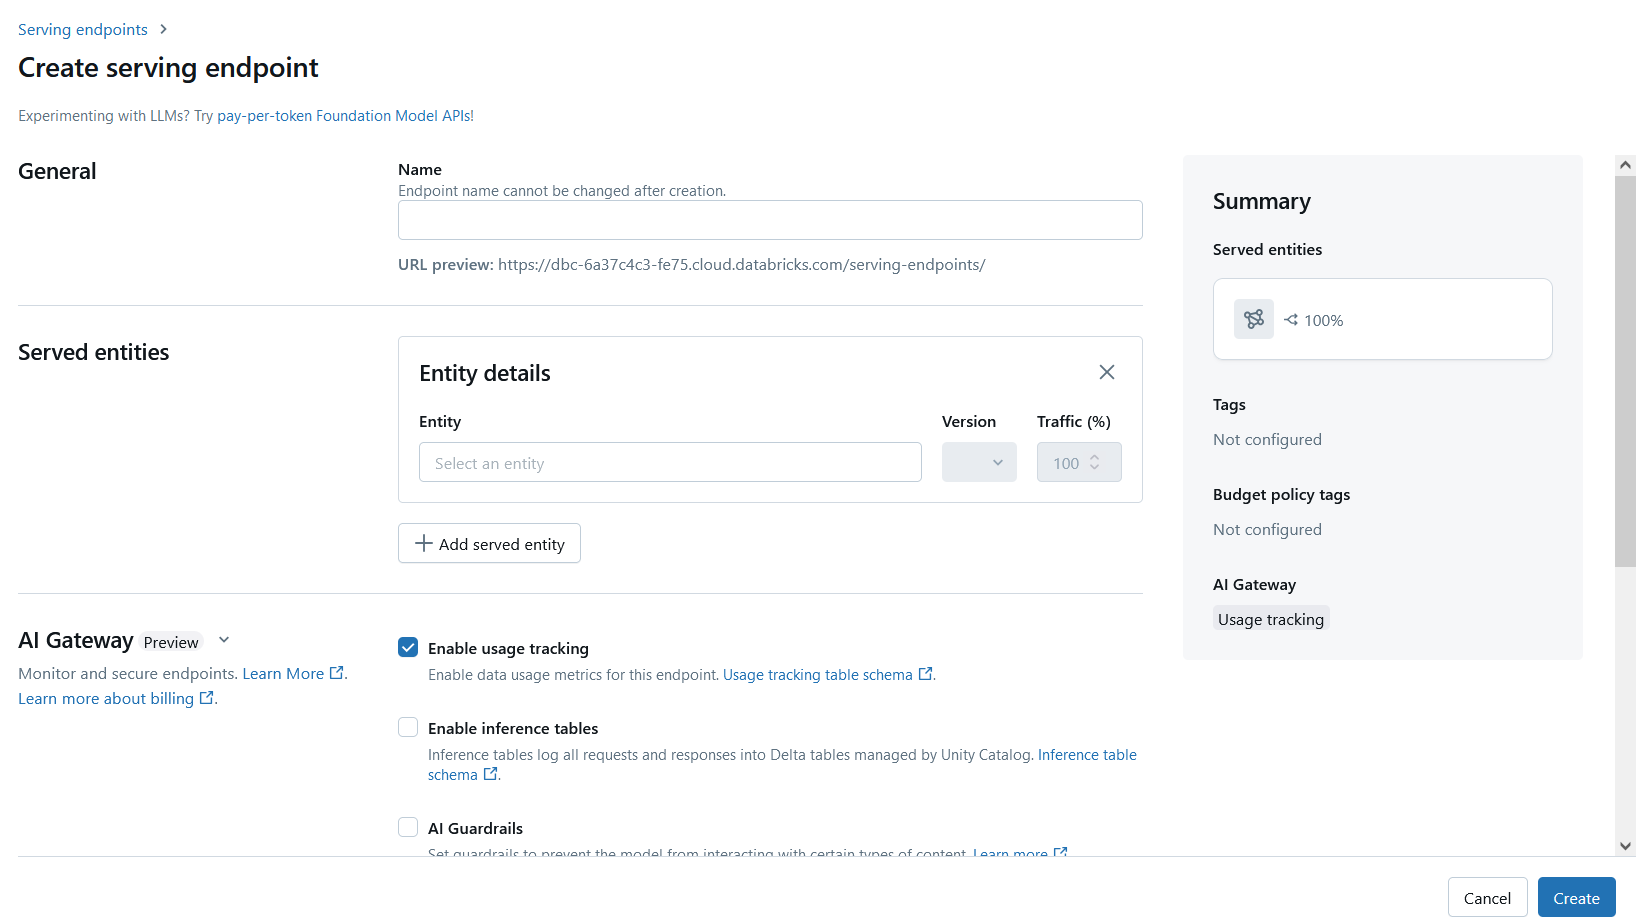
Give your serving endpoint a name and select the Served Entity, which in this case is an Amazon Bedrock model so choose Amazon Bedrock from the list.
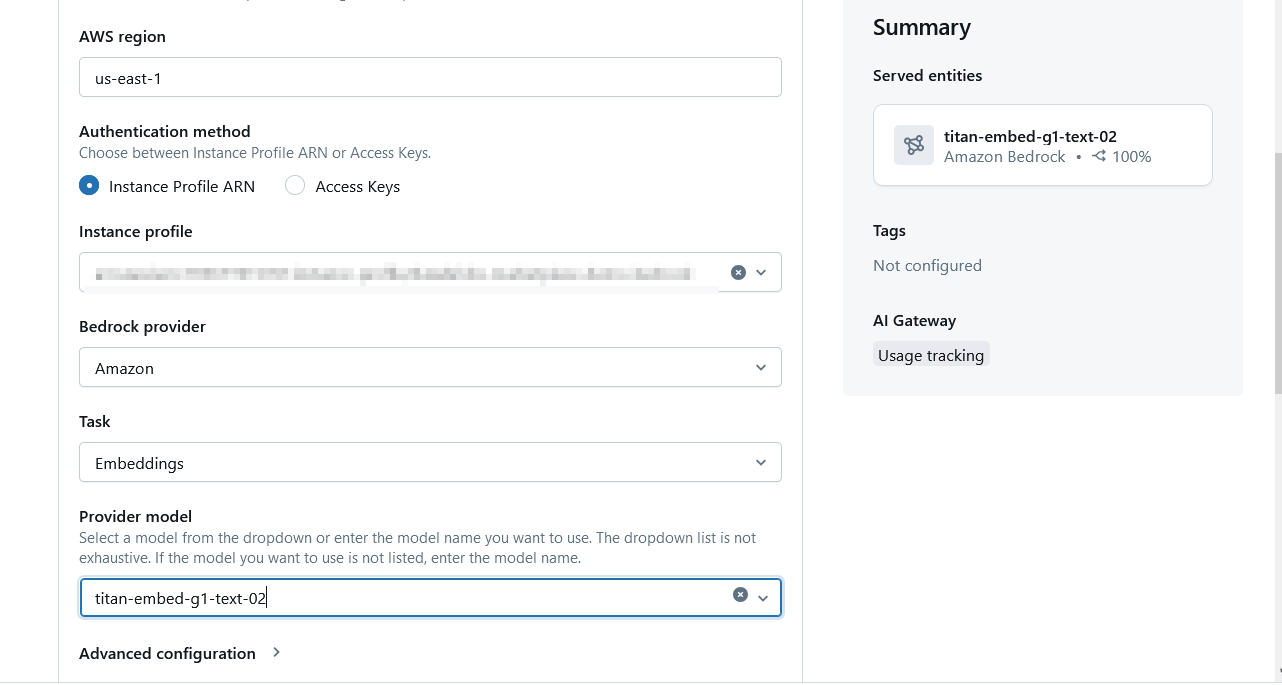
When selected, you will need to enter specific details of your AWS environment, including the Region, the instance profile you created previously in this section, and the task and model you will be using. Considering that you are using this endpoint for generating a vector query index, you will need an Embedding model.
Step 3 – Crate a vector search index
You are now ready to create a fully automated vector search index of your users data. Go back to your Databricks catalog and click on the local Databricks table we copied the Users data into, click on the Create button on the upper right-hand corner and select “Vector Search Index”, and enter the necessary details for the vector search index to be automatically crated:
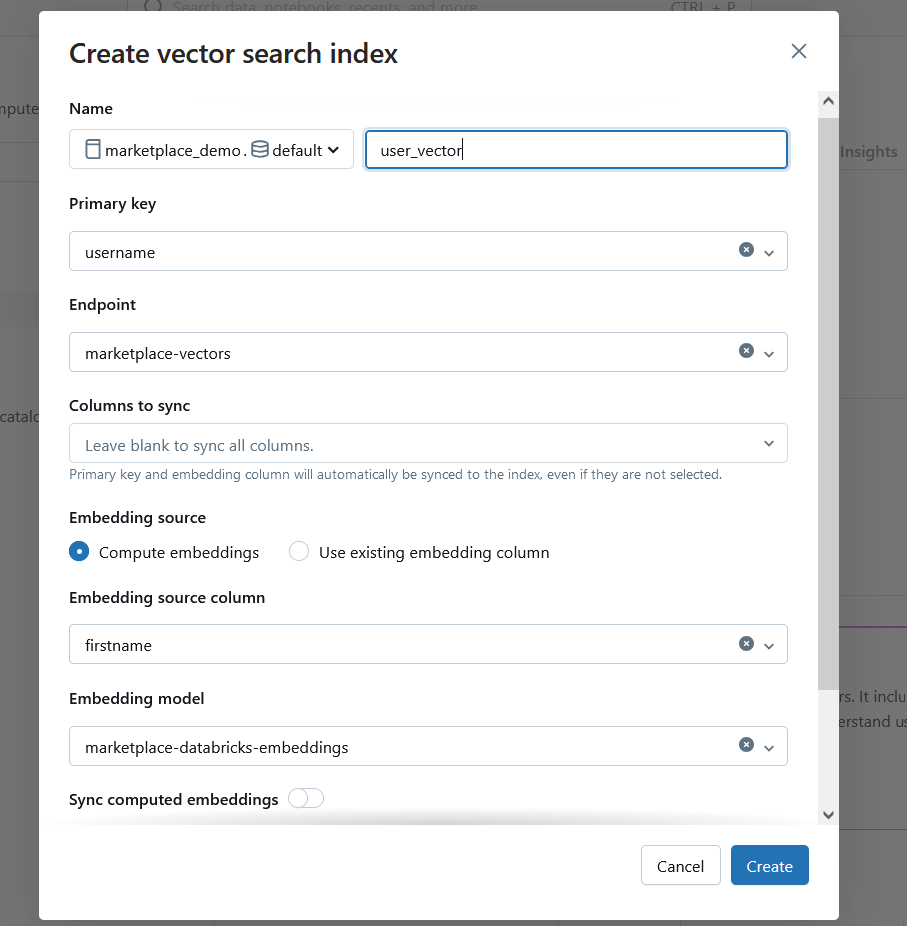
For specific details on how to configure a vector search index, the official documentation in Databricks website is super-helpful.
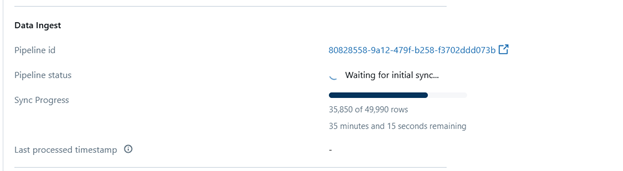
The vector index generation is fully automated. You will be able to see the process by looking at the index and the pipeline status will show how many records have already been vectorized as part of the process.
Querying the index
Now, it’s time for the machine learning engineers to query this index as part of their LangChain implementation. For the purposes of this tutorial, it is beyond the scope to look into a full LangChain implementation, but the following example should give you enough of a solid idea of how to use and integrate with a LangChain application:
Python Code:
from langchain_aws import BedrockEmbeddings
embeddings = BedrockEmbeddings(model_id="amazon.titan-embed-text-v1")
vector_store = DatabricksVectorSearch(
endpoint=endpoint_name,
index_name=index_name,
embedding=embeddings,
text_column="firstname",
)
results = vector_store.similarity_search(query="Cindy", k=1)
for doc in results:
print(f"* {doc.page_content} [{doc.metadata}]")
Key takeaways
Demonstrated in this use-case, Databricks integrates tightly with AWS tools such as Amazon Redshift and Amazon Bedrock, enabling end-to-end workflows with data at their core and facilitating collaboration across multiple stakeholders.
You can use Databricks to dramatically simplify processes that would otherwise require data pipelines and increased complexity, such as vector generation and data migration. With its tight integrations with IAM, security can be granularly managed using AWS security primitives.
If you haven't yet given it a try, you can start using Databricks Data Intelligence Platform free in AWS Marketplace.
Disclaimer
This tutorial is intended to help you understand implementation fundamentals and serve as a starting point. The reader is advised to consider security, availability, and other production-grade deployment concerns and requirements that are not within scope of this tutorial for a full scale, production-ready implementation.
Why AWS Marketplace for on-demand cloud tools
Free to try. Deploy in minutes. Pay only for what you use.
Launch directly into your AWS environment
Featured tools are designed to plug in to your AWS workflows and integrate with your favorite AWS services.
No sales cycles—start building right away
Subscribe through your AWS account with no upfront commitments, contracts, or approvals.
Free trials help you evaluate fast
Try before you commit. Most tools include free trials or developer-tier pricing to support fast prototyping.
Usage-based pricing, billed through AWS
Only pay for what you use. Costs are consolidated with AWS billing for simplified payments, cost monitoring, and governance.
Curated tools built for cloud engineers
A broad selection of tools across observability, security, AI, data, and more can enhance how you build with AWS.